• HOME
  • {A}’s Chipmunk Training Archives

 Homepage

  • The Homestead
    • Home Projects
    • Home Improvement
    • Home Decor
      • Seasonal Home decor
        • FALL Home Decor
        • WINTER Home Decor
        • SPRING Crafts and Creations
        • SUMMER Crafts and Creations
    • Our Chickens
    • Gardening
    • Organization
    • Re-Purposing
    • Furniture Refinishing
    • Budget
  • Crafts & Creations
    • Seasonal Home decor
      • FALL Crafts and Creations
      • WINTER Crafts and Creations
      • SPRING Crafts and Creations
      • SUMMER Crafts and Creations
    • DIY (Do-It-Yourself) Project
    • Kids Arts and Crafts
    • Homemade/Handmade Gift Ideas
    • Holiday Crafts
    • Fan Pulls
    • Free Printable/Downloadable
    • Sewing Projects
    • Giveaways
    • Business Features
  • Recipes/FoodFun
    • Breakfast
    • Lunch
    • Main Dish
    • Sandwiches
    • Appetizers
    • Slow Cooker
    • On The Grill
    • Side Dishes
      • Soups
      • Salads
    • Baking
      • Breads, Rolls and Muffins
    • Snacks
    • Treats
    • Desserts
    • Drinks
  • Homeschooling
    • Elementary Homeschooling
      • Elementary Homeschooling READING
      • Elementary Homeschooling MATH
      • Elementary Homeschooling LANGUAGE ARTS
      • Elementary Homeschooling SCIENCE
      • Elementary Homeschooling HOME ECONOMICS
      • Kids Arts and Crafts
    • Middle School Homeschooling
      • Middle School Homeschooling SCIENCE
      • Middle School Homeschooling HOME ECONOMICS
    • Language Arts
    • Math
    • History / Social Studies
    • Geography
    • Foreign Language
    • Field Trips
    • Games
    • Nature Study
  • The Big Picture
    • Life In General
    • Celebrations
    • Faith
      • Into the Light; The Series
    • Giveaways
    • Reviews & Sponsors
  • Photography & Lettering
    • Photography
    • truck lettering
    • vehicle graphics
    • Newborns
    • Kids
    • Engagement
    • High School Senior Pictures
    • High School Senior Pictures Sneak Peeks

Old Doorknobs to Jewelry Holder | DIY

May 9, 2011 By Laura 29 Comments

old-doorknobs-jewelry-organizer-holder-12
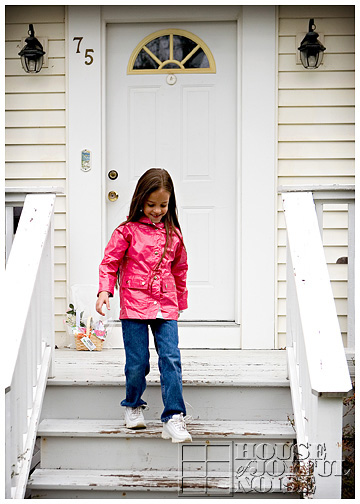
My youngest daughter {O}, age 8, is all about her accessories. She loves fashion design, and gets great joy out of planning her outfits, head to toe, every day. Her hair accessories have been taking over my side of the bathroom cabinet, and she has been keeping a lot of her jewelry in a box, which as you can imagine, tends to get things a little tangled.  Something had to be done, and I had a great idea for an accessory holder!

old-doorknobs-jewelry-organizer-holder 
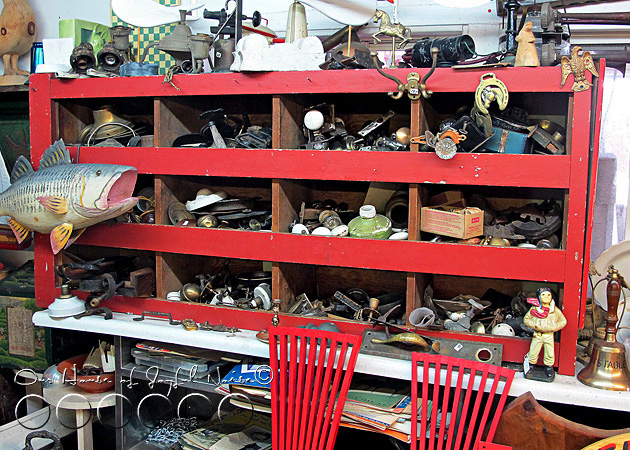
There’s an antique place in E. Wareham nearby, called Clam Shack Antiques, that we’ve frequented often in the past couple of years.  I knew it was just the place to hit first, for some of the supplies I needed for my project, as I recalled there was a load of old antique door knobs there.   I rummaged through them all, chose some I really liked, and bought them for a deal.
–

old-doorknobs-jewelry-organizer-holder-1 
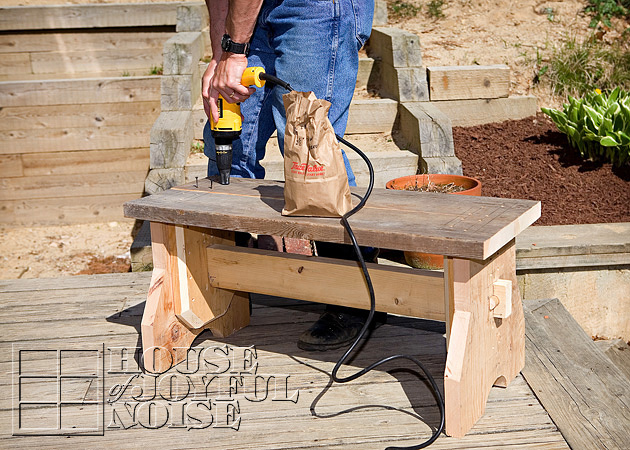
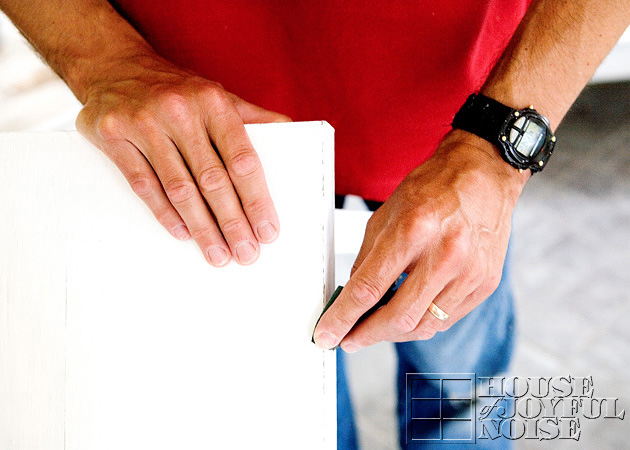
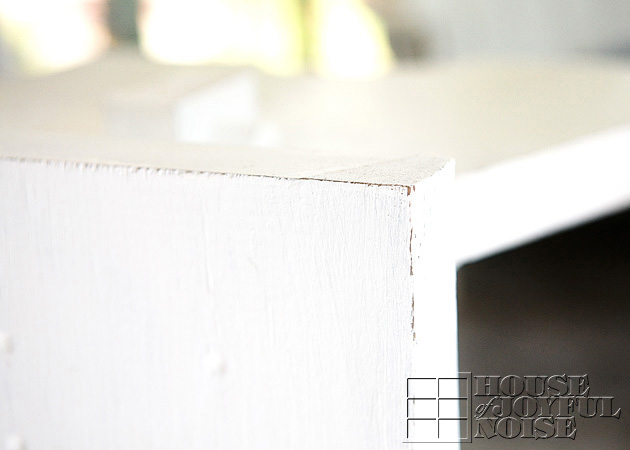
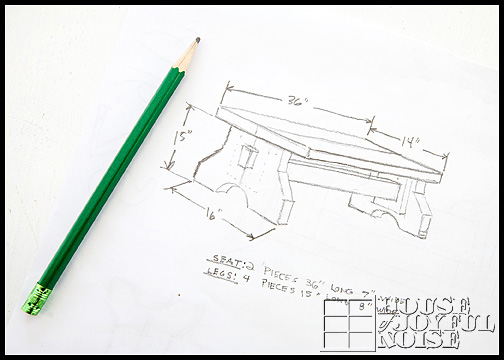
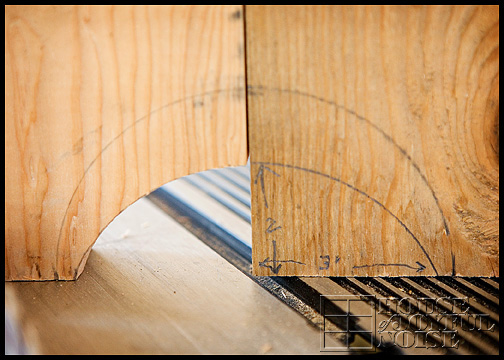
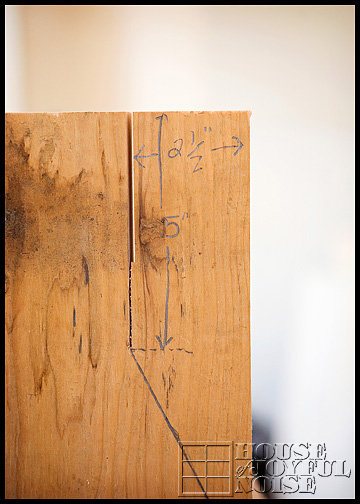
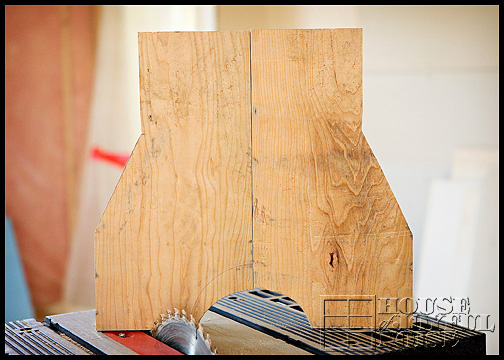
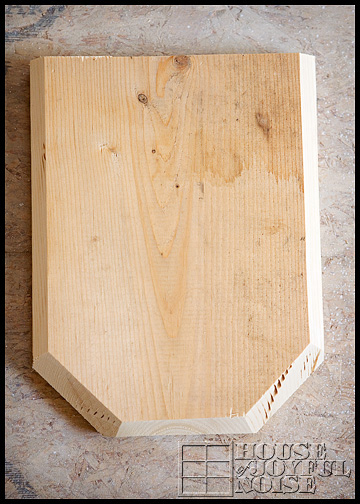
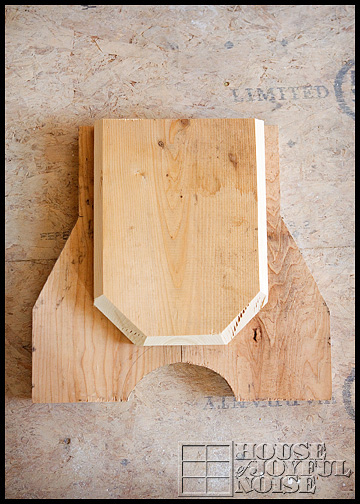
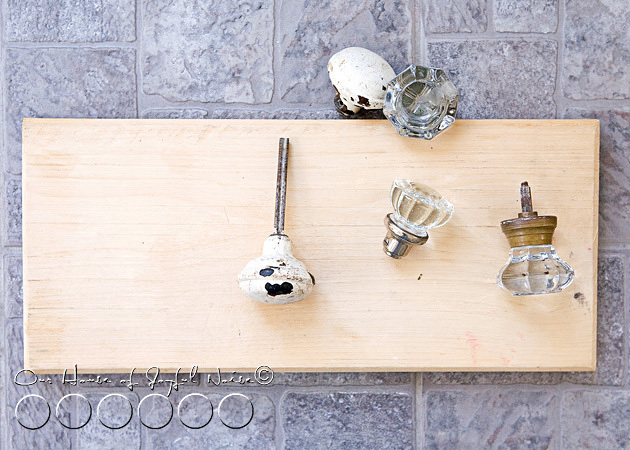
At home, I already had the perfect piece of wood.  My father comes down to visit us a lot, and when he comes, he usually brings a load of stuff we may, or may not, want.  He knows how we love to make something, out of nothing.  Or take a piece of junk, and turn it into something nice or useful.   This nice solid piece of wood, was among the last load he showed up with.  It’s not truly perfect actually.  Someone had routered it, but the piece was not cut exactly even, to begin with.  But that’s alright.  We embrace imperfections. (Starting with ourselves.  Do we have a choice?  ; ).

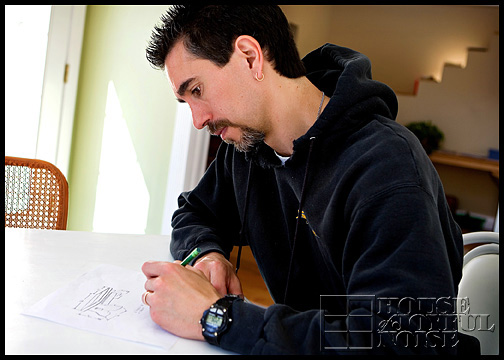
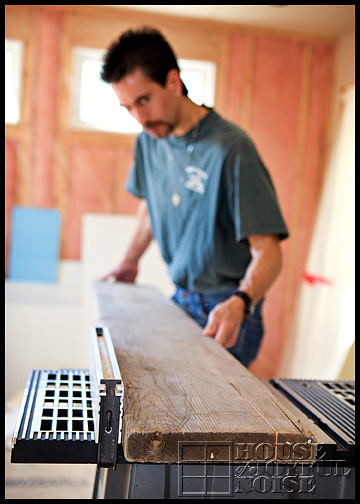
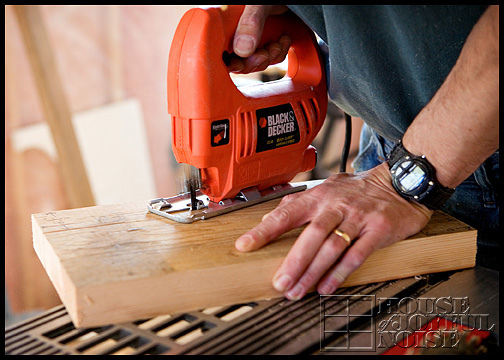
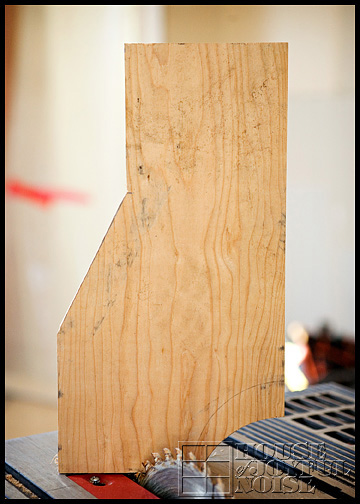
I had all I needed, to get to work on my vision.
–

old-doorknobs-jewelry-organizer-holder-2 
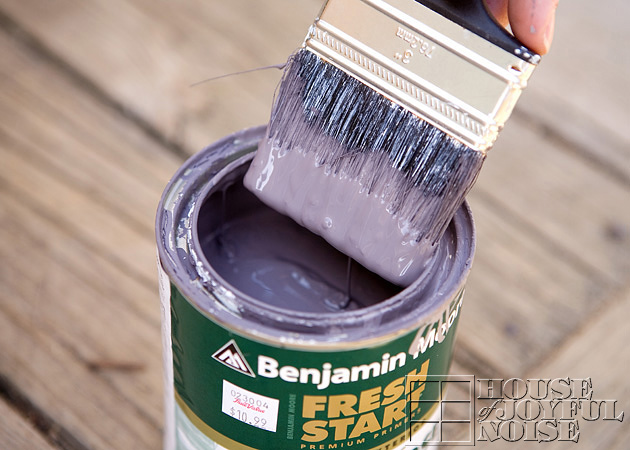
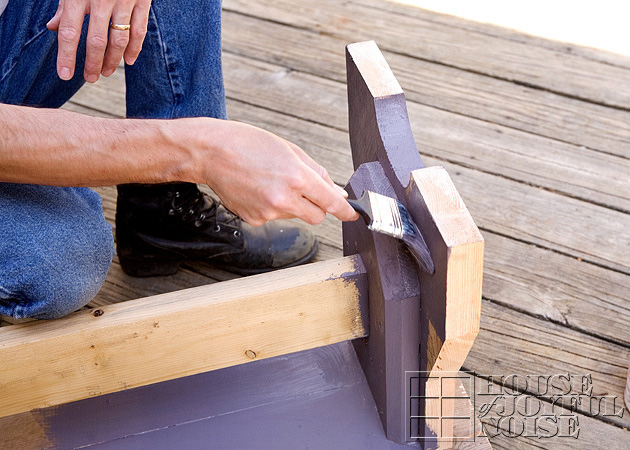
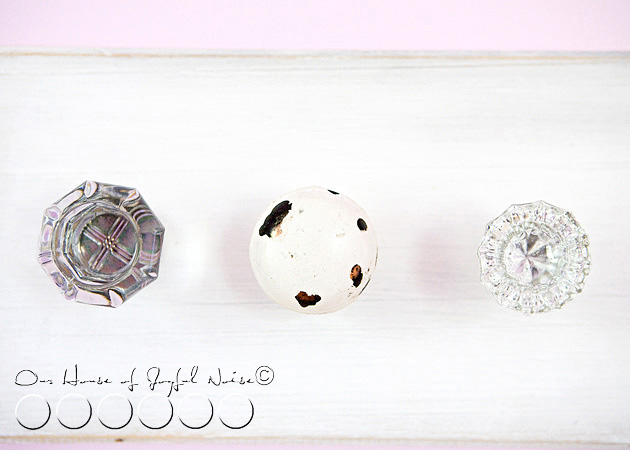
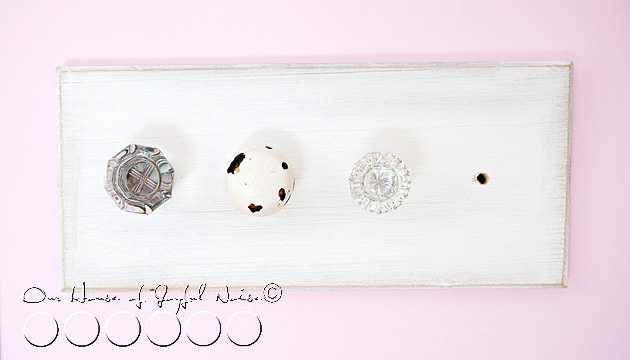
This is what I made.  I painted the wood, and then distressed it a little.  Then I had Michael install 3 of the door knobs I chose for this project, in my particular specified order. (So important, you know.)   I did not want any two knobs alike for this project, so we are saving the rest for another upcoming house project.

–

old-doorknobs-jewelry-organizer-holder-3 
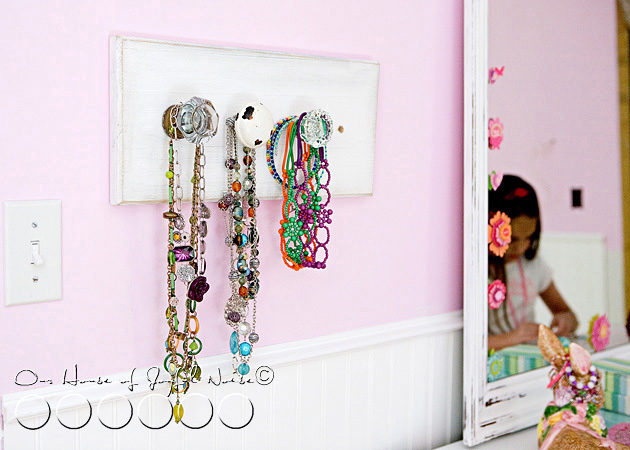
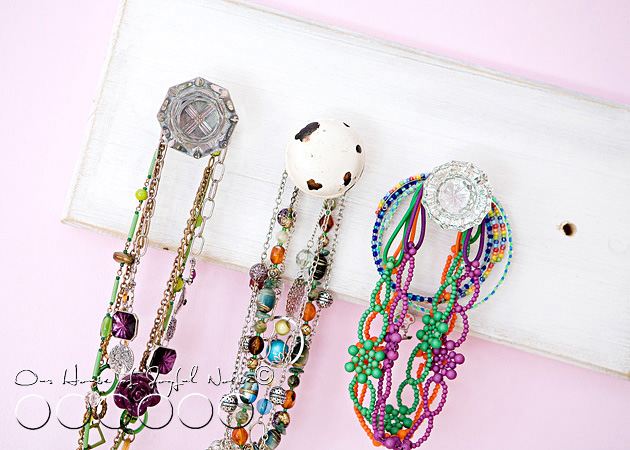
Here, is {O}’s accessory holder in use, just as I had envisioned it. Well, it’s not actually quite done, as you see.  I’ll tell you more about that in a minute.  But the knobs are just perfect, to hang her accessories on.  She has some nice pieces, too!

–

old-doorknobs-jewelry-organizer-holder-4 
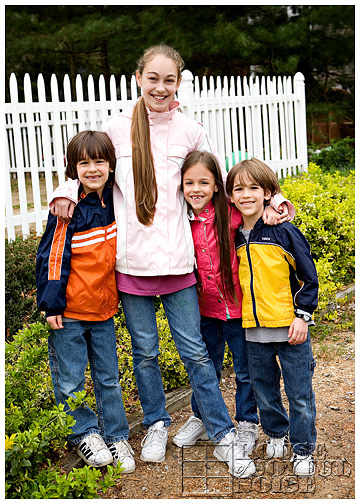
{O} is such a fun kid to have around.  She has such a feminine style, and gets so excited about anything I want to do with her, or her room. She appreciates my creative side, has one of her own, and is as enthusiastic as I am, about any project I brainstorm about, or work on.  She loves to work with me, too.

–

old-doorknobs-jewelry-organizer-holder-5 Hunting for door knobs, has been so fun.  I have discovered how unique door knobs can really be.
–

old-doorknobs-jewelry-organizer-holder-6 
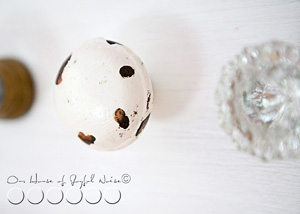
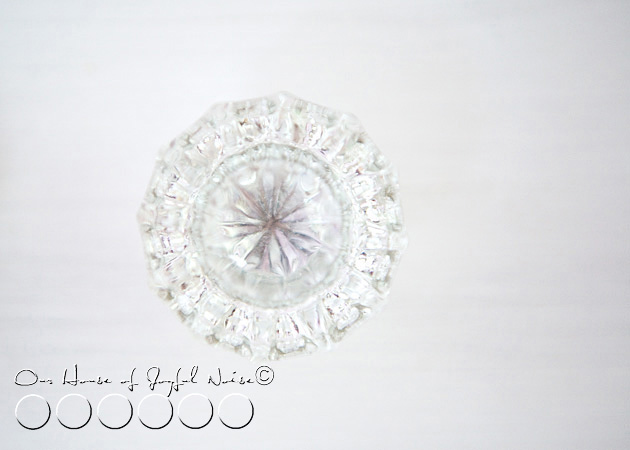
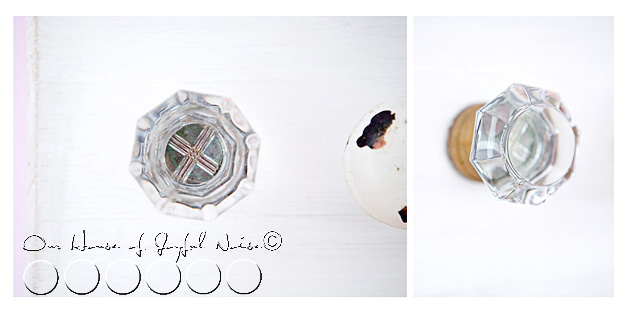
The glass ones can be especially fascinating, and beautiful.

–

old-doorknobs-jewelry-organizer-holder-7 But even this dinged up one has such character.  I think it’s brass, underneath that paint. This one, and it’s match, were pretty yellowed, when I brought them home.  We just washed them with hot water and soap, and they whitened quite a bit.  They still look old and discolored of course, which is why I love them.  But…not yellow.

–

old-doorknobs-jewelry-organizer-holder-8 I really still cannot believe, that I grew up in a house that is close to 100 years old, and I never appreciated it’s history, while I lived there.

I want a second chance!

–

old-doorknobs-jewelry-organizer-holder-9 
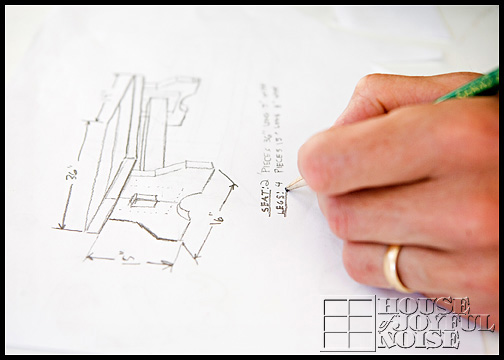
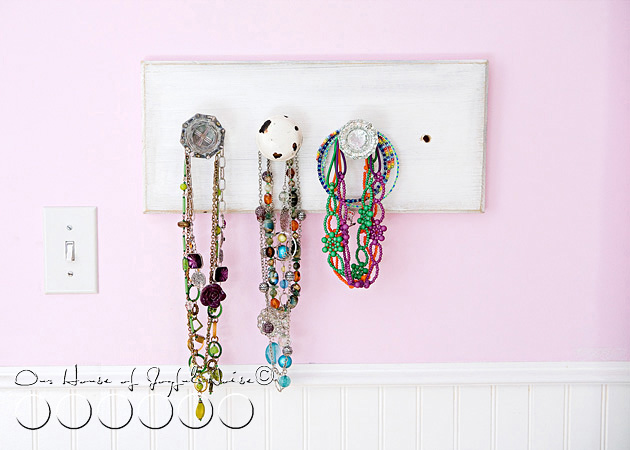
Which reminds me.  Were you wondering what the 4th hole was for?  I’m going to get a door knob from my parent’s house, that I just mentioned, and add it to this piece of art, that I created for {O}’s room.  It is like art – don’t you think? My father will be selling the house soon, now that my mother has been gone for 6 years.  It’s just taken him a long time, to be ready to let go.  I think he’s still working on that, actually.  (So am I. ) Anyway, that house is loaded with all of the details that a house of that age does, including more doors and doorways than you can shake a stick at. And thus, door knobs.

That 4th hole will be filled, very soon.  I could easily find another door knob in my antique hunting, and I will be getting lots more, anyway.  But it’s important to me, that the last one be from my old home, and {O}’s grandparents, for this.
–

old-doorknobs-jewelry-organizer-holder-10 
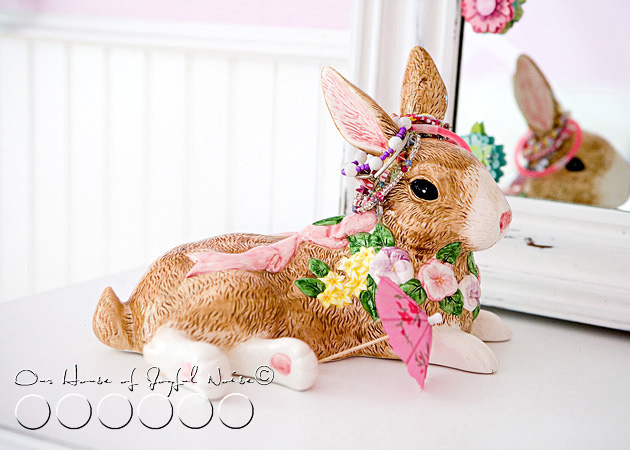
{O} confiscated the ceramic bunny, that was put aside to go back up in the attic, from our Easter house decorating pile.  It looks quite fitting and perfect, in her room.  And she found it’s ears, are just the right size for her bracelets.
–

old-doorknobs-jewelry-organizer-holder-11 
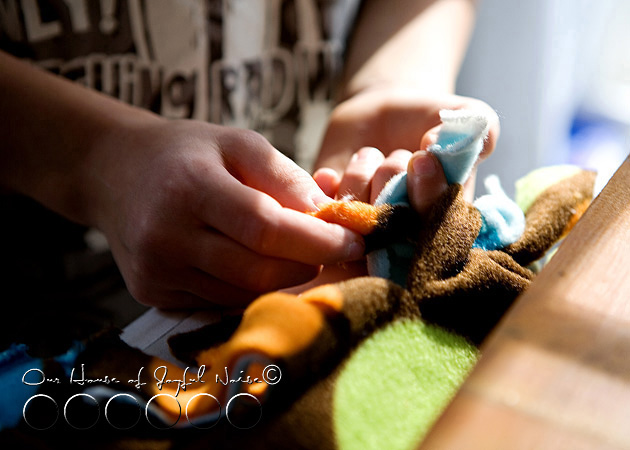
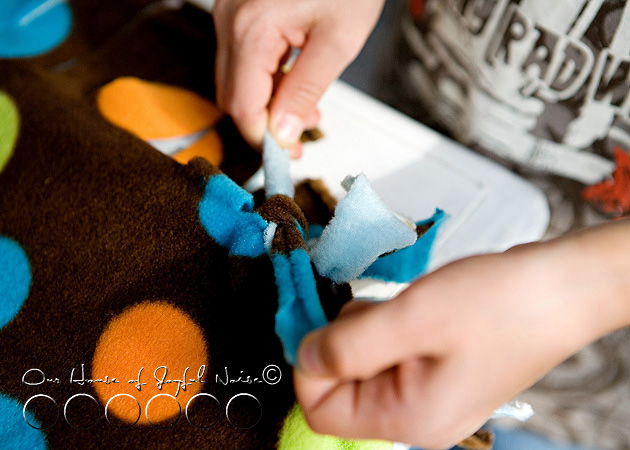
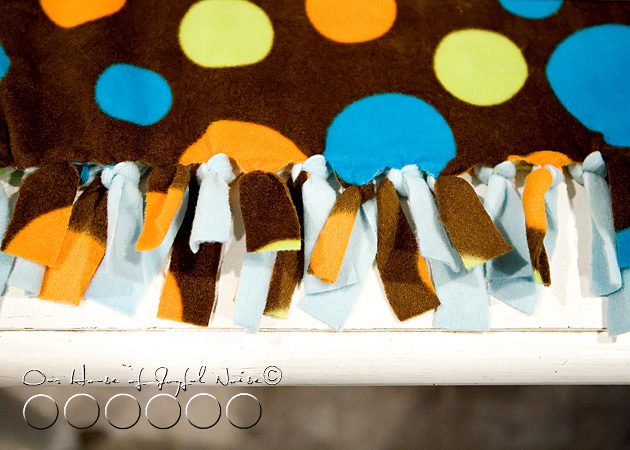
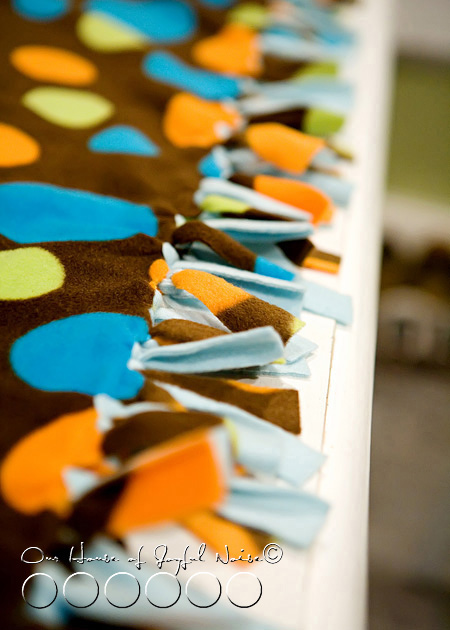
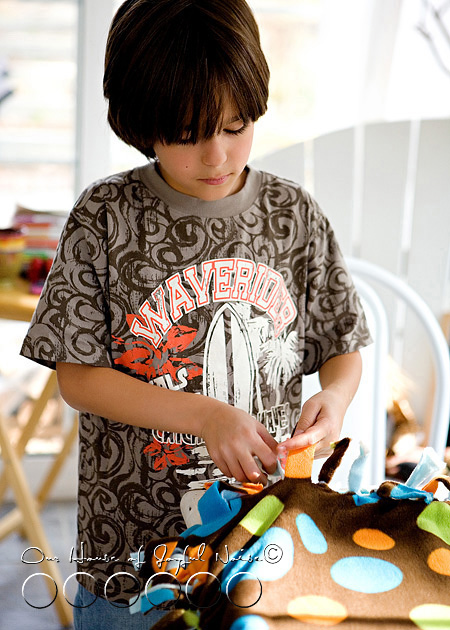
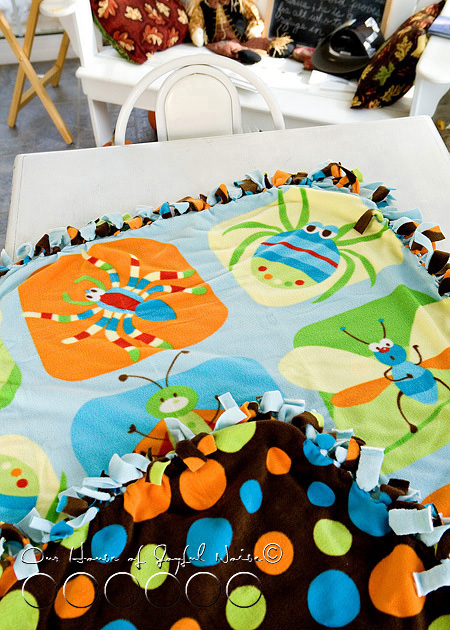
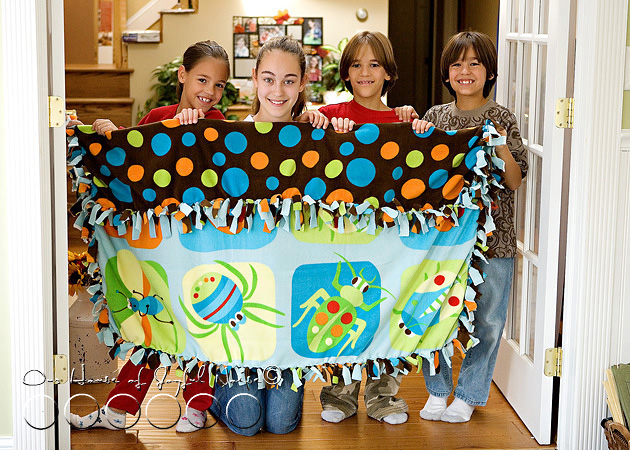
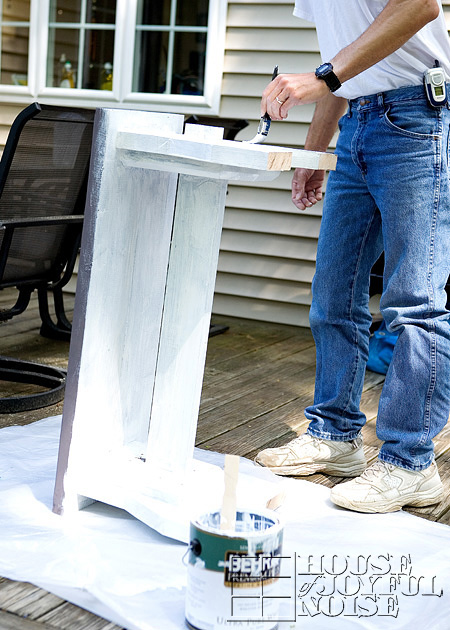
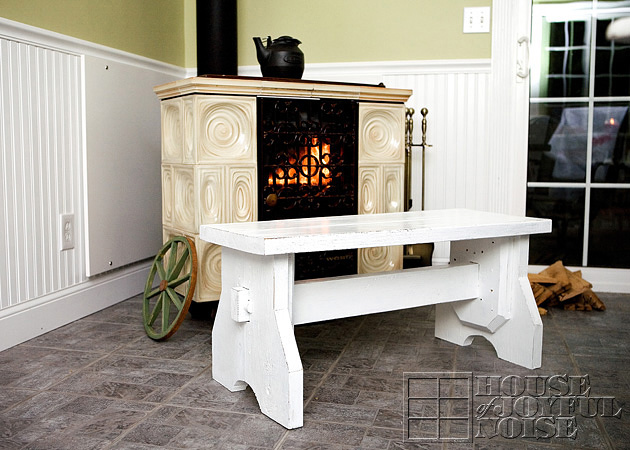
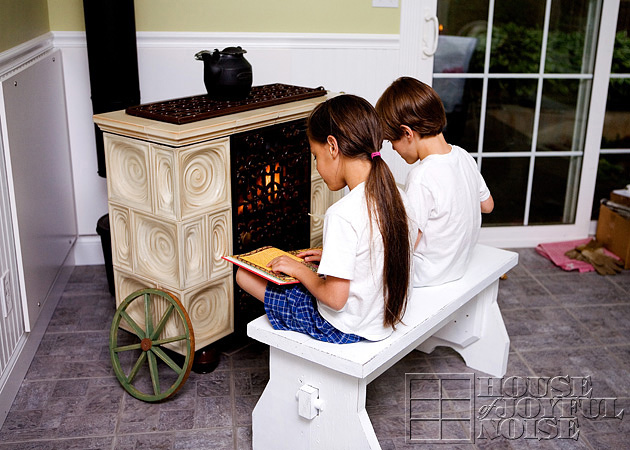
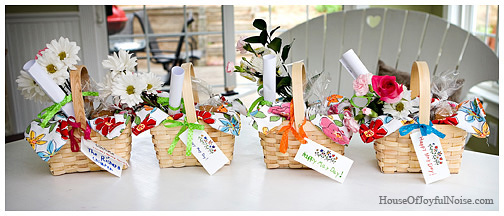
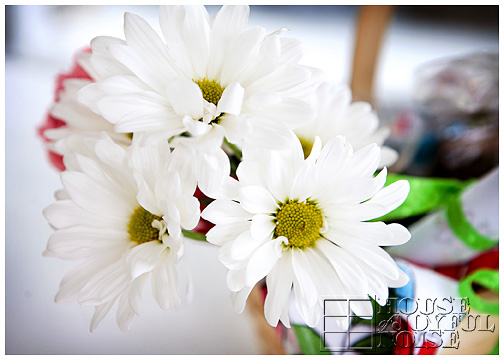
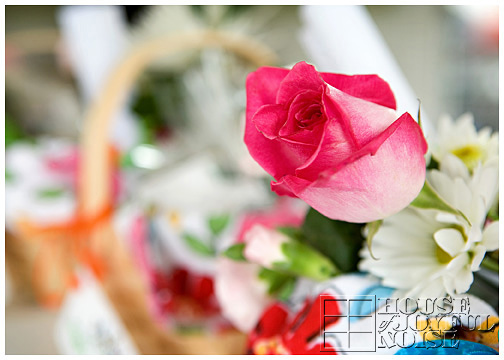
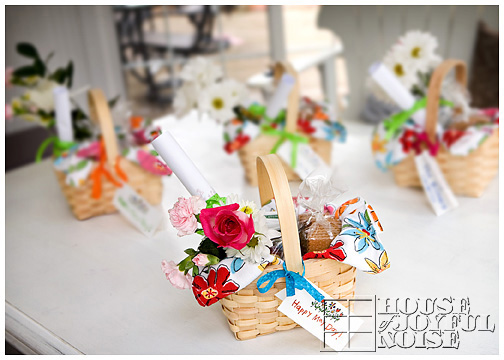
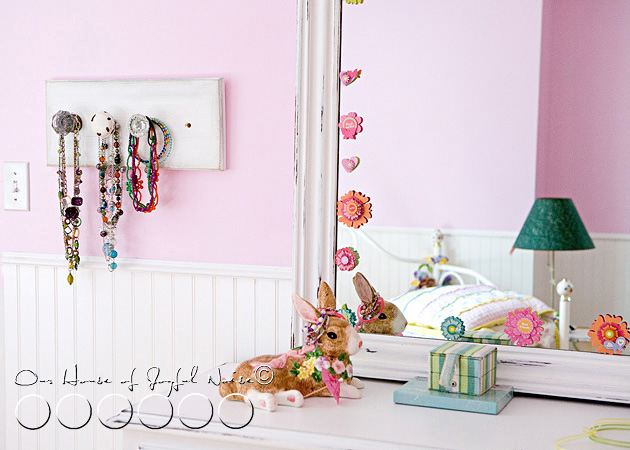
And in these photos, have been peeks for you, of another project I have already mentioned I’ll be sharing.  That post will be up by Thursday, in The Homestead (Home & Gardens) section of this blog.

So, what did you think of this project?  Did you like my idea? Please share your thoughts, in the comments. : )  I love it so much, I get giddy.

Like this project? Than ‘Like’ our Facebook Page! There’s some more clever ideas coming up!!

~~~~


Filed Under: Crafts & Creations, DIY (Do-It-Yourself) Project, Organization Tagged With: antique-doorknobs, do-it-yourself-DIY-projects, jewelry-organization, necklace-bracelet-holder, organization, projects-for-old-doorknobs, what-to-do-with-old-doorknobs

No-Sew, Double-Sided Fleece Blanket | Tutorial

November 6, 2010 By Laura 4 Comments

The kids and I were recently brainstorming for ideas, to put together a very special package for a certain little boy.  It was very special circumstances, that called us to put something together very special, just for him. I wanted to share with you all this idea our oldest, {A}, came up with:  Making a no-sew, double-sided fleece blanket for him.

no sew double sided fleece blanket
It was the perfect idea for this little boy.

The kids had received fleece blankets like this before, as gifts, and as single layer blankets.  But I wanted to see if we could make a double-sided blanket, so that it would have a different pattern on each side. How FUN, right? And it would be double warm and cozy!

It’s really quite easy, and well worth the effort!   Maybe this is a home-made gift idea you can use sometime, for Christmas gifts, or birthdays.


They are great for anyone, at any age.  From babies to grandparents, and anyone in between.  Just change up the patterns to be more suitable for the recipient, and it’s perfect. Who doesn’t use blankets? It can be a single layer too, and would take even less time. It just wouldn’t have a different pattern on the reverse side.  They are great as throws for beds, getting all wrapped up and cozy to watch a movie, as a lap blanket while you read, or even traveling in the car.  Just choose the appropriate patterns, and a suitable size for whom ever it is for.

Here’s How Easy it is to Make a No-Sew, Double-Sided Fleece Blanket

no-sew-double-sided-fleece-blanket-tutorial We found this set of 2 different patterns, at Joann Fabrics!  I didn’t know there was such thing, and had planned on having to choose 2 patterns separately, and have them cut off the roll to size.   So we were pleased to find these available!  (I also unexpectedly got it at half price!!)  There are a few sizes available in sets. This one was 48″ x 60″.  Perfect width and height for a little boy.  But you can buy any patterns you want off the rolls, and just cut them to matching size.

no-sew-double-sided-fleece-blanket-tutorial-1

I was tickled with this 2-in-1 fleece fabrics of chocolate brown with colored polka dots, and bugs!

Again, perfect for a little boy.

  • The first thing we did was lay it out on a clean table, layering the 2 pieces, one on top of the other, as perfectly lined up as possible.

Then we chose a side to start on, and laid a heavy board several inches away from, but along that edge, to keep the fabric from moving too much.

no-sew-double-sided-fleece-blanket-tutorial-2

We were prepping to cut fringes through both layers.   So using a snapline chalk, we measured up 5 inches from the edge, and snapped a chalk line across from one end to the other, to indicate where to stop cutting, so the fringes would all be the same length. This would create 5 inch long fringes, minus what is taken up when we knot them. Then we measured in from each corner 4 inches,  and cut 1 inch wide fringes, all the way across in between.   In other words, we stopped cutting fringes 4 inches from each end.   This would leave you a squarish block piece on all of the corners, for now.   We’ll get to why we did that, in a bit.

Now, if you don’t have a chalk-line to mark things off, you can use a ruler and chalk per usual.  But this was faster.

no-sew-double-sided-fleece-blanket-tutorial-5 Then, we just started tying each top layer of fringe piece, to the bottom layer fringe piece.

no-sew-double-sided-fleece-blanket-tutorial-6 Now because this blanket is 2 layers, the fringe pieces need to be double tied. Or else it would just un-tie.

But if it was a one-layer blanket, you would just knot the one piece of fringe, and once, would do.

You get me? ; )

no-sew-double-sided-fleece-blanket-tutorial-3
This is how it starts looking.
–

There can be a cool little technique here, where the print of the same side can show most. or the other side.  While tying it (like the beginnings of shoe tying), I found whichever side you stuffed through the whole, is the side that ended up on top. I wanted the opposite side showing, so I made sure to stuff that piece and pull it through to on top.

Now you even get that, or you don’t.  Either way will not ruin your blanket.  This project is virtually fail-proof!

no-sew-double-sided-fleece-blanket-tutorial-4
This is done all the way down, to your 4 inch corner piece.

The same process is done on every side of the blanket.  Again, stopping 4 inches for each corner.

Now what to do with the 4 inch corners:  We just cut 1 inch fringes, on angles, to go around the corner. I think it was 3 cuts, creating 3 more fringes.  Just make then 1″ -ish wide, like the others. This was to create a rounded corner blanket.   It IS an option, to just make fringe cuts one inch apart, all the way to the end, on 2 ends, to make the whole blanket more rectangular.  If you do it that way, I would do one whole side first, and then the opposite side, so they are the same.  Then work on the other 2 sides.

no-sew-double-sided-fleece-blanket-tutorial-7

Cutting 2 layers of fleece at once was a little hard for the kiddos, but they were very helpful for tying!    They took a lot of care with their work.

no-sew-double-sided-fleece-blanket-tutorial-8

Look how cute!   I just loved the colors.  And the bugs.  And the polka dots!

We were really happy with how it came out.

no-sew-double-sided-fleece-blanket-tutorial-10

The kids were really excited to send it out to our special gift, to this special little boy, along with some other gifts. It was a big package.

We hope our home made blanket warms his heart, as much as it warms him, head-to-toe.

It was certainly made with love!

Save

Save

Save

Save

Save

Filed Under: Crafts & Creations, DIY (Do-It-Yourself) Project, Holiday Crafts, Homemade/Handmade Gift Ideas, Kids Arts and Crafts, Tutorial Tagged With: birthday gift ideas, blankets, Christmas-gift-ideas, gift-ideas-for-anyone, gift-ideas-for-kids, handmade-gift-ideas, homemade-Christmas-gift-ideas, how-to-make-a-fleece-blanket, how-to-make-an-easy-blanket, no-sew fleece blanket, no-sew projects

How to Build a Wood Stove Bench – Part III – Finished

July 8, 2009 By Laura 1 Comment

How to Build a Wood Bench

For those of you who have been following our blog for awhile, you’ll know how this post is a little late coming.  The project was done quite awhile ago – we just didn’t get to posting the last part of the project.  Not sure if anyone has literally been following this project to build a bench of their own anyway.  If so….we’re sorry!!

For the rest of you, who may be new to our blog here, or missed these project posts before, we can catch you up with links, and a brief explanation:   We were using a silly footstool at our wood stove over the winter, to sit upon as we loaded wood into the stove, or poked the fire some.  Eventually, I had mentioned that I thought Michael should build us a real rustic bench enough times, that he got to sketching.

Here are Parts I and II of this project:

How to Build a Wood Stove Bench – Part I

How to Build a Wood Stove Bench – Part II

So, where were we?   Oh yes.   Michael had completed building the bench, and it just needed to be sanded some, primed, and painted.  (And I prefer….sanded a little again, for that older look.)

The primer we used was a mixed color that, actually, was not quite the color we were going for.  I wanted a medium brown that had some gray in it.  But it came out looking more like…..medium gray-brown with some purple in it?

How to Build a Wood Bench

It was a Sunday when we had gotten this primer.  Michael had them mix it up at the little local hardware store.  By the time we popped open the can, the store was closed.  We had gotten the primer that day, for our unfinished farm table we had gotten for the sun room.  I was eager to do the project that day, so we used the primer anyway, and it turned out to be fine.

Like the bench, we were painting the table white anyway, in the end.  The reason the primer color mattered any, was because I like to sand the corners and edges of the piece of furniture, to give it a worn old look.  Most times we sand right down to the wood anyway, but in parts the primer does show.  But it is so subtle, you couldn’t pinpoint the color.

So, after a quick sanding of the bench, Michael got to priming.  It wasn’t important to us to have it super smooth, so if it would be to you, you’d want to put more time into that, until it is as smooth as you’d like it all over.  We pretty much got right to priming.

How to Build a Wood Bench

Once it was primed all over, and the primer had dried, he filled in the screw holes some with filler, and got to painting it white.

How to Build a Wood Bench

I helped, with a brush of my own, in between taking photos. : )

How to Build a Wood Bench

Once it was painted all over, dried, and got a second coat dry, Michael sanded the edges and corners some, to make the bench look older and worn, as I had told him I wanted.

How to Build a Wood Bench

And when he was all done, I did it again. : )  He just wasn’t aggressive enough for me. I wanted it OLDER and MORE WORN than he had accomplished.  But ….it’s a preference thing.

How to Build a Wood Bench

That’s better!!  We did the same with our farmer’s table in the same room, so they kind of go together.

So now, the bench was finally done, just in time for……………SPRING??  lol

But, we did have a few very cold and rainy days and nights in early spring, that we got a cozy fire going.

How to Build a Wood Bench

How to Build a Wood Bench

So much better than the footstool….don’t you think??  That thing was barely accommodating to the backside of myself.

Remember, you may not need a wood stove bench, but a bench like this can be used in any room of the house.  For taking off and putting on shoes in a mudroom.  By a window for some light reading.  In the bathroom for putting down your fresh clothes and towels.  Or outdoors under a tree, on your deck, or by an outdoor fire pit! I’m sure if you’re needing a rustic bench, you know the perfect spot for it at your home.

We hope you enjoyed this home project, however sporadic. Sometimes, we’re just pleased with ourselves, that we finished a project, even if it did take longer than we had originally planned!

Save

Save

Save

Save

Filed Under: Crafts & Creations, DIY (Do-It-Yourself) Project, Home Projects, The Homestead Tagged With: build-a-bench, build-it-yourself-wood-bench, how-to-build-a-wood-bench, wood stove bench, wood-bench-plans

May Basket Delivering! – SO FUN!

May 1, 2009 By Laura 6 Comments

Our May Basket Delivering Day was so fun! We wanted to share it all with you.
may-day-baskets_
There was no schooling on our agenda today – just delivering our May baskets for May Day, and the kids could not have been more excited! But, first, I had to have some of my own fun, taking just a few more photos, as detailed memories.

daisies

rose

may-day-baskets

Ok, now I was ready. So next the kids loudly debated about which May basket was ‘theirs’, based on the tag they made, and who was going to who’s door, ringing the doorbell, and running for their life.   Once that was settled, they were very eagerly ready to go!  But you know I’m getting a photo of them first, and they know it too.

ready-to-secretly-deliver-may-day-baskets

I was so grateful that the light rain we had going on, went on hold for us once it was time to get down to business.  I didn’t mind the gray overcast day—it’s actually better for the photo taking. : )

Our first stop was right at the end of our road……

1_delivering-may-day-baskets
This is the home of a lovely elderly couple who have nearly ancient history in our neighborhood. This home of their is new, but it is built right in front of the old and smaller home that they raised 11 children of their own in!  They are so sweet.  So {A} placed the basket on the porch, rang the doorbell and ran. We were ‘seen’…..their visiting daughter opened the door as she and I were climbing back into the van up the road some. Last year their visiting son saw us the same way. Now…our hopes are always that our intended receivers would come to open the door, because that would give us more ‘get-away’ time, if you know what I mean. ; )

2_delivering-may-day-baskets

Next stop was up the main road a bit……

ring-and-run-may-day-basket-deliveries
{J} was up for his hit and run.  lol. This is the home of Sr. Jeremy—the long time nun resident of our parish.  She has done marvelous and wonderful things within our church family. We love her dearly…..and she loves children, DEARLY!!  She is a HOOT, if you know what I mean, and she has no reservations about speaking her mind. Ever. My kind of Girl!

ring-and-run-may-day-basket-delivering_
I was hiding behind a bush with my camera, and I couldn’t have been more tickled pink with getting this shot!! Look how his feet aren’t even touching the ground!  He was hysterical, trying to run before the door opened. We got away in time, but did spy with our little eyes, Sister open the door, see the May basket, and look everywhere for the sneaky one. lol

Next stop was a little ride, and it was {S’s} turn…..

secretly-delivering-may-day-baskets

This is the home of a lovely older couple from church, who dig us. And we dig them. We always sit all together in 2 pews in front or behind each other. They adore our kids, and are smitten with their church behavior.  They are probably in their late 70’s, and have great senses of humor.

Now, I have to tell you…THIS was a tricky one. And we got TOTALLY BUSTED!  See, here’s the thing. We were pretty sure these Peeps were going to be home. The brick sidewalk leading to this door, is very windy. It actually does a zig, and then a zag. So sidewalk is actually shifted very much to the right side, walking towards the door, and then does a zig to straighten head on to the door. So as we are walking, we are looking RIGHT IN the big window door-right. And we see movement in there. Oh dear!  So {S} puts the basket down, and tries to hurry ringing the door bell, which is of course door right….

may-day-baskets-getting-caught
…and as he rings, he finds himself face to face with Mrs. G….coming to the door. DAG NABBIT!! Do you see her?  Need help?

may-day-baskets-getting-caught_2
Do you see her now??  No??  It’s ok…it’s ok…it happens to the best of us. (Well, not really….I just don’t want you to feel bad…)…look again…

may-day-baskets-getting-caught_3
Now?? Because that’s really all I can do to help you. lol

So anyway….she’s coming, {S} sees her, but he starts ringing the doorbell anyway, and again, and again, because really….he was NOT missing the opportunity to ring a doorbell like everyone else! (We don’t have one on our house…lol).

Mrs. G opened the door, and laughing she said “WHAT are you DOING?”…and {S} said “Happy May Day!“, and she replied with a big laugh, “Aren’t you just the sweetest thing!“….and he has been repeating that all day. I think he believes her! lol. No…he is. So anyway…I was laughing so hard, from the nerves and getting caught, I forgot to take photos of her standing there, pleased as punch with their surprise.  Then we ran away, with her yelling after us…‘Thank youuuu!!!”

We had ONE more stop, and it was {O’s} turn……

may-day-basket-deliveries
This is the home of our friend, Dr. Ann. She is a veterinarian, and she has become quite attached to our kids too.  (And us, her.) We also know her from church, and we also sit near her.  (She saved a pew for us on Sunday morning, because we were running late, and it was JAM PACKED because it was a First Communion Mass….bless her soul!! We were so thankful!)   Anyway, she calls the kids ‘The Children‘….and if you heard her voice.  LOVE her voice. She’s a lector too…which is so lovely hearing her read Sunday readings to us…and she is also a singer. (She got us all tickets to her concert this Sunday!) Anyway….she knows all of he kids names, but she always says to the kids “So how are THE CHILDREN today??!!  HmmMM??”….and they all giggle, and say, “Gooood.”  She’s a doll.

We knew she wasn’t home, because her car was not there, and she works long hours at her business in town, her own Veterinary Hospital.   But…the kids enjoyed the fact that her cats were in the window watching us. lol.  So at least SOMEONE saw her in her cool hot pink slicker, even if they did have fur!

2_may-day-basket-delivering

That was the last of our May basket deliveries!  Met with BIG groans and sighs by ‘the children’.

As we all climbed out of the van in our driveway, they were still talking about how they wish we had more homes to go to.  They had SO much fun.  WE ALL did.  We just LOVE doing these kinds of things. Especially for other people. The whole process….planning surprises for others, shopping, making and baking things, and just having fun making someone’s day.

Here they all with mission accomplished:  Basket-less!

finished-delivering-our-may-day-baskets
Later on tonight, we got a call from the old woman at the end of our road. She left the sweetest message on our machine, expressing how wonderful that May Day gift basket made her feel, and the memories it brought back to her of the May Pole at school when she was a little girl. If you heard her sweet, sincere and shaky little voice, well….

That’s what it’s all about.

We can hardly wait until next year.  I’ve heard the kids talking, and I can see this getting WAY out of hand next time.

But who cares??!!

Hope you all had a wonderful May Day!

Save

Save

Save

Save

Save

Save

Save

Filed Under: Celebrations, Crafts & Creations, DIY (Do-It-Yourself) Project, Giveaways, Giveaways, Holiday Crafts, Homemade/Handmade Gift Ideas, The Big Picture, Traditions Tagged With: Catholic, Catholic-family, Catholic-kids, delivering-May-baskets, developing-thoughtfulness-in-your-children, kids-May-activities, May, May-basket-ideas, May-basket-inspiration, May-baskets, May-celebrations

How to Build a Wood Stove Bench – Part I

March 28, 2009 By Michael 5 Comments

Hi Everybody. I’m Michael, a.k.a. Mr. House Of Joyful Noise.
I’m excited to introduce my first project on the blog!  I’m going to teach you how to build a wood stove bench.

Michael - House of Joyful Noise blog

 I’ll be working this project in parts, and blogging as I go.  I’ll do my best to explain what I’ve done, along with what photos we took, but if you find you still have questions, you can let me know in the comments to this post, and I will try to answer as best I can.  So check the comments for replies if you leave me a question.

The other day, my bride mentioned that she was tired of our little stool in front of the wood stove.  She wants something larger, homier, and I had to agree.

1_l

So I asked her what she would like to have, and she described the type of bench she would like.  At this point, I sketched out something, as I always do when I start a project, just to have an idea of what direction I’m going in.

How to Build a Wood Bench

How to Build a Wood Bench

I came up with a height that would be best to sit and load the stove with wood, poke the fire, or clean the stove out, etc. My bride wanted it wide enough for 2 people to sit together. ♥♥  I also wanted a comfortable width so the bench would be stable on the floor.  I felt like I had a good enough plan on paper to start the project.

How to Build a Wood Bench

I set out to find some scrap stock around the house.  I ended up using two 6 foot pieces of 2″x10″ ‘s, left over from our sun room rafters.

I wanted the bench top 14 inches wide, and 36 inches long.  So I ripped one of the 2×10’s to 7 inches in width.

How to Build a Wood Bench

Once I had that ripped to size, it was time to cut it to 36 inches in length. This left me with 2 finished pieces 7″x36″.

How to Build a Wood Bench

Then it was time to start the legs. I knew I needed 4 pieces 8 inches wide, by 15 inches tall.  (Two pieces 8″x15″ per leg.)  So it was back to the table saw to rip my second 2×10 to 8 inches in width.

How to Build a Wood Bench

With that ripped to 8 inches wide, I then cut 4 pieces 15 inches long.  These would be the legs. I then sketched the pattern onto one of the legs.  I measured from the side in to 2.5 inches, and down from the top 5 inches, and marked it with a pencil.   Then from the bottom of that piece, on the same side, I measured up 5 inches, and marked that. Then I drew the angle connecting those 2 points.

How to Build a Wood Bench

How to Build a Wood Bench

I cut on that pattern, and then repeated this 3 more times with the 3 remaining pieces. This gave me 4 identical pieces to build 2 legs for the bench.

How to Build a Wood Bench

I also wanted an arch cut out of the bottom of the leg.  So I measured 2 inches up the side, and marked it. Then I measured 3 inches along the bottom, and marked it. I took a one gallon paint can, set it on the piece, so that the can touched on both of those marks, and traced the curve. I cut them out with a jigsaw.  (Don’t pay attention to the larger pencil arc. I was just figuring out how high I wanted it.)

How to Build a Wood Bench

Here is a finished half leg.

How to Build a Wood Bench

Putting 2 of these cut pieces together, this gives you an idea of the look of a finished leg.

How to Build a Wood Bench

Now, to secure these 2 pieces together, I cut a support piece for the inside of each leg. They are 9¼ wide by 12 inches high.  To dress these pieces up a little, I cut 2 45 degree angles off the bottom, and did 45 degree bevel all the way around, except for the top.

How to Build a Wood Bench

That piece will sit centered on the width and flush to the top of the legs.

How to Build a Wood Bench

In Part II of this project, we will finish the cutting, and get ready for assembly of this bench.  Later on, in Part III, we will prime, paint and finish the bench to a worn look, and show you how it looks  in front of the wood stove.

Something to think about:  In keeping with the general design of this bench, the measurements could be changed to build a bench for many different uses. For example, you could build a bench for your deck, your garden, a wall bench for in your home, or a bench for your kids to sit on in their playroom.

The projects I intend to blog about are anything I happen to be doing anyway, for our own home or needs. So as they come up in life, I will try to share in this manner here on our blog.  I think you will find that my projects are often rough and simple. Since I am not a carpenter by trade, I have limited tools to work with. But I make do ok.  My hope is that these projects will offer a jumping point for projects you may like to do, or inspire the men in your family in some way.

Please feel free to leave any suggestions or feedback about these project posts for me as well. I am new at blogging and explaining step by step. I just DO IT. So if there is anything I can do to clarify things for you, please let me know and I will do my best.   Meanwhile, I hope you enjoyed Part I of my first blogged project!!
Click Here >>>> for Part II

Save

Save

Save

Save

Save

Save

Save

Save

Save

Save

Filed Under: Crafts & Creations, DIY (Do-It-Yourself) Project, Home Improvement, Home Projects, The Homestead Tagged With: build-a-bench, build-it-yourself-wood-bench, how-to-build-a-wood-bench, wood stove bench, wood-bench-plans

  • « Previous Page
  • 1
  • …
  • 5
  • 6
  • 7
  • 8
  • Next Page »

We are wicked happy to have you here! We hope you find much inspiration, help, humor and enjoyment here.


Archives


POPULAR POSTS

* * * * * *

SUBSCRIBE to House of Joyful Noise blog! Every new post, delivered right to your email box!


Privacy Policy

Amazon Affiliates

Never at any additional cost to you, we may earn a small commission for our endorsement, recommendation, testimonial, and/or link to any products from our website. Your purchase through our links helps support our family, while sharing with you the products we authentically use and recommend, for various ideas, and letting you know where you can purchase them. Thank you for your support!

[footer_backtotop]

Copyright © 2025 HouseOfJoyfulNoise.com · Genesis Framework by StudioPress