• HOME
  • {A}’s Chipmunk Training Archives

 Homepage

  • The Homestead
    • Home Projects
    • Home Improvement
    • Home Decor
      • Seasonal Home decor
        • FALL Home Decor
        • WINTER Home Decor
        • SPRING Crafts and Creations
        • SUMMER Crafts and Creations
    • Our Chickens
    • Gardening
    • Organization
    • Re-Purposing
    • Furniture Refinishing
    • Budget
  • Crafts & Creations
    • Seasonal Home decor
      • FALL Crafts and Creations
      • WINTER Crafts and Creations
      • SPRING Crafts and Creations
      • SUMMER Crafts and Creations
    • DIY (Do-It-Yourself) Project
    • Kids Arts and Crafts
    • Homemade/Handmade Gift Ideas
    • Holiday Crafts
    • Fan Pulls
    • Free Printable/Downloadable
    • Sewing Projects
    • Giveaways
    • Business Features
  • Recipes/FoodFun
    • Breakfast
    • Lunch
    • Main Dish
    • Sandwiches
    • Appetizers
    • Slow Cooker
    • On The Grill
    • Side Dishes
      • Soups
      • Salads
    • Baking
      • Breads, Rolls and Muffins
    • Snacks
    • Treats
    • Desserts
    • Drinks
  • Homeschooling
    • Elementary Homeschooling
      • Elementary Homeschooling READING
      • Elementary Homeschooling MATH
      • Elementary Homeschooling LANGUAGE ARTS
      • Elementary Homeschooling SCIENCE
      • Elementary Homeschooling HOME ECONOMICS
      • Kids Arts and Crafts
    • Middle School Homeschooling
      • Middle School Homeschooling SCIENCE
      • Middle School Homeschooling HOME ECONOMICS
    • Language Arts
    • Math
    • History / Social Studies
    • Geography
    • Foreign Language
    • Field Trips
    • Games
    • Nature Study
  • The Big Picture
    • Life In General
    • Celebrations
    • Faith
      • Into the Light; The Series
    • Giveaways
    • Reviews & Sponsors
  • Photography & Lettering
    • Photography
    • truck lettering
    • vehicle graphics
    • Newborns
    • Kids
    • Engagement
    • High School Senior Pictures
    • High School Senior Pictures Sneak Peeks

A Kitchen Improvement | Custom Built Mega-Storage Shelving

February 10, 2010 By Laura 15 Comments

 Here is the kitchen project I have been SO excited to share with you all!  Again, this was one of my brainstorms, and I’ll be darned if I should’ve thought of it sooner!

So….take a good look at the photo below. This is a stairwell down into the middle level where our laundry room is, to our finishes basement (with 1/3 of a side unfinished.)  You see that ledge along the stairs and half-wall?  We are always putting stuff there that needs to go down and put away, that we don’t have room for to keep in the kitchen.  Extra platters, our slow cooker, etc.  Plus, we have plenty around the kitchen that could use a better residing place.

So one day it hit me……we could make this area into some really awesome, USEFUL, shelves.  And I knew just how it could be done, more or less. So, I told Michael about it, he drew what he thought, I said “No, no no, like this….”….and drew out what I thought, and we debated some. In the end, he understood my ‘vision’…and I got BEYOND excited.

kitchen-custom-built-mega-storage-unit-1 That half wall is about 4.5- 5 inches thick. Pretty useless, as is the ledge.  The half wall is a nice way to keep the kitchen open to the school room (which was one of the rooms added on to the house), but when this hum-dinger of an idea hit me, it all suddenly seemed like long-time-wasted space.

So, here, is the beginning rough framing of these shelves…..

kitchen-custom-built-mega-storage-unit-2

Michael was just testing the fit of it, if it was going to work alright, etc. We talked about how to finish it off.  Which is always a good thing, to bounce each other’s ideas off of each other.  Because in the end, we come up with the best overall solutions.  We just love working together on new ideas. Especially when it comes to improving the appearance and functionality of our home.

And here it is finished . . . . . .

kitchen-custom-built-mega-storage-unit-7 I am SOOOOO in love with it. I can’t BELIEVE I didn’t think of this sooner!  Notice how we incorporated the 1/2 inch wall, and added the actual shelving space for a new 19.25 inch top surface?!   Ohhhh, the things I could display there.  For now, I just took what I really wanted MOVED…a few photos frames, and a candle.
–

kitchen-custom-built-mega-storage-unit-4 I even love the little nubby things, that cover the screws.  It adds character!

The shelves I have now, will serve in holding things that have just been in the way around the kitchen, and just ‘stuck somewhere’ as there was nowhere else to put it, as well as many of my favorite things.

kitchen-custom-built-mega-storage-unit-6 Look at the fine trim work.  Underneath………

kitchen-custom-built-mega-storage-unit-9 ….as well as on top.  This was purchased trim, primed and painted, and mitered, to fit.
–

kitchen-custom-built-mega-storage-unit-8 One of the sentimental things our new shelves displays, is our family plate.
Our names are actually under each hand, but I edited them out because…..right, I’m still thinking on that.
–

kitchen-custom-built-mega-storage-unit Our growing collection of cookbooks.   Below that on the right is the plates the kids made, for the triplets 6th birthday at a ceramic place.
–

bowl I SO love this bowl.  I love roosters. Love the royal colors. Had to have it.  There was a few other pieces that matched, when I found them at Marshall’s.  But I resisted buying every piece. I just got the bowl.

img_5005 Here’s our big guy, who has resided at the far end of the half wall, for some time. He’s made of tin.
He looks better and more secure, in a wider platform such as this.   De Colores!  ; )
–

kitchen-custom-built-mega-storage-unit-3 I can’t tell you the JOY I will get, going up and down these stairs, from now on.   Or, on second thought, I may think, “Ugh. I need to dust again.” lol.
But generally, it makes me happy.

–

wall_decor This has been over our stairs for some time.  It’s a large framed piece, from a family friend’s upscale boutique, Grandma Daisy’s, in Dennisport, MA.  It was a gift, and I love it too.

It is nice, to have a husband, who can whip up nearly anything you dream.  His gets such skills and ambition, from his father, who was/is very much the same exact way.  “Why buy it….when we can make it?”  Or sometimes….”We can’t afford to buy that, but we can make it!”  Always cheaper.  And again….you just love your home even more, when you’ve invested such thought and hard-work into it.

So, here is the BEFORE and AFTER, together:

kitchen-custom-built-mega-storage-unit-10

I hope you enjoyed reading about this project, as much I enjoyed sharing it.  Wouldn’t you know, no sooner was this one done, did I have another GRAND idea for our kitchen.  The little things that bug me, inspire me, more than you know.  I’m a picky one, but who ever said that was a bad thing?
Thanks for coming by!

Save

Save

Filed Under: Home Improvement, Home Projects, Organization, The Homestead Tagged With: custom-built-shelves, custom-kitchen-storage, Home Improvement, home-projects, kitchen improvement, organization, shelving-inspiration, storage-space

Superbowl Menu

February 8, 2010 By Laura 2 Comments

We had a nice little Superbowl Sunday.  We kept it pretty low-key, for a couple of reasons:

1) Our own New England Patriot’s weren’t playing.

2) It was a school night.

Every year, I get all excited about Superbowl Sunday, no matter who is playing. And then I realize how late the game is starting!  And then I remember, that I forget that that is the case, almost every year!

Still, we can’t let the opportunity for a little private family party, pass us by.  But considering the circumstances this year, we kept the menu simple-simple.

pastrami-sandwiches Pastrami Sandwiches – we love them. We just put a pound 1/2 of pastrami in our steamer for 10-15 minutes, rearranging in the steamer basket about 1/2 way through for even heating of the meat, and then we pile it on a toasted wheat roll.  The kids prefer no mustard, but Michael and I like a little French’s.

jalapeno-poppers

Here’s an item we were downright excited to try:  Jalapeno Poppers!

Participating Ingredients:

  • 18 fresh jalapeno peppers
  • 8 oz. package cream cheese, softened
  • 3/4 shredded or grated cheddar cheese
  • 1 green onion chopped
  • package of bacon, cut in half to shorten (18 slices, 36 halved)
  • brown-sugar BBQ sauce
  • toothpicks
  • RUBBER GLOVES!

(You will only chop jalapeno peppers without gloves once, but never again.  I did, once, and my fingers spent the entire night in HELL.  Literally, I’m quite sure.  The throbbing pain of burn, was nearly unbearable.  I was near tears.  Just take my word for it, and use gloves when chopping these babies, and don’t touch any part of yourself after having touched the peppers!  Especially your eyes!)

1) SO….once dressed in your gloves, slice the peppers in half, lengthwise. We keep the stems on, and try to cut those in half too. It gives you a little handle later, and keeps them cute! Clean out the inside of the peppers completely – free of seeds and white membrane.  However, the real heat is in the seeds and the white membranes – so if you like more kick, leave a little.  We left just a little seed in ONE pepper, and I got the Lucky Popper. ; )

2) In a bowl, combine softened cream cheese, chopped green onion, and cheddar cheese. Mix well.

3) Being sure your gloves are on again, or still, using a little old-style butter knife, or a cheese spreader, fill all of the peppers halves with the cheese filling. We filled it well, as a little heap.

4) Pre-heat the oven to 275 degrees.  (I realize most cooks/bakers do this first, but I’m too slow to prep the food, so the oven is on for too long, for no reason.  Plus, I feel pressure because the oven is waiting and ready, but I’m not done! lol)

5) Next, wrap each cheese-filled pepper, with a 1/2 piece of bacon.  Do not pull it tight, as the bacon shrinks when it cooks. Secure each one with a toothpick through the side of the pepper as you go, and place on a cookie sheet.  (We cover the cookie sheets with tin foil for stuff like this, to avoid having to wash the pan after. ; )  Call us lazy.

6) Generously brush each bacon-wrapped-cheese-filled-pepper, with brown sugar BBQ sauce.

7) Put in oven for about an hour, or until the bacon is crisp and sizzling.

*You can serve immediately, at the risk of burning mouths.  But we found anyway, that letting them set & cool some for 10-15 minutes, really makes them all the better!  They firm up a bit, and you can really enjoy the different elements of the Jalapeno Popper in your mouth, instead of it all being very soft and mushy in your mouth.

A friend asked us, “Will the kids eat those?”, and the answer was YES!  Our little ones, especially, like hot stuff.  {A} just thought they “were just o.k.”.   But it’s not the recipe, it’s her.    ; )

We’ll be adding these to our appetizer hit-list for future occasions.  We put 1/2 f this batch, already cooked, in ziplock bag and into the freezer, to be able to just heat some up sometime soon. And trust me, soon it will be!

BTW – My friend Mary Beth, from Nothin’ But Country, made up a batch of the Bacon-Wrapped Pineapple Bites for her Superbowl party, and came by the blog here to leave a fantastic review of the recipe!  Check it out! If her review doesn’t convince you to try them, nothing will!  And check out her blog too! She and her husband LOVE to cook, and all kinds of great recipes.

chips-and-salsa We also snacked on tortilla chips and salsa through the game, in between hoots & hollers at the tv.   As you can see, we already had been at them before I remembered to take a photo. lol.

jsfootball Our ever-creative boy, {JM}, made a football for our party, as some festive decor.  He made it out of gold and white tissue paper, and a little gold mylar.  That boy is ALWAYS ‘making something’, and he never ceases to surprise us with his great ideas either.   Get this……..

jslitfootball  …..the football lights up!!  In the dark, it really puts off quite a glow!

Since our New England Patriot’s weren’t playing in the Superbowl this year <boo-hiss!!>, we decided to cheer on the Saints!  Why?  No real significant reason, except maybe because their names is the Saints, and we like their logo the best. : )  We are really happy for New Orleans.

Did YOU watch the Superbowl?  Which team did you cheer on?
And more importantly, what was on your Superbowl Menu, if you had one?  Do share!

Save

Filed Under: Appetizers, Crafts & Creations, Kids Arts and Crafts, Life In General, Recipes, Sandwiches, Snacks Tagged With: appetizers, jalapeno-poppers-recipe, party food, pastrami-sandwiches, superbowl-menu-ideas

{Kreature-Triple-Feature}: A Mixed Post

February 3, 2010 By Laura 10 Comments

We’ve got a few brief things to share today, and we hope for your comments & thoughts on any or all of it!

First up, is an amusing little story:

You know the stories you’ve heard, of instances when a baby has been left on someone’s home doorstep, or at a hospital?  Especially since the ‘Safe Haven Law’ went into effect, there have been numerous stories of such cases in the news.  But most of us have heard similar stories, going way back before the law was enacted. (Starting with Moses in the basket, floating along the river, in hopes someone would find him, and keep him safe and loved.)

Well, something QUITE similar happened, not at our home, ….. but our church!

And it wasn’t a baby that was left…. but a lop-eared bunny!

lop-eared-bunny HE (it’s been guessed) was found inside our empty church on Saturday, by one of the Knights of Columbus!  He was left there, in her big, clean cage, supplied with fresh food, fresh hay and full bottle of water.
–

lop-eared-bunny-1 There was a note, that simply stated that he was not being taken cared for well enough anymore, and that was it!
–

lop-eared-bunny-3

lop-eared-bunny-4
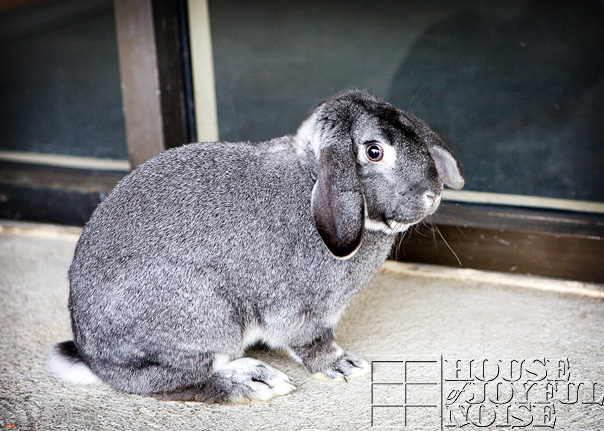
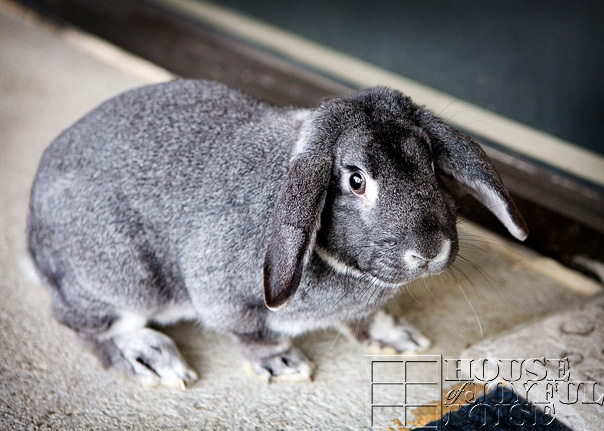
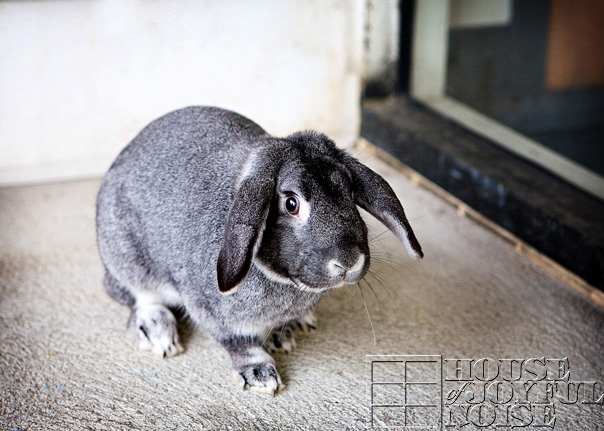
He’s just beautiful.  BIG, SO SOFT, such a gorgeous gray coat, and very handler friendly.

And get this…..

HE’S POTTY TRAINED!

We had heard the story after Mass on Sunday, and went right over to the parish center to see him.

Yesterday, we just had to go back, so I could get some photos of him.  I was right on time, because a parishioner was there and had him out of him cage, trimming the his nails.  This guy is really good with animals, and seemed to know a few things about rabbits.

lop-eared-bunny-5
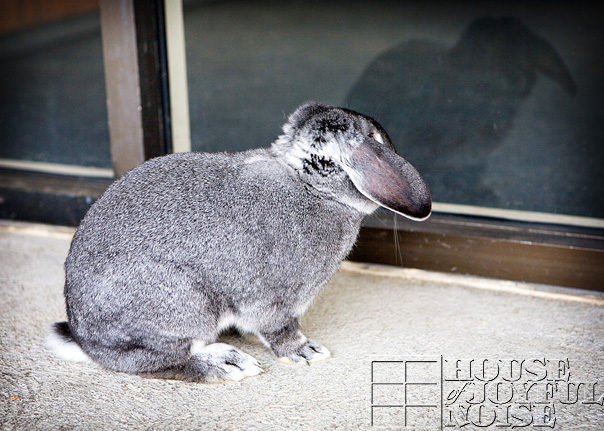
Look at him,  checking out his reflection in the window.
–

lop-eared-bunny-6
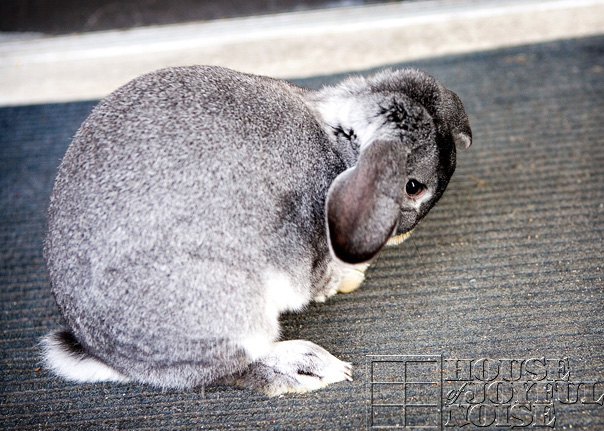
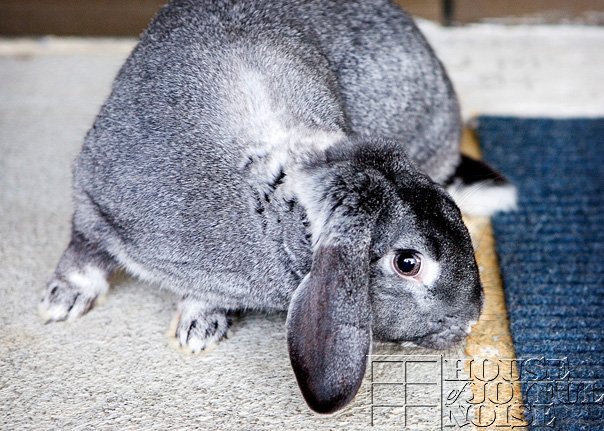
And there is nothing cuter, than watching him wash his face, with his paws.  We just about melted.
–

lop-eared-bunny-7

 Surprisingly, our pastor fell quite smitten with the bunny, and decided that if no one claims him as a joke or something, the church is keeping him!!  He already named him, ‘Kreature’.  (Borrowed from the story of ‘Kreature’ from Harry Potter, I guess…which we’re not familiar with.)

He’ll be living at the parish center, where he will get PLENTY of LOVE and ATTENTION, from our huge parish family.


…………………………………………………………………………………………….

candlemas
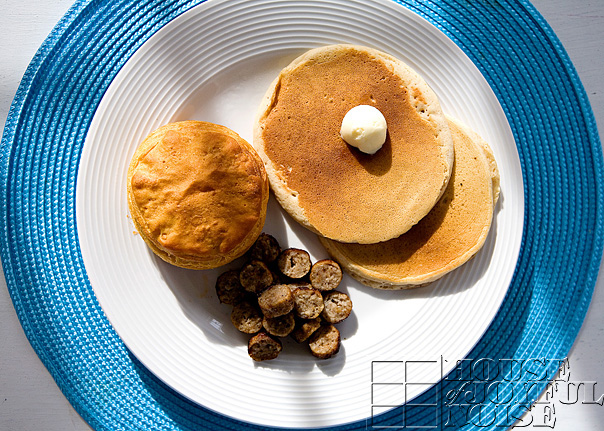
I considered several different activities, in the couple of days prior,  to do in light of Candlemas. (Light…lol…no pun intended. ; )  But, nothing was really appealing to me enough.  In the end, we just decided to have a ‘circle breakfast’, representing the solar system and light, and talk about again, all of the meaningful events, that are tied into Candlemas.

candlemas-breakfast
For those of you who have never heard of Candlemas, I would be happy to link you to information, but would never be able to CHOOSE exactly what to link you too.  It’s a complex day, honoring several events, that interestingly, can be said to be all tied to one another in some way.  So, may I be so nervy as to suggest you just Google ‘Candlemas’ yourself, see the abundance of links, and click on one or 3, that draw your attention.

It’s all worthy of a little celebration.  But knowing the days will grow longer and longer with daylight, certainly makes us happy.


……………………………………………………………………………………..

00_

In our day to day life, I think any one who really knows us, will tell you that I am one of THE most protective mothers out there.  Some say, ‘over-protective’, even – which sits quite fine with me.

As parents, most all of us go to certain extents also, when using the web, to protect our children.

As a professional child-photographer, I do all I possibly can do, to protect the identity of my subjects.  While I use their photos online, on marketing material, and in displays, all with legally-signed permission from the parents, I never ever use the children’s names, or give out any other information relevant to their location or safety.  I am actually more of an advocate about that, than most of my parents even seem to care about.  After all, what harm can come of anyone seeing a photo of a child online, and knowing their first name?

Which brings me to the point of this post, in relation to OUR life, specifically.  Like so many parents do with their own blogs, etc., I have used a substitute of sorts, for our own children’s names.  Some parents come up with fun nick-names, etc., that represent their children.  Everyone has different circumstances, and there is also a wide variation of feelings and comfort levels on the matter.  Which I respect 100%.

So this post is in no way an argument about the relevance or importance of doing so for any family in part, or as a whole, but more directly about US, in particular.

From the beginning, we have opted to use our children’s initials, inside of brackets.  When we started this blog, I didn’t have very strong feelings on making an effort to protect our children’s online identity, per sey.  Naturally, as a child-photographer, I’m all about photographing children. And as a mother who is in love with her children, and of which this blog revolves around, I definitely was going to be posting TONS of photos of our own children.   (Their Dad is quite fine with it as well, by the way.)  But in using their names, I was sort of ….undecided.  I couldn’t really think of a single reason, in OUR life circumstances, how using their names would jeopardize their safety, on any given day.  But just in case I thought of something later, I embarked on this blogging journey, using the bracketed initials.

But lately, I have been asking myself WHY we do that, and what harm could possibly come of using their names?

I’m just starting to feel a little…..silly, I suppose, using their bracketed initials.  Silly, when I consider the following facts:

  • In home schooling our children, they are pretty much under our wing at all times.  They don’t take a bus, walk to or from anywhere on their own, nor are they ever really anywhere without us.  They know full well, anyway, that just because someone knows their name, does not mean that they KNOW them, nor should they trust them.  We have a safety plan in place & in practice for everything.  Even just playing in the yard.  These are things that we talk about frequently, and they are tested on them as well.
  • Our whole family was on national television, for goodness sake, and their faces and names were used. That show has aired a gazillion times, and probably will continue to for some time.
  • Between our 2 home-based businesses and 2 sets of growing clientel, in and around the surroundings areas, many people know us because of our lines of work.
  • Then of course there is also the blog here, which is gaining a growing audience all of the time.  For those local to us, they know our names anyway!  For those who aren’t local, what harm could they be when they are not even in close proximity to us?
  • We end up communicating with many visitors of this blog.  We really enjoy communicating and networking with so many of you.  I am willing to bet that many of you, reading this right now, KNOW what our children’s names are anyway.  Do YOU?
  • The kids are also involved in activities or programs here and there, and we are also out about the world a lot. We don’t live in a bubble, and our crew seems to attract attention every where we go.  In part because 1/2 of our family is seemingly the exact same size.
  • In our REAL LIFE, people see their face, and learn their names, whether on a personal or casual basis.  So what is the difference?

So, I guess I’m just thinking out loud, in a way, and asking you to share your thoughts on this matter for US.  In our particular situation.  Not a general opinion on the matter, because again, I feel everyone’s situation is different, and it IS up to the respected discretion of each and every parent/family.  But maybe point out something we haven’t thought of, or share the notion that you really see no risk in it either.  Generally speaking, I am thinking more of the now 7 year olds.  Our oldest is more independent and grown up enough to keep herself safe.  She has a different set of safety rules.  I think I stopped worrying about her physical safety as much, right around the time I realized she is WAY bigger than I am! Still,…..I will always be protective of my children, and instruct them on safety.

Somehow, I thought this was going to be a brief question for you.  But I guess a little background might be helpful, for you to offer your thoughts, if you will, on the use of our children’s names on this blog.  I don’t know what our final decision would be, but I would love YOUR food for thought, and consideration.  To help us ‘think outside the box’ on this one.

We value your comments (on anything), as well as your respectful opinion!

UPDATE-2016:  I continued refer to the kids using their initials in brackets for years.  Just because I started out doing so, even though I wasn’t all that uncomfortable with their first names being out there, with their photos on the blog. As they got older and continues blogging, in time, I just using their names, and do so today when blogging.  So in full disclosure for this very old post now, here are their names:

{A} – Alexis….more formally know as Alexis Grace – the oldest girl
And the triplets:
{J} – JackMichael
{O} – Olivia (Faith)
{S} – Shane (Jacob)

Save

Save

Save

Filed Under: Celebrations, Faith/ Catholic, Life In General, The Big Picture Tagged With: Candlemas, lop-eared-bunny

Fan Pulls: for Winter and February

January 29, 2010 By Laura 9 Comments

I have found I enjoy making fan pulls for our home decor, to go with various seasons or holidays. But it was almost the end of January, when I put up our winter-themed fan pull. Reasons being, I had to make it first!  Next year, they will all be up right on time, because they’ll all already be made.  But for this little craft-session, I also made February’s. A LOVE theme of course.

We’ll look at the winter one first.  This one we’ll probably use maybe in late November, if it has snowed, and maybe the first week or so of December. But then we’ll be having our Christmas fan pull up for the rest of December.  The winter one here will go back up for the month of January, and maybe early March until it feels like spring.  Unless of course I make a St.Patrick’s Day one, although we’re not Irish. But I suppose that’s not St. Patrick’s fault. lol

winter-fan-pull-decor-craft

I’d like to take this opportunity to say . . . fan pulls are very hard to photograph!    Maybe I’m not using the right lens, that I don’t have. : )   But I just can’t seem to capture beauty of the fan pulls, in relation to the room, if that makes any sense.  So…I do the best I can for you.  They are also difficult to crop, being a very thin piece straight down so – forgive me for some of the tall vertical photos that require extra-scrolling. I did get into the photo taking because, they have beautiful detail.  So the extra photos are just some art-fun I was having, that I hope you’ll appreciate.

The winter fan pull was easy to make, because I found little snowflakes, already on a chain!  So I bought 2 of them, and just connected them.  I used 26 gauge wire at the very top and like last time, just sort of balled it, to slip into the catch from the actual fan chain higher up.

You will find I am showing lots of seemingly similar photos in this post, because I want to show you the various displays of color that these throw when the light hits them. BEAUTIFUL hanging there on a sunny day.

winter-fan-pull-decor-craft-1

See here….blues, purples….
–

winter-fan-pull-decor-craft-2
… and here….oranges and pinks!
So as it spins or swings some, it’s just lovely with the colors changing rapidly.
–

winter-fan-pull-decor-craft-3
Here is a closer up of the snowflakes on the chain.

Yesterday when I was making them, it was snowing out!

But it’s gone today.  It’ll snow again though.

winter-fan-pull-decor-craft-4

The gorgeous big snowflake on the bottom, I found separately at the craft store, and added to the snowflake chains.
Love the colors in this one above.

winter-fan-pull-decor-craft-5
Now look at this!  Same big snowflake from a different angle.  See?
It’s glass or crystal I think.  I’m not sure.
–

winter-fan-pull-decor-craft-6 Here is the snow flake chain laying on the table.
It is SO much easier for me to photograph them this way, than them hanging in the middle of the room.
Pretty though, huh?

winter-fan-pull-decor-craft-7

So these are more what they look like hanging up.  It’s just hard to photograph that way.

winter-fan-pull-decor-craft-8

winter-fan-pull-decor-craft-9
I couldn’t stop taking photos. lol

So…..that’s for winter.

For February, the month of love, here is what I did….

valentines-day-fan-pull-decor-craft

…which again, the photo just doesn’t do it justice.   I do want to mention that this one IS threaded beads all the way.  And, unlike using 26 gauge wire all the way through as I did for December’s, I found that heavy fishing line works great!  I did double it for extra strength, just in case.  And THEN, I used the wire to attach at the top.   It’s one of those things, like with anything new, you learn a little bit every time, and do better next time.  If you recall, December’s has a little swagger, from the wire through the beads.  It didn’t hang straight.  I SAID I liked it, and thought it gave it character. But I just didn’t want to do it over. ; )  I like the slinky flexibility of heavy fishing line, much better.

So here is a much better and closer look.   Red beads in 2 different sizes, some little silver bars, and some diamond-like studded squares.  I LOVE them.  They did not come with the red beads….I put them all together.  They were all cheap-cheap.

valentines-day-fan-pull-decor-craft-1

But the big heart at the bottom….not so much!!  When I found it, it was SO PERFECT and JUST what I was looking for for the bottom of this fan pull.   So I looked to see how much it was.  $15.00!! It was a cubic zirconia.  I almost cried.  I mean….I just don’t spend money on such frivolous things.  We can’t!!  But I REALLY wanted it!  Most all of the beads were on sale….so I was thinking, somehow, this one must be too.  It was with all of the beads. So {A} brought it to the register to have them price check it.  But guess what?  It was really and truly $15.00.

I just stood in the aisle…frozen.  I couldn’t spend that on it, and I couldn’t leave with out it.   So there was nothing else to do, but just stand there.   With my whole family around me, who were losing their patience.

So, Michael finally said, “Oh just get it!!.  Gosh….every time I pull that fan chain, I’m going to say, “$15.00!!  $15.00!!” He really would too.  Trust me.  Not that I would ever forget myself….but the joy of seeing the beauty of it would help me get past it, in time. But not Michael. Well, I already felt guilty enough.  That little announcement would surely tarnish that ‘love’ feeling I would have had going on through-out the month of February.  So….when I got to the register, I did what I would recommend YOU ALL DO, whenever you can.   I begged for a coupon or a discount!  I said, “Please….do you have a coupon hanging around I can use?” And she said promptly answered, “No I don’t. Sorry.” (For the record, she didn’t really sound sorry.)  So I said, “But my husband said he is going to say “$15.00″ every time he pulls the fan pull chain!”.  THEN she said….“Actually, I guess I do have this 40% off one item coupon in my drawer here.”

See?  : )  So then I did the happy dance, let out a “YA-HOOOO!!” through out the whole store, the kids said, “MAMAAAA!“, and then I thanked her profusely, of course.

She said I was welcome, and I believed her that time.

valentines-day-fan-pull-decor-craft-3

Oohh….Be still my heart!  (No pun intended. lol)

It’s a gorgeous piece, is it not?

I think the whole fan pull, is just beautiful. Classy.  Gorgeous. It twinkles!

And every time Michael pulls that chain to turn the fan on and off, he can smile and say…

valentines-day-fan-pull-decor-craft-2
“40% off!”.

“40% off!”

Well Folks, that’s it for this edition of ‘Fan Pulls’!

I hope you found that my crafting, and shopping tips, inspired you!

Save

Filed Under: Crafts & Creations, FALL Crafts and Creations, Fan Pulls, Holiday Crafts, Seasonal Crafts and Creations, WINTER Crafts and Creations Tagged With: crafts, fan pull crafts, fan-pull-decor, fan-pull-ideas, love-fan-pull-craft, snowflake-crafts, valentine's-day-fan-pull-craft, winter-fan-pull-craft

Creatures Great and Small | A Custom Christmas Photo Shoot and Card Design | Photography

January 28, 2010 By Laura 5 Comments

I promised I would share the 2 previous years of working with these 2 sweet little girls.  I decided I would work backwards from the most recent that I already shared, so this post is the photo shoot and card designed for 2008.  The theme I came up with was ‘Creatures Great and Small’, because we had a creatures great and small, and all beautiful, to work with!

The girls’ mom has a horse, and she has had him for many years, so I asked if we could do the Christmas photo shoot with him.  She LOVED that idea, because she really wanted photos of her horse with her girls anyway.   Incidentally, a couple of months after this photo shoot, our oldest daughter {A}, received horse riding lessons from us for Christmas at these stables, where my clients horse is boarded, and so happened to ride this very horse every time for her lessons.  {A} was really excited about that, because she was assisting me at this photo shoot, and so was familiar with this horse already.   His name is Wellington, and he is a BEAUTY!

Now, I didn’t really have a ‘theme’ going in my head yet, for the Christmas card itself, except that it would have photos of the girls and Wellington.  But, I had faith in myself that I would come up with something. Somehow, I would MAKE it work.  lol

A Sweet Christmas | A Custom Christmas Photo Shoot and Card Design | Photography

Meet Wellington.

As usual for my work-style, I DID have visions in my head for the photos I wanted to take of the girls with the horse.  But when I got to the stables and talked to Wellington’s ‘trainer’, I realized I was going to have to come up with other ideas, real quick.  I wanted to take the horse and the girls out in the field, and put the girls on him, for one.  But, she said she would only allow the girls on him if he was IN the stall.  Bummer!!  Then she said the girls really should wear helmets.  LOL!!  Ok…I’m all for safety, but really.  That was going to kind of ruin my photos.  I talked her out of that little bit. So….needless to say, all of the shooting was done in this DARK stall, with ‘dappled sun’ coming in through the windows, which always bugs me in portraits in most cases. (Like this one! lol)
Talk about feeling creatively challenged at every turn.

Just so you know….it is VERY hard for me to ‘let go of my visions’, once they are in my head.  I can get downright, uummmm….ornery, about it. (No, really!).  So….I was really feeling like my little dreams were crushed, but I had no time to pout.  (Again…bummer!).  I had to ‘make do’.  I don’t like ‘making do’!

Ok….done complaining.

A Sweet Christmas | A Custom Christmas Photo Shoot and Card Design | Photography

So here is one photo of a small handful of shots of the girls on Wellington’s bare back.   It was not an easy shot, because the little one wasn’t comfortable, saying her sister was ‘smooshing’ her. lol.  I was sure not to let the oldest one really put her weight on the little one, but….I wanted this shot, and I was going to get it!

–

laura-lee-richard-photography-creatures-great-and-small-8

I took this shot with absolute purpose.  You’ll see soon enough. ; )  lol.

Oh!!  About the plan for clothing for this session.  I had suggested the mom find winter capes and boots, for the girls.  But she was unable to find any capes.  She found these beautiful coats with matching hats though, and I was thrilled with them as an alternative!!

A Sweet Christmas | A Custom Christmas Photo Shoot and Card Design | Photography

In the doorway of the stall.   Which is 1 of a several stall in a row.  These stalls are so cool.
You’ll see, it’s like a long house, with a farmer’s porch!  I just love it.

–

A Sweet Christmas | A Custom Christmas Photo Shoot and Card Design | Photography

The little one, and Wellington, having a moment.

–

A Sweet Christmas | A Custom Christmas Photo Shoot and Card Design | Photography

And the oldest with him too.  She has been around Wellington more, being the oldest.

–

A Sweet Christmas | A Custom Christmas Photo Shoot and Card Design | Photography

I really love this shot at the porch of the stall.  Don’t they just look beautiful and classy!?

And look at these 2 beautiful faces.  Such gorgeous brown eyes.

A Sweet Christmas | A Custom Christmas Photo Shoot and Card Design | Photography

As I said, the mom chooses all of the photos to be used on the card, and then orders those in prints along with lots of others from the photo shoots.  This shot above isn’t the close-up shot of them together that she used for the card, but I chose it for this post because I just love the little ones expression, again.   She cracks me up.

–

A Sweet Christmas | A Custom Christmas Photo Shoot and Card Design | Photography Here is a better look at the style of the outdoor stalls. I just love the old feel to it all, with the porch with worn spindles, and gorgeous old wood split-doors!  Look at the rocking chairs off to the side.   But back to the girls, you’ll notice that the little one doesn’t have her hat on anymore.  Wellington kept nipping at it, and he pulled it off.!  lol.  She threw a little fit.   So….Wellington got another peppermint candy to keep his mouth busy, and the little one got one, too.  Both of the girls were doing a really good job, and I knew the photos were going to be great.  As I said before, it just takes a little more time and patience with little ones sometimes.

Besides what you’ve seen here, there were other photos I took and the mom bought too, including some of the boarding owner’s Clydesdale horse, Baron.  My client bought photos of him too, to give as a gift to the owner.

I was so excited to get the photos edited, and show them to the mom–who was over the moon again!  Once she chose which ones she wanted me to work with, I got to work on the card – and here is how it came out. She LOVED that also.  And so did I!   I blurred out the names, per usual.

These cards were 5×7, and were printed on a beautiful linen stock.   And I did think of appropriate text for the card – which for me, is the fun of the creative process.
**Again – Please ignore the necessary watermark, for the web. Naturally they were not part of the card or images.

A Sweet Christmas | A Custom Christmas Photo Shoot and Card Design | Photography FRONT of the card.

A Sweet Christmas | A Custom Christmas Photo Shoot and Card Design | Photography They opened up vertically, so this is the INSIDE SPREAD.

A Sweet Christmas | A Custom Christmas Photo Shoot and Card Design | Photography
The BACK of the card…..which I thought was a riot.

Again, I love that this client let’s me have so much fun on the back of cards.  She lets me do whatever I want with everything, and naturally, I can really get along with someone like that!

Huge photo print order. Huge Christmas card order. Happy client. Happy photographer/designer.

The next session I show with this family, will be the very first time we worked together, 2007.

Hope you are enjoying this series. : )

Save

Save

Save

Save

Save

Save

Filed Under: Kids, Photography, Photography & Lettering Tagged With: creatures-great-and-small, custom-Christmas-cards, Laura Lee Richard Photography, Laura-Lee-Richard-Photography-custom-card-designs

  • « Previous Page
  • 1
  • …
  • 56
  • 57
  • 58
  • 59
  • 60
  • …
  • 100
  • Next Page »

We are wicked happy to have you here! We hope you find much inspiration, help, humor and enjoyment here.


Archives


POPULAR POSTS

* * * * * *

SUBSCRIBE to House of Joyful Noise blog! Every new post, delivered right to your email box!


Privacy Policy

Amazon Affiliates

Never at any additional cost to you, we may earn a small commission for our endorsement, recommendation, testimonial, and/or link to any products from our website. Your purchase through our links helps support our family, while sharing with you the products we authentically use and recommend, for various ideas, and letting you know where you can purchase them. Thank you for your support!

[footer_backtotop]

Copyright © 2026 HouseOfJoyfulNoise.com · Genesis Framework by StudioPress