• HOME
  • {A}’s Chipmunk Training Archives

 Homepage

  • The Homestead
    • Home Projects
    • Home Improvement
    • Home Decor
      • Seasonal Home decor
        • FALL Home Decor
        • WINTER Home Decor
        • SPRING Crafts and Creations
        • SUMMER Crafts and Creations
    • Our Chickens
    • Gardening
    • Organization
    • Re-Purposing
    • Furniture Refinishing
    • Budget
  • Crafts & Creations
    • Seasonal Home decor
      • FALL Crafts and Creations
      • WINTER Crafts and Creations
      • SPRING Crafts and Creations
      • SUMMER Crafts and Creations
    • DIY (Do-It-Yourself) Project
    • Kids Arts and Crafts
    • Homemade/Handmade Gift Ideas
    • Holiday Crafts
    • Fan Pulls
    • Free Printable/Downloadable
    • Sewing Projects
    • Giveaways
    • Business Features
  • Recipes/FoodFun
    • Breakfast
    • Lunch
    • Main Dish
    • Sandwiches
    • Appetizers
    • Slow Cooker
    • On The Grill
    • Side Dishes
      • Soups
      • Salads
    • Baking
      • Breads, Rolls and Muffins
    • Snacks
    • Treats
    • Desserts
    • Drinks
  • Homeschooling
    • Elementary Homeschooling
      • Elementary Homeschooling READING
      • Elementary Homeschooling MATH
      • Elementary Homeschooling LANGUAGE ARTS
      • Elementary Homeschooling SCIENCE
      • Elementary Homeschooling HOME ECONOMICS
      • Kids Arts and Crafts
    • Middle School Homeschooling
      • Middle School Homeschooling SCIENCE
      • Middle School Homeschooling HOME ECONOMICS
    • Language Arts
    • Math
    • History / Social Studies
    • Geography
    • Foreign Language
    • Field Trips
    • Games
    • Nature Study
  • The Big Picture
    • Life In General
    • Celebrations
    • Faith
      • Into the Light; The Series
    • Giveaways
    • Reviews & Sponsors
  • Photography & Lettering
    • Photography
    • truck lettering
    • vehicle graphics
    • Newborns
    • Kids
    • Engagement
    • High School Senior Pictures
    • High School Senior Pictures Sneak Peeks

Gardening FAIL: Growing Strawberry Plants in Rain Gutters

June 4, 2015 By Laura 93 Comments

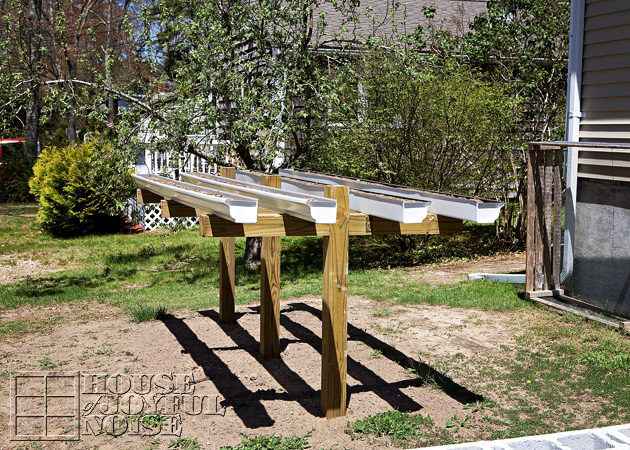
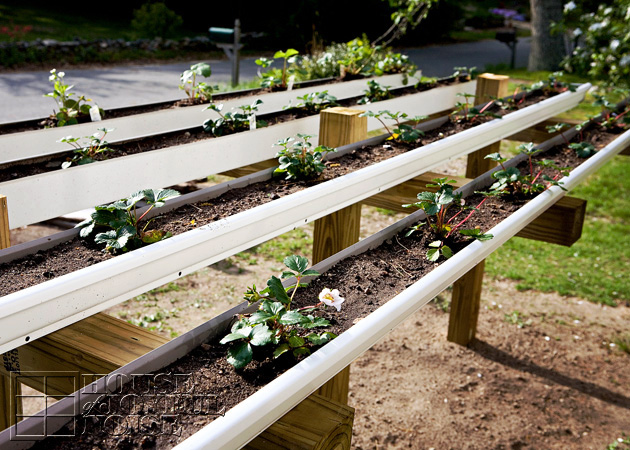
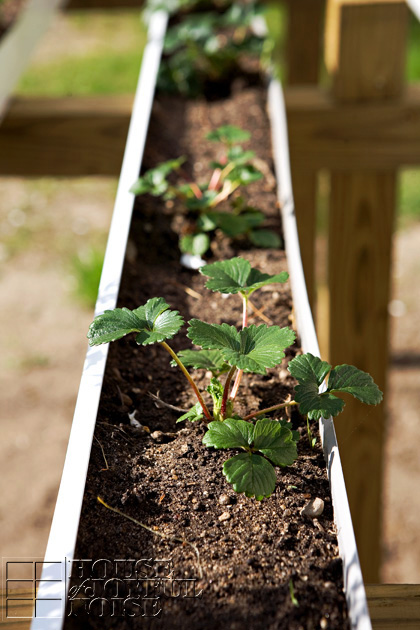
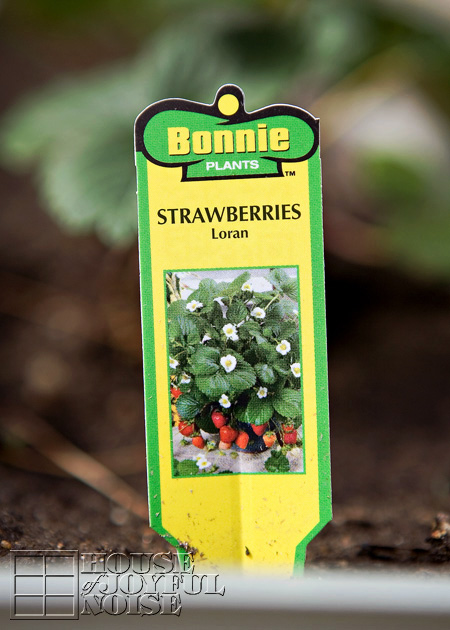
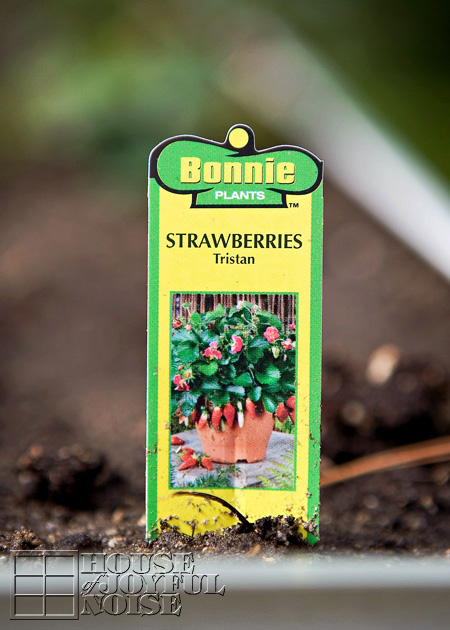
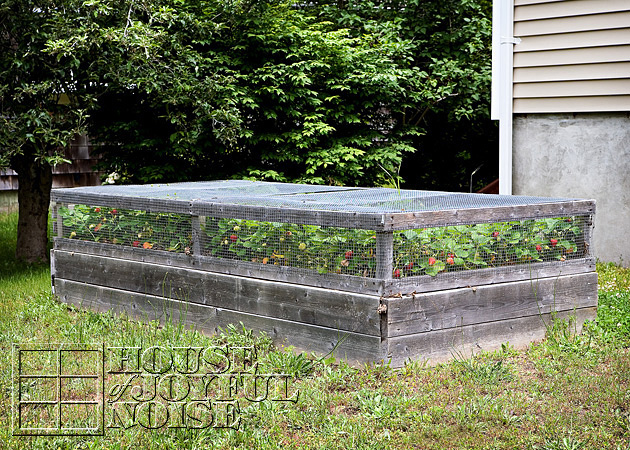
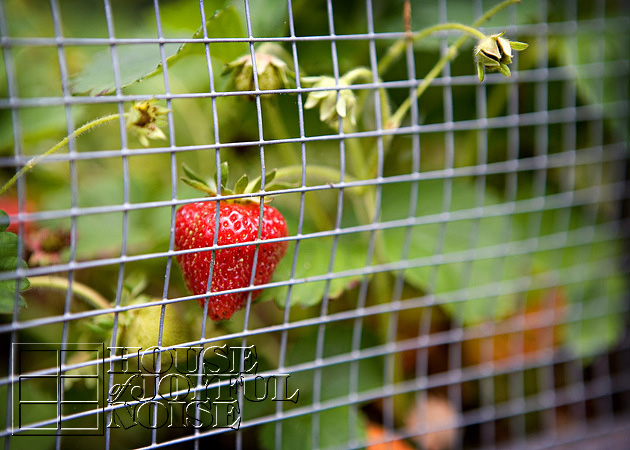
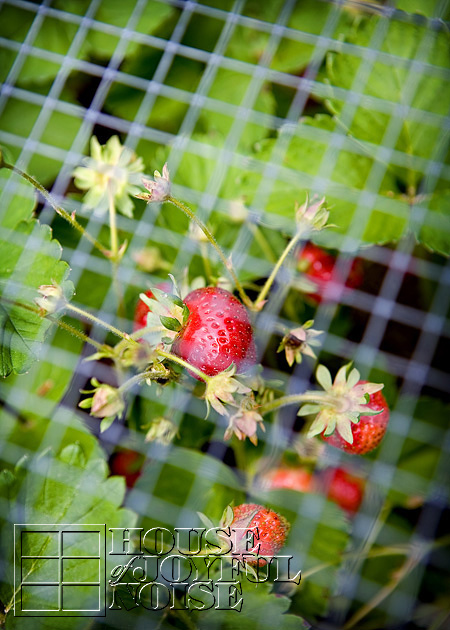
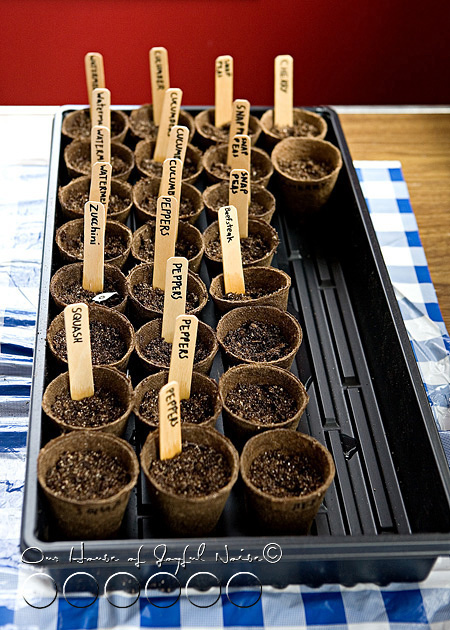
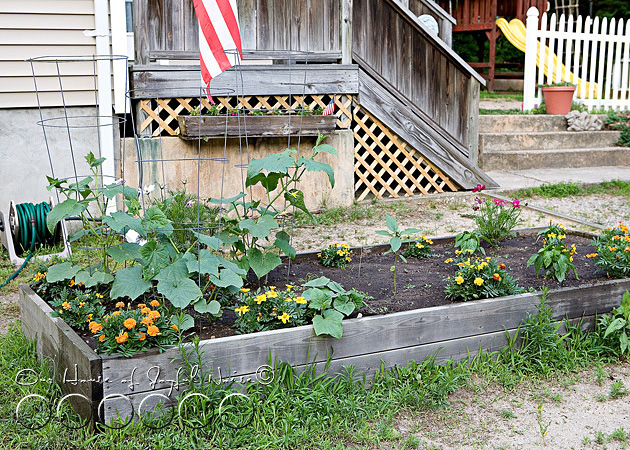
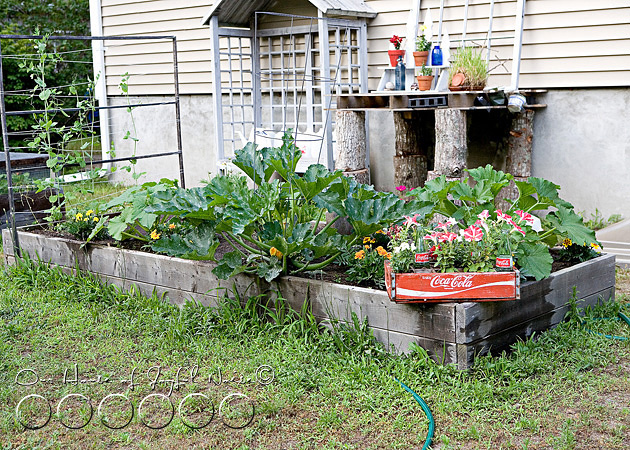
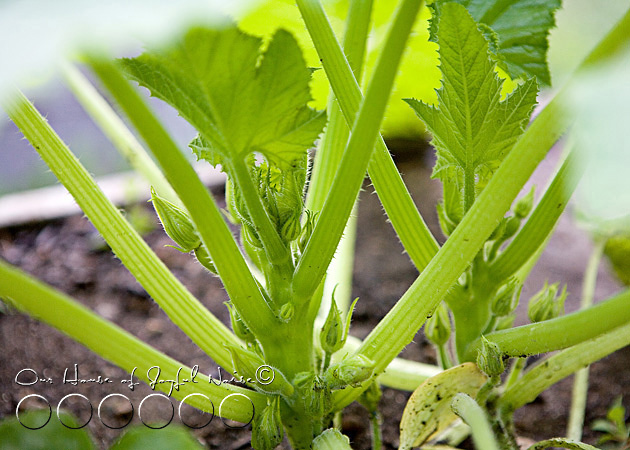
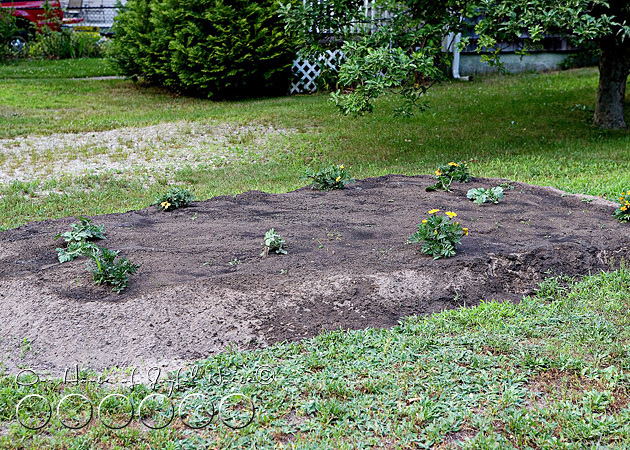
I’ve been feeling an urgency to get this blog post update out, because I have been seeing ridiculous growing traffic on our Strawberry Planting in Rain Gutters post.  And I think we should let you all know, that growing strawberry plants in rain gutters hasn’t turned out so well for us.  And by that I mean….well, they are all dead. Big gardening fail. It’s true. Take a look for yourself.

Are we missing any signs of life here, People? Yeah, we didn’t think so.
<Sigh.>
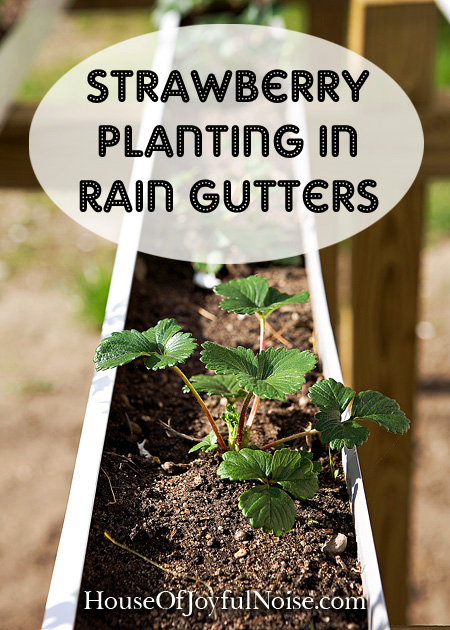
I had such high hopes. It was this photo below, that I saw online, that really had me daydreaming, about growing a wealth of strawberries from rain gutters, like this……
[Read more…]

Filed Under: Gardening, The Homestead Tagged With: Gardening, growing-strawberries-in-rain-gutters, strawberries, strawberry-plants-in-rain-gutters-not-thriving

Strawberry Planting in Rain Gutters

May 22, 2014 By Laura 18 Comments

 We’ve have grown strawberries in our gardens going for five seasons now, and we have thoroughly enjoyed it!
While strawberry plants generally comes back and produce for 3-4 years before they are done, we managed to squeeze one more year out of ours. This year however, it was truly time to start over. And so, we decided to really change things up and start anew, by planting and growing our new strawberry plants in rain gutters. We’ll be sharing with you this fun gardening experiment and the progress of it all, with any of it’s failures or successes, as we go along here. We know we can always make improvements if need be, as we learn. Meanwhile, we enjoy the process so much. Isn’t that what it’s all about?
This is the first post on our strawberry plantings in rain gutters, and we’re starting with the construction and set up of it.


But before we dig into our new strawberry growing system, why don’t we briefly review our past strawberry growing years, of which we learned much and had much success with.  We’ve have many blog posts on our strawberries over the past years, but not everyone has been following us for that long. So allow me to mention the highlights, with links to the original posts where there is more info, since could be interesting or helpful information for someone.
If you’re just interested in getting right to the rain gutter method, just skip right down to that sub-headline.


Our Strawberry Growing History and Links to Those Past Posts

When we built our new strawberry bed in 2009, with new plantings in it, it wasn’t 24 hours before we realized squirrels and birds were going to be a problem!
So that very first morning, Michael whipped us up a solution with his carpentry skills, that has served us quite well, protecting our strawberries from winged and furry creatures, every year since.
There was some real excitement over our first picked strawberry.

We shared many of our lessons learned while growing strawberries.
And we certainly enjoyed our delicious berries, having many-a-strawberry shortcake, learning to make and can jam, and other treats such as Strawberry and Chocolate Nachos, and this beautiful Berry Parfait.

All of those links above open in a new window, so feel free to bookmark or pin them on your interest boards for later.

Anyway, while we got a great crop of berries every year, our 4th year was probably the most abundant, and so we thought maybe we could get one more year out of them. And also, we knew it would be soon time to replace all of our garden beds, but we hoped to get one more year out of them as well. So we went for a fifth year, which was less productive, and confirmed to us that it was time to start over with some new baby starter plants.

Strawberry Planting in Rain Gutters

Which brings us to this season.
As I’ve mentioned, our garden beds were needing replacing.  Last season, we had some wood rot and termite problems insome of them, but we got through one more season with them, and they served their purpose and got us through one more year. But this past brutal winter really gave them the last kick in the pants, and they literally just started falling apart as spring broke.  That’s including our strawberry bed. But since it was time to start again with new strawberry plantings anyway, the timing was perfect to start everything all over from scratch.

So we got planning all of our new garden beds, and already have them built.  We’ll be sharing the rest with you in another upcoming post.
But for the strawberry growing, we decided to try using rain gutters!


I had seen this photo somewhere, and I was instantly intrigued.  I believe another Facebook Page shared it, and then I shared it to our Facebook Page.  Many of us got talking about it, and we trying to figure out the construction of it, how high they were, and how they were protected from birds and such, if at all.
All I knew was I really wanted to try something like it.

I showed Michael, and he liked the idea too. But he got drawing on paper (as he always does, if you’ve noticed with our projects over the years), and had his own tweeks.  While I always have ideas of my own, and we collaborate a lot, I trust him in the final decisions where the construction goes.

Here’s what he came up with.

Using 4×4′ pressure treated posts, he cut them into 6 ft. and 4 ft. pieces, constructing 3 T structures, all screwed together.
They support four 10 ft. sections of aluminum rain gutters, with end caps, which were bought separately.
They are screwed securely onto the horizontal posts.
I just imagined them higher, even though I knew it would be difficult to tend to the plants. But he thinks more height isn’t necessary. So we’ll see there if it is is better in the long run, to make them higher. But right now, I’m glad I can just stand there at them, and do my gardening thing.

I planted a good many of our new plantings, but the sun was hit this day, and it was getting to me. So a couple of my helpers (also known as our kids) happily agreed to help finish getting them all done.

Although as I planted, I was wondering if the gutters were quite deep enough, having to plant right to the bottom, they seem to be doing all right!
As evidenced by home much we have seen them grow day to day, and by that little white bloom you see in the photo above. Which by the way, I cut off. Reason being, I really want to be sure the plants roots are well established, before the plant starts producing berries. So I usually remove the first flowers of every season, before I let them go ahead and produce berries.


You can see they are thriving, and I am really excited to see how they grow, flow over, and produce.
The varieties we chose this year are compact plants. We’ll talk more about that in a minute.
–

Michael drilled holes in the gutter towards the bottom, every 1-1/2′ or so, for proper drainage.

In the past in our strawberry bed, we grew berries of the June-bearing and Ever-bearing variety. In time we decided we just preferred the June-bearing, so we ripped out all of the Ever-bearing.

This time, considering we are growing them in rain gutters, we decided to try more compact plants.
These will produce few, if any, runners.  So I’m not sure quite what to expect, in terms of spreading or filling in the gutters.  But it’ll be fun to find out!
I did put all of the plants in with the upper part of the biodegradable cup intact, so it may be awhile before we really see them go anywhere.

None the less, I’ve done some research, and I expect we’ll be quite pleased with the varieties we chose.  Both are ever bearing varieties though, which should give us berries throughout the season. But I’m a tad nervous only because it was the ever-bearing we had decided we were less happy with in the beds.  But we’ll see how they do in the rain gutters!

The Lorans produce the typical white bloom, and should give us rounder, plump, juicy berries.
–

The Tristans are a little more unusual. They actually produce dark pink blooms, and the berries are an off shape as well. They are a bit elongated, and kind of pointy. But I’ve heard they too are delicious!
I can’t afford to have any more outlinks in this post, as I’m already afraid it’s going to go to the spam folders of our subscribers. But if you are interested, do Google for more info on these 2 strawberry varieties. BonniePlants(dot)com looked like a great resource. Then use the search tool there.

We had impulsively picked up a couple of herb plants too. Which is new territory for us.
Since we had a little room left in the gutters, and no other plans for the herb plants yet, we stuck them in the gutters too.
I’m not sure how well they will do there, but we can always dig them out and replant them elsewhere.

So we’ve got some Parsley……


……as well as some Oregano. (Which will be delicious, on Michael’s pizza.)
–

So that’s concludes where we are at with our new experiment, of growing strawberry plants in rain gutters.
BUT, it’s not quite done!
As soon as we start letting the plants produce berries, we’ll have the next step to contend with:

UP NEXT on this topic:  Protecting them from birds, squirrels, and the like.
We do have a plan for that of course!  And we’re ready to go!
Be sure you are following us so you don’t miss that, the reveal of our other new garden beds, or the building of our chicken coop!
(SO excited to finally be getting chickens!)
Thanks for your visits!  Share your thoughts  or questions with us, if you’ve got some!  We always try to respond.

UPDATE:
Click HERE to see how these strawberry plants in rain gutters are looking one year later.


Save

Filed Under: Gardening, The Homestead Tagged With: garden-gutters, garden-ideas, Gardening, loran-strawberries, rain-gutter-strawberry-plants, strawberries, strawberry-planting-ideas, strawberry-plating-in-rain-gutters, tristan-strawberries

Lessons Learned with Growing Strawberries

June 27, 2012 By Laura 23 Comments

00_1-150x150

Here at our bitty homestead, we’re in our fourth year of gardening in the raised beds that Michael built.  This includes growing strawberries, which has come with a few surprises and lessons learned, some quite by accident! I thought I would tell you a little bit about that today. Especially because lately, we’ve had more strawberries than we’ve known what to do with, and it was the last thing we expected.

The first thing we learned, the very next morning after planting our very first strawberry starter plants 4 years ago, was that we needed to find a way to protect them from the birds and small animals, if we ever wanted to have any berries to pick.  There were squirrels feasting on our new plantings in our bed, and that put Michael in high gear. By the end of the day, he had built this ‘cover’ for the strawberry bed, that has protected it 100% ever since. It is just made of chicken wire and strapping, but it has been the perfect solution. It lets all of the light and rain/water in, the hungry critters out, and lifts right off for picking time.

lessons-learned-growing-strawberries Initially, we had planted both Ever Bearing, as well as June Bearing plants.  But after 2 years and not being so happy with the June Bearing plants, we ripped them out at the beginning of last season, and let the Ever Bearing take over. They were just too small, and not as good as the Ever Bearing. We weren’t sure we’d get any more Ever Bearing berries out of it that late in the game, but at least the June Bearing were out of the way.

lessons-learned-growing-strawberries-1 In the first couple seasons of production, we got some consistent berries to pick.  There were some every day. But rarely enough all at once, to really do anything with. So we just ate them snack-style all within the day we picked them. Year/Season 3 (last year) was better in the overall crop, with the Ever bearing having taken over the bed, and producing after all. We actually had enough at once to have dessert a few times.  I also saved the berries picked a few(0ther) days in a row, vacuum sealed them in a freezer bad, labeled and dated the bag, and put them in the freezer.

BTW, the vacuum sealer machine was a brand called ME. ; ) I sealed the bag tightly with a drinking straw stuck in the bag, put my hot lips up to it, and sucked all of the air out myself! Until it was pretty shrunk-wrapped looking, and I was blue.

lessons-learned-growing-strawberries-2
Now here are two things to take note of, in our new strawberry growing experience:

1) In the beginning, we had researched a lot on strawberries, and read that strawberry plants tend to only produce for about 3 years, before you really need to start again, because they won’t produce much anymore.  The first season is also expected to be somewhat of a slimmer crop, because the roots are really just trying to get established in the soil. In fact, it’s recommended that you pluck off the first flowers that produce (indications that a strawberry is about to form there), to give those roots more time to establish well.

2) Another thing we had read to do, was to cut or mow the plants down to an inch or 2 at the end of the season, and cover the whole bed with hay, or some other non-seed producing mulch, for the frost season.  Then in the spring after any risk of frost had passed, you could remove the top layer or so if there was a lot of it, but that generally the plants would grow right up through it – and then prior to breaking ground, the plants down in the soil would be protected from cold temperatures. So that’s what we did, and we found all of that to be true.In the meantime, my friend Paula told me that some woman Ann…or Annie Something….(I gathered from the way I was told, that I should know who this woman was…), highly recommends not covering your beds with any extra mulch of any kind.

However, come the end of Season/Year 3, we figured those plants were DONE anyway. We had gotten 3 years out of them, and planned on plating new starters the following spring.  So did not bother covering the bed with hay. We just let all of the abundance of plants, with stems, runner, leaves and all, just die there in the bed.  By autumn, it was looking as neglected and ugly as could be, in that cage. And early spring was not looking much better.

Until, new green plants broke through the broken down decay all around it.  We still figured they would develop much, and that we’d need to plant new at the end of May or so. But they just kept growing, and then they were flowering and producing like (not yet mature) berries, all through May.  By June, we were picking!

lessons-learned-growing-strawberries-3 Our very first picking, was a pretty healthy bunch!  But there were SO many more than these, that we would have picked as well. We just wanted to give them one more day. From then on, there were many strawberries that needed to be picked, every day or 2! So we had to gather, that Ann(ie) Something was right. There is no need to go through the extra efforts, or expense, of covering the beds with any other form of mulch, to protect them plants from the cold.  The plants all dying down at the end of their season, establish themselves as their own bedding cover. In fact, it seems allowing that, by intended means of giving up these old plants, somehow reaped a supposed extra year of production, and our overall best and largest season of strawberries ever!

So as you have probably gathered by now, we’ve been learning along the way here, and it’s been delicious and rewarding!  Who knows.  Maybe we’ll get a 5th year out of these plants, next year? Yeah…..likely not. But we all feel like we know more now, to be more successful in growing strawberries, than ever. That’s really part of the fun of gardening: learning!  The kids have labored and learned right along with us, and it’s been so wonderful.

lessons-learned-growing-strawberries-4 You might be wondering, what we did with having such a constant flow of incoming fresh strawberries on our hands.  Well……we ate some as we washed them.  Some were fresh berries on top of our cereal in the morning. There was Strawberry Shortcake to be had, a few times.  And lastly, some more went into the freezer for the plan of making jam, and others were made into a new and creative snack dessert.  The last two mentioned, are new strawberry-themed posts, coming up soon.  So stay with us!

Do you grow strawberries?  In beds or out of the ground? How do you keep the birds and critters from eating them?
Tell us about your strawberry-growing experiences, or hopes.

. . . . . .

Come join us on FACEBOOK, or TWITTER!


Filed Under: Gardening, The Homestead Tagged With: Gardening, growing strawberries, how-to-protect-strawberries, lessons-learned-growing-strawberries, protecting-strawberry-beds-from-animals, protecting-strawberry-plants-from-birds, raised-bed-gardens, strawberries, strawberry-growing

Garden Peek!> Early Summer 2011

July 20, 2011 By Laura 1 Comment

early-flower-vegetable-garden-photos-12

I believe we’ve been both gardening and blogging, for about 3 years.  Our life is filled with so many various passions, there is more than we are actually able to get to blogging.  I sure try to get it all in though!  But one area that is especially hard to keep you all updated with, is the gardening!  Good gosh. Things grow and change SO fast, by the time I photograph what I want, edit the photos, and start putting a post together (while you know, living my life and doing 1,000 other things in the midst of it all), the post report, explaining the photos I took, don’t seem very current by the time I get to typing it out! But my intent today, is really just to share with you all what we’ve got growing this year.

In that light, after the first photo, the photos in this post were taken in early July. As I type, it is the 20th of July. Still, while reporting with photos is unavoidably a little delayed, we like to try and give you the picture of the process as a whole, even if the photos are a little behind the 8-ball of the gardens in the moment.  I imagine it is all still relate-able for the interested gardeners (or wannabes) reading, and perhaps it opens a door for conversation, as you reflect back on the few weeks prior to your own gardening-status, and the subsequent changes.  So we’re going to roll with this delay-thing we have going on in the gardening blog-shares, and hope you all can too.

early-flower-vegetable-garden-photos

One thing we did differently this year, that we have not done in the past 2 years, is start our vegetable plants from seed!  Our experience with gardening has been that we learn a little more every year.  While we were somewhat successful in growing the plants from seed indoors, to transplant to the garden beds come Memorial Day weekend, I’m not sure our timing was right with everything. (?) For example, our pepper plants started out so tiny in the beds, that I couldn’t imagine them ever producing fruit this season!  But in sharing this with my Mother-in-law when she visited in early June, she mentioned those seeds probably should be planted in February or so.  She and my Father-in-law kept a beautiful yard full of gardens when they lived in this area. In the course of our conversation, I could not even remember the month we actually did start the seeds. But I was sure it was not that early!  The packaging of the seeds did not say, that I could tell, how long prior to replanting, that the seeds should be started. It only seemed to say how many weeks before they should bare their first fruits. So….I was winging it all. All of the seeds did sprout, grow plants, and were transplantable. In fact,  some grew too tall to keep the clear cover on, for the greenhouse effect.  What to do about that? And as I said, maybe different seeds should have started at different times. But when, for each variety, is my question. So, more researching to be done, and more lessons to be learned.  But as I have said all along, the learning as we go is half the fun!  Next year , also, I’ll keep a record of when the seeds were put in the soil. At least write the date on the containers!

Here is just a couple of other small points to note:  1)  As a reference, these photos were taken in early July. Things have grown and changed a lot since then.  So we plan to update you soon, but a little after the facts of course. : )  2) Please pay no mind to the very patchy crabgrass, in our sand-dirt, that needed mowing badly. It was done that evening.  But I am working on not procrastinating photos or a post, due to a likely irrelevant detail, so don’t call me out on that, or I may have a relapse with my self-therapy. ; )  Alrighty?

early-flower-vegetable-garden-photos-1

Here in Bed #1 we have little pepper plants on the far right, behind the Marigolds.There is Green Peppers, and Jalapenos.  Aside from the Marigolds, we also have Cosmos, and a sweet single Sunflower that {O} grew.  I plant the Marigolds and Cosmos in ever bed, to attract bees and butterflies, for assistance in pollination. But also, because I love bees and butterflies.  : )   On the far left, we have Cucumbers growing.


early-flower-vegetable-garden-photos-2

In Bed #2, we are growing Yellow Summer Squash and Zucchini.  We were adamant about the squash varieties growing in another bed this summer, after last year’s devastation!  Some of you may recall the sudden and devastating death of our squash bed last year, and eventual discovery of the culprit!  More on our remedy for this in just a bit.  But also in this garden bed is something new we are trying to grow Sugar Snap Peas! We had no idea what we were doing there at first, but I researched it and learned quickly. They started out ‘thin’, in my Mother-in-law’s word. That was her nice way of saying ‘puny’ I think. Made me giggle. But they are looking GOOD now. A closer look on that in just a minute as well. All else we have here, is the Marigolds, Cosmos, and still sitting there is our now-virtually-famous Coke Bottle Box and Candy-Cane Striped Petunias. There’s also a few Snap Dragon in that box.

early-flower-vegetable-garden-photos-3 Promising buds of  squash.

early-flower-vegetable-garden-photos-4

early-flower-vegetable-garden-photos-5 Squash Flowers.  No, we have not prepared them as a recipe in any way yet. Fried? Stuffed? It just sounds strange to me.  We’ll see who can convince me.

early-flower-vegetable-garden-photos-6 We were pretty excited to see these 2 pods!  I have fond memories of picking & gobbling peas in my aunt’s garden, when I was little.  I want our kids to be able to do the same.

early-flower-vegetable-garden-photos-7

So as I implied earlier, I wasn’t sure starting out, how we would do producing Sugar Snap Peas this first year. But regardless, I have loved watching them climb our wooden frame, and zig-zagging twine.  The hornets are ‘having at’ that wood frame, by the way.  I’ve found myself watching & studying their activity intently, both fascinated & irked at the same time.  I hope the frame holds up through the season anyway. It’s easy enough for Michael to whip another one up next year.  As an update, the peas are doing wonderfully, and I’ll show you more on that next garden post.

early-flower-vegetable-garden-photos-8 Garden #3 is the Strawberry Bed.

You are welcome to check out the post prior to this one, for lots of photos and chat on our Strawberries this year.

early-flower-vegetable-garden-photos-9 Another new learning experiment this year.  Since last year we learned that we planted our Pumpkin Patch too soon, this year we thought we’d try using the bed as a Watermelon Patch first!  The kids planted the seeds into this bed themselves. You can hardly see them well in this early photo, but let me point them out among the Marigold plants.  The Watermelon plants are in the upper far left, the one in the middle-ish, and far center-right.  There were just a couple others that the squirrels pulled out, before we got to spraying a Deer-Off border.  So I planted a row of 6 new Watermelon seeds in the soil vertically on the far right side. Updated photos of the plants will be coming up too.  We’re not sure if we’ll actually get Watermelons this year either, as my Mother-In-Law said those should have been planted earlier too.  But the plants are spreading like mad now, and I did catch a glimpse of a flower. So there’s a small chance we’ll get at least 1 melon. Heyyyy, we can split it!

early-flower-vegetable-garden-photos-10 Lastly, in Bed #4 we have 4 Varieties of Tomatoes:  Cherry, Early Girl, Big Boy & Beefsteak.

This is the bed that was our Squash Bed last year! First, we screened all of the soil, looking for any Vine Borers that were hibernated down into the soil, pupating, after the devastation they do in the year prior, waiting to reak new havoc again this year!  We learned that’s what they tend to do!  We didn’t really seem to find any, but we used a new bed for the squash this year just in case.  Besides, we try to rotate the beds every year or 2, so the soil is not depleted of any nutrients from one particular plant variety.

early-flower-vegetable-garden-photos-11 Some Cherry Tomatoes on the vine.

early-flower-vegetable-garden-photos-13 Marigolds.

early-flower-vegetable-garden-photos-14 Cosmos.

And lastly, a quick look at how our Mailbox Garden Tub has filled in….

early-flower-vegetable-garden-photos-15 I love how the Calibrachoa spill over.

early-flower-vegetable-garden-photos-16 And I have always loved Snap Dragons.

early-flower-vegetable-garden-photos-17 THIS, is not a photo from early July, but a more recent photo after some picking, last weekend. We have been enjoying Yellow Summer Squash, Zucchini, and Cucumbers, so far.

And that my friends, is your Late Garden Report!  Stay tuned for more Late Reporting, right here in the The Homestead ~Home & Gardens section, of Our House Of Joyful Noise.  Meanwhile, I’m open to some sharing and garden chat in the comments!


Save

Save

Save

Save

Filed Under: Gardening, Photography, The Homestead Tagged With: cosmos, cucumbers, early-gardening-season, flower photography, flower photos, garden beds, garden photography, garden photos, Gardening, gardens, green peppers, jalapenos, peppers, snapdragons, squash, strawberries, sugar-snap-peas, vegetable-plants, watermelon-patch, yellow-summer, zucchini

What’s Growing in the Gardens!

July 13, 2010 By Laura 12 Comments

18_summer-squash-photos-300x200

Finally, I have gotten it together enough, to show you what we’re growing in all of these garden beds we’ve got going.   I’m telling you, I find it extremely challenging to blog about garden updates, because everything changes so fast!   So, this post shares some of the rapid garden progress that can happen in what seems like the blink of an eye.

But I also wanted to share this little story with you.  A couple of weekends ago, we had a spontaneous tag sale.  We had quite the traffic for it too (thanks to Michael’s  Tag Sale professional signage that no one could miss).  But what was so funny, was people were more interested in our gardens when they got here, than our tag sale items!!  It was comical.  They were walking around, peeking under leaves, asking questions and generally flattering us to death.  For 2nd year gardens, we were puffing up a bit and struttin’ around like peacocks. I know…then we felt guilty.  lol.  But seriously….people were all over our gardens.  We sold a lot at the tag sale though too, once they got on task for their stop in the first place.

So anyway, back to the point of the post….

01_first_garden_bed Shown here first, is garden bed #1.   This photo was taken June 23, 2010, as are several of the following photos.

02_1st_garden_tags In it, we have growing 3 varieties of tomato plants:  2 Romas, 4 Early Girls, and 2 Burpee Big Boys.
–

03_garden-bed Here is another view, taken the same day, to show the height of the plants.   As you see in this garden, we also have some Marigolds, Celosia, and Cosmos.
–

04_2nd-garden_bed Garden bed #2.
–

05_2nd-garden-tags In this one we have growing several plants of  California Wonder Green peppers, Jalapeno Peppers, and Straight Eight Cucumbers.  We also have in this bed, 2 more tomato plants, of the Sweet 100 Cherry variety.
–

06_2nd-garden-newangle Here’s another angle, from the same day.
–

07_garden-turtle-ii-decor Also in this garden, is my turtle.  I had a turtle just like this one some years ago, in my hosta bed, and the kids lost it!  We never did find it either.  So I bring it up now and then to the kids, when it comes to mind, because I really missed my turtle!  Well, we were in Michael’s Arts & Crafts one day, and one of them spotted the same exact turtle I’ve been missin’.  So they all pitched in a dollar and some change, and bought me a new one.  So this one has even more sentimental value, because the kids were thoughtful enough to buy it for me, and compassionate enough to feel bad about the one they lost, when I….was trying to make them feel bad about the one they lost. lol.  I love my turtle.  You don’t have to.  But I think he is cute.
–

08_triplets-strawberry-bed You’ve seen a 100 photos of our whole strawberry bed, so I skipped that.  But we got quite the crop from our June Bearing plants!  The kids were out there picking them every day.    This photo was taken on June 8, when we were really cranking them out.
–

09_a-strawberry-picking

The days were still occasionally cool, especially when the sun wasn’t out. Thus, Old Lady Winter here, in her fleece jacket. lol.  My mother used to call me Old Lady Winter, because I was always cold when I was younger.  “If you can hear me up there, Mom, I’m not cold all of the time anymore!  I’m more like Old Lady Hot Flashin’!“

Our Everbearing strawberry plants have put out some smaller strawberries (as is expected with this variety) but not the  impressive quantity yet.  We should have a crop in spring, summer and fall.  But spring gave us nothing, and summer has only given is a small handful so far.  Maybe the roots are still not established enough?  Maybe we should have plucked the flowers in the early season of this year too?  Anyone know?  We’re holding out hope.

10_strawberries But if they don’t start giving us some fruit this year, we may just rip the Everbearing plants out, and let the runners of the June Bearing take over.  Because they have been very good to us!!  I’m thinking we might need 2 strawberry beds.  Maybe 3. lol
–

11_big-strawberry
Care to taste the fresh berry sweetness?
–

12_4th-garden-bed This, is bed #4.  It’s the new bed we built this year.   The tag salers really couldn’t get over our squash plants. One tag sale’n guy was so very amazed, he just stood there staring and asked, “What the hell did you put in there?!”  (Pardon his French. lol)
–

14_yellow-summer-squash-tag In it, we have Yellow Straightneck Summer Squash, and also Zucchini of some kind, which I forgot to take a tag photo of, just like the Sweet 100 Cherries.

So, just to show you some growth and progress, and proof that we haven’t killed anything yet:

15_1st-garden-bed-grown

….This is Bed #1, with photo taken this time on July 6, 2010.  The tomato plants had grown much taller and stronger for sure.  They are also beginning to produce fruit.  I am very excited about my tomato sandwiches to come.  : P’   Even the Marigolds and Celosia are bigger than we have ever grown.
–

16_2nd-garden-bed-grown The Cherry tomatoes and pepper plants are growing well too.   Both gardens have grown even more, now a week later.  I cut the lower leaves on the pepper plants since this photo too, so we are expecting a big growth spurt.

But here’s what has really just grown out of control……

17_4th-garden-bed-grown ….the squash garden bed!  Man….that guy from the tag sale would probably fall right over, if he saw it today.   It’s truly insane, and I swear it has grown another half of a foot since this shot.  See that cosmo plant in the front corner there?  That thing too is MUCH bigger than our cosmo plants last year.  This thing has a trunk!

We water all of the gardens every night with the hose.  But I’ll tell you, the rain works magic.  If it rains during the night, we can’t wait to peek out there in the morning, because there is always very obvious overnight growth.  It feels like Christmas morning!
–

18_summer-squash-photos Here’s just some fun summer squash shots.   I didn’t take any of the zucchini that day, because they were just so dark on the dirt.
–

19_fresh-picked-squash We can’t even keep up with the squash picking.  I sent a heap home with my father, and the next day we had a heap more.  It’s madness.  Gave more to 2 neighbors, and there is a bunch more today.    I’m going to try making some zucchini bread.  We love steamed vegetables anyway, but we might not much longer,  if we keep eating it the way we’ve had to!  I think maybe we don’t need this many squash plants.  Does anyone have any recipes for us to use these?  Do send.

No Giveaway in this post.  But you’re certainly welcome to grab some squash, if you want some!

Save

Save

Save

Filed Under: Gardening, Seasonal Home decor, SUMMER Home Decor, The Homestead Tagged With: cucumbers, front-yard-garden-beds, gardens, green peppers, raised garden beds, strawberries, summer squash, tomatoes, triplets, zucchini

  • 1
  • 2
  • Next Page »

We are wicked happy to have you here! We hope you find much inspiration, help, humor and enjoyment here.


Archives


POPULAR POSTS

* * * * * *

SUBSCRIBE to House of Joyful Noise blog! Every new post, delivered right to your email box!


Privacy Policy

Amazon Affiliates

Never at any additional cost to you, we may earn a small commission for our endorsement, recommendation, testimonial, and/or link to any products from our website. Your purchase through our links helps support our family, while sharing with you the products we authentically use and recommend, for various ideas, and letting you know where you can purchase them. Thank you for your support!

[footer_backtotop]

Copyright © 2025 HouseOfJoyfulNoise.com · Genesis Framework by StudioPress