• HOME
  • {A}’s Chipmunk Training Archives

 Homepage

  • The Homestead
    • Home Projects
    • Home Improvement
    • Home Decor
      • Seasonal Home decor
        • FALL Home Decor
        • WINTER Home Decor
        • SPRING Crafts and Creations
        • SUMMER Crafts and Creations
    • Our Chickens
    • Gardening
    • Organization
    • Re-Purposing
    • Furniture Refinishing
    • Budget
  • Crafts & Creations
    • Seasonal Home decor
      • FALL Crafts and Creations
      • WINTER Crafts and Creations
      • SPRING Crafts and Creations
      • SUMMER Crafts and Creations
    • DIY (Do-It-Yourself) Project
    • Kids Arts and Crafts
    • Homemade/Handmade Gift Ideas
    • Holiday Crafts
    • Fan Pulls
    • Free Printable/Downloadable
    • Sewing Projects
    • Giveaways
    • Business Features
  • Recipes/FoodFun
    • Breakfast
    • Lunch
    • Main Dish
    • Sandwiches
    • Appetizers
    • Slow Cooker
    • On The Grill
    • Side Dishes
      • Soups
      • Salads
    • Baking
      • Breads, Rolls and Muffins
    • Snacks
    • Treats
    • Desserts
    • Drinks
  • Homeschooling
    • Elementary Homeschooling
      • Elementary Homeschooling READING
      • Elementary Homeschooling MATH
      • Elementary Homeschooling LANGUAGE ARTS
      • Elementary Homeschooling SCIENCE
      • Elementary Homeschooling HOME ECONOMICS
      • Kids Arts and Crafts
    • Middle School Homeschooling
      • Middle School Homeschooling SCIENCE
      • Middle School Homeschooling HOME ECONOMICS
    • Language Arts
    • Math
    • History / Social Studies
    • Geography
    • Foreign Language
    • Field Trips
    • Games
    • Nature Study
  • The Big Picture
    • Life In General
    • Celebrations
    • Faith
      • Into the Light; The Series
    • Giveaways
    • Reviews & Sponsors
  • Photography & Lettering
    • Photography
    • truck lettering
    • vehicle graphics
    • Newborns
    • Kids
    • Engagement
    • High School Senior Pictures
    • High School Senior Pictures Sneak Peeks

Re-Purpose Old Calendars | DIY Wall Art

March 26, 2013 By Laura 17 Comments

Have you ever found yourself sad to turn the page on your 12 month wall calendar, because you liked the image for the ending month better? Or hesitant to throw out a calendar with so many great visuals at the end of the year? After all, when we buy a wall calendar, we usually pick out the one we did, because we liked the pictures or designs that went with each month. 

So isn’t it a great recycling idea, to re-purpose old calendars into DIY wall art, using some of those favorite months, for home decor?

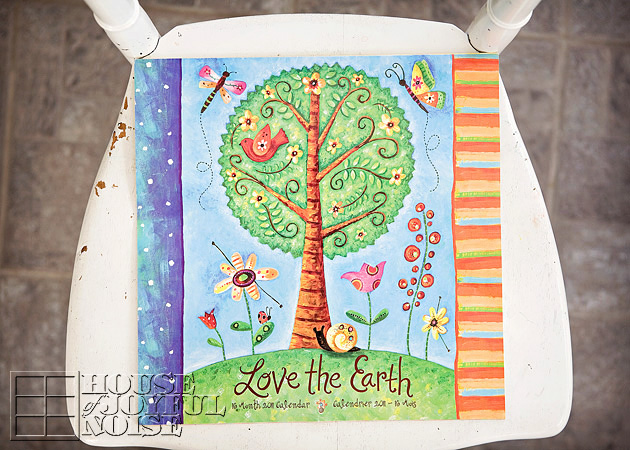
I had chosen this 2011 calendar for my youngest daughter to use in her room, because I just loved the artwork in it, so much. 
And can you believe I got it for $1.00, at Michael’s Arts and Crafts?! A buck!
Our girl enjoyed it hanging in her room the whole way through. And she used it to remember things on certain days, as well.
When the year came to an end, she was sad to take it down, and I just couldn’t throw it out, either.


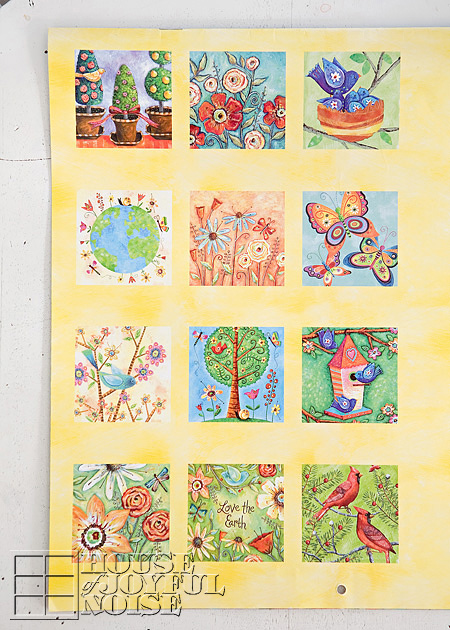
I loved so many of the months artwork pictures, that I was hoping I might figure out something creative to be able to do with them. 
I had it for the whole following year; busy with other projects most times, forgetting I even had this calendar other times, and then finding it again and remembering I wanted to do something with it. I just wasn’t sure what.
And then it hit me: Why not keep it simple, and just frame some of the pages as artwork?!

So we chose 2 picture-pages for each of our girls’ rooms. Ones that they loved, but that also went well with each of their room colors.
After taking those 4 pages out, I DID throw the rest of the calendar away, because it had already been hanging around for a year after it’s expiration.

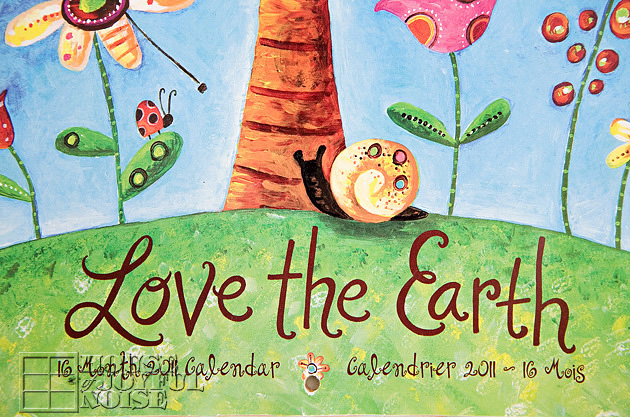
But in looking at all of the photos I took of the calendar for this blog post, I wish I kept the cover! 
Because I’ve realized the cover was the artwork I loved most. Dag nabbit!
I could have trimmed it right over the bottom copy there, and had say a 12″ x 1o or 11″ piece of artwork too.
Oh well. Trying to let go of the regret, since there is nothing I can do about it now.

So let me tell you the simple way in which I turned this old calendar into 4 awesome, colorful and artistic looking pieces of wall art.

The calendar measured 12″ x 12″, so that was the size to work with.
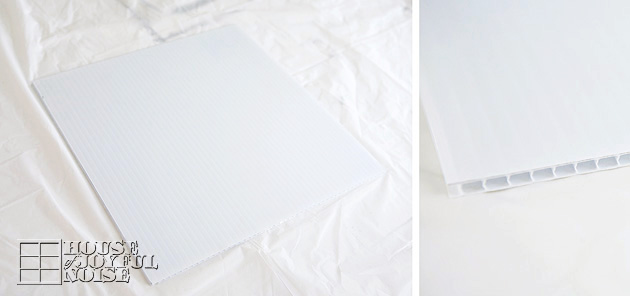
To give the floppy calendar page some stability, it needed to be mounted on something. You can also just use some sturdy pieces of cardboard. 
But my husband had some corrugated plastic around, that he uses to make yard stake signs for different companies.  Real estate agents use them a lot, as does various home contractors, etc.
So I used that stuff. I cut four 12″ square pieces.

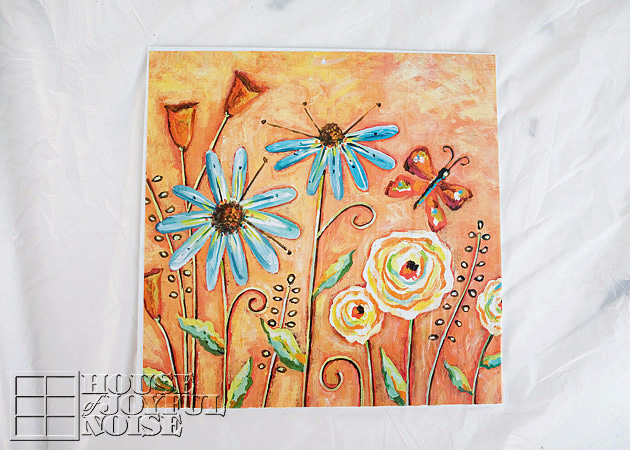
Then I simply adhered each artwork page onto each corrugated backing, using Modge Podge as the glue.

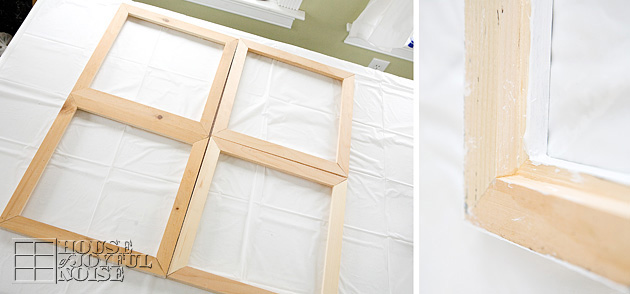
Next we needed 4 12×12″ frames.  I am quite sure square frames are available in stores. One could certainly get them custom made, if necessary. But my husband is pretty good at just banging out any frames when I need them, and it’s a lot more cost efficient to make them ourselves, than buying them at retail stores. I also really prefer to finish them myself, so they have the look and style I am envisioning. 
So he builds the frames, and I paint them.

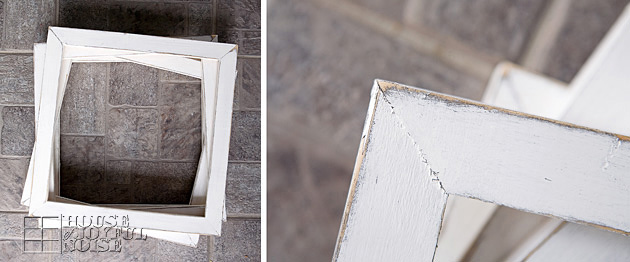
I have various ways of finishing frames or any woodwork pieces.
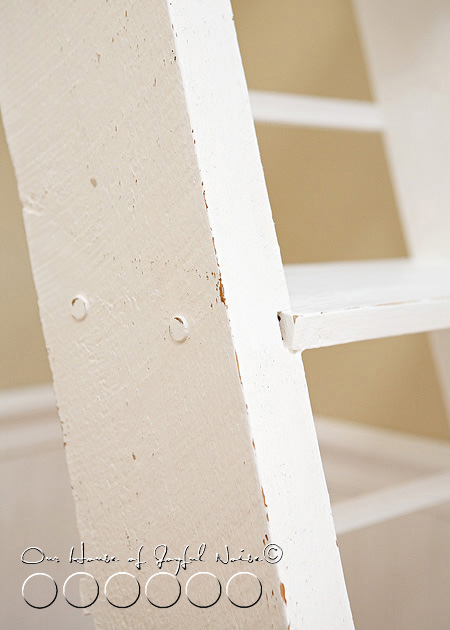
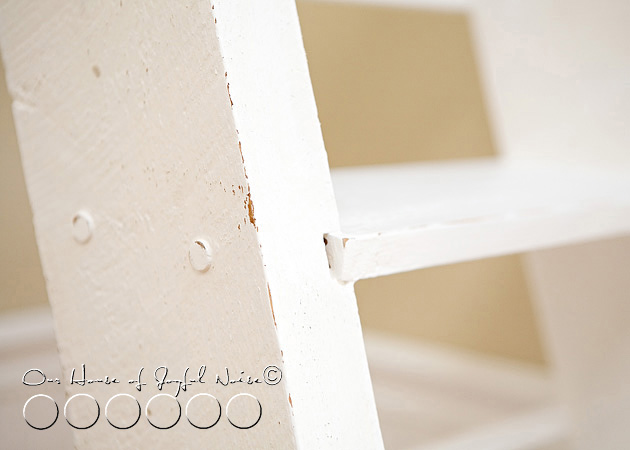
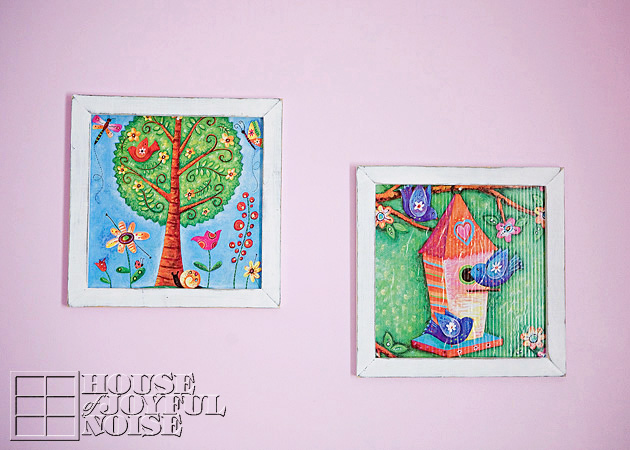
For these, I painted them dark grey first, then white, and then distressed the edges well with sandpaper.
This resulted in some grey paint as well as bare wood showing through the distressed areas of the white finish. That mix of shades and depth was just what I was aiming for.

The mounted artwork just popped into the back of the frames, and I used a few tiny nails to ensure they were held in.
Done!

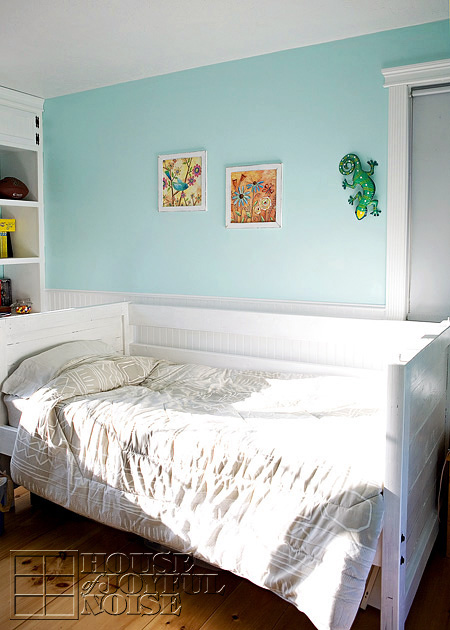
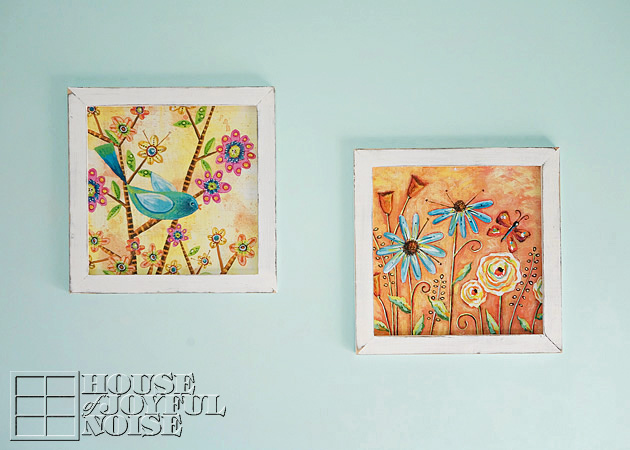
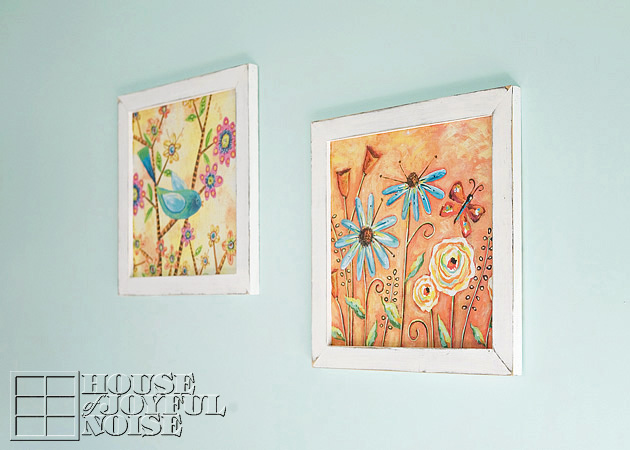
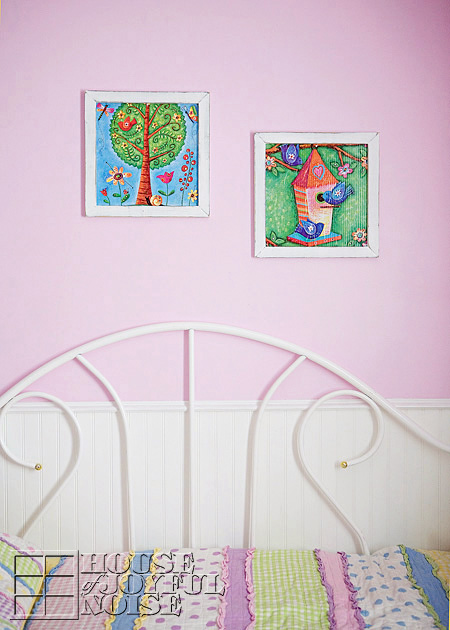
Here’s a look at several photos of the finished art pieces, adding pretty and cheerful decor to each of the girls’ rooms:

(Our oldest daughter, Alexis’ room.)


–
(Next, our youngest daughter, Olivia’s room.)

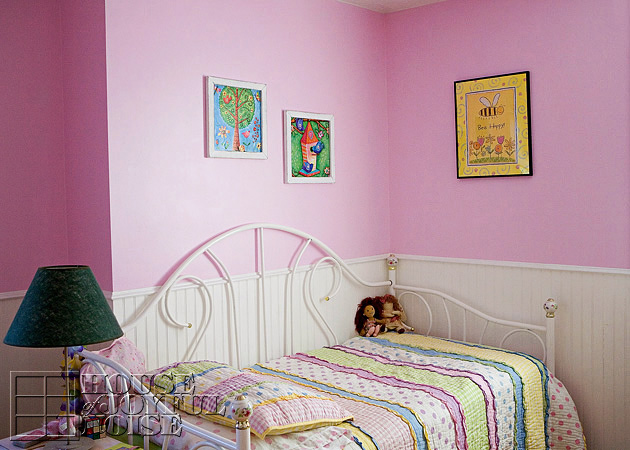
There you have it. Inexpensive and beautiful accent wall decor.

As anther tip, stores often sell expiring soon calendars at a steep discount, when it’s already half way through a year, etc. So if you keep an eye out for them, making framed pictures such as these is another way to create more awesome budget friendly decor for your home, or to give as gifts.

The more I think about it, the more creative ideas I can think of, to recycle and make the most of out-of-date calendars.
So before you throw out your next expired calendar, think about what else you can use it for.
Hope you enjoyed this idea, and seeing the results of it.

* * * * * *

Please come follow us here and there:


Filed Under: Crafts & Creations, Home Decor, Re-Purposing, The Homestead Tagged With: budget-home-decorating, DIY-wall-art, handmade-frames, home-decor-ideas, inexpensive-wall-art, Modge Podge, recycling, repurposing, repurposing-ideas, repurposing-old-calendars, wall-decor-ideas

Rustic Makeshift Potting Bench | Gardening Solution

June 15, 2011 By Laura 7 Comments

potting bench

When you need a potting bench, and you don’t have one, you just have to make do. And that’s how this rustic makeshift potting bench came to be.

We’ve been blessed time and time again, with wood to burn in our wood stove through the cold seasons of the year.  Having a cozy fire going in our home, is definitely our preferred source of heat, and we’ve hardly had to invest much in keeping it going.  Oak pallets are dropped and stacked beside our driveway regularly through the winter, by Michael’s supply company, who is always looking to get rid of them.  They burn nice, hot & slow.

potting bench This load of tree wood is from the guy a few houses down, who was clearing off his lot behind his home. He had no need for it, so we took it.  Naturally, I knew we could burn a lot of it. It needs to be split & stacked still, of course, but there’s plenty of time for that.  There was some nice logs in there, and I had another idea for some of it. Explaining what I wanted to Michael, was the biggest trip.  Eventually, I had to just direct him through the process, because he was not getting ‘my visual’ so to speak.


potting bench

What I wanted, was a potting bench put together, using cut logs, and a pallet.   A rustic makeshift table of sorts, near our gardens, to re-pot plants on, work at, or place our fresh picked produce as we went along.

He got the visual, about the time it got done.

potting bench
Of course nothing looks like much of anything, without a little touch of decor pretty. I had a few things I had picked up here and there for next to nothing, that looked perfect on the table top.  Added a few of my smaller potted flowers, and I loved it. Just what I had pictured.  Even Michael loved it.


potting bench The bench has proven handy, indeed.   I use it all of the time.


makeshift-potting-bench-5
Country-ish, charming, and functional.

What’s not to love?

makeshift-potting-bench-6 I know the decor will change and evolve, over and over again. Because it’s just a great place to put the interesting little things we find, on our walks along the seashore, and stuff like that.  That rock you see in the back corner of the shelf, is like a perfect round ball. So cool.


potting bench
So what do YOU think of this set-up? 
We live on a dead-end road, with very few neighbors.

But if you were driving by, would you see it and think….“WHAT the HECK?”

potting bench Because I don’t know….I just love seeing it there.
Call us rednecks.

Maybe because it’s so simple.

makeshift-potting-bench-9
It’s really just the simple little details in life, that make me so happy inside.
Thanks or coming to check it out. Happy Gardening!


Save

Filed Under: Gardening, Home Decor, Re-Purposing, The Homestead Tagged With: diy, Gardening, makeshift-potting-bench-ideas, pallet-projects, pallet-recycling, potting-benches, repurposing

Ladder to Bookshelf | Re-Purposing

March 15, 2011 By Laura 25 Comments

ladder-book-shelf-4

In addition to our continual progress of finishing the inside of our home since our major house reconstruction, we’ve had a continually growing list of ideas for smaller projects around our home.

One of them has involved this ladder inside our home.

ladder-book-shelf

ladder-book-shelf-2
It has been right here where you see it, every since we bought our home in 1995.   What has changed a lot, is almost everything around the ladder.  For one thing, at the foot of this ladder, where you now see French doors to our sun room, was a brick hearth, to a black iron coal stove, that was built into a brick wall as a fireplace of sorts.

You may wonder just what the purpose of the ladder was.

ladder-book-shelf-1

Well, at the top of the ladder, was a carpeted crawl loft, that was open to and overlooked the living space.  We had a few large floor plants up there, that looked lovely in the sunlight, that streamed in from the skylights.

But when we added a second story to our home, the crawl loft, and all of the new construction to the backside of the house, became the boy’s room.  So, a wall replaced our beloved crawl loft.

As you’ve probably figured out along the way here, the ladder was the way to get up into the loft.

ladder-book-shelf-2
It’s a beautiful, solid, solid (read: HEAVY!!) wood.  It’s the same natural wood the beams were made of, that also used to be a part of the house.


ladder-book-shelf-1

As a humorous tidbit of knowledge for you, (if you’ve never been through our home reconstruction posts), the crawl loft became our (mine and Michael’s) bedroom, when we gave our own to our triplets following their birth.   The house only had 2 bedrooms at the time, and ours was by far the biggest.   So…we took our bed down, put the mattresses up in the crawl loft, and we climbed the ladder to bed every night.

We really didn’t mind it, much. You couldn’t really see our bedding that much, and it was….cozy. : )    I’d say it was even kind of fun.  Except for when one of the kids woke up, and needed us.  Or, when we had to go potty.   I feared in the dead of night many times, that I would fall trying to descend the ladder in my sleepy state, and splat on the brick hearth below.    But it never happened.  Maybe because Michael said “Be care-ful” every.single. time. I had to go down.  Even when he was sleeping.

Oh…..{A} just found a photo that will give you an idea of how much the house has changed:

loft See the loft at the top?  With big boxy openings, roped off with 2 ropes.  You can also see the natural beams I spoke of.  They were great for wrapping Christmas lights on, and using for outdoor toddler swings, in the house!  The beams were so strong, and with the cathedral ceiling, there was plenty of room! Of course they had outdoor swings too.  Boy did they love swinging.  You can also see what was the back door.  That wall came down, and there is a school room there now, on the other side of the stairwell that descends into the floor.   Yes…things have changed.  Drastically. Inside and out.   Do you love seeing houses transformations?  I’ll post the links on our HOJN Facebook Page sometime soon, if you’d like.  But be sure to ‘Like’ the HOJN Facebook Page, so you don’t miss them in your feed!  I put lots of fun extras there, for you all.

ladder-book-shelf

Anyway….ever since the loft was ripped out and the wall went up, the ladder-to-nowhere,  has remained there.  We couldn’t get rid of it! It was a sentimental piece.  We always loved that ladder, and it’s one of those things people always mention when they first visit our home.   It’s unique, and unusual, in a home. But really…. it’s needed purpose!  And it’s looked dark and ….. well, heavy, in our light and airy living space.

So I had an idea to make the ladder more useful, and we started by doing something possibly, crazy.

ladder-book-shelf-8

We painted it white.  After adding a few little pieces you may notice, which you’ll understand why in a moment.

Now, if you know me, I’m really not down with perfectly painted stuff.  I like things old. Beat up. Worn.

ladder-book-shelf-6
So I took a sandpaper covered block, and ‘had-at’ the newly painted ladder.

ladder-book-shelf-7 And wore a hole in it. : )  (The sandpaper of course. Not the ladder.)

ladder-book-shelf-9
I did my best to make it look……well, not ‘just painted’.

ladder-book-shelf-10
But I’m not any kind of expert at distressing pieces yet.  I’m sure it needs something more.  A glaze of some kind, to crack the paint some, or something.  I don’t want to yellow it, as a lot of the ‘new paint’ around is white as snow.  But, I plan to ask a friend what more I can do, to push it a little more.

But the purpose of painting the ladder, and adding the little crossbars to the back, was to use it for….

ladder book shelf
Books!!

With the exception of when we were actually using the ladder every day to access the loft, we’ve always had photo frames and little things displayed on the ladder. I just took them off before photographing it before.  But, we are swimming in books around here.  So I thought it would be a creative and useful transformation.

ladder book shelf
Mostly it’s the kid’s books on the ladder for now, with the bottom step left open for stepping up and reaching higher.   There are lots more books, that will be relocated to the ladder, soon.  And we have more book shelving that Michael just installed as well, that will be for another post.

ladder book shelf

Because not only do the kids have more reading books, but then there are my own, and some of my mother’s too.   Books of all kinds.  For leisure, for education, for how-to, for you-name-it.  As I said, we’re swimming in them.

ladder book shelf
I actually filled a couple of boxes recently, with books to get rid of.    We have cabinets filled, and boxes downstairs, of more books – still needing sorting.

ladder book shelf

So this ladder transformation I think was a wise one.   The ladder now has purpose.  I’m sure it feels more worth, in it’s day to day life.  We all need purpose.  Don’t you think?


ladder-book-shelf-3
I have to admit:   I’m feeling a little pang inside, about painting over this beautiful wood.

Do you think that was a mistake?

ladder book shelf
But I do think the corner as a whole, looks a little cheerier, and more in keeping with what the rest of the house has going on.  Because we’ll probably be doing something with those wooden breakfast bar chairs too.  Not painting them white.  But they need stripping of the shellac , or something.

Anyway….

ladder book shelf

BEFORE                                                                                       AFTER

What do you think?  A good idea?   And are you cringing, because I painted that wood?  Go ahead and tell me the truth.  I think I can take it.


Save

Save

Save

Save

Filed Under: Home Decor, Home Improvement, Home Projects, Organization, Re-Purposing, The Homestead Tagged With: book-storage-solution, creative-bookshelf, ladder bookshelf, ladder-makeover, ladder-repurposing, repurposing

We are wicked happy to have you here! We hope you find much inspiration, help, humor and enjoyment here.


Archives


POPULAR POSTS

* * * * * *

SUBSCRIBE to House of Joyful Noise blog! Every new post, delivered right to your email box!


Privacy Policy

Amazon Affiliates

Never at any additional cost to you, we may earn a small commission for our endorsement, recommendation, testimonial, and/or link to any products from our website. Your purchase through our links helps support our family, while sharing with you the products we authentically use and recommend, for various ideas, and letting you know where you can purchase them. Thank you for your support!

[footer_backtotop]

Copyright © 2025 HouseOfJoyfulNoise.com · Genesis Framework by StudioPress