• HOME
  • {A}’s Chipmunk Training Archives

 Homepage

  • The Homestead
    • Home Projects
    • Home Improvement
    • Home Decor
      • Seasonal Home decor
        • FALL Home Decor
        • WINTER Home Decor
        • SPRING Crafts and Creations
        • SUMMER Crafts and Creations
    • Our Chickens
    • Gardening
    • Organization
    • Re-Purposing
    • Furniture Refinishing
    • Budget
  • Crafts & Creations
    • Seasonal Home decor
      • FALL Crafts and Creations
      • WINTER Crafts and Creations
      • SPRING Crafts and Creations
      • SUMMER Crafts and Creations
    • DIY (Do-It-Yourself) Project
    • Kids Arts and Crafts
    • Homemade/Handmade Gift Ideas
    • Holiday Crafts
    • Fan Pulls
    • Free Printable/Downloadable
    • Sewing Projects
    • Giveaways
    • Business Features
  • Recipes/FoodFun
    • Breakfast
    • Lunch
    • Main Dish
    • Sandwiches
    • Appetizers
    • Slow Cooker
    • On The Grill
    • Side Dishes
      • Soups
      • Salads
    • Baking
      • Breads, Rolls and Muffins
    • Snacks
    • Treats
    • Desserts
    • Drinks
  • Homeschooling
    • Elementary Homeschooling
      • Elementary Homeschooling READING
      • Elementary Homeschooling MATH
      • Elementary Homeschooling LANGUAGE ARTS
      • Elementary Homeschooling SCIENCE
      • Elementary Homeschooling HOME ECONOMICS
      • Kids Arts and Crafts
    • Middle School Homeschooling
      • Middle School Homeschooling SCIENCE
      • Middle School Homeschooling HOME ECONOMICS
    • Language Arts
    • Math
    • History / Social Studies
    • Geography
    • Foreign Language
    • Field Trips
    • Games
    • Nature Study
  • The Big Picture
    • Life In General
    • Celebrations
    • Faith
      • Into the Light; The Series
    • Giveaways
    • Reviews & Sponsors
  • Photography & Lettering
    • Photography
    • truck lettering
    • vehicle graphics
    • Newborns
    • Kids
    • Engagement
    • High School Senior Pictures
    • High School Senior Pictures Sneak Peeks

Frozen Banana Bites – Such a treat! | Recipe

August 22, 2011 By Laura 2 Comments

frozen-banana-bites-recipe-4

I don’t remember exactly the last time I had a frozen chocolate covered banana, but I do know that I had one or 2 when I was a kid, and I loved them.  I thought of making them many times since I’ve had kids of my own, but never quite got to that.  So when a reader linked us up with this simple recipe for ‘Frozen Banana Bites’, I knew we had to try them.  Not exactly the same as frozen chocolate covered bananas, but close enough.  They were absolutely delectable!

*The actual recipe called for peanut butter, but with one of our kids having a severe peanut allergy, we substitute everything that calls for peanut butter, with Sunbutter.
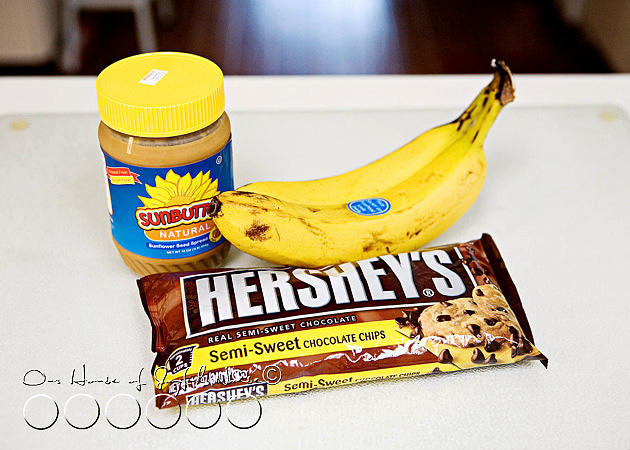
frozen-banana-bites-recipe Participating Ingredients: Bananas, Hershey’s Semi-Sweet Chocolate Chips, & Peanut Butter or *Sunbutter

Naturally, you can make as many Frozen Banana Bites as you would like. But for the sake of giving you a recipe to follow, just use the following measurements per 2 bananas, and then make as many batches as you would like. We made 2 batches, 1 at a time, considering not wanting the slices bananas to brown, or the sauce to cool too much as we worked.

  • 2 bananas
  • 1/4 Hershey’s Chocolate Chips
  • 1/4 Peanut Butter or Sunbutter

frozen-banana-bites-recipe-1 Cover a cookie sheet with some waxed or parchment paper.

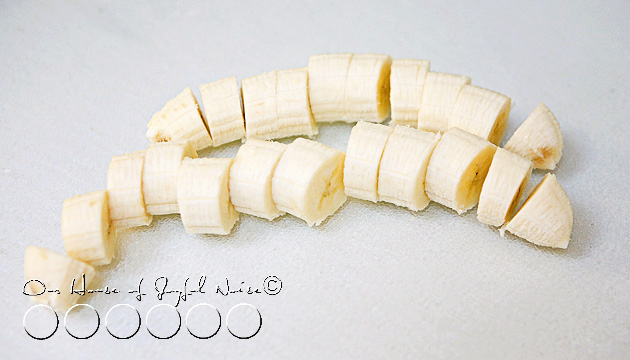
Slice the bananas into bite sized pieces.

We have big mouths.   😀

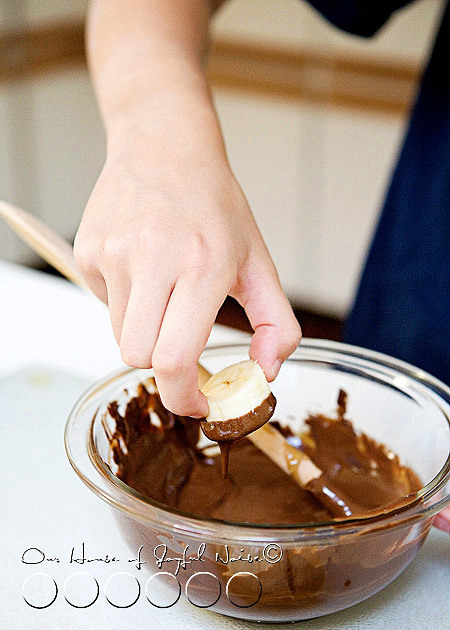
Put the measured chocolate chips and Sunbutter in a microwave safe bowl, and microwave for 20 seconds or so, mix, and keep putting back in for 10-15 second interval until it’s all melted, combined & smooth.

Tip:  I stir with a wooden spoon handle, and I stir rapidly, just as you would tempering chocolate.
frozen-banana-bites-recipe-2
With your sauce all warmed and ready, take each chunk of banana, and dip the top of it into the sauce.  Let it drip off as much as possible.
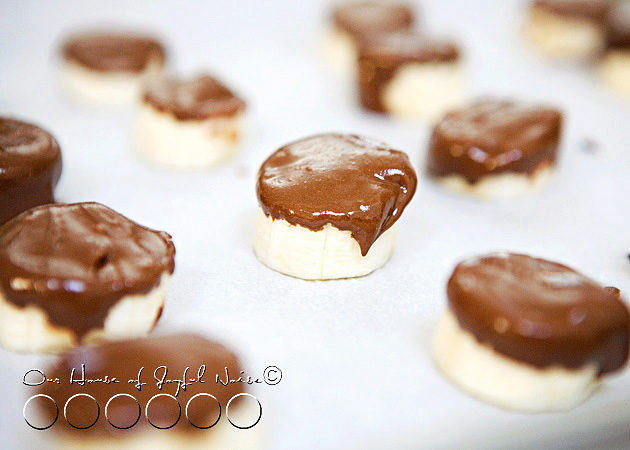
 

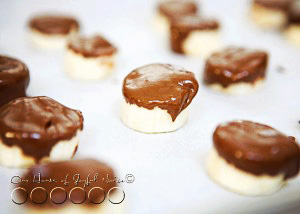
frozen-banana-bites-recipe-3 Place on the cookie sheet, sauce side up.

Optional: If desired, you also can roll the chocolatey side in chopped nuts as well, and then place on sheet.

Repeat until they are all done.

~ It’s a bit of a messy process, and there isn’t much way around it. ~

Place the sheet of Banana Bites into the freezer, and let freeze completely.

Note:  Freezing time varies, depending on how many times you your kids open the freezer door, to see if they are frozen enough to eat, yet. : )
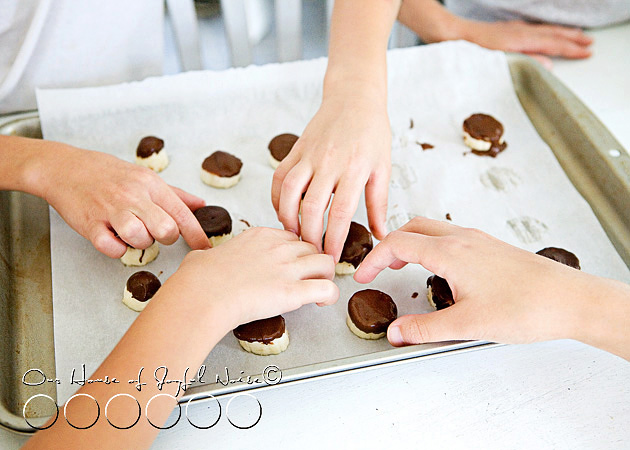
frozen-banana-bites-recipe-5 Once our first sheet was frozen, the kids and I just took them out, and had at them right away. 😛

  frozen-banana-bites-recipe-6

frozen-banana-bites-recipe-7

These guys’ expressions and sound effects are always so animated, when it comes to food.

Especially treats.

Any frozen leftovers, can be thrown in a ziplock-style freezer bag, for later enjoyment.

Hope you find them worth the small mess. ; )  We did!

***


Save

Save

Filed Under: Fun Food, Recipes, Treats Tagged With: banana-recipes, banana-treats, frozen treats, frozen-banana-bites, recipes

Chicken Italiano | Slow Cooker Recipe

June 8, 2011 By Laura 6 Comments

chicken-italiano-slow-cooker-recipe

 
As slow cooker meals go, this Chicken Italiano is definitely a family favorite!  We are sharing the complete recipe with you here today, and if it sounds good to you, we’ve got a printable recipe at the end that you can take with you. We are also sharing with you one of our favorite cookbooks, which is an affiliate link.

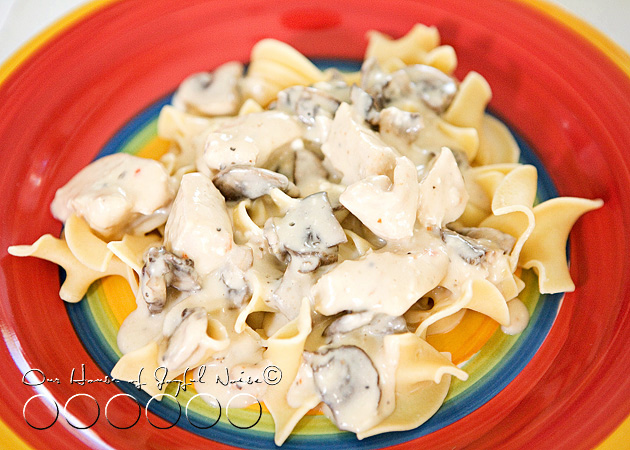
Chicken Italiano.

It may not be the most colorful meal, but don’t let that deter you from trying it, or you’ll be missing out! It’ll likely become a favorite of your families as well. It is creamy, rich, and so delicious, with the tender flavorful chicken chunks, and a rich cream cheese based sauce with mushrooms.  It’s a perfect slow cooker meal, that is easy to make, and makes the house smell wonderful! All slow cooker meals are fabulous in the colder months. But really, we are happy to make it & eat it year round! It’s that good. Everything we eat in the warmer months, can’t be cold food. Right? There are days year-round, that we need something super easy, super good, and ready at dinner time! So you get it going in the morning, and there is little to do before sitting down to eat.  This is one of those meals, and I got the recipe from one of my favorite slow cooker cookbooks:

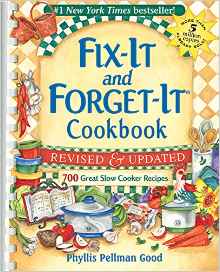
fix-it-and-forget-it-cookbook

The Fix-It and Forget-It Cookbook
(*Now Revised and Updated)
(aff)

*The Updated and Revised version is all that is available now, and I have the original. Therefore I cannot guarantee that Chicken Italiano is in this one.
However, I imagine the collection of recipes is even better in this book now, and you can print out the Chicken Italiano recipe right from this post.
–

Here’s how easy it is to make this creamy, rich & delicious dinner, with such tender chicken chunks!  Most times, we double this recipe below, and have plenty left-overs another dinner or two!

Participating Ingredients:

  • 4 boneless, skinless chicken breast halves
  • 1 envelope dry Italian salad dressing mix
  • 1/4 cup water
  • 8 oz. pkg. cream cheese, softened
  • *10-3/4 oz. can cream of chicken soup
  • *(When we double recipe, the 2nd can of soup we use is cream of celery)
  • 4 oz. can of mushroom stems and pieces, drained
  • 1/2-3/4  1lb.bag of wide egg noodles

Directions:

1) Place chicken breast halves in slow cooker

2) Combine dry salad dressing mix and water.  Pour over chicken.

3) Cover.  Cook on low for 3 hours.

3a) As soon as the chicken is cooked through, if we’re home, I break up the chicken breasts into chunks, and return to the pot, so it can absorb the seasoned liquids. (I’ve just  broken it up while in the pot, with a wooden spatula too. The chicken is so tender, it’s no problem. Just be sure you’re not damaging the bottom of your pot.)

4) Combine cream cheese and soup until blended.  Stir in the mushrooms.  Pour over chicken, and mix it up.

5) **Cover, and cook 1 more hour.

**Note: If the chicken was cut into chunks much earlier, and so you are sure it is cooked through, it is ready as soon as all of the cheese & soup is heated, smooth and blended together.

6)  While the slow cooker contents is in it’s remaining time, cook egg noodles according to the package directions.

Serve the Chicken Italiano over hot egg noodles, and enjoy.

chicken-italian-slow-cooker-recipe_03
Be prepared to serve seconds.  : P

Chicken Italiano | Slow Cooker Recipe
 
Print
Prep time
30 mins
Cook time
4 hours
Total time
4 hours 30 mins
 
A creamy, rich, and delicious slow cooker meal, with the tender flavorful chicken chunks, and a rich cream cheese based sauce with mushrooms. It's the perfect savory slow cooker meal.
: Fix It and Forget It Cookbook / House of Joyful Noise blog
: Main meal | Slow Cooker
Cuisine: Italian
Serves: 5
Ingredients
  • 4 boneless, skinless chicken breast halves
  • 1 envelope dry Italian salad dressing mix
  • ¼ cup water
  • 8 oz. pkg. cream cheese, softened
  • *10-3/4 oz. can cream of chicken soup
  • *(When we double recipe, the 2nd can of soup we use is cream of celery)
  • 4 oz. can of mushroom stems and pieces, drained
  • ½-3/4 1lb.bag of wide egg noodles
Instructions
  1. Place chicken breast halves in slow cooker
  2. Combine dry salad dressing mix and water. Pour over chicken.
  3. Cover. Cook on low for 3 hours.
  4. - As soon as the chicken is cooked through, if we're home, I break up the chicken breasts into chunks, and return to the pot, so it can absorb the seasoned liquids. (I've just broken it up while in the pot, with a wooden spatula too. The chicken is so tender, it's no problem. Just be sure you're not damaging the bottom of your pot.)
  5. Combine cream cheese and soup until blended. Stir in the mushrooms. Pour over chicken, and mix it up.
  6. **Cover, and cook 1 more hour.
  7. **Note: If the chicken was cut into chunks much earlier, and so you are sure it is cooked through, it is ready as soon as all of the cheese & soup is heated, smooth and blended together.
  8. While the slow cooker contents is in it's remaining time, cook egg noodles according to the package directions, and strain.
  9. Serve the Chicken Italiano over the hot egg noodles, and ENJOY!
3.4.3177


******


Save

Save

Save

Save

Save

Save

Save

Filed Under: Main Dish, Recipes, Slow Cooker Tagged With: Chicken-Italiano-recipe, cold-weather-meals, crockpot-recipes, easy-slow-cooker-recipes, fix-it-and-forget-it-meals, Italian-recipes, main-meal-ideas, printable-recipes, recipes, recipes-with-chicken

Josh’s Double-Chocolate Biscottis Recipe

May 15, 2011 By Laura 1 Comment

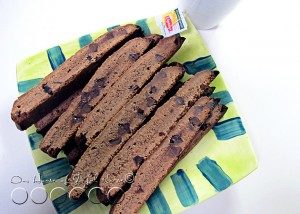
A friend of ours baked our family thesedouble-chocolate biscottis, and we enjoyed them so much, we asked him for the recipe. (So we could have some more!).  He very kindly sent the recipe to us, and he also suggested it as a blog post.  We thought it was a great idea!  It’s just not nice not to share, Italian cookies this good

bis·cot·ti

Definition of BISCOTTI :  small rectangular twice-baked cookies, typically containing *nuts, made originally in Italy.

*We omitted nuts, as one in our family has a serious allergy to nuts.


Josh’s Double Chocolate Biscotti Recipe
Recipe


Participating Ingredients

  • 1 cup of butter, softened
  • 1 1/3 cups of sugar
  • ½ of a cup of unsweetened cocoa powder
  • 4 teaspoons of baking powder
  • 4 eggs
  • 3 ½ cups all-purpose flour
  • ½ cup of white chocolate pieces
  • ¼ cup milk, semisweet, or dark chocolate pieces

Preheat oven to 400 degrees. Lightly grease 2 or more cookie sheets. Beat the softened butter with an electric mixer on medium/high speed for 45 seconds to a minute. Add sugar, cocoa powder, and baking powder. Beat until combined. Beat in the eggs until combined. Beat in flour, “If you can’t beat in all the flour, just stir it in.” Stir in the chocolate pieces.

Divide the dough in fourths: shape into four loaves and put them on the cookie sheets, adjusting the thickness and length of them to fit in the cookie sheet but not bake into each other.

Bake for 23 to 28 minutes or until wood toothpicks inserted near the centers comes out clean. Cool the loaves on cutting boards for 1 to 4 hours. (They slice easier if you let them cool longer and become more firm.)

Preheat oven to 350 degrees. Use a serrated bread knife to cut each loaf into slices, you may cut them as thick or thin as you like. Bake them for 12 to 15 minutes, turn them over on their side, and bake them for another 12 to 15 minutes.

Cool, and enjoy!

Origin of BISCOTTO

Italian, biscuit, cookie, from (pane) biscotto, literally, bread baked twice

First Known Use: 1946


Josh's Double Chocolate Biscotti Recipe
 
Print
Prep time
30 mins
Cook time
35 mins
Total time
1 hour 5 mins
 
A delightful double-chocolate biscotti cookie recipe, with a dash of facts about biscotti cookies, to further enjoy.
: House of Joyful Noise blog
: Baking
Cuisine: Italian
Serves: ~48 cookies
Ingredients
  • 1 cup of butter, softened
  • 1⅓ cups of sugar
  • ½ of a cup of unsweetened cocoa powder
  • 4 teaspoons of baking powder
  • 4 eggs
  • 3 ½ cups all-purpose flour
  • ½ cup of white chocolate pieces
  • ¼ cup milk, semisweet, or dark chocolate pieces
Instructions
  1. Preheat oven to 400 degrees. Lightly grease 2 or more cookie sheets. Beat the softened butter with an electric mixer on medium/high speed for 45 seconds to a minute. Add sugar, cocoa powder, and baking powder. Beat until combined. Beat in the eggs until combined. Beat in flour, “If you can’t beat in all the flour, just stir it in.” Stir in the chocolate pieces.
  2. Divide the dough in fourths: shape into four loaves and put them on the cookie sheets, adjusting the thickness and length of them to fit in the cookie sheet but not bake into each other.
  3. Bake for 25 to 28 minutes or until wood toothpicks inserted near the centers comes out clean. Cool the loaves on cutting boards for 1 to 4 hours. (They slice easier if you let them cool longer and become more firm.)
  4. Preheat oven to 350 degrees. Use a serrated bread knife to cut each loaf into slices, you may cut them as thick or thin as you like. Bake them for 12 to 15 minutes, turn them over on their side, and bake them for another 12 to 15 minutes.
  5. Cool, and enjoy!
3.4.3177

Be sure to grab the printable recipe, before you go! Hope you enjoy, too!


Save

Filed Under: Baking, Desserts, Recipes, Snacks, Treats Tagged With: biscotti-recipe, chocolate-biscotti-recipe, chocolate-cookies-recipes, double-chocolate-biscotti, Italian-cookies-recipe, recipes

Bruschetta (Bread Topping) – Recipe

September 11, 2010 By Laura 1 Comment

bruschetta-

Here’s another delicious little something, to make with some of those fresh summer tomatoes!

Bruschetta!!

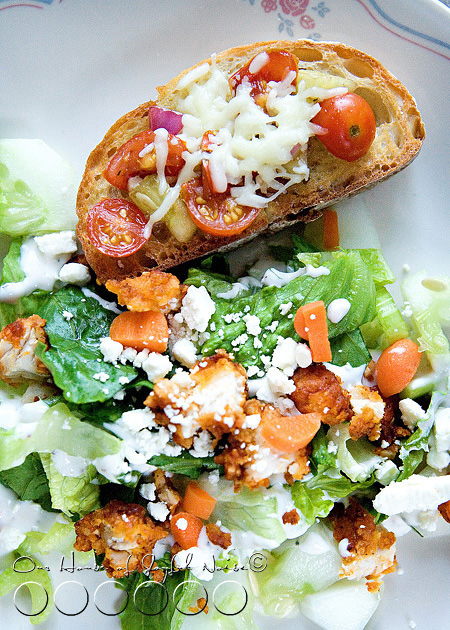
Bruschetta topping on toasted bread, is a perfect side to a nice salad (as shown here), or an appetizer for luncheons or cocktail parties. (Well, I’ve heard.  I haven’t been to a cocktail party in…..well, I actually can’t think of a time I have ever been to one, come to think of it. Or, maybe I’m not sure what one is.  But I know what bruschetta is!)

‘Bruschetta’ is an Italian word (Tuscany, to be exact), that means to ‘toast or burn’.  I prefer to toast my bruschetta.  ; )  There are many variations that can be made to this recipe, so don’t be afraid to experiment on your own!  That’s generally what I did when I made this bruschetta this evening a couple of weeks ago. My father, with his ever-discerning tongue, was here for dinner, and he gave it all gold forks. (He loved my salad too. He’s a natural born food critic. Ask anyone who has ever sat down and eaten with him.)

No complete step by step this time photos for the directions this time, but it’s easy enough to follow.  I kind of winged it, with loose measurements, adjusting by eye. You can do that….have no fear. Here’s how (generally) I made it:

Participating ingredients:

  • Ciabatta bread; (can be found at bakery), sliced thick.  French baguette loaf can also be used
  • 1 Garlic clove peeled, and cut in half once.  (Optional)
  • ~ 2 cups chopped tomatoes ( I used Early Girls > It’s what I had on hand.)
  • ~ 1/4 cup finely chopped red onion
  • ~ 1 cup chopped cucumber
  • 2 Tablespoons of Balsamic Vinegar
  • 3-4 Tablespoons of Extra Virgin Olive Oil
  • Shredded Mozzarella Cheese
  • Salt & Pepper to taste.

1) Put all chopped vegetables into a small to medium mixing bowl.

2) Add olive oil and vinegar, salt and pepper if you choose, and mix well.

3) Place mixture in fridge or just on counter to all sit together in the bowl, while you prepare the rest.

4) Per-heat oven to broil (My oven requires a temp, so I set it for 375)

5) Line cookie sheet with tinfoil, or whatever you use to protect sheet.

6) Place breads on sheet, spaced evenly.

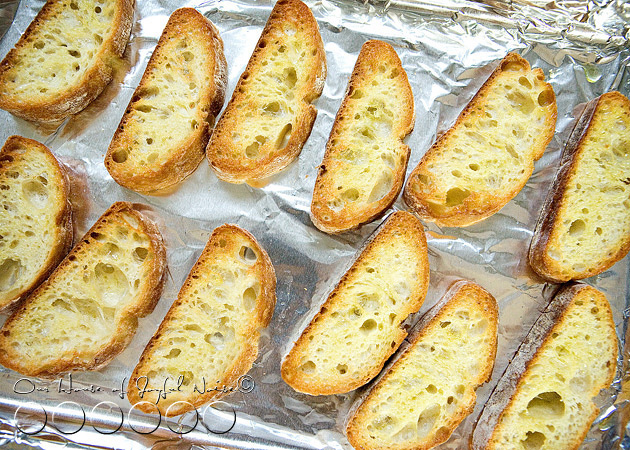
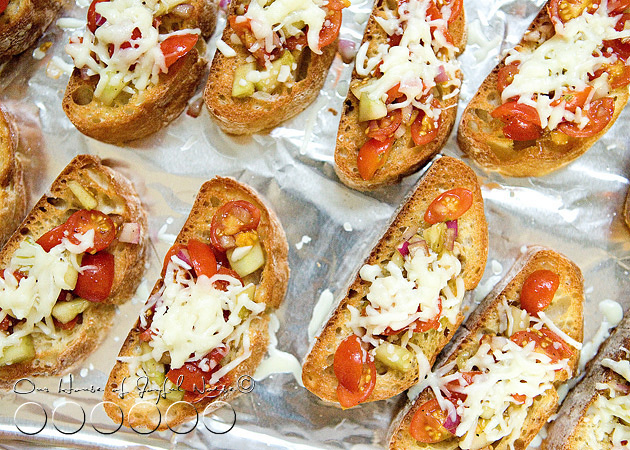
01_bread

7) Place in oven, and toast for 1-2 minutes, until you see they start to brown or turn golden. (Shown in photo above.)

8) Remove sheet from oven, and brush each bread piece with the olive oil.

9) Rub each piece with the halved garlic clove for added flavor, if desired. (I desired.)

bruschetta
10) Mix mixture in bowl again, and then I drained all of the excess liquid in the bottom.

11)  Spoon tomato/vegetable mixtures onto bread slices.

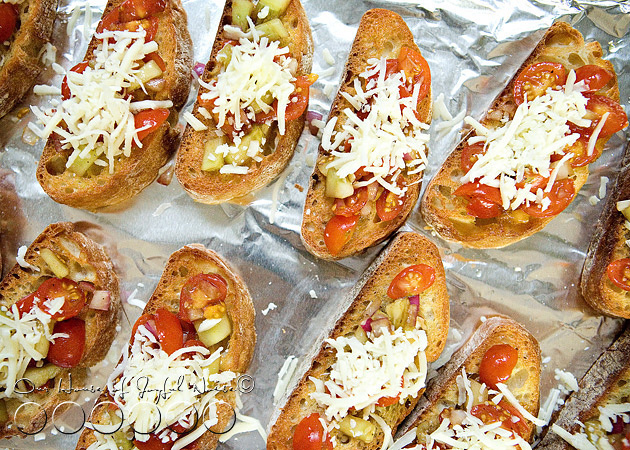
12) Top with some shredded mozzarella. (Show with all toppings on bread, in photo above.)

bruschetta
13) Put back into oven for a minute or so, watching closely, just until cheese is melted, and remove.

04_bruschetta-with-salad
Serve up, and enjoy!!

Save

Filed Under: Appetizers, Breads, Rolls and Muffins, Recipes, Side Dishes Tagged With: bread-topping-recipes, bruschetta, bruschetta recipe, recipes, tomato recipes

Scallops and Grilled Zucchini | Recipe

August 1, 2010 By Laura 5 Comments

11_carmelized-scallops_300

Here’s something you may or may not know about me.

I am not a mother that takes some time for herself now and then. I don’t go away, or even take a day, for myself, here and there. Most times, I don’t even just go shopping, without taking some or all of the kids with me. I just don’t care to be away from my kids. I like their company. I understand some mothers do like to go away, or take a break from their kids now and them. I’m betting that is normal, and I know there is nothing wrong with that. But it’s just not what I do.

But the other day, I went to visit a good friend. She is only one of a few real-life friends I have.  I only see her once in a blue moon, and I hadn’t seen her in way too long. She lives very close by, so you would think I’d be able to see at least a little more frequently, even as busy as I am.

But you see, every single time we have ever gotten together for ‘just a cup of tea’, it has pretty much turned into an ‘all day affair’.  She is SO down to earth, so funny, so easy to talk to, and listen to, that the hours always seem to just slip right away. Literally.

So we met the other day at her house, just for a cup of tea, or a glass of wine, at 1 p.m. in the afternoon.

I got home at 9 p.m.

It’s pretty much a pattern now.  Complete with Michael’s phone call somewhere in there, asking, “Is my bride ever coming home again?”.  At the end of our visit, we stood in her front doorway for another hour+, chatting some more.  It’s ridiculous.  I love her to death.

So what does that have to do with food and recipes? You came to talk about FOOD, right?  Well, the link is that of course I stayed for dinner, at my friend’s.  She said she was having scallops.  I had brought her a summer squash and zucchini from my gardens. ; ) I learned she calls scallops ‘sea candy’. She showed me how she prepares her scallops, and zucchini.  Both, on the grill. I was intrigued.  The dinner, was DELICIOUS.

This is pretty how she prepared the dinner.  But her reference of the scallops as ‘sea candy’, gave me the idea of adding a little ingredient.

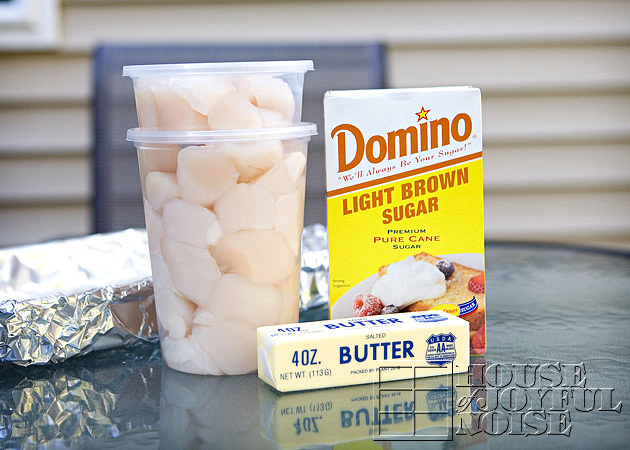
01_ingredients The scallops participating ingredients:   fresh sea scallops (easy to find here on this shore), 1/2 stick of butter, and some light brown sugar.


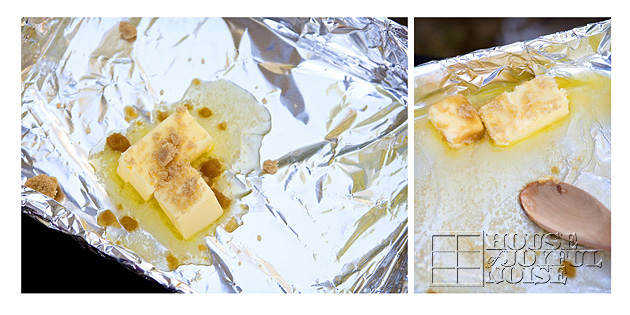
02_butter-sugar

In a foil lined tray on the grill set on about medium heat, we threw in a 1/2 stick of butter, since we had 2.5 pounds of scallops. Actually though, we threw in 3/4’s of a stick (seen above), and then took 1/4 back out. lol. (It was too much.) Then I threw in an unmeasured amount of light brown sugar.  (As it turns out, Michael secretly added more when I was not looking.  He is my ‘Sugar Boy’.  This is different than ‘Sugar Daddy’.)

–

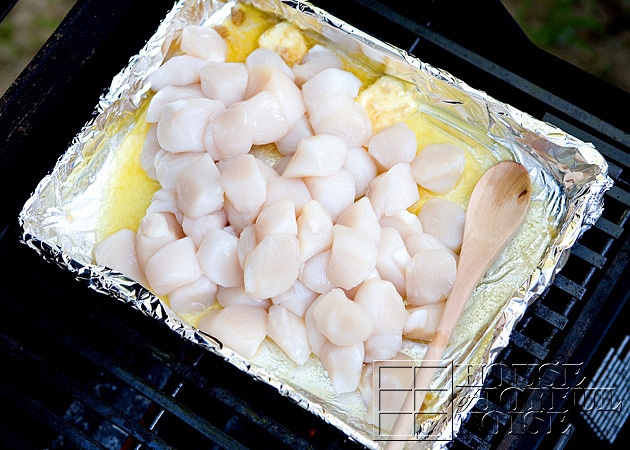
03_raw-scallops When the butter is all melted, dump in the fresh raw scallops.


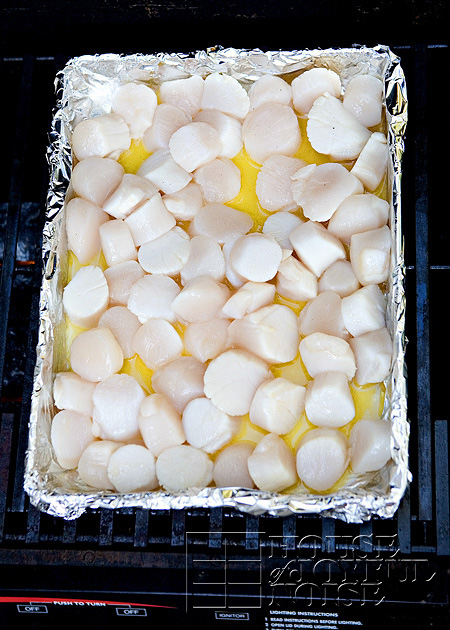
04_raw-scallops
Spread them all out evenish in the pan, and close the cover.

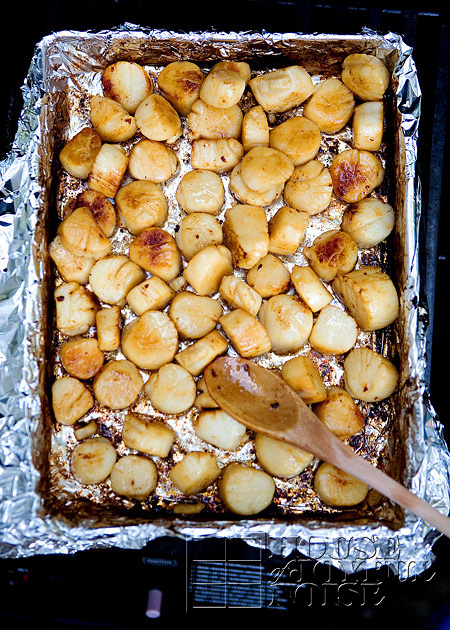
Get in there and stir them up now and then, turning the scallops over as you can. or even spinning the pan around to ensure even heating.  But the goal is to get the butter and sugar caramelizing, and that really takes a little bit of a while.

–

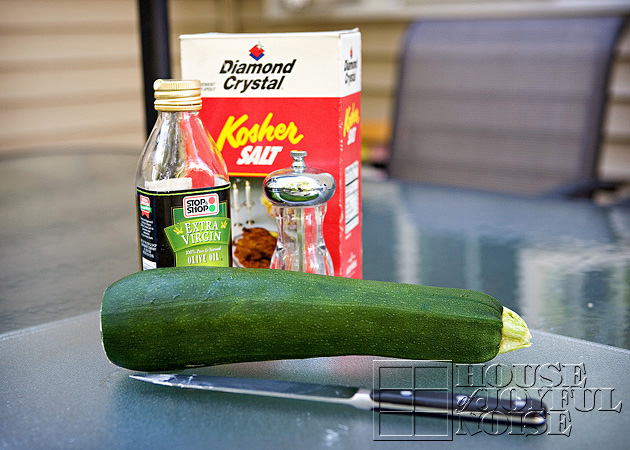
05_ingredients Then we started preparing a side dish.   Participating ingredients:  a garden-fresh zucchini, virgin olive oil, kosher salt and pepper.


06_sliced-zucchini

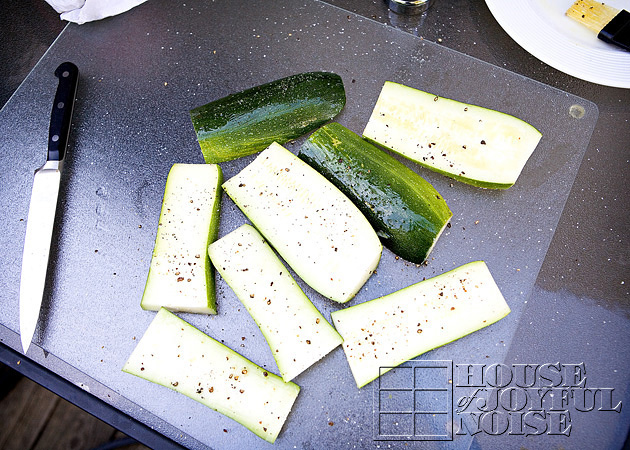
Cut off the ends of the zucchini, and then slice it up the long way, about 1/2 inches or there-abouts.  Then we cut those slices in half too.

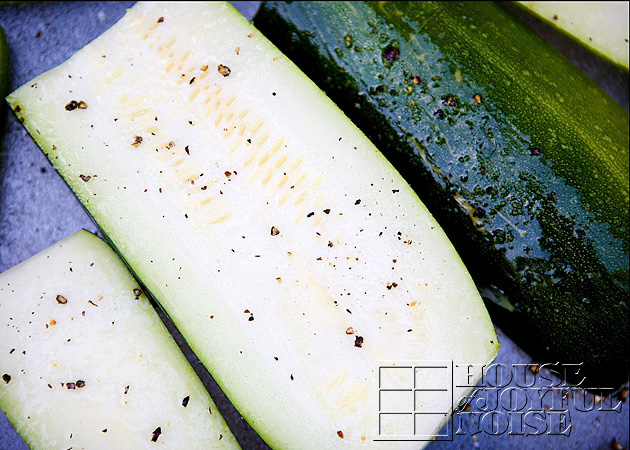
07_sliced-zucchini-squash Brush them with olive oil, and sprinkle on some kosher salt and ground pepper > both sides.

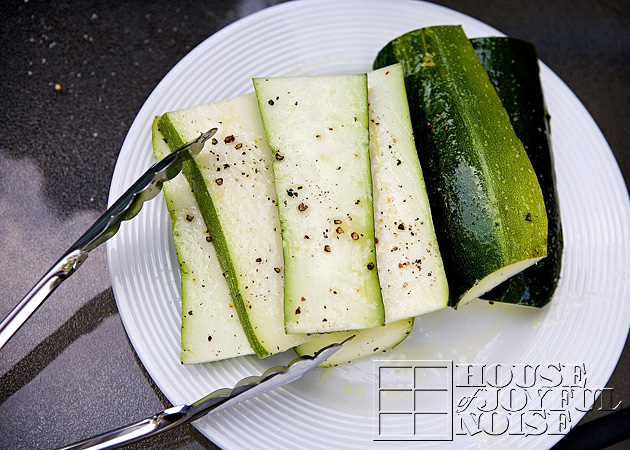
08_ready-to-grill-zucchinil They are ready to throw on the grill.  But the scallops take much longer, so we waited quite awhile before putting the zucchini on.


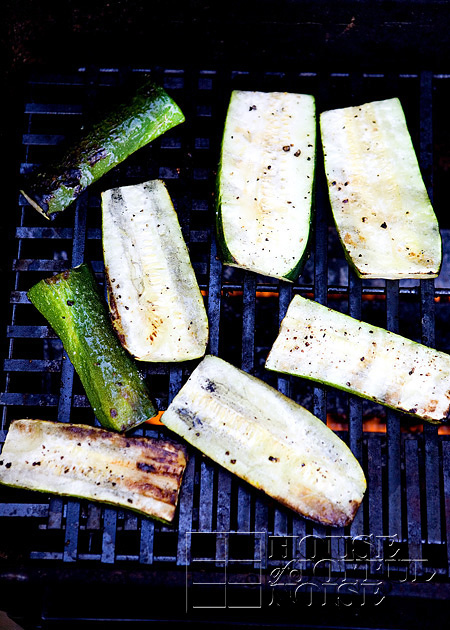
09_grilled-zucchini

When the scallops looked like they would be ready soon, we threw the zucchini on the grill.  The goal for these is to remove them off the grill when they are still dense and soft, but on the firmer side.  We don’t like mushy squash.

–

10_grilled-scallops

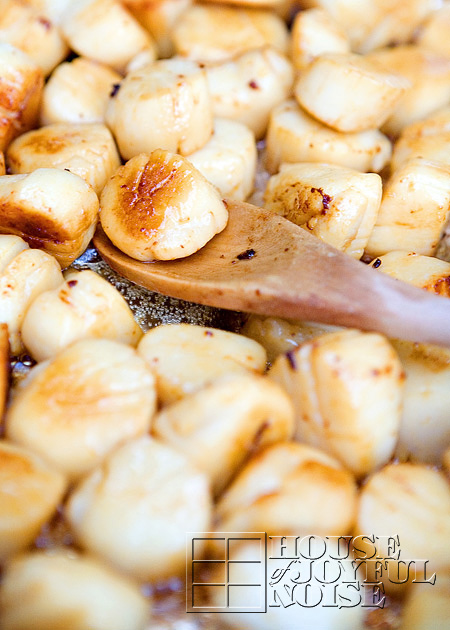
The scallops get beautifully brown, as all of the butter and sugar has caramelized.

–

11_carmelized-scallops

Look how perfect.

–

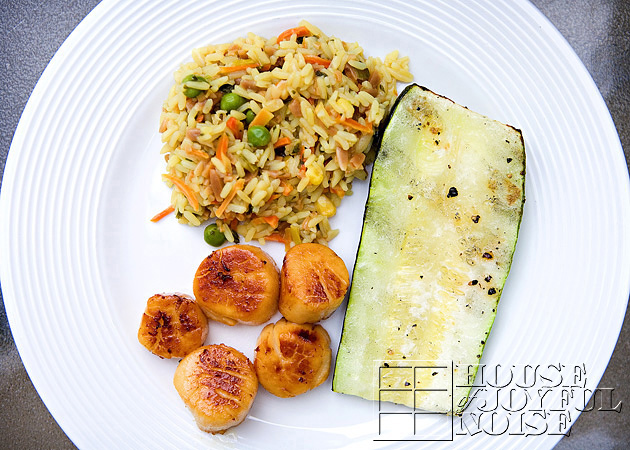
12_scallops-zucchini-rice-dinner We also made a rice side dish.  But don’t be too impressed with that.  It was literally one of those ‘Side Dish’ packets.  You know….add water and boil.

But how simple and summery is this meal?   It was SO good.  The kids enjoyed it too, as suspicious as they were.

We had scallops left over though, so Michael brought them to his friend.   He was a very grateful man, from what I heard.

This was the first time we have ever prepared scallops in any manner, and the first time we have put zucchini on the grill.  Have you grilled something new yet this summer?  Please share, or link us to it.

Save

Save

Filed Under: Main Dish, On The Grill, Recipes, Side Dishes Tagged With: grilled-scallops, grilled-zucchini, grilling, recipes, scallops, sea candy, summer-food, summer-grilling, summer-meals, summer-recipes, zucchini

  • « Previous Page
  • 1
  • 2
  • 3
  • 4
  • 5
  • 6
  • Next Page »

We are wicked happy to have you here! We hope you find much inspiration, help, humor and enjoyment here.


Archives


POPULAR POSTS

* * * * * *

SUBSCRIBE to House of Joyful Noise blog! Every new post, delivered right to your email box!


Privacy Policy

Amazon Affiliates

Never at any additional cost to you, we may earn a small commission for our endorsement, recommendation, testimonial, and/or link to any products from our website. Your purchase through our links helps support our family, while sharing with you the products we authentically use and recommend, for various ideas, and letting you know where you can purchase them. Thank you for your support!

[footer_backtotop]

Copyright © 2025 HouseOfJoyfulNoise.com · Genesis Framework by StudioPress