• HOME
  • {A}’s Chipmunk Training Archives

 Homepage

  • The Homestead
    • Home Projects
    • Home Improvement
    • Home Decor
      • Seasonal Home decor
        • FALL Home Decor
        • WINTER Home Decor
        • SPRING Crafts and Creations
        • SUMMER Crafts and Creations
    • Our Chickens
    • Gardening
    • Organization
    • Re-Purposing
    • Furniture Refinishing
    • Budget
  • Crafts & Creations
    • Seasonal Home decor
      • FALL Crafts and Creations
      • WINTER Crafts and Creations
      • SPRING Crafts and Creations
      • SUMMER Crafts and Creations
    • DIY (Do-It-Yourself) Project
    • Kids Arts and Crafts
    • Homemade/Handmade Gift Ideas
    • Holiday Crafts
    • Fan Pulls
    • Free Printable/Downloadable
    • Sewing Projects
    • Giveaways
    • Business Features
  • Recipes/FoodFun
    • Breakfast
    • Lunch
    • Main Dish
    • Sandwiches
    • Appetizers
    • Slow Cooker
    • On The Grill
    • Side Dishes
      • Soups
      • Salads
    • Baking
      • Breads, Rolls and Muffins
    • Snacks
    • Treats
    • Desserts
    • Drinks
  • Homeschooling
    • Elementary Homeschooling
      • Elementary Homeschooling READING
      • Elementary Homeschooling MATH
      • Elementary Homeschooling LANGUAGE ARTS
      • Elementary Homeschooling SCIENCE
      • Elementary Homeschooling HOME ECONOMICS
      • Kids Arts and Crafts
    • Middle School Homeschooling
      • Middle School Homeschooling SCIENCE
      • Middle School Homeschooling HOME ECONOMICS
    • Language Arts
    • Math
    • History / Social Studies
    • Geography
    • Foreign Language
    • Field Trips
    • Games
    • Nature Study
  • The Big Picture
    • Life In General
    • Celebrations
    • Faith
      • Into the Light; The Series
    • Giveaways
    • Reviews & Sponsors
  • Photography & Lettering
    • Photography
    • truck lettering
    • vehicle graphics
    • Newborns
    • Kids
    • Engagement
    • High School Senior Pictures
    • High School Senior Pictures Sneak Peeks

Ladder to Bookshelf | Re-Purposing

March 15, 2011 By Laura 25 Comments

ladder-book-shelf-4

In addition to our continual progress of finishing the inside of our home since our major house reconstruction, we’ve had a continually growing list of ideas for smaller projects around our home.

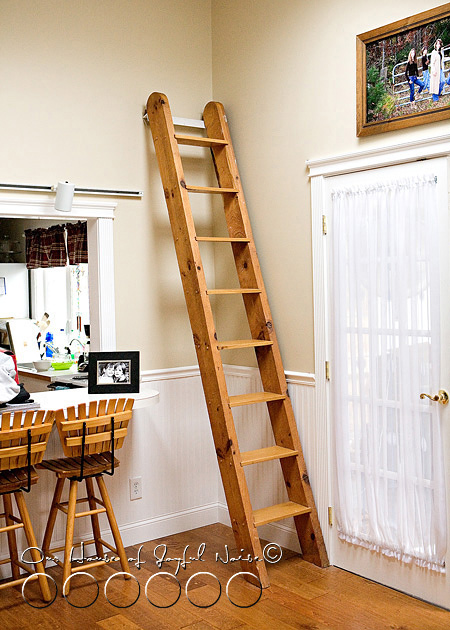
One of them has involved this ladder inside our home.
ladder-book-shelf

ladder-book-shelf-2
It has been right here where you see it, every since we bought our home in 1995.   What has changed a lot, is almost everything around the ladder.  For one thing, at the foot of this ladder, where you now see French doors to our sun room, was a brick hearth, to a black iron coal stove, that was built into a brick wall as a fireplace of sorts.

You may wonder just what the purpose of the ladder was.
ladder-book-shelf-1

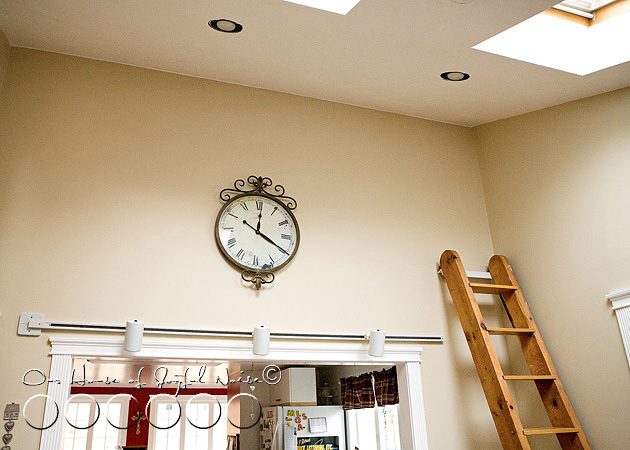
Well, at the top of the ladder, was a carpeted crawl loft, that was open to and overlooked the living space.  We had a few large floor plants up there, that looked lovely in the sunlight, that streamed in from the skylights.

But when we added a second story to our home, the crawl loft, and all of the new construction to the backside of the house, became the boy’s room.  So, a wall replaced our beloved crawl loft.

As you’ve probably figured out along the way here, the ladder was the way to get up into the loft.
ladder-book-shelf-2
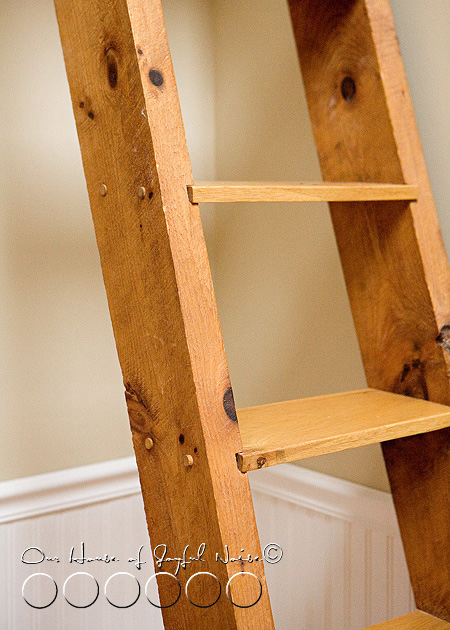
It’s a beautiful, solid, solid (read: HEAVY!!) wood.  It’s the same natural wood the beams were made of, that also used to be a part of the house.


ladder-book-shelf-1

As a humorous tidbit of knowledge for you, (if you’ve never been through our home reconstruction posts), the crawl loft became our (mine and Michael’s) bedroom, when we gave our own to our triplets following their birth.   The house only had 2 bedrooms at the time, and ours was by far the biggest.   So…we took our bed down, put the mattresses up in the crawl loft, and we climbed the ladder to bed every night.

We really didn’t mind it, much. You couldn’t really see our bedding that much, and it was….cozy. : )    I’d say it was even kind of fun.  Except for when one of the kids woke up, and needed us.  Or, when we had to go potty.   I feared in the dead of night many times, that I would fall trying to descend the ladder in my sleepy state, and splat on the brick hearth below.    But it never happened.  Maybe because Michael said “Be care-ful” every.single. time. I had to go down.  Even when he was sleeping.

Oh…..{A} just found a photo that will give you an idea of how much the house has changed:
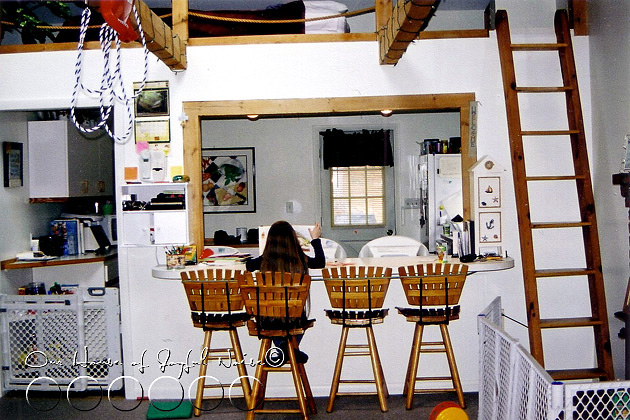
loft See the loft at the top?  With big boxy openings, roped off with 2 ropes.  You can also see the natural beams I spoke of.  They were great for wrapping Christmas lights on, and using for outdoor toddler swings, in the house!  The beams were so strong, and with the cathedral ceiling, there was plenty of room! Of course they had outdoor swings too.  Boy did they love swinging.  You can also see what was the back door.  That wall came down, and there is a school room there now, on the other side of the stairwell that descends into the floor.   Yes…things have changed.  Drastically. Inside and out.   Do you love seeing houses transformations?  I’ll post the links on our HOJN Facebook Page sometime soon, if you’d like.  But be sure to ‘Like’ the HOJN Facebook Page, so you don’t miss them in your feed!  I put lots of fun extras there, for you all.

ladder-book-shelf

Anyway….ever since the loft was ripped out and the wall went up, the ladder-to-nowhere,  has remained there.  We couldn’t get rid of it! It was a sentimental piece.  We always loved that ladder, and it’s one of those things people always mention when they first visit our home.   It’s unique, and unusual, in a home. But really…. it’s needed purpose!  And it’s looked dark and ….. well, heavy, in our light and airy living space.

So I had an idea to make the ladder more useful, and we started by doing something possibly, crazy.
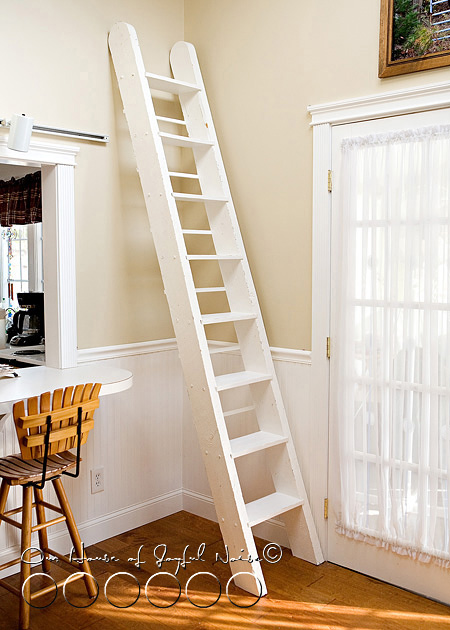
ladder-book-shelf-8

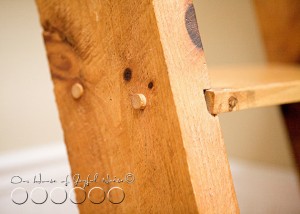
We painted it white.  After adding a few little pieces you may notice, which you’ll understand why in a moment.

Now, if you know me, I’m really not down with perfectly painted stuff.  I like things old. Beat up. Worn.
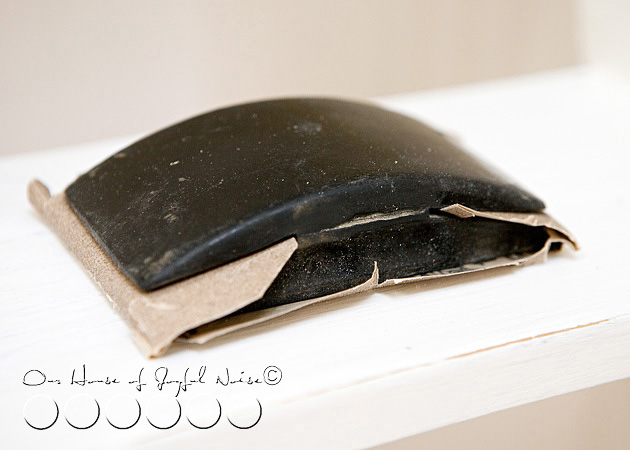
ladder-book-shelf-6
So I took a sandpaper covered block, and ‘had-at’ the newly painted ladder.
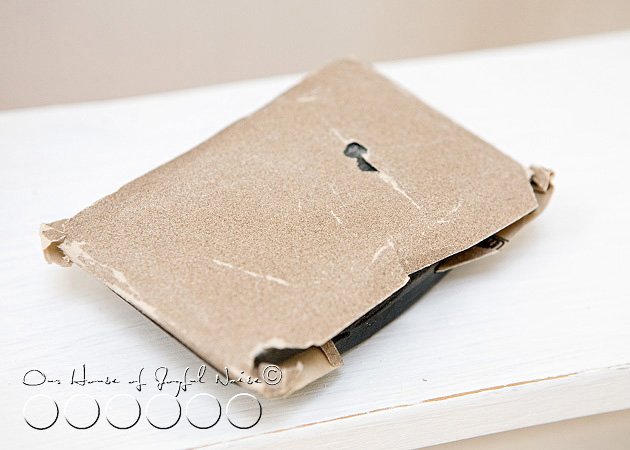
ladder-book-shelf-7 And wore a hole in it. : )  (The sandpaper of course. Not the ladder.)
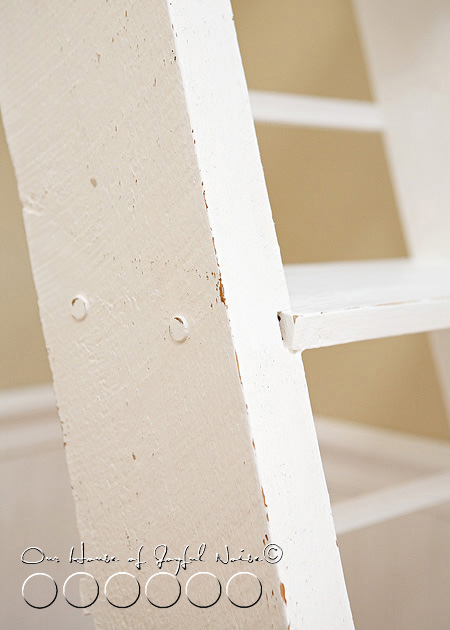
ladder-book-shelf-9
I did my best to make it look……well, not ‘just painted’.
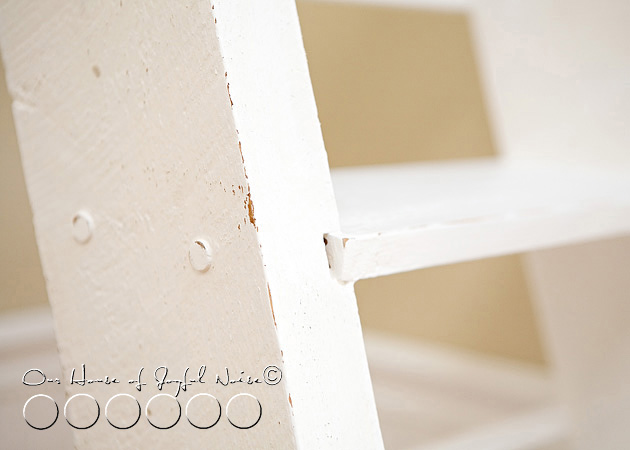
ladder-book-shelf-10
But I’m not any kind of expert at distressing pieces yet.  I’m sure it needs something more.  A glaze of some kind, to crack the paint some, or something.  I don’t want to yellow it, as a lot of the ‘new paint’ around is white as snow.  But, I plan to ask a friend what more I can do, to push it a little more.

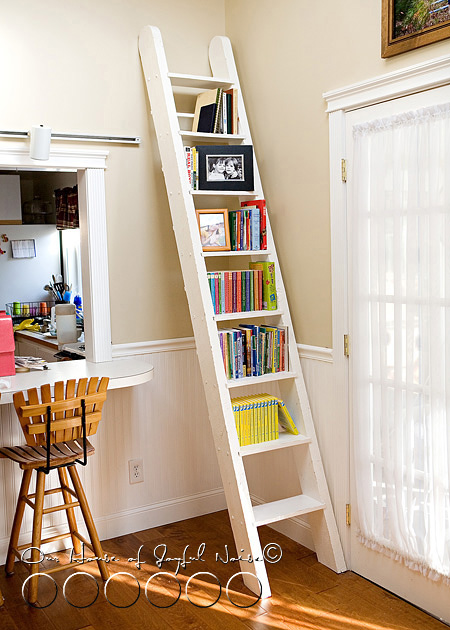
But the purpose of painting the ladder, and adding the little crossbars to the back, was to use it for….
ladder book shelf
Books!!

With the exception of when we were actually using the ladder every day to access the loft, we’ve always had photo frames and little things displayed on the ladder. I just took them off before photographing it before.  But, we are swimming in books around here.  So I thought it would be a creative and useful transformation.
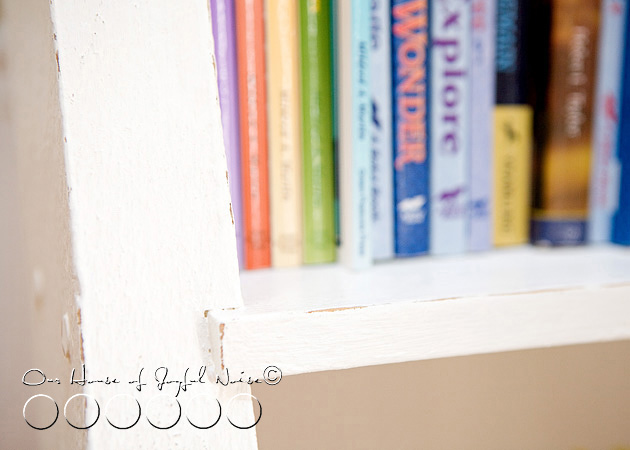
ladder book shelf
Mostly it’s the kid’s books on the ladder for now, with the bottom step left open for stepping up and reaching higher.   There are lots more books, that will be relocated to the ladder, soon.  And we have more book shelving that Michael just installed as well, that will be for another post.
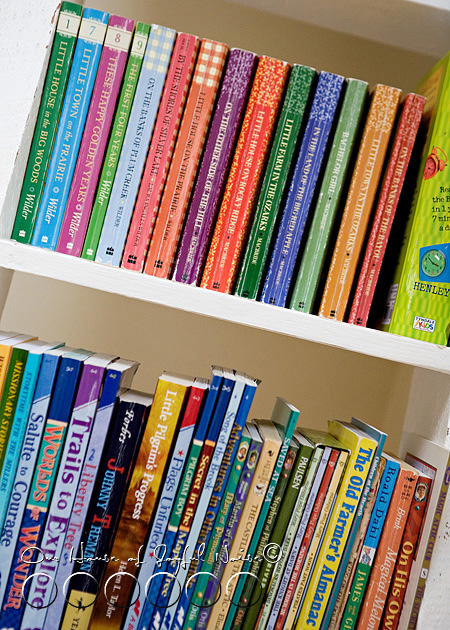
ladder book shelf

Because not only do the kids have more reading books, but then there are my own, and some of my mother’s too.   Books of all kinds.  For leisure, for education, for how-to, for you-name-it.  As I said, we’re swimming in them.
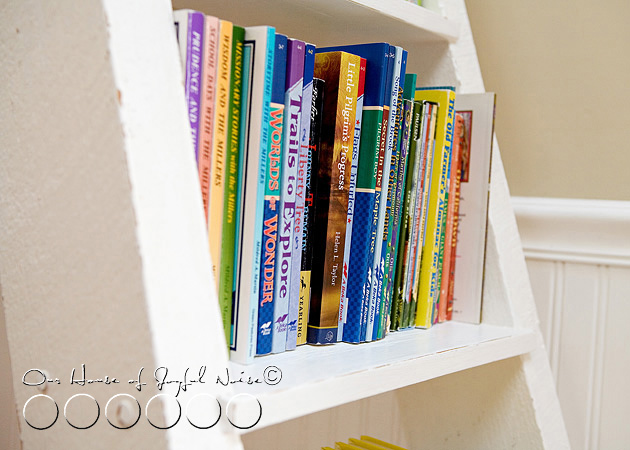
ladder book shelf
I actually filled a couple of boxes recently, with books to get rid of.    We have cabinets filled, and boxes downstairs, of more books – still needing sorting.
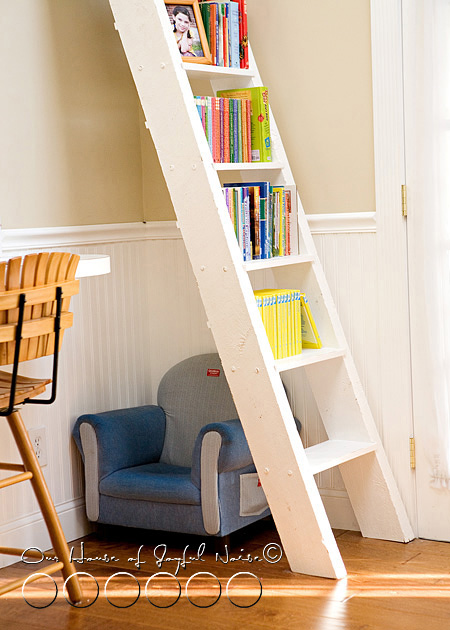
ladder book shelf

So this ladder transformation I think was a wise one.   The ladder now has purpose.  I’m sure it feels more worth, in it’s day to day life.  We all need purpose.  Don’t you think?
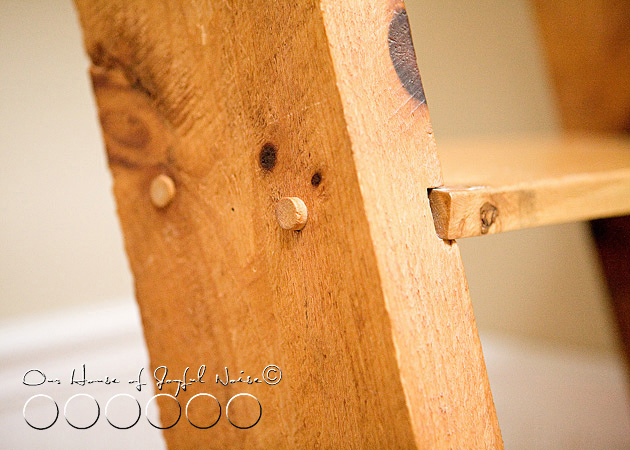

ladder-book-shelf-3
I have to admit:   I’m feeling a little pang inside, about painting over this beautiful wood.

Do you think that was a mistake?
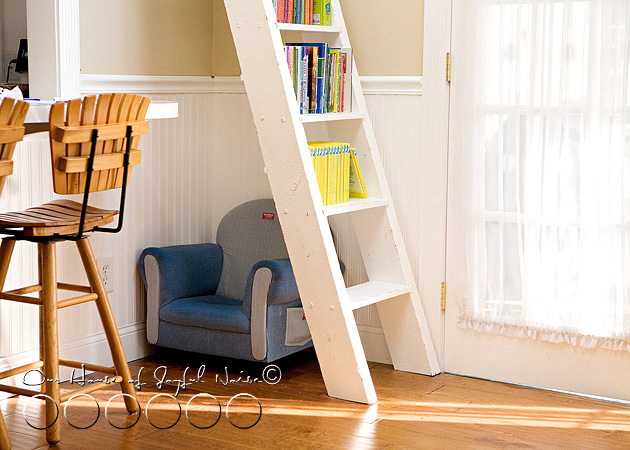
ladder book shelf
But I do think the corner as a whole, looks a little cheerier, and more in keeping with what the rest of the house has going on.  Because we’ll probably be doing something with those wooden breakfast bar chairs too.  Not painting them white.  But they need stripping of the shellac , or something.

Anyway….
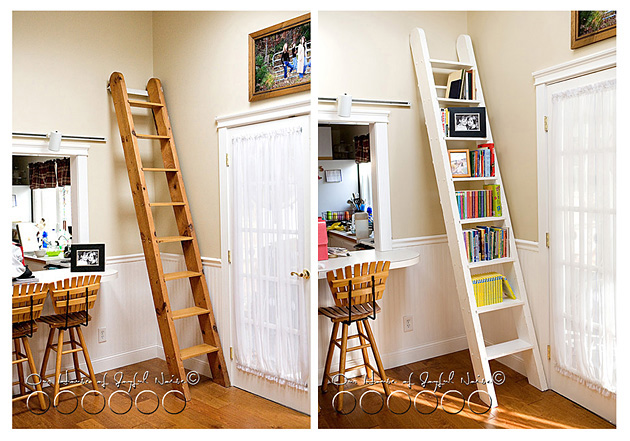
ladder book shelf

BEFORE                                                                                       AFTER

What do you think?  A good idea?   And are you cringing, because I painted that wood?  Go ahead and tell me the truth.  I think I can take it.


Save

Save

Save

Save

Filed Under: Home Decor, Home Improvement, Home Projects, Organization, Re-Purposing, The Homestead Tagged With: book-storage-solution, creative-bookshelf, ladder bookshelf, ladder-makeover, ladder-repurposing, repurposing

Let’s Talk Trash | A Solution to Hide Your Kitchen Trash

March 25, 2010 By Laura 12 Comments

In this post I’m going to do a little personal venting, and then I’m going to show you the solution to our kitchen trash problem!

kitchen-trash-solutions-7

Ask anyone who lives with me. I’m a sheer-compulsive-pet-peeved- maniac about certain aspects of our home.  The sudden sight of clutter is one. It sends me over the edge.  Like a sunny 30 mph Sunday drive, to a buck-60 in a clap of thunder.

I’ve analyzed my seemingly over-reactions enough, to figure some of myself out.  The sight of clutter, instantly clutters my mind.  An organized mind of thoughts and agendas is something I work very hard at. So I don’t need some tall and disheveled pile of paper to come along, and mess with me.  See what I’m sayin’?

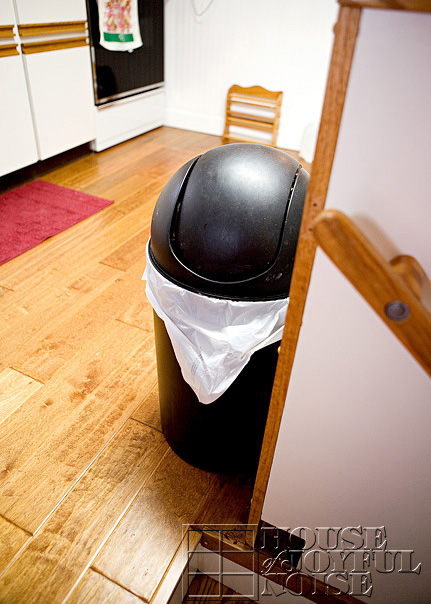
Another personal demon I’ve been determined to beat, is the trash.  I know where this issue started for me too.  I was living at someone else’s house at the time. I was in the kitchen one day, went to throw something away, and the sight of that cover of that plastic rectangle trash can stopped me in my tracks, and grossed me right out.  Nasty as all get out.  Thank goodness it had one of those levers you could step on to open it, but I found myself holding my breathe even as I did that.  Yuckity-doo-da.

I never forgot that. The haunting of it has followed me right into my own home.  You may understand the thought process for example, that your own bathroom, for instance, as in need of a cleaning as it may be, never seems quite as dirty as say, a public bathroom. Right?  One might apply the same perspective to their trash can covers.  In your own home, it may be like, “Oh, that should be wiped down.”  In someone else’s home, or worse on the sidewalk in front of the storefronts, it’s more like, “OH. GROSS.  I am NOT touching that if I can help it!”  Am I right?  (O.K….if it’s just me, don’t tell me. Sometimes I like to make believe I am one with the world.)

At any rate (….my mother used to say that phrase ALL Of the time.  I don’t get it. But I still say it now.)  At any rate, I see the clutter in my home, and the yuckity-doo-da on the trash covers, through the eyes of make-believe unexpected visitors. I really do not want someone to come into my home, and be repulsed.  Know what I’m saying?  Yes…I COULD go the therapy route.   But why not just fix the problem instead, so we ALL can be comfortable?
 

kitchen-trash-solutions

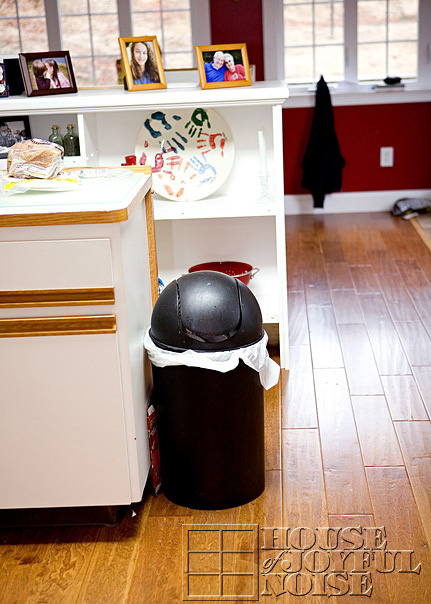
So…that brings us to our own kitchen trash container.  I’m going about my happy day.  I go to throw something away, and I see that cover.  So here we have already gone from sunny, leisure Sunday drive, to a buck-60 in a clap of thunder.  Then I try to put something IN, and the trash-a-plenty keeps it from opening properly. Ggrrrr.  Once I do finally get said-trash in, then the cover is stuck open, on some trash.  Now I have to touch it a SECOND time.
I’m ready to throw the whole thing off a cliff at this point.
–

2_stairs

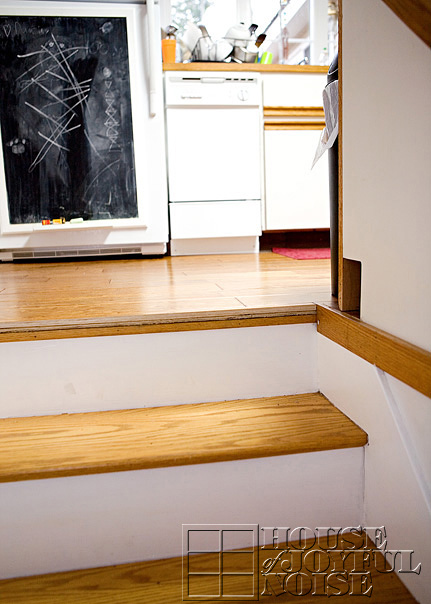
As IF I’m not self-conscious enough, this inevitably also becomes part of that ‘fun and relaxing experience’ I try to give my clients, that I photograph in my studio.   We come up from a good time, after an exciting and fun photo shoot in my studio, and we begin to climb the stairs when we are done, with me leading…..and the sun sneaks behind a cloud….

kitchen-trash-solutions-5

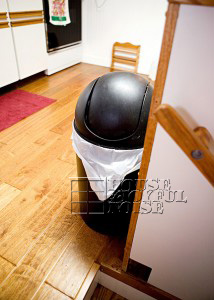
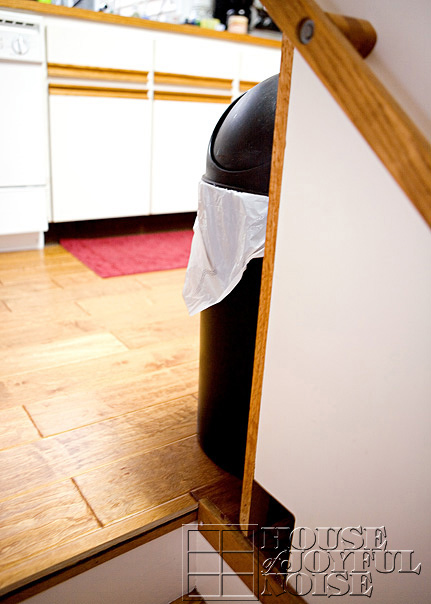
……there it ISSSSSS.  The trash.  Practically in our faces as we come up the stairs.  I notice the sticky spot.  I think I might smell something.  I keep the conversation going with a little more enthusiasm, as my distraction tactic.

kitchen-trash-solutions-6
But really.  WHO is going to miss that thing?
–
Oh.  And then there is my ‘participating ingredients’ shots I do when I am planning a recipe post for the blog . . . .

5

I get it all set up. I set my camera.  I look through the lens.  And it’s not the ingredients I see first.  All I see is the FREAKIN’ TRASH IN THE BACKGROUND!  Oh my gosh!  Somebody move that thing!!  The light seems to have disappeared, and I up my ISO.

So I was heck-bent on a solution, for this trash-matter. (Yes, there is such word as heck-bent.)   I have spent many a moment, just standing in this room or the other, brainstorming on a solution.   And I’ve had a successful brainstorm or two, as a result of my desperation.

6_corner-shelves-repurposed

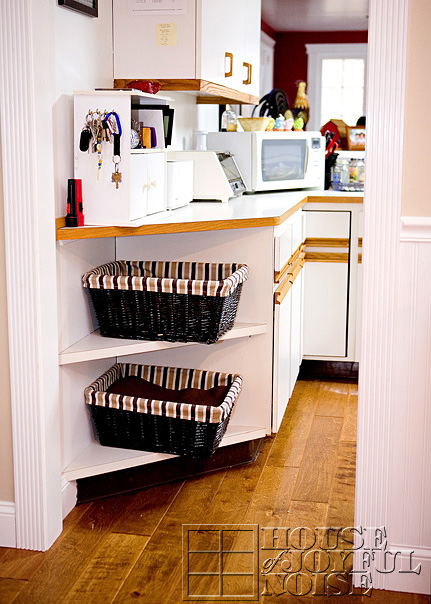
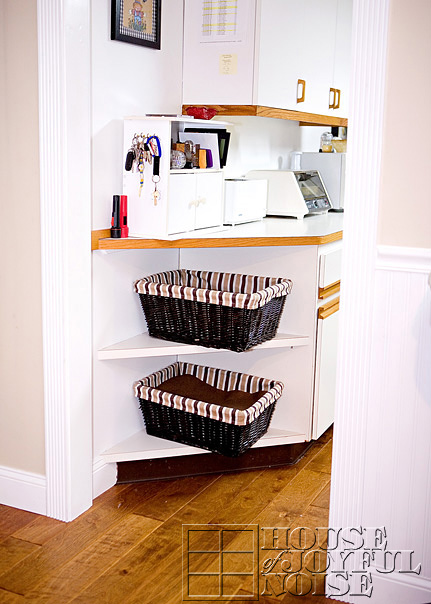
As you enter our kitchen from the front of the house, we have these corner shelves.  When we first saw this house and bought it, I thought these shelves were as cute as the dickens.   Another little unique feature to our first home, to display cute little things.   Most recently, I have had these storage baskets on the shelves, because I really needed somewhere to put ‘stuff’.  Like extra phone books we might need sometime.  I did get past that one, and just throw them out. But then….the cover would get stuck open. :  (  Or, the umpteen photo lab invoices I get.  Those piles of paper I mentioned before, or questionalbe mail. Etc.  It was a great idea for awhile for another place to stick things, until I saw the clutter in the baskets!  So I got creative and bought matching table place mats to throw on top.  ; )    I was feeling super-clever until one day, my Dad was here, and as he walked by for the 100th time that day he said, “What are these things anyway”.   I told him-storage baskets.  He said, “OK, but why are those things on top?”  So I told him; to cover the clutter of course.   But by his, “Oh. O.k.”, and the moment he took to take that in,  I got the feeling he thought that was tacky.

Now, I am quite sure my father doesn’t really know ‘tacky‘ when he sees it.  So I was concerned.  About my basket covers. Not him.  Hmmm.  We have a problem, Houston.
7_corner-shelves-repurposed

Once upon a time, I kept a few cook books on these triangle shelves.  They were awkward items to keep there.  I had a few decorative kitchen items too.  All of it could have been cute.   If no one (like me) looked closely enough at the dust that collected on the shelves and the things I kept there.

I had better use for that space.   I told Michael I had a good idea for the kitchen.  He’s all ears now-a-days.  He’s come to realize the genius that I am with my ideas.   I knew he’d see the light, in time.     ; )

–

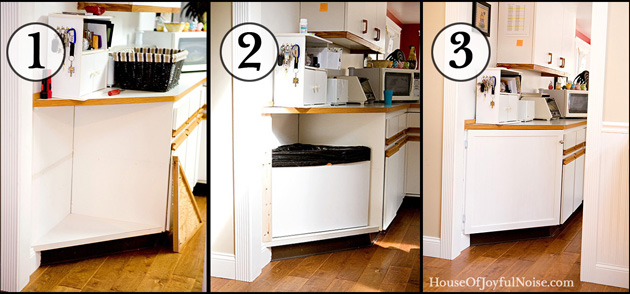
1. So Michael ripped out those shelves and supporters, and took some measurements.

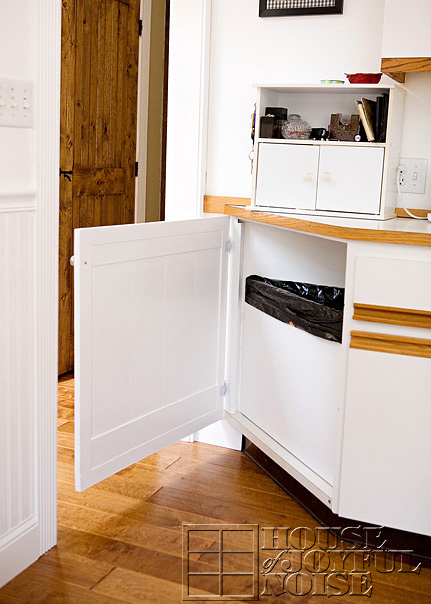
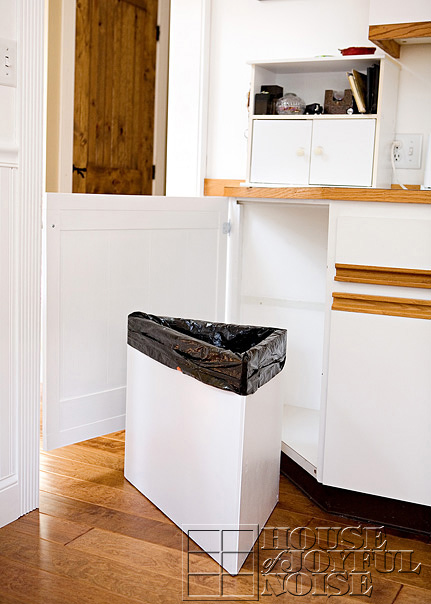
2. Then he built a custom-fitting container.  That was, of course, after he accepted the fact that he would have to buy larger trash bags from now on, and that would mean fewer in a box also.  That took a bit for him to live with in his mind, but he came around again.

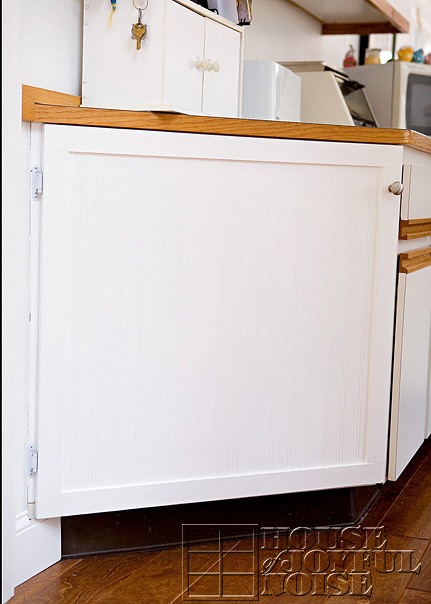
3. To finish it, he built a nice door for the cubby.  (And now, what I see is that counter-cabinet above it, that I despise. It’s next on my hit-list. But we won’t go there today.)
kitchen-trash-solutions-1-2-3-8

kitchen-trash-solutions-1

It’s really nice though.  I could look at it all day.You know how you do that, with new things in your home?  I might tomorrow, too.

–

kitchen-trash-solutions-2

It opens perfectly quietly.  And when you throw trash in, you can’t miss, or not be able to close the door again.

–

kitchen-trash-solutions-3

The container itself,  pulls right out, for easy trash bag changing.  There is felt buttons on the bottom, so it just slides in and out softly.   The door closes completely silently.   There is a spring hinge on it.
–

kitchen-trash-solutions-4

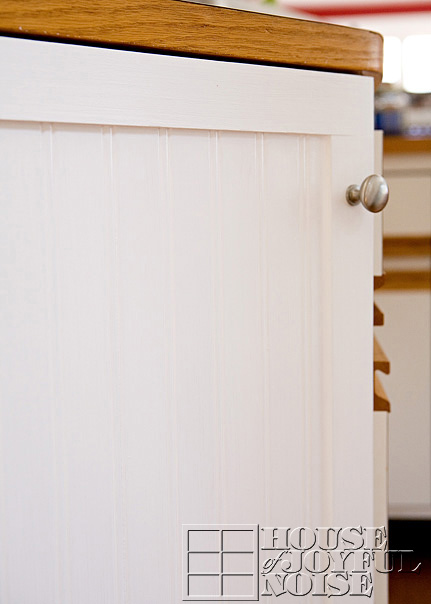
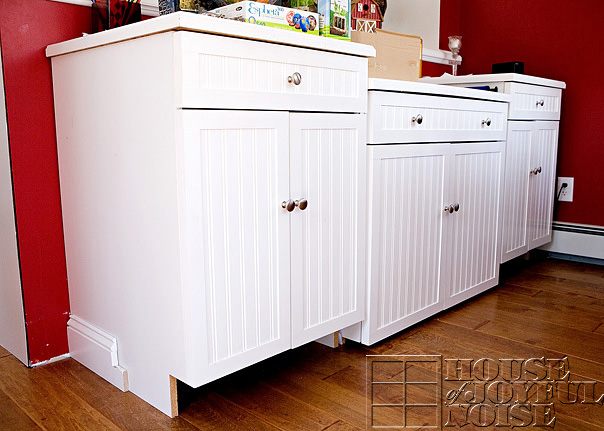
The door is built with a wainscot paneling face, framed out, and a brushed nickle knob.   The wainscot bead-boarding flows the lower walls of our home in the sun room, flowing right into the main living space under the breakfast bar, and wraps around right into the wall of the kitchen.

YOU can do this too, in any floor level kitchen cabinet, to hide your own trash container!  You can build a custom fit trash bin, to maximize your trash cabinet size! Just be sure a trash bag will fit your new container.  Or, just stick your current trash container in a cleared out cabinet.

–

15_school-room-cabinets

The trash door now also now matches out school room cabinets Michael did.  They still need kick-board faces on the bottom.

–

17_kitchen_cupboards_lower

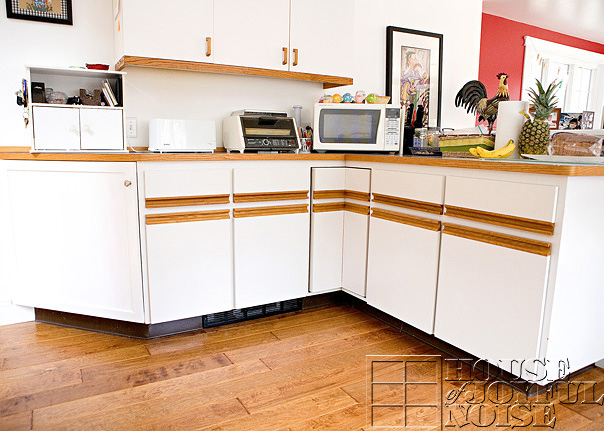
 In time, we’ll be replacing these kitchen cabinet faces with the same  doors.  They aren’t TOO bad looking.  And thank goodness, because who knows if it could be years before they get done.   But, they don’t really say ‘farm house’ to me.  And remember…I’m pretending I am living on a farm.   Minus anything gross.
–

18_notrash

The best part?   No UNSIGHTLY trash can to look at anymore!  I can’t tell you how happy this makes me. I ride these joys for weeks on end.  And some days, when I need a little pick-me-up to think about how far we have come, I say out loud to no one in particular……”Remember when we had that ugly, nasty-covered trash can in the kitchen, right by the stairs?  Man, WHAT were we thinking all of those years.  HOW did we even let people come over?“

19_openfloor

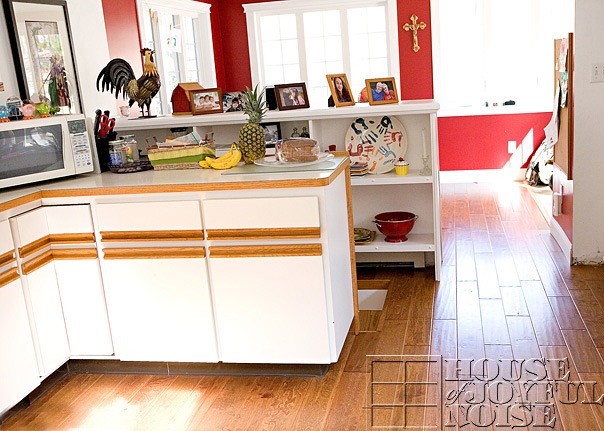
There is no longer panic coming up those stairs with my clients. My kitchen floor plan is wide-open, and the eye does not stop in some black sticky-topped container.  It’s a sunny, leisure Sunday drive.  Not a cloud in the sky looking east-ish.

See?  I am my own therapist.  And all it costs me is a little fluttering of the eye-lashes, and asking Honey, nicely, if he”ll make my new little dream come-true.

It’s a beautiful day in the neighborhood.

Who wants to come over and throw somethin’ out with me?!

Save

Save

Save

Save

Save

Save

Filed Under: Home Improvement, Home Projects, Organization, Re-Purposing, The Homestead Tagged With: hiding-your-kitchen-trash, home improvements, kitchen improvement, organization, trash-can-ideas, trash-solutions

Blessings of Wood / Home Heating with Pallets

December 19, 2009 By Laura 3 Comments

I think all of us New Englanders can agree, that it’s not cheap to heat a home in the winter seasons. Especially larger or older homes. So sometimes, we need to keep the heat thermostat down a bit, double up on clothing layers, or find a cheaper way to heat our home. We’ve done all of the above.  Today we’re sharing one way we sometimes heat our house, for FREE. If you are able to burn wood, consider burning and heating your home with free hardwood pallets, if you can find them!

a
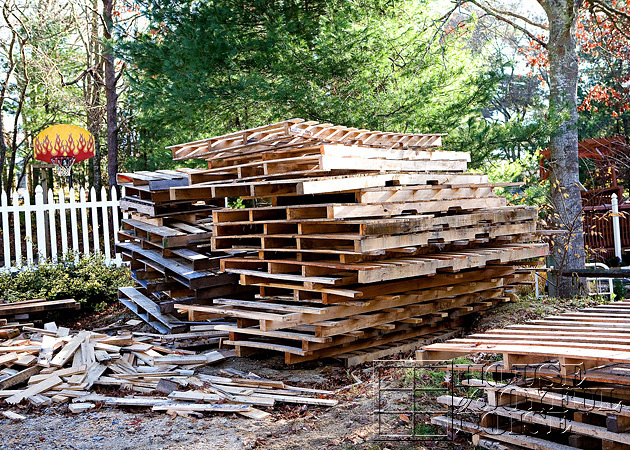
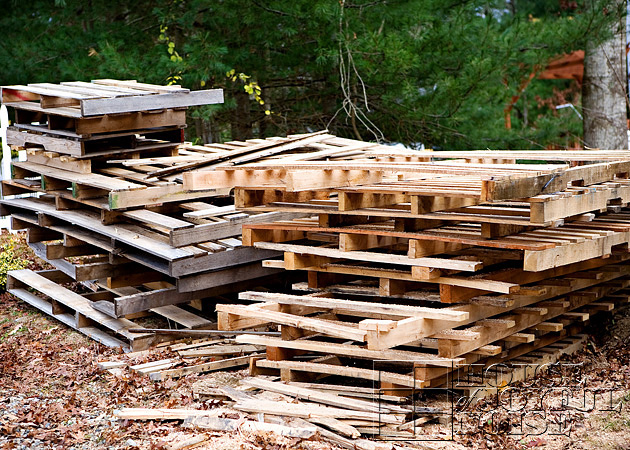
This is often what one side of our drive-way looks like, as of the past few months.  Sometimes, the piles of these pallets are a little higher, and sometimes a little lower.  But one thing is for sure – we’re always happy to see some out there!
–

heating-with-pallet-wood

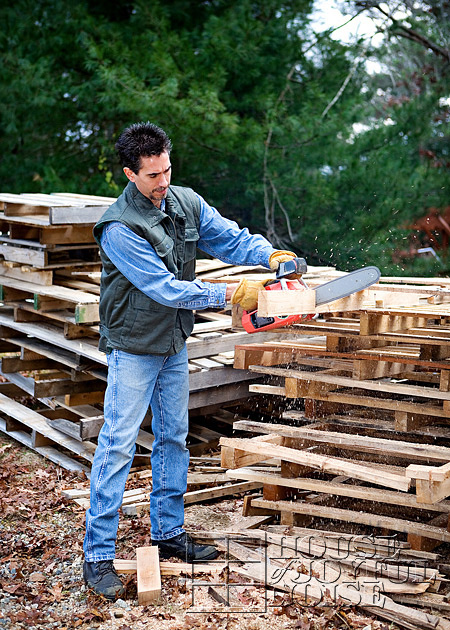
Because these pallets heat our home, for free.  Well….maybe for a little labor.  Although I doubt Michael would call it that.  Michael’s supply company for his business, sometimes gives us stacks of pallets, that they want out of their warehouse.  When they are delivering down in our area anyway, they put a stack or 2 of these on the truck, to be delivered to us.  Most of the pallets are oak, or other hard woods.  Sometimes, there’s a little pine too, but that’s o.k.  It all burns in our wood stove!  But hard wood does burn longer and hotter.

heating-with-pallet-wood-1

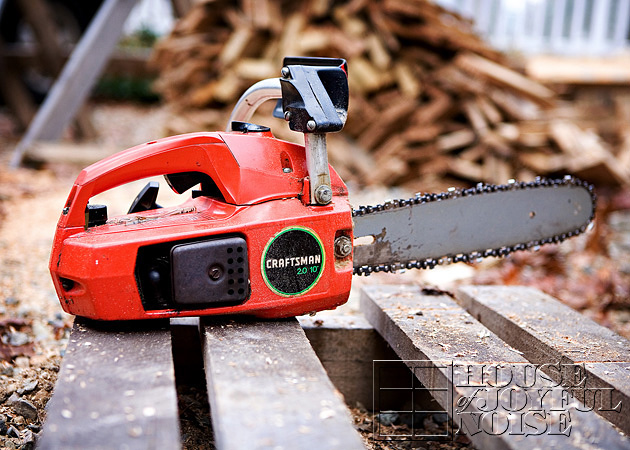
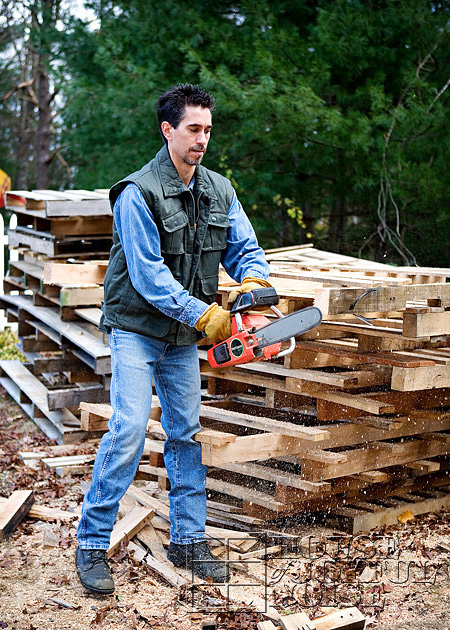
The pallets just need to be cut up.  But Michael is always happy to fire up ‘Little Red‘, and cut wood.  He loves doing it.  (Seriously. We all can tell.)  As a matter of fact, he’s out there cutting up pallets right now! On his birthday no less.  Even the kids said awhile ago, “Daddy wants to go out and cut wood on his birthday.”  lol.

heating-with-pallet-wood-3

heating-with-pallet-wood_
Can’t you see that manly-expression of satisfaction on his face?  I can. lol

He’s got an ax now too….so he’s even happier!
–

heating-with-pallet-wood-4

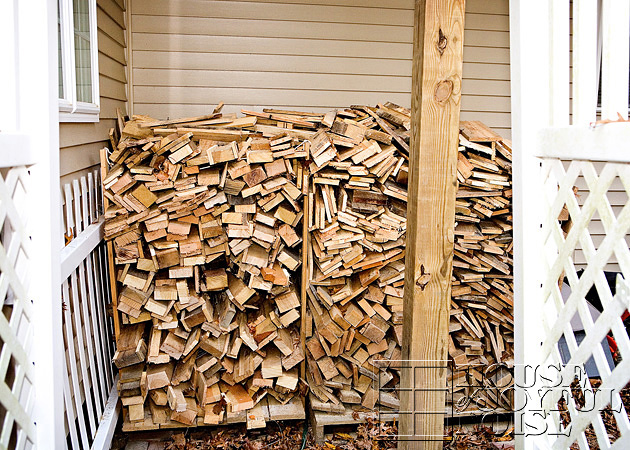
Here’s just one pile we’ve got going.
This one he keeps stacked pretty high, because he loves to just crank open that window above, and grab some wood for the stove. lol
–

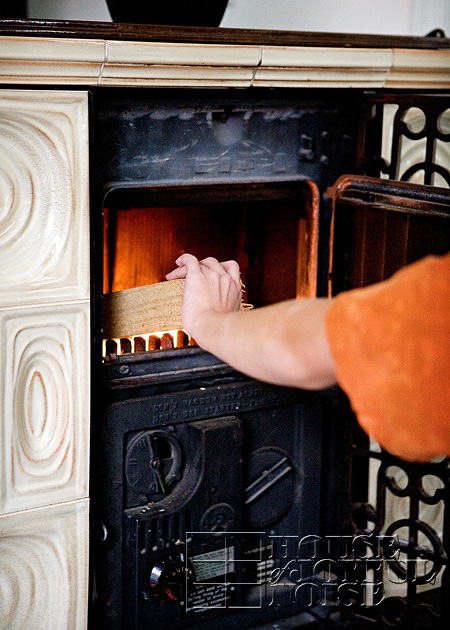
There is usually a great big pile on the floor in the house too, just to the right of the stove.

You may have wondered about all of the nails in the pallets.  Michael doesn’t bother pulling the nails out, most times.  He’s a clever time saver;
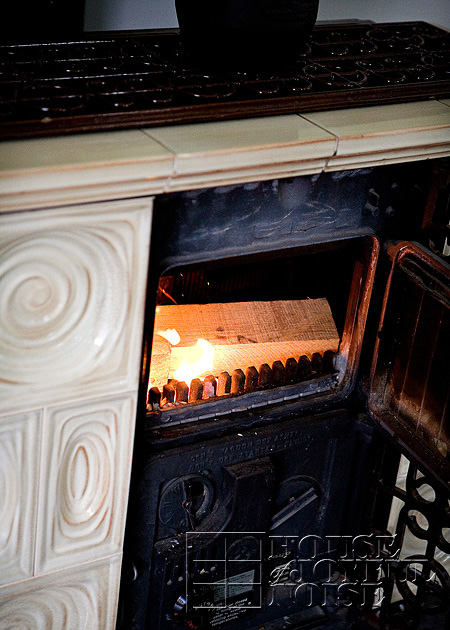
TIP: When the stove cools down from previous fire(s), he has this magnet he sticks in to the floor of the stove, and it picks up all of the nails that fell out of the wood as it burned. ; )

heating-with-pallet-wood_5

Our 2-floor house is not small, by any means, anymore.  And the living room ceiling is high.  So it can be costly to heat, with gas.  This stove really helps out with that though.  Michael has a couple of fans going, and the heat fills the house, and even blows right upstairs and heats up there, too. The entire upstairs is the new part of the house, but we don’t happen to have the heating system completely intact up there yet. Because honestly, we’ve gotten along fine without it.  After all, our stove is burning on any given cold day throughout the cold season, and most of the night.  It gets fired right back up, first thing in the morning.  We LOVE our wood stove, if you haven’t read that before here. (I reckon some of you are sick of reading that, by now. lol).

heating-with-pallet-wood_6

But this post isn’t about our stove again.  It’s about the WOOD!

We also are blessed with wood from another source.  There is a sweet old man that has lived at the end of this street for a very long time.  He and his wife are elderly now (although he doesn’t seem to know it yet, at 89 years old), but he and his wife raised eleven children in their home down there.  Of course, their children are all grown now, and they have probably 100’s of grandchildren, or something close.  Anyway, this sweet man has called numerous times, or left messages, that always go the same way:  “Michael! Lenny.  I’ve got wood down here for you. Come and get it.”   Trees that he took down himself.  Michael always catches him doing something labor-intensive, and goes over to help him.  Or, other times Michael has very sneakily snuck in like an elf, and finished a job he saw Lenny working so hard at during the day, so Lenny wouldn’t have to.

So think real hard, about where you can get some free pallets, or other wood!  If you see piles of them out back behind local warehouses and big chain stores, stop in, and ask to speak to the manager about the possibility of taking them off their hands. Look for piles of broken pallets beside dumpsters. Go for a walk on a sunny winter day, and see what old dead tree limbs you can find, throw it in the back of your truck. It may need to be seasoned for a bit back home, but you’ll appreciate it as free heating wood, at some point.

j_

Well, as I close this post, we’ve got a snowstorm on the way!!  The funny thing is, we haven’t even had a FLURRY this cold season, yet.  We’re just going to kick it off with…..who knows how much.  Supposedly a lot, but it depends on which weather report you read.  As Michael says, after reading the different predictions, “Basically, we’ll be getting anywhere from a dusting, to several feet of snow.”

One thing is for sure.  We’ll be home.  And cozy as can be.  Well….except for the kids sometimes, who will probably spend some of that time playing out there in the first fallen snow.  Perhaps they’ll build me another snowman, that I can admire outside my windows, by the fireside.

I often wonder who else always has a fire going in their home during cold seasons.   And if anyone loves it as much as we do. Do you?  If so, we hope this post gave some of you wood burners out there some new ideas, about cutting the cost of heating your homes more affordably, or for free.
Wishing you warm winters!

Save

Filed Under: Budget, Re-Purposing, Seasonal Home decor, The Homestead, WINTER Home Decor Tagged With: budget heating, burning-pallet-wood, free-wood, heating-home-for-free, heating-home-for-less, heating-home-on-a-budget, heating-homes-in-New-England, winter-heating, wood-stove-tips

How to Make a Beautiful Palm Cross – Tutorial with Directions and Photos

April 5, 2009 By Laura 3 Comments

Hi Friends!  Are you ready to make a beautiful Palm Cross, with your Palm Sunday palms? Well we are ready to show you, with this step-by-step tutorial, complete with directions and photos!

how to make a palm cross

Today has begun  Holy week, so as we move through it,  I am sure it’ll slow down around here a bit once again, as we help bring our children, in a mindful, prayerful and heartfelt way, through the most significant events of Jesus’ life, which led to the willing sacrifice of His own life, for us.

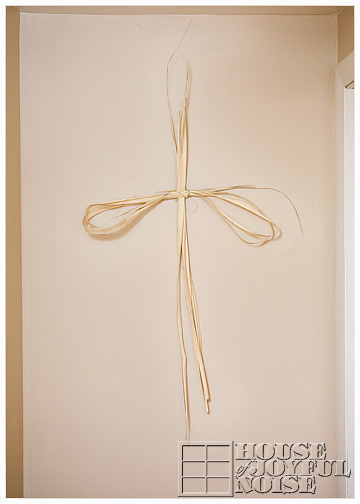
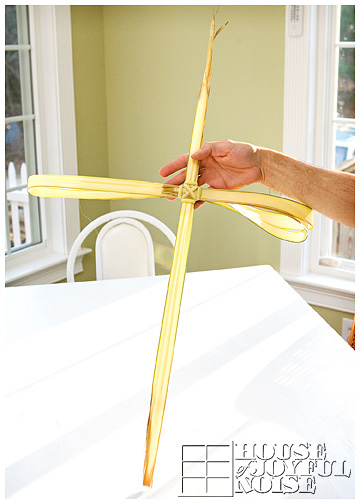
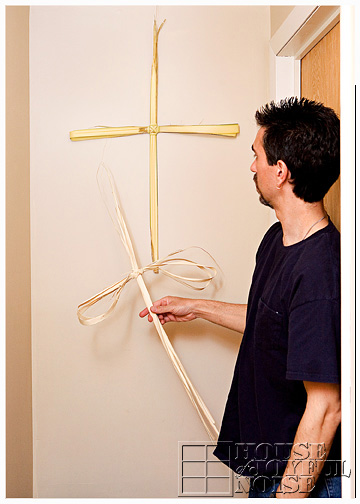
Last year on Palm Sunday, Michael took the fistful of palms we brought home from Mass, and created a big cross with them for our home.

Last Year’s Palm Cross

old-palm-cross

Our family has enjoyed it so much throughout the year, that the kids and I wanted him to make another new one with the palms we brought home today.  So as he did, I took photos, with the thought that maybe some of you may want to create one this way as well, with your own palms, for your own family home.  It is a difficult thing to explain in words only, so I am hoping the photos will help show you how to do it.

How to Make This Beautiful Palm Cross


how to make a palm cross

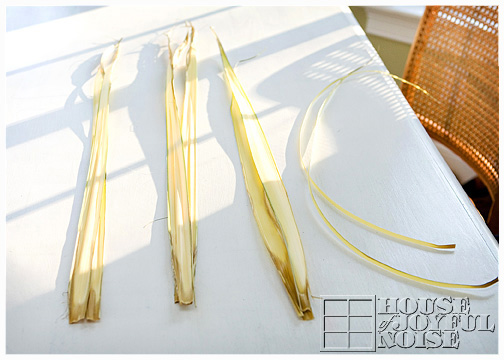
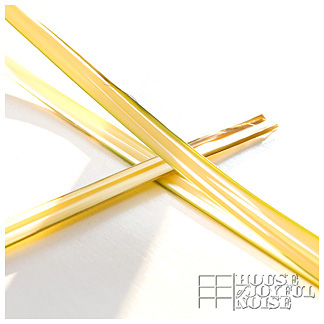
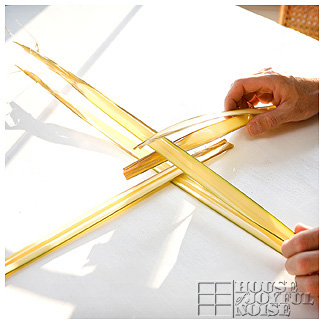
First, he takes 3 sets of 2 palms each, and at least one good palm whisp.

how to make a palm cross

In the area the intersection of the cross is, he put the ends of one set of palms alternately layered in between 2 of the others, going in the opposite direction of course.

how to make a palm cross
Then he takes the last set, and layers those for the other side.

how to make a palm cross
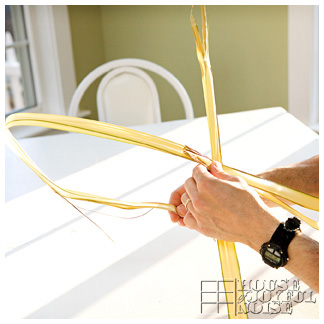
Pinching it all together at the intersection, he takes one side of the palms and makes a loop with them to the back.

how to make a palm cross
He secures that with his fingers to the middle as well, and then does the same with the other side.

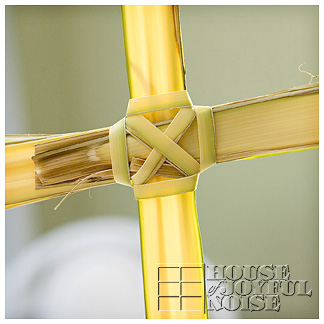
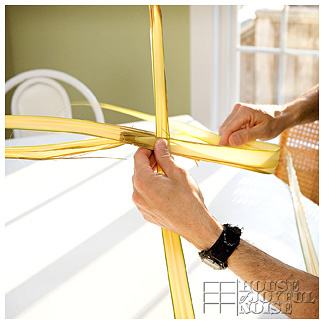
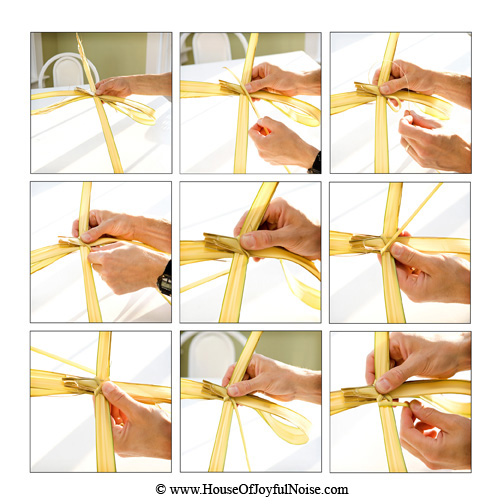
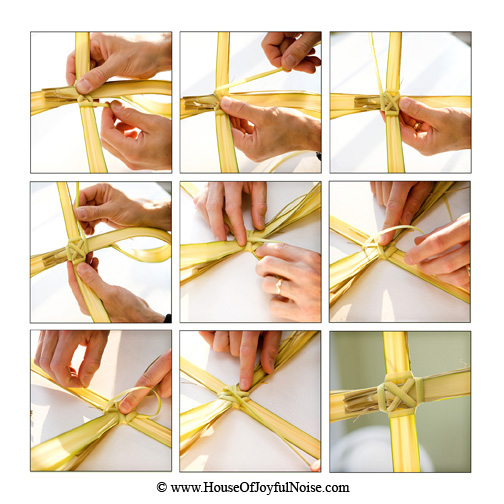
With the formed cross in hand he takes the wisp and starts wrapping the intersection of the crossed pieces, to secure them tightly.

The below collage, to be viewed left to right in rows top to bottom, is not every single move. It just gives you a general idea of how he wraps it around, crisscrossing, and going up and down as well.

how to make a palm cross

how to make a palm cross
When he only has about 2 inches left, he turns the cross over, and places it on the table, and holding the wrap tightly, he takes the remaining end and feeds it under the wrap a couple of times, and then just pulls it tightly. The front of the middle of the cross then looks like the last square in the above collage.That’s it!

how to make a palm cross

new-palm-cross

We’re sure you all have found various ways to make your own beautiful crosses with palms as well, or perhaps you just stick them behind the crucifix of your home, as we have done for many years as well. We would love for you to share how you do display your blessed palms in your home, what you may make with them, or any traditions you may have for Palm Sunday in your family.

We hope you had a happy and peace filled Palm Sunday .
May God bless you all, this Easter season!

Save

Save

Save

Filed Under: Crafts & Creations, Faith, Faith/ Catholic, Home Decor, Kids Arts and Crafts, Re-Purposing, The Big Picture, The Homestead, Traditions Tagged With: Catholic, Catholic-blogs, Catholic-families, Catholic-holy-week, Easter, how-to-make-palm-crosses, palm-cross-tutorial, Palm-Sunday-project, sunday-palms

  • « Previous Page
  • 1
  • 2
  • 3
  • 4

We are wicked happy to have you here! We hope you find much inspiration, help, humor and enjoyment here.


Archives


POPULAR POSTS

* * * * * *

SUBSCRIBE to House of Joyful Noise blog! Every new post, delivered right to your email box!


Privacy Policy

Amazon Affiliates

Never at any additional cost to you, we may earn a small commission for our endorsement, recommendation, testimonial, and/or link to any products from our website. Your purchase through our links helps support our family, while sharing with you the products we authentically use and recommend, for various ideas, and letting you know where you can purchase them. Thank you for your support!

[footer_backtotop]

Copyright © 2025 HouseOfJoyfulNoise.com · Genesis Framework by StudioPress