• HOME
  • {A}’s Chipmunk Training Archives

 Homepage

  • The Homestead
    • Home Projects
    • Home Improvement
    • Home Decor
      • Seasonal Home decor
        • FALL Home Decor
        • WINTER Home Decor
        • SPRING Crafts and Creations
        • SUMMER Crafts and Creations
    • Our Chickens
    • Gardening
    • Organization
    • Re-Purposing
    • Furniture Refinishing
    • Budget
  • Crafts & Creations
    • Seasonal Home decor
      • FALL Crafts and Creations
      • WINTER Crafts and Creations
      • SPRING Crafts and Creations
      • SUMMER Crafts and Creations
    • DIY (Do-It-Yourself) Project
    • Kids Arts and Crafts
    • Homemade/Handmade Gift Ideas
    • Holiday Crafts
    • Fan Pulls
    • Free Printable/Downloadable
    • Sewing Projects
    • Giveaways
    • Business Features
  • Recipes/FoodFun
    • Breakfast
    • Lunch
    • Main Dish
    • Sandwiches
    • Appetizers
    • Slow Cooker
    • On The Grill
    • Side Dishes
      • Soups
      • Salads
    • Baking
      • Breads, Rolls and Muffins
    • Snacks
    • Treats
    • Desserts
    • Drinks
  • Homeschooling
    • Elementary Homeschooling
      • Elementary Homeschooling READING
      • Elementary Homeschooling MATH
      • Elementary Homeschooling LANGUAGE ARTS
      • Elementary Homeschooling SCIENCE
      • Elementary Homeschooling HOME ECONOMICS
      • Kids Arts and Crafts
    • Middle School Homeschooling
      • Middle School Homeschooling SCIENCE
      • Middle School Homeschooling HOME ECONOMICS
    • Language Arts
    • Math
    • History / Social Studies
    • Geography
    • Foreign Language
    • Field Trips
    • Games
    • Nature Study
  • The Big Picture
    • Life In General
    • Celebrations
    • Faith
      • Into the Light; The Series
    • Giveaways
    • Reviews & Sponsors
  • Photography & Lettering
    • Photography
    • truck lettering
    • vehicle graphics
    • Newborns
    • Kids
    • Engagement
    • High School Senior Pictures
    • High School Senior Pictures Sneak Peeks

A Christmas Fan Pull | Crafts

December 15, 2009 By Laura 6 Comments

The other day,  I found myself gazing at this tiny,  intricate, beautiful little ceramic egg, that I spontaneously hung from our fan pull in our sun room one day, quite awhile ago.

b

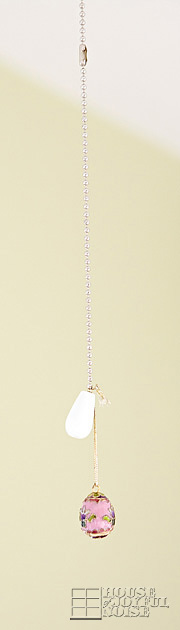
I wondered why it never struck me as a little Easter decoration until then, and how it really didn’t look quite right hanging there, the way it was.

Christmas fan pull craft

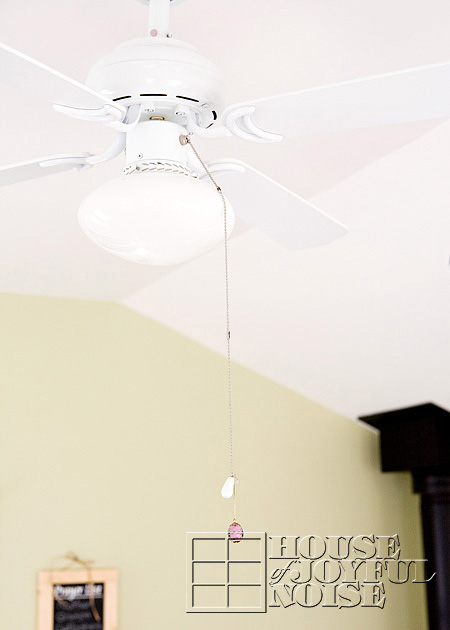
It bothered me a tad more, when I realized Christmas was really coming very soon.   I needed to do something about the egg, hanging there.  I had a little more time on my hands than I have had for the past few months, so I decided I would make a Christmas fan pull, to replace the egg.

Then I thought about the year ahead, and my imagination ran wild.  You all know I love holiday and seasonal themed ‘anythings’, and especially for my home decor.  So, if all of the ideas in my head come to be, you all will be seeing some more themed fan pulls crafts around here, as the coming year progresses.  I’ve got a whole array of a collection of fan pulls in my head, and I think it’s a lovely idea to have that collection, to change my fan pulls with the holidays and seasons as we roll through the year.

So here is my first fan pull craft, for Christmas.  It’s not quite the vision I had in my head, only because I didn’t see the beads in the store, that I created in my head. (I don’t get why I can never find the stuff I make up?  I mean, if  “I”  thought of it…..). I also sort of winged the construction of it this time around, but I am sure with experience will come…near perfection.

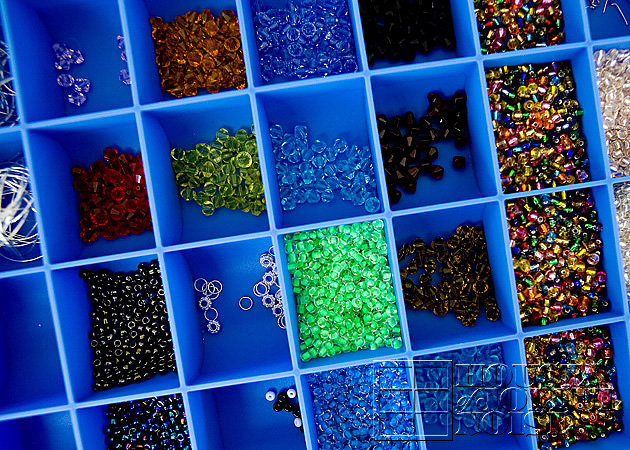
Here’s all I needed at the store for this craft:

Christmas fan pull craft

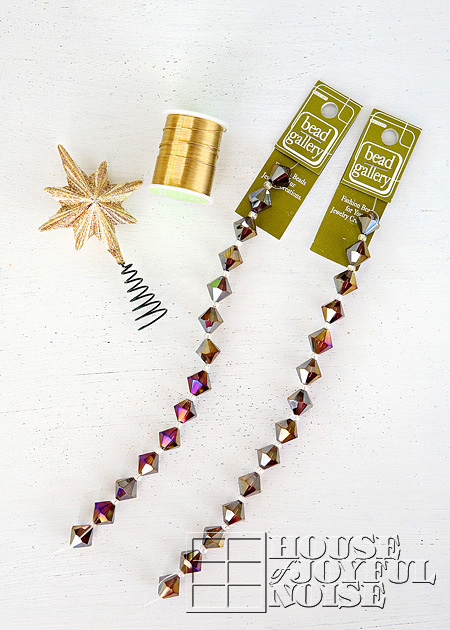
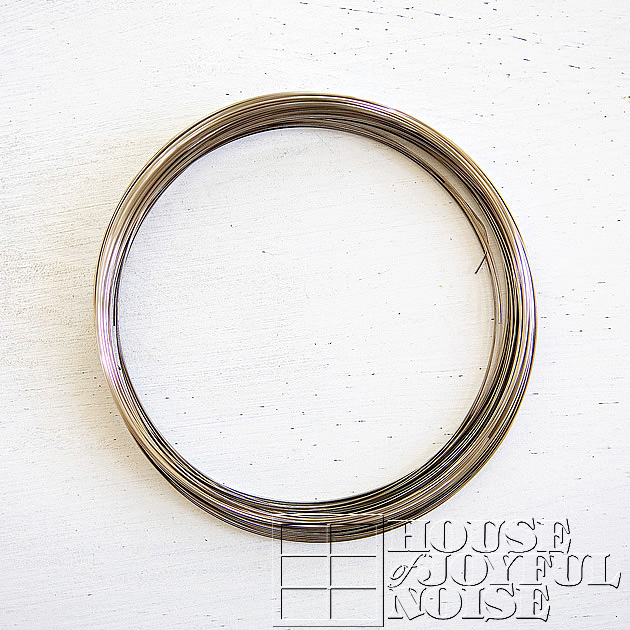
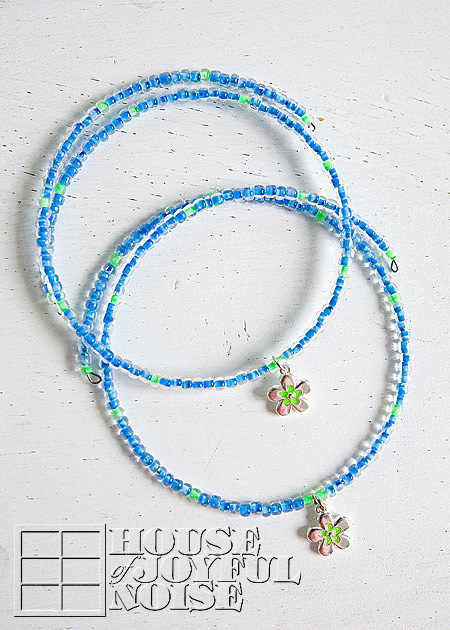
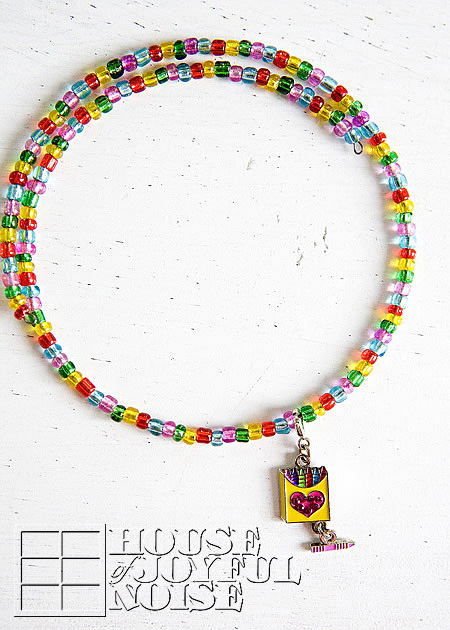
Some pretty beads that said ‘Christmas’ to me.  I love the ‘strands’ of beads found in the craft stores….because you can really take a good look at them, without them being in a container and such. Also needed, was some thin but strong gauged wire.  I went with 26 gauge.  And then…..I wanted a ‘star of Bethlehem’ of some sort.  Whatever form I could find one….which was found in a back aisle in the way of a tree topper.  I think.  But I could fix that.

beads

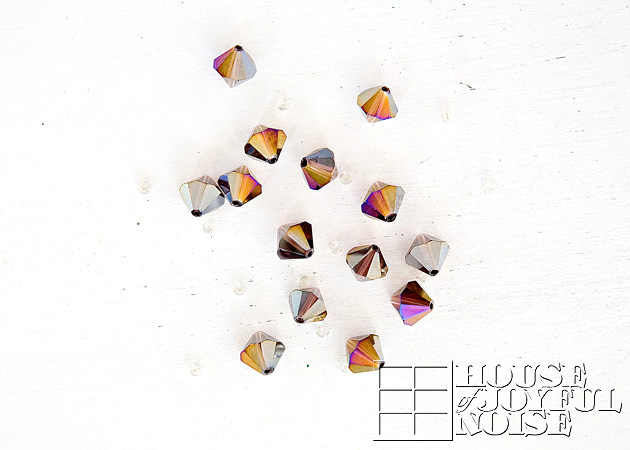
So first I cut the string and spread my beads out on the table.

ornamental star

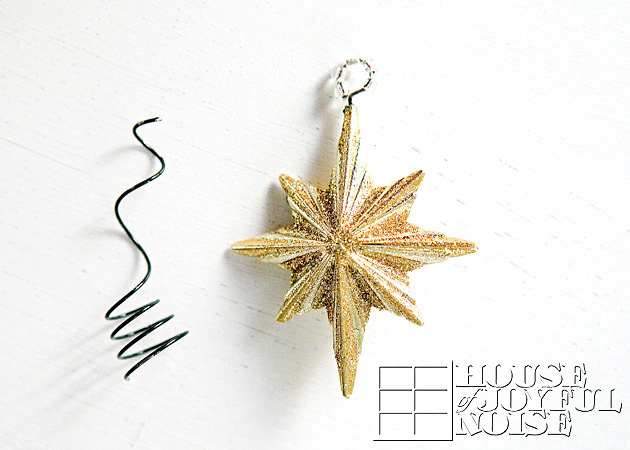
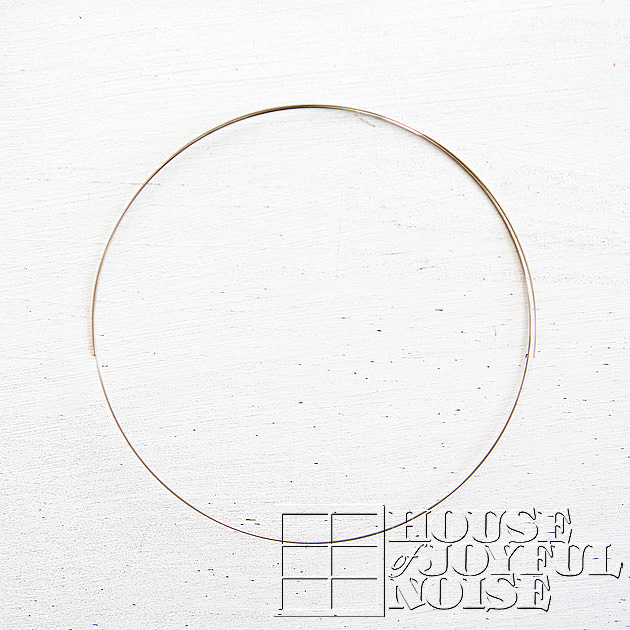
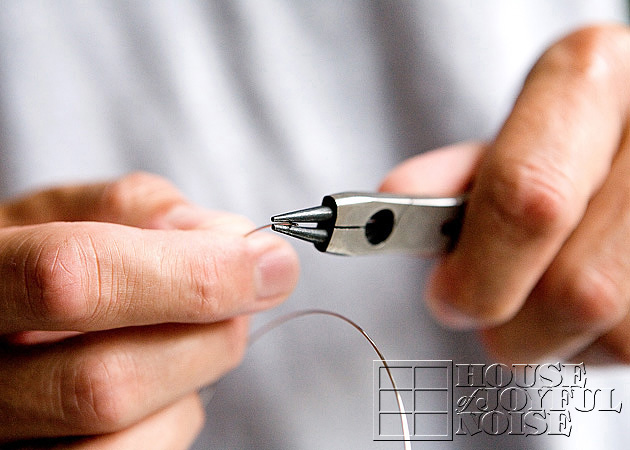
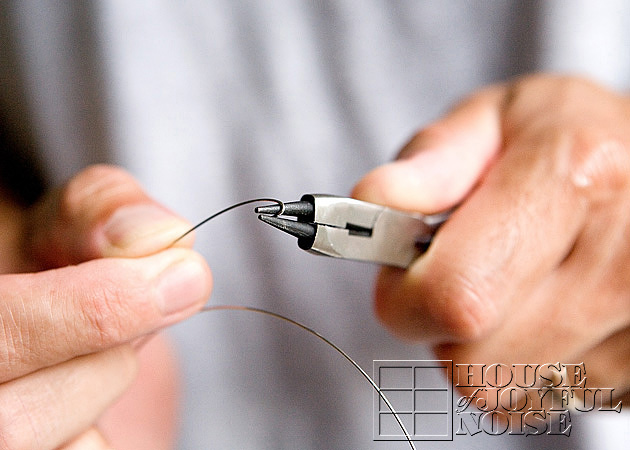
Then Michael cut the star off the wire spring, leaving some wire to twist into a circle, which I covered with the small beads that came on my strand, and closed the loop more tightly.

Christmas fan pull craft

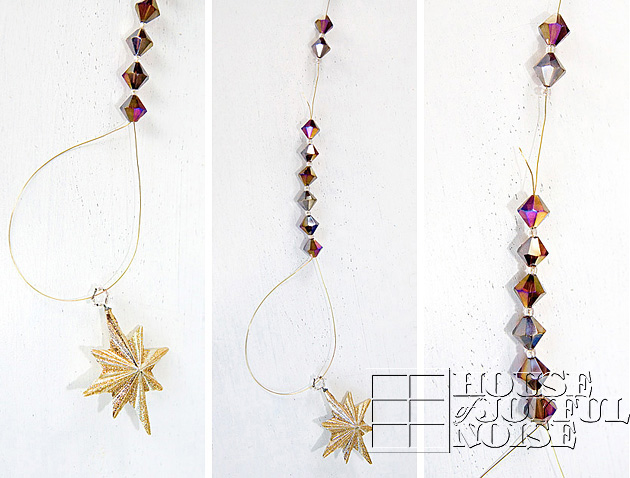
Next I measured how long I wanted my pan full, doubled that length and added a couple more inches to that, and started stringing the beads, alternating between the larger color-faceted beads, with the clear crystal ones.   Once through all of the beads, I slid the wire through the loop of the star, and back UP the whole wire of beads, until both ends were coming out of the top.

As an after-thought, I could have just hung the star on the center of the wire, grabbed both of the other ends of the wire, and fed them together through all of the beads, until they came out the top.  But that would have been too easy I guess. lol

christmas-fan-pull-craft-4

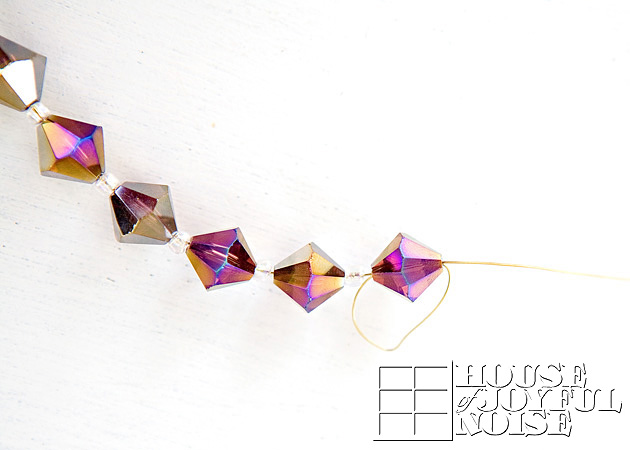
For security, I took both ends of the wire, and re-routed them again up the bottom of the top bead, so they came back out the top once again. So yes, 2 thin wires are now showing on the outside of that top bead.

Christmas fan pull craft

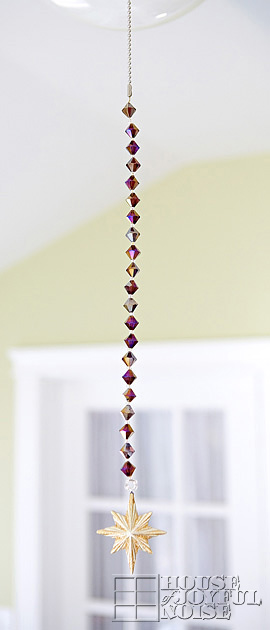
With the excess wire coming out of the top of the strand of beads (with the star on the other end), I balled up the remaining wire, and just worked it into the clasp on the piece of chain hanging on the fan.  Then I gave the whole thing a yank.  It was nice and strong, and the fan turned on and everything. : )

I noticed a bit of wave to my hanging piece, and realized it was from the doubled wire.  Perhaps I could bend it more here and there to try and straighten it a little more, but I rather like the bit of wave I think.  It adds a little character and design.  I decided to pass it off like I totally did that on purpose.

Fan pull chain and clasps can be found at hardware stores, etc.   So in the future, if my current project involves beads with large enough holes, I may just decorate the chain itself.  I already have some craft items for my plans for a new fan pull come January, as a winter theme.

Christmas fan pull craft

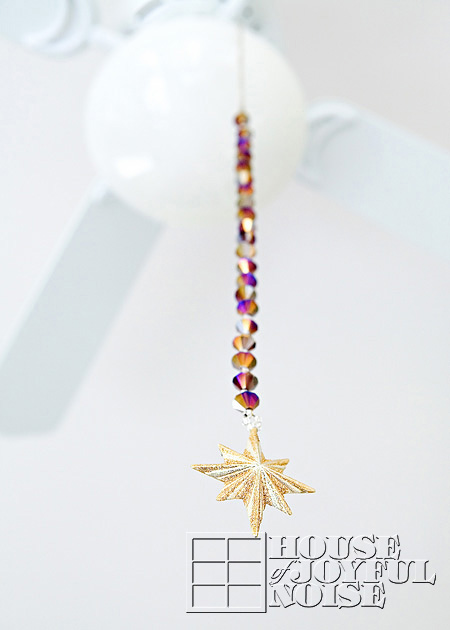
But for now, I’ll enjoy my Christmas fan pull.  I wondered if midnight blue beads would have been more appropriate, with the star of Bethlehem, but I still thought this looked rather pretty and Christmas-sy.  It really twinkles, and displays such beautiful colors, when the room is filled with sun!

It was fun to make.  I’m really going to enjoy creating this collection.

Oh, the possibilities!

Save

Save

Filed Under: Crafts & Creations, Fan Pulls, Seasonal Home decor, The Homestead, WINTER Home Decor Tagged With: Christmas decor, Christmas-crafts, Christmas-decorating, fan pull crafts

Kids’ Thankful Tree

November 30, 2009 By Laura 4 Comments

Like many of you, this past Thanksgiving, we counted our blessings.
And the kids created a little  ‘Thankful Tree’.
We are blessed.  So very blessed.

kids thankful activity

We don’t have a lot.  Many are surprised at the things we simply do without.

Some is by choice.  Much is by necessity.

But we know we are rich, by the simple things.

kids thankful activity

Because in all of the simple things….

is all of which we need to survive.

All of the things which we would hardly be able to bare to live without….

literally, or by the heart,

are the simple things, indeed.

kids thankful activity

So the simple things, are all we really need.

And it’s the simple things, that we couldn’t be more thankful for.

Save

Save

Save

Filed Under: Crafts & Creations, FALL Crafts and Creations, FALL Home Decor, Holiday Crafts, Holidays, Home Decor, Seasonal Crafts and Creations, Seasonal Home decor, The Big Picture Tagged With: fall-decor-ideas, kids-thankful-tree, kids-thanksgiving-activity, Thanksgiving-ideas

Our Church Sign Restoration, With a Surprise Underneath

October 27, 2009 By Michael 7 Comments

img_3310-300x214

Hey Friends! This is Michael here. Recently my own parish, St. Bonaventure in Plymouth, MA, commissioned me to restore our Church sign out front.  The original had been done so many years ago, and it was looking worn and weathered.  It definitely needed to be refinished.

The original sign’s background was painted with a heavy coat of burgandy. The Church asked for it to be all stripped, sanded and repainted, with the trim as white, the gold reguilded, and the background the blue as you see above.  This blue matches the doors of our church, which is symbolic.

So anyway…..I got it home and stripped all of the paint off.  What I found underneath that old paint was the most beautiful mahogany wood!  As I was sanding, I was thinking what a shame it would be to paint over that gorgeous wood.  I decided to take a photo of the wood, and bring it to my pastor, to try and convince him to just varnish over the wood, with the carved letters re-guilded and the white trim.  He agreed, saying he loves the look of natural wood anyway, and that he trusted my judgement. I think his decision about the sign was wise, as well as trusting my judgement. ; )

st-bonaventure-church-plymouth-ma_2

st-bonaventure-church-plymouth-ma

I really wish I had BEFORE and AFTER photos for you all. You would appreciate the beauty that was revealed, all the more. But with the original intention of just refinishing the sign in the exact same style, repainting it burgundy, there didn’t seem to be a purpose to taking a photo before I started stripping it.

Anyway, it’s nice to have your work respected enough to be asked to provide such an important feature of the Church.  It would have been a shame to paint over such beautiful wood, again. I enjoying restoring it to it’s intended beauty, and it feels good to see it there in front of the Church, as I drive by every day, and pull in every Sunday.  I’m really happy with how it came out, and we hope you enjoyed seeing it, too. Thanks for letting us share it with you.

Save

Save

Filed Under: Faith/ Catholic, Photography & Lettering, Signs Tagged With: Catholic-blogs, Catholic-Church-Manomet-MA, Catholic-Church-Plymouth-MA, Catholic-families, church-signs, sign-restoration, St-Bonaventure-Parish-Plymouth-MA

Wrap Jewelry – Craft Tutorial

August 23, 2009 By Laura 9 Comments

This is a fairly easy craft project tutorial where you can create some really fun or beautiful wrap jewelry for kids or adults.  Depending on the materials you use, you can really get all kinds of styles using the same concept.  Also, keep in mind;  they can be homemade Christmas gifts, and made ahead of time!  We’ve made these as Christmas gifts before, and they were very well received!  So this may be a great idea for all or some of the little girls and ladies on your list.  Or, maybe you’d like to add to your own accessories!  The pieces we created so far have been more for girls, from little girls to women, but with a little creativity and thought, we think we’ll be able to come up with some boyish pieces as well.

wrap jewelry tutorial

You don’t need much in the way of supplies!!  Here’s a quick run down, depending on the design of the piece you are making:  Memory wire, bottle-nose pliers/cutters, a bead assortment,  charms, waxed cotton cord, and possibly acrylic nail polish.

This is memory wire.  It is called such, because it keeps it’s nice shape, no matter how you try to bend it.  We threw out the packaging, but this wire can be found in any jewelry supply aisle of any craft store.  There are a 2 or 3 sizes, and this is the largest for necklaces, but it works perfect for grown ups or little ones.  The above is one piece, and you just cut off what you need.

memory-wire

memory-wire_2

Above is a piece cut off to be just the right size.  Using bottle nose wire cutters, we cut it to be 1-1/2 circles, and that seems to be just about right for grown ups and little ones alike.

c

Next, using bottle nose pliers (the same tool that has a cutter on it as well), you want to twist a little loop at the end of the wire.  This little loop is to keep any beads you put on from falling off on the other end.   You’ll only do this on one end to start, because you need to slide on your beads first on the other end.  When all the beads are on, you loop the other end to finish.

So…..you grab the tip end of the wire, and …..

d1

….just twist the wire into a little tight loop.

Michael does this for me, because honestly, my hands are not strong enough to do it myself.  But don’t let that discourage you, because {A} can do it on her own just fine. So I guess what I’m saying is, I’m just weak.

e1

This is what the little loops should look like. It’ll stop any beads from being pushed off.

i

Here’s some of our assortment collection of beads.   These container organizers are really nice!  We’ve done lots of projects using beads, so collecting them and keeping them sorted like this is fun and efficient.

wrap jewelry tutorial

Here are two little girl’s necklaces, all done.  All kinds of charms and gems can be found in craft supply stores, or online.  These charms matched some beads we had perfectly!  {A} made these.

wrap jewelry tutorial

Here’s another little girl’s necklace.

wrap jewelry tutorial

This one is adorable…

wrap jewelry tutorial

…..it’s a crayon box, as you can see.  {A} made those as well.

As we’ve said, there are all kinds of charms in craft stores, but there are also

lots of great charm places online, and here is one we’ve ordered from:  charms

And for some older looking pieces, we just found this place and this place as well.

handmade-wrap-jewelry-tutorial-4

Here’s another option, above. In the jewelry section of craft stores, you can also find little sets like this, all ready to go.   This set has 4 wooden colored beads, a beautiful polished stone, and dyed waxed cotton cord.

wrap jewelry tutorial

So I used that set to make this necklace above.  This one wasn’t quite AS quick to make as the all bead ones.  I looped one end of the wire, (well, Michael did), and put the stone and beads on first, centered as I could, and then looped the other end right away. Then I wrapped the colored cord around the wire. It did take a but more time, and patience.  I wanted the cord sort of twisted and irregular, but you can also wrap the two to make it striped, all the way down the wire.  There are a couple of small challenges with this design, but I’ll share some solutions:  1)  The cord tends to just slip around as you wrap it, making you quickly realize you are getting nowhere, fast.  So you need to start by tying the cord at the loop end of the wire, and then wrapping around the loose ends.  I used acrylic nail polish right in the beginning there, to help secure it.

2) The other challenge is just checking as you go, to be sure the beads and stones are going to end up centered on the piece, as they should be.   It’s a little tricky, and I think mine is a little off.   But use the two ends of the wire to gauge wear the center of the piece as a whole is.  Is anyone following what I’m trying to say here? lol

wrap jewelry tutorial

I made this one for ME.  : )

wrap jewelry tutorial

I LOVE it!!

f

Here’s some other kind of assorted wooden beads that would work.

h

They would look really nice with these natural shades of hemp cord. Together they would make a lovely necklace for a neutral or warm toned outfit.

Here’s another idea:  They sell much smaller memory wire, so you could make matching bracelets to go with any or all of these necklaces!  For instance, you could do the necklace with the beads and charm, and then a bracelet with just the matching beads!

handmade-wrap-jewelry-tutorial-8

Here’s our little model, {O}, who by the way, made her own necklace!

So kids can do this craft project with very little assistance, using the beads and charms.  They just need a little help to cut the wire, do the loops, and maybe put the charm on. These particular charms we ordered just have a regular round necklace clasp with the little lever.  So they can put it on the center after all of the beads have been put on, and someone loops the ends of the wire.

wrap jewelry tutorial

It appears about the same fit on kids or adults. It’s just with kids, it overlap wraps around at the back more so than on adults.  But I find them pretty comfortable, and definitely stylish.

wrap jewelry tutorial

Cute, huh?

We hope you enjoyed this craft project!  Let us know what you think, and if you have any questions at all, just ask and we’ll be happy to clarify!  We hope it makes for a great gift idea for someone, even if that someone is yourself.  : )

Save

Save

Save

Filed Under: Crafts & Creations, Homemade/Handmade Gift Ideas, Kids Arts and Crafts Tagged With: crafts, gift-ideas-for-little-girls, gift-ideas-for-women, handmade-jewelry-tutorial, homemade-Christmas-gifts, homemade-gift-ideas, jewelry-crafts, wrap-jewelry, wrap-jewelry-tutorial

How to Build a Wood Stove Bench – Part III – Finished

July 8, 2009 By Laura 1 Comment

How to Build a Wood Bench

For those of you who have been following our blog for awhile, you’ll know how this post is a little late coming.  The project was done quite awhile ago – we just didn’t get to posting the last part of the project.  Not sure if anyone has literally been following this project to build a bench of their own anyway.  If so….we’re sorry!!

For the rest of you, who may be new to our blog here, or missed these project posts before, we can catch you up with links, and a brief explanation:   We were using a silly footstool at our wood stove over the winter, to sit upon as we loaded wood into the stove, or poked the fire some.  Eventually, I had mentioned that I thought Michael should build us a real rustic bench enough times, that he got to sketching.

Here are Parts I and II of this project:

How to Build a Wood Stove Bench – Part I

How to Build a Wood Stove Bench – Part II

So, where were we?   Oh yes.   Michael had completed building the bench, and it just needed to be sanded some, primed, and painted.  (And I prefer….sanded a little again, for that older look.)

The primer we used was a mixed color that, actually, was not quite the color we were going for.  I wanted a medium brown that had some gray in it.  But it came out looking more like…..medium gray-brown with some purple in it?

How to Build a Wood Bench

It was a Sunday when we had gotten this primer.  Michael had them mix it up at the little local hardware store.  By the time we popped open the can, the store was closed.  We had gotten the primer that day, for our unfinished farm table we had gotten for the sun room.  I was eager to do the project that day, so we used the primer anyway, and it turned out to be fine.

Like the bench, we were painting the table white anyway, in the end.  The reason the primer color mattered any, was because I like to sand the corners and edges of the piece of furniture, to give it a worn old look.  Most times we sand right down to the wood anyway, but in parts the primer does show.  But it is so subtle, you couldn’t pinpoint the color.

So, after a quick sanding of the bench, Michael got to priming.  It wasn’t important to us to have it super smooth, so if it would be to you, you’d want to put more time into that, until it is as smooth as you’d like it all over.  We pretty much got right to priming.

How to Build a Wood Bench

Once it was primed all over, and the primer had dried, he filled in the screw holes some with filler, and got to painting it white.

How to Build a Wood Bench

I helped, with a brush of my own, in between taking photos. : )

How to Build a Wood Bench

Once it was painted all over, dried, and got a second coat dry, Michael sanded the edges and corners some, to make the bench look older and worn, as I had told him I wanted.

How to Build a Wood Bench

And when he was all done, I did it again. : )  He just wasn’t aggressive enough for me. I wanted it OLDER and MORE WORN than he had accomplished.  But ….it’s a preference thing.

How to Build a Wood Bench

That’s better!!  We did the same with our farmer’s table in the same room, so they kind of go together.

So now, the bench was finally done, just in time for……………SPRING??  lol

But, we did have a few very cold and rainy days and nights in early spring, that we got a cozy fire going.

How to Build a Wood Bench

How to Build a Wood Bench

So much better than the footstool….don’t you think??  That thing was barely accommodating to the backside of myself.

Remember, you may not need a wood stove bench, but a bench like this can be used in any room of the house.  For taking off and putting on shoes in a mudroom.  By a window for some light reading.  In the bathroom for putting down your fresh clothes and towels.  Or outdoors under a tree, on your deck, or by an outdoor fire pit! I’m sure if you’re needing a rustic bench, you know the perfect spot for it at your home.

We hope you enjoyed this home project, however sporadic. Sometimes, we’re just pleased with ourselves, that we finished a project, even if it did take longer than we had originally planned!

Save

Save

Save

Save

Filed Under: Crafts & Creations, DIY (Do-It-Yourself) Project, Home Projects, The Homestead Tagged With: build-a-bench, build-it-yourself-wood-bench, how-to-build-a-wood-bench, wood stove bench, wood-bench-plans

  • « Previous Page
  • 1
  • …
  • 19
  • 20
  • 21
  • 22
  • 23
  • …
  • 28
  • Next Page »

We are wicked happy to have you here! We hope you find much inspiration, help, humor and enjoyment here.


Archives


POPULAR POSTS

* * * * * *

SUBSCRIBE to House of Joyful Noise blog! Every new post, delivered right to your email box!


Privacy Policy

Amazon Affiliates

Never at any additional cost to you, we may earn a small commission for our endorsement, recommendation, testimonial, and/or link to any products from our website. Your purchase through our links helps support our family, while sharing with you the products we authentically use and recommend, for various ideas, and letting you know where you can purchase them. Thank you for your support!

[footer_backtotop]

Copyright © 2025 HouseOfJoyfulNoise.com · Genesis Framework by StudioPress