• HOME
  • {A}’s Chipmunk Training Archives

 Homepage

  • The Homestead
    • Home Projects
    • Home Improvement
    • Home Decor
      • Seasonal Home decor
        • FALL Home Decor
        • WINTER Home Decor
        • SPRING Crafts and Creations
        • SUMMER Crafts and Creations
    • Our Chickens
    • Gardening
    • Organization
    • Re-Purposing
    • Furniture Refinishing
    • Budget
  • Crafts & Creations
    • Seasonal Home decor
      • FALL Crafts and Creations
      • WINTER Crafts and Creations
      • SPRING Crafts and Creations
      • SUMMER Crafts and Creations
    • DIY (Do-It-Yourself) Project
    • Kids Arts and Crafts
    • Homemade/Handmade Gift Ideas
    • Holiday Crafts
    • Fan Pulls
    • Free Printable/Downloadable
    • Sewing Projects
    • Giveaways
    • Business Features
  • Recipes/FoodFun
    • Breakfast
    • Lunch
    • Main Dish
    • Sandwiches
    • Appetizers
    • Slow Cooker
    • On The Grill
    • Side Dishes
      • Soups
      • Salads
    • Baking
      • Breads, Rolls and Muffins
    • Snacks
    • Treats
    • Desserts
    • Drinks
  • Homeschooling
    • Elementary Homeschooling
      • Elementary Homeschooling READING
      • Elementary Homeschooling MATH
      • Elementary Homeschooling LANGUAGE ARTS
      • Elementary Homeschooling SCIENCE
      • Elementary Homeschooling HOME ECONOMICS
      • Kids Arts and Crafts
    • Middle School Homeschooling
      • Middle School Homeschooling SCIENCE
      • Middle School Homeschooling HOME ECONOMICS
    • Language Arts
    • Math
    • History / Social Studies
    • Geography
    • Foreign Language
    • Field Trips
    • Games
    • Nature Study
  • The Big Picture
    • Life In General
    • Celebrations
    • Faith
      • Into the Light; The Series
    • Giveaways
    • Reviews & Sponsors
  • Photography & Lettering
    • Photography
    • truck lettering
    • vehicle graphics
    • Newborns
    • Kids
    • Engagement
    • High School Senior Pictures
    • High School Senior Pictures Sneak Peeks

NEW Glass Tile Pendant Tutorial Using Trays | New Tips & Techniques

March 21, 2013 By Laura 28 Comments


It is not often that I ever do the same craft-like project, twice. But I’ve got a feeling that making glass tile pendant pieces are going to be something I’ll be doing again, and again. I am so fond of the high quality feel of the finished pieces, the variety of styles that can be made, the multitude of purposes they can be made to be used for, and the fact that I simply enjoy making them for myself and as gifts for others. By knowing how to do the general process of making glass tile pieces, you will then have the ability to make all kinds of wonderful and customized things, such as jewelry necklace (bracelet or ring) pendants, decorative magnets, key chains, drink coaster sets, vehicle rear-view mirror hangings, home decor embellishments, and so much more.

Recently, I did a whole lot of experimenting with making glass tile pieces, and in the process, learned quite a bit in my quest to perfect my techniques. Knowing what works well, or best, while crafting these, is information I wanted to have, considering I do plan on continuing to make them as I get the whim. In this post, I wanted to pass on all of those tips to you, if you are considering making some tiles yourself.  I will also compare the different style of these that I made, with the first time I made some glass tile pieces.

The first post I did on some glass tile pendants I made, was a detailed step-by-step tutorial, and it has been very popular in traffic.
Here below is a photo of just a couple of the finished pieces.


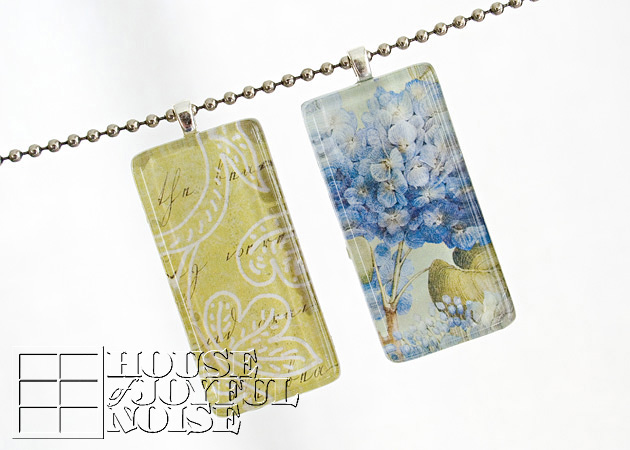
Those pendants were made differently, and are ultimately different in style, than the ones I am sharing today.
But they were also made with different materials.  Let me tell you about that first:  The first time, I used some beautiful, 2-sided scrapbooking paper (different on opposite sides), which is an adequately heavy stock to work with, and is also acid-free and manufactured printed, is completely permanent and so does not run or change in any way.  With the endless choices of beautiful scrapbooking papers available today, it’s definitely a wonderful option, when deciding on the designs of your pieces.

 Briefly put, the way in which they are made is that the 2-sided papers you chose applies directly onto the back of the tile, sealed with the glaze used, and the bail adhered directly to the back. (All seen in photo above.  You can see the complete tutorial here. I also made some lovely magnet sets at the same time. This method is just a bit more unfinished in the way that it is evident that they are hand-crafted. I would also say that they are a bit more work than the method I’m sharing in a moment, because the paper needs to be closely trimmed to size of the tile, and then the edges need some sanding down.  Still, they are beautiful finished pieces in their own way, and most everyone has a certain appreciation for hand-crafted jewelry. If you would like to follow the tutorial for that style of glass tile pendants, please see that post.
****

Now let’s move on to what I am sharing today. The glass tile pendant tutorial in this post is with using trays, which already have a bail. I am going to show you how these are made differently.


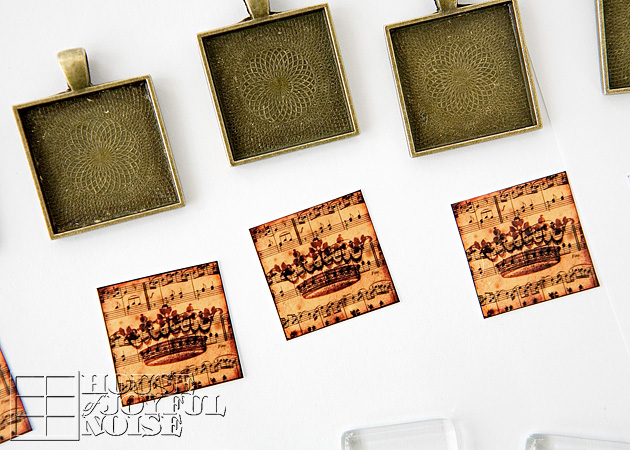
The bronze trays you see above (there are many sizes, shapes, finishes and styles available), designed to hold a graphic and glass tile, are shown in the above photos.
But first, I’d like to talk about the graphics. Meaning, the image/design that will show through the glass tile. If you would like to skip right to the successful method I used, you can jump to the SUCCESS paragraph.

If you’d like to learn through my  own personal errors and just have the power of knowledge about what does not work well in relation to printing the graphics yourself, you can also read the FAIL paragraphs.

FAIL: My trials and challenges came with hoping that I could print any graphics I wanted to use, myself. I had heard though that when using printed graphics in a craft in which the paper would come in contact with any kind of wet medium, a laser printer needed to be used, or else (if using an ink-jet printer) the ink would likely bleed/discolor, or change in some undesirable manner.  We do not have a laser printer; but in fact an ink-jet printer. Which from what I knew, as I just stated, was going to result in problems. However, I had found this stuff called Micro-Glaze, that in description of the consistency, is much like a shortening. It meant to be used to apply with a brush to the surface of the printed paper graphics, even if from an ink-jet printer, and supposedly protect the inks from the wet medium and any adverse effects. Well I can report that I tried again and again, following instructions and in various manners, without success. While the pieces always initially seemed fine, the following day the colors of the graphics became muddled beneath the glass (now permanently set), and soon it was a hot visual mess. Very frustrating in terms of a waste of time, as well as a waste of glass tile pendant supplies that are not meant to be so consumable and disposable.

FAIL: So, as seemed to be the recommendation for printing, I sent my graphics to be printed at the local copy center (Staples), that indeed only prints with laser printers. But again, I had the same sort of issues with the ink of the graphics getting blurry and muddled, and generally not looking like a clean graphic that kept it’s colors quality.  I was sure it was an ink/printing issue, and not any other supply I was using, because I was generally using the same materials I used last time, with the addition of trays. The only thing different, was that I was either printing my graphics, or having them printed, as opposed to purchased, acid-free, 2-sided scrap booking paper.  Finally, I found the solution to being able to use graphics I made myself or found somewhere, that needed to be printed somehow first.

SUCCESS:  Lastly, I decided to have the graphics I wanted to use, printed as photos. (So, on photo paper.) I was quite confident this was going to be the method that finally worked for me. While ordering those photos, in a spur of the moment decision, I chose for the photos to me printed on metallic paper.  I’m not sure if or where that may be an option for you. But as a professional photographer, I choose to have all of my photos printed by my lab for professional photographers only. (This is to ensure that my photos are printed to my specific editing settings.) I just thought maybe the metallic paper would throw a little more light back from the pendant graphic behind the glass, and I was right. But metallic paper is in no way necessary. Regular photo printing will be just as successful in the beauty of your piece.

 Another product you’ll need for these kind of projects is Diamond Glaze.

This versatile product serves as an adhesive, as well as a crystal-clear sealer, and even a dimensional liquid you can apply that dries clear and as hard as glass!
I have tried a couple of other products that have claimed the same, but this one is the best quality stuff, in my opinion. The bottle sizes it comes in are small, but that is because it goes a long way.

For the highest quality of pieces, I also highly suggest using only the highest quality of glass tiles.
I will give you links to my supplier at the end of my post.

Here is how I make glass tile pendants in 4 easy steps:


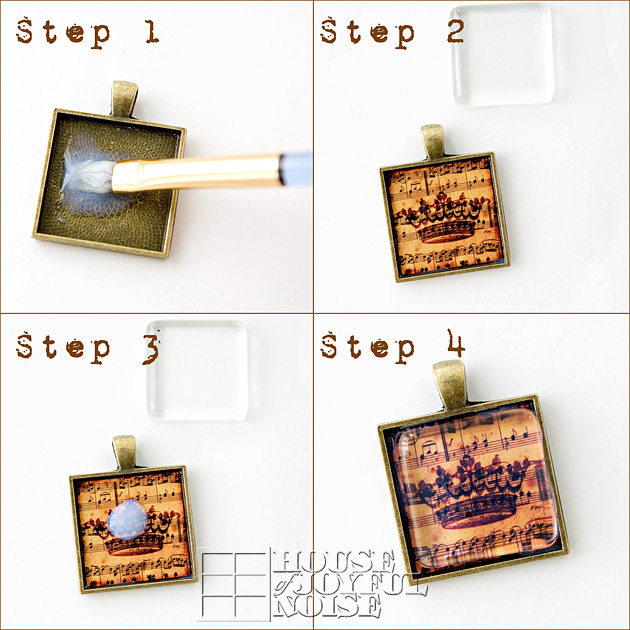
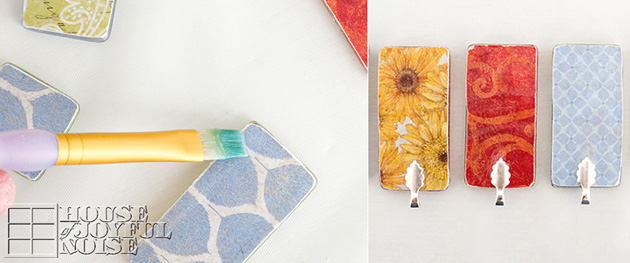
1) With your graphics trimmed to size for your pendant (and checked for fitting), put just a drop or 2 of Diamond Glaze medium in the bottom of the pendant. Using a small flat brush, spread the glaze to cover the bottom of the pendant edge to edge.  This will serve as an adhesive.

2) Lay your graphic over the just applied glaze. Only gently tap down all over. You don’t want to squish the adhesive underneath out and over the sides of your graphic.

3) On top of the graphic, in the middle areas, squeeze another drop or 2 of glaze. There is no need to spread it with this small pendant.

4) Gently place your glass tile on top of the glaze puddle. The weight of the tile will automatically squish-spread the glaze beneath the glass.
Immediately look for any air bubbles and gently press the glass tile in the appropriate places to force the air bubble out from under the edge of the tile.


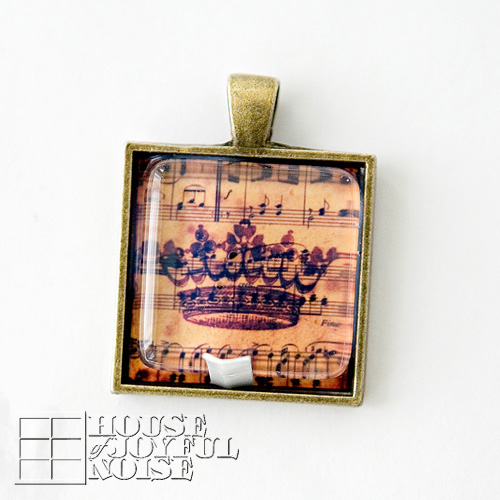
You can now leave your piece to dry and harden. If you notice that the tile is sliding more to one side or the other, because there is just enough excess space to do so, just take a little folded piece of paper to hold the gap, and your tile in place, as shown in the above photo. (But try not to let the paper tip come in contact with the glaze in the bottom of the pendant.)


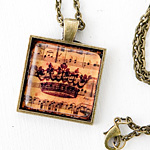
Here is a finished pendant on a matching bronze chain. I made this one for my sister, first.
She calls great Christian tunes “Jesus music”, and the crown made me think of Jesus (the Prince).
Then after I made it, I loved it so much, I made more: for me, my oldest daughter, and some friends. LOL


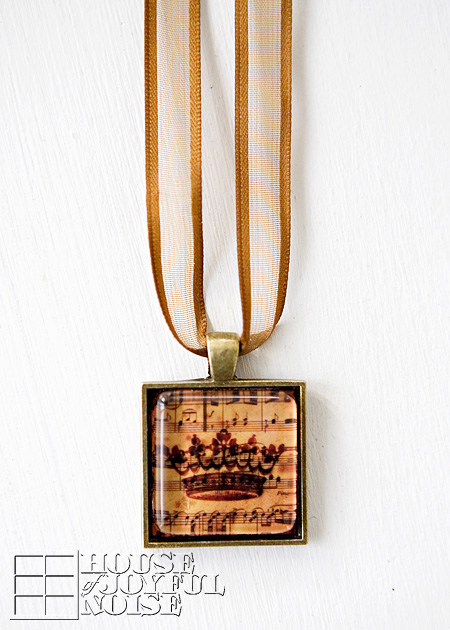
You can change it up, and wear your pendant on a little fancy, feminine ribbon.


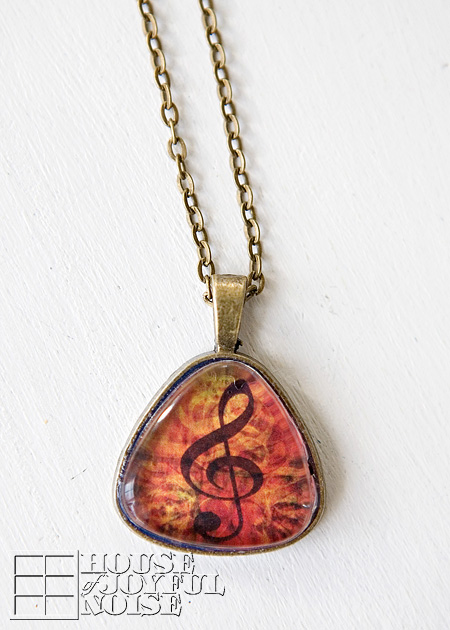
Here’s another I made; a guitar pick shape.
The crown on a music sheet pattern, as well as this music note, are graphics I found online.

But this next one ( 2 shown on the sheet), I custom designed very specially, and there is a story that goes with it . . . .


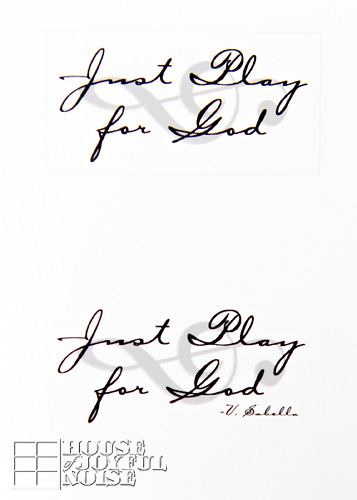
Our 10 year old son Shane plays piano, and he has a wonderful piano teacher. When his first public performance was coming up, he found himself nervous about the upcoming occasion. So he told his teacher about his nerves, and asked her for any advice or tips she might have for him. She explained that being a little nervous was very normal, and how she herself has been very nervous with her own performances in the past. She recommended forgetting about all of the people there watching and listening, and then added:

“You know Shane, just play for God.”

Well, those were words that resonated with Shane. And in essence, changed him. From that moment on, because of this suggestion, and the new light he saw it in, his nerves disappeared. When performance day came, he walked up there as calm as could be, and gave a beautiful and flawless performance.

It’s amazing, how someone can say just the right thing, in just the right way, that really speaks to our heart.  It was words that really meant something to Shane, and I literally watched the effect wash over him, and stick. So I decided I really wanted to design a meaningful pendant for his teacher, that expressed her powerful words. As a reminder that they truly meant something to someone, and helped them not only in the present time, but likely words that will be there for him to fall back on, for the rest of his life.

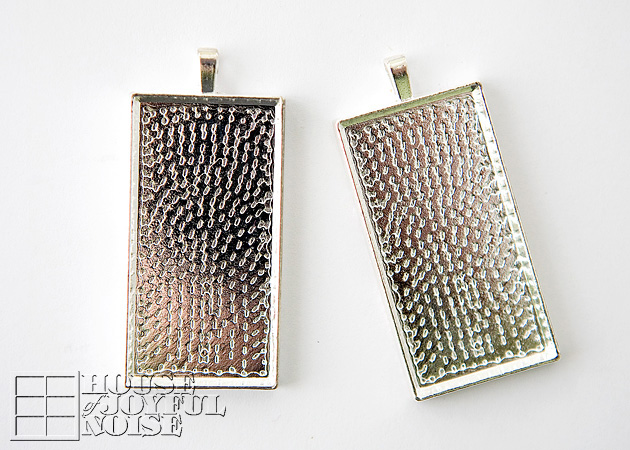
I purchased these silver-plated rectangle pendants on Etsy, with a shiny silver matching chain, and trimmed the quote-graphic to fit perfectly.

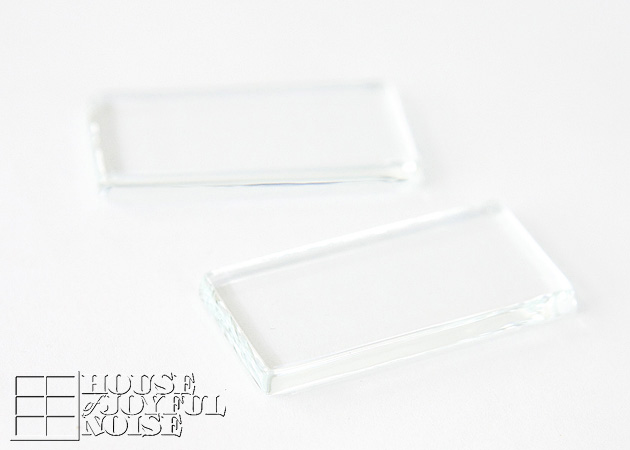
Here are the gorgeous rectangle glass tiles to fit.

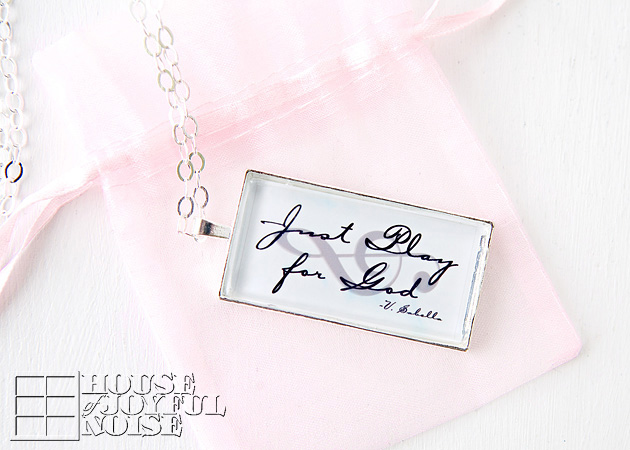
Here is the finished pendant, which was a gift he gave to his piano teacher, while (verbally)sharing with her how much her words meant to him, and why he wanted her to have this.
She cried, and it clearly meant a lot to her. We’ve seen her wear it often, too.
I had to make myself one as well.

And I made Shane a dog tag with the same graphic, which he wears with his medical i.d. dog tag (for his severe peanut allergy.)

My best recommendation for jewelry supplies is to look around Etsy. I did have a great supply vendor there, but she seems to be out of business now. Still, there are many similar vendors on Etsy. I suggest first searching for ‘pure white glass tiles’, and then hopefully they will also carry the rest of what you’ll need.  But the tiles, in my opinion, are the most important supply. I have found that the ‘pure white glass’ tiles are particularly superior in quality. So definitely make an effort to try to find those, whether you can find them on Etsy, or elsewhere.

I DO hope this tutorial has been helpful to you, and inspires you to make some beautiful glass tiles of your own!
Please leave any questions or comments you may have, in the comments section below, and I will respond best I can.
Thanks for hanging out with me.

* * * * * *

Please come follow us here and there:


Filed Under: Crafts & Creations, DIY (Do-It-Yourself) Project, Tutorial Tagged With: crafts, Diamond-Glaze, glass-tile-crafts, glass-tile-jewelry-making, glass-tile-magnets, glass-tile-pendant-tutorial, glass-tile-pendants, glass-tile-tips-and-techniques, handmade-gift-ideas-for-women, handmade-jewelry-gifts, handmade-necklaces, homemade-gifts, homemade-jewelry, tile-jewelry-using-trays

Spiritual Easter Printable for You.

March 14, 2013 By Laura 5 Comments

I felt like designing a spiritually-themed Easter printable for us, and to share with you.

So I did!

It’s designed to fit an 8×10 frame. I recommend printing it on white card stock.

Please be sure to DOWNLOAD and SAVE the full resolution version, as opposed to the image you see in this post, which is web sized.

Clicking on the colorful printable below, should bring you to the full sized version at my DropBox. You need to click the ‘Download’ button there.

*Warning Note: Do not right-click and ‘Save Image As’, or you will not get the sharp printable image.

Download. Save. Print. Enjoy!

I’ll share with you mine on display in my home decor, soon.

Hope you like it. : )

~Laura |  House of Joyful Noise blog

 * * * * * *

Please come follow me here and there:

Save

Save

Filed Under: Crafts & Creations, Free Printable/Downloadable, Holiday Crafts, Home Decor, Seasonal Home decor, SPRING Home Decor, The Homestead Tagged With: Easter, Easter decor, Easter-decorating, Easter-printable, free-Easter-printables, holiday-printables, spiritual-Easter-printable

How to Blow Out Egg Yolks and String for Hanging | Decorative Eggs for Keeps.

March 6, 2013 By Laura 10 Comments


A couple of pre-Easter seasons back, we blew out and decorated eggs, and prepped some for hanging. I took lots of photos of the process of the way we did it, but never blogged it for you all.  It’s not all that hard. And the best part is, you don’t have to figure out what you’re having for dinner that night! You’ll have a bowl full of egg yolks, ready to scramble. : )  Breakfast for dinner! We do that sometimes around here.

Scroll down to read and see just how simple it is to blow out eggs, and string them for hanging after decorating them.

When you’re done reading through, the above collage is the perfect Pin It image for these tutorials.
(Hint, hint. ; )

So let’s pierce some eggs.


Using a drill makes putting the holes in the egg very easy.  Use a 1/16 drill bit for the top of the egg. This is the smaller hole.
On the bottom of the egg, make a slightly bigger hole, using the 1/8 drill bit.

Next, use a long pin in the bottom/big hole, and move it around and jab in and out, to break up the yolk sac some.
Now it’s time to blow that yolk out.
We let the kids take turns blowing them out. They thought it would be so fun.  But I was worried their head would explode, seeing how red their faces were getting! I was like, “Oh my gosh! Breathe!” Ha ha ha.
It took them a little bit to learn how to direct the air from their blow, into the hole. You need to do that best you can.  You can also try a syringe, to push air through. Once the yolk starts coming out, it comes out pretty fluidly.


Plenty for our family of 6.

So after you have blown all of the eggs you want hallowed out, you’ll want to wash them off and out a bit. Run them under warm water, getting water inside the egg too, and shake them some, to wash the inside of the egg. Drain them as well as possible. You can then put them all on a plate in the microwave for microwave them for 10-15 seconds

Now you can decorate them.  It is a little tricky to dip-dye the hallowed eggs, because they tend to float now. So if you are dyeing them, you’ll need to keep it submerged with a spoon or whatever.  Of course, there is a host of other ways you can decorate eggs. And remember, since these are blown eggs, you’ll be able to keep them! So consider drawing on them, doing a little decoupage with dried flowers, using Washi tape, or embellishing them in a number of ways. Just use your imagining and have fun.

If you’d like to hang your hallowed eggs, here is how you can string them:
These are helpful supplies to string your eggs:

  • strong thread
  • eye needles
  • little scissors
  • toothpicks
  • small (wire) cutters. As you have probably caught on by now, my husband was the executor of this project this day, while I was the photographer.
    (Please excuse my husband’s hard-working hands in these detail shots. Love this man so much, for all he does for our family. And then he does fun things like this with us, too.)
    Thread one of the larger sized needles, and tie it off as a single thread.
    Insert the threaded needle in through the top of the egg, all the way, but leave plenty excess out of the top for hanging later.
    Now it needs to come out the bottom, and as you can imagine, it would be challenging to make the needle do that.
    So here’s the trick . . . . .
    Hover a magnet underneath the egg at the hole. 
    You can gently shake the egg as you do this, to try and get the tip of the pin to the hole as well.
    The magnet will draw the the threaded needle down out of the hole.
    Cut the pin off the thread now. You won’t need it anymore for this egg.
    On the same end of the thread that you cut the pin off, tie on a toothpick, and wrap the thread around it, as shown above.  You only need that little piece of toothpick where the thread is wrapped, (maybe 1/2″ or a little more) so you can cut the rest off using your cutters. So now you have this little piece of toothpick, tied onto the thread, that is coming out of the bottom of your egg.

    Now carefully push the whole thing back up into the hole of the bottom of the egg.  Let it fall in all of the way.
    This will act like an anchor inside the egg, for the string coming out of the top of the egg, to hang it.
    So with the single thread coming out of the top, tie it in a loop, to hang your egg.

    That is the process you do with all of your eggs.  If you don’t wish to hang some or any of your eggs, of course you won’t need to string them.
    All of it is fairly quick, and you’ll have your beautiful decorated eggs for years to come.
    Here’s how we have used some of ours:


Hung on an Easter Tree.


In a glass cylinder vase, with some pieces of Raffia paper.
What ways will you use yours?

I am considering making some more this year, decorating them in a new beautiful way, possibly personalizing some, and giving some of them as gifts!
We hope you found this tutorial helpful and learned some tricks that will help you blow some eggs of your own, and maybe string a few as well.
Thanks for coming by! May your Easter celebrations with those you love, be beautiful!

* * * * * *

Please come follow me here and there:

This tutorial was shared at Joyful Homemaking’s Think Tank Thursday Link Party #230!

Filed Under: Crafts & Creations, Holiday Crafts, Home Decor, Seasonal Crafts and Creations, Seasonal Home decor, SPRING Crafts and Creations, SPRING Home Decor, The Homestead, Tutorial Tagged With: crafts, decorating-with-blown-eggs, Easter decor, easter-crafts, Easter-home-decor, easter-tree, egg-blowing, hanging-blown-easter-eggs, how-to-blow-out-egg-yolks, how-to-string-blown-eggs

Signs, Signs, Everywhere There’s Signs. (Ours!)

February 24, 2013 By Laura 24 Comments

Are you singing now? The title was a spin off of a song.
Well anyway . . . . . .

I’ve been in the company of professional sign makers / letterers, one way or another, for about 26 years now, and I guess it’s really worn off on me.

I really love the whole entire creative process of sign-making and lettering. What’s more, I simply love signs. Most especially signs in a home.
So many months ago now, I started making some fun signs (with a little side-kick help from Michael), for the purpose of home decor.  I got so into it, that we started talking about opening an Etsy custom-order sign shop! I’ve gotten as far as naming our little sign shop, and designing a great logo for that division of business. But all else I’ve done about it, is make lots more signs. : )  And I’ve had a ball doing it!  We may very well still open that Etsy shop at any time, if we find there is interest!  But today, I just wanted to show you the signs I’ve made.

I have designed all of these myself, with the exception of two. I’ll tell you a little about each one as I go here.

I wanted a couple of signs for our bathroom.  I especially needed something for a tall narrow bead-board space in the little cubby area in our bathroom, over the floor-wall cabinet.
I wanted the sign to be along the theme of CLEAN: fresh water, suds and bubbles, etc.  This sign is the result of that.
.


So far, my sign style is: worn, old and distressed. I just can’t NOT beat it up.  I really love the look of ‘not new at all’.
.


Here is it in the space it was designed for.


That cubby space over the cabinet was empty forever. I just could figure out what to put there.
But I finally got it together. The little ceramic birdies, and the old metal pale, really kicked the gears into motion, and the rest quickly fell into place.  I think I’ll be happy with the decor of that area, for at least a little while.
By the way, I don’t know if the color of paint on our walls looks blue on your monitor, but it is actually a cool grey, on this side of the bathroom.
Our bathroom has two separate areas:  sink and vanity area in one side, and toilet shower in the other.
.


This sign, designed for my or any boys’ rooms, was inspired by a song.  It was a lot of fun to design.
One of the many things I love about this particular design, is that the R at the beginning and end of ROCKSTAR wraps around onto the sides too.


Simply put, I think the whole thing is cool.

I had a hard time choosing a color scheme, so I didn’t chose . . . . . .

I just made both!


This sign is just plain good advice.
Yes?

Most always when I get an idea for a sign, or anything else I make, the vision in my head is pretty clear in detail, and that means complete with colors.
So I most always just need to go with how I first ‘saw’ it, because nothing else seems right after that.  This sign I saw with what I considered ‘beach’ colors.
So of course, I just went with it.


This whole sign, is not my own design or phrase at all. I have seen it many times, around the internet, and I wanted it for the other side of our downstairs bathroom! Of course, I could have bought the ones I saw. But that consideration is always immediately followed by the thought, “Why would I buy it, when I can just make it myself.” Had I bought it, I would have had it a lot sooner! Because while it was an immediate plan, it took me a lot longer to actually make it! While it’s not my own design, I do love it.

Here it is hanging in our bathroom in the sink/vanity area.
The wall paint color on this side is a pale pink, with a dark grey vanity and white sink.
So the sign colors I went with go perfectly in here. It makes me smile every time I see it.

This next one I made as a gift . . . . . .

A blogger-friend I casually know, and whom I follow, one day posted a sign pretty much just like this one, and mentioned she wanted it for her home.  I offered to make one just like it for her, (as best I could), simply because I like her. I’ve noted her kindness many times before, and just wanted to make it for her, because she wished for it.  You could say it was one of those ‘Pay It Forward’ kind of moments.  We have been blessed many, many (many) times, by gifts and other thoughtful acts of kindness by others.  While it always fills us with such gratitude, for me, it doesn’t compare to the joyful feeling of giving to others. So I do give when I feel the want to do that. To me, it’s a gift to know I made someone happy, in any small way I can.


I actually tried to antique this sign some, with some dark wax along the distressed edges, to try and further age the look.
I hope I was successful.

This last sign was inspired by my oldest daughter . . . . . .

She really does SHINE, as that’s just her personality. It’s been a word that she has been described with by others, since she was a baby.
But also, ‘being a light for others’ has been a phrase I have grown her on.

All of the ‘subliminal words’ are in essence, the very things I am trying to instill in her and all of my children, of course.

Wouldn’t you know, she fell in love with this sign . . . . . .

. . . . . . and asked to hang it in her room.
It really does seem in the right place, there.

This one was a lot of work, with so many letters and colors. My head was somewhat spinning, making it; being afraid I was going to mess up my pattern, or two colors would end up too close to each other, etc. But it all worked out. If I end up selling this design though, it’s going to have to be a little more $ than others!
I do think it’s a beautiful sign for any girl’s room. I think it reminds our girls of so many important things we want them to hold on to.
That’s the power of a sign. They are so much more than just decor.


That’s all I’ve got for you today, Folks!
But I have dozens upon dozens more designs and idea in my head, for every room in one’s house! And outdoor sign ideas as well.
We’d even love to custom design requests.  It’s all just so much fun, and certainly a craft that is part of our family history.

So what do YOU think – Should we set up shop, or not?

* * * * * *

Please come follow me here and there:

Save


Filed Under: Crafts & Creations, Signs Tagged With: handmade-signs, sign-home-decor, sign-making, signs

The Blizzard of February 2013 – Our Kids’ Snow Fun

February 21, 2013 By Laura 5 Comments


How ironic, that one week after the groundhog says that spring will arrive early, do we get hit with the biggest snowstorm of the whole winter! Although we didn’t get as much snow accumulation as we were half expecting, we did lose power for 36 hours straight.  That’s an event that will burn some memories for our kiddos, of their childhood.  What fabulous family time we are blessed with, when we are forced to stop all activity, and huddle together by the fire.  Oh yes……thank goodness for the fire.  The beloved family heirloom; a WESO ceramic wood stove.  It makes any power outage so tolerable. We also are so thankful for being taught/reminded only 2 days earlier by my sister and the kid’s auntie, how to play the card game, Rummy. I am sure we played a thousand games (by the fire and at night by the light of a kerosene lantern), in the 36 hours. No I am not exaggerating, People.  36 hours! That’s a lot of time.

So this post is not about anything other than snow, and family time.  And family memories. As many fun projects as we love to share, the kids love being featured on our family blog. And you can bet I took lots of photos of them having a ball in the snow.  During the actual storm, there was not enough light to get natural photos, even indoors in our all-windows room. But I got lots outside.

About half way through the ‘blizzard’.


All kinds of wood by the stove, waiting to burn, and keep us warm.


Our wood-burning stove; our most treasured family heirloom, passed down from Michael’s paternal grandmother, down through his parents, who had it in their home for quite some time as well.  To say we appreciate this in our possession, is an understatement.  We’ve got a fire going all winter long. We hang out in this room, eat in this room, and school in this room, all by the fire in the winter months. We LOVE it.
But during this blizzard with no power for 36 hours, we not only kept warm because of this stove, but also cooked on it, and heated water.


Our other little saving grace, in the span of 36 hours; a Kohler Power play 500 watt generator. We basically used this to hook up to the internet now and then. ; )  It was great to hear the weather updates, and update our little fan base.

And now just some photos of the kids in the snow. Family, far and wide (and some in warmer climates!), like to see these too.  To see the kids, and also all of the snow and cold they are missing.

Every good snowfall, as small as our .22 acres of property is, the kids (and their Daddy) manage to make an impressive sled trail from the top of our dirt piles/property . . . down to the bottom of our driveway.

Here is a slideshow of many photos of the kids (and their daddy) sledding in our yard.

[Show as slideshow]
46-1
45-1
44-1
43-1
41-1
40-1
39-1
38-1
37-1
36-1
35-1
34-1
33-1
32-1
31-1
30-1
29-1
28-1
27-1
26-1
1 2 ►

This is my favorite photos of them all though….

The End.

Except; Wouldn’t you know it. There is yet another great big snow storm in the forecast for this weekend.
Darn groundhog and his shadow, need to retire.
Still, God knows what’s best. And I’ll take memories like these.

Please tell us about your own family memories, due to weather.

* * * * * *

Please come follow me here and there:

Save

Save

Save

Filed Under: Life In General, The Big Picture Tagged With: blizzard-nemo-east-coast-2013, Catholic-blogs, Catholic-famillies, kids-sledding, Weso-ceramic-stoves

  • « Previous Page
  • 1
  • …
  • 16
  • 17
  • 18
  • 19
  • 20
  • …
  • 101
  • Next Page »

We are wicked happy to have you here! We hope you find much inspiration, help, humor and enjoyment here.


Archives


POPULAR POSTS

* * * * * *

SUBSCRIBE to House of Joyful Noise blog! Every new post, delivered right to your email box!


Privacy Policy

Amazon Affiliates

Never at any additional cost to you, we may earn a small commission for our endorsement, recommendation, testimonial, and/or link to any products from our website. Your purchase through our links helps support our family, while sharing with you the products we authentically use and recommend, for various ideas, and letting you know where you can purchase them. Thank you for your support!

[footer_backtotop]

Copyright © 2025 HouseOfJoyfulNoise.com ยท Genesis Framework by StudioPress