• HOME
  • {A}’s Chipmunk Training Archives

 Homepage

  • The Homestead
    • Home Projects
    • Home Improvement
    • Home Decor
      • Seasonal Home decor
        • FALL Home Decor
        • WINTER Home Decor
        • SPRING Crafts and Creations
        • SUMMER Crafts and Creations
    • Our Chickens
    • Gardening
    • Organization
    • Re-Purposing
    • Furniture Refinishing
    • Budget
  • Crafts & Creations
    • Seasonal Home decor
      • FALL Crafts and Creations
      • WINTER Crafts and Creations
      • SPRING Crafts and Creations
      • SUMMER Crafts and Creations
    • DIY (Do-It-Yourself) Project
    • Kids Arts and Crafts
    • Homemade/Handmade Gift Ideas
    • Holiday Crafts
    • Fan Pulls
    • Free Printable/Downloadable
    • Sewing Projects
    • Giveaways
    • Business Features
  • Recipes/FoodFun
    • Breakfast
    • Lunch
    • Main Dish
    • Sandwiches
    • Appetizers
    • Slow Cooker
    • On The Grill
    • Side Dishes
      • Soups
      • Salads
    • Baking
      • Breads, Rolls and Muffins
    • Snacks
    • Treats
    • Desserts
    • Drinks
  • Homeschooling
    • Elementary Homeschooling
      • Elementary Homeschooling READING
      • Elementary Homeschooling MATH
      • Elementary Homeschooling LANGUAGE ARTS
      • Elementary Homeschooling SCIENCE
      • Elementary Homeschooling HOME ECONOMICS
      • Kids Arts and Crafts
    • Middle School Homeschooling
      • Middle School Homeschooling SCIENCE
      • Middle School Homeschooling HOME ECONOMICS
    • Language Arts
    • Math
    • History / Social Studies
    • Geography
    • Foreign Language
    • Field Trips
    • Games
    • Nature Study
  • The Big Picture
    • Life In General
    • Celebrations
    • Faith
      • Into the Light; The Series
    • Giveaways
    • Reviews & Sponsors
  • Photography & Lettering
    • Photography
    • truck lettering
    • vehicle graphics
    • Newborns
    • Kids
    • Engagement
    • High School Senior Pictures
    • High School Senior Pictures Sneak Peeks

How to Blow Out Egg Yolks and String for Hanging | Decorative Eggs for Keeps.

March 6, 2013 By Laura 10 Comments


A couple of pre-Easter seasons back, we blew out and decorated eggs, and prepped some for hanging. I took lots of photos of the process of the way we did it, but never blogged it for you all.  It’s not all that hard. And the best part is, you don’t have to figure out what you’re having for dinner that night! You’ll have a bowl full of egg yolks, ready to scramble. : )  Breakfast for dinner! We do that sometimes around here.

Scroll down to read and see just how simple it is to blow out eggs, and string them for hanging after decorating them.

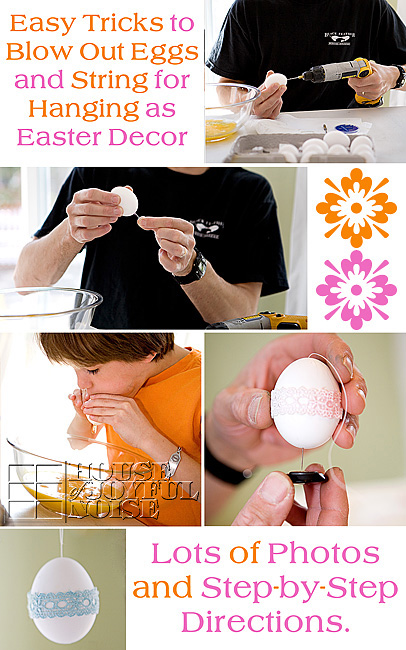
When you’re done reading through, the above collage is the perfect Pin It image for these tutorials.
(Hint, hint. ; )

So let’s pierce some eggs.


Using a drill makes putting the holes in the egg very easy.  Use a 1/16 drill bit for the top of the egg. This is the smaller hole.
On the bottom of the egg, make a slightly bigger hole, using the 1/8 drill bit.

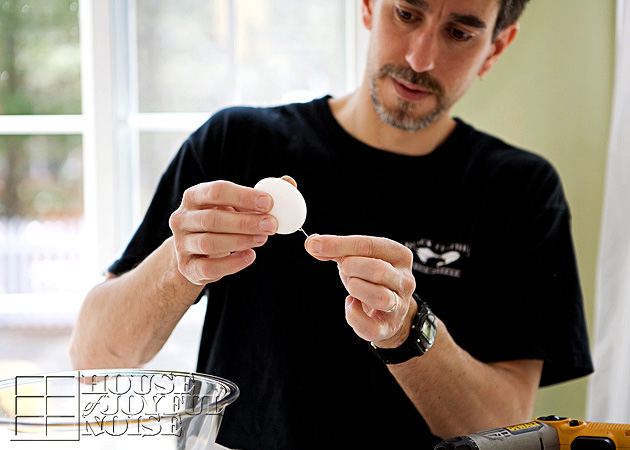
Next, use a long pin in the bottom/big hole, and move it around and jab in and out, to break up the yolk sac some.
Now it’s time to blow that yolk out.
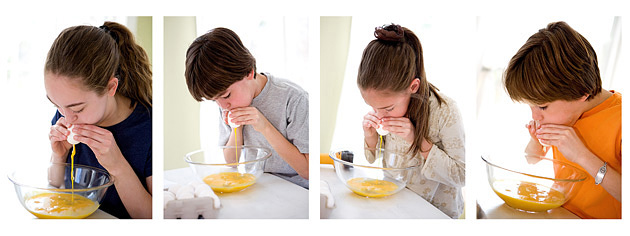
We let the kids take turns blowing them out. They thought it would be so fun.  But I was worried their head would explode, seeing how red their faces were getting! I was like, “Oh my gosh! Breathe!” Ha ha ha.
It took them a little bit to learn how to direct the air from their blow, into the hole. You need to do that best you can.  You can also try a syringe, to push air through. Once the yolk starts coming out, it comes out pretty fluidly.


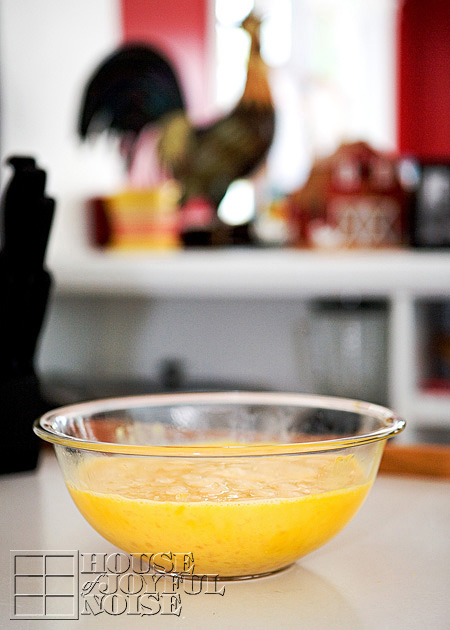
Plenty for our family of 6.

So after you have blown all of the eggs you want hallowed out, you’ll want to wash them off and out a bit. Run them under warm water, getting water inside the egg too, and shake them some, to wash the inside of the egg. Drain them as well as possible. You can then put them all on a plate in the microwave for microwave them for 10-15 seconds

Now you can decorate them.  It is a little tricky to dip-dye the hallowed eggs, because they tend to float now. So if you are dyeing them, you’ll need to keep it submerged with a spoon or whatever.  Of course, there is a host of other ways you can decorate eggs. And remember, since these are blown eggs, you’ll be able to keep them! So consider drawing on them, doing a little decoupage with dried flowers, using Washi tape, or embellishing them in a number of ways. Just use your imagining and have fun.

If you’d like to hang your hallowed eggs, here is how you can string them:
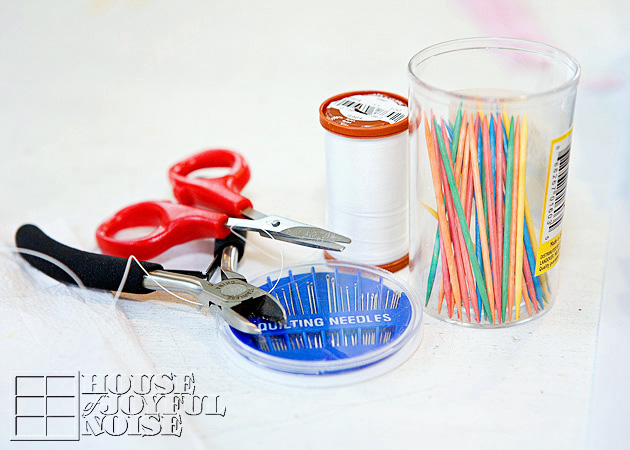
These are helpful supplies to string your eggs:

  • strong thread
  • eye needles
  • little scissors
  • toothpicks
  • small (wire) cutters. As you have probably caught on by now, my husband was the executor of this project this day, while I was the photographer.
    (Please excuse my husband’s hard-working hands in these detail shots. Love this man so much, for all he does for our family. And then he does fun things like this with us, too.)
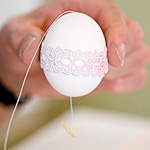
    Thread one of the larger sized needles, and tie it off as a single thread.
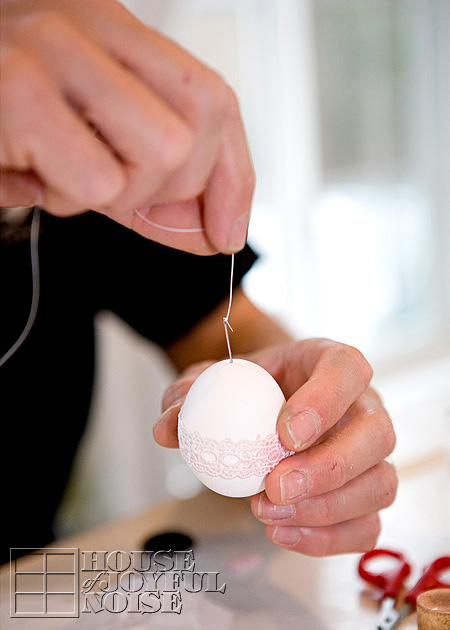
    Insert the threaded needle in through the top of the egg, all the way, but leave plenty excess out of the top for hanging later.
    Now it needs to come out the bottom, and as you can imagine, it would be challenging to make the needle do that.
    So here’s the trick . . . . .
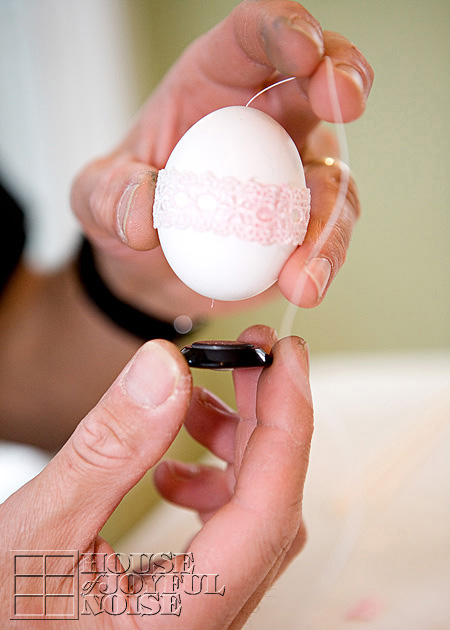
    Hover a magnet underneath the egg at the hole. 
    You can gently shake the egg as you do this, to try and get the tip of the pin to the hole as well.
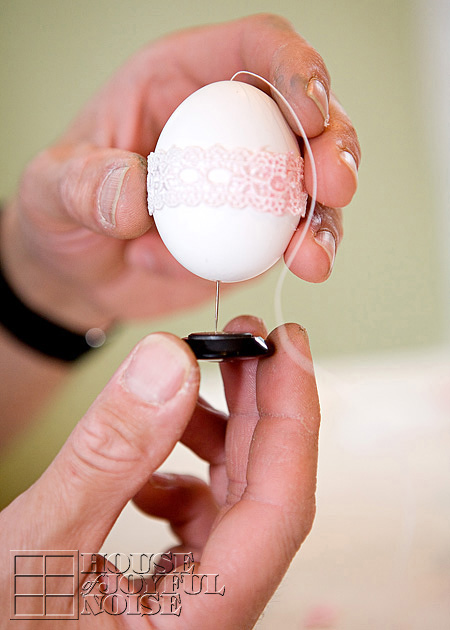
    The magnet will draw the the threaded needle down out of the hole.
    Cut the pin off the thread now. You won’t need it anymore for this egg.
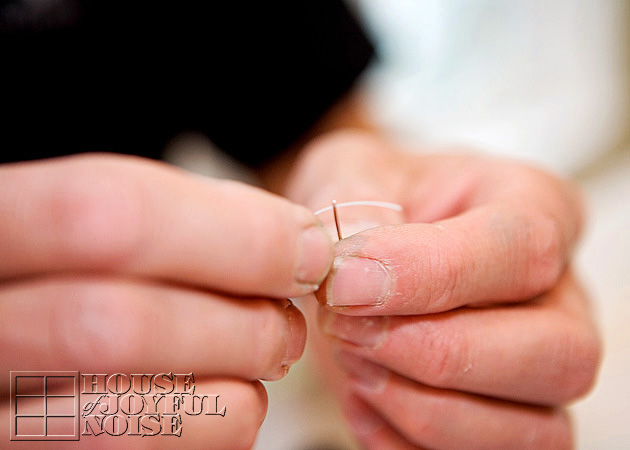
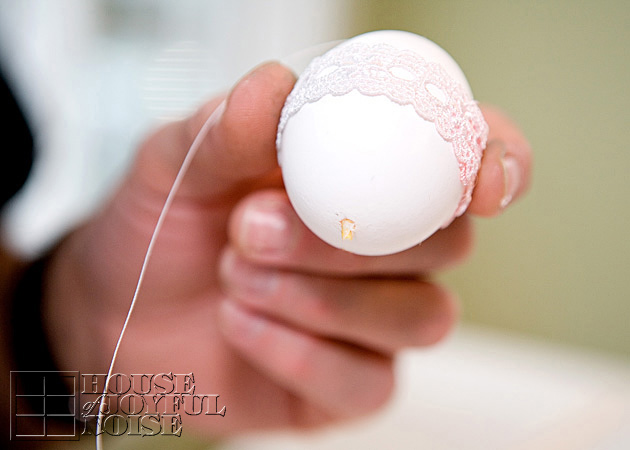
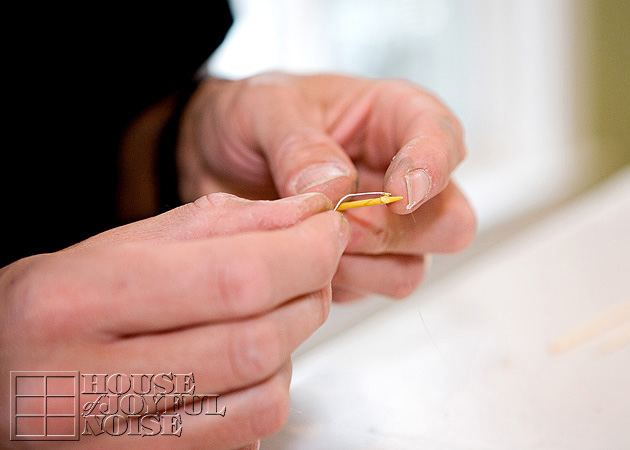
    On the same end of the thread that you cut the pin off, tie on a toothpick, and wrap the thread around it, as shown above.  
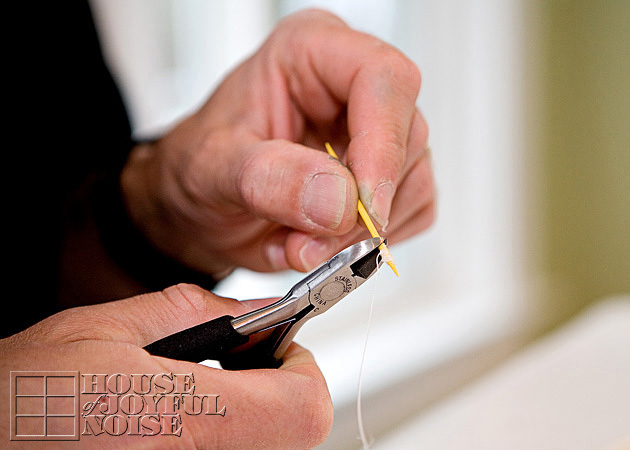
You only need that little piece of toothpick where the thread is wrapped, (maybe 1/2″ or a little more) so you can cut the rest off using your cutters. 
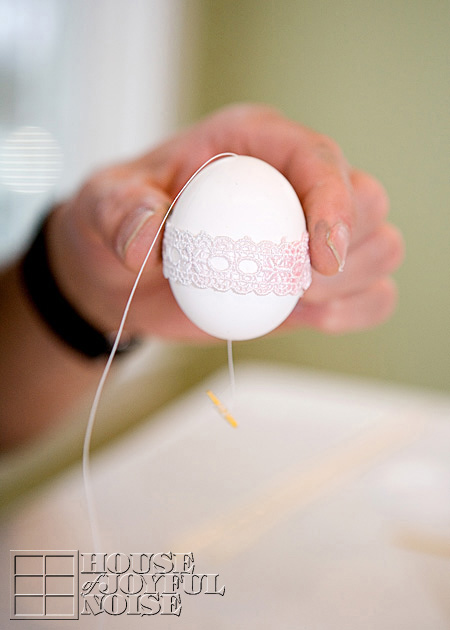
So now you have this little piece of toothpick, tied onto the thread, that is coming out of the bottom of your egg. Now carefully push the whole thing back up into the hole of the bottom of the egg.  Let it fall in all of the way.
    This will act like an anchor inside the egg, for the string coming out of the top of the egg, to hang it.
    So with the single thread coming out of the top, tie it in a loop, to hang your egg.

    That is the process you do with all of your eggs.  If you don’t wish to hang some or any of your eggs, of course you won’t need to string them.
    All of it is fairly quick, and you’ll have your beautiful decorated eggs for years to come.
    Here’s how we have used some of ours:


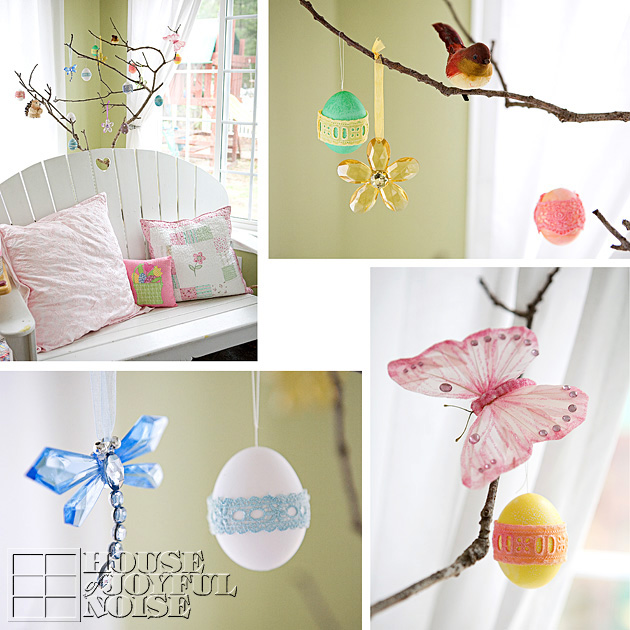
Hung on an Easter Tree.


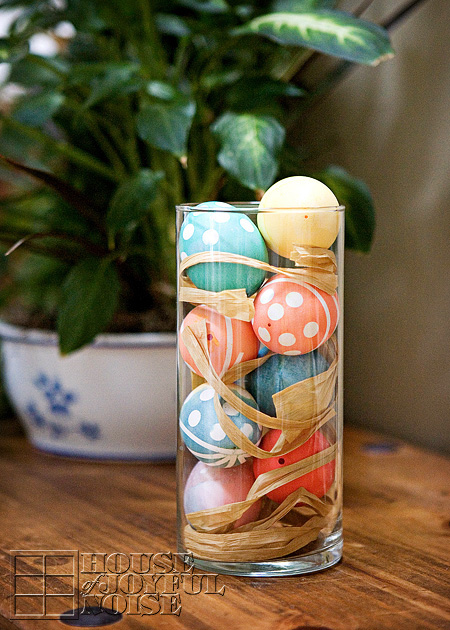
In a glass cylinder vase, with some pieces of Raffia paper.
What ways will you use yours?

I am considering making some more this year, decorating them in a new beautiful way, possibly personalizing some, and giving some of them as gifts!
We hope you found this tutorial helpful and learned some tricks that will help you blow some eggs of your own, and maybe string a few as well.
Thanks for coming by! May your Easter celebrations with those you love, be beautiful!

* * * * * *

Filed Under: Crafts & Creations, Holiday Crafts, Home Decor, Seasonal Crafts and Creations, Seasonal Home decor, SPRING Crafts and Creations, SPRING Home Decor, The Homestead, Tutorial Tagged With: crafts, decorating-with-blown-eggs, Easter decor, easter-crafts, Easter-home-decor, easter-tree, egg-blowing, hanging-blown-easter-eggs, how-to-blow-out-egg-yolks, how-to-string-blown-eggs

Signs, Signs, Everywhere There’s Signs. (Ours!)

February 24, 2013 By Laura 24 Comments

Are you singing now? The title was a spin off of a song.
Well anyway . . . . . .

I’ve been in the company of professional sign makers / letterers, one way or another, for about 26 years now, and I guess it’s really worn off on me.

I really love the whole entire creative process of sign-making and lettering. What’s more, I simply love signs. Most especially signs in a home.
So many months ago now, I started making some fun signs (with a little side-kick help from Michael), for the purpose of home decor.  I got so into it, that we started talking about opening an Etsy custom-order sign shop! I’ve gotten as far as naming our little sign shop, and designing a great logo for that division of business. But all else I’ve done about it, is make lots more signs. : )  And I’ve had a ball doing it!  We may very well still open that Etsy shop at any time, if we find there is interest!  But today, I just wanted to show you the signs I’ve made.

I have designed all of these myself, with the exception of two. I’ll tell you a little about each one as I go here.

I wanted a couple of signs for our bathroom.  I especially needed something for a tall narrow bead-board space in the little cubby area in our bathroom, over the floor-wall cabinet.
I wanted the sign to be along the theme of CLEAN: fresh water, suds and bubbles, etc.  This sign is the result of that.
.


So far, my sign style is: worn, old and distressed. I just can’t NOT beat it up.  I really love the look of ‘not new at all’.
.


Here is it in the space it was designed for.


That cubby space over the cabinet was empty forever. I just could figure out what to put there.
But I finally got it together. The little ceramic birdies, and the old metal pale, really kicked the gears into motion, and the rest quickly fell into place.  I think I’ll be happy with the decor of that area, for at least a little while.
By the way, I don’t know if the color of paint on our walls looks blue on your monitor, but it is actually a cool grey, on this side of the bathroom.
Our bathroom has two separate areas:  sink and vanity area in one side, and toilet shower in the other.
.


This sign, designed for my or any boys’ rooms, was inspired by a song.  It was a lot of fun to design.
One of the many things I love about this particular design, is that the R at the beginning and end of ROCKSTAR wraps around onto the sides too.


Simply put, I think the whole thing is cool.

I had a hard time choosing a color scheme, so I didn’t chose . . . . . .

I just made both!


This sign is just plain good advice.
Yes?

Most always when I get an idea for a sign, or anything else I make, the vision in my head is pretty clear in detail, and that means complete with colors.
So I most always just need to go with how I first ‘saw’ it, because nothing else seems right after that.  This sign I saw with what I considered ‘beach’ colors.
So of course, I just went with it.


This whole sign, is not my own design or phrase at all. I have seen it many times, around the internet, and I wanted it for the other side of our downstairs bathroom! Of course, I could have bought the ones I saw. But that consideration is always immediately followed by the thought, “Why would I buy it, when I can just make it myself.” Had I bought it, I would have had it a lot sooner! Because while it was an immediate plan, it took me a lot longer to actually make it! While it’s not my own design, I do love it.

Here it is hanging in our bathroom in the sink/vanity area.
The wall paint color on this side is a pale pink, with a dark grey vanity and white sink.
So the sign colors I went with go perfectly in here. It makes me smile every time I see it.

This next one I made as a gift . . . . . .

A blogger-friend I casually know, and whom I follow, one day posted a sign pretty much just like this one, and mentioned she wanted it for her home.  I offered to make one just like it for her, (as best I could), simply because I like her. I’ve noted her kindness many times before, and just wanted to make it for her, because she wished for it.  You could say it was one of those ‘Pay It Forward’ kind of moments.  We have been blessed many, many (many) times, by gifts and other thoughtful acts of kindness by others.  While it always fills us with such gratitude, for me, it doesn’t compare to the joyful feeling of giving to others. So I do give when I feel the want to do that. To me, it’s a gift to know I made someone happy, in any small way I can.


I actually tried to antique this sign some, with some dark wax along the distressed edges, to try and further age the look.
I hope I was successful.

This last sign was inspired by my oldest daughter . . . . . .

She really does SHINE, as that’s just her personality. It’s been a word that she has been described with by others, since she was a baby.
But also, ‘being a light for others’ has been a phrase I have grown her on.

All of the ‘subliminal words’ are in essence, the very things I am trying to instill in her and all of my children, of course.

Wouldn’t you know, she fell in love with this sign . . . . . .

. . . . . . and asked to hang it in her room.
It really does seem in the right place, there.

This one was a lot of work, with so many letters and colors. My head was somewhat spinning, making it; being afraid I was going to mess up my pattern, or two colors would end up too close to each other, etc. But it all worked out. If I end up selling this design though, it’s going to have to be a little more $ than others!
I do think it’s a beautiful sign for any girl’s room. I think it reminds our girls of so many important things we want them to hold on to.
That’s the power of a sign. They are so much more than just decor.


That’s all I’ve got for you today, Folks!
But I have dozens upon dozens more designs and idea in my head, for every room in one’s house! And outdoor sign ideas as well.
We’d even love to custom design requests.  It’s all just so much fun, and certainly a craft that is part of our family history.

So what do YOU think – Should we set up shop, or not?

* * * * * *

Filed Under: Crafts & Creations, Signs Tagged With: handmade-signs, sign-home-decor, sign-making, signs

The Blizzard of February 2013 – Our Kids’ Snow Fun

February 21, 2013 By Laura 5 Comments


How ironic, that one week after the groundhog says that spring will arrive early, do we get hit with the biggest snowstorm of the whole winter! Although we didn’t get as much snow accumulation as we were half expecting, we did lose power for 36 hours straight.  That’s an event that will burn some memories for our kiddos, of their childhood.  What fabulous family time we are blessed with, when we are forced to stop all activity, and huddle together by the fire.  Oh yes……thank goodness for the fire.  The beloved family heirloom; a WESO ceramic wood stove.  It makes any power outage so tolerable. We are also so thankful that we had recently been reminded taught/reminded only 2 days earlier how to play the card game, Rummy. I am sure we played a thousand games (by the fire and at night by the light of a kerosene lantern), in the 36 hours. No I am not exaggerating, People.  36 hours! That’s a lot of time.

So this post is not about anything other than snow, and family time.  And family memories. As many fun projects as we love to share, the kids love being featured on our family blog. And you can bet I took lots of photos of them having a ball in the snow.  During the actual storm, there was not enough light to get natural photos, even indoors in our all-windows room. But I got lots outside.

About half way through the ‘blizzard’.


All kinds of wood by the stove, waiting to burn, and keep us warm.


Our wood-burning stove; our most treasured family heirloom, passed down from Michael’s paternal grandmother, down through his parents, who had it in their home for quite some time as well.  To say we appreciate this in our possession, is an understatement.  We’ve got a fire going all winter long. We hang out in this room, eat in this room, and school in this room, all by the fire in the winter months. We LOVE it.
But during this blizzard with no power for 36 hours, we not only kept warm because of this stove, but also cooked on it, and heated water.


Our other little saving grace, in the span of 36 hours; a Kohler Power play 500 watt generator. We basically used this to hook up to the internet now and then. ; )  It was great to hear the weather updates, and update our little fan base.

And now just some photos of the kids in the snow. Family, far and wide (and some in warmer climates!), like to see these too.  To see the kids, and also all of the snow and cold they are missing.

Every good snowfall, as small as our .22 acres of property is, the kids (and their Daddy) manage to make an impressive sled trail from the top of our dirt piles/property . . . down to the bottom of our driveway.

Here is a slideshow of many photos of the kids (and their daddy) sledding in our yard.

(Slideshow link removed.)

This is my favorite photos of them all though….

The End.

Except; Wouldn’t you know it. There is yet another great big snow storm in the forecast for this weekend.
Darn groundhog and his shadow, need to retire.
Still, God knows what’s best. And I’ll take memories like these.

Please tell us about your own family memories, due to weather.

* * * * * *

Save

Save

Save

Filed Under: Life In General, The Big Picture Tagged With: blizzard-nemo-east-coast-2013, Catholic-blogs, Catholic-famillies, kids-sledding, Weso-ceramic-stoves

Love is the Beauty of the Soul./ A Social ShareIt

February 14, 2013 By Laura 7 Comments

With yet another mess on my sun room table to share with you today, you may be interested in an update on how the art studio is coming along.
Yes, no, maybe?
Well, as of this week, it is all wired for the electricity. So we’re happy to have that part finished.
Also, the entire studio is all primed and painted. Which is just all white. I’m thinking that would be pretty boring photos for you all.  But it sure looks a lot nicer, and brighter, then it did, with just the sheet-rock.  I believe the ceiling is next, and that may be something to see.  We’re going with something a little different than traditional, with that.  So stay tuned if you care to see.

No big story on this ‘Social ShareIt’. I think the statement speaks for itself, and the heart I painted is just what I envisioned for it.
This was a challenging painting, trying to get the effect I wanted. I was going for a glow or light from within the heart.  Watercolor painting is such an ongoing learning experience, for me. There are so many techniques you can use, to get different effects. I can feel myself learning more and more, each time I paint, and it only adds fuel to the fire. I just want to paint more and more.   Wet on wet is always fun, and it really pushes me, because I need to work quickly.

Still wet.

After scanning it into the computer, and adding some text design, here is the finished ‘Social ShareIt’ . . . .


I was pleased with how it came out.
On Facebook, you can share this creation, “Love is the Beauty of the Soul’, or any other ShareIts we have so far, from our Facebook Page’s ‘Social ShareIt’ Album.
On Pinterest, you can repin from our ‘House Of Joyful Noise Social ShareIts’ Board, or you’re welcome to just pin it right from this post.

More of what we’ve been up to, and some other show-and-tell, coming up soon.
Let us know what you think of this new ‘Social ShareIt’ below, and thanks so much for swinging by!

* * * * * *

Save

Save

Filed Under: Crafts & Creations, House Of Joyful Noise 'Social ShareIts' Tagged With: House-Of-Joyful-Noise-Social-ShareIts, Love-is-the-beauty-of-the-soul, love-quotes, Quotes, watercolor

Banner of Love | A Valentine Decor Craft

February 4, 2013 By Laura Leave a Comment

While February, the ‘month of love’, was approaching throughout January, I had had this image in my head of a burlap pennant banner that spelled out LOVE, with little pink ribbons, over our french doors in the sun room, to the living room.  Of course, I didn’t actually have one, so it was something I’d need to create. After pondering how I might go about doing that, I decided I wanted to keep it as simple as possible, even if it doesn’t hold up for subsequent Valentine holidays.

As planned, I got some burlap, for the pennants themselves. I’ve never worked with burlap before.  Good-gosh does it stink!  I don’t understand why. ???  I need to get educated on burlap I guess.  I’m adding it to my list of things I intend to Google.  But in the meantime, I hung the burlap outside for a bit, and even went so far as to FeBreeze it, so I could work with it. I could have used another material, but my vision, was the burlap. So for this project I used it, as well as jute string, a 4.5″ x 6.5″  pad of designer cardstock that contained a variety of pink patterns (for the letters), and pink satin ribbon.

 I also used a few other supplies to make it as well, and I’ll explain in these easy steps as I go along here.
But before I do, let me show you how sweet it came out.

Kind of shabby-chic looking, don’t you think?
Of course this would be sweet with fabric letters, and would probably hold up for many more ‘months of Love’ and Valentine decor to come, but it would probably require some sewing, and I still don’t sew yet. I’m going to learn someday. But it wasn’t happening before this craft. So I used paper cardstock letters. Which does kind of have it’s own charm, I think.

This is how I made this rustic, simple, sweet little banner:

I made a template for the pennant, that measured 7″ wide by 10″ to the point. You can use cardboard as a template. My husband cut me a piece of sheet metal he had, but that’s not really necessary.
So using the template, I traced the pennants with a brown marker. I used the finished edge of the burlap itself, as the top of the pennant, to help hold it together as well as reduce my cutting.
1. Place pennant template at edge of material.  2. Trace template.  3. Cut out pennant.

4. To keep the sides of the pennants (the sides that form the V) from falling apart, because burlap is a weave, I applied a bit of matte Modge Podge just on the edges.
Modge Podge dries clear, and it worked like a charm.


Using the small 4.5″ x 6.5″ pad of designer cardstock that I bought, I wanted each letter as large as possible. So I made each letter to fit a full cardstock sheet edge to edge. I just created the outline of each letter (4.5″ x 6.5″) in photoshop, and arranged two of the letters side by side on an 8.5 x 11″ standard space, and printed them out. LO on one, and VE on another. Then, I traced those printed letters onto tracing paper. Then, I arranged each letter tracing upside down on the backside of my little cardstock sheet (for each letter).  Having done that, I had a backwards letter on the back/white sides of my cardstocks to cut out, so that when I did cut them out, they were facing the right way on the front.  Some of the patterned paper is embellished and bumpy, so it was easier to transfer the pencil lines on the backside, and keep the patterned side clean as well.

Here are my letters all cut out.
Again, the letters I designed filled a mini-cardstock sheet, so it reduced some of the cutting I needed to do, minimized paper waste, and gave me as large letters as possible.

Next, I wanted to string the pennants.

I planned to use jute string for this; another stinky material! I did not want to cut holes in the burlap at all, because it would simply fall apart, being a weave. So using the tip one side of the scissors, open, I just poked it into an existing hole of the burlap where I wanted a hole for the string, and gave the scissors a little twist.  No cutting, but just pushing the fiber-string over.


Then I strung a sufficiently long enough piece of jute through each pennant piece, as seen above.  

To add some touches of pink and pretty, I wanted to add some little simple bows. To do this, I first tied a little piece of satin ribbon onto the jute string in between each pennant, with a little piece of thread, and then cut off the excess thread ends to just leave the little knot.  Then I tied a bow with the ribbon. The reason I tied the ribbon onto the jute string with the thread first, rather than just tying the ribbon directly onto the jute string, was so that my bows would not be sideways.

  I did not take photos of this part, but to attach the cardstock letters to the burlap pennants, I used Modge Podge as a sort of glue.
I simply covered the back of each letter, and pressed it down onto each pennant.  Although the letters created to extend beyond the pennants, I still Modge Podged the entire back of the letters, because I figured it would help give each paper letter that extra stability.
I let it all dry, lying flat.

Then we hung it up, right where I envisioned it to be.

I think it makes for very cute Valentine decor.
It’s also made me start humming a few times,
♫ The Lord is mine, and I am His
His banner over me is LOVE . . . ♫


Sorry if that sticks in your head all day long, now! ; )
Hope you enjoyed this project, and it inspires you to make one like it, or one of your own design.

We’d LOVE your thoughts or a hello, if have another moment.
But know we’re always glad when you visit.

* * * * * *

Save

Filed Under: Crafts & Creations, Holiday Crafts, Home Decor, The Homestead, Tutorial, WINTER Crafts and Creations Tagged With: February-crafts, holiday-decor, how-to-make-a-burlap-pennant-banner, love-banner, love-themed-decor, pennant-banner, valentine-craft-decor, Valentines-Day-decor-craft, valentines-home-decor

  • « Previous Page
  • 1
  • …
  • 16
  • 17
  • 18
  • 19
  • 20
  • …
  • 100
  • Next Page »

We are wicked happy to have you here! We hope you find much inspiration, help, humor and enjoyment here.


Archives


POPULAR POSTS

* * * * * *

SUBSCRIBE to House of Joyful Noise blog! Every new post, delivered right to your email box!


Privacy Policy

Amazon Affiliates

Never at any additional cost to you, we may earn a small commission for our endorsement, recommendation, testimonial, and/or link to any products from our website. Your purchase through our links helps support our family, while sharing with you the products we authentically use and recommend, for various ideas, and letting you know where you can purchase them. Thank you for your support!

[footer_backtotop]

Copyright © 2026 HouseOfJoyfulNoise.com · Genesis Framework by StudioPress