• HOME
  • {A}’s Chipmunk Training Archives

 Homepage

  • The Homestead
    • Home Projects
    • Home Improvement
    • Home Decor
      • Seasonal Home decor
        • FALL Home Decor
        • WINTER Home Decor
        • SPRING Crafts and Creations
        • SUMMER Crafts and Creations
    • Our Chickens
    • Gardening
    • Organization
    • Re-Purposing
    • Furniture Refinishing
    • Budget
  • Crafts & Creations
    • Seasonal Home decor
      • FALL Crafts and Creations
      • WINTER Crafts and Creations
      • SPRING Crafts and Creations
      • SUMMER Crafts and Creations
    • DIY (Do-It-Yourself) Project
    • Kids Arts and Crafts
    • Homemade/Handmade Gift Ideas
    • Holiday Crafts
    • Fan Pulls
    • Free Printable/Downloadable
    • Sewing Projects
    • Giveaways
    • Business Features
  • Recipes/FoodFun
    • Breakfast
    • Lunch
    • Main Dish
    • Sandwiches
    • Appetizers
    • Slow Cooker
    • On The Grill
    • Side Dishes
      • Soups
      • Salads
    • Baking
      • Breads, Rolls and Muffins
    • Snacks
    • Treats
    • Desserts
    • Drinks
  • Homeschooling
    • Elementary Homeschooling
      • Elementary Homeschooling READING
      • Elementary Homeschooling MATH
      • Elementary Homeschooling LANGUAGE ARTS
      • Elementary Homeschooling SCIENCE
      • Elementary Homeschooling HOME ECONOMICS
      • Kids Arts and Crafts
    • Middle School Homeschooling
      • Middle School Homeschooling SCIENCE
      • Middle School Homeschooling HOME ECONOMICS
    • Language Arts
    • Math
    • History / Social Studies
    • Geography
    • Foreign Language
    • Field Trips
    • Games
    • Nature Study
  • The Big Picture
    • Life In General
    • Celebrations
    • Faith
      • Into the Light; The Series
    • Giveaways
    • Reviews & Sponsors
  • Photography & Lettering
    • Photography
    • truck lettering
    • vehicle graphics
    • Newborns
    • Kids
    • Engagement
    • High School Senior Pictures
    • High School Senior Pictures Sneak Peeks

Liberty Shakers! – A 4th of July Craft for Kids

July 1, 2009 By Laura 5 Comments

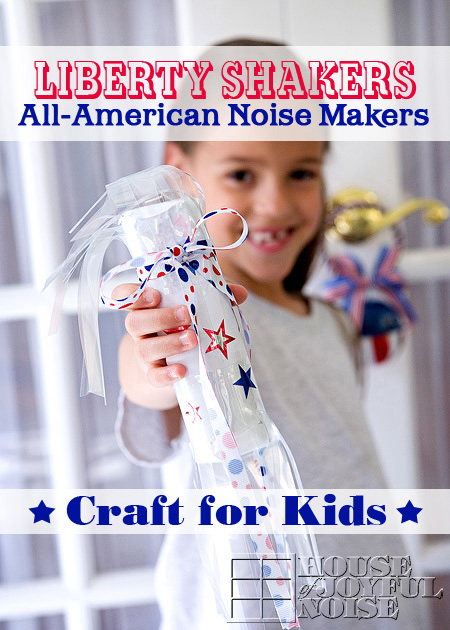
I thought this 4th of July craft, we call Liberty Shakers, was a great one for the kids to make, so they could have a little something to make some ‘joyful noise’ at  our various celebrations coming up for America’s birthday!

red white and blue July kids craft

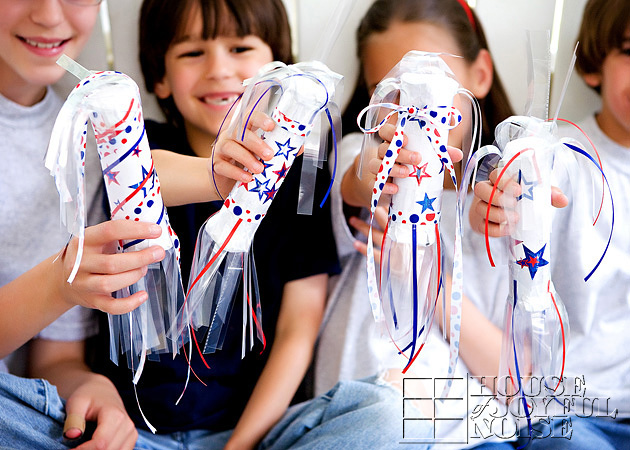
  Living in America’s Hometown, our town most always has a huge, big long 4th of July parade through the heart of our downtown area.  But this year, there will be no parade, due another exciting event their holding. (Which is even more exciting, and we’ll be sure to document and share with you when the times comes.)    Anyway, my point is, if there’s a 4th of July parade in your town, your kids will love having these along.  Maybe they can shake them for the fireworks finale too!!

Very young kids will definitely need some assistance making these, but none at all using them!  : )

Here’s what you’ll need for supplies:

 red white and blue July kids craft

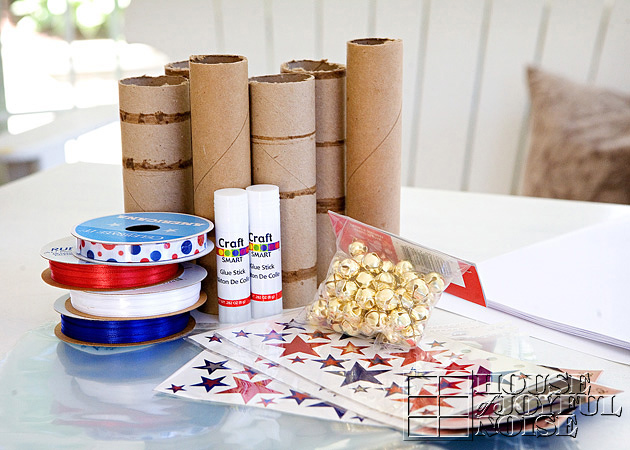
  • Bathroom tissue tubes, and/or paper towel tubes cut in 1/2
  • A pile of white copy/printer paper (or any white paper)
  • Clear acetate sheet protectors
  • Small jingle bells
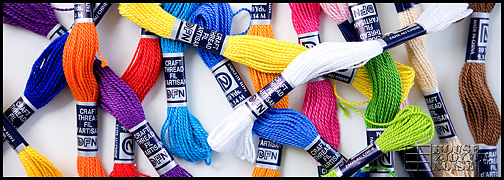
  • Any red/white/blue ribbon
  • Red/white/blue star stickers of any kind
  • Clear shipping tape (not shown, but it was a lifesaver)
  • Fiskar cutter (also not shown-not needed but I use it A LOT for most everything regarding cutting straight paper.
  • *Craft glue – *Note there are glue sticks on the corner. Can I just vent for a second?  I’ve decided I despise glue sticks, because every brand I have ever tried has been lousy.  We ended up using the same brand glue in an Elmer’s Glue style bottle. Elmer’s glue would work too.   But my opinion is, it’s never worth bothering with the glue sticks.  Great concept for kids,  if they actually worked.  Thanks for listening.

Here’s how you make them:

 red white and blue July kids craft

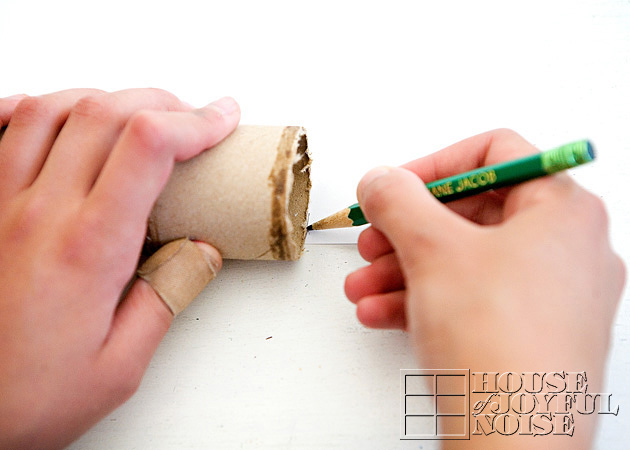
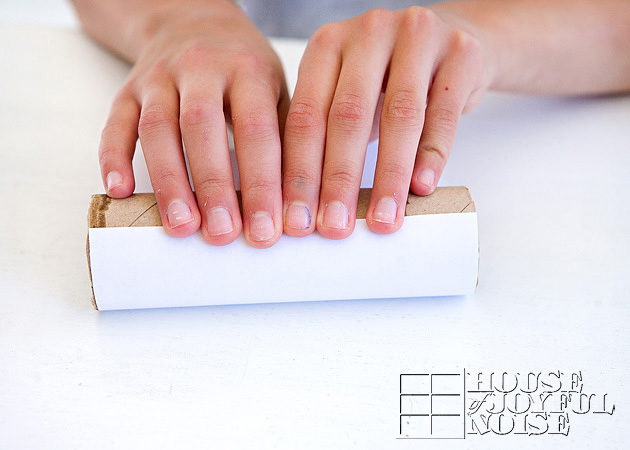
1)   Grab a sheet of white paper and a tube, and placing the tubes end at the edge of the paper, mark off the width of paper you’ll need (where you’ll cut).

 red white and blue July kids craft

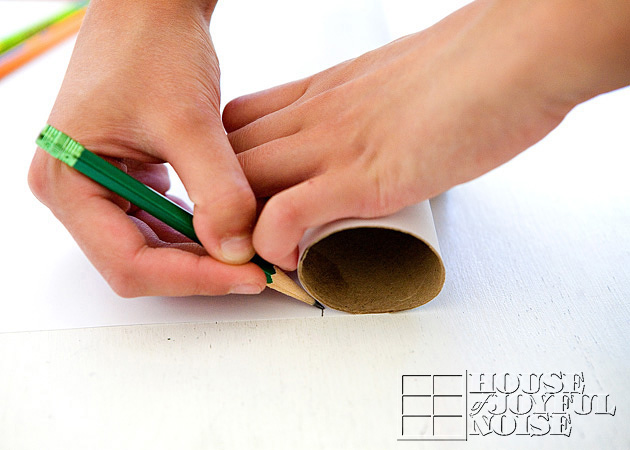
2)   The roll the tube in the paper to determine how much length of paper you’ll need, and mark that side.  (Similar to determining how much gift wrap you need to wrap a present.)

 red white and blue July kids craft
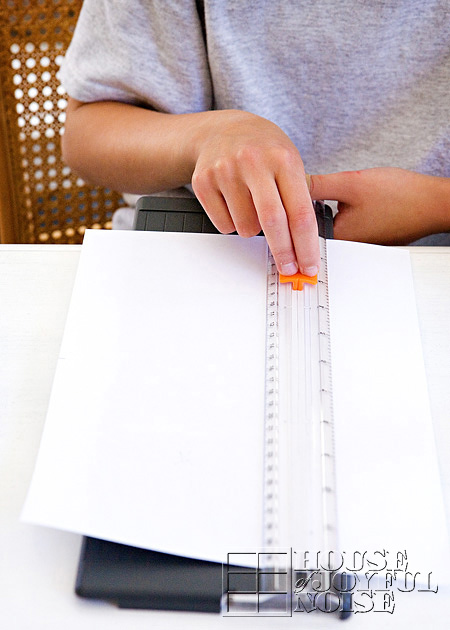
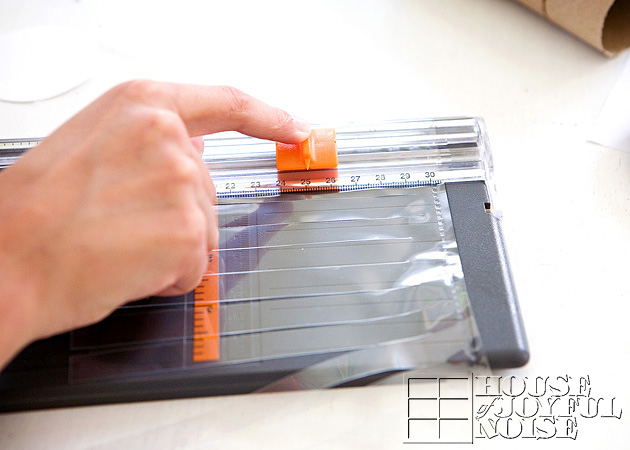
3)    Here we are cutting the size of paper we need, determined by our tick marks, using the * Fiskar cutter.

*If you don’t have a Fiskar cutter, but find yourself doing crafts that require cutting in a straight line, this tool is worth it’s weight in gold!  I use it ALL of the time.  They are available at any fine crafts store.  The orange blade piece pops out for easy replacement and it also comes with a scorer piece that pops in!

Now if you don’t have this tool, using a ruler and pencil to mark your lines from your tick marks, and cutting with scissors will work as well, of course.

 red white and blue July kids craft

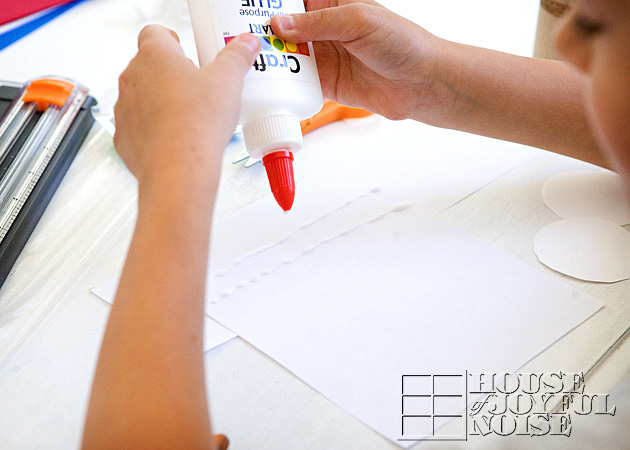
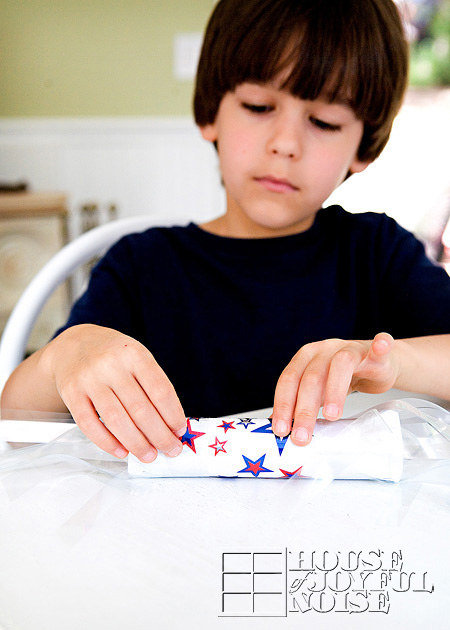
4)    Put glue at one end of the sized piece of paper you cut > the end that will run lengthwise with your tube.

 red white and blue July kids craft

5) Start rolling the paper around your tube.

 red white and blue July kids craft

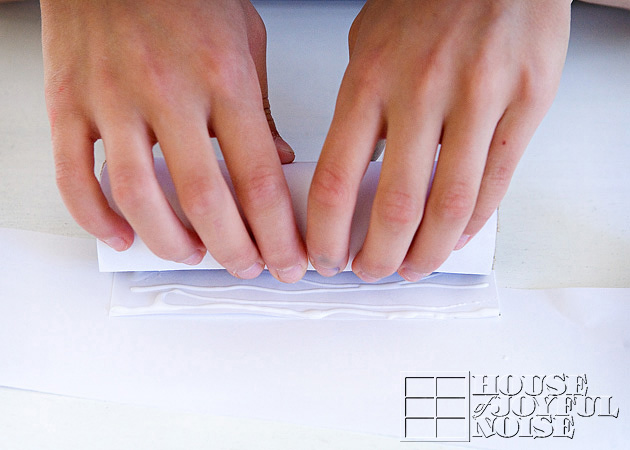
6) The end of the paper you are rolling should have the glue already at the end, to seal it to the tube.

7) Now, this next step I do not have any photos of because frankly, it took a little figuring and a lot of assistance on my part.  So there was a little too involved to be photo-taking.  But…..you need to cut some circles out of your white paper , that do not need to be perfect.  But these paper circles do not to be about 1/2 or so bigger than the end of your tubes.   You may want to trace the end of the tube as a guide, keeping your pencil tip away from the edge of the tube.   Then you can cut some small slits around the edge of your circles (toward the center, for easier folding. Because you need to use these circles to close off the end of your tubes.  Placing the circles at the end of the tube, fold over the tube all the way around.  This is one step that the clear packing tape came in very handy. We just cut the right size pieces of tape and wrapped it around to hold the paper closed over the tube end.  Comprendez?  ONLY CLOSE ONE END OF THE TUBE AT THIS POINT!!!

 red white and blue July kids craft
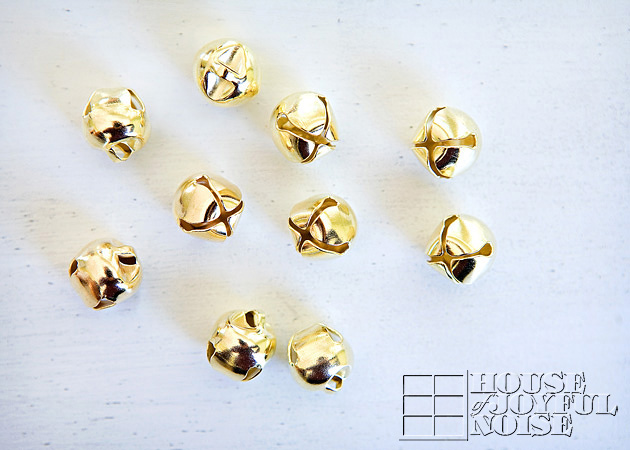
8) Let the kids count out 10 jingle bells, and drop them into the open end of the tube.
Also,  maybe using more or less will make different sound effects, but we did not test that theory, so please do not hold us responsible with that idea.  : )

9)  NOW, you can close the remaining open end of the tube, following step 7) above.

 red white and blue July kids craft
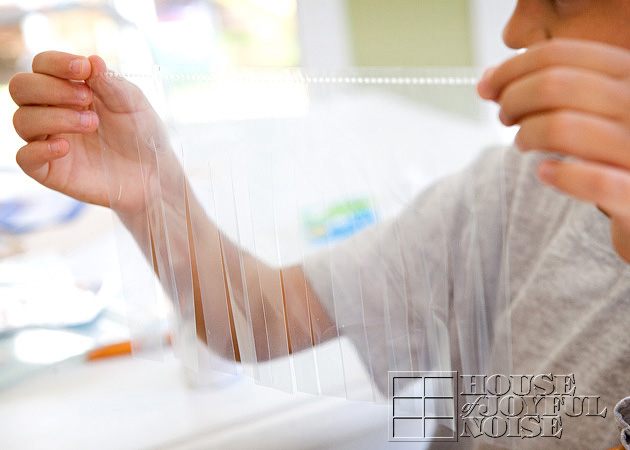
10 ) Next, take an acetate sheet, and cut it in half, using the center ring whole as a marking point.

11) Then cut fringes with either scissors, or your Friskar cutter. You need to stop an inch or so, short of the end!  You do NOT want to cut all of the way.

When you are done, you should have a piece that looks like this below….

 red white and blue July kids craft
So you are going to need this fringe piece for EACH END of every tube you are making.

12)  Again, no photos here, but wrap the fringe piece(s) around the end(s) of the tube(s), with the base on the tube, and fringe ends extending off the end.   And again, clear shipping tape was perfect for securing it.

 red white and blue July kids craft

 red white and blue July kids craft

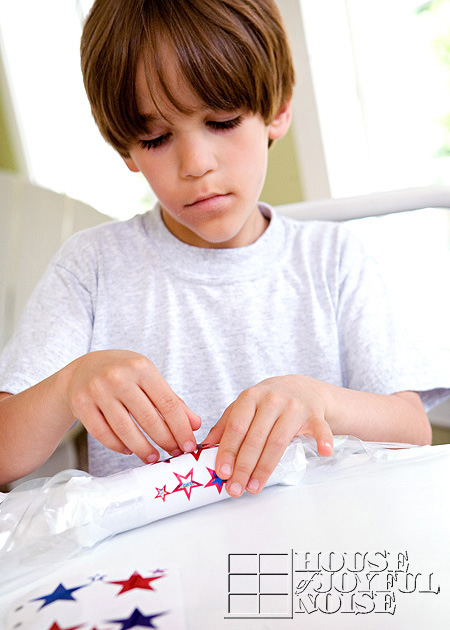
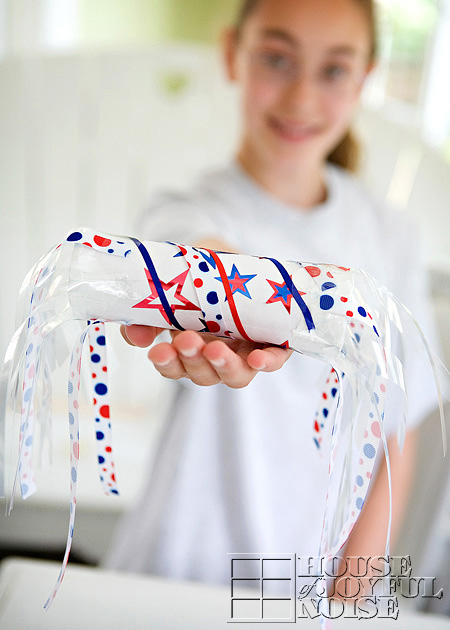
13)  Decorate the tubes with sticker as you’d like.

14)   To further dress up your shakers, you can use the red, white and blue ribbons in various creative ways.   You can cut long pieces of the ribbon and tape them at ends of the tubes along with the fringes, and/or wrap them around the tubes as bands-again using tape to secure.   For {O}’s, we tied one band, on one end, with a big bow, and long ends, to make it girly-girly for her. : )

15)   Once they are all decorated -they are ready for S H AK I NG!


 red white and blue July kids craft

 red white and blue July kids craft

 red white and blue July kids craft

 red white and blue July kids craft

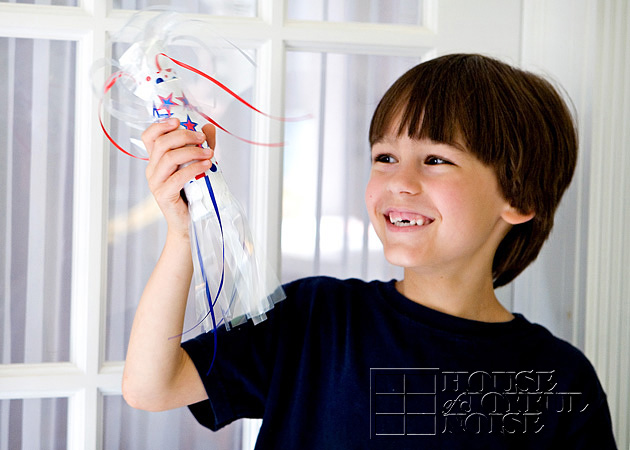
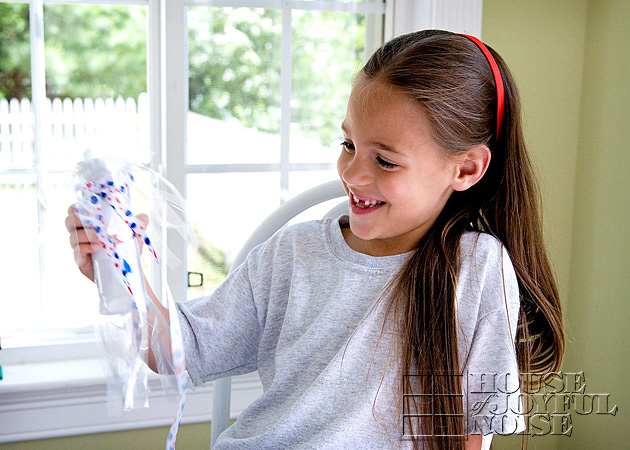
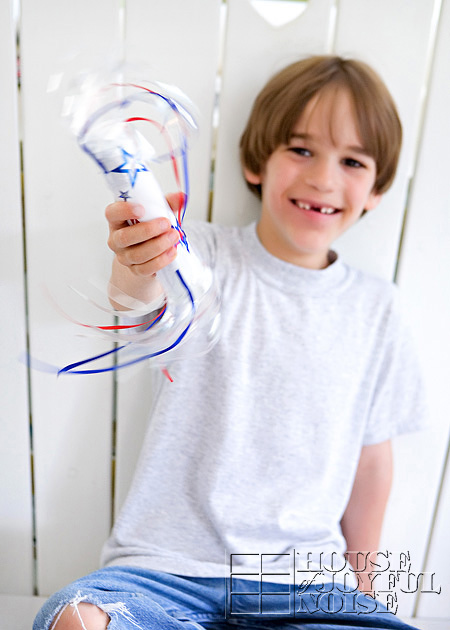
I love that they kind of look like fire crackers, too.

 red white and blue July kids craft

HAVE FUN, making some ALL-AMERICAN NOISE!!

Save

Filed Under: Crafts & Creations, Holiday Crafts, Kids Arts and Crafts Tagged With: American-kids-crafts, July-crafts, kids crafts, Liberty-shakers, parade-noise-makers, red-white-blue-crafts

We Rock! – Painted Rock Family – Kids Craft

April 24, 2009 By Laura 7 Comments

painted-rock-family

I was wondering what my oldest daughter was doing out there in the driveway.

She was getting rocks together, to surprise us with our very own Rock Family. Ourselves, actually.

Left to right: Mama, Daddy, {A}, {J}, {O} and {S}.

I was taking photos before the glue even dried, and became transparent.  Sorry ’bout that.

It’s a little (well known) craft she saw in my very favorite magazine subscription: Faith & Family; The Magazine of Catholic Living.

It ROCKS, too.

For those who get this magazine, and are interested, it’s the May/June issue 2009. Page 94.

Just thought I’d share how cute we are.  : )

Save

Filed Under: Crafts & Creations, Kids Arts and Crafts, Kids Arts and Crafts, The Big Picture Tagged With: craft, kids crafts, ladybug-rocks, painted-rock-family, rock-painting

Making Friendship Bracelets – Kids Craft

February 19, 2009 By Laura 5 Comments

Klutz friendship bracelets
(This post contains an affiliate links, for which we may be compensated for.)

To add to {A’s} ka-trillion other hobbies, {A} has taught herself the art of bracelet making, using the Klutz Friendship Bracelets Craft Kit (affiliate link)   She just LOVES to make things, and will put hours on end into creating this or that.  Or more of those things. : )   She is also passionate, about GIVING the things she makes, to others.  Which is great for 2 reasons:  1) it’s a Christ-like thing to do, and 2) For all she makes, we’d be pushed out of the crevices of our own home, if she kept it all. : )

So she put in over-time in the weeks leading to Christmas, and made every one of us a bracelet in the colors that mean the most to us, as well as one for most all of her cousins.  I hired her to make one, to give to my God-Daughter for Christmas. Plus,  she made another for one uncle, who requested one for himself.

Klutz friendship bracelets

Klutz friendship bracelets

Each bracelet is a bit tedious and time-consuming process.  But she doesn’t seem to mind it, as she sits and chats, or enjoys the peace and coziness of the fireside.
The craft kit and book gives simple directions to learn how to make these bracelets, step-by-step, with lots of photos, and a starter set of string colors to work with.

This is what the Klutz Friendship Bracelets Craft Kit looks like, and you can find it HERE.

91+8p69DzeL._SL1500_

Klutz friendship bracelets

She has made SO many, and has really had fun doing so . . . .

Klutz friendship bracelets


But most all of these are given away by now.   The third one in from the left, is mine. It’s brown, with my kids birth colors, which are also the branding colors of my business. I LOVE it.  She gave it to me on Christmas morning, as ONE of many things in a beautifully wrapped box.  Some of the items in that box with my bracelet, were drawings from all of my children, made with love.  (SO sweet. They make me 2 0r 3 a day, but you know, these were Christmassy-special), green-apple and water-melon lollipops (I have a little sucker-addiction as of late), and get this…a $50 gift card to Macy’s. WHAT??  From my 11 year old kid??  I was dumb-founded.  Turns out, she rightfully earned it, working side by side with her Dad at a local firm.  Impressed with the work she was doing for their company, along with her Daddy-Boy, they gave it to her. And she gave it to MOI (that’s ME, in French. You knew that, right?) , for Christmas.

Can I tell you how HAPPY I was to get that card?  VERY!!  I knew JUST what I was getting with that card.  Something I just can’t get myself to spend money on (especially for myself), but needed pretty badly.   Want to know what I bought?  Because I WILL tell you. I am joyful enough in this grateful heart of mine, to tell you just what I spent that $50 on.  I brought my daughter with me, to share in the happy shopping day, as I threw those items happily on the counter for the cashier to ring up.  You want to know, don’t you.  Are you sure??  Ok. I’ll tell you.

Bras.

Yes, it’s true!!  These things can put a BIG SMILE on your face, when you really need them.  As the lady handed me that bag, and thanked me for shopping at Macy’s, I turned to my daughter next to me, and jumped up and down hugging and thanking her for my new under-things.  I might have even squealed, in my moment of excitement. She wrinkled her nose, and shushed me, as she often does in her cute-little way, when she is ‘slightly embarrassed‘. (<That’s a big expression with my kids.)    But I knew it made her happy, to make me so happy. Though she could NOT understand WHY I would choose THAT to use my $50 on.  But, she was happy for me.

OH!!!  I’m sorry.  We were talking about her bracelets, and not my under-things.Right. (But they are so nice!)  So sorry.

So this is the latest new technique she has learned:

Klutz friendship bracelets

Cool huh?? It’s called ‘Broken Ladder’.

She wants to make lots more, and maybe have enough done to sell a few.  She has more business-ventures going in that head of hers.  I love her ambition though.  She is good with her money too.  She saves some, spends some, and often gives away some, in one way or another.  Often times, to buy supplies to make things, to give away.

I always wonder, just what she will choose to do with her life, when she is all grown up.  You know, on days when I can ‘go there’ and think about that.  But for now, we mostly enjoy watching her ‘get there’.  Because we can tell already, it’s going to be good, when it comes. And we’ll spend that time, in the future,  looking back to these days, when she was on her way.

She’s a colorful one, for sure.

Klutz friendship bracelets
This craft kit really is a fun little gift, for girls or boys!  They’ll spend hours making bracelets for their friends and family.
More embroidery thread, in a wide variety of colors, can be found at any quality craft store.

Thanks for dropping by, for another peek at what we’ve been up to.

Save

Save

Filed Under: Crafts & Creations, Homemade/Handmade Gift Ideas, Kids Arts and Crafts Tagged With: embroidery-thread-crafts, friendship-bracelets, gift-ideas-from-kids, kids crafts, Klutz-friendship-bracelets-craft-kit

Mini-Masterpiece Magnets Made by Kids – Gift Ideas from Kids

February 12, 2009 By Laura 8 Comments

magnets kids can make

If you need gifts from your little kids, that they made, for loved ones, these Mini-Masterpiece Magnets are perfect!
It’s basically finger-painting fun, made into little framed pieces of colorful art, to use on refrigerators. Your recipients will love them, and your kids will be so proud they made them, themselves!
We’re teaching you how to make them!

First, just let your kids finger-paint with vibrant colors, on large quality, acid-free art paper.

making-masterpiece-magnets-by-kids_5

making-masterpiece-magnets-by-kids_4

making-masterpiece-magnets-by-kids_2

making-masterpiece-magnets-by-kids

making-masterpiece-magnets-by-kids_3

We call them “Mini-Masterpiece Magnets.”

It was abstract fine art, done our way!  And each one SIGNED by for the artists, no less!!
They all had a hand, in making each one. 😉

These are a fantastic gift idea from kids, that they can make themselves with love, for Christmas gifts and other occasions, for family and loved ones!
They are so fun for the kids to make themselves, and they will make them proud to have their masterpieces on display on anyone’s refrigerator!

Here’s how we made them:

We took those full sheet finger paintings, mounted them on magnetic material, cut them into 3″ x 3″ squares, and then ‘framed’ them with some black vinyl.
It’s that simple!

Then we made up sets of three, put them in those nifty clear bags I love, with a ribbon and a tag that said ‘Mini-Masterpiece Magnet Set’.  : )

We thought they were so colorful and fun, and honestly, it was my favorite hand-made craft gift we made to give as Christmas gifts.  We can only hope others could appreciate all of the colors and happy-emotion of these paintings, to adorn their refrigerators, perhaps to hold up a masterpiece of their own child’s, or a shopping list!

We made A LOT of them, and really…….they were truly hand picked into sets, for each recipient.  They may look all the same to some, but it was a painstaking task for us silly ones, choosing which ones we wanted to give to who, and which we just had to keep!

masterpiece-magnets-by-kids_all

Here’s a closer look at a few of these priceless paintings:

magnets kids can make

Big Mess.  Crazy Colors. Loud Laughs. Huge Fun. = ART MADE WITH LOVE

magnets kids can make

Save this idea for a rainy day craft, or as a Christmas gift idea from your own little Picasso-People.
Our kids had a blast making them, and as an update (2016), they have been loved and enjoyed for many years by all who received this gift from the kids. They’ve been on our own refrigerator for all these years, holding up other pieces of their art, and bringing us smiles from the memories we made, making them.

Thanks for coming by for some more inspiration and ideas!

Save

Save

Save

Filed Under: Crafts & Creations, Homemade/Handmade Gift Ideas, Kids Arts and Crafts, Kids Arts and Crafts Tagged With: art-magnets, Christmas-gift-ideas-from-kids, finger-painting-art, finger-painting-ideas, gifts-kids-can-make, handmade-homemade-gift-ideas-from-kids, kid-craft-gifts, kids crafts, kids-arts-and-crafts, magnets, magnets-kids-can-make

Rare Birds at the Park – Kids Made Paper Bird Costumes

October 28, 2008 By Laura Leave a Comment

kids-craft-paper-bird-costumes

Each of our kids are pretty creative in their own rights.  Definitely different styles, ideas, and interests, but we would consider them all quite creative.  And equally messy in their creating. : )   Not to digress already, but our ‘school room’ serves many, many purposes.  It’s the most used room in our home. And it is there that the children create the most.  Sometimes alone.  Sometimes together. But either way, the mess is always BIG.  My family can tell you that there are daily lessons (or lectures….whatever you want to call it), about cleaning up after our creating!  But that one’s not sinking in as much as Mama would like. They are off to share their creation, and the mess they left behind is quickly forgotten.  Or more likely, it was never acknowledged at all!

I will never give up on teaching them to clean up their unbelievable messes, born in the process of their creating.  But I’d rather the mess, than they ever quit following their creative hearts.  Creating is a big part of their world.  Their days. Their childhood life.  And it’s one of those things that solidifies one of our purposes in home schooling them.  We want them to have OODLES of time, to do with as they wish.  To have enough free time they MUST fill on their own, that they hear the whispers of their heart. Their passions calling them. The voice of God. And they’re good at it already!!  I love to see what they choose to do–to see their imaginations hard at work, kicked into high gear— to see their own inner joy coming out, having found on their own, what makes them happy, as they pass their gift of time.

So with all of that being said, our boy {J} is definitely a unique, creative one. He is just different in his process, I guess. He is not spontaneous in his creating.  He’s a real, thorough planner (and thinker).  Often times, he tells me how he had this, or that, idea, while lying in bed waiting to fall asleep at night, and deciding what he was going to do in the morning. And trust us….we know when he gets up with a mission! He is in that school room, getting right to work on what he had planned. Immediately.  There is no time to waste.  No time to get dressed, wash up, or even eat breakfast.  He’s busy. And he needs to ‘just finish’ what he was making.  Which could be quite awhile!!  I love to just watch him at times.  Especially the cute things he does with his tongue when he is very focused.

And so we come to the focus of this particular post …  one of his grand and clever ideas. He had decided to make himself the wings and mask, of a blue jay.  Blue jays are around all day long in our yard bird sanctuary – and they do demand our attention. So it was no surprise he chose the blue jay.  What did surprise us, was the effort involved to make such a ‘costume’ once we saw what he had done.  He taped multiple pieces of paper together, to make each wing, and used a paper plate for the face.  I have reason to believe he even got out the bird identification book, to be sure of what their ‘mask’ looks like.

Now,…..had we known what he was doing, we could have offered larger paper, or cardboard, and maybe some paint, to create this bird costume. But, this creation was done before we knew what he was doing. Honestly…when he came out, showing me what he made, I must have had my mouth wide open. I was impressed, to think that a 6 year old boy would come up with this idea, and be so inspired to follow through with so much work, to make it a reality.  He even made handles on the inside of the wings, for his hands.

{J} – The Blue Jay

blue-jay-paper-costume

It wasn’t long  (maybe….3 seconds?), before the other little kids wanted their own bird costumes, too.  {J} was happy to help instruct, and lend a hand here and there, but he wasn’t doing it for them!!  It even took them a few days to get the coloring complete, with some requests from their big sister to help them color too.  It IS a LOT of paper to cover!  But eventually, they got them done.  Now, they may have not wanted these bird outfits quite as much as {J} did, but at least he didn’t have something they didn’t have now!  And in the end, they all were pretty proud birds.
.

{O}-The Cardinal

cardinal-paper-costume-kid-craft

.
{S} – The Goldfinch

gold-finch-paper-costume-kid-craft

So….after having these wings and masks all over the house (and not necessarily together, as the sets they should be), I knew it was time to do something real with them.  So the other day, we took them to the park, where they could really have space, to spread their wings and fly.  And that they did.

paper-bird-costumes-kid-craft

paper-plate-bird-masks-kid-craft

They never quite got off the ground.  In fact, the ground beneath their claws was squishing and squashing all over the place.  Apparently from a recent irrigation treatment. So, it wasn’t long before we flew back to our nest. But it was fun while it lasted, and at least I got my photos!

Oh, I meant to mention that we often joke with {J}, that he’ll probably have his own show someday.  Perhaps called {J}’s Craft Show.  He just smiles, as if it may just be what he is planning. One thing is for sure – He’s already got 2 booked guests;  his sisters, who have every intention of coming on his show.  And little does he know, his Mama sure does, too.

Filed Under: Crafts & Creations, Kids Arts and Crafts Tagged With: kids crafts, kids-creativity, paper-costumes

  • « Previous Page
  • 1
  • 2
  • 3
  • Next Page »

We are wicked happy to have you here! We hope you find much inspiration, help, humor and enjoyment here.


Archives


POPULAR POSTS

* * * * * *

SUBSCRIBE to House of Joyful Noise blog! Every new post, delivered right to your email box!


Privacy Policy

Amazon Affiliates

Never at any additional cost to you, we may earn a small commission for our endorsement, recommendation, testimonial, and/or link to any products from our website. Your purchase through our links helps support our family, while sharing with you the products we authentically use and recommend, for various ideas, and letting you know where you can purchase them. Thank you for your support!

[footer_backtotop]

Copyright © 2025 HouseOfJoyfulNoise.com · Genesis Framework by StudioPress