• HOME
  • {A}’s Chipmunk Training Archives

 Homepage

  • The Homestead
    • Home Projects
    • Home Improvement
    • Home Decor
      • Seasonal Home decor
        • FALL Home Decor
        • WINTER Home Decor
        • SPRING Crafts and Creations
        • SUMMER Crafts and Creations
    • Our Chickens
    • Gardening
    • Organization
    • Re-Purposing
    • Furniture Refinishing
    • Budget
  • Crafts & Creations
    • Seasonal Home decor
      • FALL Crafts and Creations
      • WINTER Crafts and Creations
      • SPRING Crafts and Creations
      • SUMMER Crafts and Creations
    • DIY (Do-It-Yourself) Project
    • Kids Arts and Crafts
    • Homemade/Handmade Gift Ideas
    • Holiday Crafts
    • Fan Pulls
    • Free Printable/Downloadable
    • Sewing Projects
    • Giveaways
    • Business Features
  • Recipes/FoodFun
    • Breakfast
    • Lunch
    • Main Dish
    • Sandwiches
    • Appetizers
    • Slow Cooker
    • On The Grill
    • Side Dishes
      • Soups
      • Salads
    • Baking
      • Breads, Rolls and Muffins
    • Snacks
    • Treats
    • Desserts
    • Drinks
  • Homeschooling
    • Elementary Homeschooling
      • Elementary Homeschooling READING
      • Elementary Homeschooling MATH
      • Elementary Homeschooling LANGUAGE ARTS
      • Elementary Homeschooling SCIENCE
      • Elementary Homeschooling HOME ECONOMICS
      • Kids Arts and Crafts
    • Middle School Homeschooling
      • Middle School Homeschooling SCIENCE
      • Middle School Homeschooling HOME ECONOMICS
    • Language Arts
    • Math
    • History / Social Studies
    • Geography
    • Foreign Language
    • Field Trips
    • Games
    • Nature Study
  • The Big Picture
    • Life In General
    • Celebrations
    • Faith
      • Into the Light; The Series
    • Giveaways
    • Reviews & Sponsors
  • Photography & Lettering
    • Photography
    • truck lettering
    • vehicle graphics
    • Newborns
    • Kids
    • Engagement
    • High School Senior Pictures
    • High School Senior Pictures Sneak Peeks

Maple Sugar House Field Trip | Homeschooling

April 1, 2012 By Laura Leave a Comment

maple-sugar-field-trip-homeschooling-16

            As a kid growing up in western Massachusetts, tapped maple trees and maple farms seemed to be everywhere.  Visiting maple sugar houses, and learning about the process of making maple syrup and sugar, were some of my favorite school field trips. 

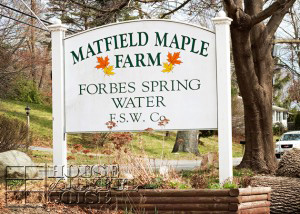
     Living a significant shift away from that area now, maple farms are not as common around here. But this was yet another field trip I really wanted to take our kiddos on.   We almost arranged one out where I grew up, but the timing of getting out there would have risked missing the end of the season this year.  So I found Matfield Maple Farm, less than an hour from us, and we went on a beautiful day! It almost felt wrong from the get-go, with no snow on the ground though!  And that was not the only change in the picturesque scenes I have carried in my fond memories of maple sugaring. But I was still excited for the kids to learn all about today’s process of maple sugaring farms.

My visual memories of the maple tapping season are very much like this:

maple-sugar-field-trip-homeschooling-20      
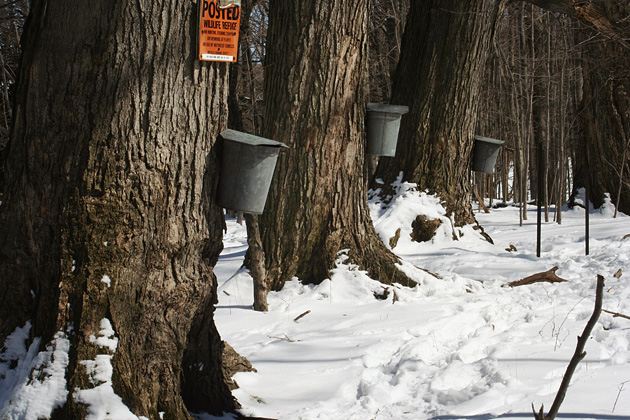
Metal pails on trees, catching the pure sap from the taps that were put into them. And always, as I recall, snow on the ground.   After all, one of the best parts of our class trips, was eating syrup on snow, inside the sugar house!  Maple tapping season is the few weeks of the tail of winter, and first weeks of spring, when the nights are still cold, but the days are warmer.  That’s when the sap starts flowing. But in western MA, near the Berkshires, we always got so much snow in the winter in those years, it simply had not all melted yet, come maple sugaring season.

MY have things changed.  Not only are winters not as true as they used to be throughout the season , but maple trees being tapped for  sap at many farms, now look like this:

maple-sugar-field-trip-homeschooling
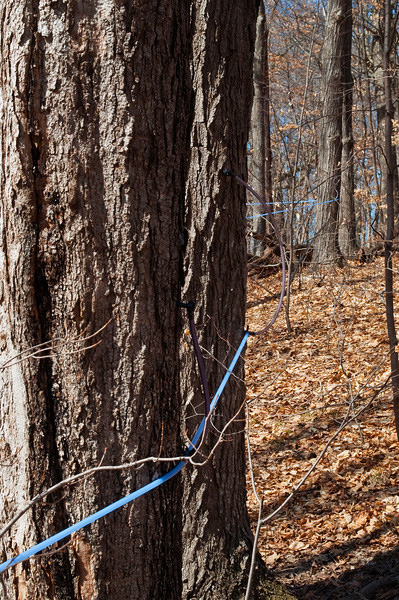
They are drilled and tapped much the same way, but tubes run connecting one tree to another, with all of the sap from all of the trees, running to one place.  I realize it’s more time efficient, and time is money after all. But I must say, I really miss the charm of good old fashioned pails on maple trees. 

     Watching and learning the whole process of how maple sap is collected, and boiled down into pure maple syrup, was still something I wanted my kids to see for themselves.  But I really hoped it would be just like how I learned about it, and I was looking forward to taking photos of the pails on the trees!  I did have an idea this farm used the more modern method, so it wasn’t a complete surprise. But I was hoping. They did say they also tap with pails, but we didn’t happen to see any. 

     Still, we were very much enjoying our trip, and it sure was a beautiful day for one.  Saturday was when the touring was, so Daddy/Michael was able to come too. It was a family field trip!

maple-sugar-field-trip-homeschooling-1       
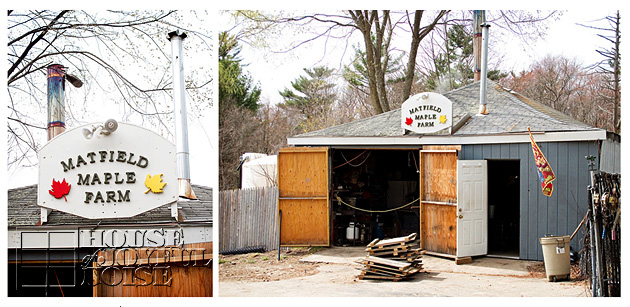
We had a chuckle at their cute sugar shack sign.  We’d recognize that shape anywhere!  Clever, recycling a basketball backboard into a sign! We  just love little family run businesses, and we always do all we can to support them, because we know all about having a little dream, and trying to make it work.

maple-sugar-field-trip-homeschooling-2      
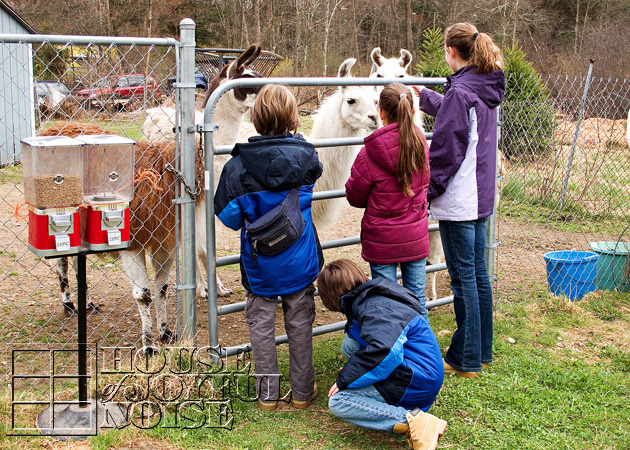
The kids fed the llamas, while a small crowd of us waited for the tour guide. {JM} was gathering clovers on the ground to feed them too.

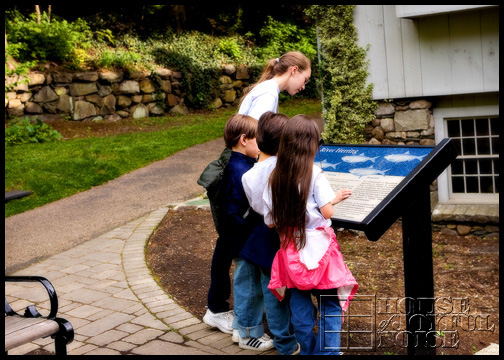
    Soon, the owner/tour guide, and his daughter led us out into the woods, as he started telling us about the maple farm.

maple-sugar-field-trip-homeschooling-3

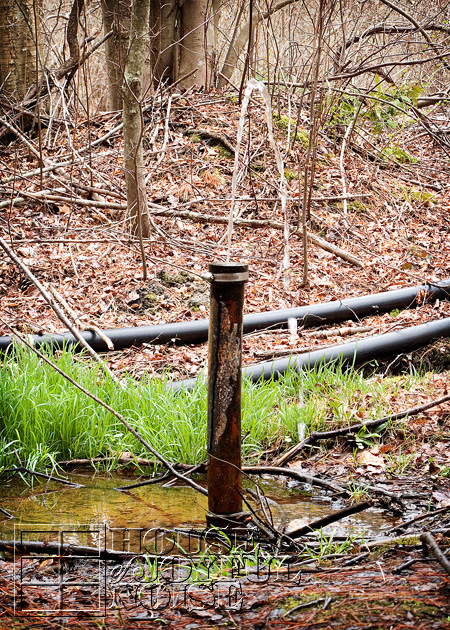
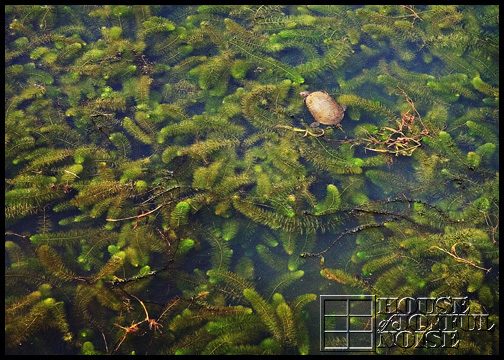
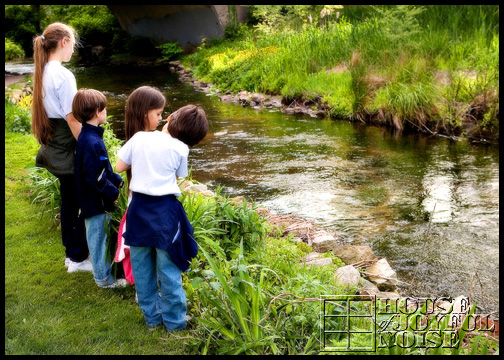
     The first stop was this natural spring. Do you see how vibrantly green that grass is?  The guide told us that is there even through the winter snow, because of the spring there. Imagine how pretty that must be. BUT….no snow for us! ; )

maple-sugar-field-trip-homeschooling-4       
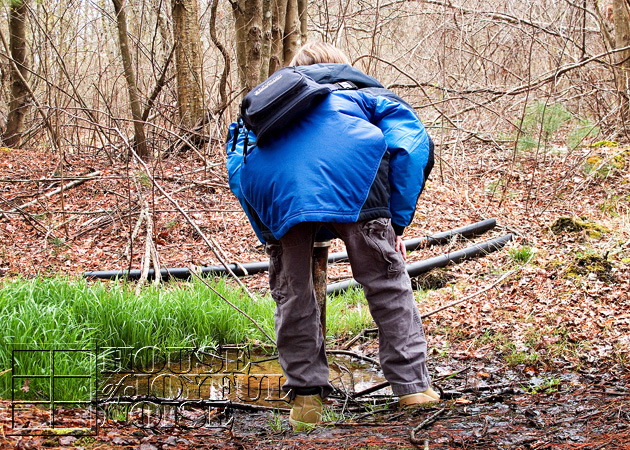
We were all offered to get a drink, and taste the fresh spring water. So I told one of my boys, who was going up first, that I wanted to get a photo of him getting some water. But all I got a bum shot!


maple-sugar-field-trip-homeschooling-5     
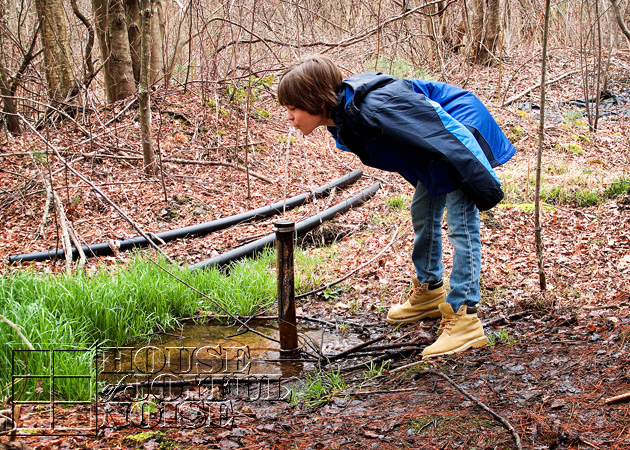
Thankfully I have other kids, and got another chance.


maple-sugar-field-trip-homeschooling-6 
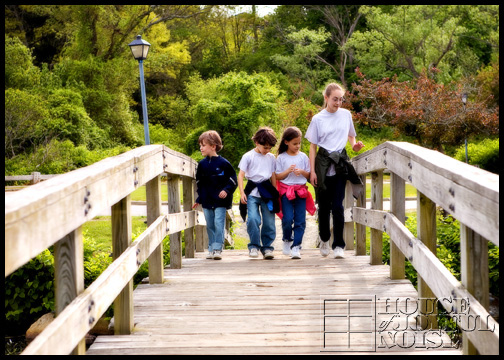
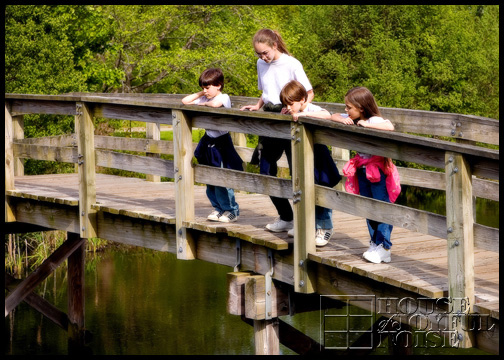
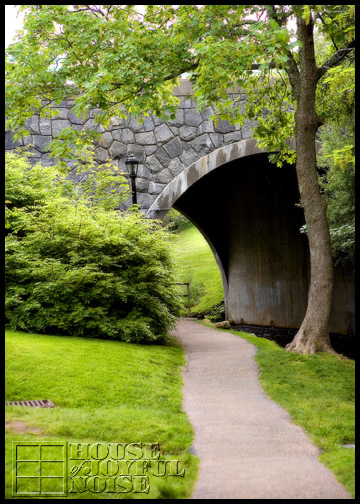
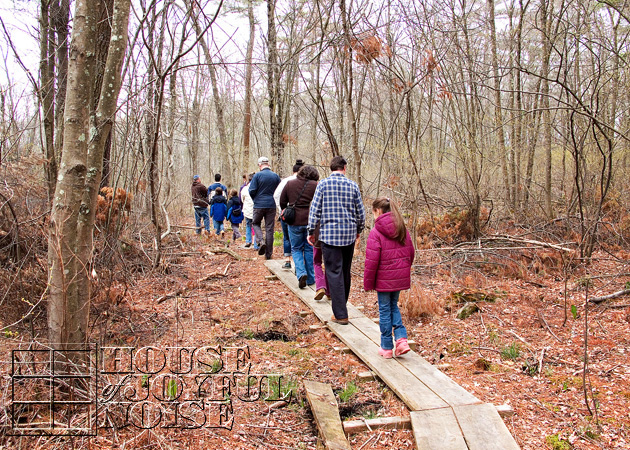
We moved on, following each other on these wood-board paths. 

     A couple of times, we all had to duck under sap lines.  I personally thought of doing the limbo, but didn’t want to show off. ; )


maple-sugar-field-trip-homeschooling-7
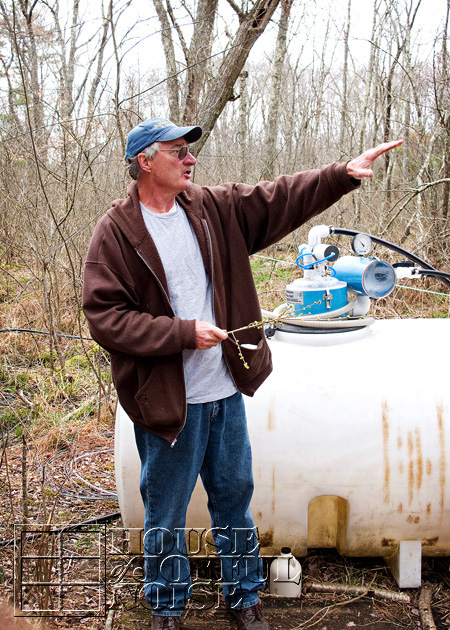
Next we stopped at the 450 gallon gathering tank, where all the lines run to.  Here, the guide told us about the easiest way to know what trees to tap.  They go out scouting trees in the warmer weather, and mark the maples, when the trees have leaves.  That is when they can quite obviously tell which trees are of the maple variety.  As opposed to the winter / early spring, when it’s harder to tell which are which.   See the jug down by his feet? In it was a little treat for us all.

maple-sugar-field-trip-homeschooling-8     He passed out little sampling cups, and poured us all some pure maple sap, straight out of the trees. If you have never seen or tried it, maple sap looks just like water, and tastes almost as refreshing, with just a hint of sweet.  Sap straight from the sugar maple tree is about 98 percent water and 2 percent sugar, as well other nutrients, and minerals.  Maple syrup is derived by boiling it all down to the point where the process of evaporation leaves only about 33 percent of water and 67 percent sugar.


maple-sugar-field-trip-homeschooling-9      
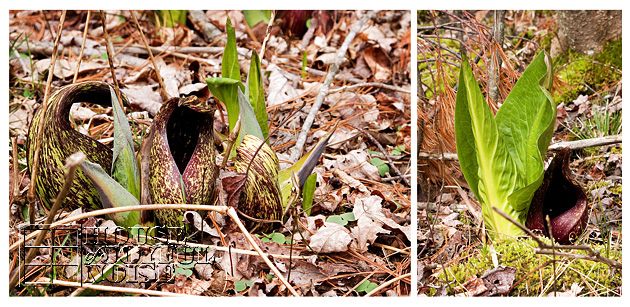
Do you know what this is? It’s called Skunk Cabbage. He broke off a piece for us to smell, but recommended we don’t let it touch our nose, whilst sniffing!  It’s named well. It stinks terribly! 


maple-sugar-field-trip-homeschooling-10
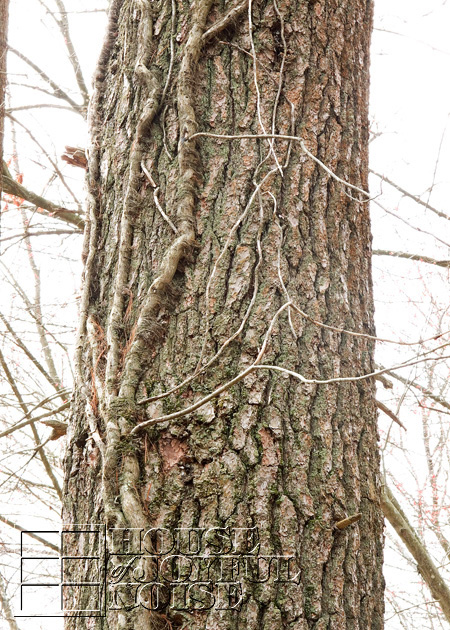
A poison Oak tree, evidences by the poisonous vine plant climbing it.


maple-sugar-field-trip-homeschooling-11  
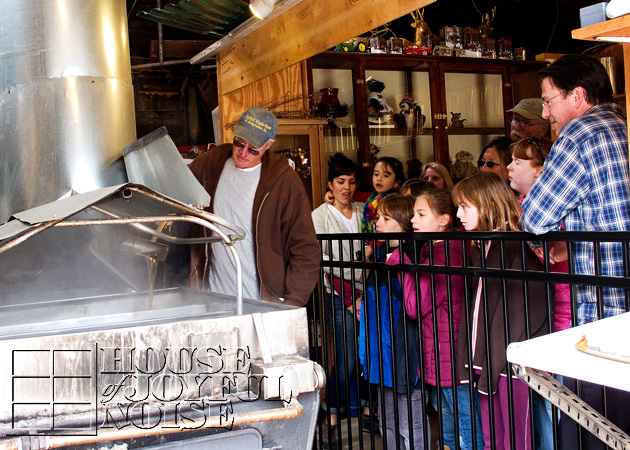
Back at the sugar shack, we all learned more about the process of boiling down the sap to the right consistency.  This is a wood burning boiler, bringing the sap to the boiling point of 212 degrees.  When it does boil, the steam rises up out of the sugar shack, and the syrup gets thicker and sweeter.


maple-sugar-field-trip-homeschooling-12
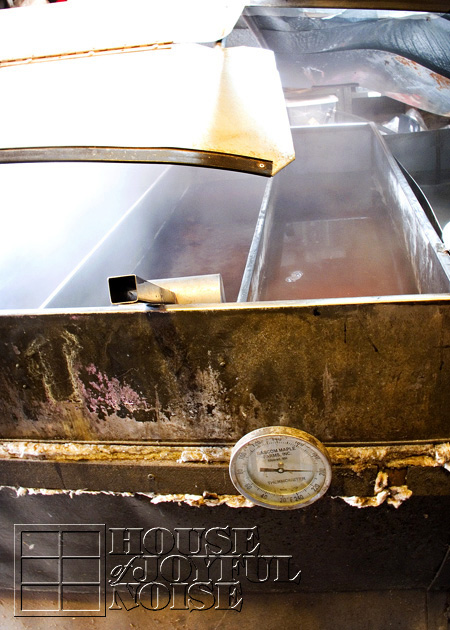
To the right of this shot is the pre-heating waiting area.  As it is moved into the boiling area, and getting to increasing thickened consistencies, it is moved over to the next holding well.


maple-sugar-field-trip-homeschooling-13
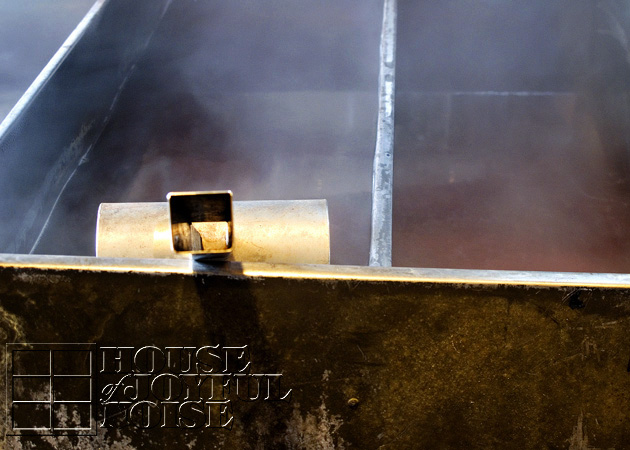
We found it interesting that it takes 40 gallons of maple tree sap, to make one single gallon of maple syrup!


016       
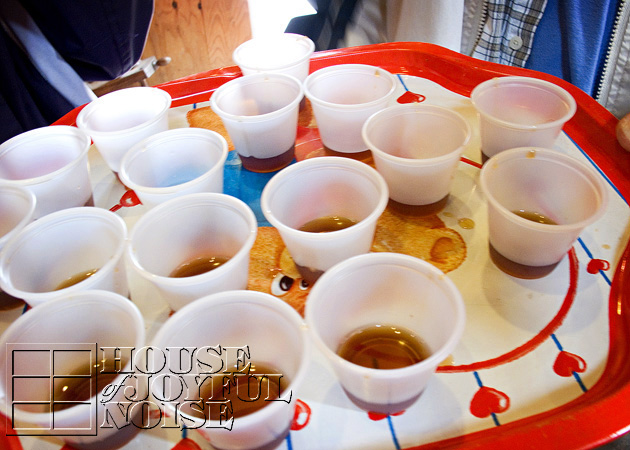
Samples of the finished product were shared with us as well. The kids were sure to get their own little cup, and immediately began asking about plans to have pancakes for dinner.  Honestly, there is no comparison between pure maple syrup, and the ‘syrup’ for pancakes that they sell at the grocery store, which is actually made of corn syrup!

maple-sugar-field-trip-homeschooling-14      
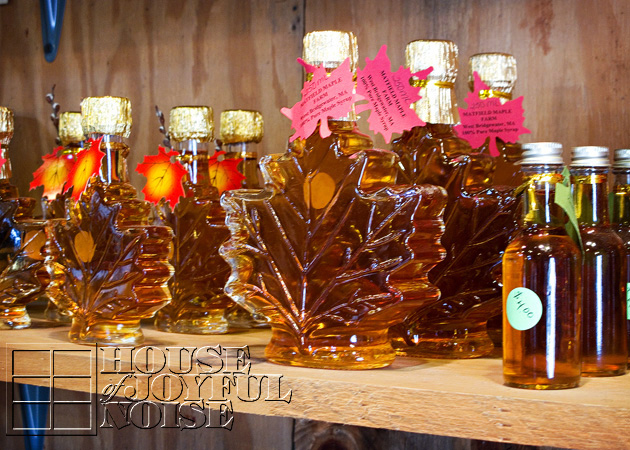
Another favorite part of field trips is always the gift shop! Here, what they sold was right behind us right there in the sugar shack, on some shelves.  Of course they sold pure maple syrup in fancy bottles, and there was some maple sugar candy as well, which is made by bringing the boiling process even further, removing an even higher percentage of water, until the sugar starts to crystallize. (I think.)

    A quick funny story about maple sugar candy:  As a kid on maple sugar house field trips, I always spent my spending money on buying maple sugar candy for my father.Every time. And I’d be so excited to give it to him, because I was under the impression he really loved it.  Then about a year or so ago he and I were discussing maple sugar houses, and I found out he hates maple sugar candy!  He says it’s far too sweet for him. But it just goes to show you how happy he pretended to be, so as not to hurt my feelings as a kid. (Thanks, Dad. : ) 

     I didn’t buy him any candy this time.

maple-sugar-field-trip-homeschooling-15 
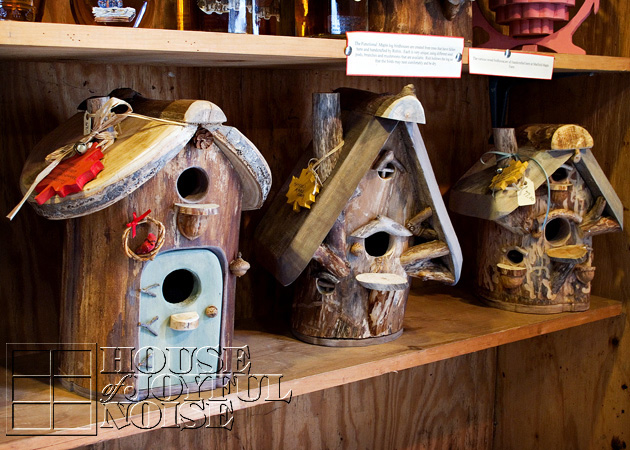
We thought these bird houses were cute too.


maple-sugar-field-trip-homeschooling-17
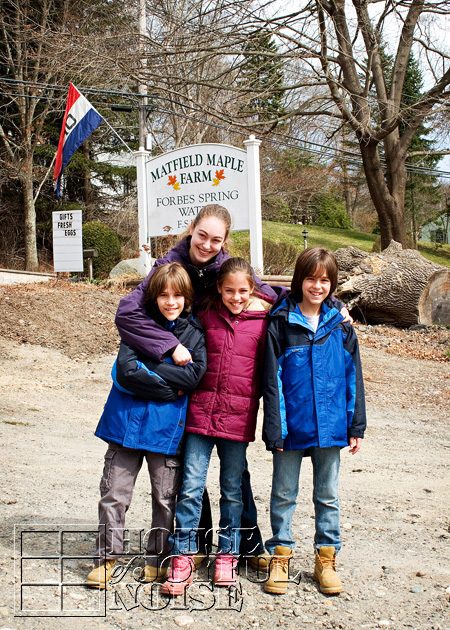
The kids had a great time, as you can tell by the smiles on their faces.


maple-sugar-field-trip-homeschooling-18      
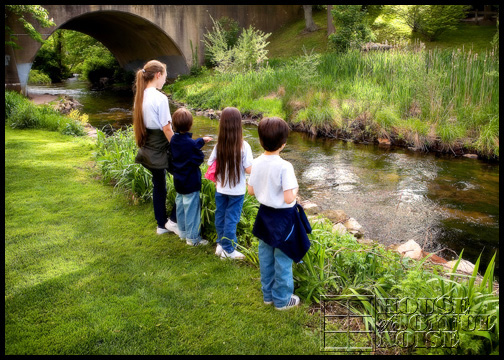
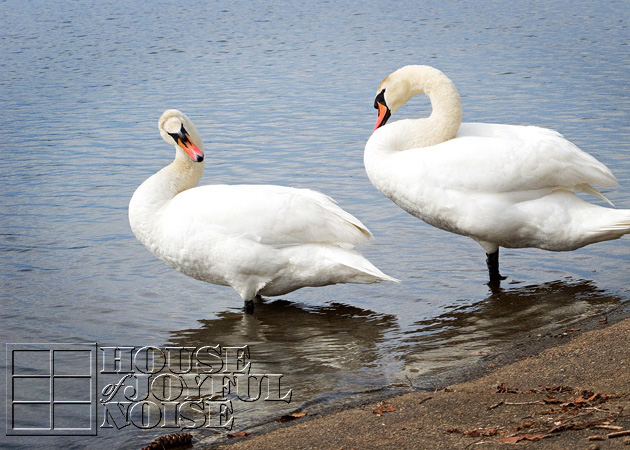
On the way home, we stopped lakeside, and ate our nice picnic lunch with the swans.

maple-sugar-field-trip-homeschooling-19      
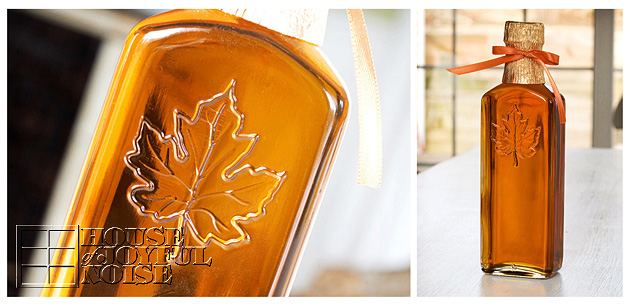
It was a wonderful day, and along with the memories, we brought home a bottle of pure maple syrup. Chosen not only for it’s contents, but of course for the fabulous bottle, with an embossed maple leaf in the glass!  I already have ideas of what I can do with it, for detail home decor come Autumn.  But before then, we have many pancakes and waffles to eat, drizzled with our pure maple syrup! 

      A planned meal for that night was quickly kicked to the curb, and we satisfyingly filled ourselves with blueberry pancakes. It was the kid’s first maple sugar house trip, but it won’t be their last! We will be getting to a maple sugar farm in the next couple of years, that still does things the good old fashioned way! But this place was still worth the trip, and no doubt the memories and lessons will be as sticky as the syrup on their plates.

     I know not everyone lives in the right climate, but have you all been to a maple sugar shack lately? Did they use the old or new method, and what your thoughts on the two? We’d enjoy it if you shared.


Filed Under: Field Trips, Homeschooling, Nature Study, Science Tagged With: homeschooling, homeschooling-field-trips, homeschooling-nature, homeschooling-science, maple-farm, maple-sugar-house, maple-sugar-shack, maple-sugaring, nature-study, pure-maple-syrup

A Baby Raccoon Study | Homeschooling

May 23, 2011 By Laura 8 Comments

baby-raccoon-study-homeschooling-9


Some of our most exciting homeschooling lessons, often times turn out to be ones that were not part of my day’s lesson plan at all!  Like the countless opportunities of teachable moments  that pop up throughout every single day for us as parents/teachers, to utilize in educating and guiding our children down the right paths, we’ve had many days, where a lesson to study has sauntered right into our yard!  And it can be a darn cute lesson!!

baby-raccoon-study-homeschooling Such was the case the other day, when we spotted this baby raccoon, right up on the hill, outside of our school room windows! (For the sake of reference in this post, we’ll assume the baby was a girl.)  She was enjoying the banana peels & strawberry tops we had thrown out there.


baby-raccoon-study-homeschooling-1 She was poking around and frolicking about up there on our hill, all afternoon, and gave us plenty of time to study here, research facts about baby & adult raccoon, and of course as always, abandon all self-control, and take more photos than necessary. : )


baby-raccoon-study-homeschooling-2 The kids get so very excited, when we spot wildlife, whether it be here on the homestead, or out in a (small) worldly travels.   We all learn so much, gathering both fun, useful, and definitely good to know kind of facts!  So as we share with you all of the photos of this adorable masked critter, we’ll also share with you a lot of what we have learned, as our unexpected study unfolded.

Maybe you’ll learn a new thing or two about raccoons, that you didn’t know before! (We sure did. That would be more than 2 things though.)  We’ll see.

baby-raccoon-study-homeschooling-3

Well, every life starts with mating season. Right?

That would be winter, for raccoons.  January through the end of March.  Although we had some raccoons up in our tree one night around 9 pm, making ALL kinds of racket.  We could have sworn they were ‘busy’, if you know what I mean.  (HOLY LOUD!)  In fact, until we got further into researching, we joked that this baby was probably from once upon a night! 😉

baby-raccoon-study-homeschooling-4 Baby raccoons are called ‘kits’.  
They are born after 63 days of gestation, in the spring, and are born in litters of 4-5. They generally stay with their mother until the Fall, unless their has been some interference of the nest, or tragedies brought on by man or nature.


baby-raccoon-study-homeschooling-5 By studying the appearance and motor skills of raccoons at various young ages, we determined this kit to be somewhere between 8-10 weeks.   The mother was no where in sight throughout the day.  While I easily approached the baby to photograph her, I was keenly aware and cautious, of a mother raccoon coming out of nowhere to protect her young.  But I was brave (any risk is often small for a good photo!), and that never happened.


baby-raccoon-study-homeschooling-6

Raccoons grow to be about 12-35 pounds, and 12-28 inches long.
They are omnivores, which means they will eat most anything.  Both meat and vegetation.

It is not true, that raccoons like to wash their food before they eat it.


baby-raccoon-study-homeschooling-7 As we can surmise, by looking at these photos.


baby-raccoon-study-homeschooling-8
I know it is difficult to tell the scale of our little visiting kit here, but she was small enough that she could have sat in Michael’s big hand.

Another sign of how young she was, was her frequent fatigue.  She needed to rest a lot between activity.

baby-raccoon-study-homeschooling-10 She had just scrounged around our hill, and then sat upon our retaining wall here.  I could see her growing sleepy, as I sat nearby taking photos of her.  Her instinct was to keep an eye on me.   But her instinct was not stronger than her will to stay awake.   In a matter of seconds, she put her head down like this, and then…..

baby-raccoon-study-homeschooling-11 ….tucked her head, and curled right into a ball, for a snooze!
The desire to nap, was much stronger than her fear of me, or will to protect herself!


baby-raccoon-study-homeschooling-12

How cute is she?  A little fuzzy ball.

After her kit-nap, she had a little more activity, and then curled up into a ball once again, in a patch of sandy dirt up on the hill.   By then, we were observing her through our school windows, when it began to rain on her!!  We felt so bad for her, but she kept sleeping on.  So Michael grabbed a box from our basement, cut out a door, tip-toed out there, and put it over her.


baby-raccoon-study-homeschooling-13 We carried on with our day, but soon noticed 2 things:  She had pulled down the flap of the box, to sleep on instead (smart little kit!), and then she was coming out for a little more exploring.

baby-raccoon-study-homeschooling-14 As much as we were tempted, and the kids were pleading their cases, it is not wise to keep raccoons as pets, for a variety of reasons.  They can be very dangerous, and keeping them in captivity would ultimately end up with a sad ending.

Adult raccoons have few natural enemies.  I think we as humans, dislike them more than other creatures, for their mere clever interference with our camping activities, and trash disposal efforts.  They are indeed curious, and clever.  Their front paws and back legs all have 5 toes each, and they are as skilled as human fingers. Raccoon have been witnessed to unlacing shoes, opening purses, and undoing zippers!  They are both great climbers, and swimmers. They are members of the ‘carnivora’, such as dogs & cats, but are also related to the panda bear.


baby-raccoon-study-homeschooling-16 One of the most distinguishing features of the raccoon, is it’s black mask.
The purpose of their mask, is to reduce glare, and enhance their night vision.  As many of us have grown to understand through our own observations and experiences with raccoons, they mostly sleep during the day, and are most active, searching for the food, from dusk through the night.


baby-raccoon-study-homeschooling-15 Our kit, who we had fallen a bit attached to, despite our best resistance (ok….the kids did not try real hard…), did not end up staying with us for life, as we had entertained notions of in our minds.  She seemed to like her box, but it didn’t turn out to be ‘all that’ after all.   She was in there for a good part of the evening and early dark, but later that night, she went missing. (As she had the freedom to do!).  My own mother instincts kicked in.  I had fleeting thoughts of going to search for her with a flashlight, and bring her home to safety. “She is still so small and helpless, ” I worried, “and prey for larger animals right now.”  But I knew…such is nature. And anyway…I was tired and wanted to go to sleep!

Michael was the first one up the next morning, at 6:30 a.m.  Kit was back by then, and he had the pleasure of watching her climb the tree stump, and roll around in the morning-dew grass out there, as cute as she is, while he ate his breakfast.  But awhile later when the rest of us woke, she was gone again.


baby-raccoon-study-homeschooling-17 Our best guesstimate, as to why she was around with no mother in the first place, is that her mother was in fact close-by, sleeping in a tree, and kit wandered off to play.  And nap, as needed.  We have faith that she was not abandoned, as she appeared well cared for and fed.  She was just practicing her independence, but will not truly be ready to be on her own, until fall.

We amuse ourselves with how hopeful we are though.  The box is still out there.  None of us have grabbed it and broken it down.  I suppose we all carry the hope, that she may sleep away at nap time once again, and come to play and amuse us.   If only for a lovely afternoon, once again.


baby-raccoon-study-homeschooling-18

THE END.

You had to know THAT was coming.  ; )

So did you learn anything new about raccoons yourself?  Do you have anything to teach us about them, that we may have missed?  What opinion have you formed of raccoons, based on your own experiences?  Are they a nuisance? Amusing? Clever? Cute? Please share your thoughts, experiences or facts, with us in the comments.

*(Love this post? How about subscribing to our blog in the sidebar, ‘Liking’ our Page on Facebook, or following me (Laura) on Twitter? Or all 3? 😀     )

Save

Save

Save

Save

Save

Save

Save

Filed Under: Homeschooling, Nature Study, Photography, Photography & Lettering, Science Tagged With: backyard-photography, homeschooling, homeschooling-science, nature-studies, raccoon facts, raccoon-study, raccoons, wildlife-photos

Incubation and Embryology of the Chick | Chick Coloring

March 31, 2010 By Laura 7 Comments

Incubation and Embryology of the Chick | Chick Coloring

chick-coloring-incubation-embryology-10

Although we have a small line-up of homeschooling posts about recent happenings coming your way, I’ve been inspired recently to take a little trip down our homeschooling memory lane, back to early 2007, when we did a study on chick embryology,  incubated eggs and hatched chicks!   At the time, the kids ages were 9, 4, 4, and4.  So not only will you notice how young our kids look compared to today (now 12 and 7, respectively), but you’ll see how very unfinished our home was back then!  Remember, Michael has been finishing all of the inside of our home himself.   (With a little help and direction from me too.)  As far as we have to go on this house, we can look at these photos and think, “We’ve come a long way, Baby!”

My brother, his wife, and their 2 kids, have a chicken coop, which began with an order of live chicks last year, I believe.   But soon they will be receiving a batch of eggs, and will be incubating and hatching them themselves, for the first time. I am SO excited for them, and especially for my niece and nephew, to have this exciting experience!  So much so, that we are itching to do it again ourselves all over again, since the our youngest kids are 3 years older now. The little ones would be able to get so much more out of the study and be a lot more hands-on, as {A} was for our first experience 3 years ago. It would be fun for the kids to compare notes with their cousins too.  Nonetheless, with Easter coming in a few days as well, we thought it would be cute and fun to blog about our chicks.  This experience in 2007, was ‘pre-blog’, so we never did get to share it with you all.

chick-coloring-incubation-embryology

We picked up our order of 24 eggs from the Plymouth County 4-H on March 13 of that year.  They have a wonderful Embryology Program, and supplied us with the eggs, an incubator (rented), a very informative book, a poster, and some feed.
–

chick-coloring-incubation-embryology-11

We got our eggs incubating right away.  This process of incubation, to expected hatching would be about 21 days.  The temperature of the inside of the developing eggs needed to be regulated at 100-101 degrees.  So the goal of environmental temperature within the incubator, needed to stay within the 97-103 degree range.  The humidity level was also a very important factor, and that was the hardest part for us!

{A}, being the oldest and the most appropriate age for this project at the time, was the most involved in the hands-on activities .  She did most of the rotating duties, temperature checks, egg observations, and kept records on everything on a daily basis.

The eggs needed to be rotated 3 times a day.  Therefore, we marked them with an X on one side of each egg, and an O on the other.  (We had XO eggs! lol).  They were each also numbered, 1-24.  These markings helped us be assured that every egg was rotated every time.

chick-coloring-incubation-embryology-12 –

Candling was a very interesting activity that was part of this project.  This allowed the kids to observe the development of the chicks, without damaging them.  This can be done on days 3,4,6,7,and 13.   Michael created a make-shift ‘candle’ using a light projector we had.

chick-coloring-incubation-embryology-13

By holding the egg to the light, we were able to look for developments and progress inside of the eggs.

In the period of time in days 11-14, we had the option of giving our chicks some COLOR.  This is a completely safe and harmless procedure for the chicks!!  If it was not, we wouldn’t have done it!  To understand this process more thoroughly or to get directions, please see (and save)  this link:  Chickscope. Another great link is here.  In brief, this is done by injecting harmless vegetable dyes, into the albumen area of the egg.  This is a pinhole break through just the very surface of the egg shell, at a specific area of the egg. In the following days, as the chicks continue to develop and grow, the sac that contains the color is naturally broken, and the chick is surrounded by the fluid coloring.  This results in temporarily colored chicks.  Michael performed this procedure, while {A} observed and recorded data.  Unfortunately, I was away these few days at a professional photographer’s conference.  So there are no photos of this part of the study.   But the results are coming up!

Throughout the day on March 1, we could hear faint peeps from within the eggs!   Talk about excitement!  The next day, the peeps were a little stronger.  We knew the time was drawing near, as we were just about at day 21!

Sure enough, very late at night on March 3, as I was exhausted and headed to bed, I took a last peek into the incubator, and lo and behold, an egg was hatching!   I was like, “Are you kidding me?  They are going to start hatching NOW?!  As I’m ready to go to sleep?”.  It was like both of my own labors, that kicked in high gear, right as I was most exhausted and badly needing a good night of sleep.  So of COURSE eggs would start hatching at this time.

Still, the anticipation and excitement perked me up a little.  I got {A} up and, the little ones, one by one, to take a peek.  I put them back to bed after a few minutes, but I kept watch for awhile longer.  It looked like it was going to be a slow process, and so thankfully, unlike my own labors, I was able to go get some sleep.

Early the next morning, we had 2 hatched!

chick-coloring-incubation-embryology-14

We could see that there was another, who had tried to break free of it’s shell, but never quite made it.  We lost that one.  But the 2 that successfully hatched seemed to be doing fine.  One was a very dark color.  He almost looked purple?  Which was not a color we had used, so we were confused for a bit there.  The other was green.

chick-coloring-incubation-embryology-15

I was not able to take photos of the chicks very well, through the little cheap (no pun intended, lol) plexi-glass viewing windows, but they were sure fun to watch! They were flopping all over the place, and all over each other.

The kids were so tickled, watching for more activity with the other eggs, and watching the chicks that had been born.

  chick-coloring-incubation-embryology-16

chick-coloring-incubation-embryology-17

chick-coloring-incubation-embryology-18

chick-coloring-incubation-embryology-1

chick-coloring-incubation-embryology-2

In the end, we had only hatched 4 eggs.    To truly learn from the study, and understand the developments of the embryos/chicks, it was necessary for someone to break open and study the eggs that had not hatched.  I could not do it myself.  Michael took that task on.    He and {A} took those eggs up on the hill out back, and dug a big hole in the ground.  Then {A} sat on a stump, with her back to her Daddy, while he dictated the number on each egg, and the stage of development, while she recorded the data in her notebook.  Then Michael buried them.

What they found, was some eggs were never fertilized at all. Some barely started developing, and for some reason didn’t continue.  Others were pretty much fully developed, but had never hatched. It was all natural outcomes.  That was probably the only unpleasant and sad part of this experiment.

Soon, the chicks were able to be transferred to a big sanctuary (Michael built), where we could really observe and enjoy them.

chick-coloring-incubation-embryology-3

Once our baby chicks dried off and got fuzzy, we realized our dark chick was not a colored chick, but a rooster!
–

chick-coloring-incubation-embryology-4

We also had a green one, a natural yellow one, and a pink one.    One for each of the kids!!  We did expect a higher hatching success rate, but we were glad to get some!

The funniest, and most entertaining thing about these chicks in their first few days, was just watching them gain their strength.  They were so active one moment, and would suddenly just doze right off and plop where ever they were.

chick-coloring-incubation-embryology-5

It was an absolute riot, to watch happen, over and over.   Just look at these photos of them!  A moment before, they were very energetic, then they would just wither into a nap, and the next moment be up and about again.  We know some older folks, who do the same thing these days.  ; )

  chick-coloring-incubation-embryology-6

chick-coloring-incubation-embryology-7

chick-coloring-incubation-embryology-8 –

Soon, {A} was able to gently hold them one by one, although it was important to keep it fairly brief and keep them warm, and to always wash hands after wards!  (The same was done handling the eggs.)

chick-coloring-incubation-embryology-9

With each of the kids having their ‘own chick’, and knowing we wouldn’t be able to keep them much longer, I just knew a fun photo shoot, with the kids and the chicks  in the studio, was in order!!    So click on over to the Photography & Lettering section of this blog, to check out the portraits from that shoot, and find out the names of our chicks!!  Not much to read in that post!  I promise!  Just photos to enjoy.  See you there!!

Save

Save

Filed Under: Homeschooling, Science Tagged With: 4H-club, baby-chickens, chick-candling, chick-development-candling, chick-embryology, chick-incubation, coloring chicks, egg hatching, homeschooling, homeschooling-science, homeschooling-science-experiments

Herring Run Faster Than Us – Homeschooling Field Trip

May 23, 2009 By Laura 4 Comments

jenney-grist-mill-plymouth-ma_1

We are very fortunate to live in such a beautiful, historic town, of Plymouth, MA. (Also historically known as Plimoth.)  It’s scenic, almost everywhere you look, and as homeschoolers, it’s a world of education.  I’ll be showing you more of these parts we live in soon, but this is one place we  love to go.  It’s a great place to take a long walk, completely away from any streets and traffic.

On one is the famous Jenney Grist Mill, which has a quaint tavern and ice cream shop. (At this point in time.) The mill is only turning when they are grinding corn inside, making corn meal.

herring-run-homeschooling-field-trip

Right across a drive way is a surreal little pond, that is just so quiet, it feels like it’s own little world. Quiet enough to hear the nature.  It’s full of wild life to spot. There are birds in flight everywhere, and a swan couple.  Fish, frogs, muskrats and turtles. There is also a bridge over it all.  This is where the herring are born, and come back to in the spring to spawn, by way of the lovely brook that runs through this whole park, connecting of course, to the ocean.

herring-run-plymouth-ma

5_turtle

The kids spotted a turtle.

jenney-grist-mill-plymouth-ma-herring-run_2

Heading back the other way out behind the mill, is where you can get a good look at the herring, during the spawning time of spring.   As they swim upstream, on their journey to the fresh water pond, they are abundant and easy to observe right here. Unfortunately, we were late going to take a look this year.  They come through mid-April to mid-May.  So they beat us this year, and had already been through, and gone, before we went to check it out this past week.  We’ve been in previous years though, and it is a sight to see!  Herring fish swimming and jumping on top of each other, everywhere.  If you look just on the other side of the slanted stone wall in the photo above, you can see the ‘fish ladder’, that many of the fish use to help themselves along.

We spotted a few fish, but the real active season had really past.

jenney-grist-mill-plymouth-ma_3

The kids still re-read the herring information board at the location.

They really do have such an amazing life cycle.

town-brooke-plymouth-ma-herring-run_1

Continuing to walk along, it is just so peaceful and serene, following the brook all of the way, and going through a couple overpass tunnels, that  the kids love to make echos in. That part is less than peaceful, or serene. lol

town-brook-plymouth-ma-herring-run_2

I love this photo above.  I have no idea what the interaction was about between{J} and {O}, but it just strikes me as a moment full of love and tenderness between siblings.

Just beyond this spot, continuing in the same direction,  is a large park, with lots of walk ways, another quaint foot bridge, spreads of green grass, and nice little benched areas to sit.

But we headed back to the direction we came from, because it was time to go get some dinner, and we had a long walk back first.  It was a nice evening for a family walk, but I was kicking myself for waiting so long to go, and missing the herring season.  We’ll be back here many times before that season rolls around again, because it’s a great place to take a stroll on summer nights, and throughout the fall as well.

town-brook-plymouth-ma-herring-run_3

Next year though, we’ll be sure not to miss the herring again, and I promise to take lots of photos!!

Have you ever seen herring swimming upstream in the spring?

Save

Save

Save

Filed Under: Elementary Homeschooling, Elementary Homeschooling SCIENCE, Field Trips, History / Social Studies, Homeschooling, Nature Study, Science Tagged With: herring-run-Jenney-Grist-Mill, herring-run-Plymouth-MA, herring-runs, herring-spawning, homeschooling, homeschooling-nature-study, homeschooling-science, homeschoolng-field-trip-ideas, Jenney-Grist-Mill, MA, Plimoth-Ma, Plymouth MA, Town-Brook-Plymouth

Whale Carcass Washes Ashore – A Spontaneous Field Trip

September 23, 2008 By Laura 1 Comment

This morning, after having had an extended weekend away, we were planning a regular school day today, with getting some our book lessons done.  That is, until we woke up to helicopters, circling around and around, near our house.  So my husband turned on the tv to find out what might be going on, and low and behold, there was a whale carcass washed ashore on our beach nearby. Time for a spontaneous field trip!  THIS is the beauty of homeschooling!

So the kids ate breakfast, washed up and got dressed as fast as they could, and we all headed out in search of the whale. After a driving down a few side-roads that had public access ways, and checking the shore there, we finally found the spot.  Except the only way down was very steep, very sandy and rocky cliff.  But if you know us…..we went for it.   We all made it down safely, as I wondered out loud, repeatedly, how we’d ever make it back up!  But we’d figure that out later I guess.  We had a dead whale to study. : )

whale-carcass-washed-ashore_1

Though it didn’t seem to be a full grown adult, it was rather impressive, nonetheless. (And seemed huge to our little kids.) It was so interesting to see all of it’s parts, up close and in person.  as a whole, it was not pretty by any means!! Not anymore, anyway. Part of it was really decomposing, as it seemed to have been dead awhile, and just finally got washed ashore.

This side (photo below), was the worst. It was barely recognizable as a whale at all. And in standing on the other side, where the breeze came on off-water, the smell was intolerable. UGH! But it was this side that you could see the bones of the jaw, on the far right, as well as the eye socket.  So it was fascinating, visually.

The kids enjoyed walking around it, checking it out, asking questions and stepping on it’s tail. LOL. Naturally, I was taking photos, and thinking about blogging with such yucky, yet interesting photos, about our unexpected experience.  Below at this angle you can see the upper jaw bones even better,  on the far left this time.

whale-carcass-washed-ashore_2

As we were looking at it, yet another couple of helicopters were flying around over head.  Other people began to arrive too, and some guessed we were homeschoolers.

whale-carcass-washed-ashore_3

Once we had our fill of fascination and disgust, we decided to figure out which one of the many sets of beach access stairs, that climbed the cliff-side, were public.  As we made our way down the beach, we came across a scattered intestines of the whale, here and there, that had washed up separately. (Yuck.) Once up the cliff and on our way up the road, back to our van, we saw the environmental police showing up.  Marine biologists had already been there, in the earlier morning hours.

When we got home, we did some research and determined that it was a humpback whale.  Later TV news reports throughout the day confirmed that.  It’s not yet determined if this whale died of natural causes, or by accident due to being bumped by a ship, or caught up in fishing nets.  It seems they plan to retrieve the the skeleton of the whale for museum display, and either bury the flesh, or drag it back out to sea.

It was yet another homeschooling adventure our kids were able to witness! They talked about it the rest of the day, and the little ones colored pictures of whales and other sea creatures, and recreated the scene with imaginary play.  After we got all of our book lessons done of course.

whale-carcass-washed-ashore_4

Filed Under: Elementary Homeschooling, Elementary Homeschooling SCIENCE, Field Trips, Homeschooling, Life In General, Nature Study, Science, The Big Picture Tagged With: beached whales, homeschooling, homeschooling-field-trips, homeschooling-marine-biology, homeschooling-nature-study, homeschooling-science, marine-biology, whale, whale-carcass-washed-ashore, whales

  • 1
  • 2
  • Next Page »

We are wicked happy to have you here! We hope you find much inspiration, help, humor and enjoyment here.


Archives


POPULAR POSTS

* * * * * *

SUBSCRIBE to House of Joyful Noise blog! Every new post, delivered right to your email box!


Privacy Policy

Amazon Affiliates

Never at any additional cost to you, we may earn a small commission for our endorsement, recommendation, testimonial, and/or link to any products from our website. Your purchase through our links helps support our family, while sharing with you the products we authentically use and recommend, for various ideas, and letting you know where you can purchase them. Thank you for your support!

[footer_backtotop]

Copyright © 2025 HouseOfJoyfulNoise.com · Genesis Framework by StudioPress