• HOME
  • {A}’s Chipmunk Training Archives

 Homepage

  • The Homestead
    • Home Projects
    • Home Improvement
    • Home Decor
      • Seasonal Home decor
        • FALL Home Decor
        • WINTER Home Decor
        • SPRING Crafts and Creations
        • SUMMER Crafts and Creations
    • Our Chickens
    • Gardening
    • Organization
    • Re-Purposing
    • Furniture Refinishing
    • Budget
  • Crafts & Creations
    • Seasonal Home decor
      • FALL Crafts and Creations
      • WINTER Crafts and Creations
      • SPRING Crafts and Creations
      • SUMMER Crafts and Creations
    • DIY (Do-It-Yourself) Project
    • Kids Arts and Crafts
    • Homemade/Handmade Gift Ideas
    • Holiday Crafts
    • Fan Pulls
    • Free Printable/Downloadable
    • Sewing Projects
    • Giveaways
    • Business Features
  • Recipes/FoodFun
    • Breakfast
    • Lunch
    • Main Dish
    • Sandwiches
    • Appetizers
    • Slow Cooker
    • On The Grill
    • Side Dishes
      • Soups
      • Salads
    • Baking
      • Breads, Rolls and Muffins
    • Snacks
    • Treats
    • Desserts
    • Drinks
  • Homeschooling
    • Elementary Homeschooling
      • Elementary Homeschooling READING
      • Elementary Homeschooling MATH
      • Elementary Homeschooling LANGUAGE ARTS
      • Elementary Homeschooling SCIENCE
      • Elementary Homeschooling HOME ECONOMICS
      • Kids Arts and Crafts
    • Middle School Homeschooling
      • Middle School Homeschooling SCIENCE
      • Middle School Homeschooling HOME ECONOMICS
    • Language Arts
    • Math
    • History / Social Studies
    • Geography
    • Foreign Language
    • Field Trips
    • Games
    • Nature Study
  • The Big Picture
    • Life In General
    • Celebrations
    • Faith
      • Into the Light; The Series
    • Giveaways
    • Reviews & Sponsors
  • Photography & Lettering
    • Photography
    • truck lettering
    • vehicle graphics
    • Newborns
    • Kids
    • Engagement
    • High School Senior Pictures
    • High School Senior Pictures Sneak Peeks

Halloween Craft | A Dripping Paint Pumpkin

October 8, 2012 By Laura 42 Comments

000_

 Last year for the Halloween/Hallowtide season, I went bat **** crazy (no Halloween-pun intended ;), with the decorating, inside and out.  I did a huge photo-galore post on it, and it’s a popular one, come that time of year again. There is some real creativity there, for you to see. This year, however, I didn’t need to do much of anything, because I have all of last years stuff! So I’ve mostly just been doing little fall-fun crafts, and baking. I did however, decide I wanted to do a little pumpkin project I thought of, and I thought I would show it to you all, and tell you how I went about it.

001_faux-pumpkin
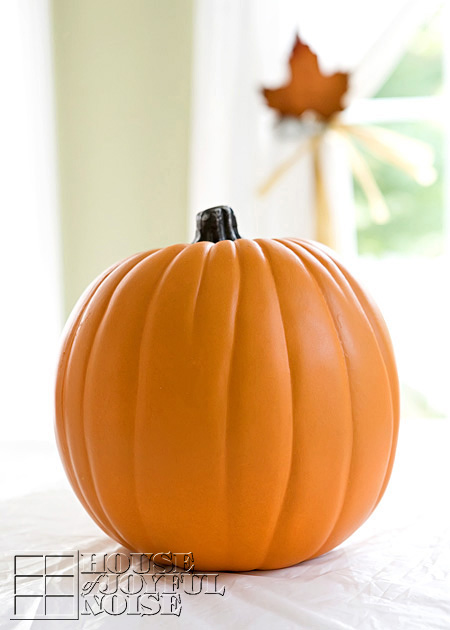
I started with a medium sized faux craft pumpkin.  You absolutely can use a real pumpkin if you’d like, but obviously it will not last beyond this season. So if you want your pumpkin craft for keeps, than faux is the way to go!

I also covered my table as always, to protect it, with a cheap party table cloth, of which I always have a bunch on hand from the Dollar Tree store.  Unless they get real messy (and it sure will this time), you can use them over and over.  Of course old newspaper or something else disposable will do.

002_halloween-faux-painted-pumpkin-craft 
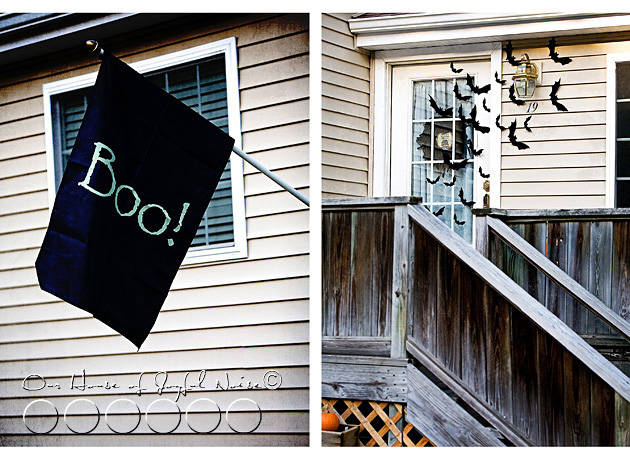
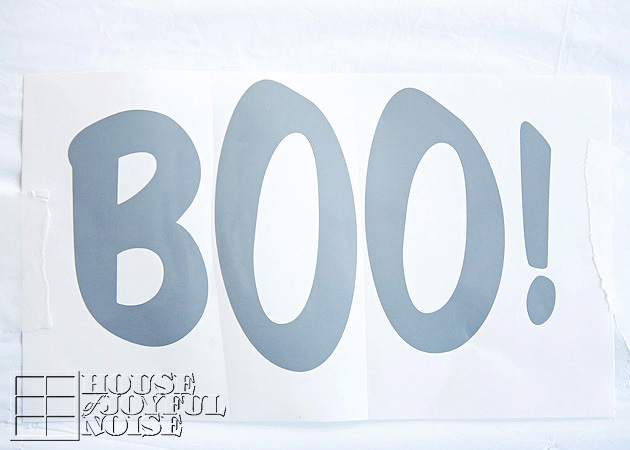
I cut out an appropriate sized BOO! for my pumpkin, out of vinyl.  I don’t know why, but I have always loved the whole BOO thing, for this time of year. Probably because it’s so . . . . . . childish. Elementary. You know, not a serious scare kind of thing, because I’m really not into that.  Anyhoo, you can use any kind of graphic or word(s) you’d like for this project.  Use your imagination and put some of your own style into it. Or, you can copy my BOO, and I won’t BOO-HOO about it.

003_halloween-faux-painted-pumpkin-craft
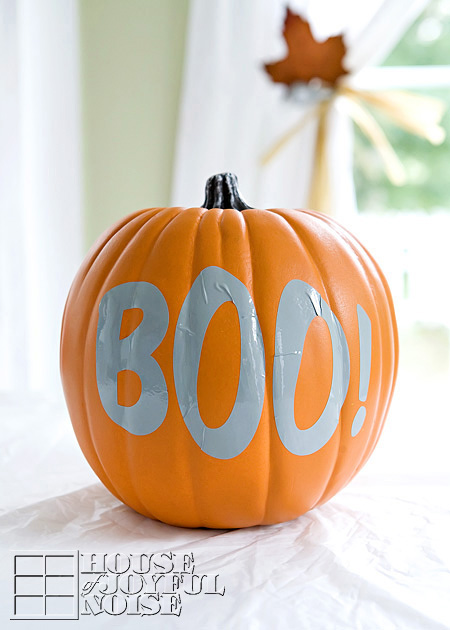
So I properly positioned my vinyl design and applied it to my pumpkin. Now you’ll notice it’s got wrinkles in it all over the place. That’s ok!  My husband is a professional master with vinyl (for real), but I’m not so much.  Of course it’s harder to apply to curving surfaces but anyway, but also, I wasn’t extra careful either because this is just a mask! I am using the vinyl to protect the pumpkin for where I do not want paint, and will later be peeling the vinyl letters back off. So any wrinkles did not concern me.  I just made sure I went over every area of the vinyl with a lot of pressure with my squeegee.  (As seen in the next photo.)

004_halloween-faux-painted-pumpkin-craft
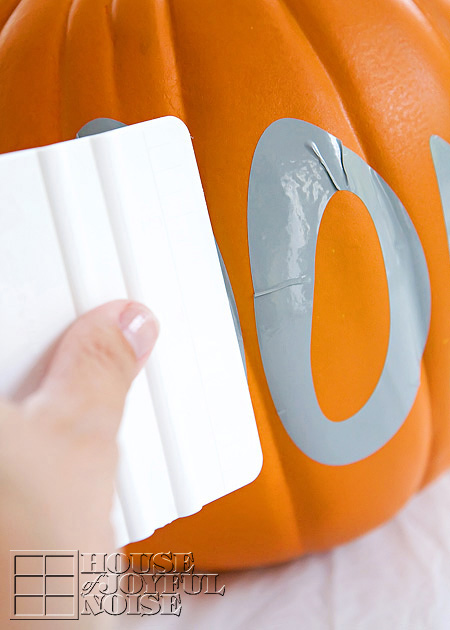
What I did want to be concerned with, was doing my best to close any gaping holes that formed at the edge of the vinyl where wrinkles were.  Because I didn’t want paint to get under there.  If you do this project, you really want to do your best to seal down the vinyl edges. Especially at the top!  Chances are paint is going to get under the vinyl somewhere, but the better you have those gaps closed off, the less clean-up on the pumpkin later.  You’ll see what I mean in a little bit.

005
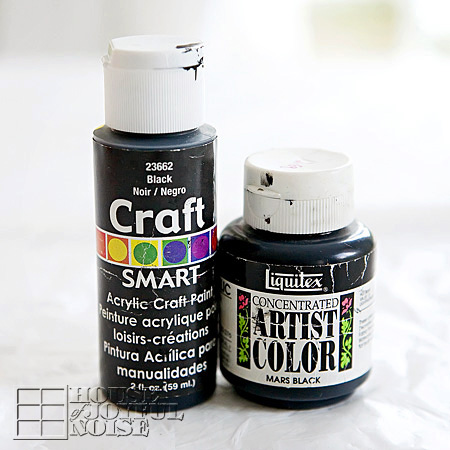
Black was the only color paint I’d be using, and I had two partial bottles in my storage. So I just mixed them up together in a glass measuring cup, because the spout on the cup would be coming in handy.

006_halloween-faux-painted-pumpkin-craft 
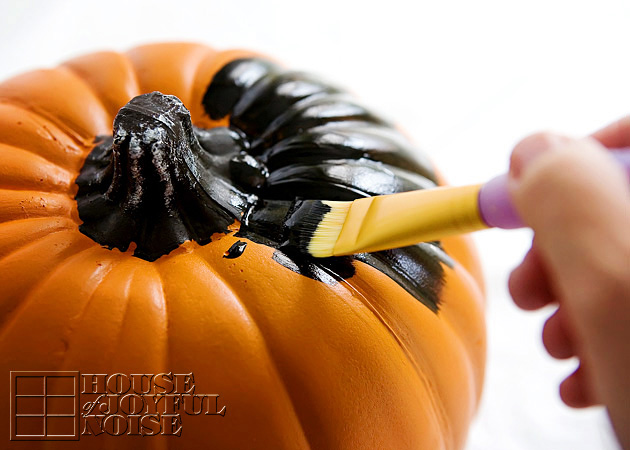
To begin the painting process though, I used a flat brush and painting out the top.  I imagine a foam brush would work fine enough as well.

After I had painted out the top all the way around, it was time to get messy. Thank goodness for the table cloth.

007_halloween-faux-painted-pumpkin-craft
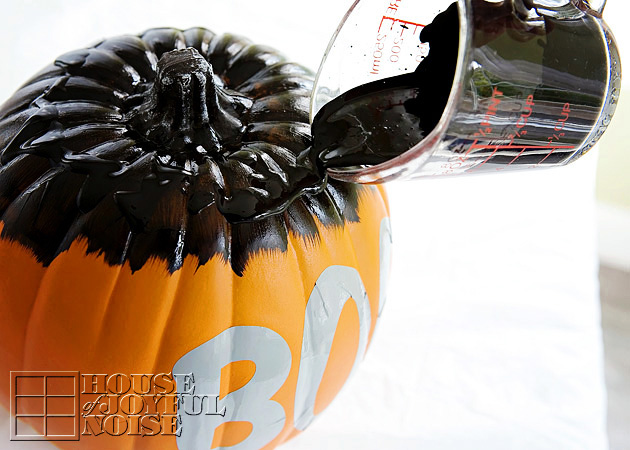
I just started pouring paint onto the pumpkin, right out of my cup, starting on the black where I had already painted black, and about the level where gravity would take over the paint. Because getting the paint dripping is the whole goal here.

008_halloween-faux-painted-pumpkin-craft
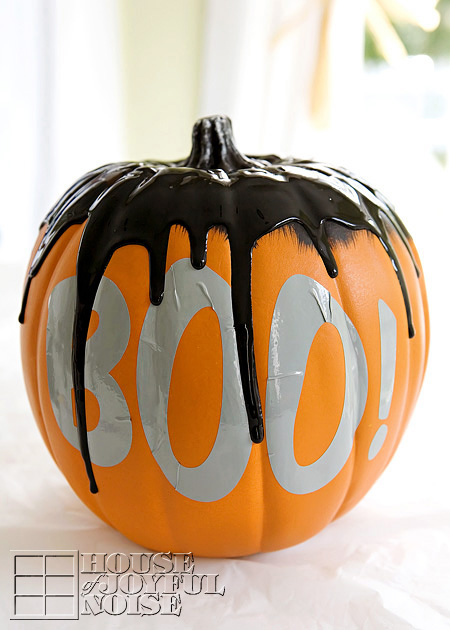
And it was working for me. : )  Now….depending on the consistency of your paint, you may want to add water to it just a drop or 2 at a time, to thin it a little of you need to at all. But really just a drop or 2 at a time, and test it, because you do not want it too thin and runny.  I really loved the look of my pumpkin right there in this photo!  lol. The 3 dimension of the paint was giving me new ideas!  But, for my original project plan here, I needed the paint to cover my lettering, and yet still have a drip look to it.

009_halloween-faux-painted-pumpkin-craft
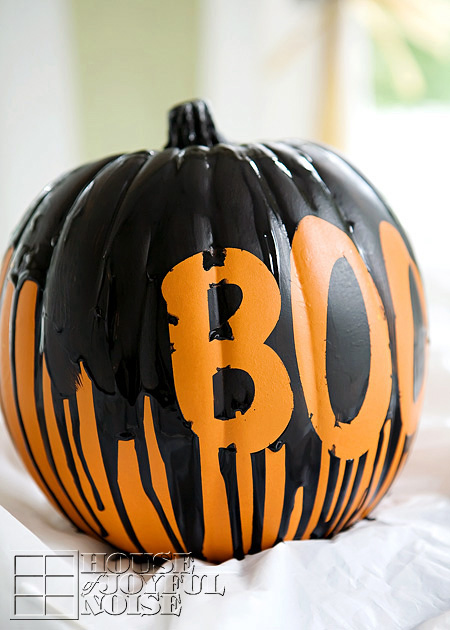
So I really got the drip factor going. You see how messy this is getting? Oh . . . you haven’t seen anything, yet. LOL.  As cool as this looked, I knew peeling the letters off with even this amount of paint, would leave it unable to read.

010_halloween-faux-painted-pumpkin-craft
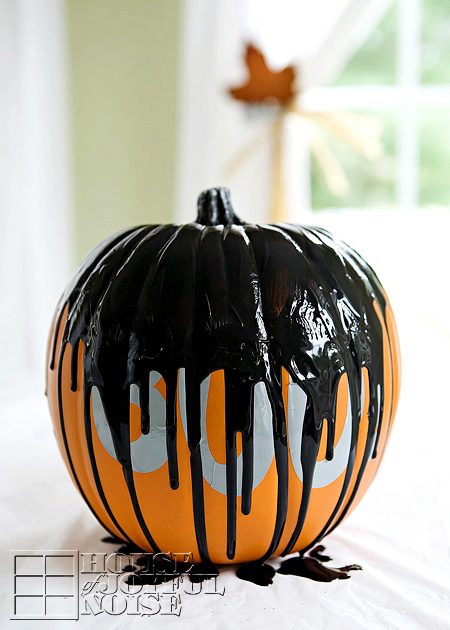
So I just kept adding paint, and helping it along to drip, with my brush when needed.  The paint tended to puddle on top of the pumpkin too, so I helped that out and down. And, as the paint dripped onto the table, I kept moving the pumpkin back out of the paint-puddle.  I really wanted the dripping to be evident after the word, which didn’t leave me a lot of room. So I was sure to have the drips starting from higher all around the word, on the sides of the pumpkin.

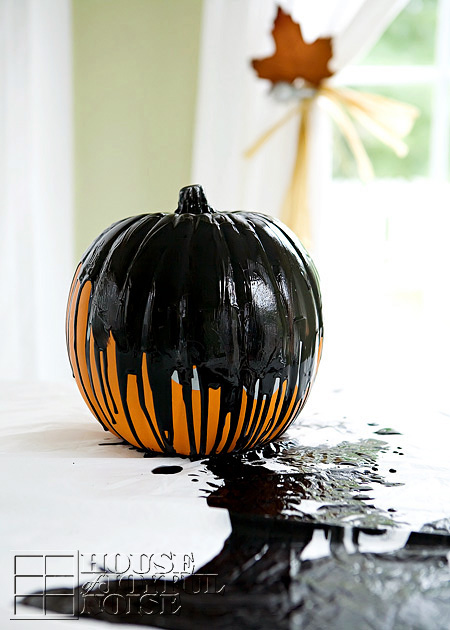
Basically at this point, I had to leave the paint to dry a little. Not bone-dry.  But dry enough to be able to peel out the lettering.

011_halloween-faux-painted-pumpkin-craft
Just awhile later, I did peel out the vinyl. I used the tip of an x-acto to do that.
Now, you can see it’s a bit of a mess.  It’s obvious where the paint did indeed get under the vinyl and onto my ‘negative space’ word.  But no worries:  I just used damp q-tips to clean it off.  It took a few q-tips in some areas, and sometimes a little scrubbing with it, but it worked well enough.

012_halloween-faux-painted-pumpkin-craft
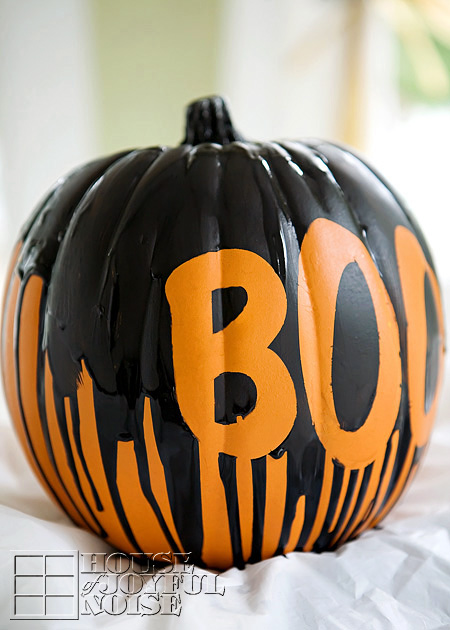
Much
better, don’t you think? Not perfect, but cleaner lines.  There is still something that bugged me though . . .

013_halloween-faux-painted-pumpkin-craft 
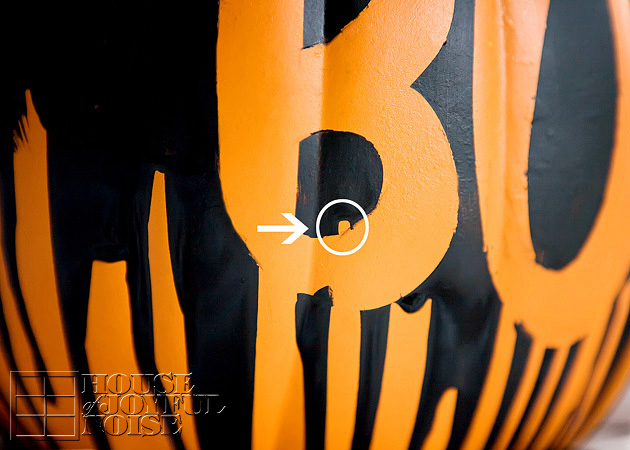
This little spot is where the paint over-dried at the vinyl edge, so when I peeled off the letter B, a little paint peeled off right there.  So to fill that area in, I could have just touched it up with paint. But I didn’t. I just used a permanent black Sharpie marker to fill it in there.  And while I was at it, I went around any areas on the insides of the letters, where it could have used a cleaner line edge. I cheated. Oh yes I did.  All over the place.

And I had to paint the stem a better brown; because whatever that color was that it came as, was not working for me!

It never did become perfect, and that was o.k. with me. Because I am working on embracing imperfections since, let’s face it….I can be a hot mess some days. And there is only so much time in a week!

014_halloween-faux-painted-pumpkin-craft
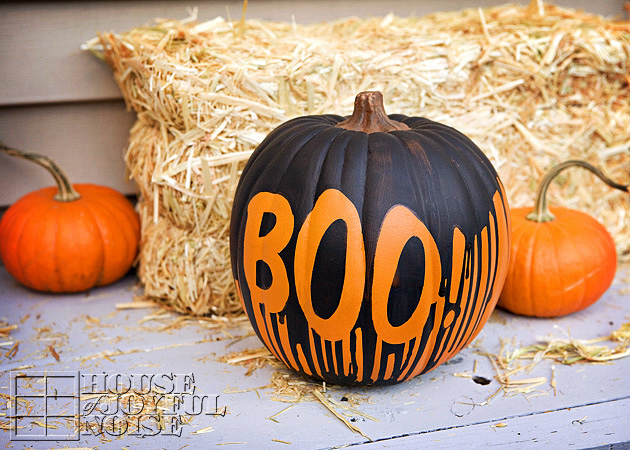
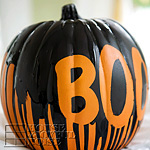
So I called it DONE, and put it on simple display, with a little bale of hay and little sugar pumpkins from my mother-in-law, and I think it came out rather cute.
So BOO!
What say YOU?!


Save

Filed Under: Crafts & Creations, FALL Crafts and Creations, Holiday Crafts, Tutorial Tagged With: craft-pumpkin-craft-project, creative-pumpkin-ideas, Halloween, Halloween-crafts, pumpkin-decorating-ideas, pumpkin-painting

Our Halloween Decor! (Indoor-Outdoor-Photos Galore!)

October 9, 2011 By Laura 22 Comments

BOO, People!! So excited here, to show you all around! I had a goal this year (2011), to have our whole homestead Halloween decor done (known as the 3-day Hallowtide, to us) by October 1st! That way, we could enjoy it all the whole month of October.  I also wanted it all blogged no more than a few days later. How long can it really take, to photograph, edit, and blog it? Apparently….9+ days.  With my kids busy schedules, I’m in the driver’s seat, in gyms and on fields, more than in my computer chair these days. (Enjoying it, although behind in work to say the least. But my kiddos come first!)

best Halloweeen decor

Now, I have to explain real quick, that I have been trying to ‘find my place’, with Halloween decor, for years.  From a spiritual/Catholic point of view (always where I am at), I don’t like to stray too far from the true meaning or Christian roots of any holiday, including Halloween. This is why we have always extended our focus to Hallowtide = All Hallows Eve, All Souls’ Day, and All Saints’ Day.  (You can see more about that, and how we roll, HERE.)

On a completely unrelated note, but tying in with the theme, I personally am a big baby, some may say. I do not like scary/gory/terror/evil anything.  My kids laugh at everything they see, and I look away. I freak out inside a little bit, myself. Not to mention (ok, I will….), that I see zero value in all of it. So…. decorating has always been a bit of a reluctance / confusion for me, about what I wanted to do.  But I can say this year, I found my groove, and the game was on!
In that light, I hope you enjoy seeing our homestead, outdoors and indoors, that I have photographed for you all.
LET’S GO!

best Halloweeen decor Off the bat ( <—- <giggle!), I’d like to give huge props and thanks to Emily from Frosting & Ink Social Designery! <—- Click on the link to see her Etsy shop!  I purchased this Halloween Party Collection from Frosting & Ink, and used it for my home decor!  While I can design much of anything myself, I hardly have time these days. And besides, when I saw what Emily created, I was all over it!  So she deserves lots of credit here! I’ll be posting some her beautiful designs, and showing you how I used them throughout these photos. I actually have not used them all yet, but there is always next year!

002

Got to warn you:  I handed the Hubs the cobweb stuff, to be in charge of getting that done, and he went crazy with it!  Even {O} giggled watching him and said, “I can tell you’re having fun with that stuff Daddy! You don’t want to stop!”

One more note:  I had fun editing these photos, with some little grunge effects, etc.  My house is not actually this grimy looking, inside or out!  Not that’s it’s perfectly clean either.  If anything, it gets more of the messy & dust-bunny kind of dirty. LOL  ; )

So here is my very favorite Halloween creation, I made with a design from Frosting & Ink….

best Halloweeen decor

My Halloween Parking Sign! That’s right, I’m the witch around here! Heee hee heeee! Some will agree with that, in a heart beat. ; )  Others will argue, “No000 sir.  She is kidding you.  She is the sweetest thing ever!”  Depends who you talk to. LOL. (Or the day? lol).  Just kidding.

best Halloweeen decor

Anyway….I smile every time I pull the car into our driveway, about 20 times a day, and see my sign.  It’s something I made to be able to use every year, for years to come. I saw the whole thing in my head, the second I saw the design.  Michael made the jagged wood board for me, and we painted/distressed it, etc. It is weatherproof.

If you are wondering how, I do plan to do a quick post in the Crafts section, about how I made some of these Halloween decor things, sometime this week.  But this post is just about showing our decorations for now.

best Halloweeen decor I just have to show you the amazing and beautiful detail in Emily’s work!  I always loved that font used for ‘Parking’.  A band I love, Daughtry, uses that letter-style for their logo. It’s called Bleeding Cowboys, I think. It’s a perfect choice for Halloween designing.  Good call, Emily!

best Halloweeen decor

I was soooo on the fence (<—-another pun…giggle!) about getting this skeleton at Michael’s Arts & Crafts!!  I definitely am drawn to skulls and cross-bones and stuff, you know?  I have no idea why. They just ‘look’ cool to me. Yet I don’t really want to like them so much. LOL.  So….this is about my line, as far as decor goes.  See? Call me a wimp.  As long as we placed him humorously, was our/my decision.  I do like seeing him, hanging out there! (As long as it’s not dark out! lol)
–

007_halloween-garden-home-decor Here is a wider view of our front-yard-gardens.
The flowers are pretty deadish now, which really kind of makes it all work!  Don’tcha think?
–

best Halloweeen decor

Another perspective of our friend.  From Snap Peas to Skeletons!
–

best Halloweeen decor I love my newly painted buttoned bottle.

best Halloweeen decor The potting bench.


best Halloweeen decor

Bats swarming our front door.   It was a popular idea last year, that I loved.  But I’m slow. : )
Details of how I did this will be in the Crafts post too.

best Halloweeen decor This chest Michael picked up free somewhere in front of someone’s house.  It’s super interesting inside!  Really old…meant for shipping clothing and goods, etc., I think.  There are all of these compartments inside.  BUT, when opened, there is a heavy mold/mildew odor (which I am immediately allergic to), that we can’t get rid of.  So, we’ll be tossing it, instead of doing anything more with it.  But I thought it would be cool to keep through Halloween out on the front deck, anyway.
–

best Halloweeen decor

Through the glass of our front door here, you can see our Halloween wreath I made, with another design from my party pack from Frosting & Ink!

SO……that’s about it for our outdoor Halloween decor.

Would you like to come in??…

best Halloweeen decor When you order for this particular pack from Frosting & Ink, you are supposed to give her your last name, so she can customize this design.  I incorporated it into a wreath.  I’ll share more about how I made this later, in the craft post, too.

best Halloweeen decor The wreath is technically on the inside, because it is not weatherproof, in any way! Just turning it over here, so you can get a better look of it as a whole.  But faces outdoors.

best Halloweeen decor

Our Halloween Tree.  Yep….still have that stick tree there! LOL.

The Halloween lights and black crow were bought at Michael’s Arts and Crafts.

best Halloweeen decor

Some of you may know, I love making inter-changable fan pulls, for our all-season room.  (Anyone?)  I haven’t made one in a long time.  BUT, I did make one for Halloween this year!….

best Halloweeen decor Beads and this spider, from Michael’s Arts and Crafts.

best Halloweeen decor

How cute are the little ghosts??

020_halloween-fan-pull-spider

best Halloweeen decor

I did this kind of thing on our French doors, for Christmas and spring too.  I used the the little Cupcake Toppers and Party Signs, from the same Frosting & Ink Party Collection,  for what I call ‘Fancy Strands’, down my doors.

best Halloweeen decor

best Halloweeen decor

best Halloweeen decor

025_ A little over the top with the cobwebs, much?  It is a bit of an old family portrait now. Well, only 2-3 years. Time for a new one, although we’ll keep this one up somewhere in the house, too, anyway. But that’s the fam.

Well would you look at the time!….

best Halloweeen decor

It’s late, and I must get to bed.  I am sure we’ll have something more Halloween-ish to share, in the coming weeks.  We do plan to do something with pumpkins!  And as I said, I’ll be showing how I made everything crafty in this post, in a coming post in the Crafts section. So….we do hope you come again. (If you DARE!!  Because we’re wicked scary….right? ; )

ETA:  Here is the link for:  Tips, Tricks and How-To’s to our Halloween Decor  in this post

Please say  “BOO!”….if you enjoyed this peak of our Halloween Homestead!!?

Feel free to share the post, or PIN any photos you’d like, as well!

Isn’t the Halloween season fun??

* * * * * *
creative Halloween decor


Save

Filed Under: Faith/ Catholic, FALL Home Decor, Holidays, Home Decor, Photography, Seasonal Home decor, The Big Picture, The Homestead Tagged With: Catholic-blogs, Catholic-families, Catholic-Halloween-decorating, Frosting-and-Ink-Social-Designery, Halloween, Halloween-crafts, Halloween-decor, Halloween-fan-pull, Halloween-home-decor, Halloween-tree, Hallowtide, indoor-Halloween-decorating-decor, Michaels-arts-and-crafts, outdoor-Halloween-decor, really-creative-Halloween-decor

We are wicked happy to have you here! We hope you find much inspiration, help, humor and enjoyment here.


Archives


POPULAR POSTS

* * * * * *

SUBSCRIBE to House of Joyful Noise blog! Every new post, delivered right to your email box!


Privacy Policy

Amazon Affiliates

Never at any additional cost to you, we may earn a small commission for our endorsement, recommendation, testimonial, and/or link to any products from our website. Your purchase through our links helps support our family, while sharing with you the products we authentically use and recommend, for various ideas, and letting you know where you can purchase them. Thank you for your support!

[footer_backtotop]

Copyright © 2025 HouseOfJoyfulNoise.com · Genesis Framework by StudioPress