• HOME
  • {A}’s Chipmunk Training Archives

 Homepage

  • The Homestead
    • Home Projects
    • Home Improvement
    • Home Decor
      • Seasonal Home decor
        • FALL Home Decor
        • WINTER Home Decor
        • SPRING Crafts and Creations
        • SUMMER Crafts and Creations
    • Our Chickens
    • Gardening
    • Organization
    • Re-Purposing
    • Furniture Refinishing
    • Budget
  • Crafts & Creations
    • Seasonal Home decor
      • FALL Crafts and Creations
      • WINTER Crafts and Creations
      • SPRING Crafts and Creations
      • SUMMER Crafts and Creations
    • DIY (Do-It-Yourself) Project
    • Kids Arts and Crafts
    • Homemade/Handmade Gift Ideas
    • Holiday Crafts
    • Fan Pulls
    • Free Printable/Downloadable
    • Sewing Projects
    • Giveaways
    • Business Features
  • Recipes/FoodFun
    • Breakfast
    • Lunch
    • Main Dish
    • Sandwiches
    • Appetizers
    • Slow Cooker
    • On The Grill
    • Side Dishes
      • Soups
      • Salads
    • Baking
      • Breads, Rolls and Muffins
    • Snacks
    • Treats
    • Desserts
    • Drinks
  • Homeschooling
    • Elementary Homeschooling
      • Elementary Homeschooling READING
      • Elementary Homeschooling MATH
      • Elementary Homeschooling LANGUAGE ARTS
      • Elementary Homeschooling SCIENCE
      • Elementary Homeschooling HOME ECONOMICS
      • Kids Arts and Crafts
    • Middle School Homeschooling
      • Middle School Homeschooling SCIENCE
      • Middle School Homeschooling HOME ECONOMICS
    • Language Arts
    • Math
    • History / Social Studies
    • Geography
    • Foreign Language
    • Field Trips
    • Games
    • Nature Study
  • The Big Picture
    • Life In General
    • Celebrations
    • Faith
      • Into the Light; The Series
    • Giveaways
    • Reviews & Sponsors
  • Photography & Lettering
    • Photography
    • truck lettering
    • vehicle graphics
    • Newborns
    • Kids
    • Engagement
    • High School Senior Pictures
    • High School Senior Pictures Sneak Peeks

Tips, Tricks and How-To’s to Our Halloween Decor – Crafts

October 16, 2011 By Laura 2 Comments

09_-300x214

I hope you all had the chance to join us, for our Halloween Decor Tour, in which we shared with you all of the festive touches I made, to put a little Halloween in the air, indoors and outdoors!  The post tour naturally consists of a ton of photos, or else how else could I show you all?  That, and my small chit-chat, made the post plenty long enough.  So I promised to share how I made some of the decor, in a separate post in the Crafts & Creations section soon. And here we are.

So I’ll start with the fact that, all of the signage design work that you see in this post (and the tour), that is similar in style and all ties together so beautifully, is part of the Halloween Party Complete Collection, which I purchased from Frosting & Ink Social Designery’s Etsy Shop.  Please note that everything that I printed out, I did so on textured white card stock. That really adds a nice touch. I also was sure that my printer printed the actual colors, being sure my settings did not allow the printer to choose the colors. (Yes, I am a color snob. I demand accuracy. )
 

001_halloween-parking-sign

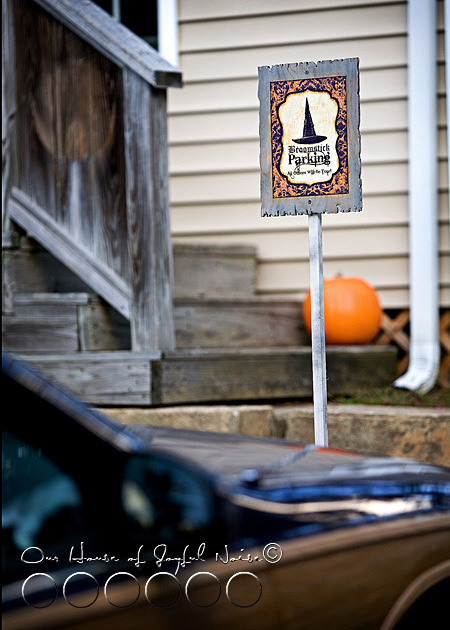
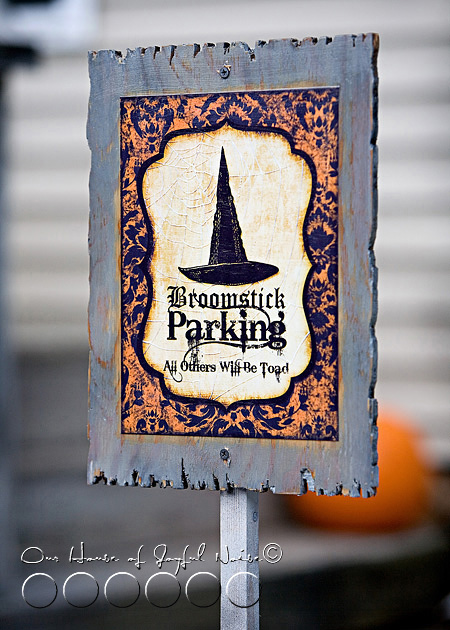
One of the features I was most excited to show, was indeed the biggest hit with our readers!  That would be my Witch Parking Sign.  ; )

–
02_
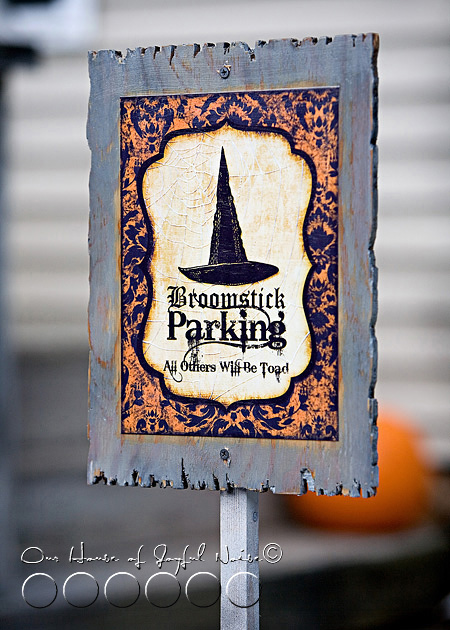
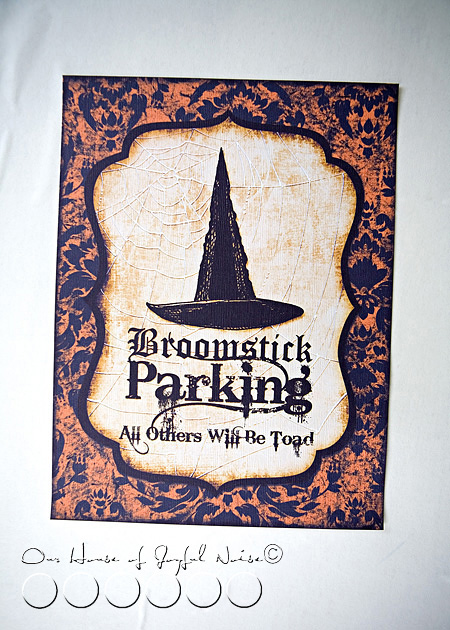
To start, I printed out the sign from my Halloween Party Complete Collection on a piece of 8.5″ x 11″ textured white card stock.  The actual design was 7.5″ x 10″, so there was an inch of white paper to trim off, all the way around. For anything rectangle or square, I want a perfectly clean straight edge.  So I always use this….
011_fiskar-trimmer

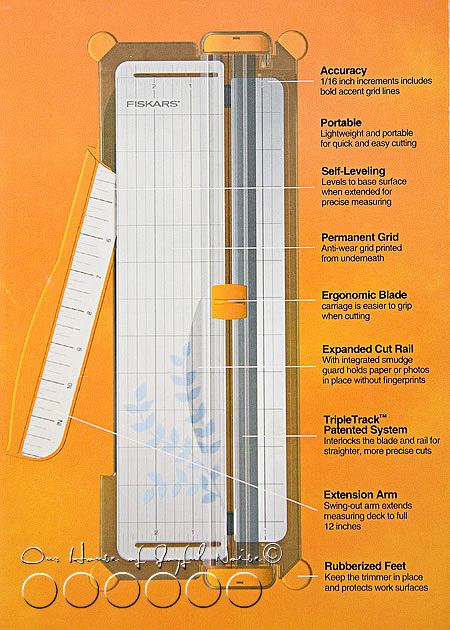
….my Fiskar Trimmer for cutting paper or card stock. But using scissors, or an x-acto blade and a metal ruler on a mat, would also work.

Now for the sake of saving you from having to keep scrolling up, I am going to show you the photo of this sign again. (Because I’m thoughtful like that. : )  You need to be able to refer to it and see it as I talk here.

001_halloween-parking-sign

I wanted to mount my paper sign on a piece of old looking wood, so I asked Michael to please cut a piece of thin plywood about 10.5″ x 13″, and to try and make the edges look jaggedy, like old broken wood. To get that effect that you can see above, he used a saber saw.  Then he stained it dark grey.

Now I needed to mount the paper sign, onto the wood sign.  I had every intention of really using the sign, right at the head of my parking space outside.  So it needed to not only be applied permanently, but the whole sign needed to be weather-proofed, sealed and protected, as well.

–
03_modge-podge-outdoor

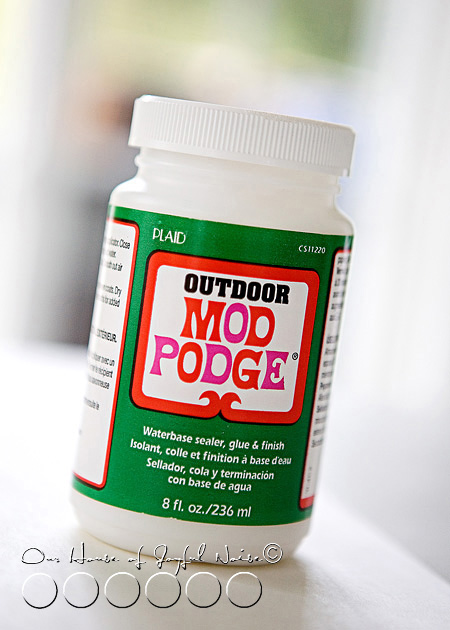
To do both the job of applying the paper sign to the wood, and sealing and protecting the whole thing I used Outdoor Modge Podge!   I applied a layer of glue to the back of my paper, as well as a coat on the front of the wood sign.  Then I placed them together with the design perfectly in place, smoothed it all out being sure there were no bubbles, and let it all dry overnight.   When it wasn’t so tacky to the touch anymore, I applied another coat over the whole sign (front and back), and let dry completely, again.   When that dried, I applied one more coat, and let it all dry again.  I paid special attention to be sure I was sealing the edge of the paper, to the wood sign. Any moisture getting in between when outdoors, would ruin it.

*Note – With a past project quite similar to this one, where I was applying paper to wood, and then adding final coats, I did not allow the coats to dry enough in between applications.  I didn’t want to, you know… wait. It didn’t turn out well, People. The paper was bubbling here and there because it wasn’t dry enough in the first place, making the paper soggy and rolling up, and it was just a mess. So leaving it to dry even 24 hours or so between coats sometimes, is necessary. Having patience, or not, shows in the final piece.  Rushing things, and hoping for the best, may not end well. Don’t do it.

–
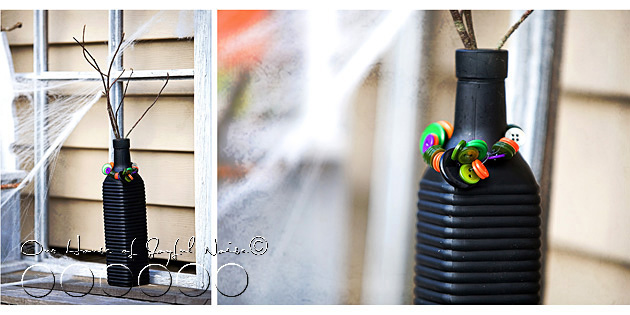
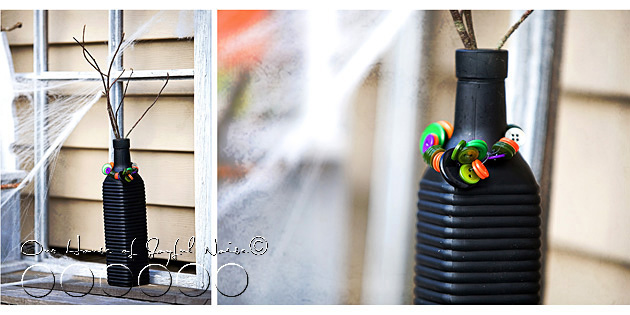
004_halloween-bottle-accent I had this bottle displayed on my garden potting bench already. It was a cool indigo blue, but had faded in the sun.  So I decided to spray paint it matte black, and make a little Halloween necklace for it, by stringing buttons in colors that together, say Halloween to me: orange, black, green, and purple.  Different button sizes, and no pattern, rhyme or reason. Just string them on. I’ve made these little wrap necklaces for bottles and vases before, using beads and other elements as well. In doing so, I have used different materials to string on. But one thing I have found especially handy to use, is stretchy fishing line.  It works nice for small necks of things especially, that you may want to wrap around more than once, because if it barely is going to fit, it stretches some to prevent the string from breaking. It’s easy to work with. Of course, for a different look for indoor pieces, you may choose to use raffia, suede string, ribbon, etc.  I put a dead stick in it, and it was perfect!  It’s a small thing, but I really had fun with it, and I like how it came out.
–
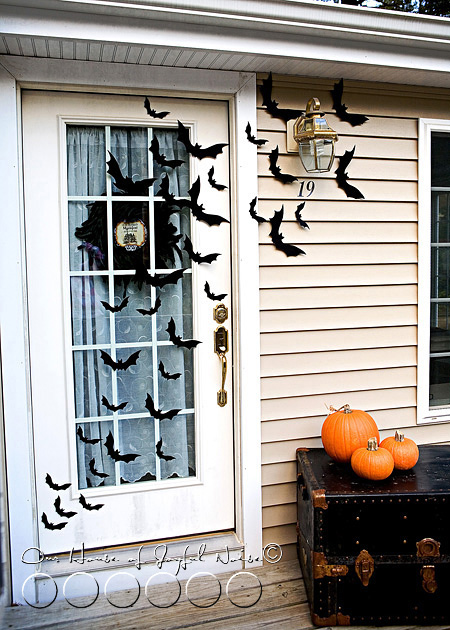
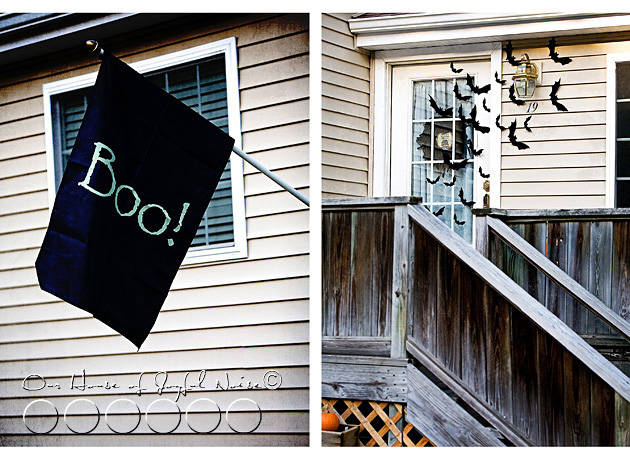
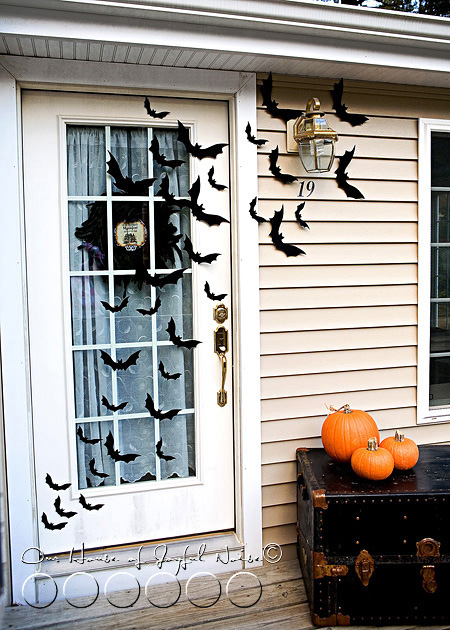
05_halloween-front-door-decor-bats

I think the swarming bats around the front doors around Halloween time, was an idea first featured in Country Living Magazine (?) last year, and lots of crafty home-owners all over the country were all over the idea, including me!  I just didn’t get to it until this year. There are bat templates you can download from the internet, if you do a search, and I would guess that others looked and found some to use, as I did.  They can be cut out and used to trace with white chalk onto black material, over and over. Then you simply cut them out.  I looked around for bats that looked right to me, a lot. So in the end, I can’t remember where I actually found one I liked. (Or I’d tell you.) But anyway, I did resize it to have 3 different sizes of bats.
06_

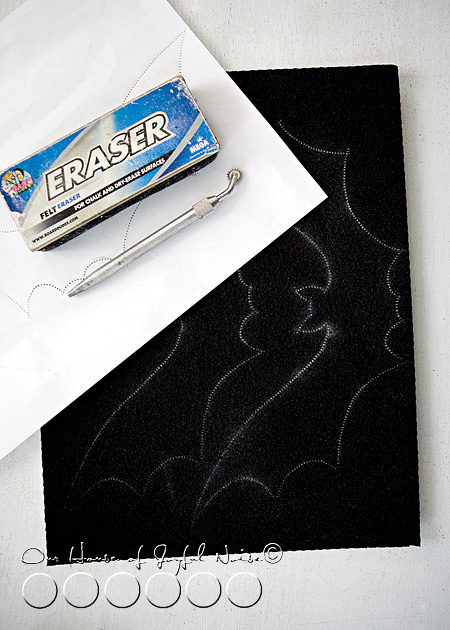
I made the bats out of stiffened felt. I think I got about 15 sheets or so, and got as may bats as I could out of them.  Instead of cutting the bats out of the paper and tracing them, I went about things a different way – because I could, and it just seemed easier.  Michael (my husband) has this perforation wheel, to create a pattern of holes through paper, and then you pounce that pattern onto another material, using chalk dust. So we just perforated the bat patterns on the paper, and then used our school chalk board erasers with chalk dust on them, to pounce the patterns onto the felt.

Scissors + Kids = Bats

Just so you know, my kids love cutting things out, and ask to help. I’m not into child labor. ; )

We stuck all of the bats on the house and door, using duct tape on the back.  Yes, one or 2 do blow or fall off now and then. Maybe there is a better way to adhere them, but duct tape works good enough for me. I don’t even notice if or when any are missing.  Michael does though. He tends to be the bat chaser I guess. LOL. But generally, they stay put pretty well.

–
 

07_halloween-wreath

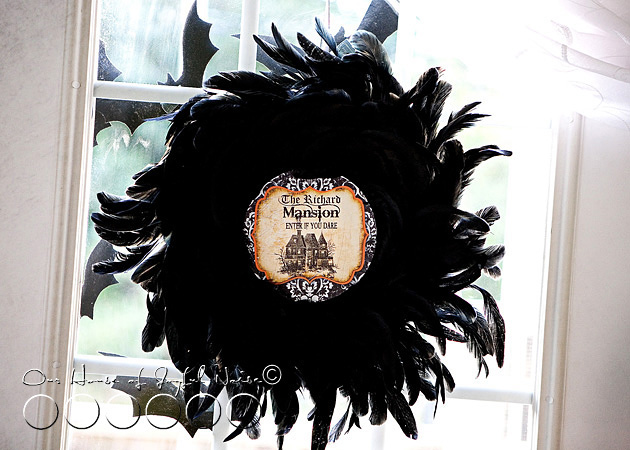
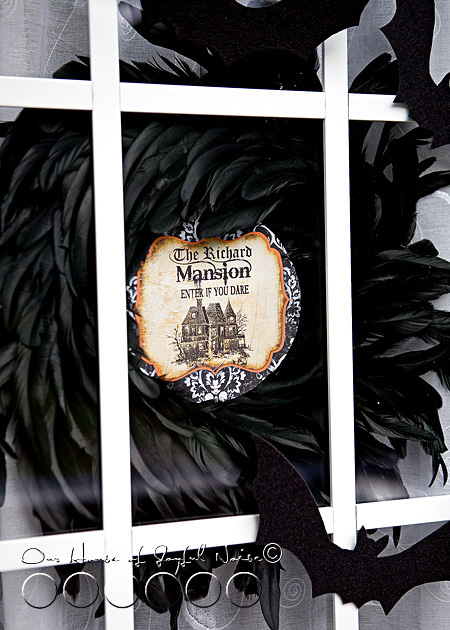
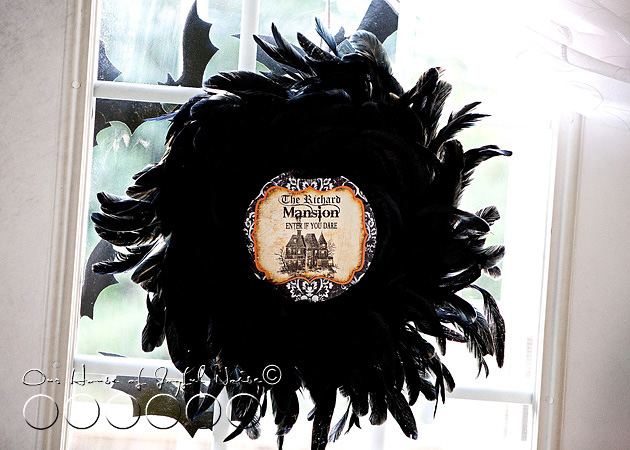
This funky black feather wreath itself was wicked easy!
I simply bought it as is, at Michael’s Arts & Crafts! (Where I bought all of the materials I needed, but didn’t have on hand.)
08_halloween-indoor-wreath-decor

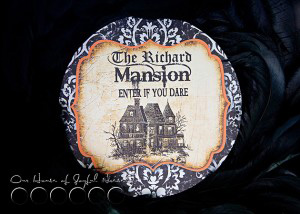
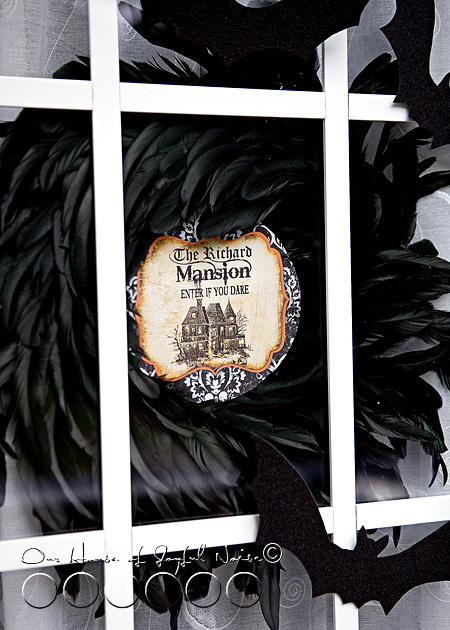
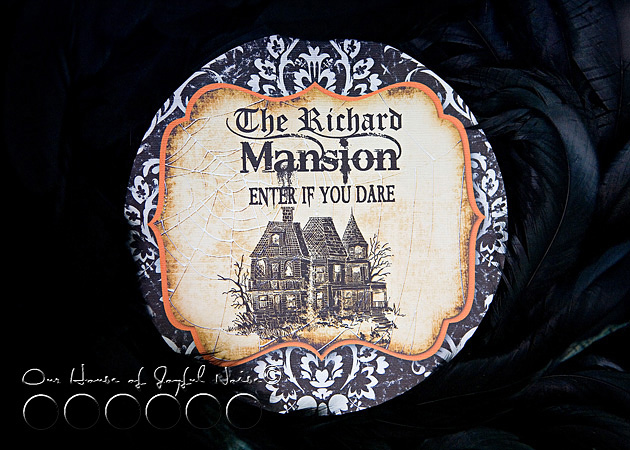
The circle sign in the middle, was another design in the collection I bought. Frosting & Ink customizes it with your own last name, before sending you the files! How cool is that?

The middle of the feather wreath was originally empty. Just a hole. So somehow, we needed to find a way to stabilize the sign in the front middle. The feathers were not going to hold it there.  So we simply cut a square out of some leftover stiffened felt, and mounted it on the back with hot glue, covering the wreath hole.  Then we just folded some pieces more stiffened felt and used them as spacers, connecting them with hot glue from the inside of the back support felt piece, to the back of the front design circle.  Simple fix!  It needed to be an indoor wreath, no doubt about that.  But thankfully, we have a glass front door, so we were still able to use it as a front door wreath that shows on the outside, when the brave ones come knocking.  ; )

We hung the wreath by hot gluing a piece of black sheer ribbon to the wreath itself on the back, and then to the top of the door frame. Yes, we did. lol. It comes right off, without damage.
09_cutting-perfect-circles
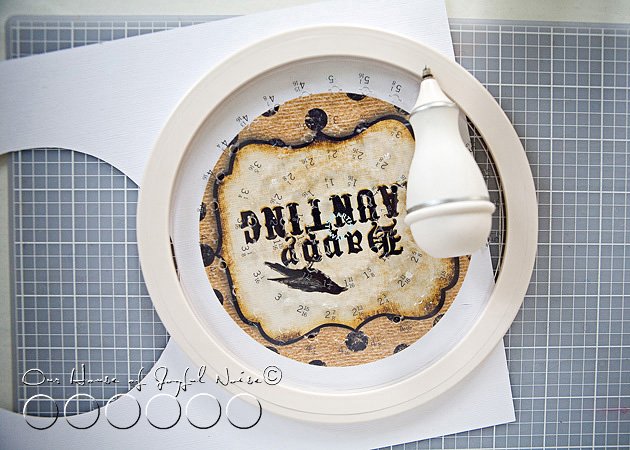
One might wonder how I cut out all of the circle designs.  There were many circle designs to be cut, and it would surely be no fun having to do so with scissors.  I want my circles perfect, so it was high time I got a good circle cutter. (With a 50% of coupon, of course.)  I got the Martha Stewart Circle Cutter, and I love it!! The blade pops on to the fit-in-your-hand cutter, and the blade swivels, so it makes circle cutting seamless and perfect.
10_halloween-french-doors-home-decor

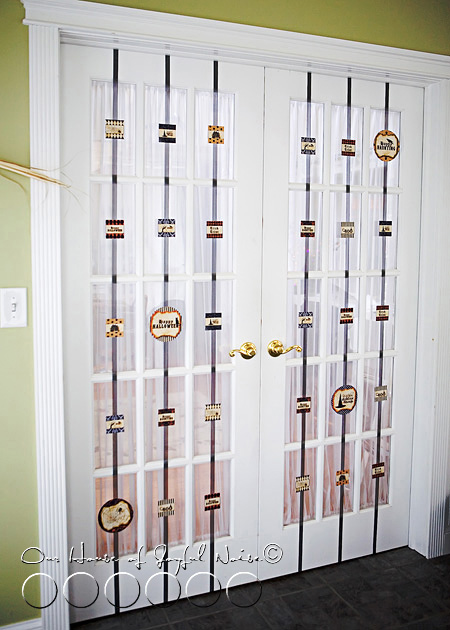
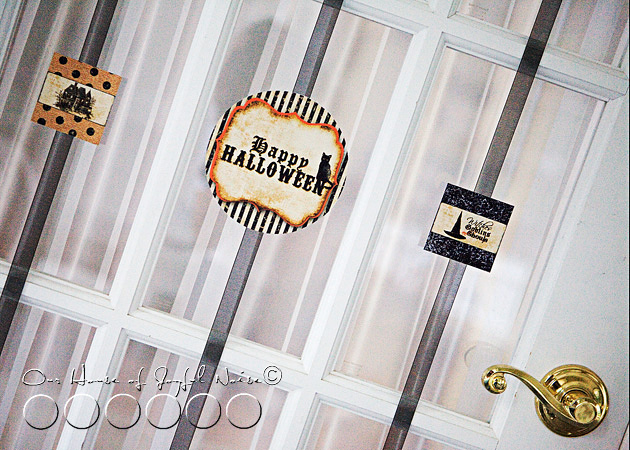
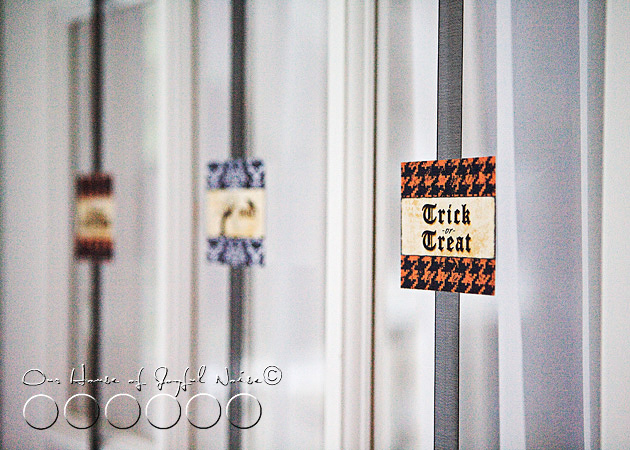
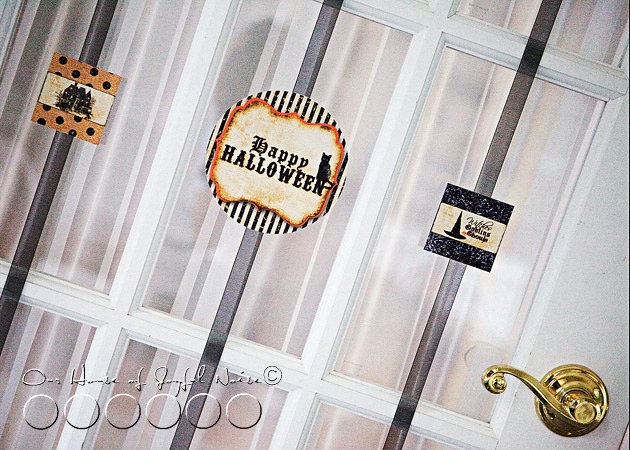
For all of these little mini-signs (originally cupcake/cake toppers, table signs, etc.), I again used my Martha Stewart Circle Cutter for the round designs, and my Fiskar Trimmer for the square designs. Sticky tabs were used to stick them to the black sheer ribbon strands, that run from the top of the doors to the bottom. Simple and cute!
–
012_halloween-ghosts-fan-pull

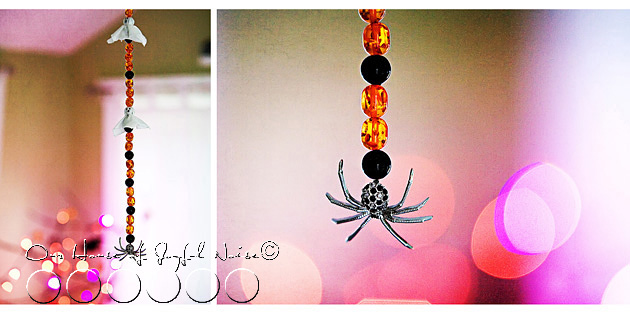
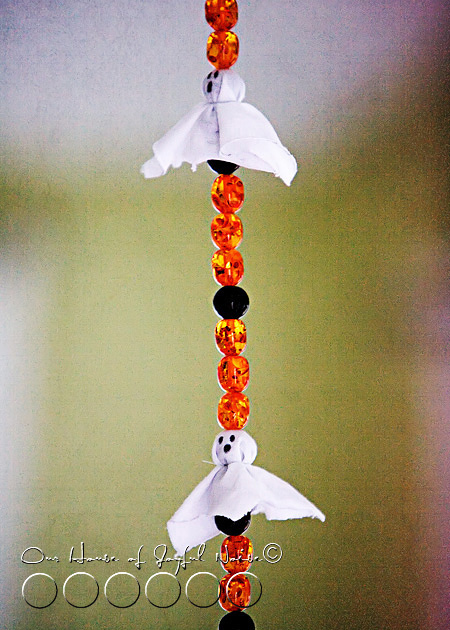
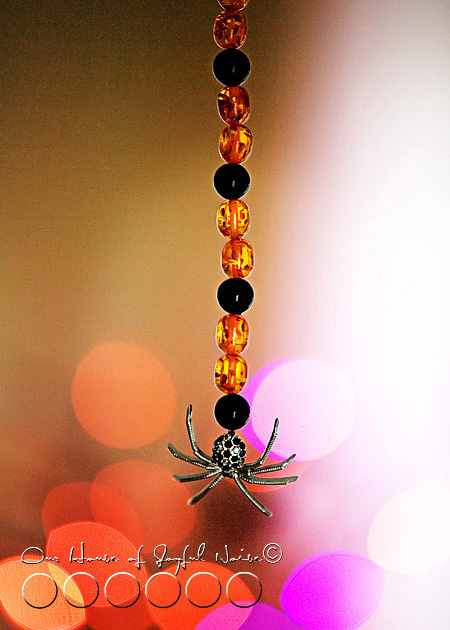
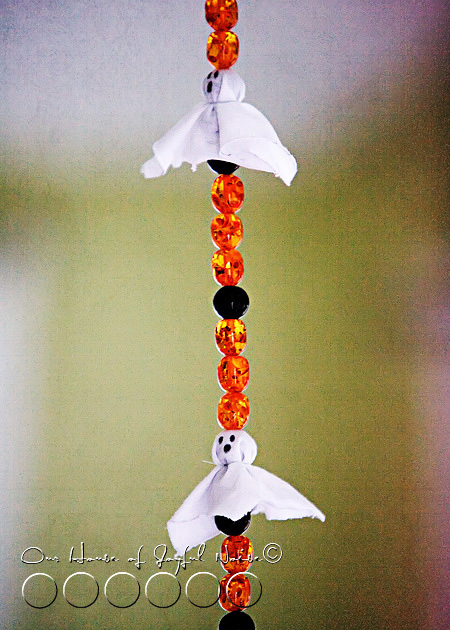
Lastly I just wanted to mention how I created little ghosts on my Halloween Fan Pull. The heads themselves are simply formed by t-shirt material cut into squares, and forming it over the round beads. Then I used more clear fishing line to tie off the necks some to create the head better, and the kids drew on faces. This is all done while making the fan pull itself, which I also do using strong test fishing line, doubled. The spider element is at the bottom (center of the line), and then I used a fat needle and the fishing line to quickly string all of the beads on.  When it was time to make a ghost, I simply stuck the needle right through the middle of the square piece of material over the round bead, tied off the head with another piece of fishing line (trimmed down after knotted), and continued to string beads. When all of the beads are on for a fan pull, Michael ties on a little piece of wire and knots it up into a ball, to hook right into the ball chain clasp.  Works like a charm!  >  I hope you comprehend those directions. It’s late now. I was watching  X-Factor (2 hours this night) while doing this post too, on commercials.

I think a good thing to take from this post is, there can a lot of ‘winging it’ with crafting, with just a little fire-thought. Yes, sometimes you find one method works out better than another. But the process is simply figuring out what you are trying to create or do, and what kind of materials you may need or have on hand, to make it all work. (Whatever your project may be.). Just think about how you want something to look, and what you can use in terms of material, to achieve that vision. It’s not about doing everything perfectly, but learning as you go, and picking up a few tricks along the way. As you know by now, I have found fishing line to be pretty handy in my crafting!  There is some pretty strong test line that is durable, and it’s practically invisible, which can be a helpful for some projects too. There are so many tools out there that can make the more tedious parts of crafting (like cutting things out), faster and easier. And then there are lots of things right around your house, that you can use as well. Substitutions and preferences, are all part of the crafting game. If you have fun making what you do, and it makes you and/or others smile (even on the inside) when they see your creations around, then you are a successful crafter!

(Is there anything I missed?  Anything you wanted to know about our Halloween Decor that you had a question about, that I didn’t answer here? Please go ahead and ask, and I’d be happy to do my best to answer.)

* * * * * *


Save

Filed Under: Crafts & Creations, DIY (Do-It-Yourself) Project, Faith/ Catholic, FALL Crafts and Creations, Fan Pulls, Holiday Crafts, Holidays, Seasonal Crafts and Creations, The Big Picture, Tutorial Tagged With: creative-Halloween-decor-ideas, Fiskar-trimmer, Halloween-crafting, Halloween-crafting-tips, Halloween-decorations, holiday-crafting, holiday-decor, home decor, Martha-Stewart-Cutter, Michaels-arts-and-crafts, Modge Podge, Outdoor-Modge-Podge

Our Halloween Decor! (Indoor-Outdoor-Photos Galore!)

October 9, 2011 By Laura 22 Comments

BOO, People!! So excited here, to show you all around! I had a goal this year (2011), to have our whole homestead Halloween decor done (known as the 3-day Hallowtide, to us) by October 1st! That way, we could enjoy it all the whole month of October.  I also wanted it all blogged no more than a few days later. How long can it really take, to photograph, edit, and blog it? Apparently….9+ days.  With my kids busy schedules, I’m in the driver’s seat, in gyms and on fields, more than in my computer chair these days. (Enjoying it, although behind in work to say the least. But my kiddos come first!)

best Halloweeen decor

Now, I have to explain real quick, that I have been trying to ‘find my place’, with Halloween decor, for years.  From a spiritual/Catholic point of view (always where I am at), I don’t like to stray too far from the true meaning or Christian roots of any holiday, including Halloween. This is why we have always extended our focus to Hallowtide = All Hallows Eve, All Souls’ Day, and All Saints’ Day.  (You can see more about that, and how we roll, HERE.)

On a completely unrelated note, but tying in with the theme, I personally am a big baby, some may say. I do not like scary/gory/terror/evil anything.  My kids laugh at everything they see, and I look away. I freak out inside a little bit, myself. Not to mention (ok, I will….), that I see zero value in all of it. So…. decorating has always been a bit of a reluctance / confusion for me, about what I wanted to do.  But I can say this year, I found my groove, and the game was on!
In that light, I hope you enjoy seeing our homestead, outdoors and indoors, that I have photographed for you all.
LET’S GO!

best Halloweeen decor Off the bat ( <—- <giggle!), I’d like to give huge props and thanks to Emily from Frosting & Ink Social Designery! <—- Click on the link to see her Etsy shop!  I purchased this Halloween Party Collection from Frosting & Ink, and used it for my home decor!  While I can design much of anything myself, I hardly have time these days. And besides, when I saw what Emily created, I was all over it!  So she deserves lots of credit here! I’ll be posting some her beautiful designs, and showing you how I used them throughout these photos. I actually have not used them all yet, but there is always next year!

002

Got to warn you:  I handed the Hubs the cobweb stuff, to be in charge of getting that done, and he went crazy with it!  Even {O} giggled watching him and said, “I can tell you’re having fun with that stuff Daddy! You don’t want to stop!”

One more note:  I had fun editing these photos, with some little grunge effects, etc.  My house is not actually this grimy looking, inside or out!  Not that’s it’s perfectly clean either.  If anything, it gets more of the messy & dust-bunny kind of dirty. LOL  ; )

So here is my very favorite Halloween creation, I made with a design from Frosting & Ink….

best Halloweeen decor

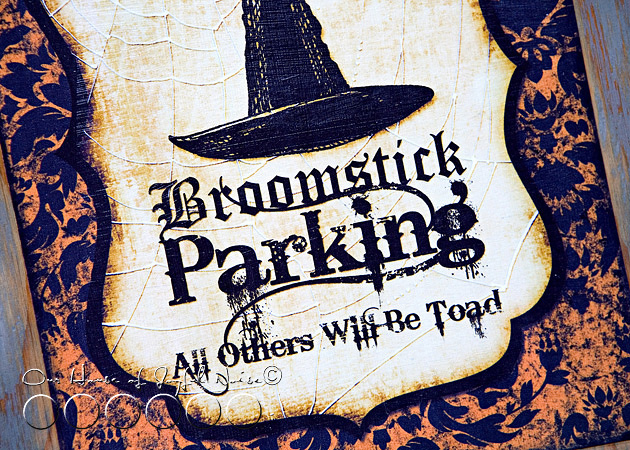
My Halloween Parking Sign! That’s right, I’m the witch around here! Heee hee heeee! Some will agree with that, in a heart beat. ; )  Others will argue, “No000 sir.  She is kidding you.  She is the sweetest thing ever!”  Depends who you talk to. LOL. (Or the day? lol).  Just kidding.

best Halloweeen decor

Anyway….I smile every time I pull the car into our driveway, about 20 times a day, and see my sign.  It’s something I made to be able to use every year, for years to come. I saw the whole thing in my head, the second I saw the design.  Michael made the jagged wood board for me, and we painted/distressed it, etc. It is weatherproof.

If you are wondering how, I do plan to do a quick post in the Crafts section, about how I made some of these Halloween decor things, sometime this week.  But this post is just about showing our decorations for now.

best Halloweeen decor I just have to show you the amazing and beautiful detail in Emily’s work!  I always loved that font used for ‘Parking’.  A band I love, Daughtry, uses that letter-style for their logo. It’s called Bleeding Cowboys, I think. It’s a perfect choice for Halloween designing.  Good call, Emily!

best Halloweeen decor

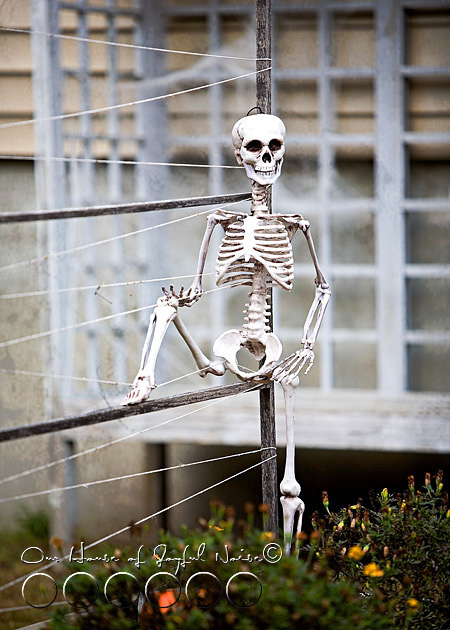
I was soooo on the fence (<—-another pun…giggle!) about getting this skeleton at Michael’s Arts & Crafts!!  I definitely am drawn to skulls and cross-bones and stuff, you know?  I have no idea why. They just ‘look’ cool to me. Yet I don’t really want to like them so much. LOL.  So….this is about my line, as far as decor goes.  See? Call me a wimp.  As long as we placed him humorously, was our/my decision.  I do like seeing him, hanging out there! (As long as it’s not dark out! lol)
–

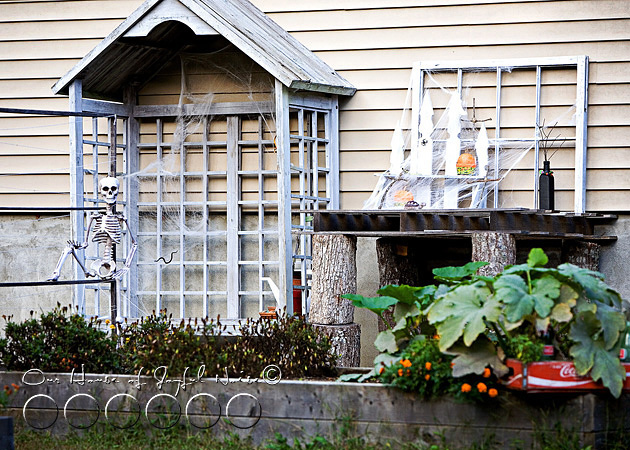
007_halloween-garden-home-decor Here is a wider view of our front-yard-gardens.
The flowers are pretty deadish now, which really kind of makes it all work!  Don’tcha think?
–

best Halloweeen decor

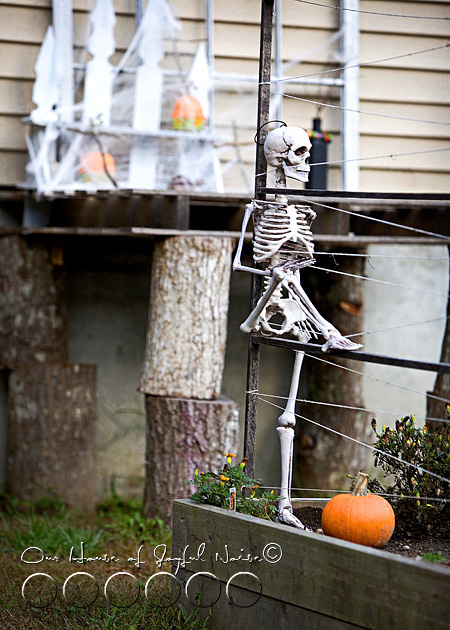
Another perspective of our friend.  From Snap Peas to Skeletons!
–

best Halloweeen decor I love my newly painted buttoned bottle.

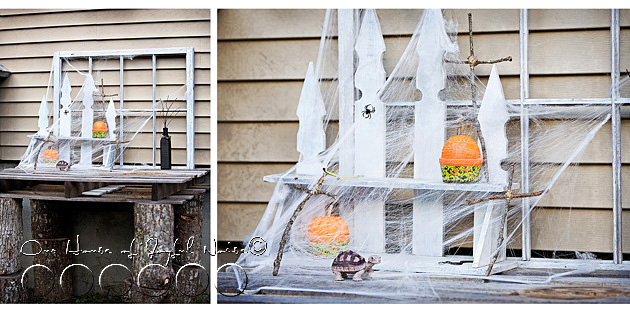
best Halloweeen decor The potting bench.


best Halloweeen decor

Bats swarming our front door.   It was a popular idea last year, that I loved.  But I’m slow. : )
Details of how I did this will be in the Crafts post too.

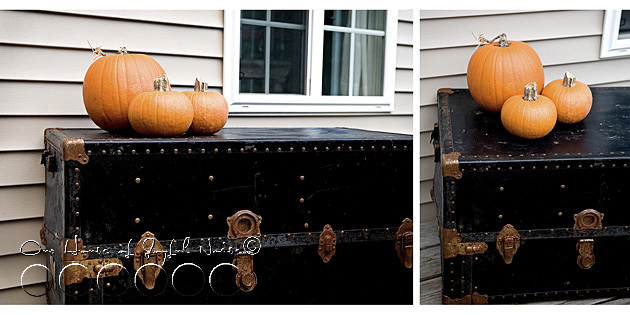
best Halloweeen decor This chest Michael picked up free somewhere in front of someone’s house.  It’s super interesting inside!  Really old…meant for shipping clothing and goods, etc., I think.  There are all of these compartments inside.  BUT, when opened, there is a heavy mold/mildew odor (which I am immediately allergic to), that we can’t get rid of.  So, we’ll be tossing it, instead of doing anything more with it.  But I thought it would be cool to keep through Halloween out on the front deck, anyway.
–

best Halloweeen decor

Through the glass of our front door here, you can see our Halloween wreath I made, with another design from my party pack from Frosting & Ink!

SO……that’s about it for our outdoor Halloween decor.

Would you like to come in??…

best Halloweeen decor When you order for this particular pack from Frosting & Ink, you are supposed to give her your last name, so she can customize this design.  I incorporated it into a wreath.  I’ll share more about how I made this later, in the craft post, too.

best Halloweeen decor The wreath is technically on the inside, because it is not weatherproof, in any way! Just turning it over here, so you can get a better look of it as a whole.  But faces outdoors.

best Halloweeen decor

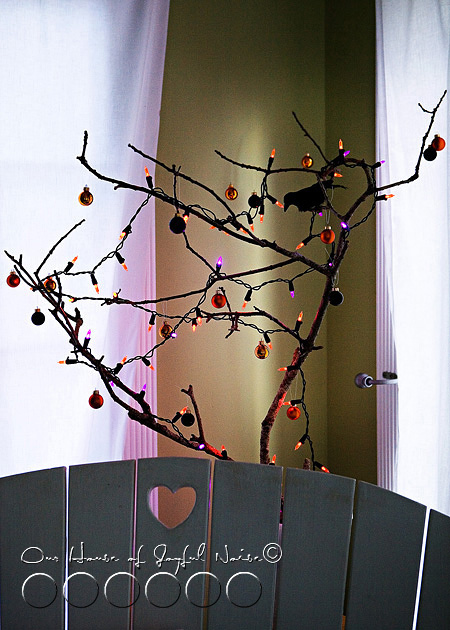
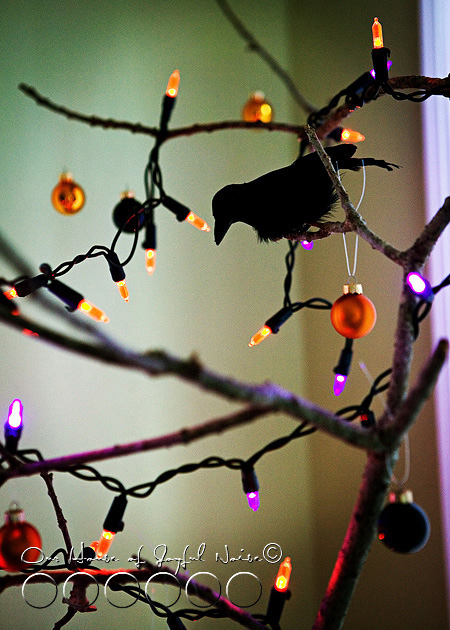
Our Halloween Tree.  Yep….still have that stick tree there! LOL.

The Halloween lights and black crow were bought at Michael’s Arts and Crafts.

best Halloweeen decor

Some of you may know, I love making inter-changable fan pulls, for our all-season room.  (Anyone?)  I haven’t made one in a long time.  BUT, I did make one for Halloween this year!….

best Halloweeen decor Beads and this spider, from Michael’s Arts and Crafts.

best Halloweeen decor

How cute are the little ghosts??

020_halloween-fan-pull-spider

best Halloweeen decor

I did this kind of thing on our French doors, for Christmas and spring too.  I used the the little Cupcake Toppers and Party Signs, from the same Frosting & Ink Party Collection,  for what I call ‘Fancy Strands’, down my doors.

best Halloweeen decor

best Halloweeen decor

best Halloweeen decor

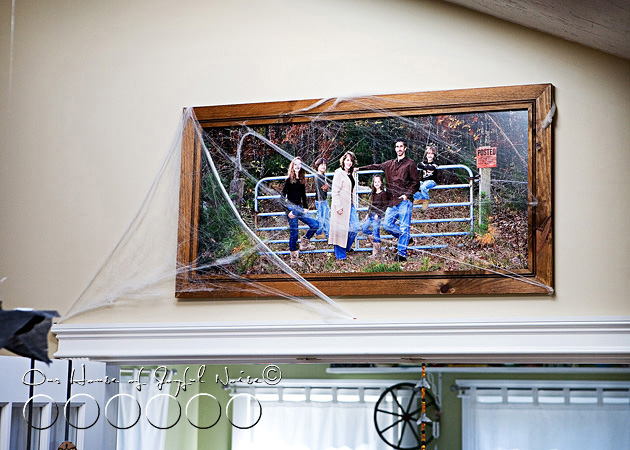
025_ A little over the top with the cobwebs, much?  It is a bit of an old family portrait now. Well, only 2-3 years. Time for a new one, although we’ll keep this one up somewhere in the house, too, anyway. But that’s the fam.

Well would you look at the time!….

best Halloweeen decor

It’s late, and I must get to bed.  I am sure we’ll have something more Halloween-ish to share, in the coming weeks.  We do plan to do something with pumpkins!  And as I said, I’ll be showing how I made everything crafty in this post, in a coming post in the Crafts section. So….we do hope you come again. (If you DARE!!  Because we’re wicked scary….right? ; )

ETA:  Here is the link for:  Tips, Tricks and How-To’s to our Halloween Decor  in this post

Please say  “BOO!”….if you enjoyed this peak of our Halloween Homestead!!?

Feel free to share the post, or PIN any photos you’d like, as well!

Isn’t the Halloween season fun??

* * * * * *
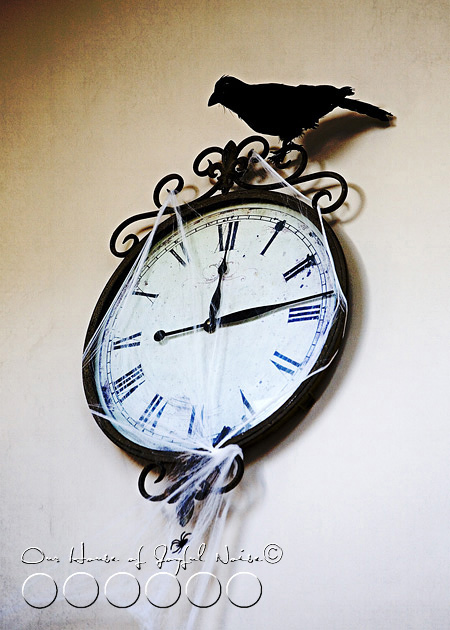
creative Halloween decor


Save

Filed Under: Faith/ Catholic, FALL Home Decor, Holidays, Home Decor, Photography, Seasonal Home decor, The Big Picture, The Homestead Tagged With: Catholic-blogs, Catholic-families, Catholic-Halloween-decorating, Frosting-and-Ink-Social-Designery, Halloween, Halloween-crafts, Halloween-decor, Halloween-fan-pull, Halloween-home-decor, Halloween-tree, Hallowtide, indoor-Halloween-decorating-decor, Michaels-arts-and-crafts, outdoor-Halloween-decor, really-creative-Halloween-decor

COOL AMERICANA | Red, White and Blue Detail Ideas for 4th of July Cookout

June 26, 2011 By Laura 8 Comments

We’re talking about red, white and blue detail ideas for your 4th of July cookout bash, today.

americana-red-white-blue-ideas-cookout-5

When the 4th of July falls on a day of the week, that makes for a long weekend, Americans all over the country often either host or attend a good ole’ fashioned all-American cookout! It’s the summer bash of the season, when families and friends get together, have good summertime eats, and make fond memories together that they remember for many years.

If you’re planning on throwing an All-American bash this summer, here’s just a couple of detail ideas, that will color your party Red, White & Blue, and remind everyone how happy they are to be an American, and have loved ones to celebrate with!

americana-red-white-blue-ideas-cookout
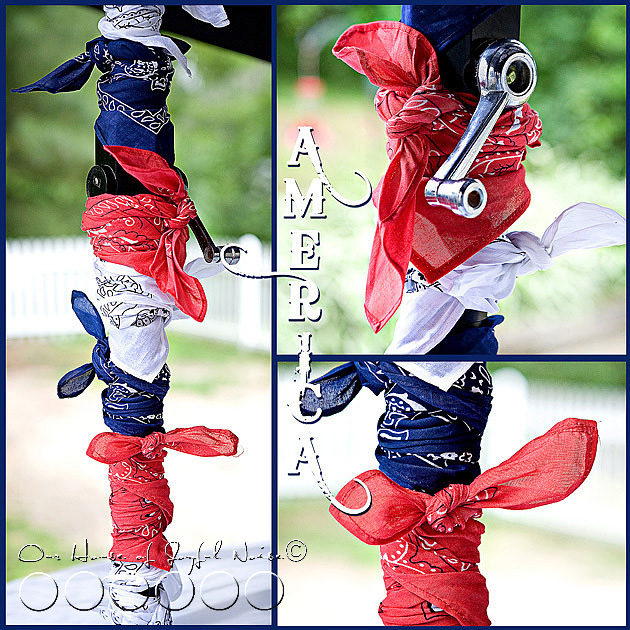
If you’ve got a patio table with an umbrella, you may or may not be able to relate to the annoyance, of that pole sticking out of the middle of the table. Ours is black, which is not the most festive of colors in my book. It’s also a hindrance to the photos I’m trying to take, of the spread, or the loves ones gathered around the table.  If you need the umbrella to block the sun, there is no getting rid of that pole!  But I did think of a way to dress it up, and make it an asset to the party decor! I picked up cheap red, white and blue bandanas, and wrapped them tightly around the pole, making the most of the remaining corners to make a nice bow, and pulling the bottom corner to overlap the bandana below it.


americana-red-white-blue-ideas-cookout-1
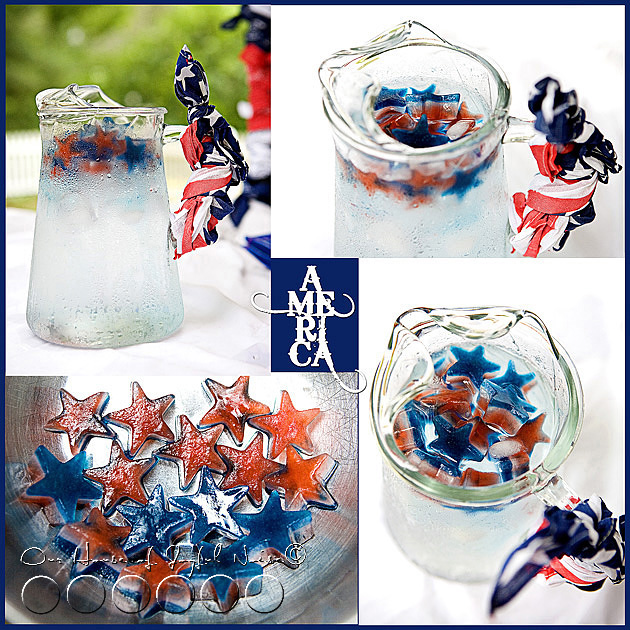
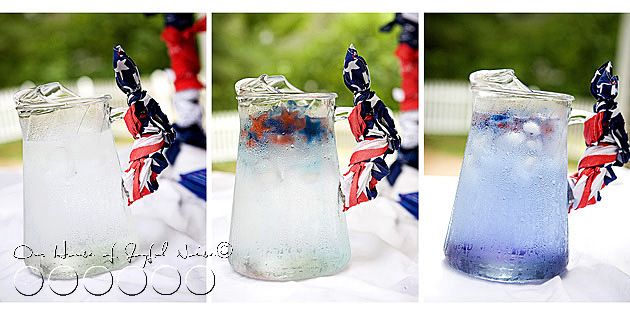
An AmericanFlag bandana can be wrapped around the handle of pitchers, adding a little more festivity, and added grip to that handle.

And what about red, white & blue striped ice, thrown in some refreshing ice water! I picked up some star shaped ice molds at Michael’s Arts and Crafts, and using red and blue Gatorade, and plain water, the kids filled the molds *1 colored layer at a time, freezing each layer in between.  *TIP: To get even layers, do this pre-test: Fill one a single star in the mold with water, and then suck it up with a medicine dispenser.  Check out the measurement of the liquid that filled the star, and divide it by 3!  That’s how much of each color you’ll need to fill the stars evenly.

You’re welcome. : )


americana-red-white-blue-ideas-cookout-2
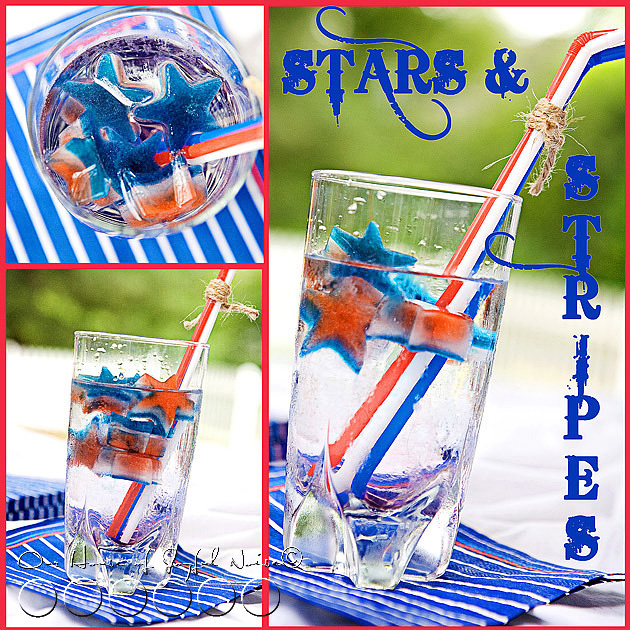
Try tying 3 colored straws together, to make another American-style detail. You could use pretty ribbon, but I loved the rustic touch of gardening twine.


americana-red-white-blue-ideas-cookout-3 This was the coolest surprise.  Eventually, as the star-striped colored ice melted, it tinted the water light blue! I loved it!  But to slow the process of your colored Gatorade stars melting right away, be sure you fill a COLD pitcher, with ice-cold water, and then throw in a tray or 2 of plain ice cubes. On top of the plain ice cubes, add your star-striped ice.


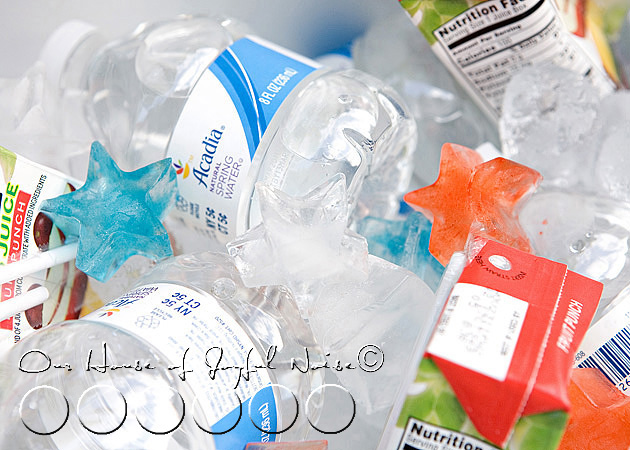
americana-red-white-blue-ideas-cookout-4 We also experimented making solid-colored stars with just a little food-colored water.  Consider making plenty, and throwing them in with your cooler of cold drinks, for your guests.

If you ask us, nothing makes a good time better, than hanging out & having fun with people you care about, really great food & drinks, and great all-American music, chatter, & hardly laughter in the air.

Make your 4th of July celebration memorable, with a few simple details.


Save

Filed Under: Celebrations, Crafts & Creations, Holidays, Seasonal Crafts and Creations, SUMMER Crafts and Creations, The Big Picture Tagged With: 4th-of-July-cookout-details, American decor, red-white-blue-cookout-decorating-ideas

Camp Site Eclair | Getting Creative with Fondant

June 12, 2011 By Laura 22 Comments

fondant-art-fathers-day-dessert-14

I was brainstorming about a good dessert to have for Father’s Day coming up,

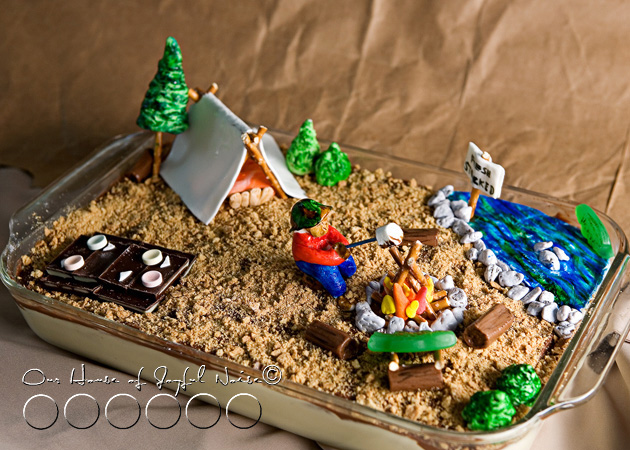
when I came up with this idea:  A Camp Site Eclair Dessert.

fondant-art-fathers-day-dessert I know the Daddy in our family, loves camping, fishing, and marshmallows! So this whole dessert was going to make him very happy, because there is a whole lot of marshmallow fondant involved! And as a bonus, there are other surprise treats everywhere!

I decided to make it ahead of time (with a little help from the Daddy in celebration, and our kiddos.)  Thankfully, we can save all of the decorations on top, make the dessert again next week, and redecorate.  Because I wanted to be able to share the idea with you all, our blog readers, in case you’d like to replicate the idea, or let it spark an idea of your own in some way.

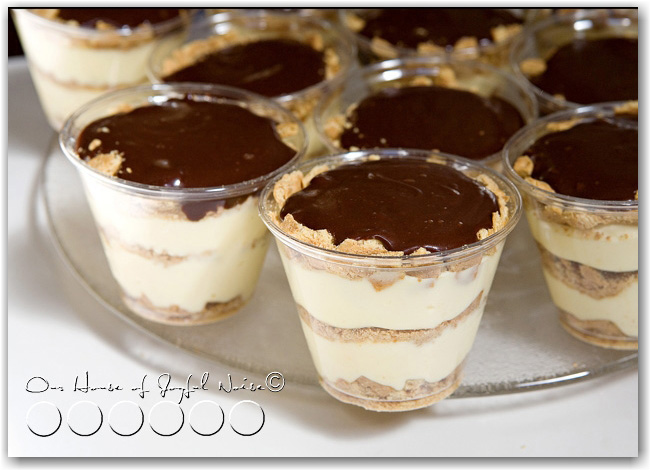
So this decorated dessert is the pan variation of No Bake Eclair. You may remember we shared this recipe before, as individual cup servings, that looked like this:

fondant-art-fathers-day-dessert-2 You can find that recipe and directions for the cups version here.

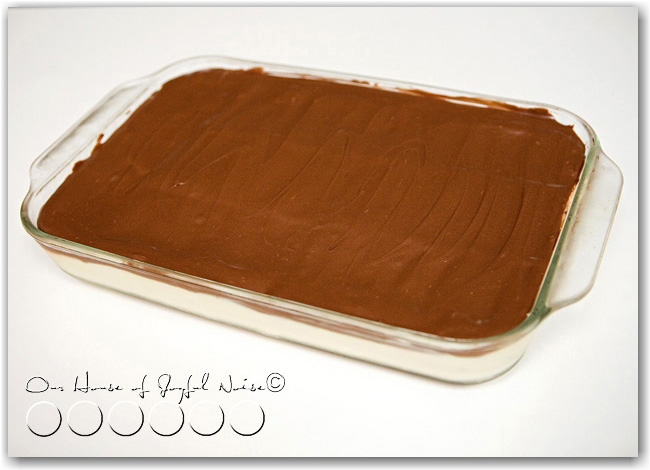
fondant-art-fathers-day-dessert-1 This is what our No Bake Eclair Dessert originally looked like, before covering with crushed

graham cracker, for a nice dirt ground effect, to set the scene for our camp site.  Here is the easy, no-bake

recipe for it. You can whip this part up ridiculously quickly!

::::::

No Bake Eclair

Participating Ingredients:

  • graham crackers
  • 2 boxes instant vanilla pudding
  • 8 oz. cool whip
  • 1 can of chocolate frosting and 2 tbsp. milk
  • 3   1/2  cups of milk

Directions:

Mix the pudding and milk with the blender- let it get a little thick. Add the cool whip in.

Butter a 9X13 in. cake pan. Place WHOLE graham crackers in the bottom of pan. You will need to break some though.

On top of graham crackers add 1/2 of the pudding/cool whip mixture.

Put on another layer of crackers and then the other half of the pudding mixture.

Place last layer of graham crackers on top.

In a separate bowl empty the frosting and add 2 tbsp. of milk. Mix so the frosting is creamy and easy to spread.

Frost the crackers and enjoy!

 ::::::

Now to share as much as I can, about how we decorated the pan of No-Bake Eclair:

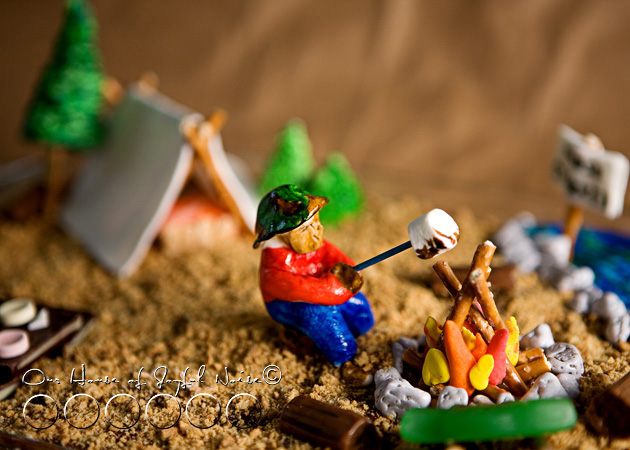
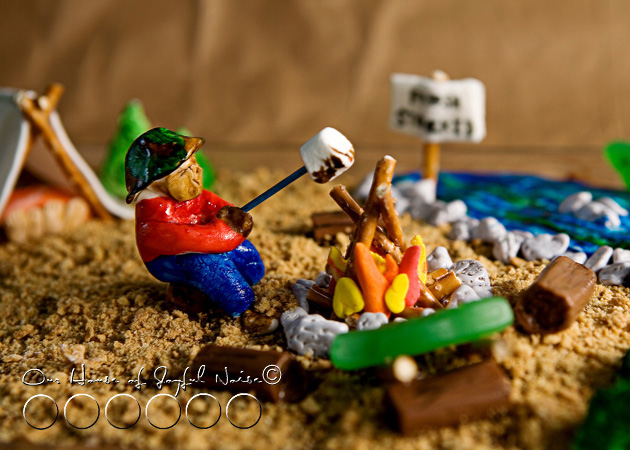
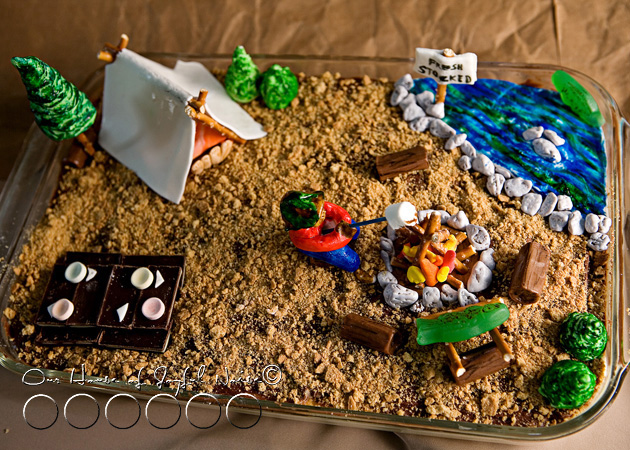
fondant-art-fathers-day-dessert-5 The ground as I said, is the top frosting layer, covered in lots of very crushed graham cracker.  On top of that, everything is made out of marshmallow fondant, various kinds of candy, and little pretzel sticks.

Now please keep in mind, we are no fondant artists, yet! This is our very first time working with the stuff.  This is actually marshmallow fondant, which is made so easily with mini marshmallows, confectionery sugar, and water.   Then of course, we used some food dye. (Not food coloring, but food dye, used for coloring icing.)  I very easily found 2 videos on making marshmallow fondant, and coloring it, just by Googling. I will put them at the end of this post, for your convenience.

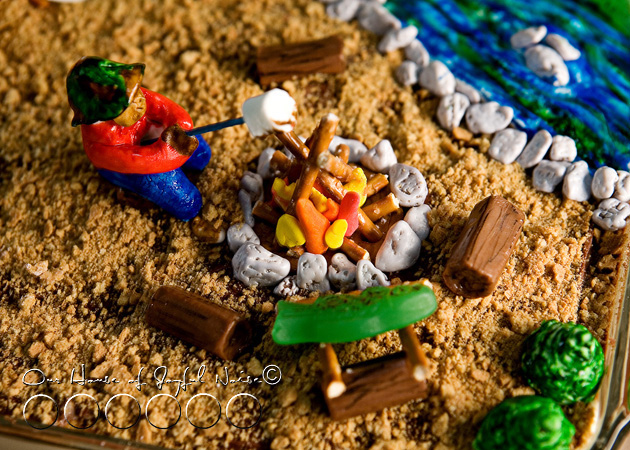
fondant-art-fathers-day-dessert-4 Don’t mind the father’s face, lol.  We really didn’t expect it to show much. It was just quickly smushed together. lol
But we’re not sure we could have done much better, if we tried. LOL

He is completely made of white/uncolored marshmallow fondant, and then painted with food dye and a brush.

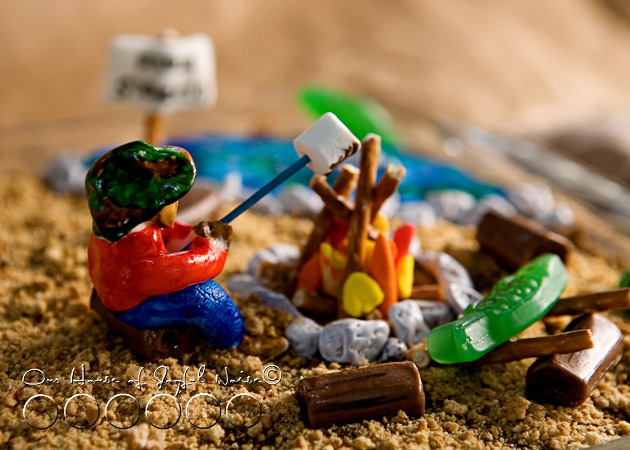
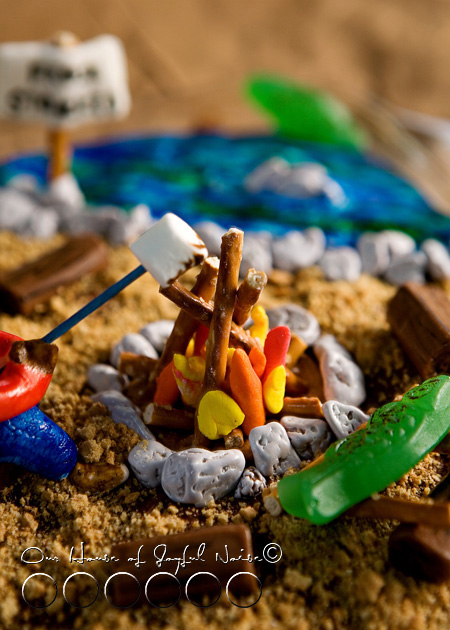
fondant-art-fathers-day-dessert-5 The camp fire is made of colored fondant for the flames, pretzel sticks, and chocolate rocks that we found in the cake aisle of Michael’s Arts & crafts.

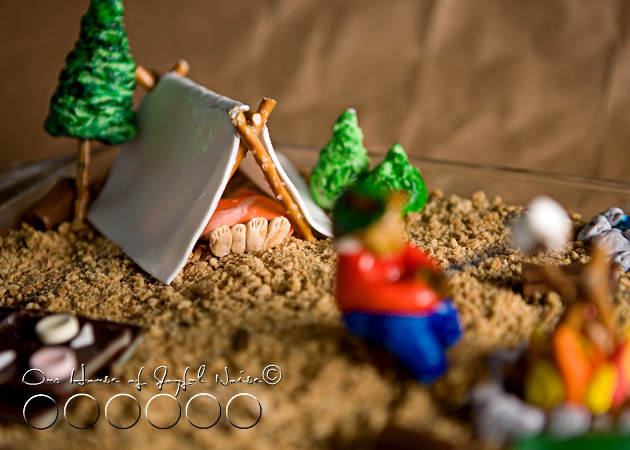
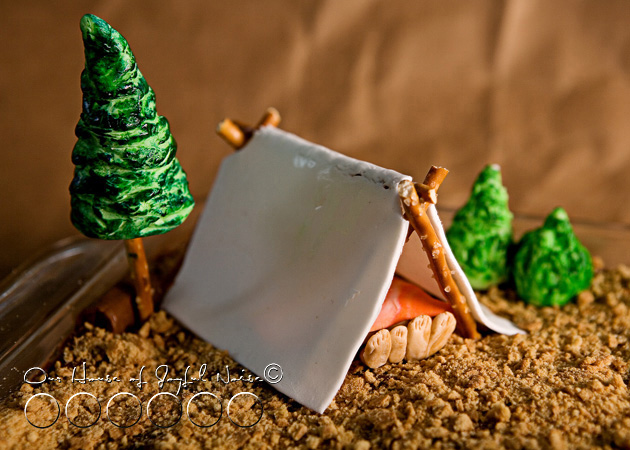
fondant-art-fathers-day-dessert-6  The tent and family feet are also all fondant, and pretzel sticks to hold the tent up.

fondant-art-fathers-day-dessert-7 Here’s a helicopter view.

The trees and bushes are green dyed fondant, molded around Hershey Kisses, and then more green dye painted on the trees & bushes, for texture.  The pine tree uses a pretzel for the trunk.

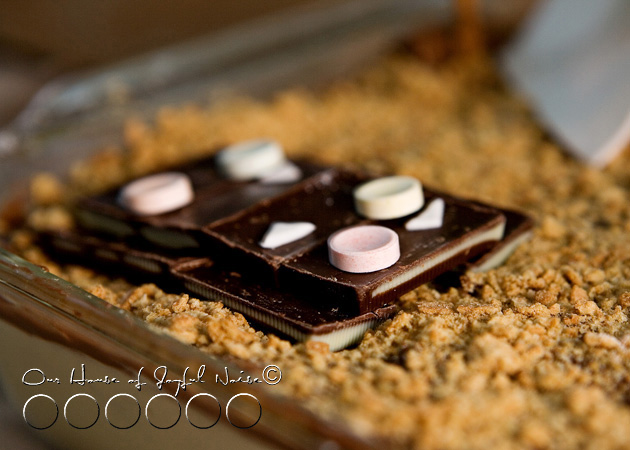
fondant-art-fathers-day-dessert-8  This is a set picnic table.  The table top probably could have been another layer higher.  But the table and bench seats are made of Andes Candies, the plates are Smarties Candies, and the little triangle napkins is plain marshmallow fondant.

fondant-art-fathers-day-dessert-9 All of the logs you see here and there, are Tooties Rolls, with a little edible black writing pen to show some grooves and bark.

fondant-art-fathers-day-dessert-10 The 2 fish on the scene are Swedish Fish.

The marshmallow on a stick is actually fondant, but we could have just used a mini marshmallow, since we had plenty left from  making the fondant.

fondant-art-fathers-day-dessert-11

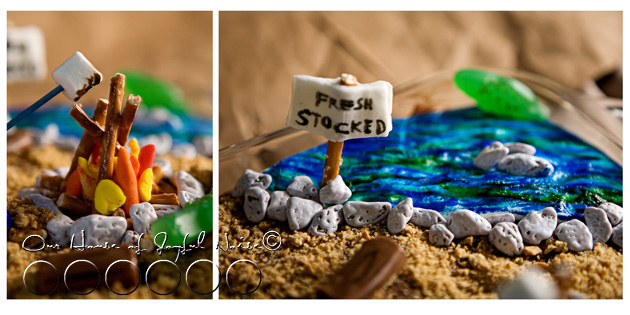
fondant-art-fathers-day-dessert-12 The water is plain fondant, painted with blue and green dye.

The sign face is fondant, with a pretzel stick, and more chocolate rocks. (Love those!)

fondant-art-fathers-day-dessert-13  The tent, and the family dirty feet, is my favorite part!

It was so fun to make, and we thought it came out pretty good!!

Between shopping for the goods, and making it all, it was almost a day project, but a fun family one!

We wanted to note too that, while fondant and the colors are all edible, we don’t really eat artificial colors. But it is all SUPER fun to get creative with, as decorations.

Please tell us you are a at least little impressed with our work, even if you aren’t. 😉   Either way, hope you find yourself inspired to play with some fondant, and get creative with food, too!!

::::::

*(Love this post? How about subscribing to our blog in the sidebar, ‘Liking’ our Page on Facebook, or following me (Laura) on Twitter? Or all 3? 😀

Making Marshmallow Fondant

Coloring Fondant


Save

Save

Filed Under: Desserts, Fun Food, Holidays, Recipes, Treats Tagged With: cake decorating, coloring fondant, fathers-day-dessert, fishing-camping-scene-dessert, fondant ideas, fondant-art, getting-creative-with-fondant, marshmallow fondant, no-bake, no-bake-eclair

Personal Photos of Our Easter Day

May 4, 2011 By Laura 1 Comment

00_

Just sharing some personal photos of our kids with you, from our most

beautiful, joyful, memorable, perfect Easter Day.

  001

These lovely flowers were sent from a family friend.  She’s always so thoughtful on holidays.

The daisies are still very much alive, in a wine glass of water. Had to keep the polka dot ribbon too.

002
The Lord is Risen!!
This Calvary plant the kids made, is now out in my gardens.


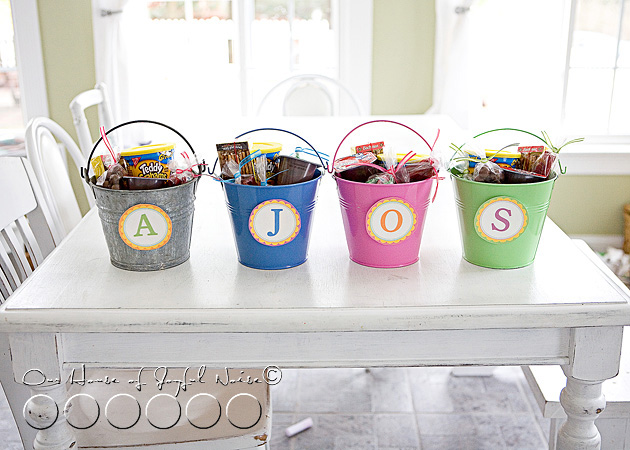
easter-pails_003 We don’t do the E.B. (or S.C.), but I always love having surprises for the kids.  Especially because they ask for nothing, expect nothing, and do easily remain so focused on our faith. They couldn’t wait to go to Mass, and neither could I!  It had been an intense but beautiful Holy Week, but we were ready for the celebration!
–

004 I’ll share my puzzle with you.  Unscramble it, if you can! ; )  lol

–

005

006

007

008
009

010

011

The greatest gifts of our earthly life. . . .

012

–

triplets_013

A Package Deal kind of Blessing!

–

014
I can’t tell you, how happy these piggy-braids made me.

{A} asked for me to do them, and she loved them too.

The shock of it all almost stopped my heart,

on Easter morning.  ; )

Our beautiful doll, is now way taller than me.

015

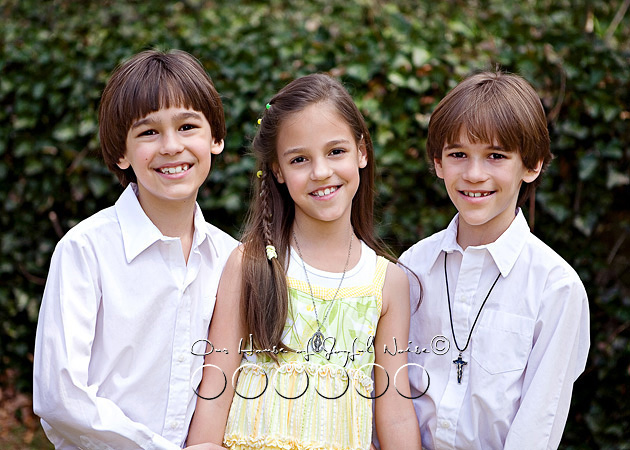
Our girls….

016

017

–

Our boys….

018

–

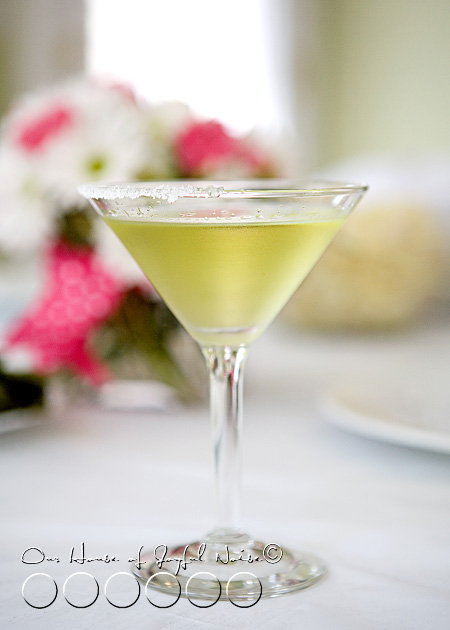
easter-apple-tini_19 I did not photograph our delicious Easter dinner.

But I did photograph my pretty Apple-Tini!

******

Hope your Easter Day was joyful too, and picture-perfect in every way!


Save

Save

Filed Under: Celebrations, Faith, Faith/ Catholic, Holidays, The Big Picture Tagged With: Catholic-blogs, Catholic-families, Easter, Easter photos

  • « Previous Page
  • 1
  • 2
  • 3
  • 4
  • …
  • 8
  • Next Page »

We are wicked happy to have you here! We hope you find much inspiration, help, humor and enjoyment here.


Archives


POPULAR POSTS

* * * * * *
SUBSCRIBE to House of Joyful Noise blog! Every new post, delivered right to your email box!


Privacy Policy

Amazon Affiliates

Never at any additional cost to you, we may earn a small commission for our endorsement, recommendation, testimonial, and/or link to any products from our website. Your purchase through our links helps support our family, while sharing with you the products we authentically use and recommend, for various ideas, and letting you know where you can purchase them. Thank you for your support!

[footer_backtotop]

Copyright © 2025 HouseOfJoyfulNoise.com · Genesis Framework by StudioPress