• HOME
  • {A}’s Chipmunk Training Archives

 Homepage

  • The Homestead
    • Home Projects
    • Home Improvement
    • Home Decor
      • Seasonal Home decor
        • FALL Home Decor
        • WINTER Home Decor
        • SPRING Crafts and Creations
        • SUMMER Crafts and Creations
    • Our Chickens
    • Gardening
    • Organization
    • Re-Purposing
    • Furniture Refinishing
    • Budget
  • Crafts & Creations
    • Seasonal Home decor
      • FALL Crafts and Creations
      • WINTER Crafts and Creations
      • SPRING Crafts and Creations
      • SUMMER Crafts and Creations
    • DIY (Do-It-Yourself) Project
    • Kids Arts and Crafts
    • Homemade/Handmade Gift Ideas
    • Holiday Crafts
    • Fan Pulls
    • Free Printable/Downloadable
    • Sewing Projects
    • Giveaways
    • Business Features
  • Recipes/FoodFun
    • Breakfast
    • Lunch
    • Main Dish
    • Sandwiches
    • Appetizers
    • Slow Cooker
    • On The Grill
    • Side Dishes
      • Soups
      • Salads
    • Baking
      • Breads, Rolls and Muffins
    • Snacks
    • Treats
    • Desserts
    • Drinks
  • Homeschooling
    • Elementary Homeschooling
      • Elementary Homeschooling READING
      • Elementary Homeschooling MATH
      • Elementary Homeschooling LANGUAGE ARTS
      • Elementary Homeschooling SCIENCE
      • Elementary Homeschooling HOME ECONOMICS
      • Kids Arts and Crafts
    • Middle School Homeschooling
      • Middle School Homeschooling SCIENCE
      • Middle School Homeschooling HOME ECONOMICS
    • Language Arts
    • Math
    • History / Social Studies
    • Geography
    • Foreign Language
    • Field Trips
    • Games
    • Nature Study
  • The Big Picture
    • Life In General
    • Celebrations
    • Faith
      • Into the Light; The Series
    • Giveaways
    • Reviews & Sponsors
  • Photography & Lettering
    • Photography
    • truck lettering
    • vehicle graphics
    • Newborns
    • Kids
    • Engagement
    • High School Senior Pictures
    • High School Senior Pictures Sneak Peeks

3 Little Garden Chairs | Refinishing

July 2, 2012 By Laura 9 Comments

006_annie-sloan-provence-paint-color-300x214

There’s been these 3 little chairs, sitting in our basement for years now.  One of my husband Michael’s clients offered them to him, knowing we had triplets, and thinking maybe we could use them.  They are about toddler size. So he brought them home, and they’ve been in the basement ever since. I’ve never been a primary-colors kind of girl.  I thought maybe I would repaint them or do something with them at some point, for the kids, or maybe as available props for my photography studio.   But, I was just never inspired to ‘have-at’ them.

Until of course, I was.

001 
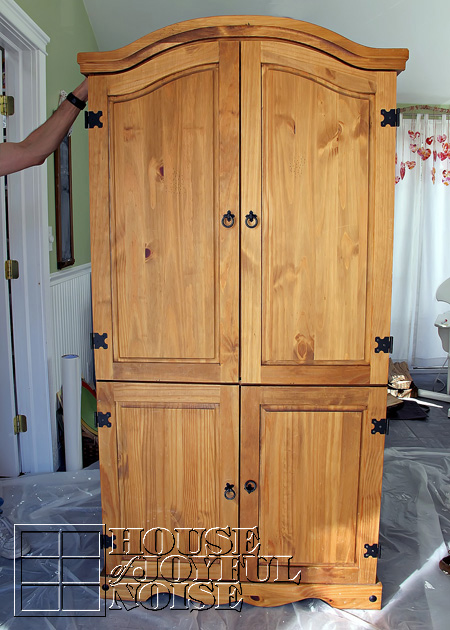
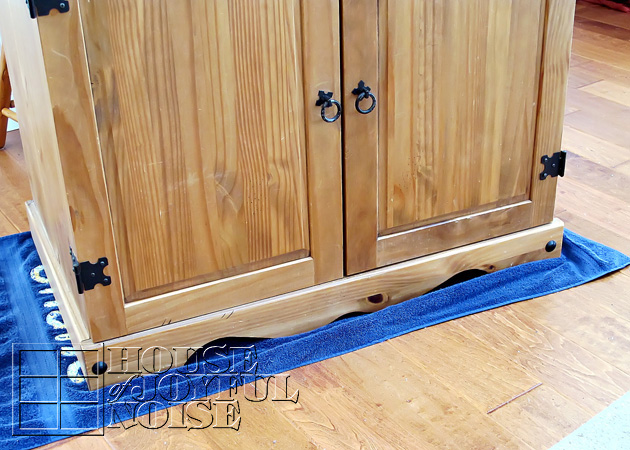
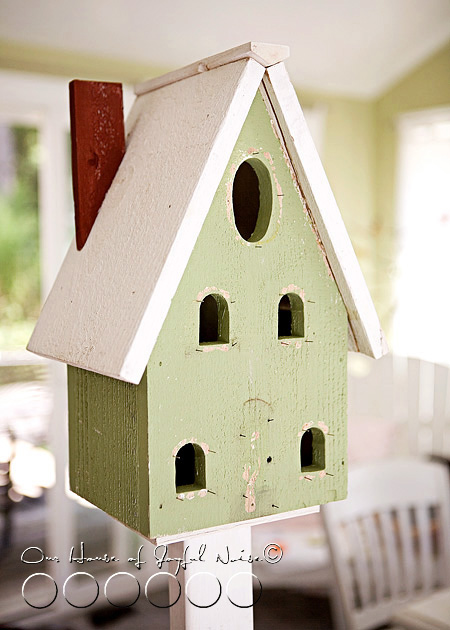
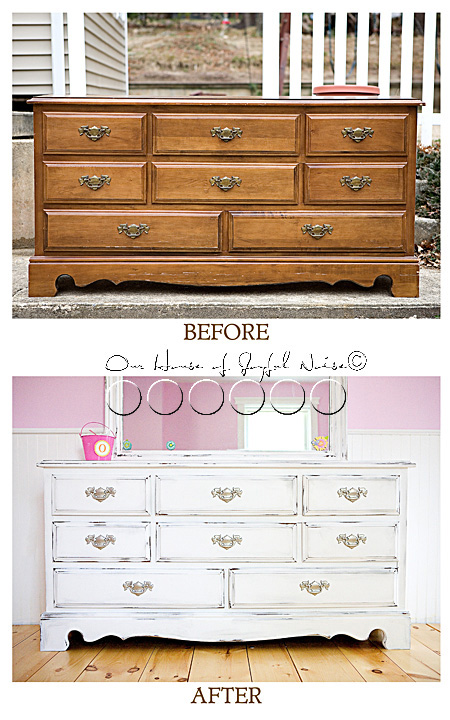
I know these are ugly. Please don’t leave! I promise you, it gets much better! We were hauling out all kinds of things out of our basement that needed to GO, for our yard sale. Michael put these chairs out there, and when I saw them I said, “Hey! We’re not selling these! I could make them into cute little garden chairs!”  Well then….there was my inspiration.  The idea hit me for the first time, and flew out of my mouth. (As most thoughts do, if you must know. But I’m getting better.)  As so as it was, I was finally inspired to do something with these 3 little chairs.

The challenge was the primary colors of paint that was already on them.  Yes, I was going to paint them anyway, but I was NOT going to NOT distress them. And I sure as heck was NOT going to strip them.  They didn’t mean enough to me, to work that hard.  I mean, I love to paint, and to sand, and even to wax.  But stripping off paint? Not so much. So the primary colors underneath were staying, and I was starting to imagine, they were going to look pretty cool when I was done!

I’ll say right here, that I didn’t take photos of every step of the process.  But I think you all know what painting and sanding looks like. I DID take a whole bunch of photos of the chairs all done though! Lots. Those are the more fun photos you all like to see most, right. Because there was no special complicated process. I will tell you just how I did it right now, which was easy as 1-2-3, and then you can see so many photos I had so much fun taking as well, simply to show you.

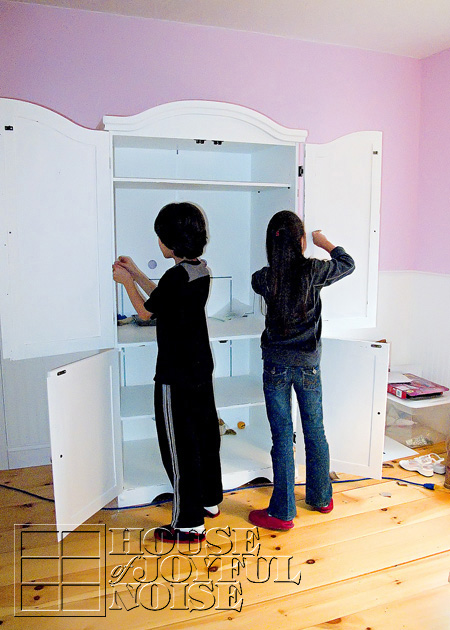
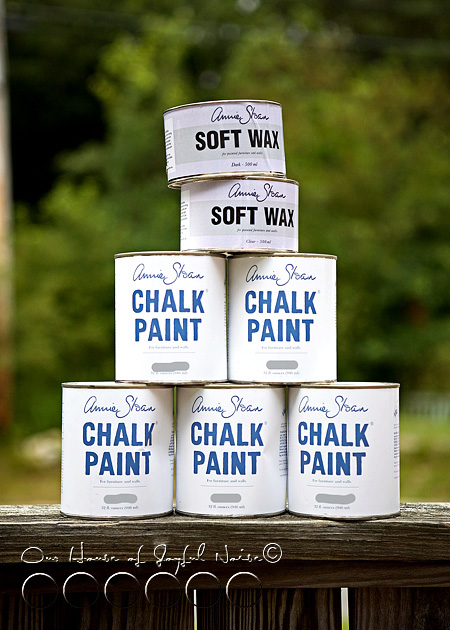
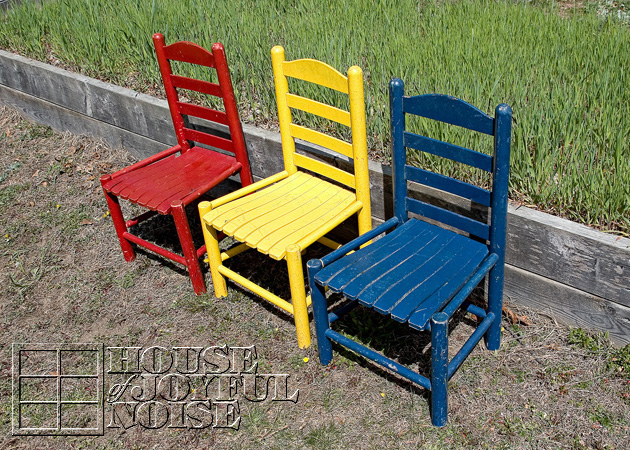
Since I had 3 chairs, I thought it would be perfect to use the cans of the 3 colors of Annie Sloan chalk paints that I still had: Provence, Versailles, and Paris Grey. So, 1) I painted each one those colors.  It was actually very scattered painting sessions over a period of a few weeks, and my girls helped some too when they wanted to.  2) Then I distressed them to my liking. (That means, a lot of sanding. ; )

002_annie-sloan-waxes 
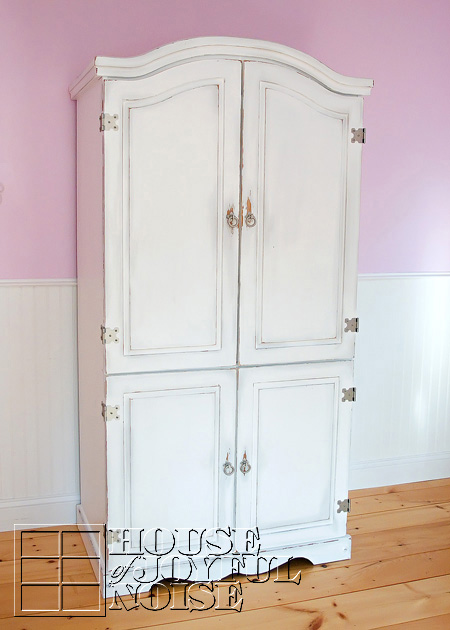
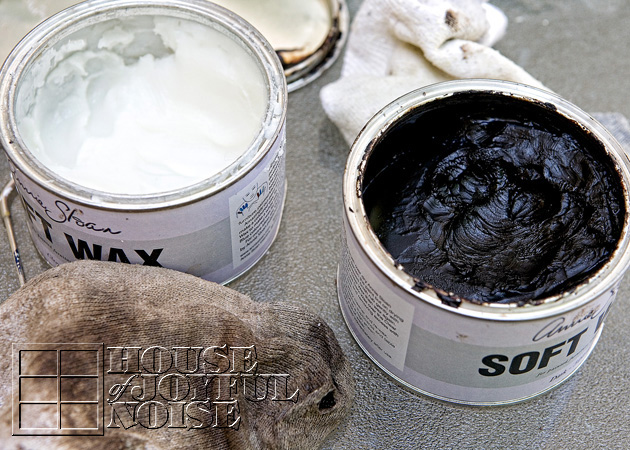
3) Lastly, I waxed them with my Annie Sloan waxes.  It was especially important for them to be waxed, because I knew they were going to be left outside in all kinds of weather. So they needed some kind of protection, to preserve all of my efforts, of making them into cute little garden chairs around our homestead.  I did wax each chair one at a time, from start to finish.  First I did the clear wax all over a chair, let it set up a bit, but before it was completely dry, I worked in some dark wax where I wanted it, to give them a more antiqued, aged look. It kind of has to be done that way, because the dark wax is potent stuff. It only takes a little bit, and if the clear wax is too dried, it is hard to rub off – or even rub around, the dark wax. So that is always the little bit tricky part, as well as wicked messy and sticky and stinky. But I’ll tell you what, this point in my project process really proved even to me, how much I love furniture refinishing! Because it was also sunny and hot this day.  But I was out on our deck working away in the sun, sweating my a*# off (but wouldn’t you know it, it’s still all there!), but singing and rocking out to the music, with that nasty sock on my busy hands, and having a ball!

Or I might of been high on wax fumes. Hard to say. But it was fun! That much I’m sure of.

Not much chatting left. Just a ton of photos, and some tidbits I think you might like to know.

003_chair-antiqued-with-dark-wax 
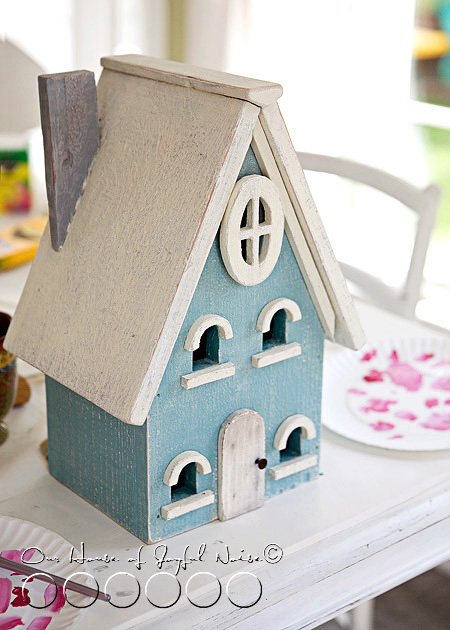
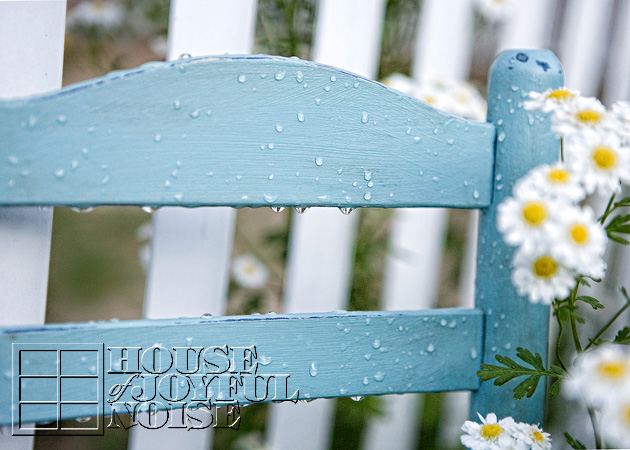
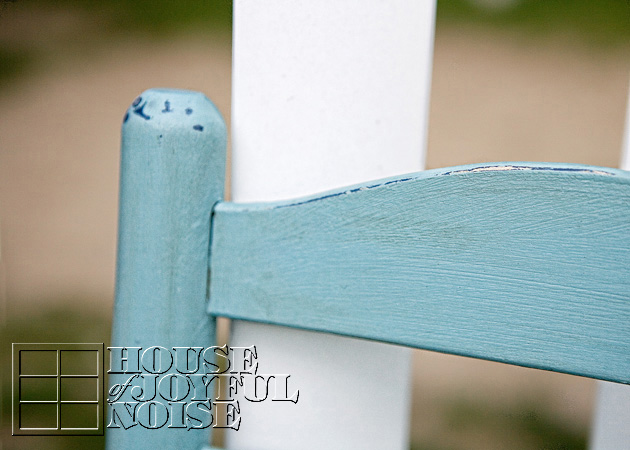
Here you can see a couple of things, that really make these chairs beautiful to me. Knowing the primary colors underneath were going to show, I was careful in deciding which paint color was going on which chair. So here is the (Annie Sloan) Provence, on the dark blue.  You can also best see in this photo, the dark wax work, that helps make the chair look more aged.

 And a bunch of photos, where I have this one right now . . . . . .

004_chair-refinish

005_chair-refinishing

006_annie-sloan-provence-paint-color

007_garden-chairs

008_garden-chair

009_repainted-furniture 
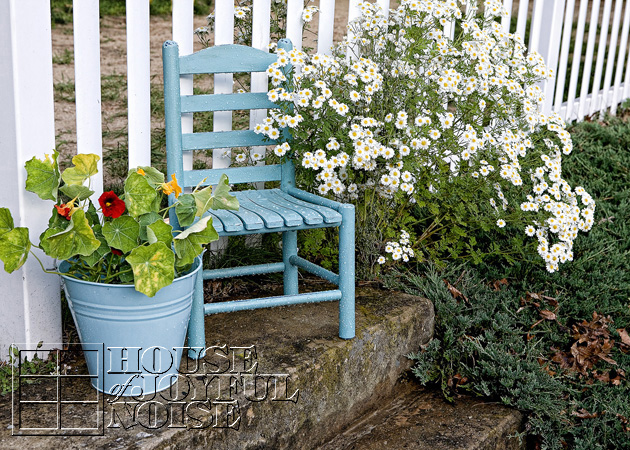
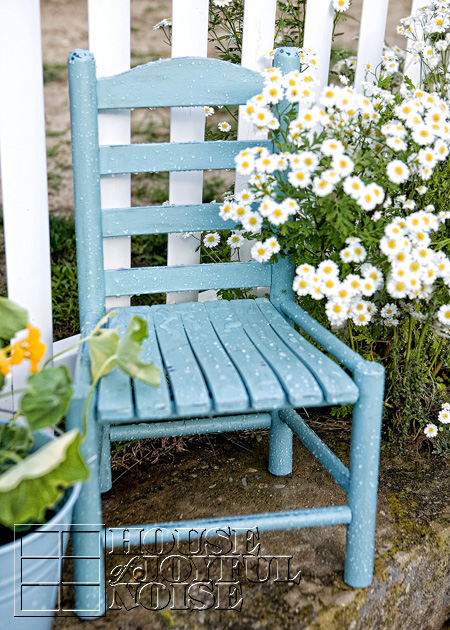
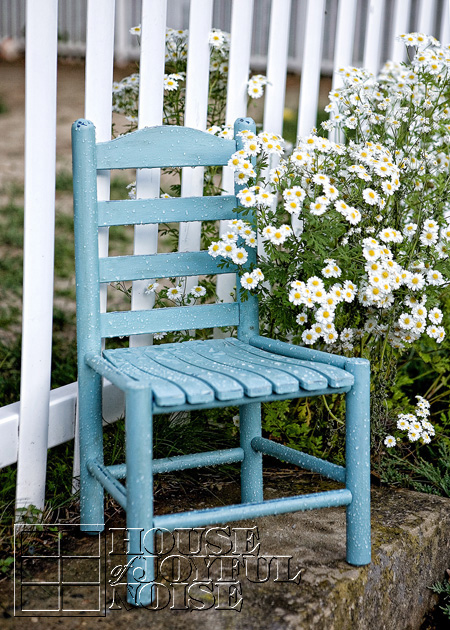
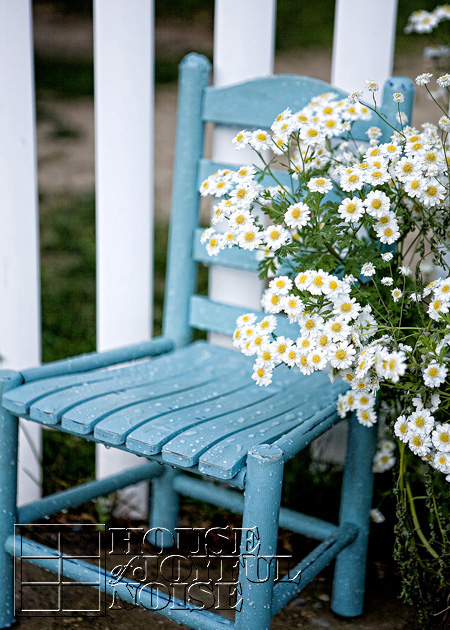
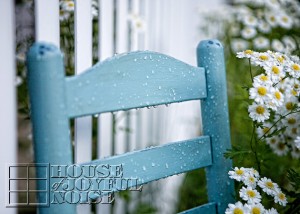
Do you love it? I do!! I love the color, and I love where it is, with the daisies and the white picket fence there.  What I don’t love, is our yard. You may have noticed the lack of real grass. We pretty much just have crabgrass, and fine sand. I don’t much like the cement steps either. But, we have decided to hold off a bit and not invest in our grounds anymore, until we make some other pretty big decisions.  So, we make due, with making ugly . . . pretty, best we can for now.

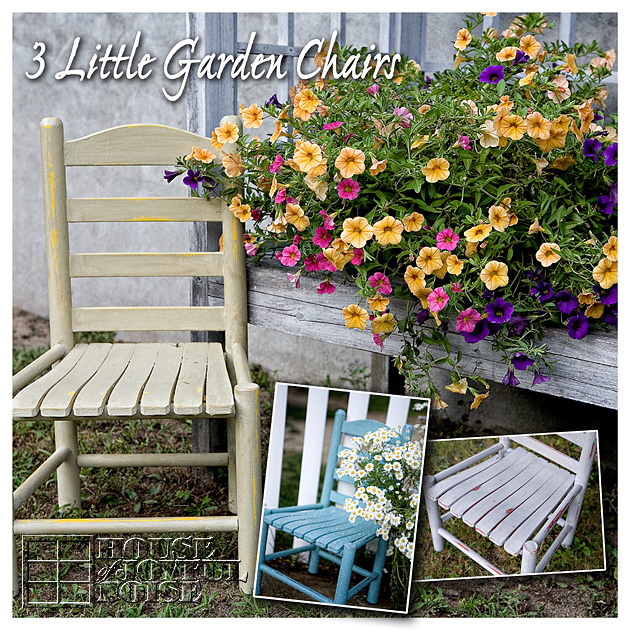
Next up, is the one that was yellow chair, which I painted Versailles.  It’s out front with the garden beds, next to the covered bench and potting bench . . . . . .

010_little-garden-chairs

011_garden-chair

012_annie-sloan-versailles-paint-color

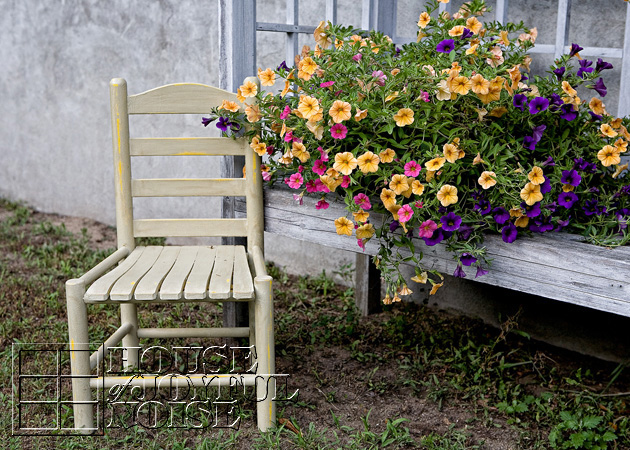
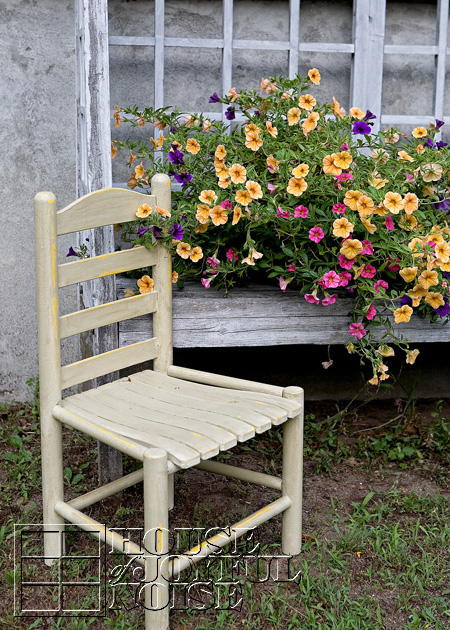
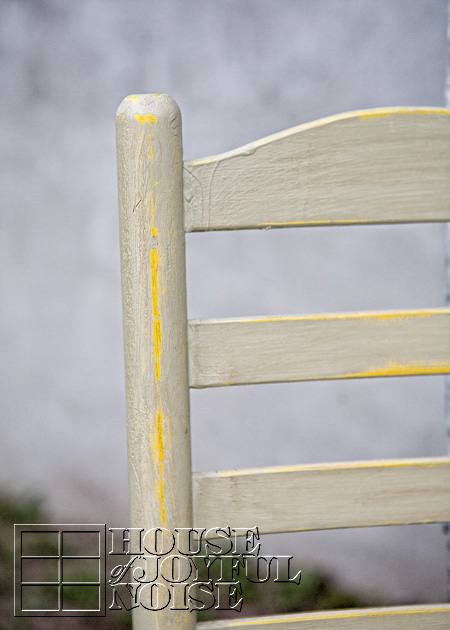
Again, you can really see the paint underneath, where I excessively sanded, just the right amount. : )  You can also see the dark wax work, which only adds some character to it, to me. And do you see where the paint dripped? Some may think that is some imperfection. But I see it, and it makes me smile and feel happy. Because it reminds me of the memory, that my little girl was helping me paint this chair.

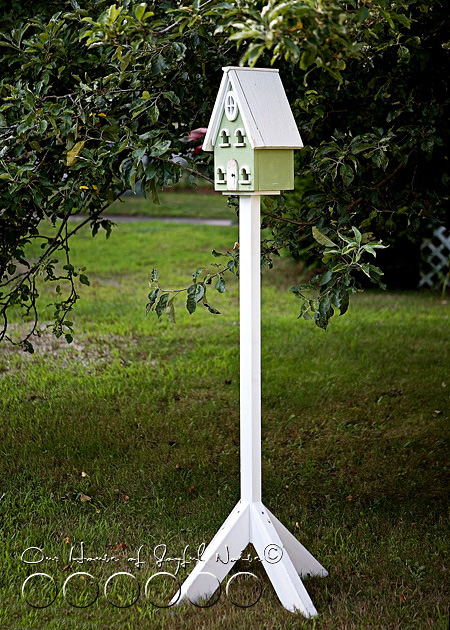
 And lastly, is the red chair, that I painted Paris Grey! I really wasn’t sure where I was going to put this one. So I just stuck it under the apple tree, and it seemed to look like it was at home there. Funny thing is . . . . . . it’s not at our home. (Yikes!)

013_little-garden-chair

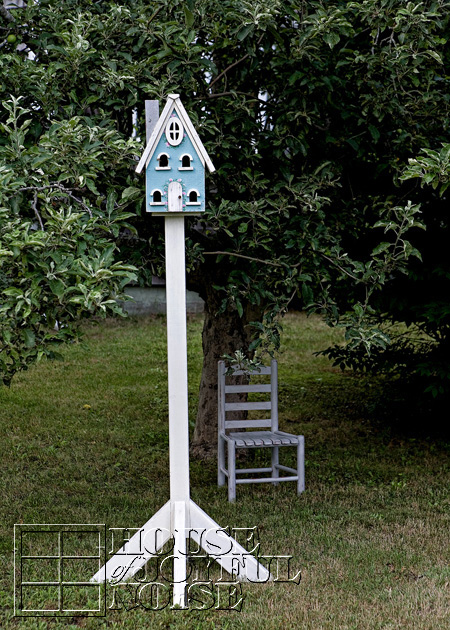
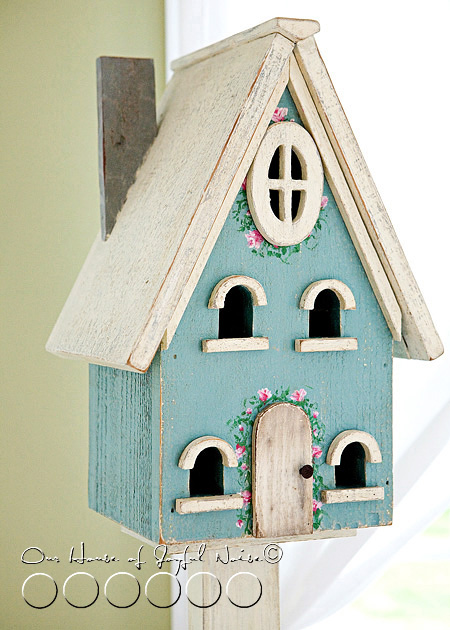
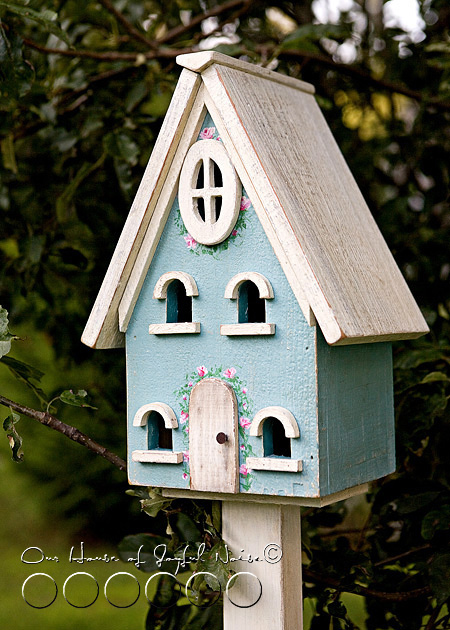
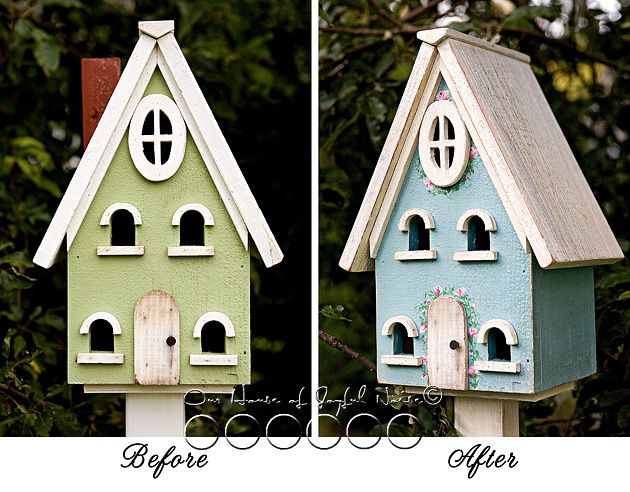
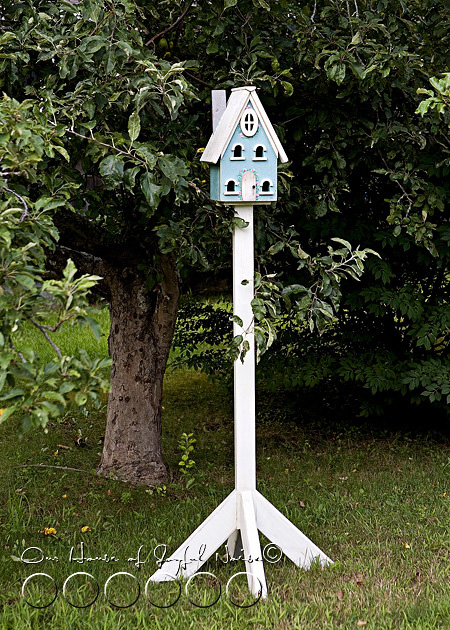
The apple tree is not actually ours, nor on our property of course. Just over the line, but we pretend it’s ours. The owner is not usually around at all, and Michael does manage the property. (My excuse to take such liberties.) But she’s coming tomorrow for a week, so we’ll see if I get my hand slapped, or she kicks it back to our side, along with the birdhouse. And if I get arrested or anything, I’ll surely let you know. Because we’ll need to collect some bail!  (You all would help me get out. Right?!  Say yes.)

014_garden-chair

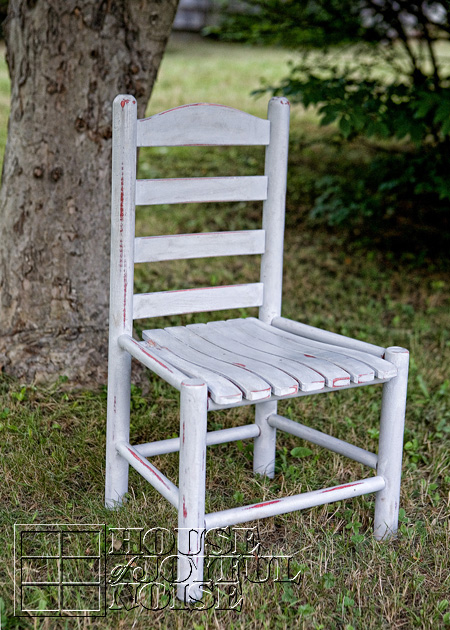
Care to sit for a spell, in the cool shade of the apple tree?

015_annie-sloan-paris-grey
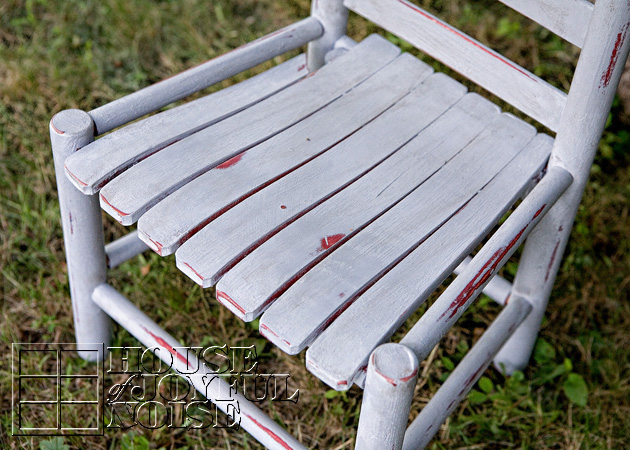
See? I really go to town, with my sand paper!  This one even has a little broken piece. Again = love.

 I always say . . . . . . it’s the little things, that make me so happy.

016_three-little-garden-chairs Thanks for taking a stroll around my gardens with me. (We literally, walked around the garden beds.) I always love when you visit us here, so please come again. We invite you to join us on Facebook too.


Save

Save

Filed Under: Furniture Refinishing, Furniture Refinishing, Gardening, Home Decor, Photography, Refinishing, The Homestead Tagged With: aging-furniture, annie-sloan-chalk-paints, annie-sloan-wax, cute-garden-decorations, distressing-wood-paint, garden photography, garden-decor, garden-decor-ideas, how-to-antique-furniture, little-garden-chairs, making-furniture-pieces-look-antique, painting furniture, photography, re-painting-furniture, refinishing-chairs, refinishing-furniture, still-life-photography, triplets, weather-proofing-furniture

An Armoire Refinish

April 19, 2012 By Laura 6 Comments

furniture refinish


It’s been awhile since we’ve shared a furniture refinish project with you.  Unlike the last one which was extremely meaningful and refinished with much love, my mother’s dresser, this one is not so special.  It’s a useful piece for our home, but it’s just a piece we picked up years ago at some department store or other.
  Regardless, it has been in a room we wanted it out of.  The only other place we could figure that it could be used and where we also would have room for it, was in our youngest daughter’s bedroom.  Yes, the same bedroom my mother’s dresser was refinished for.  And I was NOT putting this darker piece up there, in that bright, fresh and airy room. So, it needed to be refinished to fit in up there, first.


furniture refinish
I’d always thought this piece was cheap quality, because it’s just seemed so, to me. Maybe because I have since bought another armoire (years ago also, but after this piece), that to me, has a lot more character than this one.  I just love the latter one more.  I’m not positive what type of wood this one is made of, but my husband’s guess is Poplar.  After researching his guess, I’m guessing he is right. Because something about it has reminded me of something like ‘balsam type wood’.  It’s not light in weight, but it is hella-absorbent!  Lord have mercy, painting it was no fun at all.

I have to admit, my heart was not in the refinish of this piece at all, as it was with my mother’s dresser, but it simply had to be done, = chore.  So I begged my oldest to help me paint it.  She agreed, but she wasn’t having any more fun than I was. So we were miserable together. We don’t have a paint sprayer and compressor yet, but this piece has really encouraged me to get one!  We had at it with good old paintbrushes and rollers.   And because of all of the hardware, it needed to be taken apart. Ugh.

I thought using a paint and primer in one, would keep it from needing to be painted twice, but no such luck.  Poplar = Sponge!  Maybe there is a prep trick to help with that, but I’m just an amateur learning. And what I learned this round was…..look into that before painting poplar again!

furniture refinish

Here, I just wanted to show you a little trick for moving heavy furniture on hard flooring. Put a large enough sized towel or blanket under the piece.  It makes it easy to just slide across the floor, without the need to literally pick it up and carry it.  (Unless steps or carpet are involved, of course.)   In this moment, we were just moving it through the family room into the sun room to be painted.  But then….it did need to go up a flight of stairs.

I did not take photos of the painting process. Not much to see but 2 busy people pouting, with paintbrushes. But the goal was to make it match, or at least coordinate, with my mother’s dresser in the same room it would be in. Although, I had no intentions of using the same entire refinish process as my mother’s piece.  And also…..the two pieces are completely different kinds of wood, as well as two completely different colors of original wood. But my hope and goal, was that somehow, they would pair well enough together.  You’ll see they did, if you stick with us here.

furniture refinish


Once it was completely painted, it went right upstairs, because we needed it out of the way where it was painted in the sun room.  But it still needed to be distressed.  If you know me, I’m not much into uniformly and perfectly painted pieces. Luckily, I had a couple littles who were begging to help.  I thank my lucky stars daily, that they think helping with most anything, is fun.  So I gave them some course pieces of sandpaper, and showed them all of the edges I wanted done.  We worked together until it was done. 

They were willing to work for free, but I gave them great big XOXO’s for the help. ; )

Here is a look at the finished piece, but then I’ll show you some details and another little step I took with it:

furniture refinish

furniture refinish This is my mother’s dresser. But you really should check out the whole post to see the amazing transformation.

armoire-furniture-refinish-4
They go together pretty well enough, don’t you think?

I did two things to really help age the look of the armoire, and help it tie in with my mother’s dresser. 

furniture refinish
The first as I said, was the sanding of the edges, to wear down or chip off the paint. That’s what the kids helped me with. 

furniture refinish
There were a lot of edges, inside and out!


furniture refinish

We also spray painted the hardware the same nickle color as the hardware on my mother’s dresser. It’s nicking off some on the handles here, but that only adds to the charm of it, to me.

 Lastly, if you notice the aged color to it in the photos of the whole piece, where it looks kind of dirty, (not done yet in closer detail photos above), as opposed to all fresh white, this was done with a plain old dry piece stainless steel wool. It really, really changed the look of the whole armoire, and made me finally love it! I think I do!  And here, is the Before and After….

furniture refinish In the end, it was really worth it, I think.  But only because I had lots of help! What are your thoughts?  I’d love to know, just out of curiosity. I learned in my research, that Poplar wood is meant to be a beautiful natural wood. So maybe most would never venture to paint it. (Or maybe they know how absorbent it is!).  But I didn’t hesitate. Would you?


Save

Filed Under: Crafts & Creations, DIY (Do-It-Yourself) Project, Furniture Refinishing, Furniture Refinishing, Refinishing, The Homestead Tagged With: antiquing-furniture, armoire-makeover, armoire-refinish, furniture-makeovers, furniture-painting, furniture-refinishing

My First Annie Sloan Chalk Paint Project / Before & After

August 31, 2011 By Laura 21 Comments

annie-sloan-chalk-paint-project-7

I have been SO ridiculously excited about this post. And you all know what happens when I get excited! I babble! But I’m going to make great effort in not doing that, this time. (Deep breath. I can do it! I know I can!).  I’ve just had to focus on getting our current $100 Gift Card Give Away together (located in The Big Picture ; ).

So, we’re talking Annie Sloan Chalk Paint.  If you visit many creative-type blogs, surely you have heard of it by now. It’s ‘all the rage’ right now, as they say. And frankly, I was believing it.  So we ordered 5 cans of paint, and both the clear and dark waxes.   Now, I’m not going to get into exactly what colors we ordered right now because, we have a very long list of refinishing projects we plan on doing with this paint, and I feel like each one will be more of an exciting surprise for you all as we blog those ‘Before and After’ projects, if you don’t even know the colors we have to work with.  Am I right? I even went so far, as to digitally cover the paint colors, the day our order came in, and I was so excited I had to share a photo on our Facebook Page.  I know.  The lengths that I will go to.

But anyhoo, that’s the preliminary chat!

annie-sloan-chalk-paint-project-5

I have never worked with chalk paint before, or waxes.  So because I expected this to be a whole new experience than any I’d had before when painting, I wanted to start with a small project.  You know, something fun, but o.k. to experiment with, so I could get a real feel for how this paint worked, and practice waxing, etc.  I know that sounds wise.  ; )  But in other words, I was scared to just jump in with this stuff, and re-do some important family furniture piece for our home when, frankly, I wasn’t sure I’d know exactly what the heck I was doing.

Now, as a little related side-story, there is an elderly couple who are very dear friends of ours, and almost a couple of months ago, {A} helped their daughter move them to a more suitable and helpful place for folks their age. Not a rest home. It’s a lovely community. But in the process of packing up one place to move to the next, they were down-sizing and getting rid of a whole  lot of great stuff.  They were bringing it all to a consignment place, but before they did, they gave us dibs to go through it all, and take whatever we wanted.  We didn’t take a whole lot, but what we did take is pretty cool stuff.

One of those things, was this bird house.

The daughter believed it was really an indoor home-decor piece. But I told her, “That’s o.k. I’m still putting it outside.” Because I new just where I wanted to put it. Under the apple tree, near our gardens.  And I have to tell you, every time I have caught glance of it over there, it has made me smile, and bubbles up joy inside me. I just love to see it standing there. It’s charming, isn’t it?

0011

0021

But I also new, it was the perfect kind of piece, to take the wrath of my experimental Annie Sloan endeavors. I couldn’t imagine I could possibly ruin it, really.  Could I?  My challenge was, what color should I paint it? Because  I actually really liked the color it was, already. And I knew A.S. (Annie Sloan) had a color called Versailles, that is like a tannish-green, of sorts? Pretty similar to this. But if I was going to paint it, I wanted it to be look different enough in the end, to be worth the work!  So as much as I loved the color it was, I was going to veer in another direction.

0031
I can’t tell you how pleased I was to learn, that every little piece of window framework, and even the door, came off!  Gosh, how could I possibly screw this up, right? The way I saw it, I’d hardly even need any brush control, now.  This was going to be a breeze.


0041
Because I had intentions of seriously sanding and distressing the piece when I was done, to make it look somewhat old and weathered,  I felt like I needed to paint a new color, under the top new color. So I painted the entire house Paris Grey first.

0051
As well as the entire stand.

Then it was time, to really get down to the fun parts.  And because of that, I completely got lost in my own world. Completely. If you know me, you know, that once I get into my creative projects, I’m in a zone of my own. Time FA-LIES.  I feel so much joy inside as I work, being creative, and frankly, I’m oblivious to much else going on around me, or what else I should be doing.

Like….taking photos as I go.  I mean, the project was over the course of a few days, because I have lots of responsibilities and priorities, with my family, that need tending to. But I was right back to my project, every-chance-I-got.  Like…”Let me back at it!”.  I was also pretty much a mess while I was doing it too, so touching my camera was really not in the forefront of my mind. Still, I will tell you all about my process to the final piece.

Ready to see a little transformation?

0061

For the body of the house, I went with the Annie Sloan paint color Province, which I think is so beautiful. Even in the can. I was a little concerned that it would clash with the greens of the outdoors. And yet, I wanted it to stand out too. In the the end, I was just dying to paint with this color. So it’s what I went with.  All of the window trims, house trim, and roof, was painted in Annie’s Old White.  As was the stand.  I did use 2 coats, because I knew I’d be sanding like the dickens, and I really wanted some contrast there. So once it was all painted and dry (it dries super fast, which is a good thing for impatient me), I waxed the whole thing with the Clear Wax, doing the little pieces individually, and put it all back together. The wax took some getting used to, to work with. There’s a ‘good time’ to wipe it down, after applying, when it’s no longer wet, and not too dry either. But just touching it, I got a feel for it quickly. After the clear wax coating, I sanded the dickens out of it with 100 grit sandpaper, really attacking the edges of pieces, and even the downward strokes on the roof and house walls.

Then, I applied the dark wax, and when ready, rubbed it in or off where I wanted. The dark wax is messy stuff. But FUN!!

Waxing and sanding, is not a glamorous job. I was a HOT MESS, while working at this point. It was hot and humid out anyway, so I was sweating, putting out such physical labors. The sanding of this piece was a messy job, that I decided needed to be done on the deck, from the paint dust.  The wax has a wicked strong odor too, as some mediums do, but I did that in my sunroom where the whole project was, with all of the (surround) windows open.  So imagine me: trickling sweat, hair stuck to my head, paint dust stuck to me everywhere, hands and nails a wreck with paint and wax, and possibly stinkin’.  But having the freakin’ time of my life!!

0071 This is what I love, about creativity.  It’s contagious!!  Just look at the hot mess on this table, that looked just like this for days. But I’m NOT the only one who made it!!  The ‘other’ kids helped! Once one in our family starts getting creative doing one thing or another, someone else gets a hankering to do something of their own too, and so another does, and so on. We had coloring, painting, and even wood burning going on here in this room! Thank goodness we have other places to eat dinner together in the house. Because this was the sight in this one for a good 3 days.

But the birdhouse was not done. Did you notice the pink paint around in a couple of photos up?  ; )  All along, if I was going to paint my house Province, I envisioned tiny painted pink roses, and little green vines and leaves on it. I’d use acrylic paints for this part. Not Annie Sloan.  The problem was, I had never painted little flowers in this kind of paint before. I’ve been more of a watercolorist.

But….there is always my very best friend to turn to:  GOOGLE!  I was sure I could search up some quick how-to videos and get myself a quick lesson or 2. And so I did.  Then I squirted some pinks, greens and white plops of paint on a coated paper plate, got out some brushes, practiced a few roses on the plate, and then just winged it!!   With a pencil, I lightly traced the door and attic window on the house (for placement) and then removed them (to put back on after painting the roses & vinery), and then….I went ahead and painted the roses and vinery right on the house.  (This is huge for me, People! I don’t spontaneously wing things like this, with no real experience. Because I’m a serious perfectionist! Normally, I would want 100% confidence first because, this wasn’t going to come off the chalk paint!  But, because I am also working on this need-for-perfectionism-part of me, I challenged myself to do it anyway. Fearing….I came so far with loving my birdhouse, only to possible ruin it in a moment. Yikes! But that’s the assignment, you know? Looking fear dead in the eyes, and saying,

“You won’t take me down!! I won’t LET you!”

annie-sloan-chalk-paint-project

And there she was.  All done.
I felt like I won.

Once the acrylic dried, I did rub some clear wax over the flowers and vines, just for protection.

annie-sloan-chalk-paint-project-1

I really, really, really loved the original door. Especially that rusty nail door knob!  So I really did not want to mess with it much. All I did with it, was give it an Old White wash (part water), let it dry, clear waxed it, distressed it good, and then used some dark wax on it too.

In the end, I distessed it so much that in parts, I went right down to the original wood.  So again, the whole process was:

1) Undercoat of paint. 2) Painting of top coat. 3) Clear wax application and rubbing in or off. 4) Distressing. 5) Dark wax.

And for this project, the added steps of the acrylic floral painting and clear waxing.

annie-sloan-chalk-paint-project-2
I could not wait, to put her outside, back under the apple tree.


annie-sloan-chalk-paint-project-3
I love the whole piece. But the door is still my favorite feature.

Do you forget what it used to look like?

With any kind of refinishing projects, I personally just love to see the side-by-side “Before & Afters”, so I’ve got one for you, with this project….

annie-sloan-chalk-paint-project-6

I loved it before. And thankfully, I still love it.

What do YOU think?  Would you have left it alone? Or do you like my refinish?  I’d love to know your preference. You won’t hurt my feelings much. ; )

The important thing is two-fold:

1) I got a really good feel for this paint, and waxes, and a certain new (healthy!) addiction.

annie-sloan-chalk-paint-project-4

And 2) I have to tell you, every time I have caught glance of it over there, it has still made me smile, and bubble up joy inside me.

I just love to see it standing there. It’s charming, isn’t it?

I’m telling you. If some little birds don’t move in to this sweet little pad, I just might!

******

Filed Under: Crafts & Creations, Home Decor, Re-Purposing, Refinishing, The Homestead Tagged With: annie-sloan-chalk-paint, annie-sloan-chalk-paint-projects, before-and-after-refinishes, before-nd-after-Annie-Sloan-projects, bird-house-make-over, bird-houses, home-and-garden, refinishes, refinishing, refinishing-bird-houses

Big Furniture Refinish } A Work of Heart

May 10, 2011 By Laura 51 Comments

 This is the biggest furniture refinish I have done, yet.  (Well, my husband did very kindly help me. I worked pretty hard on it too, though.)
But as big of a job as it was for my hands, it was a much bigger job, for my heart.

refinishing furniture
(‘Before’ thumbnail. The ‘After’ is a must see!)


refinishing furniture This is my mother’s dresser.  My mother passed away very suddenly, in 2005.  Her passing hit me like a train, and threw me into a grieving like I had never known. In the state of fog & hurt I lived in, one month after another, the only other thing I was aware of at all, was the depth of grief my father was in. It was hard to watch him go through all he was. I honestly don’t know which hurt more.

This dresser was the only one my mother ever had, in all of my years growing up, since the day I was born.   Except for a few sets of sheets, the drawers of it have been empty for the past several years, since my sister and I cleaned out my mother’s clothing together. But the rest of the house my father has kept exactly, as my mother had it. People say things to him about that, but he can’t understand why anyone thinks he would change anything.

My youngest daughter had moved out of the bedroom she had shared with her triplet brothers, and into her very own room.  I gave her my old white iron twin daybed, from my adolescent years, but she still needed a bureau of some kind.  One night, as I lay in bed, unable to sleep, I got to thinking about what kind of dresser would go best in her room, and when I came up with a long dresser with a mirror, I immediately got thinking about my mother’s.

refinishing furniture My intention right along, had been to find an antique or used dresser somewhere in my hunting, and refinish it.  We don’t buy much of anything new.  But when I remembered my mother’s, I knew I had more thinking to do.  You see, I knew my father wasn’t going to use it again.  He has the tall dresser, that goes with this one. When he sells the house, I knew he would either sell the dresser in an estate sale, or sell it with the house.  But one way or another, he wouldn’t be taking it with him, because he didn’t need it.

My issue was, the dark finish and style of the dresser, didn’t go with {O}’s room at all, or our home’s farmhouse style in general.  But, when it comes to sentimental matters, I am also the type, that doesn’t like things to change. I want everything to stay the same – which is why I take such comfort in going to my parent’s home, where my father is, and everything is just as my mother left it. My mother would be there too, if I had any say in that.

refinishing furniture So the idea of refinishing this dresser, of my mother’s, was hard to think about.  Just the vision of it, just as it is, with every detail, brings back memories. It’s such a part of my history, and my parent’s.  But it was either take it and refinish it, or let the whole thing go to some stranger, who never even knew my mother.   I decided changing it was a easier to handle, than letting it go altogether.

I talked to Michael about it the next morning, and called my father that afternoon, to ask him about it.  I was tentative, to tell him about the refinishing part.  (Yikes!) He did pause for a second of silence, when I got to that part of my plan.  But I wasn’t sure in the moment, if it bothered him because it was my mother’s, or if he didn’t get why I would do that.  I guessed it was the latter, knowing him pretty well, and a couple of questions later, I found I was right.  I figured, even if he was OK with me refinishing it, he wouldn’t understand why I would bother.  (Because he wouldn’t even think of it….because it works as is!)   “Why would you do that?”  “Because Dad, it doesn’t go with her room.  At all.”  I could hear him trying to wrap his brain around it.  He’s just a simple guy, who is not at all about home decor, etc.  If it works, it’s good! If it’s comfortable, it doesn’t matter what it looks like.  But he was fine with whatever I wanted to do with the dresser.  And he insisted on bringing it down to us, even though Michael had every intention of going out to western MA to get it.

I knew he would insist on driving it down, and as soon as possible.  He always makes sure we understand, “Anything you guys ever need, just ask me.  I mean it.” He means it.  There is nothing he wouldn’t do for us.  The dresser arrived in the back of his van, which arrived in our driveway, that weekend.

It was a beautiful day, so we got right to sanding it down, before it even came into the house. I did need to take a deep breathe, and push my hesitancy away, before I let the sander hit the surface.  But after I took some ‘before’ photos!

refinishing furniture I could see the dresser, all refinished just as I wanted it, in my head.  I went to Home Depot myself that week, and found what I was hoping I would, for the original hardware – which I definitely wanted to keep!  It was the design of the hardware, that that really marked the dresser as my mother’s, and part of my parent’s set.

The spray paint I chose, was brushed nickel.

refinishing furniture The tone was so beautiful.

The dresser itself, was a whole lot of work.  A lot.  Sanding, painting, steel wooling, and the high & smell of denatured alcohol, that was stuck in my head.  It was a big piece to work on. So much to it. My hands took a beating.

But the labor of it all, was therapeutic in a way, too.  It was a process I needed to go through.  Accepting change, and looking it in the eye, whether it is easy, or welcome, or not.  Knowing inside, that the only thing that is ever guaranteed to never change, is the memories born in the minutes and years that pass by.

Time marches on.

refinishing furniture The dresser came out absolutely beautiful, I think.  I totally love it, refinished.  It now goes so perfectly, with the rest of {O}’s bedroom.

But it’s funny to me that, as completely different as it looks now, I somehow still see my mother’s dresser.

refinishing furniture Every time I see the hardware, I am back in my parent’s bedroom(s), or I actually hear in my head, the clinking sound it makes, when the drawer is closed and the handle is let go.  I heard it for 21 years, or something.

refinishing furniture The dresser has new history now.

{O} now has her grandmother’s dresser, and she watched her parent’s refinish it with love, just for her.

refinishing furniture

I can’t tell you how many times, I used this big mirror myself, growing up in a house with 5 kids, and one bathroom.

I can even easily imagine the many things of my mother’s on the dresser top, that were there for so many years.

refinishing furniture {O} is slowly covering it, with her own things, now.

She knows it’s her Meme’s dresser, and it makes her happy to have it in her room, and call it her own, now.

Things change.  It’s a part of life.


refinishing furniture
And yet some matters of the heart, inside, never do.

No matter what it looks like, on the outside.

refinishing furniture Sometimes, letting go, is all we can do.

While we hold on to whatever we can, as best we can.

I’m so happy I thought of getting my mother’s dresser, before it was too late.

I miss her so very much,  and it was hers.

Nothing I do to it, can ever change that.

******

Did you enjoy this post? They aren’t all this long, but they always have lots of photos!

Come ‘LIKE’ us at our Facebook Page!


Save

Save

Filed Under: Budget, Crafts & Creations, DIY (Do-It-Yourself) Project, Furniture Refinishing, Home Projects, Into the Light; The Series, Life In General, Refinishing, The Big Picture, The Homestead Tagged With: furniture-makeover, painting furniture, refinishing-furniture

  • « Previous Page
  • 1
  • 2

We are wicked happy to have you here! We hope you find much inspiration, help, humor and enjoyment here.


Archives


POPULAR POSTS

* * * * * *

SUBSCRIBE to House of Joyful Noise blog! Every new post, delivered right to your email box!


Privacy Policy

Amazon Affiliates

Never at any additional cost to you, we may earn a small commission for our endorsement, recommendation, testimonial, and/or link to any products from our website. Your purchase through our links helps support our family, while sharing with you the products we authentically use and recommend, for various ideas, and letting you know where you can purchase them. Thank you for your support!

[footer_backtotop]

Copyright © 2025 HouseOfJoyfulNoise.com · Genesis Framework by StudioPress