• HOME
  • {A}’s Chipmunk Training Archives

 Homepage

  • The Homestead
    • Home Projects
    • Home Improvement
    • Home Decor
      • Seasonal Home decor
        • FALL Home Decor
        • WINTER Home Decor
        • SPRING Crafts and Creations
        • SUMMER Crafts and Creations
    • Our Chickens
    • Gardening
    • Organization
    • Re-Purposing
    • Furniture Refinishing
    • Budget
  • Crafts & Creations
    • Seasonal Home decor
      • FALL Crafts and Creations
      • WINTER Crafts and Creations
      • SPRING Crafts and Creations
      • SUMMER Crafts and Creations
    • DIY (Do-It-Yourself) Project
    • Kids Arts and Crafts
    • Homemade/Handmade Gift Ideas
    • Holiday Crafts
    • Fan Pulls
    • Free Printable/Downloadable
    • Sewing Projects
    • Giveaways
    • Business Features
  • Recipes/FoodFun
    • Breakfast
    • Lunch
    • Main Dish
    • Sandwiches
    • Appetizers
    • Slow Cooker
    • On The Grill
    • Side Dishes
      • Soups
      • Salads
    • Baking
      • Breads, Rolls and Muffins
    • Snacks
    • Treats
    • Desserts
    • Drinks
  • Homeschooling
    • Elementary Homeschooling
      • Elementary Homeschooling READING
      • Elementary Homeschooling MATH
      • Elementary Homeschooling LANGUAGE ARTS
      • Elementary Homeschooling SCIENCE
      • Elementary Homeschooling HOME ECONOMICS
      • Kids Arts and Crafts
    • Middle School Homeschooling
      • Middle School Homeschooling SCIENCE
      • Middle School Homeschooling HOME ECONOMICS
    • Language Arts
    • Math
    • History / Social Studies
    • Geography
    • Foreign Language
    • Field Trips
    • Games
    • Nature Study
  • The Big Picture
    • Life In General
    • Celebrations
    • Faith
      • Into the Light; The Series
    • Giveaways
    • Reviews & Sponsors
  • Photography & Lettering
    • Photography
    • truck lettering
    • vehicle graphics
    • Newborns
    • Kids
    • Engagement
    • High School Senior Pictures
    • High School Senior Pictures Sneak Peeks

Setting Eyelet Embellishments – A Tutorial

July 5, 2011 By Laura 4 Comments

setting-eyelet-embellishments-crafts-tutorial-4

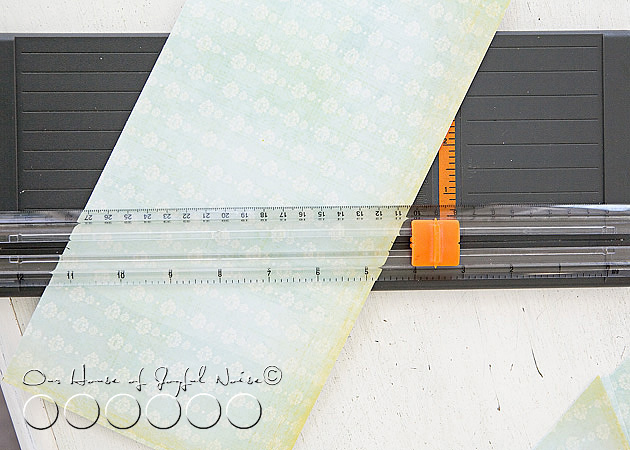
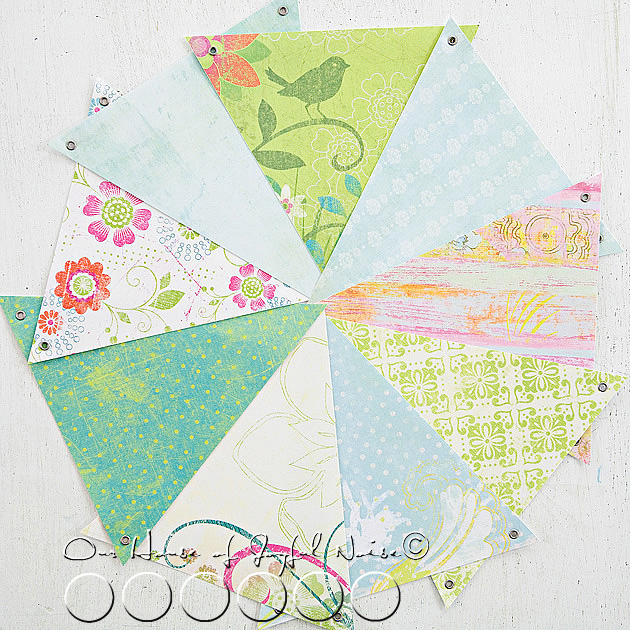
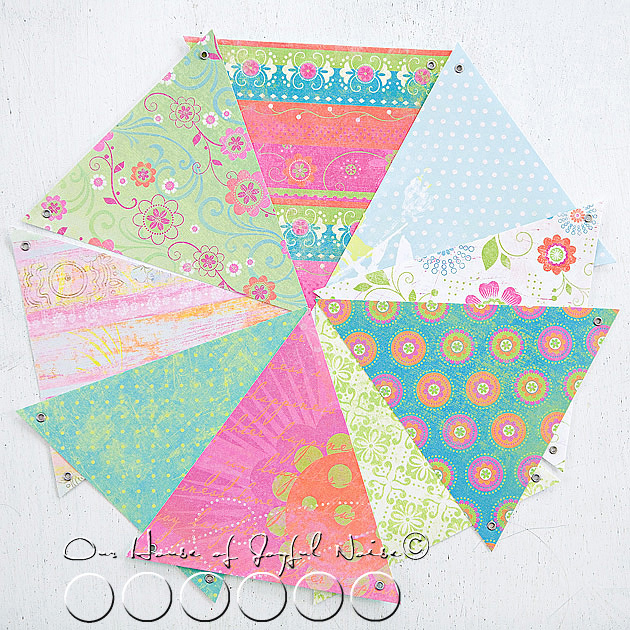
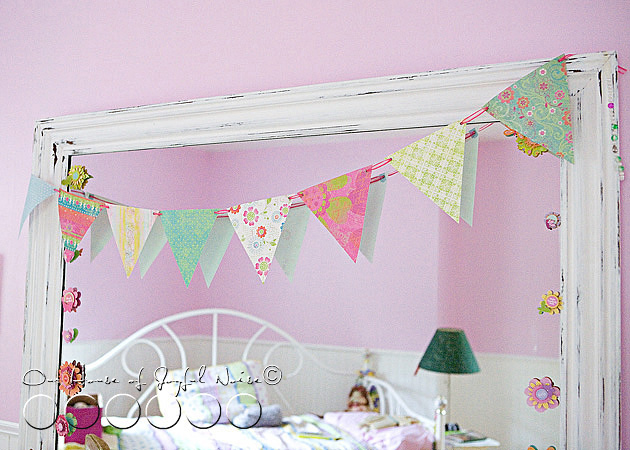
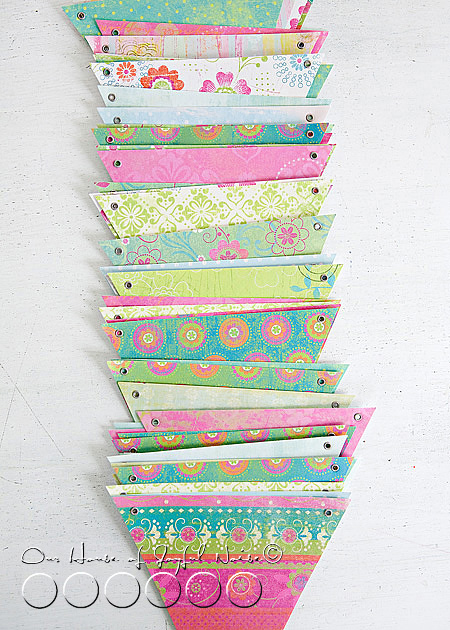
Several blog posts back, I shared a simple craft I did making decorative paper pennants. Part of that project was putting eyelets in the top corners of the pennants, to string ribbon through, and hang like paper bunting. I asked in that post if there was anyone interested in a tutorial on the procedure of using eyelets, and one of our readers, Lindy over at Veni Vidi Scrappy, said she would.  She is a passionate scrapbooker, as evidenced by her great site, so this would make for a very useful technique for her. But there are many creative ways you can use eyeletting for.

I’m happy to share how I set eyelets! But what I didn’t know at the time I offered is, there are new tools that supposedly make this process even easier, and quieter, that have become available in the scrapbooking industry in recent years.  I have had my eyelet/brad set, from Making Memories, for a good many years. Apparently, longer than I knew!  So for the sake of reference, the newest tools now available, and the methods in which they are used, can be seen here at this site.

However, I have rather enjoyed using my cute little hammer, and the method I have used all of these years, as noisy as it is. So regardless of the fact that this is now the ‘old fashion’ way’, I’m going to share it as promised anyway.  And most likely continue to do things the old fashioned way, for a good many years to come.  And show you now just how I do this.


setting-eyelet-embellishments-crafts-tutorial 
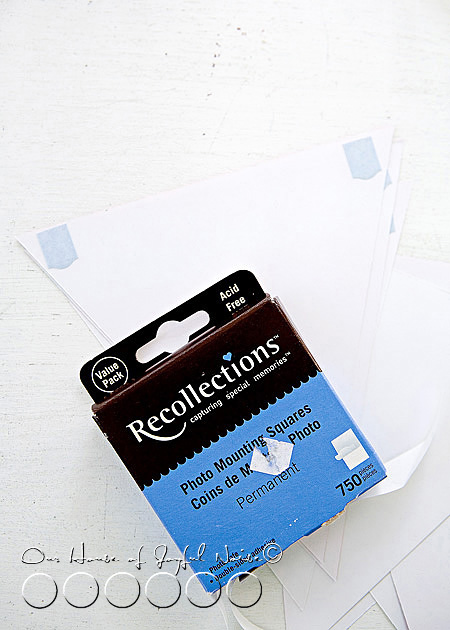
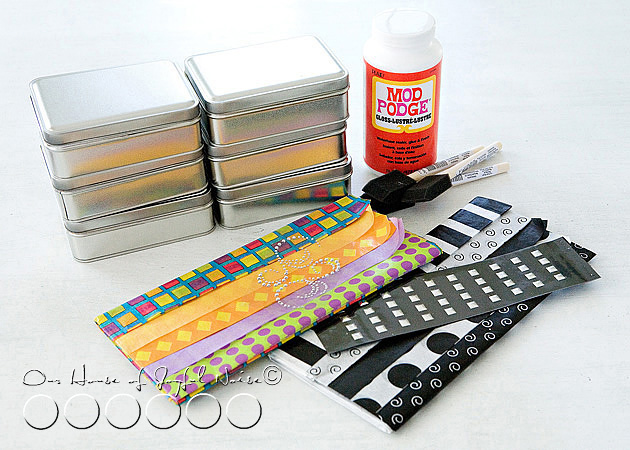
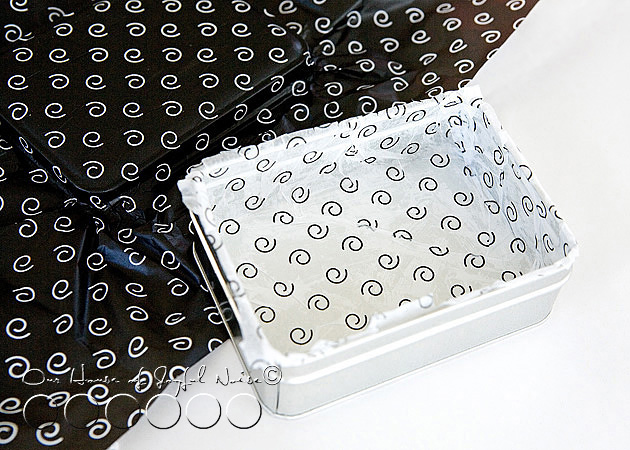
As I mentioned, the old tool set I have is from the company Making Memories (MM). The small container you see are some MM eyelets, used in this tutorial, and are brushed aluminum.  But they come in bronze as well, and a large selection of colors.  Eyelets come in 2 sizes, and the tool tips for both sizes come with this set. Also seen is my cute little hammer, and a self-healing mat I use to set eyelets on. I also use it for cutting things with an x-acto knife. You should be able to find these tools at Michael’s Arts and Crafts, and other craft supply stores.

setting-eyelet-embellishments-crafts-tutorial-1 
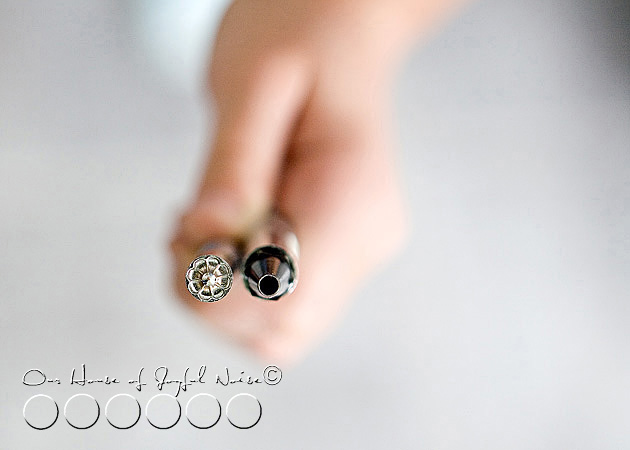
On the right you see the tip of the small hole puncher, and on the left is the eyelet setter. Yes, kind of
backwards, and not in order of use. Sorry, but I did not think of that at the time I took the photo.


setting-eyelet-embellishments-crafts-tutorial-5 
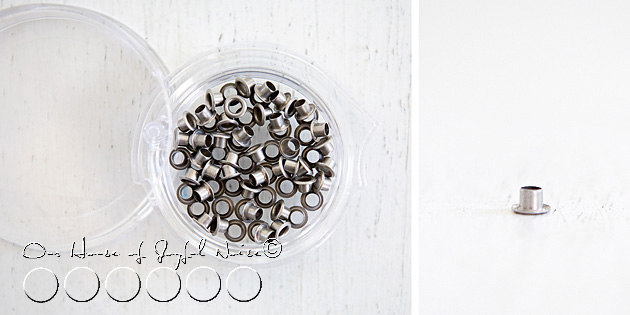
Here is a better look at the eyelets, before they are hammered. Cute little things.


setting-eyelet-embellishments-crafts-tutorial-6 
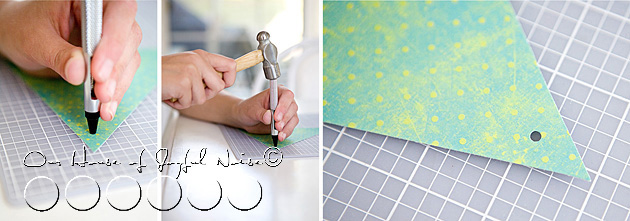
The first tool you’ll need is the hole puncher. Screw the hole punching tip into your handle, and position it straight up and down, on the material you want to put an eyelet through. In this case, I am just putting one in the point of a spare paper pennant I had, for the sake of demonstration.  Also, you’ll want to work on a mat like this, a piece of cardboard, or something to protect the surface you are working on. So, holding the hole punching tip firmly where you want the eyelet, gently hit the top of the instrument with your hammer once.  It taps a clean hole through the paper very easily.


setting-eyelet-embellishments-crafts-tutorial-2 
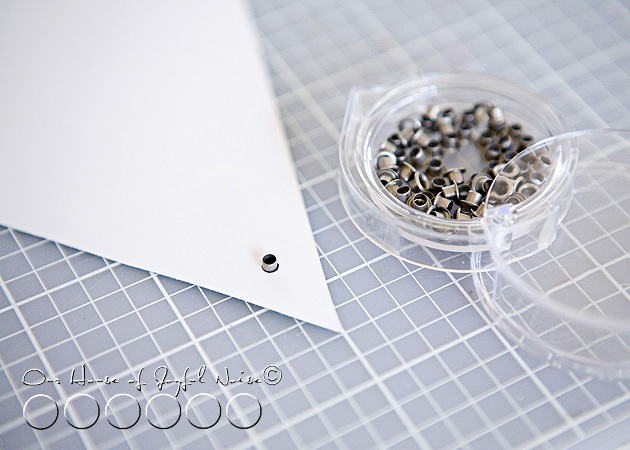
Next, place an eyelet in the hole you made, going in through the front of the material, and place it down on your protected surface.

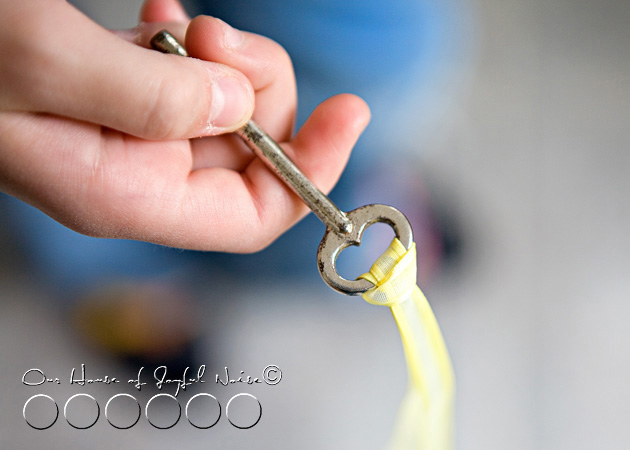
Now it’s time to use the setter tool, to set the eyelet in the paper, by hammering & ultimately splaying out the aluminum tube.


setting-eyelet-embellishments-crafts-tutorial-3 
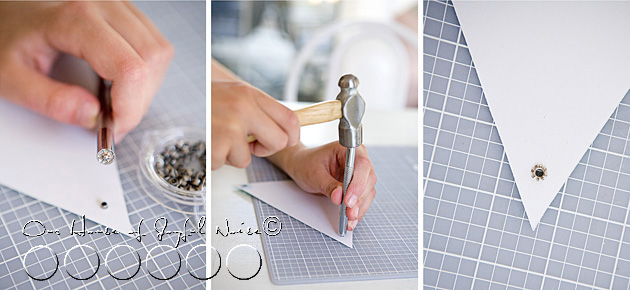
This is the fun part, I think.  Take your setter tool, and put the point of it into the hole of the eyelet tube. Holding the setter firmly straight up & down, and being sure to keep it in in place, you are going to hammer the top of the tool several times.  This time you’ll be hitting harder than you did before, while just tapping a hole through paper. Hammering the eyelet to set it, is something you’ll get a feel for quickly, as to how hard you need to hit the hammer, and how many times you’ll need to, to get the job done. Basically, your goal is to the splay the tube open flat, making it look flower-like.

I can tell you, the process of my eyeletting has a real rhythm to it. I hit the top of the tool four times, and then I remove the tool off of the eyelet, and hit the back of the eyelet on my paper a 5th time, to make sure it is good and flat.  So the sound pattern is 4 loud hammer to tool noises, and 1 thud when I hit the eyelet on the mat. : )

((1))-((2))-((3))-((4))–(5)

setting-eyelet-embellishments-crafts-tutorial-7 
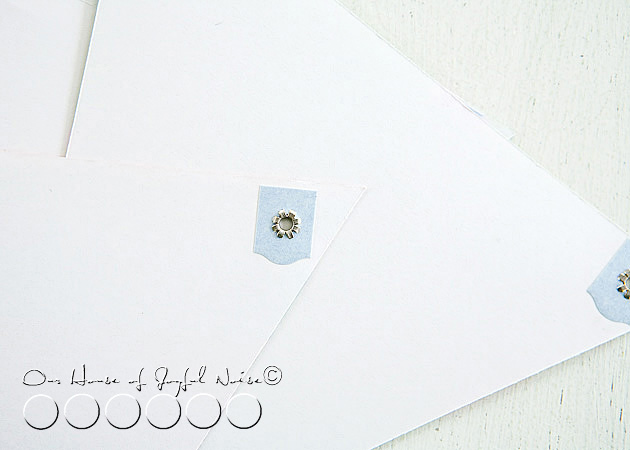
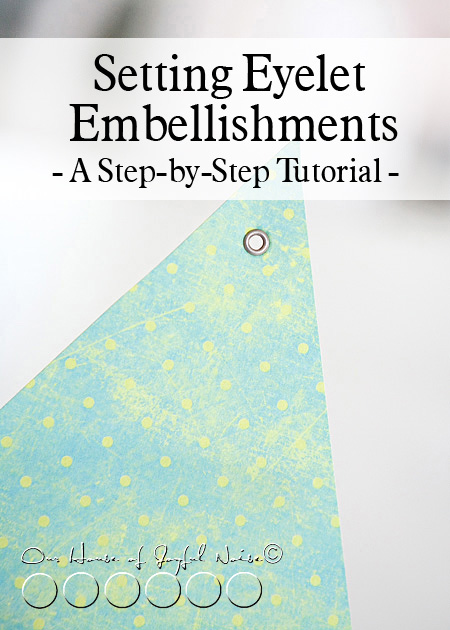
That’s it! Here is what the eyelet looks like on the front of your material! It may seem like a lengthy procedure to you, explained so thoroughly here. But I assure you, it’s very quick. You’ll find yourself doing many in rapid succession.  I would just tap all of your holes first, and then set your eyelets.


Eyeletting is popular embellishment technique in scrap booking and card making, but can also be used through fabrics as well.
I believe snaps are put on clothing much the same way.

I hope you found this tutorial helpful & inspiring!

Imagine the unique ways in which you can incorporate some eyeletting into
your creative projects!


Save

Save

Save

Filed Under: Crafts & Creations, DIY (Do-It-Yourself) Project, Tutorial Tagged With: embellishments, eyelet-setting-tool-kit, eyelet-tutorial, how-to-set-eyelets, setting eyelets

Eyeletted Paper Pennants | Room Decor | Craft Tutorial

June 13, 2011 By Laura 9 Comments

eyeletted-paper-pennants-room-decor-tutorial_0001

Sometimes, my crafts come about in all-backwards-sorts-of-ways. This craft, these pretty eyeletted paper pennants, is one of those.
I love how they came out. And lucky for you, I took photos of the whole process.

eyeletted-paper-pennants-room-decor-tutorial-12

See, I happened to be in one of my favorite crafts stores, Michael’s Arts & Crafts, and saw this pad of 12×12 scrapbooking paper, that was nothing short of stunning to me.

I had to have it.

The hesitation was, that I don’t much scrapbook these days.  I will again, one day, begin scrapping like mad very regularly, and catch up on the many years I am behind on.  But in the moment, it seemed foolish to buy the pad of paper to save, for years.   So I bought it with the promise to me, that I would find something to do with the beautiful papers, right away.

eyeletted-paper-pennants-room-decor-tutorial Are they not ever so lovely?  Please take a real moment, to look at that photo. Because on this particular day, it took a little more patience than I had, to arrange them in that perfect fan, you see.


eyeletted-paper-pennants-room-decor-tutorial-1 It’s The Sasha Paper Collection.

What I decided to do with some of the paper, was make paper pennants, with metal eyelets.  My original and only intention, was just to string them in my daughter(‘)s (plural & possessive, lol) rooms, like bunting. No big project, by any means, in the end. But the project will be expanded, as you’ll soon learn.

Now, I did get the pad of designer paper on sale. But still, I as always, I wanted to get the most ‘bang for my buck’.  So this is how I utilized the space of my paper:

eyeletted-paper-pennants-room-decor-tutorial-13

Remember asking yourself back in school, when in your life, you would ever need to use that math?  There it is, People. I figured it out rather quickly, and rather felt genius-like.  Of course, I’m practicing a lot with my 8 years olds triplets, these days.  ; )

I have good craft plans for the pale yellow scrap pieces, by the way.  So all you tree-huggers can be at ease.
(Nothing wrong with a tree-hugger. I’m just sayin’.)


eyeletted-paper-pennants-room-decor-tutorial-2 Oh how I *love* my Fiskar Trimmer, in times like these!!  Zip, zip!!

eyeletted-paper-pennants-room-decor-tutorial-3

Now because I was going to be putting eyelets through these paper pennants, I thought it wise to perhaps, re-enforce them, to prevent them ripping when pulled for any reason. So I just used some photo mounting stickers, and didn’t remove the the backing.

THEN, I added all of the metal eyelets. Which, you may or may not know, can be all kinds of fun!

Do you all know what metal eyelets are?  This is what they look like….see the corners of the pennants:

eyeletted-paper-pennants-room-decor-tutorial-4

Perfect to attach or strong ribbon.  This ferris wheel of patterns, are the ones my oldest daughter chose, for her room, which is a color I like to call ‘Spring Rain’.  (Because I forget the real name of the paint. lol).

eyeletted-paper-pennants-room-decor-tutorial-5

This wheel of designs my youngest daughter (the middle & only girl triplet) chose for her room, which is a soft pretty pink.


eyeletted-paper-pennants-room-decor-tutorial-6
Here are the tools needed for doing metal eyelets, in case you do not know anything about this technique. (I don’t know why I feel like there will be people who have never heard of this?  So perhaps I am over-explaining to a very crafty-wise crowd….)

eyeletted-paper-pennants-room-decor-tutorial-7 But just in case, I’m going to give you a little more info here.  Above, are the 2 main tools needed: the hole tapper, and the eyelet smasher.  A hammer is involved. <Eyebrows bouncing up and down.> Sounds like fun, huh?

I think it is.  : )


eyeletted-paper-pennants-room-decor-tutorial-8 This is what the eyelets look like, post-smashing.


eyeletted-paper-pennants-room-decor-tutorial-9 I was thinking I might do a little eyelet technique tutorial, step by step with photos, if there is anyone who would like to learn?  Eyelets can be used for a wide variety of crafts, including fabric!  It offers an awesome element to scrap booking and card making as well. Your imagination is the only limit. Let me know in the comments, if a tutorial would tickle your fancy.

I’ll do it for even 1 person.  I’m full of love like that.

I’ll even dedicate the tutorial to you, like a song.  ; )

eyeletted-paper-pennants-room-decor-tutorial-10 I used the same sheer ribbon I always have on hand, to string this paper bunting, and I just hung it across {O}’s Mirror for now.


eyeletted-paper-pennants-room-decor-tutorial-11 {A} chose the pale yellow ribbon.  Pay NO mind to the horrid curtain and window with no trim (in these photos).  She has an amazing room, hand-crafted by hubby, and I can’t wait to show you all sometime soon.

  eyeleted-paper-pennants-room-decor-tutorial_012

So, in closing, I have to tell you….with getting 6 pennants, out of multiple designs chosen out of this pad of paper, and the way I got carried away with my happy-hammer, I ended up with WAY more eye-letted pennants than I ever needed, for my original plan!  I have a horrible guesstimation gauge!  Ask my hubby – I can never figure out the appropriate sized container to store dinner left-overs in!  Either way too big, or way too small….never just right.Ever.

Anyway….the question is:

“WHAT TO DO WITH ALL OF THESE EXTRA EYE-LETTED PENNANTS?”

I have a few brainstorms brewing, but I would LOVE *YOUR* ideas!  It’s quite possible there are many of you who will have amazing ideas, I would never have thought of.  So give them to me!  What would YOU do with them?

*(Love this post? How about subscribing to our blog in the sidebar, ‘Liking’ our Page on Facebook, or following me (Laura) on Twitter? Or all 3? 😀 )


Save

Save

Save

Filed Under: Crafts & Creations, DIY (Do-It-Yourself) Project, Tutorial Tagged With: crafts, eyeletted-paper-pennants, eyeletting-tutorial, paper-pennants-tutorial, pennants, pennants-craft, pretty-pennants, room-decor-pennants

Tissued Decorative Storage Tins | Craft

June 7, 2011 By Laura 7 Comments

tissued-storage-tins-craft-21

Sometimes, us creative people, have ideas that come out better in our head, than they do in real life!  Agree? But this project of tissued decorative storage tins was the opposite.  On the one hand, it may have been just a tad more difficult than I had imagined.  Only because I should have remembered how tissue paper and I, can go round and round and round.  We just don’t seem to get along. I normally do not have the patience for the stuff, and end up making the tissue a wrinkled mess. So much so, that I refer to my husband, to put the tissue in gift bags if I can, and he also is so kind, as to do all of my packaging for my portrait photography orders for my clients.   But on the other hand, these tissued tins actually came out way nicer than I expected!  I’d have to say the credit for that probably goes to Modge Podge. Love that stuff!

This idea is one I came up with as homemade gifts for our nieces & nephews, for Christmas 2010, as well as for my God-Daughter {Ju}. (You all know her by now, right?)   I thought they would be cool for them to keep little treasures & trinkets in, in their rooms, or even for my oldest nephew/God-Son to keep change or what-not in in his Jeep.

tissued-storage-tins-craft Here’s all you need!

As well as an x-acto knife or razor blade of some sort (not shown), and possibly a little patience, if you are like I am with tissue paper.  If you don’t need the patience…..well I’m happy for you!  : )

tissued-storage-tins-craft-1 I was so thrilled to find such bold & funky designer tissue paper, at The Dollar Store!…. that I thought was just perfect for the age range of the kids, from elementary school to teens, and for both the boys and the girls as well.  The silver sticky elements I got in the scrapbooking section of Michael’s Arts & Crafts.


tissued-storage-tins-craft-2 I found the tins shown, at Michael’s Arts & Crafts.

They had a variety of shapes and sizes to choose from.

tissued-storage-tins-craft-3

Modge Podge and foam brushes came from the same place.

So this is how this is done:

With your foam brush, you begin by Modge Podging the inside of one tin, and then layer it with the tissue design you would like on the inside.


tissued-storage-tins-craft-4 You really only want to Modge Podge up to the lip of the inside of the tin before laying on the tissue, but let the tissue overlap from there, for now.  Just carefully rip off or cut the excess with scissors.  Then leave to dry.  We’ll get to how to finish it off in a minute or 2.

Now I am telling you right now, there is no way for the tissue to come out perfectly smooth. Most especially on the inside, where you virtually have to stuff the tissue in there.  But do be careful not to tear the tissue or poke a hole in it. However, IF you do by accident, (as I did more than once (yes, the patience with tissue issue…..) it’s not that hard to cover it up, or manipulate the tissue to make the hole not show.  Honestly, it’s just the insides of the tins that are the hardest part of the whole project.

tissued-storage-tins-craft-5 Do the outside of the tin cover, in much the same way.  Again, only Modge Podge to the lip of the lid, then apply the tissue.  Now getting a little (Modge Podge) glue where it shouldn’t be, and the tissue sticking to it, is no big deal. It can be scraped off easily enough once dry.


tissued-storage-tins-craft-6 Just rough trim it with your x-acto blade, and then leave to dry.  If you are trimming first before it really sits to dry, just make sure you don’t drag-rip the tissue.  Your blade will get Modge Podge on it, so you’ll want to try to keep it clean too.

tissued-storage-tins-craft-7 Now you can do the outside of the tin container the same way:  Apply the Modge Podge, and then apply the tissue, smoothing it all as best you can.  Agai…wrinkled are going to happen here and there.


tissued-storage-tins-craft-8 It was really fun to have these co-ordinating designs to work with.  (Pay no mind to my BlackBerry over there.  Always nearby, and forever bLiNkInG!)

Now, in terms of cleaning them up, I found an x-acto knife to be a handy little tool!  I trimmed off the excess tissue, by running the sharp point of the blade, right in the groove of the lips.  If you aren’t sure exactly where or how I mean, just inspect the earlier photo above of the bare tins, and the ones coming up, and think about how the tin is put together.  You can’t have tissue anywhere, where the tin cover and container need to fit together.  Just a little common sense I dug up there. ; )

OK, so after each tissued piece is dry, and you have trimmed the excess tissue off everywhere, you then need to put a coat of Modge Podge over all of the tissue layers, inside and out!  I did second coats of Modge Podge too, letting them dry before coats, and I recommend doing that.  That is what gives the tins a finished look, once they are dried, and keeps the tissue surfaces protected.  Granted, now that the tissue is trimmed and there is tin lips exposed, you want to try and apply the Modge Podge a little more carefully, as to not get glue all over the naked tin parts .  But again, if any gets on the bare tin edges, once it is dry, it scrapes right off like any glue would. Modge Podging the inside of the tissued tins are probably the hardest to do with your foam brushes, only because you’ll see it puddles a little where folds and creases of the tissue are.  It looks a mess at first. But that is ok…..just spread it out best you can, because the Modge Podge really dries hard and clear.  You are using the foam brush to sort of stick down and smooth out any wrinkled tissue as well, as you work.  You’ll be amazed how good it starts to look as the Modge Podge dries clear.

I wanted to personalize them, so I had hubby cut their initials out of sliver mylar vinyl.  Then used the decorative sticky elements, to add a little extra bling.  Finally, I went right over the mylar and the elements on the covers, with another coat of Modge Podge.  Honestly, these came out slick & with a bit of sheen, seeing as though I used the glossy Modge Podge.

I LOVE how they came out, and I am about to show you a whole bunch more of photos, so you really can get the idea. (And, o.k., so I can show them off a little more.)

tissued-storage-tins-craft-9

Bold Black & white for the boys……bright happy colors for the girls.


tissued-storage-tins-craft-10

tissued-storage-tins-craft-11

tissued-storage-tins-craft-12

tissued-storage-tins-craft-13

tissued-storage-tins-craft-14

tissued-storage-tins-craft-15

tissued-storage-tins-craft-16

tissued-storage-tins-craft-17

tissued-storage-tins-craft-18

tissued-storage-tins-craft-19

tissued-storage-tins-craft-20

Like? Love? Let me know what you think!

******


Save

Filed Under: Crafts & Creations, DIY (Do-It-Yourself) Project, Homemade/Handmade Gift Ideas, Tutorial Tagged With: crafts, gift tins, handmade gifts, homemade-gifts, Modge-Podge-crafts, modge-podge-projects, storage-tins, tissue paper crafts

Skeleton Key Accessories

May 22, 2011 By Laura 5 Comments

skeleton-key-accessories

I’ve always thought skeleton keys were pretty cool, even back when I was a kid.  While hunting at a frequented antique/junk stop of mine for old door knobs (for my recent Door Knob Project) I found some door knobs were part of a whole working set, complete with the opposite knob, door plate, locking mechanism, and of course…key holes.  That got me wondering if there might be some old skeleton keys around the place too. So I asked the old man who owns the place.

skeleton-key-accessories-1

By golly he did.  He pulled out this box from under his desk, and dropped it in front of me with a clang.   At first sight, it was looking like I wasn’t going to find much.  But a little digging proved me wrong. I realized that, like vintage door knobs, skeleton keys come in many sizes, shapes and unique styles, as well. I did get a few keys on this day, to start, and I have a few different ideas of what creative things I can do with them.

One idea I put into action so far, was to make a simple necklace or 2 with them.  This particular project here was for {O}, our ‘Resident Accessory Girl”.  So these shown here in this post are a bit little-girlish in fashion, but I’ll give you some great ideas for grown women necklaces in a minute.

I gave {O} one of the keys and a steel wool pad, and let her try to clean it up this key, out on the deck.  She’ll take a task on, anytime.  She’s the kind that wants to be busy, at all times.

skeleton-key-accessories-2
It started out looking like this. We didn’t find it necessary to get rid of all of the rust, as that’s what gives it an aged look, and a bit of charm.  But certainly we wanted to smooth it down enough, to be sure it wouldn’t be leaving rust residue on any clothing. Also, that nasty gauze strip needed to be removed.  Yuck! That thing had me wondering all kinds of hee-bee-gee-bee thoughts.  Nothing fashionable about that scrap!

skeleton-key-accessories-3
Once the key was clean, we looped it onto some very simple satin & sheer ribbon we had on hand, in bright fuchsia pink
!

skeleton-key-accessories-4

{O} did a nice job cleaning the key up, and we thought it looked pretty cute!! I let her know that, when she wore this piece or others like it, out & about, that she can expect the question, “What’s the key to?”, and that it would be a good idea for her to have some answers ready. The expression on her face flashed from realizing I was probably right, to thinking-mode, in quick succession.  She can be so funny sometimes. So far, here’s some answers she came up with:

“Maybe to my heart!”

“To allll of my secrets.”

“That’s for me to know, and for you, to never know!” 😀


skeleton-key-accessories-11 I gave her some different colored ribbons, cut to size and knotted, so that she can change out the ribbon on the key anytime, to co-ordinate with other outfits.

Then I showed her again, how simple it is to tie on the key, and I’ll show you right now too.

skeleton-key-accessories-7  With the lose ends knotted, take the opposite end doubled, and put the loop through the key hole.


skeleton-key-accessories-8  Then take the knotted end, and pull it through the inside of the loop that you just fed through the key.


skeleton-key-accessories-9  Pull slowly….

skeleton-key-accessories-12
….to make sure that it tightens nice & neatly at the top of the key.


skeleton-key-accessories-10 Voila!!  Slip the necklace over your head!

Here’s another technique, for a different look:

Feed the doubled ribbon through the top of the key, using the opposite end with the knot this time, and then put the opposite end’s plain loop through.  Then slowly pull to tighten so that the  end’s knot and tails tighten at the key top.

skeleton-key-accessories-6
You then can also slide on one or more pretty beads, over the doubled ribbon, right down to the knot.  To do this, you do need to use beads with a large enough hole.  I kind of stuffed this one through!

For some more grown up looks, consider using multiple keys, and other types of ribbon in more earth tones or royal colors, or try leather or suede string.  You can also add beads in a mix or match variety of beads made of ceramic, glass, carved wood, etc.  If you are a more experienced jewelry maker, you could work with chains, links and clasps, along with other decorative elements, to really make a vintage-style necklace.

Skeleton keys can actually be incorporated into all kinds of fashion accessories.  Since they do come in different sizes, think in terms of designing as bracelets, belts, zipper pulls, or hair accessories.

I know we plan to make more unique projects using skeleton keys, and I am sure to be sharing them right here, with you!

skeleton-key-accessories-5

We hope you enjoyed this simple little creative idea, for your wardrobe accessory collection.

If you have an other answers for {O} about what the key might be to, or, if you have re-purpose ideas for skeleton keys yourself, please share them with us in the comment section.  We hope to hear your great ideas!


Save

Save

Filed Under: Crafts & Creations, DIY (Do-It-Yourself) Project, Kids Arts and Crafts Tagged With: key-necklaces, repurposing-old-skeleton-keys, skeleton keys, skeleton-key-accessories

Big Furniture Refinish } A Work of Heart

May 10, 2011 By Laura 51 Comments

 This is the biggest furniture refinish I have done, yet.  (Well, my husband did very kindly help me. I worked pretty hard on it too, though.)
But as big of a job as it was for my hands, it was a much bigger job, for my heart.

refinishing furniture
(‘Before’ thumbnail. The ‘After’ is a must see!)


refinishing furniture This is my mother’s dresser.  My mother passed away very suddenly, in 2005.  Her passing hit me like a train, and threw me into a grieving like I had never known. In the state of fog & hurt I lived in, one month after another, the only other thing I was aware of at all, was the depth of grief my father was in. It was hard to watch him go through all he was. I honestly don’t know which hurt more.

This dresser was the only one my mother ever had, in all of my years growing up, since the day I was born.   Except for a few sets of sheets, the drawers of it have been empty for the past several years, since my sister and I cleaned out my mother’s clothing together. But the rest of the house my father has kept exactly, as my mother had it. People say things to him about that, but he can’t understand why anyone thinks he would change anything.

My youngest daughter had moved out of the bedroom she had shared with her triplet brothers, and into her very own room.  I gave her my old white iron twin daybed, from my adolescent years, but she still needed a bureau of some kind.  One night, as I lay in bed, unable to sleep, I got to thinking about what kind of dresser would go best in her room, and when I came up with a long dresser with a mirror, I immediately got thinking about my mother’s.

refinishing furniture My intention right along, had been to find an antique or used dresser somewhere in my hunting, and refinish it.  We don’t buy much of anything new.  But when I remembered my mother’s, I knew I had more thinking to do.  You see, I knew my father wasn’t going to use it again.  He has the tall dresser, that goes with this one. When he sells the house, I knew he would either sell the dresser in an estate sale, or sell it with the house.  But one way or another, he wouldn’t be taking it with him, because he didn’t need it.

My issue was, the dark finish and style of the dresser, didn’t go with {O}’s room at all, or our home’s farmhouse style in general.  But, when it comes to sentimental matters, I am also the type, that doesn’t like things to change. I want everything to stay the same – which is why I take such comfort in going to my parent’s home, where my father is, and everything is just as my mother left it. My mother would be there too, if I had any say in that.

refinishing furniture So the idea of refinishing this dresser, of my mother’s, was hard to think about.  Just the vision of it, just as it is, with every detail, brings back memories. It’s such a part of my history, and my parent’s.  But it was either take it and refinish it, or let the whole thing go to some stranger, who never even knew my mother.   I decided changing it was a easier to handle, than letting it go altogether.

I talked to Michael about it the next morning, and called my father that afternoon, to ask him about it.  I was tentative, to tell him about the refinishing part.  (Yikes!) He did pause for a second of silence, when I got to that part of my plan.  But I wasn’t sure in the moment, if it bothered him because it was my mother’s, or if he didn’t get why I would do that.  I guessed it was the latter, knowing him pretty well, and a couple of questions later, I found I was right.  I figured, even if he was OK with me refinishing it, he wouldn’t understand why I would bother.  (Because he wouldn’t even think of it….because it works as is!)   “Why would you do that?”  “Because Dad, it doesn’t go with her room.  At all.”  I could hear him trying to wrap his brain around it.  He’s just a simple guy, who is not at all about home decor, etc.  If it works, it’s good! If it’s comfortable, it doesn’t matter what it looks like.  But he was fine with whatever I wanted to do with the dresser.  And he insisted on bringing it down to us, even though Michael had every intention of going out to western MA to get it.

I knew he would insist on driving it down, and as soon as possible.  He always makes sure we understand, “Anything you guys ever need, just ask me.  I mean it.” He means it.  There is nothing he wouldn’t do for us.  The dresser arrived in the back of his van, which arrived in our driveway, that weekend.

It was a beautiful day, so we got right to sanding it down, before it even came into the house. I did need to take a deep breathe, and push my hesitancy away, before I let the sander hit the surface.  But after I took some ‘before’ photos!

refinishing furniture I could see the dresser, all refinished just as I wanted it, in my head.  I went to Home Depot myself that week, and found what I was hoping I would, for the original hardware – which I definitely wanted to keep!  It was the design of the hardware, that that really marked the dresser as my mother’s, and part of my parent’s set.

The spray paint I chose, was brushed nickel.

refinishing furniture The tone was so beautiful.

The dresser itself, was a whole lot of work.  A lot.  Sanding, painting, steel wooling, and the high & smell of denatured alcohol, that was stuck in my head.  It was a big piece to work on. So much to it. My hands took a beating.

But the labor of it all, was therapeutic in a way, too.  It was a process I needed to go through.  Accepting change, and looking it in the eye, whether it is easy, or welcome, or not.  Knowing inside, that the only thing that is ever guaranteed to never change, is the memories born in the minutes and years that pass by.

Time marches on.

refinishing furniture The dresser came out absolutely beautiful, I think.  I totally love it, refinished.  It now goes so perfectly, with the rest of {O}’s bedroom.

But it’s funny to me that, as completely different as it looks now, I somehow still see my mother’s dresser.

refinishing furniture Every time I see the hardware, I am back in my parent’s bedroom(s), or I actually hear in my head, the clinking sound it makes, when the drawer is closed and the handle is let go.  I heard it for 21 years, or something.

refinishing furniture The dresser has new history now.

{O} now has her grandmother’s dresser, and she watched her parent’s refinish it with love, just for her.

refinishing furniture

I can’t tell you how many times, I used this big mirror myself, growing up in a house with 5 kids, and one bathroom.

I can even easily imagine the many things of my mother’s on the dresser top, that were there for so many years.

refinishing furniture {O} is slowly covering it, with her own things, now.

She knows it’s her Meme’s dresser, and it makes her happy to have it in her room, and call it her own, now.

Things change.  It’s a part of life.


refinishing furniture
And yet some matters of the heart, inside, never do.

No matter what it looks like, on the outside.

refinishing furniture Sometimes, letting go, is all we can do.

While we hold on to whatever we can, as best we can.

I’m so happy I thought of getting my mother’s dresser, before it was too late.

I miss her so very much,  and it was hers.

Nothing I do to it, can ever change that.

******

Did you enjoy this post? They aren’t all this long, but they always have lots of photos!

Come ‘LIKE’ us at our Facebook Page!


Save

Save

Filed Under: Budget, Crafts & Creations, DIY (Do-It-Yourself) Project, Furniture Refinishing, Home Projects, Into the Light; The Series, Life In General, Refinishing, The Big Picture, The Homestead Tagged With: furniture-makeover, painting furniture, refinishing-furniture

  • « Previous Page
  • 1
  • …
  • 4
  • 5
  • 6
  • 7
  • 8
  • Next Page »

We are wicked happy to have you here! We hope you find much inspiration, help, humor and enjoyment here.


Archives


POPULAR POSTS

* * * * * *

SUBSCRIBE to House of Joyful Noise blog! Every new post, delivered right to your email box!


Privacy Policy

Amazon Affiliates

Never at any additional cost to you, we may earn a small commission for our endorsement, recommendation, testimonial, and/or link to any products from our website. Your purchase through our links helps support our family, while sharing with you the products we authentically use and recommend, for various ideas, and letting you know where you can purchase them. Thank you for your support!

[footer_backtotop]

Copyright © 2025 HouseOfJoyfulNoise.com · Genesis Framework by StudioPress