• HOME
  • {A}’s Chipmunk Training Archives

 Homepage

  • The Homestead
    • Home Projects
    • Home Improvement
    • Home Decor
      • Seasonal Home decor
        • FALL Home Decor
        • WINTER Home Decor
        • SPRING Crafts and Creations
        • SUMMER Crafts and Creations
    • Our Chickens
    • Gardening
    • Organization
    • Re-Purposing
    • Furniture Refinishing
    • Budget
  • Crafts & Creations
    • Seasonal Home decor
      • FALL Crafts and Creations
      • WINTER Crafts and Creations
      • SPRING Crafts and Creations
      • SUMMER Crafts and Creations
    • DIY (Do-It-Yourself) Project
    • Kids Arts and Crafts
    • Homemade/Handmade Gift Ideas
    • Holiday Crafts
    • Fan Pulls
    • Free Printable/Downloadable
    • Sewing Projects
    • Giveaways
    • Business Features
  • Recipes/FoodFun
    • Breakfast
    • Lunch
    • Main Dish
    • Sandwiches
    • Appetizers
    • Slow Cooker
    • On The Grill
    • Side Dishes
      • Soups
      • Salads
    • Baking
      • Breads, Rolls and Muffins
    • Snacks
    • Treats
    • Desserts
    • Drinks
  • Homeschooling
    • Elementary Homeschooling
      • Elementary Homeschooling READING
      • Elementary Homeschooling MATH
      • Elementary Homeschooling LANGUAGE ARTS
      • Elementary Homeschooling SCIENCE
      • Elementary Homeschooling HOME ECONOMICS
      • Kids Arts and Crafts
    • Middle School Homeschooling
      • Middle School Homeschooling SCIENCE
      • Middle School Homeschooling HOME ECONOMICS
    • Language Arts
    • Math
    • History / Social Studies
    • Geography
    • Foreign Language
    • Field Trips
    • Games
    • Nature Study
  • The Big Picture
    • Life In General
    • Celebrations
    • Faith
      • Into the Light; The Series
    • Giveaways
    • Reviews & Sponsors
  • Photography & Lettering
    • Photography
    • truck lettering
    • vehicle graphics
    • Newborns
    • Kids
    • Engagement
    • High School Senior Pictures
    • High School Senior Pictures Sneak Peeks

Christmas Advent Calendar Idea for the Home

November 25, 2012 By Laura 9 Comments

        As I type this post, it’s the end of the weekend following Thanksgiving, and the last weekend of the month of  November.  For many families, this is the weekend their home gets decorated for Christmas!  While it probably would have been nice to share this idea with you just a little sooner, I personally prefer to get past Thanksgiving, before I can (or even want to) focus on Christmas.  That being said, there still are several days to spare before the first of December is here, so you still have time to do this simple and beautiful idea, for a Christmas Advent Calendar in your home.  This idea is something I created  two years ago, and I thought I’d share it with all of you, in case it’s something you’d like to try for your own kids.
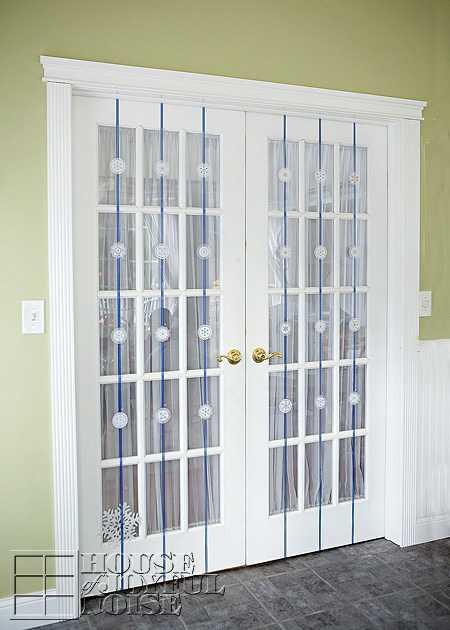

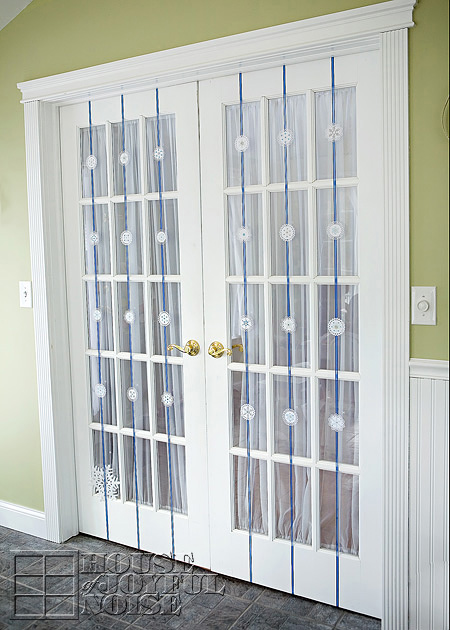
If your a frequent visitor here at our blog, you may have seen us decorate our french doors like this before.  Using door length ribbons, and placing a decorative element on the ribbon strand in each window, I call these ‘fancy strands’.  I’ve made them for the season of spring, and also Halloween. So this project started out with the same single intent of dressing up our French doors, in this case for the festive season winter, but immediately turned into the idea of using it as a home Christmas Advent Calendar for the kids. For us, December and the the Christmas Advent Calendar is not so much about the countdown until Christmas Day, but celebrating the whole season each day.  This idea made every day really fun for our kids.

You don’t need French Doors in your home, to adapt this idea!
You can do the same thing using other areas or parts of your home. Some suggestions are using regular doors, a large wide window, the banisters of the stairs in your home, or even a wall.  Look around your home and find your options, and then just make it work for you!  In addition, you can create this using any theme or colors. You may want to use red and green ribbon, with paper gift elements, or gold ribbon and ornament shapes.  The theme and look of it is part of the creative fun.  I wanted mine to work throughout winter. When Christmas was over, we simply peeled off the numbers on the windows, and the strands stayed through February or so.

I’m going to tell you how I made this Advent Calendar so simply.
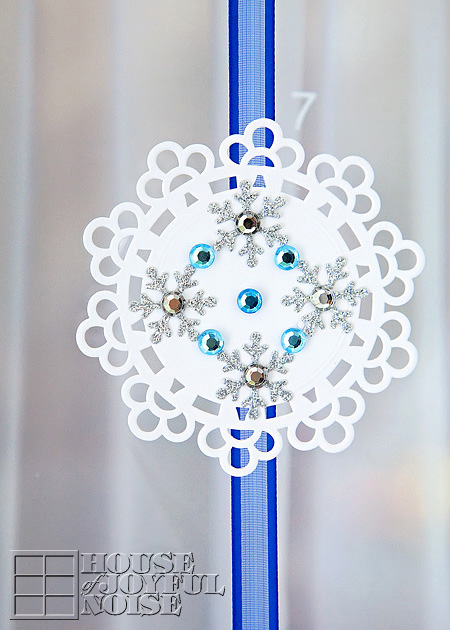

The snowflakes were fun to make. I actually did not just buy them this way.  The white paper snowflake alone, are die-cuts I bought packaged loose, in the scrapbooking area at Michael’s Arts and Crafts.  To give them some sparkle and make them more beautiful, I also found sticky some snowflake-ish elements of glitter and rhinestones, and put them together to make my own specially designed snowflakes. So easy and fun, creating each one!
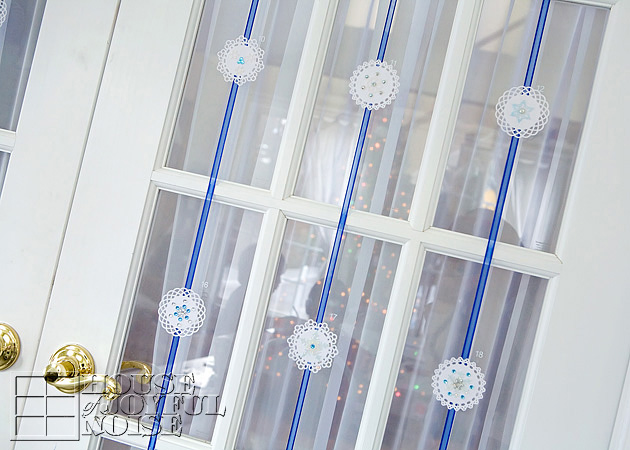
I chose blue ribbon for my winter theme, and placed a single 1-piece length from the top to the bottom (underneath) of the door, down each row of window frames of my doors.
I measured the height of the doors, and made sure I bought enough ribbon spools for 6 whole full lengths. We have 30 window panes, so plenty for the 25 days until Christmas.
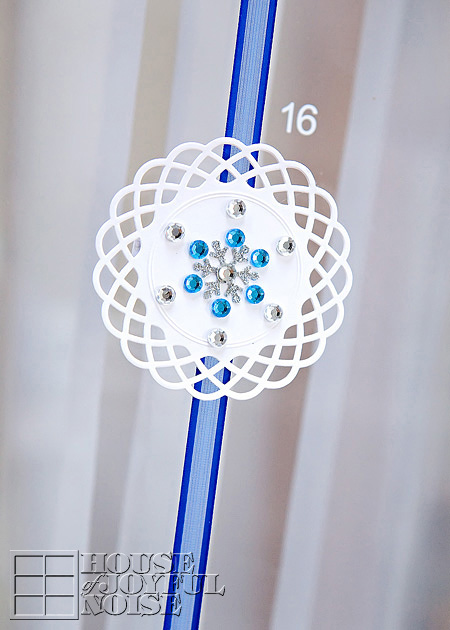

To number the Calendar for the days of December, we cut small white vinyl numbers, and simply put them on the glass besides the upper-right of each snowflake.
However, if you are creating your advent calendar elsewhere in your home, the number can certainly be put ON the paper elements.
On front side of the snowflakes, it’s just pretty.
But on the backside, it was designed to serve a purpose.
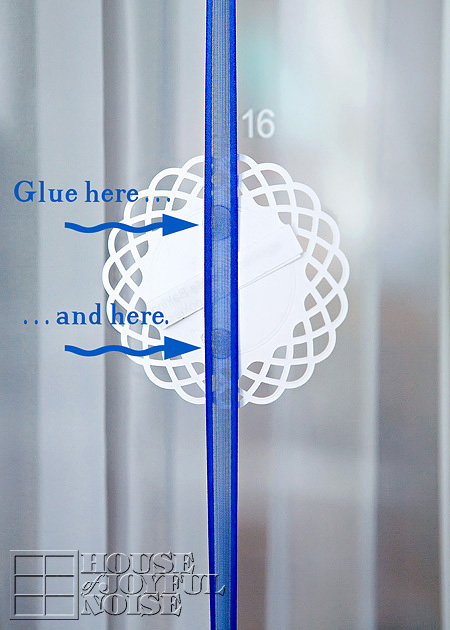

When attaching the snowflake to the ribbon, I was sure to put two dabs of glue; one at top of the snowflake, and one on the bottom, leaving a space without glue in between.
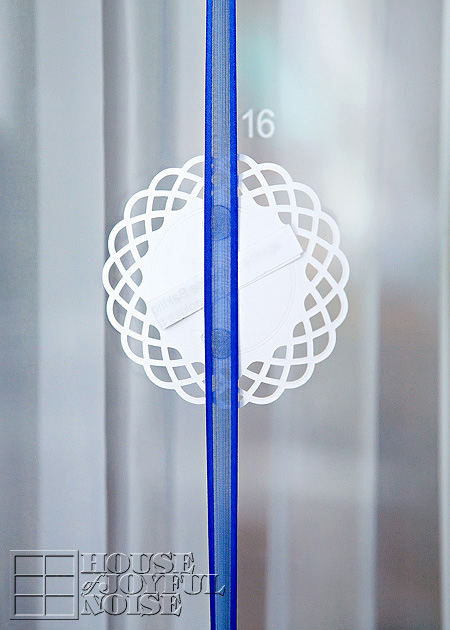

Did you notice the little slip of paper slid under the ribbon? There was one for each snowflake, and each little slip expressed something different for that day.

Again, we’re simple folks. Our holidays are kept pretty simple too, and our days of any season are focused on faith and our family. For Christmas, it’s about pondering and celebrating Jesus’ birth, the time we spend together being creative, making things for others, and generally just having fun together as a family.
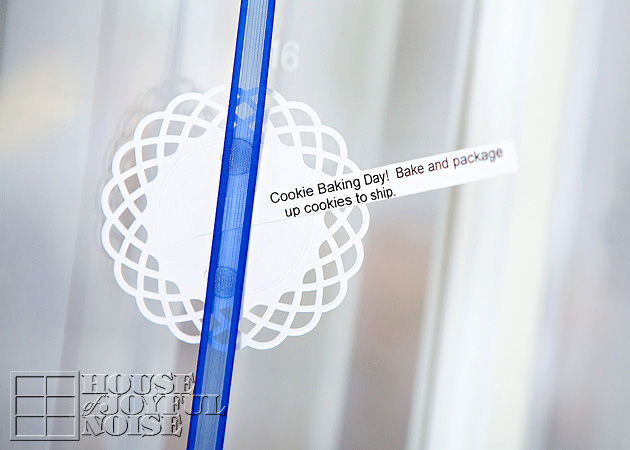
So our slips of paper behind each snowflake reflected those kinds of things.  Some were a surprise activity for the day: maybe a task for serving others. Some were a small treat, and others were a Scripture to remember and reflect on. A good variety of that kind of thing. Again, you can come up with what you want for your family, throughout the month of December, as you prepare for Christmas, and enjoy the season.  
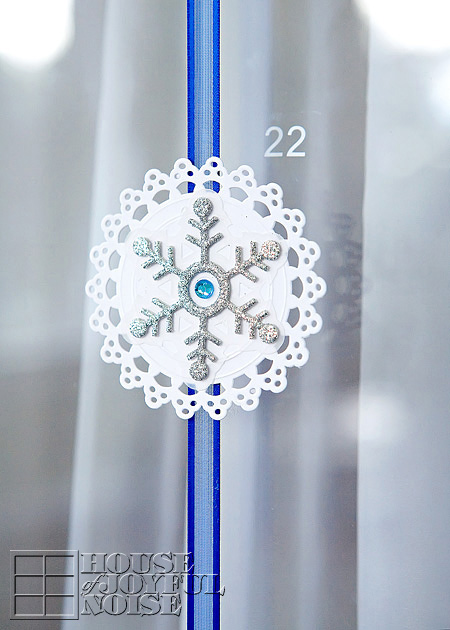

Just type up a list in small print on your computer, skipping a line in between, print it out, and cut them into strips to fit behind your elements.
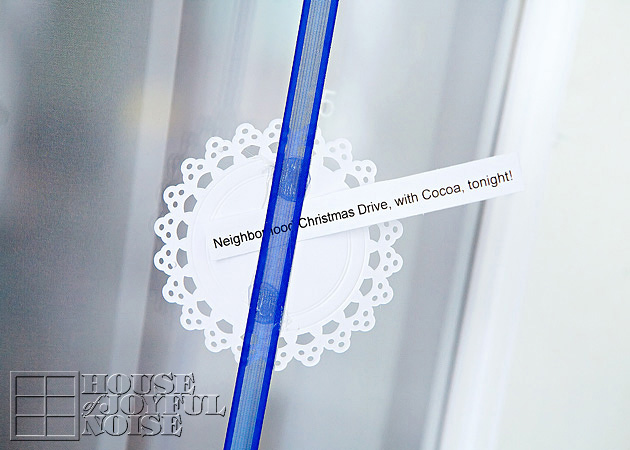
The kids took turns taking out the slip and reading it to the others each morning. That way they knew what was in store for the day.
It really takes very little to get our kids all excited. You would not believe the fun we have each year, just driving around neighborhoods checking out people’s home Christmas lights and displays, with our cocoa and snacks!
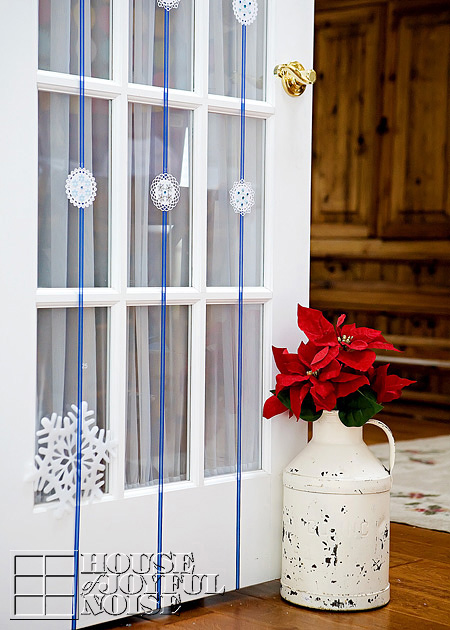

The big snowflake represents December 25th – Christmas Day.
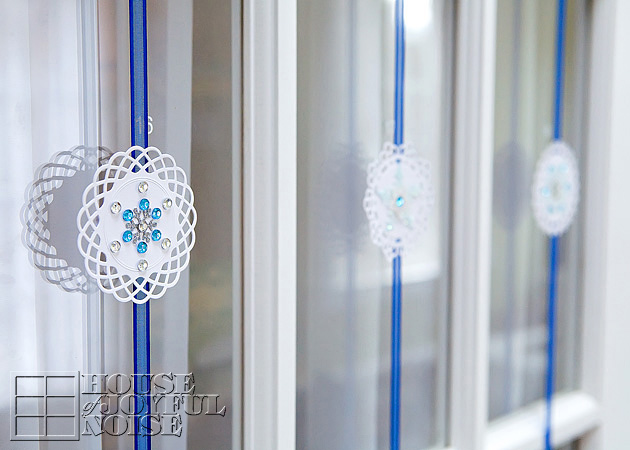
I thought it all came out very pretty, and of course the strands themselves are reusable again every year.
It takes no time at all to cut out some new little numbers, and apply them.  The slips of paper can be used again if they re saved as well.
Mix them up, add new ones, or create a whole new set. I like to keep our kids on their toes.

This Christmas season, make the most of every day with your family, and keep the spirit and love of what Christmas is truly all about, alive in your hearts and homes.
We hope you find this idea inspiring. Thanks for coming by.

* * * * * *

Please come follow me here and there:


Save

Filed Under: Crafts & Creations, DIY (Do-It-Yourself) Project, Holiday Crafts, Home Decor, The Homestead Tagged With: advent-calendar-craft, advent-calendar-for-the-home, advent-calendar-ideas, advent-calendars, Catholic-blogs, Catholic-families, Christmas-advent-calendars, Christmas-craft-ideas, Christmas-decorating, December-home-decor, door-advent-calendars, home-advent-calendar, homemade-advent-calendar, how-to-make-an-advent-calendar

Rustic Autumn Wreath | A Simple Craft

September 24, 2012 By Laura 20 Comments

000_autumn-decor-150x150

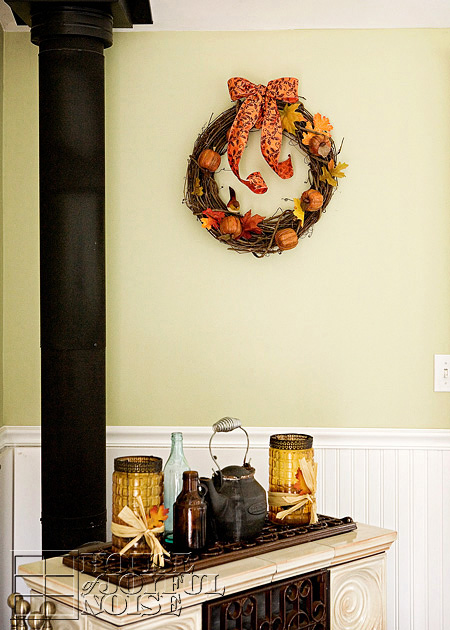
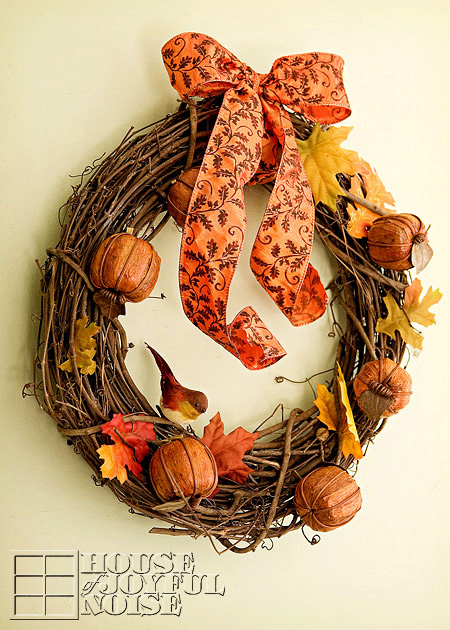
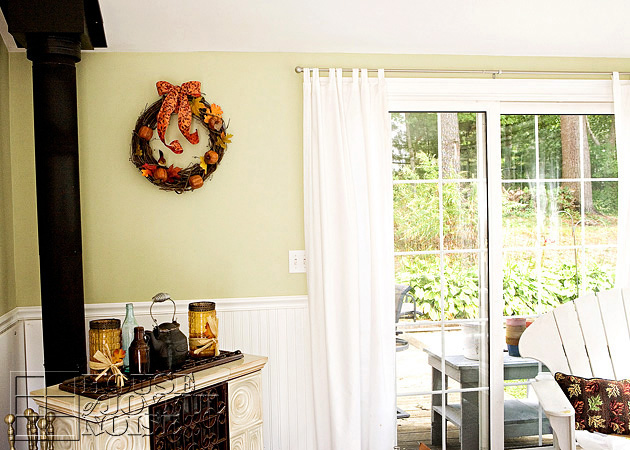
 If you’d like to add a touch of crafted Autumn decor to your home, but don’t have a lot of time or energy right now, this wreath is for you! It is so very simple and quick to make.  I think it’s beautiful, and has a real rustic flair that fits right in here at our homestead.

002_autumn-decor-crafts
I hung our wreath in the sun room, on the wall directly in front of anyone coming in through our front door.

It’s so very simple to make, you really don’t even need to be shown how.
But I will tell to you how, and give you a couple of tips as well.

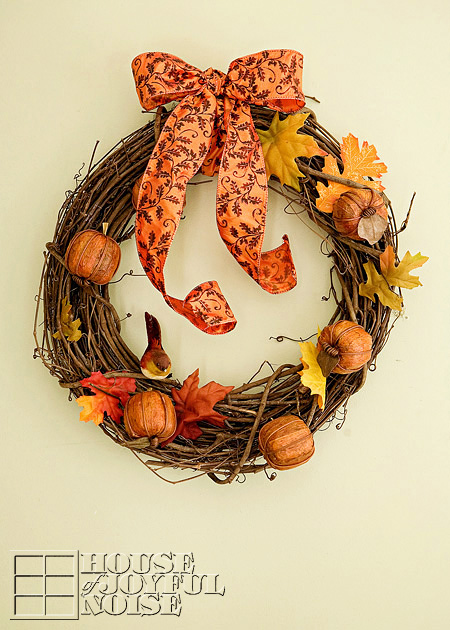
003_fall-wreath
Start with a stick/branch wreath, which can be found ready-made at your local craft store.

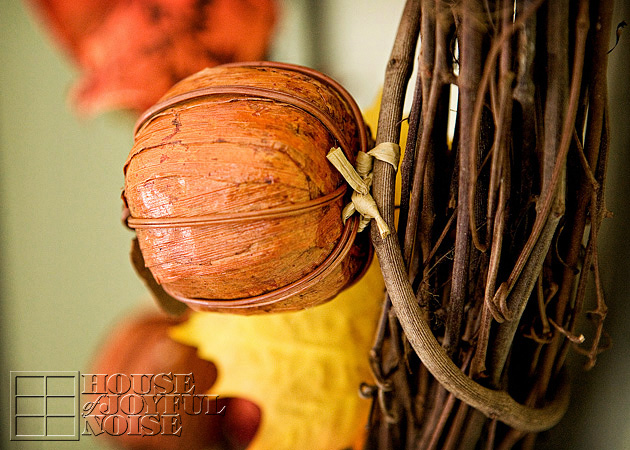
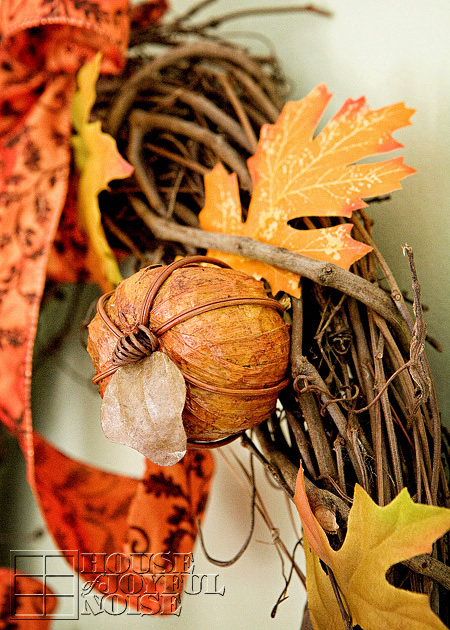
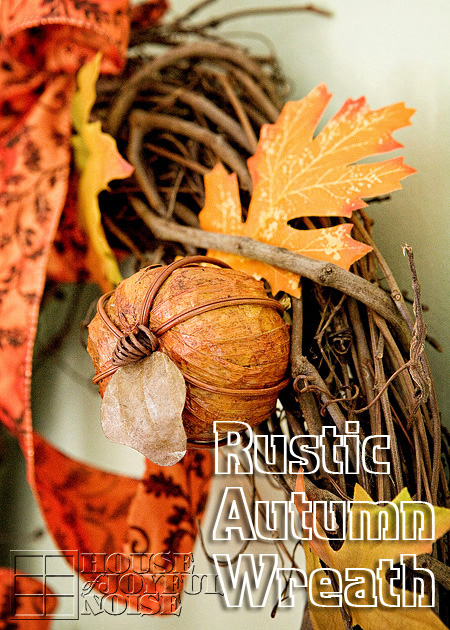
The pumpkins I also found at the craft store. They are very light in weight, made of a paper medium, and some kind of painted wire.  They are finished with a shellac, and they came as a bunch in a net bag, much like potpourri comes. So you may want to look in that area.

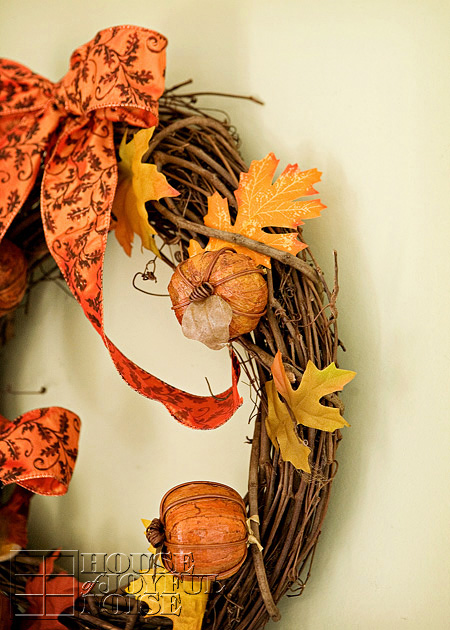
005_fall-home-decor-crafts To attach them to the wreath, I used a small piece of raffia! I simply slipped it under the wire on the bottom/underside of the pumpkin, and tied it onto a branch where I wanted the pumpkin placed. How easy is that? I cut any excess tails of raffia I didn’t need, but I don’t even care if it is seen, because it just adds to the simple rustic charm of  the wreath, in my opinion.

004_autumn-decor-accents
Then I added some nice looking faux fall leaves.  You can simply just tuck them under the intertwining sticks of the wreath. But if you want to be sure they stay, and/or plan to save the wreath to use year after year, I recommend using a dab of glue from a glue gun at the base of the leaf or stem area, and stick in between branches in an inconspicuous place.  The leaves don’t need to be any more attached than that, and keeping the leaves loose gives it a more natural look.

006_autumn-wreath-decor-crafts
Just follow that technique with leaves and pumpkins, all the way around.

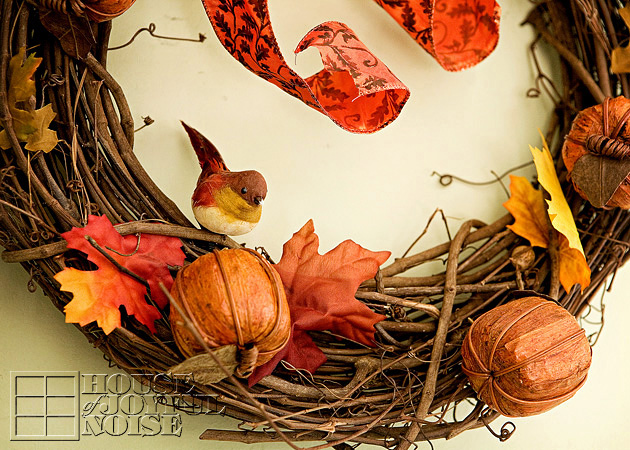
007_autumn-crafts-decor The little birdie is just a clip on, and was also picked up at the craft store at some point. It was one we had, and it not only went perfectly with this wreath, with it’s warm tones, but added new interest.

008_fall-wreath
The wide ribbon is wired, which can be a little difficult to work with, when tying bows or making nice curls. But I found a trick I’ll share with you.
TIP:   When working with wired ribbon, use an aluminum can, cup, or any cylinder object to make nice curls for the tail of your ribbon, or uniform loops in your bows.  Simply choose an appropriately sized cylinder object, relevant to the size you’d like your curls or loops, and use it to shape your ribbon.  You can place the cylinder into the loops to make them nice and round where they curve around, and/or wrap the ribbon around the tails to make nice curls.

009_autumn-home-decor It’s really as easy as that! It can literally be done in 10 minutes.

010_rustic-autumn-wreath
It’s not only a simple and beautiful wreath for this awesome season, but you can say you made it yourself.

Save


Save

Filed Under: Crafts & Creations, DIY (Do-It-Yourself) Project, FALL Crafts and Creations, FALL Home Decor, Home Decor, Seasonal Crafts and Creations, Seasonal Home decor, The Homestead Tagged With: autumn home decor, autumn-crafts, Autumn-decor-ideas, autumn-wreath-tutorial, autumn-wreaths, fall-crafts, fall-decor, fall-home-decor, fall-wreath-tutorial, fall-wreaths, rustic-wreaths, seasonal-crafts, seasonal-decor, seasonal-wreaths

Customized Sketchbooks | DIY idea

September 18, 2012 By Laura 15 Comments

customized-sketchbooks-idea

The kids and I are well into a new school year here, and things are going really well so far.  Our oldest is a high school sophmore now, and the 3 youngest (triplets) are fifth graders.  So naturally, each year has gotten more academically involved, deeper and serious for all of us;  myself as the teacher, and they as students.  But I can freely admit that I am learning almost as much as they are, and enjoying my re-education as we progress with each year.  I love finding new ways to keep their homeschooling experiences fun.

One new idea I came up with this year, actually came about as I was brainstorming a gift idea for a special-little someone-else in my life.  While that gift is more elaborate and expensive, and personalized from me, it occurred to me that it might be fun to incorporate the general idea into our schooling, on a more budget level, for my own kids. So I mentioned the idea to them, of keeping their own sketch books throughout the year, and was not prepared for their level of excitement about it! I also wanted them to customize their very own a little bit, so they treasured them more.

The intentions for these sketch books are for the kids to just use freely whenever they want to, to practice drawing, write a little poetry, journal some thoughts, or even just doodle as they feel like it. But I did let them know I may ask them to use their sketch pads to express their thoughts or feelings in any way they’d like, following field trips or other home schooling or life events worth noting, in an artistic way. These pads are for dry medium only, but naturally you can adapt the general idea to any kind of pad, as well as customize the cover using any material you’d like. But today, I’m just sharing with you what we did.

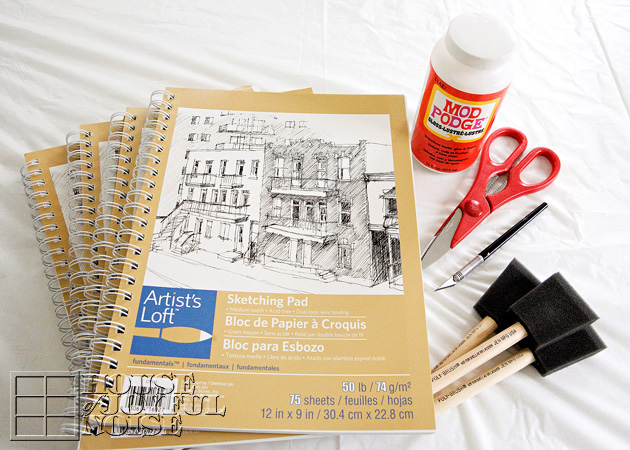
Here’s the basic supplies we worked with:

  • customized-sketchbooks-idea-1 Inexpensive spiral bound sketching pads
  • Modge Podge
  • Foam brushes
  • Scissors or an X-Acto type blade

customized-sketchbooks-idea-10
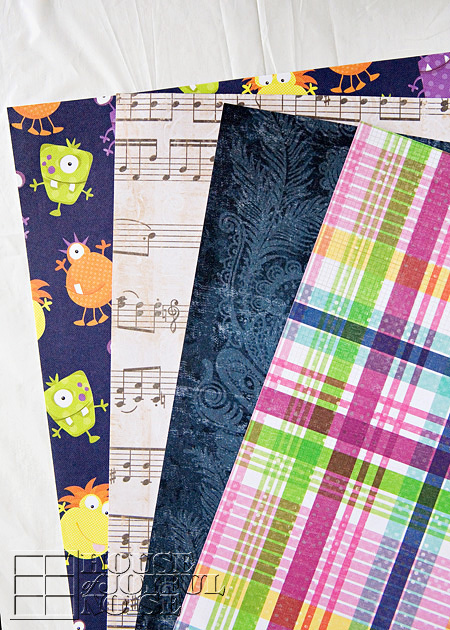
And, 12″ x 12″ patterned scrap booking paper.  These are the sheets my kiddos picked out for themselves.

Now things are about to get ever-so-slightly-messy. Especially with kids. So I thought I would tell you my cheap little trick I use for protecting the table for all of our craft happenings . . . . . .

0012-214x300

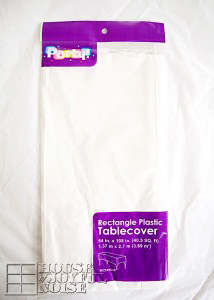
TIP: Plastic party table covers, from the Dollar Store!  One usually lasts us for many, many projects. When we are done working, we make sure any paint or glue on it is dry, and then we just roll it up in a ball and put it away for next time.  (You could fold it, if you really need to. I know some people are like that. Hey, I have my own weird issues, but they are different. I’m not judging! lol)

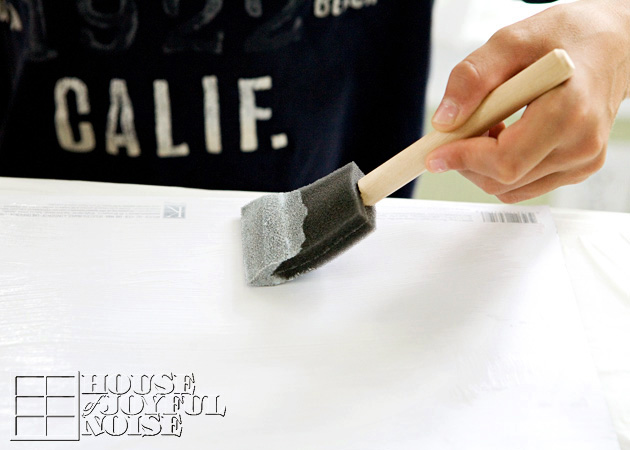
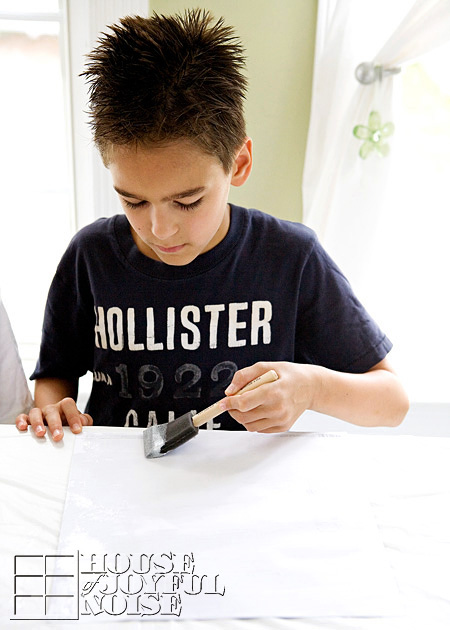
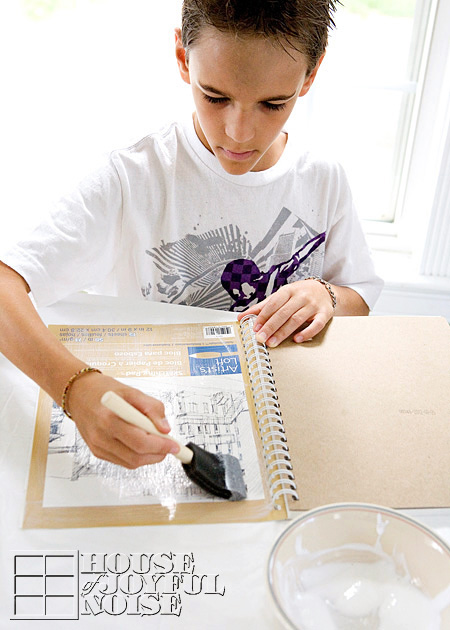
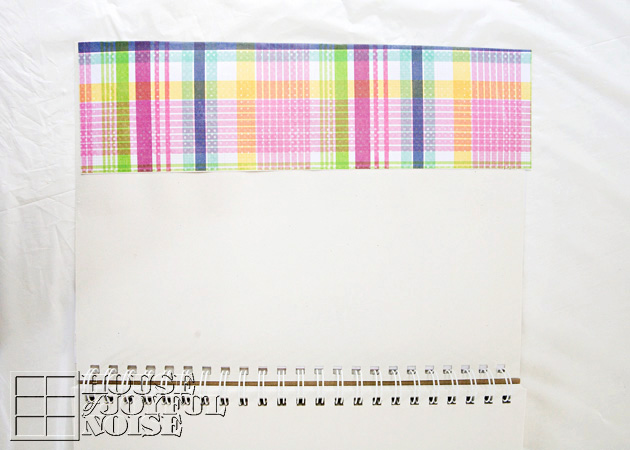
customized-sketchbooks-idea-2 So the first step is putting a quick layer of Modge Podge on the back of the patterned paper.

customized-sketchbooks-idea-3
You don’t want to put any excessive amount on, or go over and over it, or the paper will get kind of soggy, and buckle.
But you do want to go right to the edge of the paper.

customized-sketchbooks-idea-4
Then also put a layer all over the cover of the sketchbook.

customized-sketchbooks-idea-5
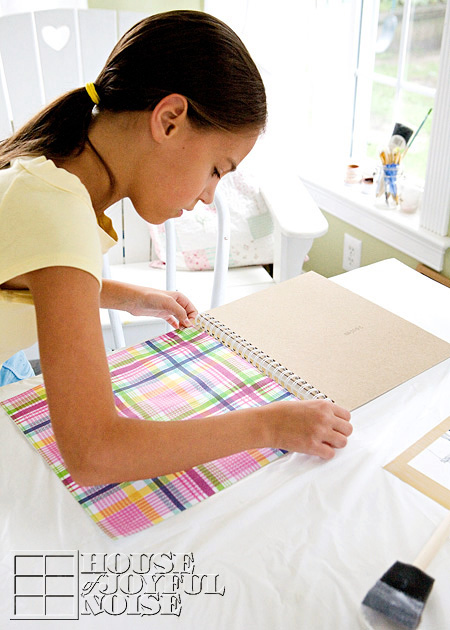
Then carefully place your Modge Podge’d paper, onto your Modge Podge’d sketch pad cover.

customized-sketchbooks-idea-6
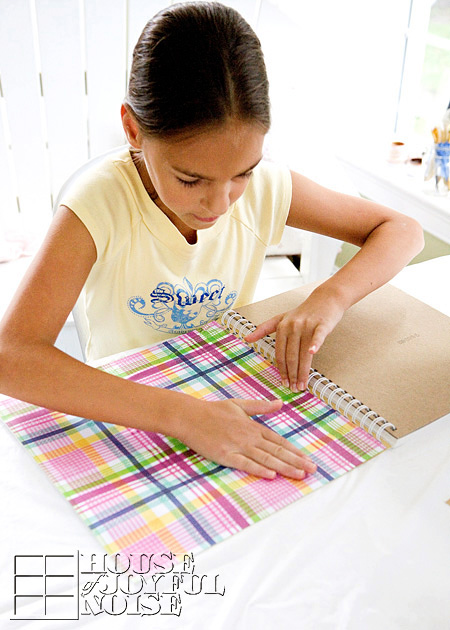
You can line up your paper evenly, by using the spiral bind as a guide.
Be sure to smooth out any air bubbles in the paper.

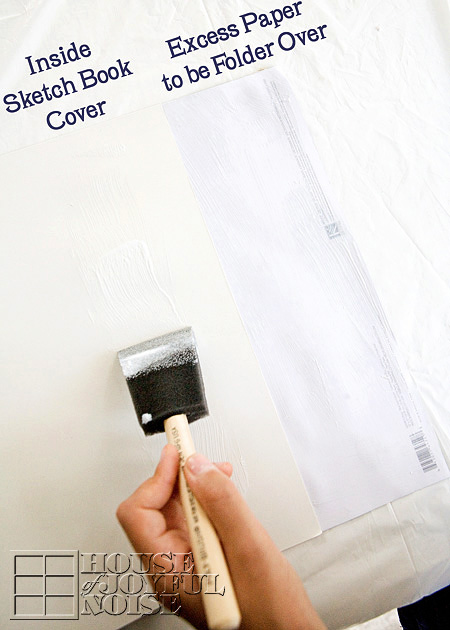
Now, the paper was not cut to size on purpose. You could figure out and prepare the exact size paper you needed ahead of time. But it just seemed easier to me to just put it on their, and then either trim off the excess, or just fold it over into the inside of the cover.

customized-sketchbooks-idea-7

These particular sketch pads were conveniently 12 ” tall, but only 9″ wide, so we had 3 extra inches to fold in.  The putting Modge Podge on both surfaces is just a preference, and may not be necessarry.  I just know with my kids, these sketch books were going places, and going to take a traveling beating. So, I figured the more secure the paper was adhered, the better.

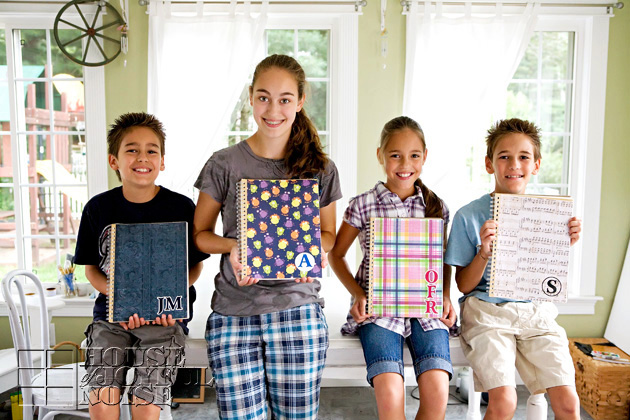
customized-sketchbooks-idea-8 Granted, not all of them came out with the paper put on perfectly straight anyway, because they are kids, and doing the best they can. And perhaps not as particular and picky as I am! (Which really, has got to be a nice feeling, sometimes!) They just had fun making them, and were really excited about the whole project. Which is really the best part:  Kids being proud of what they made, and caring for those things that much more, because it is their own creation, from start to finish.

customized-sketchbooks-idea-9 I’ll tell you, it’s been weeks now, and these sketch books have proven to be a really great idea for my kids. They have really used them, on their very own whims. Regularly! Every day. It’s a beautiful thing to catch your kids sketching this or that.  Sometimes really working on a particular one over time, trying to make it come out just right. This is how all of my illustration skills were born!

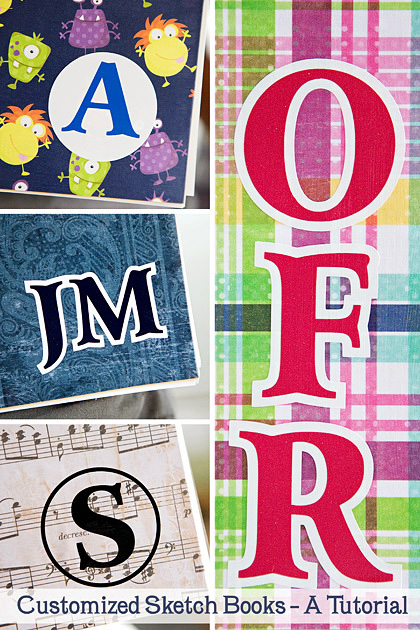
As you can see, we further personalized their sketch pads, with their initials. Those were all cut in vinyl for them, but they each specified the exact initials they wanted, colors, design and arrangement. I think they all came out so great!  And each cover really does well express their individual styles and personalities.

customized-sketchbooks-idea-11

 I hope this idea inspires you in some way. I know that for me personally, any notebook or sketch book full of blank or lined paper, gives me the butterflies.  IS there anyone else out there, who understands what I mean? The opportunity for expression just laying before those two covers, is exciting!  So consider making yourself a special one of your own, and just let whatever wants to come out of your head to your hand, come out. See what happens inside! You may be surprised, and you may just enjoy every minute of it. Everybody should just take time to chill and doodle, sometimes.

Thanks for coming over. Please share this idea if you are so inclined.

Save


Save

Filed Under: Budget, Crafts & Creations, DIY (Do-It-Yourself) Project, Homeschooling, Kids Arts and Crafts Tagged With: Catholic-families-Catholic-blogs, customized-sketchbooks, doodling, encouraging-imagination, homeschooling, illustrating, journaling, journals, sketchbook-ideas-for-kids, sketchbooks, triplets

Painted AMERICAN BIRDHOUSE – Tutorial

June 11, 2012 By Laura 27 Comments

Summer holds a whole lot of good things, and for us, it really kicks into high gear in the beginning of July, with back to back celebrating of the 4th of July, and our oldest daughter’s birthday!  Then the summer rides out with a little more down time, just chilling on the beach, making day trips, and hanging out chatting and laughing around the camp fire at night. So about this time in June, we’re getting excited for all of the fun to come, just around the corner! The gardens are planted, we’re reaching the end of our school books, and we can just feel the summer vibe coming on the sea breeze!

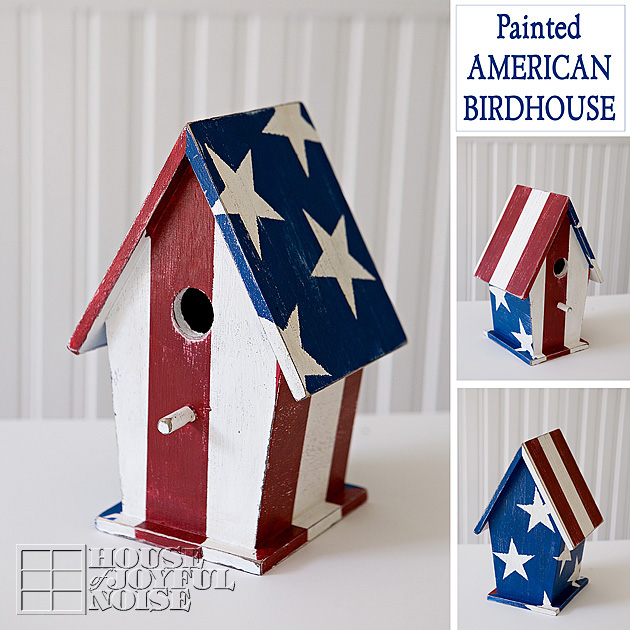
What really gives me so much joy, is helping make my home and gardens, reflect the seasons and holidays!  Around here, about mid-June through July, it is all about red, white and blue!  Our family’s homestead is that much more enjoyable, with the little bits of decor I add, and it just puts the happy in my heart, to see it.  But the greatest joy in it all for me, is planning and creating all of those little things around our home. Like this American Birdhouse I am sharing with you all today. Honestly, day or night, you can turn the music up loud, put some art tools in my hands, and COLOR ME HaPpY!!

So I’ll just tell you how I did this. While I didn’t photograph every step of the action, I can tell you what I did, and give you some photos I took of what the birdhouse looked like after those steps.


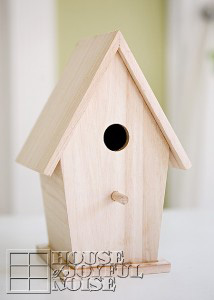
To start, I picked out an unpainted wooden birdhouse at Michael’s Arts and Crafts. There were a few styles to choose from, but this one would best work with the paint-job layout I had in my head.

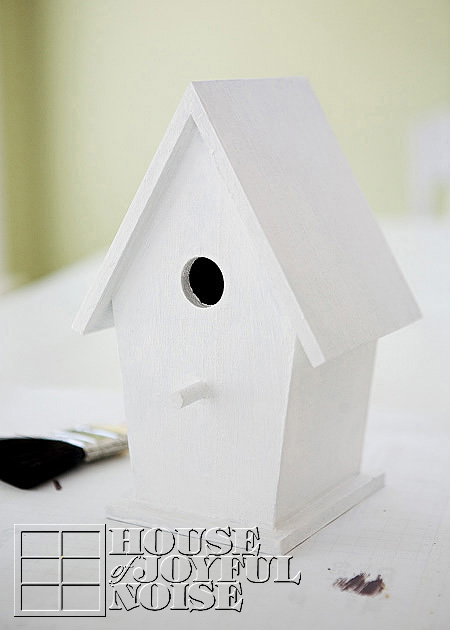
I primed it with some grey primer I had on hand, and then I painted it white with acrylic paint. Because of the grey primer, it did take 2 quick coats of white to cover. This paint dries fast, which I love, so I can keep the fun rolling.

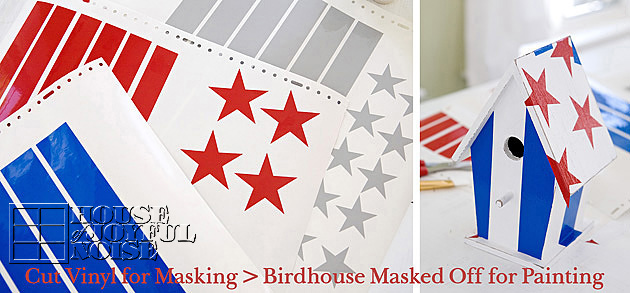
Next, I asked my husband, Michel, to cut some stars and stripes out of vinyl for me, the next job he ran, to use as masks. I wasn’t sure of the size I wanted to work with for either the stars or stripes, so he cut out 2 sizes of each.  Sticking some cut pieces on the house helped me decide which size I’d like better, and I went with the fatter stars and stripes.  NOTE: Just to confuse things, Michael used some scrap vinyl he had, that happened to be red and blue…to put on my white house. I know….it looks done already, huh? I would have preferred white masking, but c’est la vie….it was just a mask. Don’t let it confuse you-as it was trying to confuse me. It was going to be way better looking when I was done with it, but the colored vinyl did give me a good preview of the final layout!

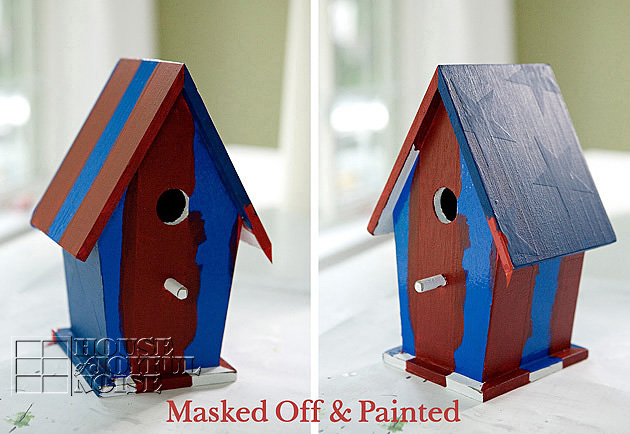
So here it is, with the masking still on, and all painted in.  Looks like a hot mess to me! It did take more brain power than I had planned on burning, trying to think in opposite terms here:  “Ok….where the red and blue mask is, it will be white….and I am painting the white I see, red and blue. Right?….Wait……”. Ugh. See? White vinyl would have taken less thought for me.
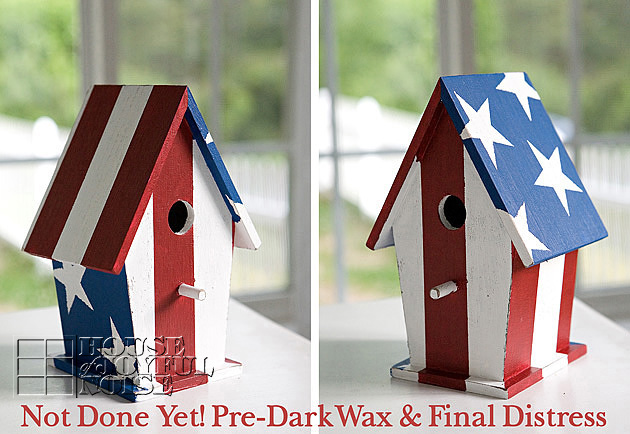
 But I managed, believe it or not, to not screw it up much.  Although everyone was instructed not to talk to me or ask me questions whilst paintbrush in hand. I’m good, but I’m not that good. ; )

So here is what it looked like after all of the masking was peeled off.  Revealing that I really did it right!

It’s looking pretty good already, huh? But it was still not done yet!

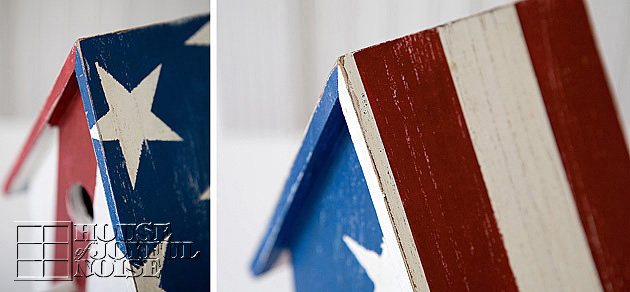
 My vision was an older looking American Birdhouse. So I finally really attacked it, with my sand paper! I go to town, distressing.  I don’t know what it means, but I suspect distressing my creations gives me an unnatural level of joy.  Sometimes, I need someone around, to stop me. For me, this is when many things I make, really come to life, and become what I created them to be.

So, after Michael took away the sand paper, I did just a few more little things:  1) I dusted it all off with a soft rag.  2) I rubbed on a good coat of clear wax, and let that dry.  3)  Then, ever so tentatively, I added some dark wax too. I am so careful with that stuff, because it is powerfully staining!  I carefully and minimally applied it, to age it exactly to a specific, pinpointed year. (Ha ha…I have no idea what year, really….I’m just kidding. lol)  I’m not sure if you can even tell how much it was aged in these photos, with the effect of the dark wax, but it really was the final touch of perfection, for me to call it d-o-n-e.
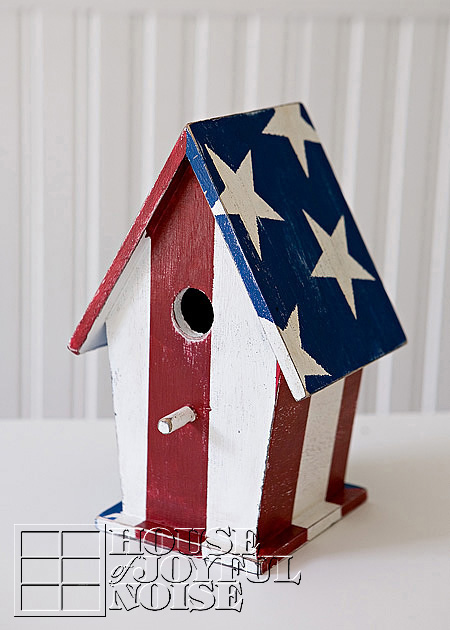
And here it is! . . . . . .


This is the front and it’s left side, obviously. But I tell you this for you to notice, how the stars wrap around from one side, diagonally, all the way to the other.  And the stripes do the same thing.

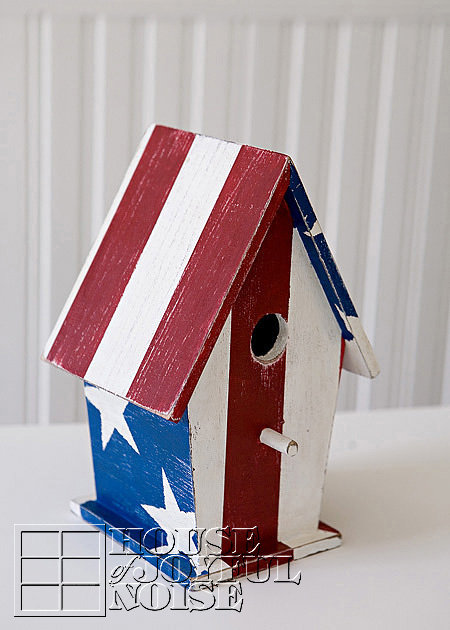
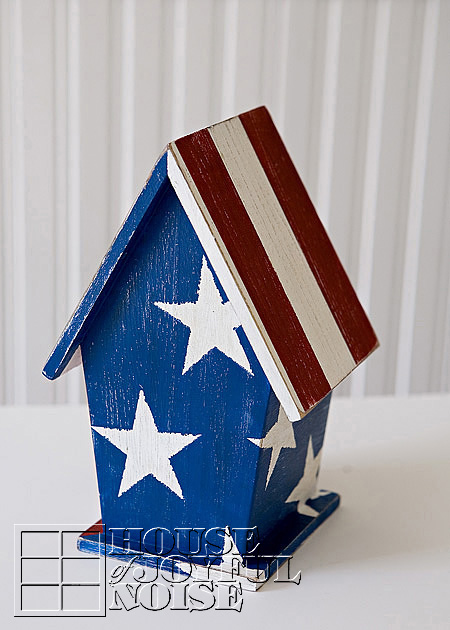
So I am about to show you all sides . . . . . .


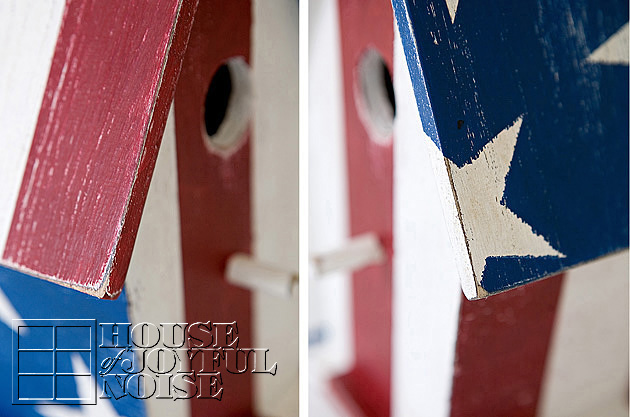
 Of course, I would love to show you close-ups of the detail in my distressing . . . . . .


It truly is what makes this an American Beauty, to me!

 I just love how it came out. Do you? You can bet your American bottom, I’ll be Pinning this baby!

Coming up soon here on the blog, I’ll be showing you where I put this, to be displayed for awhile this summer.

Tell us, do you had any special summer decor to your home this time of year?  We hope you have a moment to tell us about it, or say hello, before you ski-dattle! If not today, thanks so much for coming by! We’re always glad you did.


Save

Filed Under: Crafts & Creations, DIY (Do-It-Yourself) Project, Home Decor, Tutorial Tagged With: american-crafts, american-home-decor, american-projects, birdhouses, crafts, decorative-birdhouses, july-decor, july-home-decor, painting-birdhouses, painting-projects, patriotic crafts, red-white-and-blue-crafts, red-white-blue-decor, stars and stripes

Pinwheel Wreath | Tutorial and Decor

May 29, 2012 By Laura 19 Comments

017_pinwheel-wreath-300x214


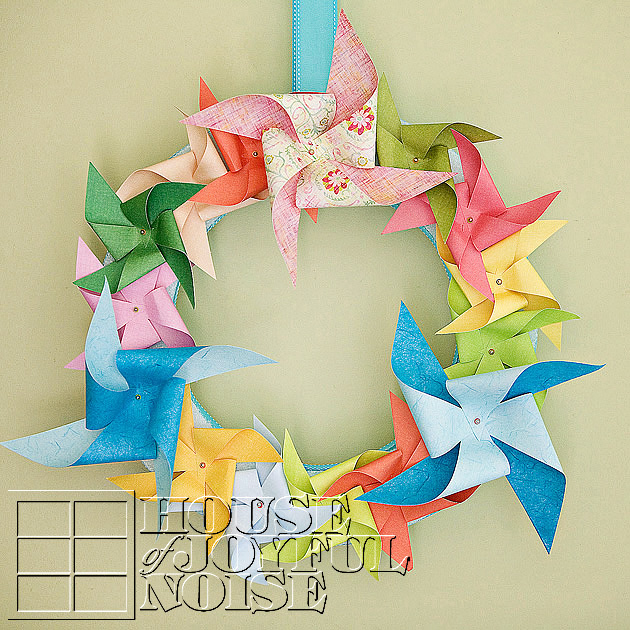
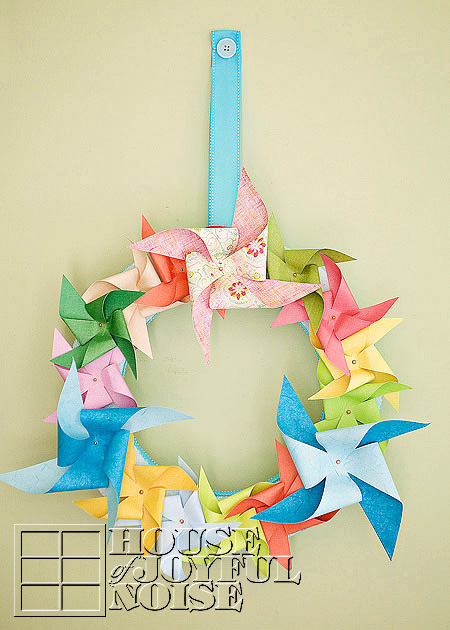
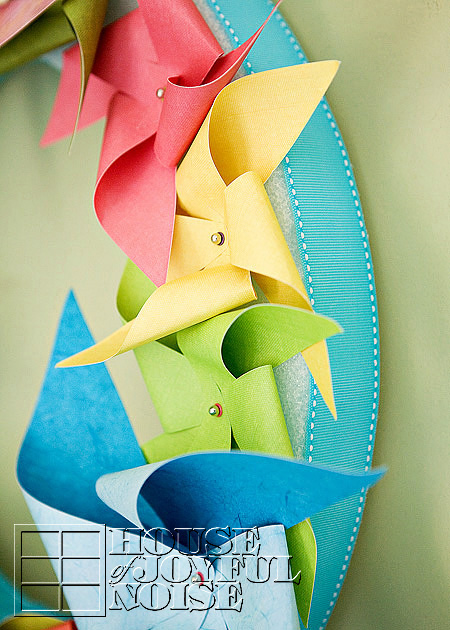
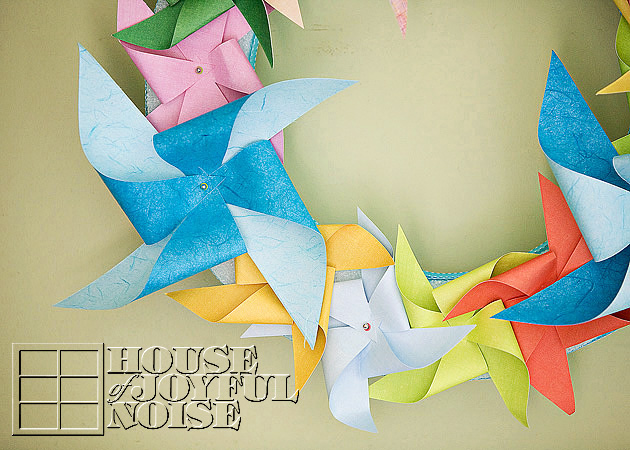
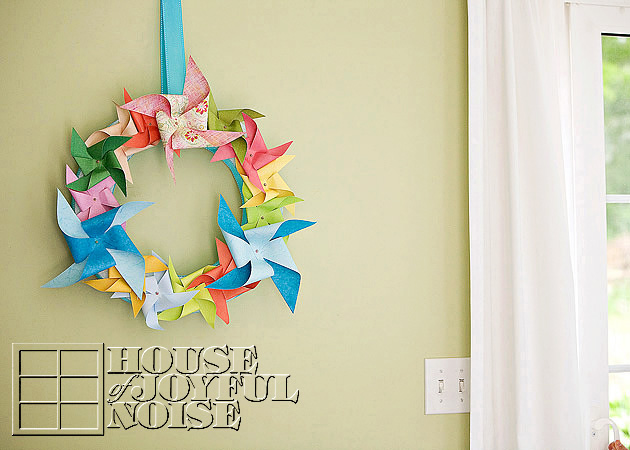
Is there anyone, who doesn’t love pinwheels? They are just so fun, so whimsical, and can give anyone that feeling of childhood joy as it spins, no matter how old we are.  I am so smitten with pinwheels lately, that projects involving them just keep popping into my head! This idea of a pinwheel wreath, however, has been on my brain since last year!  I wasn’t sure exactly how I would design it, but I figured it out as I went along, and the results just make me smile!  Just like I knew it would.

001_pinwheel-wreath-home-decor
What do you think?

I found it fun and easy to make.  They don’t spin, as this project was strictly decorative. But I’m already thinking about designing another one that works! For this pinwheel wreath however, I just wanted it to have a summer feel, with lots of pops of color, so I chose summer hues accordingly. But imagine all the different and fun color combinations that you could come up with! 

 Let me show you how easily I made this wreath.

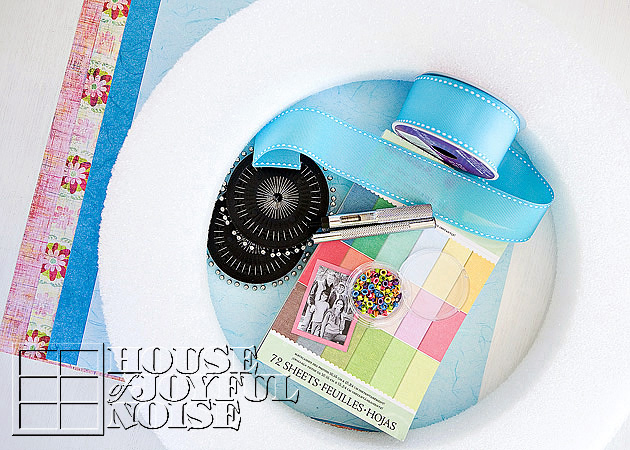
002_pinwheel-wreath-supplies
Supplies
Needed: 

**I got everything on this list at Michael’s Arts & Crafts**

  • a styrofoam wreath base
  • a pad of double-sided cardstock (called a Solid Mat Pad) -papers size 4.75 in x 6.75 in.
  • 4 or less double-sided designer 12×12 in scrap papers you love (heavier stock)
  • eyelet brads
  • eyelet setting tool set (had in my toolbox)
  • a small hammer (had)
  • long pins (- with the ball on the end. I got metallic ones.)

Optionals:

  • wide ribbon of choice
  • scissors, or a Fiskar Trimmer! (Which I highly recommend as a constant craft tool I have!)

___

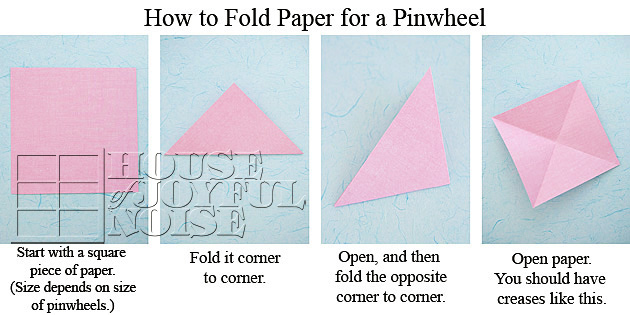
Next I am going to show you how to fold paper for pinwheels. But to start, you need your pinwheel paper in squares – size depending on how big or small you want your pinwheels. (You may want to experiment to decide that.)

The multi-colored pad of 2-sided paper I bought was 4.75 in x 6.75 in. So the easiest and fastest thing for me to do was to take 2 inches off, and make them square, at 4.75 in x 4.75 in.  So I had a little pile of those cut to size in no time (with my Fiskar Trimmer), and ready to fold.

04_how-to-fold-pinwheel-paper

As you may be able to tell in the above 3rd frame photo, I did not open the paper to make the second fold, the first time when I photographed this. But you should…..it’s easier and makes a nicer second fold.  I also zoomed in, so don’t let sizes fool you.  But looking at the 4th frame, I am sure you get the idea of how the folding needs to get done. It kind of looks like a little square kite!

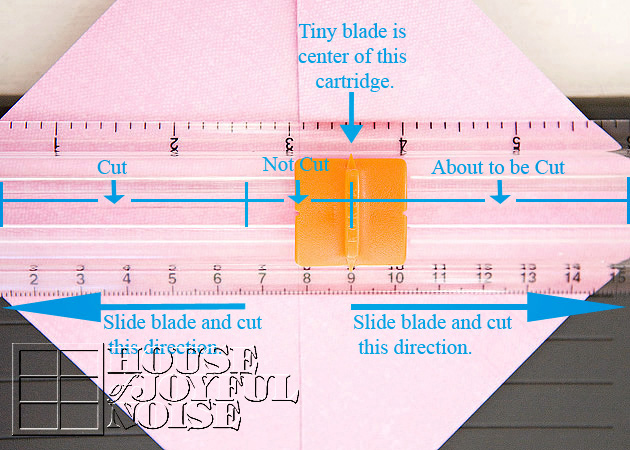
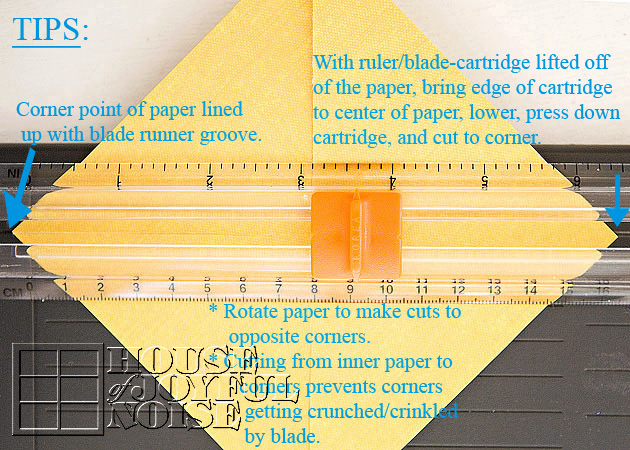
Next, is the cutting that needs to be done on the creases.  Now, you CAN just use scissors for this! Just be sure to note where you need to stop cutting.  There are 4 cuts on each square, and none of them go all the way to the center. But for mostly all of my craft paper cutting, I use my awesome (older model) Fiskar Trimmer.  In case you have one, or are going to get one for this craft, I have made some labeled photos with directions and tips here below, of exactly how you can cut them all quickly and easily. I hope they explain well for you.


005_how-to-cut-pinwheel-paper

006_how-to-cut-pinwheel-paper So if you just study these photos above and read the notes, you’ll find that cutting the square papers can be done in a zip! That’s what I love about the Fiskar Trimmer…….it’s fast, and the cuts are straight and perfect. I use it a lot!


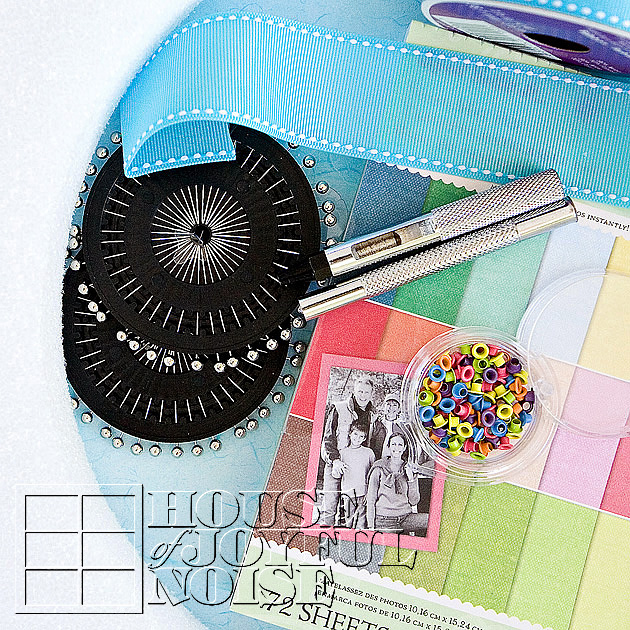
007_pinwheel-wreath-supplies In this photo above, I’d like you to take note of the eyelet setter tool set, and the pins.  I hope you are familiar with eyelet (brads) and the tools needed to set them?  They are used a lot in scrap booking as well. In a nutshell….a tip makes a hole in the paper for the brad to be put in.  The setter is used on the backside of the eyelet or brad, to ‘splay’ the metal open and hold it in the paper. You do this with a little hammer, and it’s fun!  You’ll see how it looks finished in a moment.


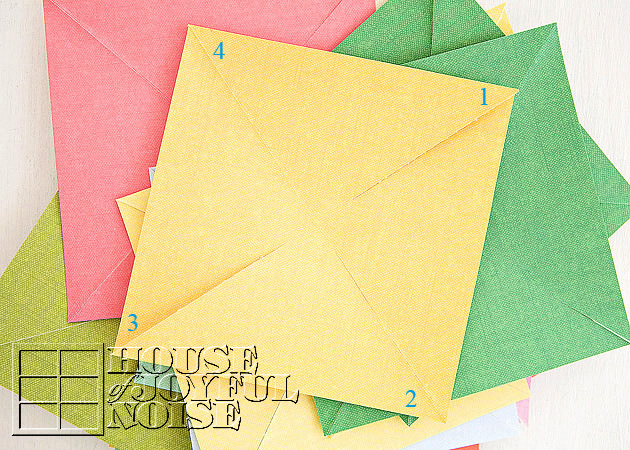
008_how-to-fold-pinwheel Here I have my little squares of paper all cut.  When folding a pinwheel, you need to bring every other corner to the center of the square. So I have numbered them to give you the visual of that.  Also, you can now get a good look at how the cuts do not go all the way to the middle, and about where they should stop.

I could not take photos of every step of this process, because it takes a lot of tight holding with very busy hands, and I couldn’t hold a camera too! But if you need to see how eyelet brads are set step by step with the hammer method, you can check this video here.  There are newer tool sets out on the market, that set eyelets or brads with a spring-action tool, and another method as well. You will see the options at the video link above, but the hammer method I use is demonstrated.


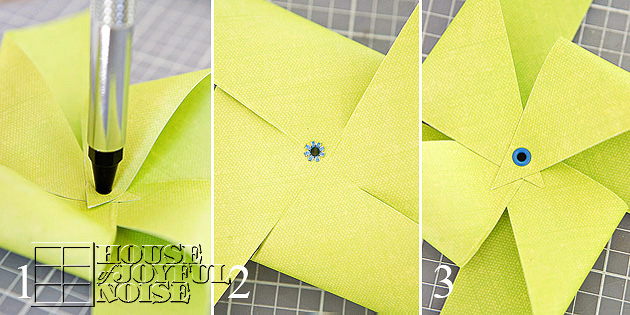
09_eyelet_brad_process-how-to-make-pinwheel

FRAME 1

Every other corner is brought to the middle, with the point quite passing the middle. Each corner overlaps the previous, and you really need to hold them all exactly in place.  Then, taking your eyelet hole puncher, you tap out the hole with the hammer on the top of the setter. With 4 layers of paper here, you really need to hit it hard a few a couple of time! ALSO NOTE:  Just like when using an ordinary paper punch, you don’t want to punch a hole off the edge of an of the papers. This can be tricky with 4 corners on top of each other! So be sure they are all in place before making the hole.

FRAME 2

The eyelet brad has been put into the hole, held in there carefully while flipping the pinwheel over, and the back of the eyelet has been hammered and ‘splayed’ (I like that word…lol) out, to hold the eyelet in place. Careful not to crush your pinwheel too much!

FRAME 3

What the finished eyelet looks like on the front.

Seriously easy as 1-2-3!  (On repeat mode. ; )

–

OHHHHhhhh….It’s about to get even more fun, now!

010_pinwheel

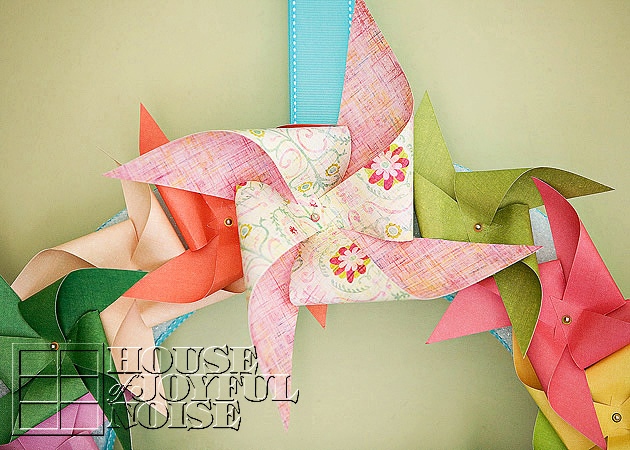
Taking your pins, and putting each one through the eyelet of each pinwheel, you can start pushing them into your styrofoam wreath!  The pins can be easily put in and taken out, so you can really play and see what you think looks good to you.  You’ll also get an idea of how many pinwheels you’ll need, and how many bigger pinwheels you’d like to use, if any. I added 3 larger pinwheels to my smaller ones.  The larger ones were made with 12″x12″ 2-sided designer scrap papers.


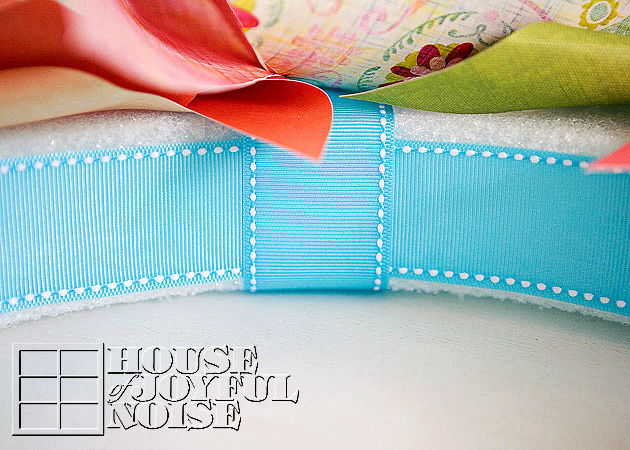
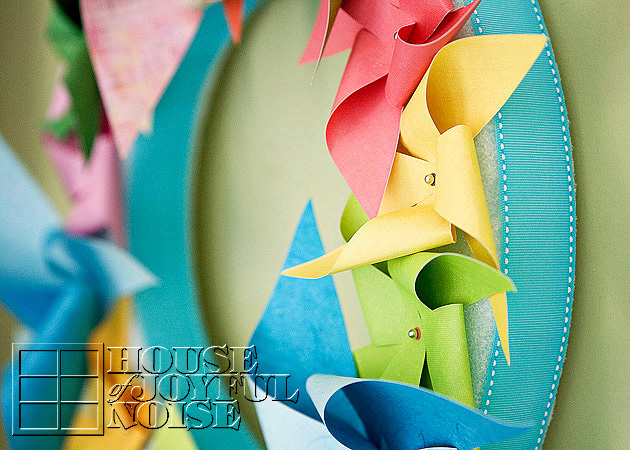
0111 Before you get all of your pinwheels put in and in place just how you’d like it, you may want to add ribbon to the inside and outside of your foam wreath.  I think the ribbon just makes the whole wreath look more finished.  There are different ways you can do that, such as wrapping and winding around the wreath. But I had beautiful turquoise wide ribbed ribbon that laid flat nicely all around the inside and outside, so I chose to do that.

To attach it, I used E6000 glue. Maybe not the best technique. But I squiggled it on, and spread it with some little ripped paper and let it get a tad tacky, before laying the ribbon down.  I was concerned it would soil through, but spreading it out and letting it set really helped, and it worked.  You may want to use hot glue, or just pin it all the way around. I was thinking….my metallic pins would have looked pretty cool.  Like shiny studs.

With the ribbon glued all around the outside and inside perimeter of the circle, I looped another cut piece to hang the wreath from later, before pinning all of the pinwheels in place.

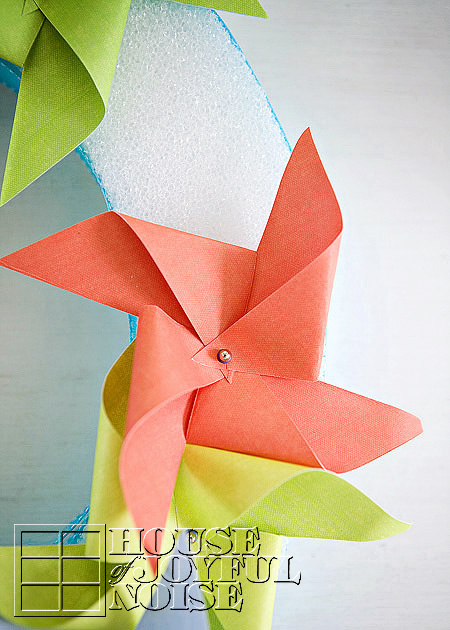
And that is the gist of how my pinwheel wreath was made!  Now you can just enjoy several photos of the finished project!

012_pinwheel-wreath-decor

013_button-ribbon-hanger

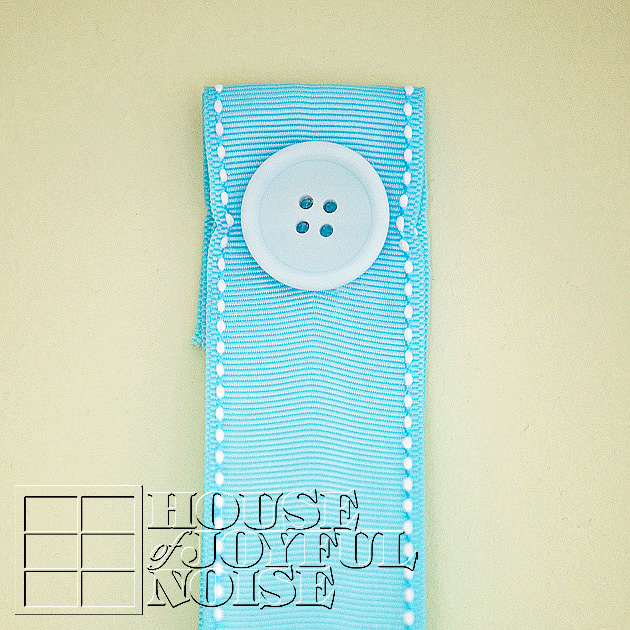
Ahhh yes…..My husband used a flat head nail, and nailed right through the ribbon to hang the wreath. Then, I just glued a big cute button on the nail head!  Love buttons!  I think it adds such a cute element, and I also really dig the white stitching on my pretty ribbon too.


017_pinwheel-wreath
014_pinwheel-wreath

015_pinwheel-wreath

016_pinwheel-wreath

018_pinwheel-wreath-decor My summer-fun pinwheel wreath is hung in our sun room, as a fun and cheery welcome on the wall right in front of anyone who walks into our home through our front door.   I not only love it, but our kids do too, of course!   I hope you are inspired to do a project as fun as this one.

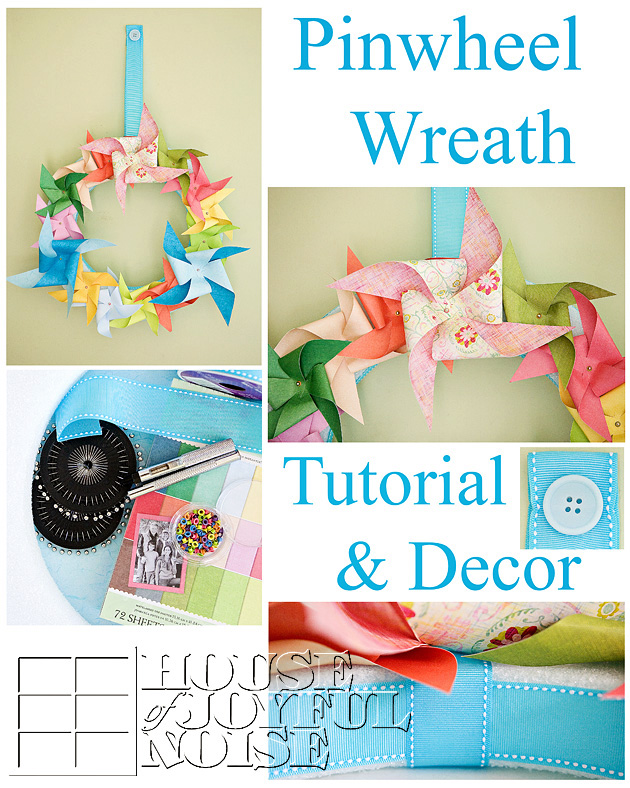
pinwheel-wreath-tutorial-decor Speaking of pinning, feel free to pin this collage to Pinterest, if you are on there! I will be!  We also have added a new ‘P’interest social button in the header, and I’d love it if you’d like to follow me on there as well!

I hope you enjoyed this tutorial.  I invite you to leave me your thoughts or questions! Happy Summertime!

* Come follow us where you are! Or subscribe!
> Buttons at the top of the right sidebar!


Filed Under: Crafts & Creations, DIY (Do-It-Yourself) Project, Home Decor, The Homestead, Tutorial Tagged With: craft-tutorial, crafts-with-double-sided-scrapbooking-paper, eyelet-brads, fiskar-paper-trimmer, home decor, how-to-fold-a-pinwheel, how-to-make-a-pinwheel, how-to-set-eyelets, pinwheel-crafts, pinwheel-tutorial, pinwheel-wreath, pinwheel-wreath-tutorial, summer-decor, summer-home-decor

  • « Previous Page
  • 1
  • 2
  • 3
  • 4
  • 5
  • …
  • 8
  • Next Page »

We are wicked happy to have you here! We hope you find much inspiration, help, humor and enjoyment here.


Archives


POPULAR POSTS

* * * * * *

SUBSCRIBE to House of Joyful Noise blog! Every new post, delivered right to your email box!


Privacy Policy

Amazon Affiliates

Never at any additional cost to you, we may earn a small commission for our endorsement, recommendation, testimonial, and/or link to any products from our website. Your purchase through our links helps support our family, while sharing with you the products we authentically use and recommend, for various ideas, and letting you know where you can purchase them. Thank you for your support!

[footer_backtotop]

Copyright © 2025 HouseOfJoyfulNoise.com · Genesis Framework by StudioPress