• HOME
  • {A}’s Chipmunk Training Archives

 Homepage

  • The Homestead
    • Home Projects
    • Home Improvement
    • Home Decor
      • Seasonal Home decor
        • FALL Home Decor
        • WINTER Home Decor
        • SPRING Crafts and Creations
        • SUMMER Crafts and Creations
    • Our Chickens
    • Gardening
    • Organization
    • Re-Purposing
    • Furniture Refinishing
    • Budget
  • Crafts & Creations
    • Seasonal Home decor
      • FALL Crafts and Creations
      • WINTER Crafts and Creations
      • SPRING Crafts and Creations
      • SUMMER Crafts and Creations
    • DIY (Do-It-Yourself) Project
    • Kids Arts and Crafts
    • Homemade/Handmade Gift Ideas
    • Holiday Crafts
    • Fan Pulls
    • Free Printable/Downloadable
    • Sewing Projects
    • Giveaways
    • Business Features
  • Recipes/FoodFun
    • Breakfast
    • Lunch
    • Main Dish
    • Sandwiches
    • Appetizers
    • Slow Cooker
    • On The Grill
    • Side Dishes
      • Soups
      • Salads
    • Baking
      • Breads, Rolls and Muffins
    • Snacks
    • Treats
    • Desserts
    • Drinks
  • Homeschooling
    • Elementary Homeschooling
      • Elementary Homeschooling READING
      • Elementary Homeschooling MATH
      • Elementary Homeschooling LANGUAGE ARTS
      • Elementary Homeschooling SCIENCE
      • Elementary Homeschooling HOME ECONOMICS
      • Kids Arts and Crafts
    • Middle School Homeschooling
      • Middle School Homeschooling SCIENCE
      • Middle School Homeschooling HOME ECONOMICS
    • Language Arts
    • Math
    • History / Social Studies
    • Geography
    • Foreign Language
    • Field Trips
    • Games
    • Nature Study
  • The Big Picture
    • Life In General
    • Celebrations
    • Faith
      • Into the Light; The Series
    • Giveaways
    • Reviews & Sponsors
  • Photography & Lettering
    • Photography
    • truck lettering
    • vehicle graphics
    • Newborns
    • Kids
    • Engagement
    • High School Senior Pictures
    • High School Senior Pictures Sneak Peeks

Plymouth Tire & Auto Service | Truck Lettering

November 30, 2009 By Michael 2 Comments

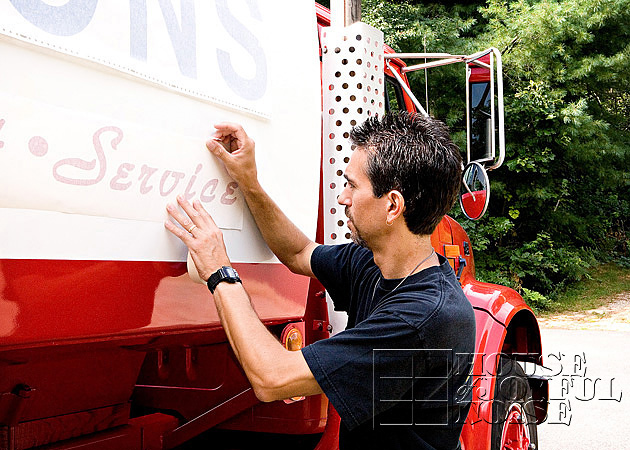
Michael here. Here is one of the most recent truck lettering jobs I have done. Plymouth Tire & Auto Service has been a customer of mine for about eight years now. I have lettered several trucks and did some signs for Steve over that time period. On this job Steve wanted me to design something different. Something that would catch the eye a bit more than the traditional door lettering that he had used in the past. So this is what I came up with.

      michael-p-richard-truck-lettering-etc

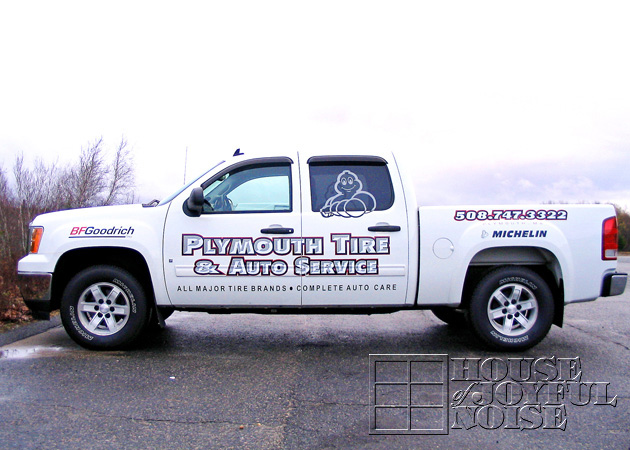
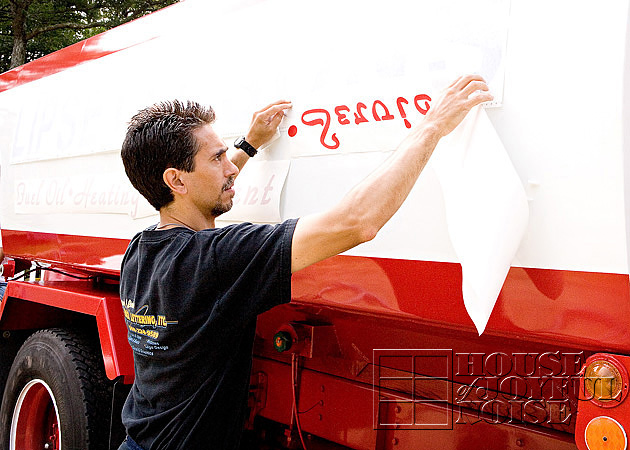
This is a four color job with each color as an overlay on top of the red base color.

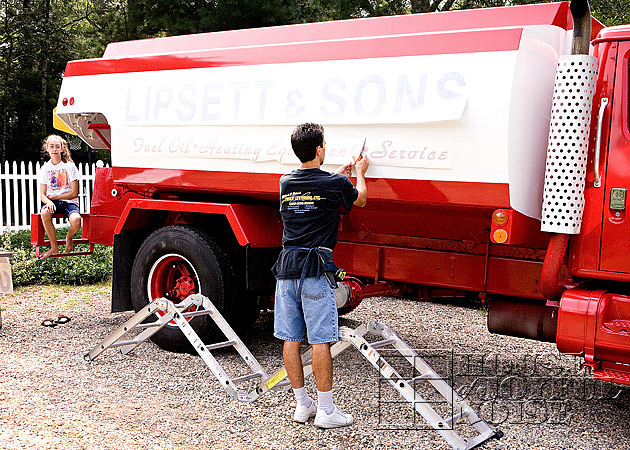
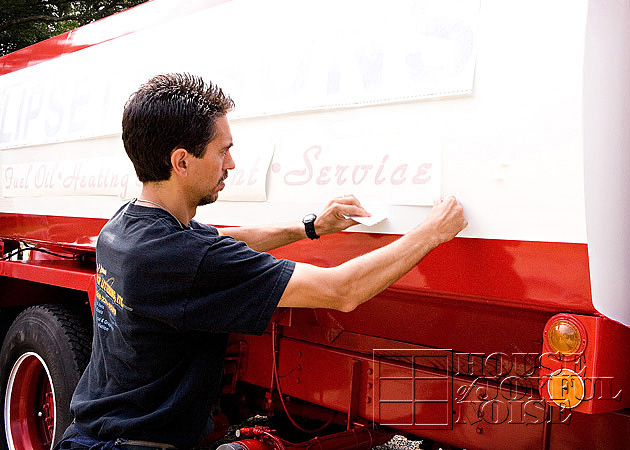
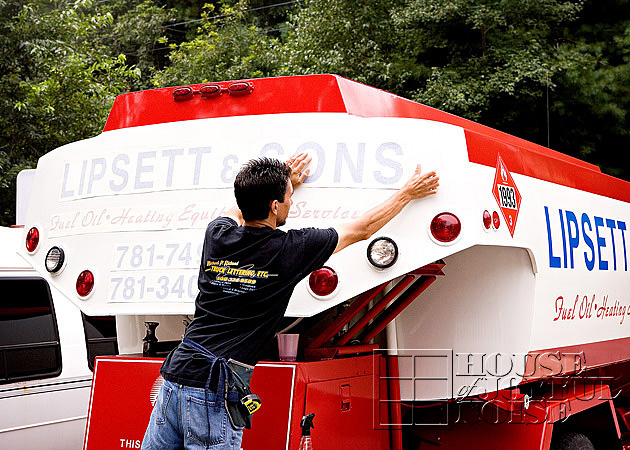
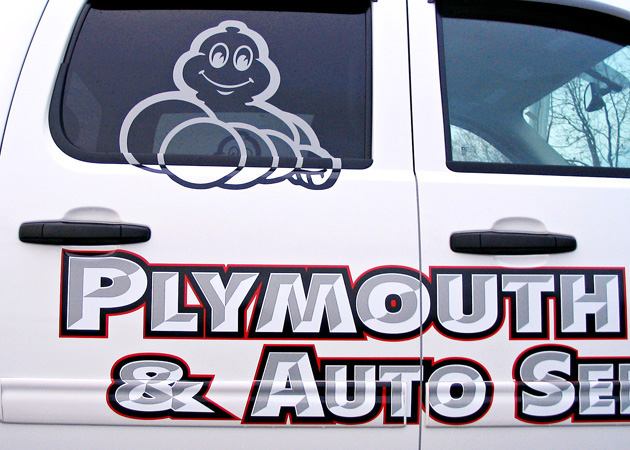
Below is closer look to show you the surface I had to work on with the second half of the name.

This took a bit more time to do as you can imagine.

michael-p-richard-truck-lettering-etc-1

michael-p-richard-truck-lettering-etc-3

michael-p-richard-truck-lettering-etc-4

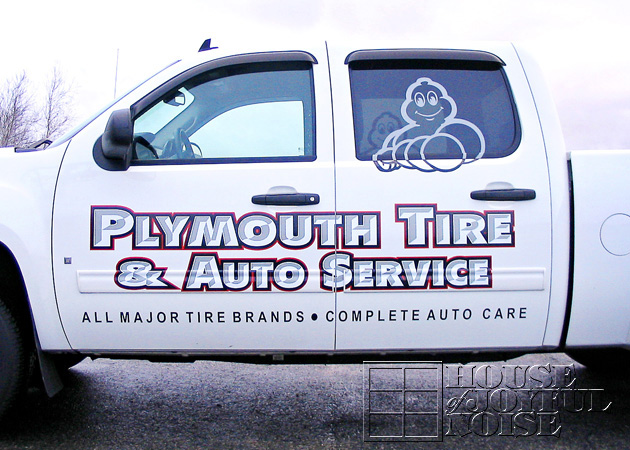
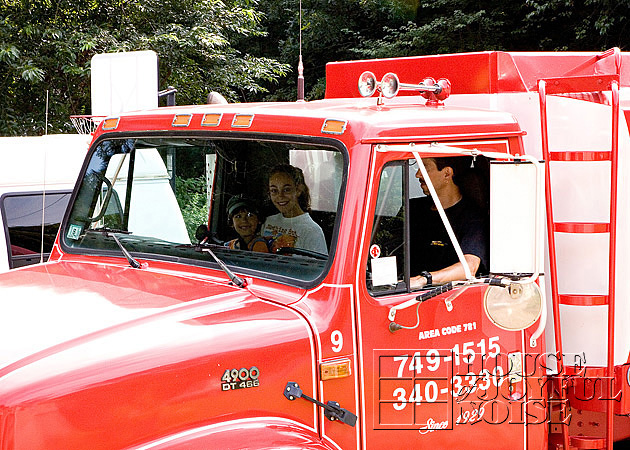
Steve and his kids got a real kick out of  “Bib” (the Michelin Man) in the back seat with his arm out the window.

michael-p-richard-truck-lettering-etc-5

michael-p-richard-truck-lettering-etc-6

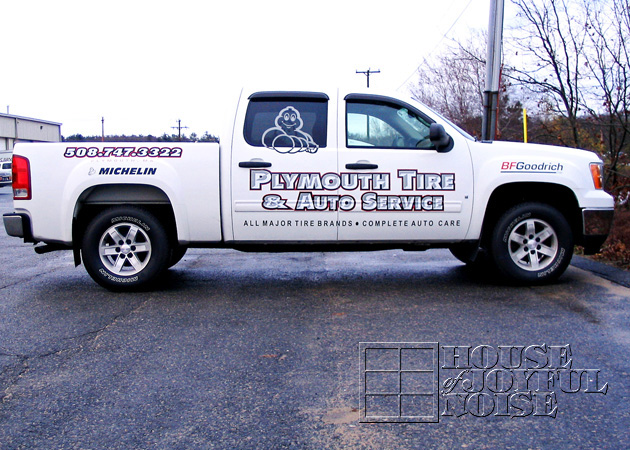
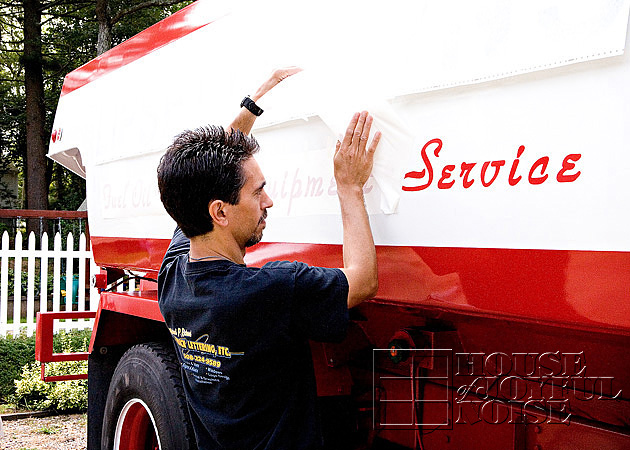
Yup, both sides match. ; )

michael-p-richard-truck-lettering-etc-2

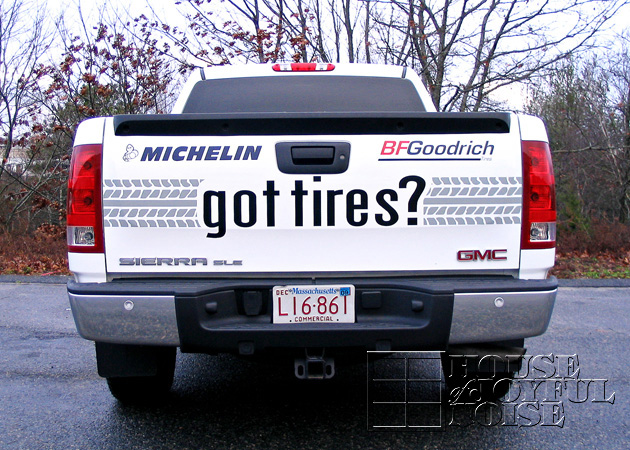
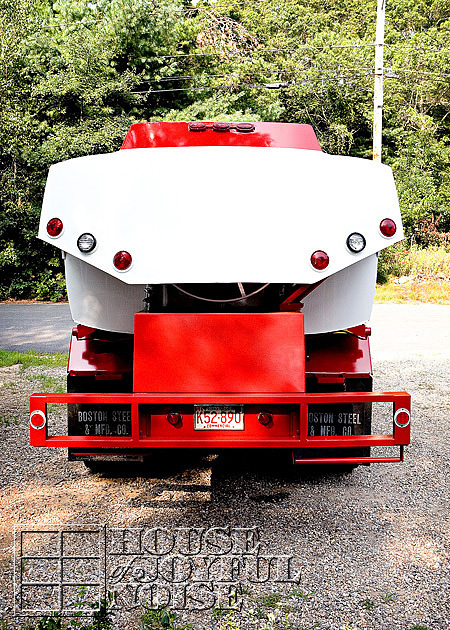
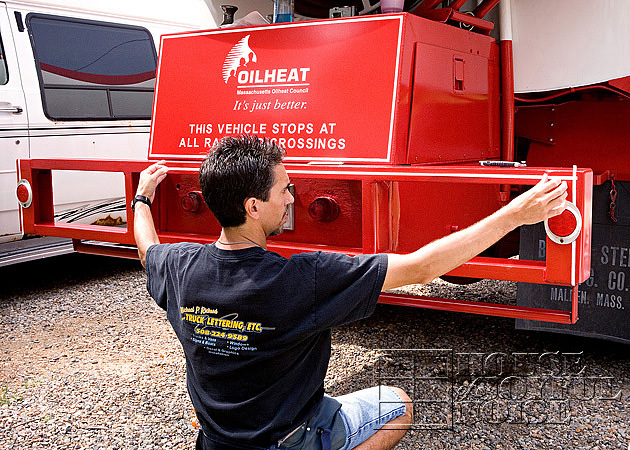
I think the back speaks for itself.  Thanks for taking a look.

  • Michael

Save

Save

Save

Filed Under: Photography & Lettering, truck lettering, vehicle graphics Tagged With: Michael-P-Richard-Truck-Lettering-Etc, Plymouth-Tire-and-Auto-Service-Plymouth-MA, truck-graphics, truck-lettering, truck-lettering-Plymouth-MA

Our Church Sign Restoration, With a Surprise Underneath

October 27, 2009 By Michael 7 Comments

img_3310-300x214

Hey Friends! This is Michael here. Recently my own parish, St. Bonaventure in Plymouth, MA, commissioned me to restore our Church sign out front.  The original had been done so many years ago, and it was looking worn and weathered.  It definitely needed to be refinished.

The original sign’s background was painted with a heavy coat of burgandy. The Church asked for it to be all stripped, sanded and repainted, with the trim as white, the gold reguilded, and the background the blue as you see above.  This blue matches the doors of our church, which is symbolic.

So anyway…..I got it home and stripped all of the paint off.  What I found underneath that old paint was the most beautiful mahogany wood!  As I was sanding, I was thinking what a shame it would be to paint over that gorgeous wood.  I decided to take a photo of the wood, and bring it to my pastor, to try and convince him to just varnish over the wood, with the carved letters re-guilded and the white trim.  He agreed, saying he loves the look of natural wood anyway, and that he trusted my judgement. I think his decision about the sign was wise, as well as trusting my judgement. ; )

st-bonaventure-church-plymouth-ma_2

st-bonaventure-church-plymouth-ma

I really wish I had BEFORE and AFTER photos for you all. You would appreciate the beauty that was revealed, all the more. But with the original intention of just refinishing the sign in the exact same style, repainting it burgundy, there didn’t seem to be a purpose to taking a photo before I started stripping it.

Anyway, it’s nice to have your work respected enough to be asked to provide such an important feature of the Church.  It would have been a shame to paint over such beautiful wood, again. I enjoying restoring it to it’s intended beauty, and it feels good to see it there in front of the Church, as I drive by every day, and pull in every Sunday.  I’m really happy with how it came out, and we hope you enjoyed seeing it, too. Thanks for letting us share it with you.

Save

Save

Filed Under: Faith/ Catholic, Photography & Lettering, Signs Tagged With: Catholic-blogs, Catholic-Church-Manomet-MA, Catholic-Church-Plymouth-MA, Catholic-families, church-signs, sign-restoration, St-Bonaventure-Parish-Plymouth-MA

Lipsett Oil Truck Lettering

August 29, 2009 By Michael 5 Comments

Hi Folks. This is Michael. : )  As I am sure we’ve mentioned before, my father was in this trade of signs and truck lettering for 52 years or so.  Lipsett & Sons was a client of his for many, many years, until my father retired.  I’ve had a business of my own (Michael P. Richard – Truck Lettering, Etc.), so when my father retired, a lot of his clients naturally came to me. Lipsett & Sons has been one of those accounts.   Just since then, in late 2006, I have lettered for Lipsett, 3 service vans, 2 oil trucks, and 1 enclosed trailer.

The lettering for this truck I had already cut out.  For existing accounts, I have the layouts I have created at a prior time, in my computer, for the various size and style trucks.  But for new vehicles, I need to take measurements, and create a properly sized layout. Sometimes designing a logo in the process, for a new business.  Once that layout is approved by the owners, we arrange for the lettering to be done on the vehicles.

So here’s this one freshly painted and waiting, in my own driveway. I work from home whenever possible.

truck-lettering-plymouth-ma

truck-lettering-plymouth-ma-1

truck-lettering-plymouth-ma-2

To be brief, once the lettering is cut, weeded and taped, I hinge it with tape in place on the vehicle, measuring carefully to be sure everything is going to end up where it should. (I will explain the cutting, wedding and taping more in depth another time.)

truck-lettering-plymouth-ma-3

Then I cut the large pieces, just to make it easier to work with.

truck-lettering-plymouth-ma-4

I lift it up, peel off the backing, bring it down straight and tight, and squeegie it down.

truck-lettering-plymouth-ma-5

truck-lettering-plymouth-ma-6

Then I remove the mask, and move on to the next.

truck-lettering-plymouth-ma-7

truck-lettering-plymouth-ma-8

On this particular job, they also want box striping all over.

truck-lettering-plymouth-ma-9

The kids love to watch me work, and sometimes help!  I still had the side you can’t see, to do.

truck-lettering-plymouth-ma-10

truck-lettering-plymouth-ma-11

The striping really adds a little something.  It looks sharp, as simple of a layout as it is.

truck-lettering-plymouth-ma-12

See 2 of my kids in there?  When I have to turn the truck around, to work on the shaded side, they love to take turns having a ride in the big trucks.  Here above, the job was complete, and I was just turning the truck around, so that when the owners came to pick it up, they could just drive it out straight.  But also, there were 2 kids who hadn’t had a ride yet.

truck-lettering-plymouth-ma-13

Calling this one done!
If you’re a local business and need any kind of vehicle lettering, you can contact me, Michael, at the following email address:
Alphbtman@aol.com

Thanks, Lipsett & Sons, for your continued business!

Save

Save

Save

Filed Under: Photography & Lettering, truck lettering, vehicle graphics Tagged With: Lipsett-Oil-and-Sons, Michael-P-Richard-Truck-Lettering-Etc, truck-lettering, truck-lettering-Plymouth-MA, vehicle-lettering

How to Build a Wood Stove Bench – Part II

May 6, 2009 By Michael 2 Comments

Here we are with more to teach you, about how to build a wood stove bench. So sorry about the big delay between the parts of this project. No doubt, many of you will need to refresh your memories about where we left off.  So here is Part I.   We’ll wait until you come back.

So below I need to cut out a rectangular notch for the cross beam to fit through. I have it sketched out in step one, which also shows 2 holes I drilled, as starters, for me to cut the notch with a saber saw.  I cut the rectangular hole to the size of 3×1.5 inches.   This is 4 inches down from the top, centered.

How to Build a Wood Bench

With that done, I now had to cut the same notch out of the legs.  On this piece, it’s also 4 inches down, 3/4 inches in from the inside, and 3inches long.

How to Build a Wood Bench

This is done 4 times, on each of the 4 pieces……… How to Build a Wood Bench
–
Lay support pieces on top of leg halves, on what is to be the inside.  Make the top flush and centered on pieces of legs, which are only pushed together here.  Using 2 -1/2 ” screws, screw them together on both inside and outside.

Below as seen:  Left: inside of one leg, Right: outside of one leg.  Put 4-6 screws on the outside (less than the inside) for a better appearance.

How to Build a Wood Bench
–
Below is one end of the center cross beam, to show the measurements that a notch needs to be cut out of.

How to Build a Wood Bench
–
Cut this out of the bottom edge of both ends of center beam.

How to Build a Wood Bench
–
Here below is a 1″  dowel, in which I ripped to 1/2″ wide, and then after, chopped to 3″ long. (2 times, for 2 pieces.)  I’ll show you what these are for in a minute…

How to Build a Wood Bench

How to Build a Wood Bench
–
At each end of the cross beam, in 1-1/16″ centered (in the height), I drilled a 1″ diameter hole.

How to Build a Wood Bench
–
Now it is time to insert the center beam into the notch which is cut into the legs.

How to Build a Wood Bench
–
Insert 3″ dowel.

How to Build a Wood Bench

How to Build a Wood Bench
–
Now you have a free-standing base.

How to Build a Wood Bench
–
Just to sturdy things up, I installed a 2-1/2″ screw diagonally, through the support, into the center beam.

How to Build a Wood Bench
–
Next, I started placing the seat planks into place, making sure that they had the same over-hang on each end and sides.

How to Build a Wood Bench
–
Once both planks were down and in place, I screwed them into place, through the seat into the leg bases with 2-1/2 ” screws.

How to Build a Wood Bench

In Part III, we are going to prime and paint this baby, giving it a nice worn, farmhouse look.

See you then!   Click here to see FINISHED BENCH >>>>  PART III

Save

Save

Save

Save

Save

Save

Save

Save

Filed Under: Home Improvement, Home Projects, The Homestead Tagged With: build-a-bench, build-it-yourself-wood-bench, how-to-build-a-wood-bench, wood stove bench, wood-bench-plans

How to Build a Wood Stove Bench – Part I

March 28, 2009 By Michael 5 Comments

Hi Everybody. I’m Michael, a.k.a. Mr. House Of Joyful Noise.
I’m excited to introduce my first project on the blog!  I’m going to teach you how to build a wood stove bench.

Michael - House of Joyful Noise blog

 I’ll be working this project in parts, and blogging as I go.  I’ll do my best to explain what I’ve done, along with what photos we took, but if you find you still have questions, you can let me know in the comments to this post, and I will try to answer as best I can.  So check the comments for replies if you leave me a question.

The other day, my bride mentioned that she was tired of our little stool in front of the wood stove.  She wants something larger, homier, and I had to agree.

1_l

So I asked her what she would like to have, and she described the type of bench she would like.  At this point, I sketched out something, as I always do when I start a project, just to have an idea of what direction I’m going in.

How to Build a Wood Bench

How to Build a Wood Bench

I came up with a height that would be best to sit and load the stove with wood, poke the fire, or clean the stove out, etc. My bride wanted it wide enough for 2 people to sit together. ♥♥  I also wanted a comfortable width so the bench would be stable on the floor.  I felt like I had a good enough plan on paper to start the project.

How to Build a Wood Bench

I set out to find some scrap stock around the house.  I ended up using two 6 foot pieces of 2″x10″ ‘s, left over from our sun room rafters.

I wanted the bench top 14 inches wide, and 36 inches long.  So I ripped one of the 2×10’s to 7 inches in width.

How to Build a Wood Bench

Once I had that ripped to size, it was time to cut it to 36 inches in length. This left me with 2 finished pieces 7″x36″.

How to Build a Wood Bench

Then it was time to start the legs. I knew I needed 4 pieces 8 inches wide, by 15 inches tall.  (Two pieces 8″x15″ per leg.)  So it was back to the table saw to rip my second 2×10 to 8 inches in width.

How to Build a Wood Bench

With that ripped to 8 inches wide, I then cut 4 pieces 15 inches long.  These would be the legs. I then sketched the pattern onto one of the legs.  I measured from the side in to 2.5 inches, and down from the top 5 inches, and marked it with a pencil.   Then from the bottom of that piece, on the same side, I measured up 5 inches, and marked that. Then I drew the angle connecting those 2 points.

How to Build a Wood Bench

How to Build a Wood Bench

I cut on that pattern, and then repeated this 3 more times with the 3 remaining pieces. This gave me 4 identical pieces to build 2 legs for the bench.

How to Build a Wood Bench

I also wanted an arch cut out of the bottom of the leg.  So I measured 2 inches up the side, and marked it. Then I measured 3 inches along the bottom, and marked it. I took a one gallon paint can, set it on the piece, so that the can touched on both of those marks, and traced the curve. I cut them out with a jigsaw.  (Don’t pay attention to the larger pencil arc. I was just figuring out how high I wanted it.)

How to Build a Wood Bench

Here is a finished half leg.

How to Build a Wood Bench

Putting 2 of these cut pieces together, this gives you an idea of the look of a finished leg.

How to Build a Wood Bench

Now, to secure these 2 pieces together, I cut a support piece for the inside of each leg. They are 9¼ wide by 12 inches high.  To dress these pieces up a little, I cut 2 45 degree angles off the bottom, and did 45 degree bevel all the way around, except for the top.

How to Build a Wood Bench

That piece will sit centered on the width and flush to the top of the legs.

How to Build a Wood Bench

In Part II of this project, we will finish the cutting, and get ready for assembly of this bench.  Later on, in Part III, we will prime, paint and finish the bench to a worn look, and show you how it looks  in front of the wood stove.

Something to think about:  In keeping with the general design of this bench, the measurements could be changed to build a bench for many different uses. For example, you could build a bench for your deck, your garden, a wall bench for in your home, or a bench for your kids to sit on in their playroom.

The projects I intend to blog about are anything I happen to be doing anyway, for our own home or needs. So as they come up in life, I will try to share in this manner here on our blog.  I think you will find that my projects are often rough and simple. Since I am not a carpenter by trade, I have limited tools to work with. But I make do ok.  My hope is that these projects will offer a jumping point for projects you may like to do, or inspire the men in your family in some way.

Please feel free to leave any suggestions or feedback about these project posts for me as well. I am new at blogging and explaining step by step. I just DO IT. So if there is anything I can do to clarify things for you, please let me know and I will do my best.   Meanwhile, I hope you enjoyed Part I of my first blogged project!!
Click Here >>>> for Part II

Save

Save

Save

Save

Save

Save

Save

Save

Save

Save

Filed Under: Crafts & Creations, DIY (Do-It-Yourself) Project, Home Improvement, Home Projects, The Homestead Tagged With: build-a-bench, build-it-yourself-wood-bench, how-to-build-a-wood-bench, wood stove bench, wood-bench-plans

We are wicked happy to have you here! We hope you find much inspiration, help, humor and enjoyment here.


Archives


POPULAR POSTS

* * * * * *

SUBSCRIBE to House of Joyful Noise blog! Every new post, delivered right to your email box!


Privacy Policy

Amazon Affiliates

Never at any additional cost to you, we may earn a small commission for our endorsement, recommendation, testimonial, and/or link to any products from our website. Your purchase through our links helps support our family, while sharing with you the products we authentically use and recommend, for various ideas, and letting you know where you can purchase them. Thank you for your support!

[footer_backtotop]

Copyright © 2025 HouseOfJoyfulNoise.com · Genesis Framework by StudioPress