• HOME
  • {A}’s Chipmunk Training Archives

 Homepage

  • The Homestead
    • Home Projects
    • Home Improvement
    • Home Decor
      • Seasonal Home decor
        • FALL Home Decor
        • WINTER Home Decor
        • SPRING Crafts and Creations
        • SUMMER Crafts and Creations
    • Our Chickens
    • Gardening
    • Organization
    • Re-Purposing
    • Furniture Refinishing
    • Budget
  • Crafts & Creations
    • Seasonal Home decor
      • FALL Crafts and Creations
      • WINTER Crafts and Creations
      • SPRING Crafts and Creations
      • SUMMER Crafts and Creations
    • DIY (Do-It-Yourself) Project
    • Kids Arts and Crafts
    • Homemade/Handmade Gift Ideas
    • Holiday Crafts
    • Fan Pulls
    • Free Printable/Downloadable
    • Sewing Projects
    • Giveaways
    • Business Features
  • Recipes/FoodFun
    • Breakfast
    • Lunch
    • Main Dish
    • Sandwiches
    • Appetizers
    • Slow Cooker
    • On The Grill
    • Side Dishes
      • Soups
      • Salads
    • Baking
      • Breads, Rolls and Muffins
    • Snacks
    • Treats
    • Desserts
    • Drinks
  • Homeschooling
    • Elementary Homeschooling
      • Elementary Homeschooling READING
      • Elementary Homeschooling MATH
      • Elementary Homeschooling LANGUAGE ARTS
      • Elementary Homeschooling SCIENCE
      • Elementary Homeschooling HOME ECONOMICS
      • Kids Arts and Crafts
    • Middle School Homeschooling
      • Middle School Homeschooling SCIENCE
      • Middle School Homeschooling HOME ECONOMICS
    • Language Arts
    • Math
    • History / Social Studies
    • Geography
    • Foreign Language
    • Field Trips
    • Games
    • Nature Study
  • The Big Picture
    • Life In General
    • Celebrations
    • Faith
      • Into the Light; The Series
    • Giveaways
    • Reviews & Sponsors
  • Photography & Lettering
    • Photography
    • truck lettering
    • vehicle graphics
    • Newborns
    • Kids
    • Engagement
    • High School Senior Pictures
    • High School Senior Pictures Sneak Peeks

“E” – 1 Year Old Boy | Snow Session | Photography

May 25, 2011 By Laura 3 Comments

laura-lee-richard-photography-plymouth-ma-child-photographer-9

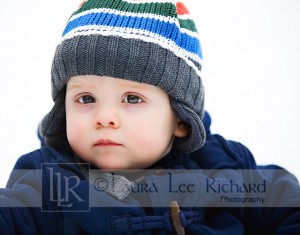
When this past winter had appeared to be over, in terms of any more snow fall, I really regretted not taking more winter-style photos.   I also regretted not having gotten any photos of my friend’s already 1 year old son.   So one morning, when a beautiful flurry started to softly fall, I was on the phone calling my friend in a heartbeat.  I asked her what she thought of doing a mini-session with “E” that morning, and she was all for it.

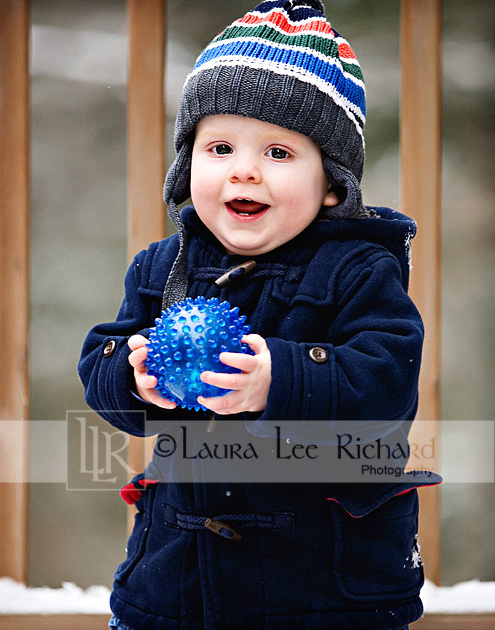
I threw my camera equipment in the vehicle, and headed right over.  There is really not much else to tell about the photo shoot, except that while the flurries were on & off while I was shooting, but “E’s” cuteness was in full gear the whole time.


laura-lee-richard-photography-plymouth-ma-child-photographer-8

laura-lee-richard-photography-plymouth-ma-child-photographer

laura-lee-richard-photography-plymouth-ma-child-photographer-1

laura-lee-richard-photography-plymouth-ma-child-photographer-2

laura-lee-richard-photography-plymouth-ma-child-photographer-3

laura-lee-richard-photography-plymouth-ma-child-photographer-4

laura-lee-richard-photography-plymouth-ma-child-photographer-5

laura-lee-richard-photography-plymouth-ma-child-photographer-6

laura-lee-richard-photography-plymouth-ma-child-photographer-7

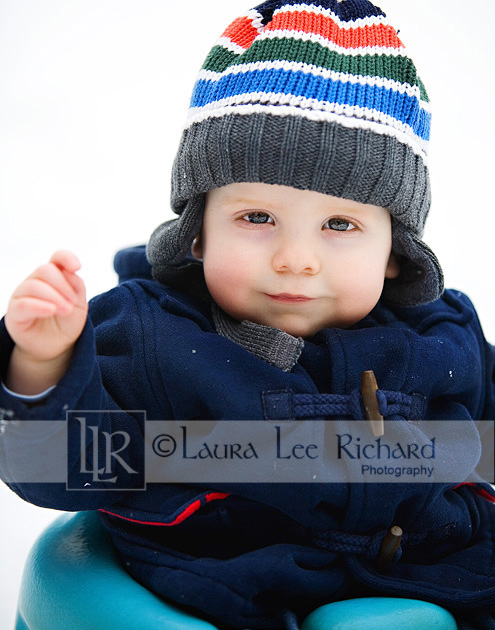
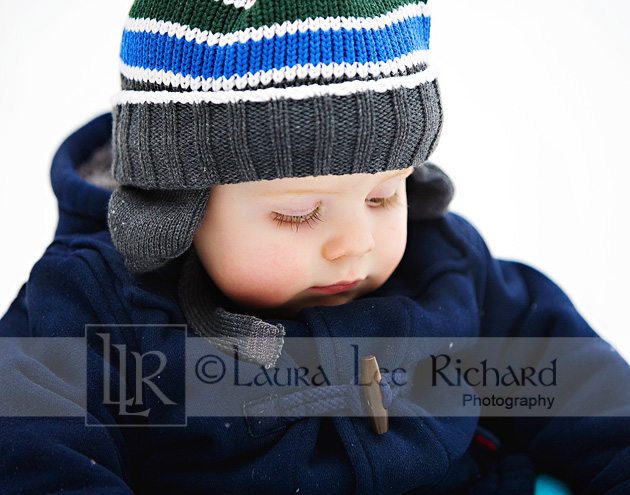
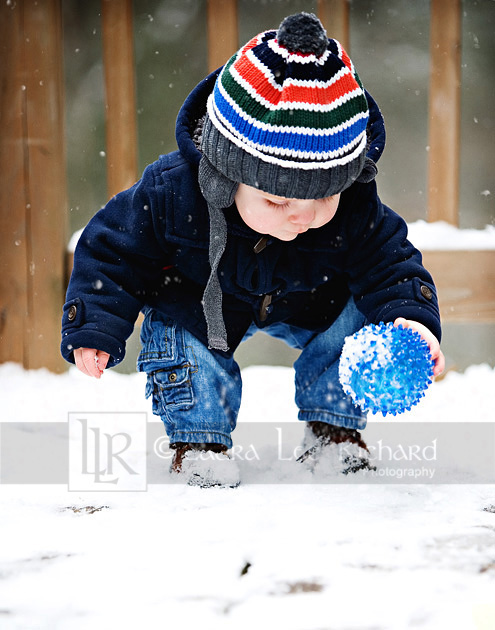
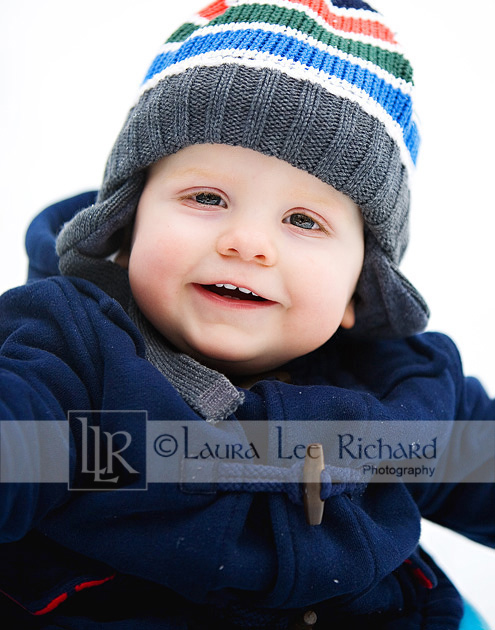
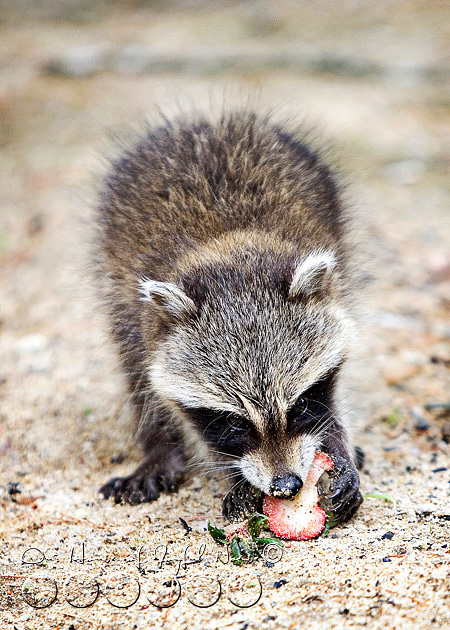
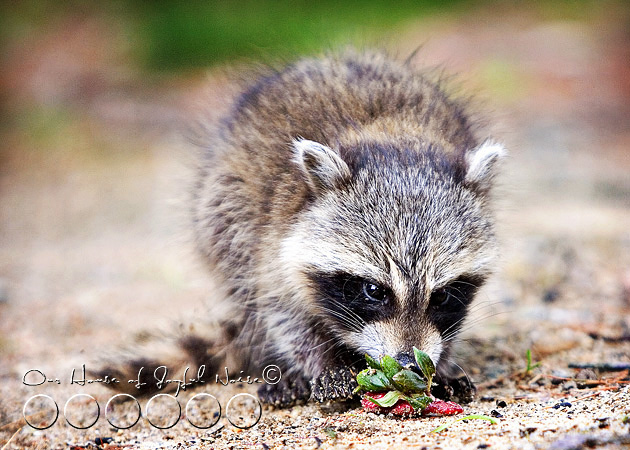
Is he cute or WHAT?  I was really glad I took the time to do this session.  It was his first time really playing in the snow, so it’s a memory, and 1 year old is such a special age.  But I do hope I get to do another photo shoot with him soon, because under that hat is some gorgeous red hair!

Hope you enjoyed seeing this session.  I made up a new watermark too.  Let me know what you think!

***

*(Love this post? How about subscribing to our blog in the sidebar, ‘Liking’ our Page on Facebook, or following me (Laura) on Twitter? Or all 3? 😀 )

Save

Save

Save

Filed Under: Kids, Photography, Photography & Lettering Tagged With: 1-year-portait, childrens-photographer-Plymouth-MA, kids-portaits, kids-portraits, laura-lee-richard-photography-plymouth-ma

Have a Coke, & Some Petunias, & a Smile!

May 24, 2011 By Laura 23 Comments

coke-bottles-crate-repurposing-creative-gardening-7


Gardening season is upon us, and we’ve been doing a few creative home-front (literally, in front of our home) projects I am excited to share with you, one after the other, here on the blog
Our garden beds are all ready for planting next weekend as well, with the soil all screened and fertilized.  (So exciting!) Aside from that, I’ve been getting creative & efficient around the garden beds, and this post is one of the little cute projects I’ve been wanting to share.

The week prior to Mother’s day, {A} and I found ourselves scouting a few antique stores, and I spotted this Coke crate among the goods, in the items on the sidewalk outside of the door of one of the stores.

coke-bottles-crate-repurposing-creative-gardening I was so drawn to it, and I had an immediate re-purposing vision for it, too.  As I walked around the store, I got to ‘thinking too much’.  As cheap as I am sure it was, there was a reason I didn’t want to get it, too.  As I hemmed & hawed about whether to get it or not, {A} wanted to know what was holding me back.  When I told her, she thought it was a ridiculous reason. But you know…I think differently than a lot of people, I think. Everything seems to have some psychological puzzle to it, to complicate things for me. It keeps my brain busy, I guess.  But the bottom line is, ultimately, we got in the car and drove home.  Yes, leaving the awesome, vintage, well-worn, old & rustic, Coke bottle crate behind.

It soooo bugged me all week.  I had wished I got it, and I said so out loud a 1/2 dozen times.  Michael asked me why I didn’t get it then, if I wanted it so bad, and {A} was happy to fill him in, with an amused chuckle at the end. (Imagine my appreciation of that. <eye roll>,)

I might tell you at some point in this post, my reasoning for not getting the crate in the first place.  If I am feeling up to being laughed at some more.  But for now, I’ll tell you now that on Mother’s Day, we went back and got that crate!  I was prayin’ it would still be there, and thankfully, it was.  $10.   That’s the price the guy gave me, and it was the most I was willing to pay.

coke-bottles-crate-repurposing-creative-gardening-1 I loved it more than I even remembered.  It had a little stink to it, and some cobwebs, that I wasn’t aware of before, because I hadn’t handled it or got that close.  But still…..it was sweet.  I especially love the printing on the wood on the inside-back.  I don’t know why. I just think the whole dang thing is cool, and I was wicked excited about my plans for it.

coke-bottles-crate-repurposing-creative-gardening-2

1970.  Get-Out!

O.K….it’s not really that old. ; )  But it’s still cool, and it’s got a really old feel.

So I gathered the other things I needed for my project, and put my little vision together…..

.

.

.

.

coke-bottles-crate-repurposing-creative-gardening-3 ….And it looked even better in real life!

Initially, I was just planning on using a mix of white & red Petunias.  But my little girl really loved these candy cane striped ones, and I love to make my kiddos happy. I threw in a few Snap Dragons for good measure.

coke-bottles-crate-repurposing-creative-gardening-5 I just love how it looks, sitting on the edge of any of the garden beds.  Or anywhere we put it out there.   And my hesitancy for getting it, has bothered me less and less, now that it makes me so happy, every time I catch sight of it.   So I guess I’ll tell you what my issue was.

See, the thing is, I just don’t condone drinking soda. (I’ll give you a moment, to say….”Oh brother!”, too.)


I mean….I am not wicked ANTI-soda, but my kids don’t drink it, and I never have it in the house.  They have all tried it, and hate it.  They don’t like the carbonation.  Which is great, because I wouldn’t let the little ones have it on any regular basis, anyway. My husband used to drink it sometimes, but I think he has come around to my way of thinking about it.  It’s just so BAD for you.  Your body, your teeth, yourSELF.

Ok, maybe I am wicked anti-soda.

Listen, I know you must think it’s ridiculous, too. But like lots of things one has strong feelings about, this goes back to my childhood.  Without naming names, when I was a kid, I knew some other kids who were having some serious stomach problems.  As it turns out, all of the soda they drank was eating their stomach. (And their teeth too, as far as I could see.)  So you see….that really disturbed me as a little kid.  I know. You need to drink a lot of it, and regularly, to have such issues.  But the point is……I’d rather encourage drinking lots of water.  And milk for the kids. And green tea, I heard, has all kinds of benefits. Liquids that are good for you! And I really did not want to send the false message to the world, in my own front yard, that I condone Coke-drinking as a life-style.  Because clearly, I do not.

But, you know….now that I see how cute my soda bottles crate is, with that really great Coke logo…..(I have to admit, and so do you, that it’s a great logo!)…..I am letting the possibility of this misconception, go.

I’m almost over it, already.

No really!

coke-bottles-crate-repurposing-creative-gardening-6

There’s a little story behind the bottles that ended up in this cute-gardening-repurposing-project, too.   While out at other antique stores on Mother’s Day, I found the perfect Coke bottles, to use for this. They were old and circa-I-forget.  But suffice it to say, they were original Coke bottles, with the embossed Coke logo in the glass.  All transparent, greenish glass.  Original Coke bottles, like I said.  $5 each, and I only wanted 3.  But Michael convinced me that he could get the exact same thing at Stop & Shop.  “Really Michael?” I asked. “Are you sure they are exactly like this.”.  “Yes”, he said. “I can’t see buying antique ones just to sit in our front yard, at $5 each, when I can get them for a buck-something.  Who is going to know the difference?”  “ME!” I said.  “I don’t do any of these things for anyone else!  I do them because they make ME happy. It’s part of the way I make my home for my family!”

(Men so don’t get these things.  Right?  Is it just my man?)

coke-bottles-crate-repurposing-creative-gardening-8 So I left those antique Coke bottles there in the store, over my husband’s antics about it. Because he was going to get me some just like them.  And only I would know, they were not really antiques.  Uh-huh.

(Now I had 2 things I would have to keep pushing out of my mind. Right?  That’s what I was thinking.)

These bottles you see in the photos, are what he brought home to me, from Stop & Shop.  I was like, “Michael!  These are not the same!!”  “Sure they are, why not?” he asked.  “BeCAUSE….”, I had to explain, “These have this red & white screen printed logo thing on them.  The others did not have that! The logo was embossed on the glass. These aren’t the same.  It’s not the real thing, Michael!!“

And then I busted out laughing hysterically, realizing the pun I just made by accident.  Which of course, lightened my heart, and I forgave him.

But I’m back to mad again, I think. I mean, I kind of would have liked the real vintage Coke bottles.  You know? On the other hand, the red & white logos do look nice among the flowers, with the red & white crate and all.

coke-bottles-crate-repurposing-creative-gardening-4 So that’s my great long story, of this little garden project.  I hope you love it, and it inspires you to get creative with your own flowers and plantings in your garden areas.  But please do not let it encourage you to drink Coke! Just pour out the contents down the drain, like I did.  Promise?  Soda in general, is just not good for you.  It’s high in sugar. It’s bad for your teeth.  I heard it eats stomachs! So disturbing.

This has been a public service announcement, and a creative gardening inspiration project, all in one!  What a bargain, huh?  Aren’t you glad you stopped by?

Here, have a water, and a smile.

: )


*(Love this post? How about subscribing to our blog in the sidebar, ‘Liking’ our Page on Facebook, or following me (Laura) on Twitter? Or all 3? 😀 )


Save

Save

Save

Filed Under: Gardening, Re-Purposing, The Homestead Tagged With: Coke-bottle-crate-ideas, creative-garden-planters, creative-gardening-ideas, Gardening, repurposing-soda-bottle-crates, using-vintage-pieces-in-your-gardens

A Baby Raccoon Study | Homeschooling

May 23, 2011 By Laura 8 Comments

baby-raccoon-study-homeschooling-9


Some of our most exciting homeschooling lessons, often times turn out to be ones that were not part of my day’s lesson plan at all!  Like the countless opportunities of teachable moments  that pop up throughout every single day for us as parents/teachers, to utilize in educating and guiding our children down the right paths, we’ve had many days, where a lesson to study has sauntered right into our yard!  And it can be a darn cute lesson!!

baby-raccoon-study-homeschooling Such was the case the other day, when we spotted this baby raccoon, right up on the hill, outside of our school room windows! (For the sake of reference in this post, we’ll assume the baby was a girl.)  She was enjoying the banana peels & strawberry tops we had thrown out there.


baby-raccoon-study-homeschooling-1 She was poking around and frolicking about up there on our hill, all afternoon, and gave us plenty of time to study here, research facts about baby & adult raccoon, and of course as always, abandon all self-control, and take more photos than necessary. : )


baby-raccoon-study-homeschooling-2 The kids get so very excited, when we spot wildlife, whether it be here on the homestead, or out in a (small) worldly travels.   We all learn so much, gathering both fun, useful, and definitely good to know kind of facts!  So as we share with you all of the photos of this adorable masked critter, we’ll also share with you a lot of what we have learned, as our unexpected study unfolded.

Maybe you’ll learn a new thing or two about raccoons, that you didn’t know before! (We sure did. That would be more than 2 things though.)  We’ll see.

baby-raccoon-study-homeschooling-3

Well, every life starts with mating season. Right?

That would be winter, for raccoons.  January through the end of March.  Although we had some raccoons up in our tree one night around 9 pm, making ALL kinds of racket.  We could have sworn they were ‘busy’, if you know what I mean.  (HOLY LOUD!)  In fact, until we got further into researching, we joked that this baby was probably from once upon a night! 😉

baby-raccoon-study-homeschooling-4 Baby raccoons are called ‘kits’.  
They are born after 63 days of gestation, in the spring, and are born in litters of 4-5. They generally stay with their mother until the Fall, unless their has been some interference of the nest, or tragedies brought on by man or nature.


baby-raccoon-study-homeschooling-5 By studying the appearance and motor skills of raccoons at various young ages, we determined this kit to be somewhere between 8-10 weeks.   The mother was no where in sight throughout the day.  While I easily approached the baby to photograph her, I was keenly aware and cautious, of a mother raccoon coming out of nowhere to protect her young.  But I was brave (any risk is often small for a good photo!), and that never happened.


baby-raccoon-study-homeschooling-6

Raccoons grow to be about 12-35 pounds, and 12-28 inches long.
They are omnivores, which means they will eat most anything.  Both meat and vegetation.

It is not true, that raccoons like to wash their food before they eat it.


baby-raccoon-study-homeschooling-7 As we can surmise, by looking at these photos.


baby-raccoon-study-homeschooling-8
I know it is difficult to tell the scale of our little visiting kit here, but she was small enough that she could have sat in Michael’s big hand.

Another sign of how young she was, was her frequent fatigue.  She needed to rest a lot between activity.

baby-raccoon-study-homeschooling-10 She had just scrounged around our hill, and then sat upon our retaining wall here.  I could see her growing sleepy, as I sat nearby taking photos of her.  Her instinct was to keep an eye on me.   But her instinct was not stronger than her will to stay awake.   In a matter of seconds, she put her head down like this, and then…..

baby-raccoon-study-homeschooling-11 ….tucked her head, and curled right into a ball, for a snooze!
The desire to nap, was much stronger than her fear of me, or will to protect herself!


baby-raccoon-study-homeschooling-12

How cute is she?  A little fuzzy ball.

After her kit-nap, she had a little more activity, and then curled up into a ball once again, in a patch of sandy dirt up on the hill.   By then, we were observing her through our school windows, when it began to rain on her!!  We felt so bad for her, but she kept sleeping on.  So Michael grabbed a box from our basement, cut out a door, tip-toed out there, and put it over her.


baby-raccoon-study-homeschooling-13 We carried on with our day, but soon noticed 2 things:  She had pulled down the flap of the box, to sleep on instead (smart little kit!), and then she was coming out for a little more exploring.

baby-raccoon-study-homeschooling-14 As much as we were tempted, and the kids were pleading their cases, it is not wise to keep raccoons as pets, for a variety of reasons.  They can be very dangerous, and keeping them in captivity would ultimately end up with a sad ending.

Adult raccoons have few natural enemies.  I think we as humans, dislike them more than other creatures, for their mere clever interference with our camping activities, and trash disposal efforts.  They are indeed curious, and clever.  Their front paws and back legs all have 5 toes each, and they are as skilled as human fingers. Raccoon have been witnessed to unlacing shoes, opening purses, and undoing zippers!  They are both great climbers, and swimmers. They are members of the ‘carnivora’, such as dogs & cats, but are also related to the panda bear.


baby-raccoon-study-homeschooling-16 One of the most distinguishing features of the raccoon, is it’s black mask.
The purpose of their mask, is to reduce glare, and enhance their night vision.  As many of us have grown to understand through our own observations and experiences with raccoons, they mostly sleep during the day, and are most active, searching for the food, from dusk through the night.


baby-raccoon-study-homeschooling-15 Our kit, who we had fallen a bit attached to, despite our best resistance (ok….the kids did not try real hard…), did not end up staying with us for life, as we had entertained notions of in our minds.  She seemed to like her box, but it didn’t turn out to be ‘all that’ after all.   She was in there for a good part of the evening and early dark, but later that night, she went missing. (As she had the freedom to do!).  My own mother instincts kicked in.  I had fleeting thoughts of going to search for her with a flashlight, and bring her home to safety. “She is still so small and helpless, ” I worried, “and prey for larger animals right now.”  But I knew…such is nature. And anyway…I was tired and wanted to go to sleep!

Michael was the first one up the next morning, at 6:30 a.m.  Kit was back by then, and he had the pleasure of watching her climb the tree stump, and roll around in the morning-dew grass out there, as cute as she is, while he ate his breakfast.  But awhile later when the rest of us woke, she was gone again.


baby-raccoon-study-homeschooling-17 Our best guesstimate, as to why she was around with no mother in the first place, is that her mother was in fact close-by, sleeping in a tree, and kit wandered off to play.  And nap, as needed.  We have faith that she was not abandoned, as she appeared well cared for and fed.  She was just practicing her independence, but will not truly be ready to be on her own, until fall.

We amuse ourselves with how hopeful we are though.  The box is still out there.  None of us have grabbed it and broken it down.  I suppose we all carry the hope, that she may sleep away at nap time once again, and come to play and amuse us.   If only for a lovely afternoon, once again.


baby-raccoon-study-homeschooling-18

THE END.

You had to know THAT was coming.  ; )

So did you learn anything new about raccoons yourself?  Do you have anything to teach us about them, that we may have missed?  What opinion have you formed of raccoons, based on your own experiences?  Are they a nuisance? Amusing? Clever? Cute? Please share your thoughts, experiences or facts, with us in the comments.

*(Love this post? How about subscribing to our blog in the sidebar, ‘Liking’ our Page on Facebook, or following me (Laura) on Twitter? Or all 3? 😀     )

Save

Save

Save

Save

Save

Save

Save

Filed Under: Homeschooling, Nature Study, Photography, Photography & Lettering, Science Tagged With: backyard-photography, homeschooling, homeschooling-science, nature-studies, raccoon facts, raccoon-study, raccoons, wildlife-photos

Skeleton Key Accessories

May 22, 2011 By Laura 5 Comments

skeleton-key-accessories

I’ve always thought skeleton keys were pretty cool, even back when I was a kid.  While hunting at a frequented antique/junk stop of mine for old door knobs (for my recent Door Knob Project) I found some door knobs were part of a whole working set, complete with the opposite knob, door plate, locking mechanism, and of course…key holes.  That got me wondering if there might be some old skeleton keys around the place too. So I asked the old man who owns the place.

skeleton-key-accessories-1

By golly he did.  He pulled out this box from under his desk, and dropped it in front of me with a clang.   At first sight, it was looking like I wasn’t going to find much.  But a little digging proved me wrong. I realized that, like vintage door knobs, skeleton keys come in many sizes, shapes and unique styles, as well. I did get a few keys on this day, to start, and I have a few different ideas of what creative things I can do with them.

One idea I put into action so far, was to make a simple necklace or 2 with them.  This particular project here was for {O}, our ‘Resident Accessory Girl”.  So these shown here in this post are a bit little-girlish in fashion, but I’ll give you some great ideas for grown women necklaces in a minute.

I gave {O} one of the keys and a steel wool pad, and let her try to clean it up this key, out on the deck.  She’ll take a task on, anytime.  She’s the kind that wants to be busy, at all times.

skeleton-key-accessories-2
It started out looking like this. We didn’t find it necessary to get rid of all of the rust, as that’s what gives it an aged look, and a bit of charm.  But certainly we wanted to smooth it down enough, to be sure it wouldn’t be leaving rust residue on any clothing. Also, that nasty gauze strip needed to be removed.  Yuck! That thing had me wondering all kinds of hee-bee-gee-bee thoughts.  Nothing fashionable about that scrap!

skeleton-key-accessories-3
Once the key was clean, we looped it onto some very simple satin & sheer ribbon we had on hand, in bright fuchsia pink
!

skeleton-key-accessories-4

{O} did a nice job cleaning the key up, and we thought it looked pretty cute!! I let her know that, when she wore this piece or others like it, out & about, that she can expect the question, “What’s the key to?”, and that it would be a good idea for her to have some answers ready. The expression on her face flashed from realizing I was probably right, to thinking-mode, in quick succession.  She can be so funny sometimes. So far, here’s some answers she came up with:

“Maybe to my heart!”

“To allll of my secrets.”

“That’s for me to know, and for you, to never know!” 😀


skeleton-key-accessories-11 I gave her some different colored ribbons, cut to size and knotted, so that she can change out the ribbon on the key anytime, to co-ordinate with other outfits.

Then I showed her again, how simple it is to tie on the key, and I’ll show you right now too.

skeleton-key-accessories-7  With the lose ends knotted, take the opposite end doubled, and put the loop through the key hole.


skeleton-key-accessories-8  Then take the knotted end, and pull it through the inside of the loop that you just fed through the key.


skeleton-key-accessories-9  Pull slowly….

skeleton-key-accessories-12
….to make sure that it tightens nice & neatly at the top of the key.


skeleton-key-accessories-10 Voila!!  Slip the necklace over your head!

Here’s another technique, for a different look:

Feed the doubled ribbon through the top of the key, using the opposite end with the knot this time, and then put the opposite end’s plain loop through.  Then slowly pull to tighten so that the  end’s knot and tails tighten at the key top.

skeleton-key-accessories-6
You then can also slide on one or more pretty beads, over the doubled ribbon, right down to the knot.  To do this, you do need to use beads with a large enough hole.  I kind of stuffed this one through!

For some more grown up looks, consider using multiple keys, and other types of ribbon in more earth tones or royal colors, or try leather or suede string.  You can also add beads in a mix or match variety of beads made of ceramic, glass, carved wood, etc.  If you are a more experienced jewelry maker, you could work with chains, links and clasps, along with other decorative elements, to really make a vintage-style necklace.

Skeleton keys can actually be incorporated into all kinds of fashion accessories.  Since they do come in different sizes, think in terms of designing as bracelets, belts, zipper pulls, or hair accessories.

I know we plan to make more unique projects using skeleton keys, and I am sure to be sharing them right here, with you!

skeleton-key-accessories-5

We hope you enjoyed this simple little creative idea, for your wardrobe accessory collection.

If you have an other answers for {O} about what the key might be to, or, if you have re-purpose ideas for skeleton keys yourself, please share them with us in the comment section.  We hope to hear your great ideas!


Save

Save

Filed Under: Crafts & Creations, DIY (Do-It-Yourself) Project, Kids Arts and Crafts Tagged With: key-necklaces, repurposing-old-skeleton-keys, skeleton keys, skeleton-key-accessories

Josh’s Double-Chocolate Biscottis Recipe

May 15, 2011 By Laura 1 Comment

A friend of ours baked our family thesedouble-chocolate biscottis, and we enjoyed them so much, we asked him for the recipe. (So we could have some more!).  He very kindly sent the recipe to us, and he also suggested it as a blog post.  We thought it was a great idea!  It’s just not nice not to share, Italian cookies this good

bis·cot·ti

Definition of BISCOTTI :  small rectangular twice-baked cookies, typically containing *nuts, made originally in Italy.

*We omitted nuts, as one in our family has a serious allergy to nuts.


Josh’s Double Chocolate Biscotti Recipe
Recipe


Participating Ingredients

  • 1 cup of butter, softened
  • 1 1/3 cups of sugar
  • ½ of a cup of unsweetened cocoa powder
  • 4 teaspoons of baking powder
  • 4 eggs
  • 3 ½ cups all-purpose flour
  • ½ cup of white chocolate pieces
  • ¼ cup milk, semisweet, or dark chocolate pieces

Preheat oven to 400 degrees. Lightly grease 2 or more cookie sheets. Beat the softened butter with an electric mixer on medium/high speed for 45 seconds to a minute. Add sugar, cocoa powder, and baking powder. Beat until combined. Beat in the eggs until combined. Beat in flour, “If you can’t beat in all the flour, just stir it in.” Stir in the chocolate pieces.

Divide the dough in fourths: shape into four loaves and put them on the cookie sheets, adjusting the thickness and length of them to fit in the cookie sheet but not bake into each other.

Bake for 23 to 28 minutes or until wood toothpicks inserted near the centers comes out clean. Cool the loaves on cutting boards for 1 to 4 hours. (They slice easier if you let them cool longer and become more firm.)

Preheat oven to 350 degrees. Use a serrated bread knife to cut each loaf into slices, you may cut them as thick or thin as you like. Bake them for 12 to 15 minutes, turn them over on their side, and bake them for another 12 to 15 minutes.

Cool, and enjoy!

Origin of BISCOTTO

Italian, biscuit, cookie, from (pane) biscotto, literally, bread baked twice

First Known Use: 1946


Josh's Double Chocolate Biscotti Recipe
 
Print
Prep time
30 mins
Cook time
35 mins
Total time
1 hour 5 mins
 
A delightful double-chocolate biscotti cookie recipe, with a dash of facts about biscotti cookies, to further enjoy.
: House of Joyful Noise blog
: Baking
Cuisine: Italian
Serves: ~48 cookies
Ingredients
  • 1 cup of butter, softened
  • 1⅓ cups of sugar
  • ½ of a cup of unsweetened cocoa powder
  • 4 teaspoons of baking powder
  • 4 eggs
  • 3 ½ cups all-purpose flour
  • ½ cup of white chocolate pieces
  • ¼ cup milk, semisweet, or dark chocolate pieces
Instructions
  1. Preheat oven to 400 degrees. Lightly grease 2 or more cookie sheets. Beat the softened butter with an electric mixer on medium/high speed for 45 seconds to a minute. Add sugar, cocoa powder, and baking powder. Beat until combined. Beat in the eggs until combined. Beat in flour, “If you can’t beat in all the flour, just stir it in.” Stir in the chocolate pieces.
  2. Divide the dough in fourths: shape into four loaves and put them on the cookie sheets, adjusting the thickness and length of them to fit in the cookie sheet but not bake into each other.
  3. Bake for 25 to 28 minutes or until wood toothpicks inserted near the centers comes out clean. Cool the loaves on cutting boards for 1 to 4 hours. (They slice easier if you let them cool longer and become more firm.)
  4. Preheat oven to 350 degrees. Use a serrated bread knife to cut each loaf into slices, you may cut them as thick or thin as you like. Bake them for 12 to 15 minutes, turn them over on their side, and bake them for another 12 to 15 minutes.
  5. Cool, and enjoy!
3.4.3177

Be sure to grab the printable recipe, before you go! Hope you enjoy, too!


Save

Filed Under: Baking, Desserts, Recipes, Snacks, Treats Tagged With: biscotti-recipe, chocolate-biscotti-recipe, chocolate-cookies-recipes, double-chocolate-biscotti, Italian-cookies-recipe, recipes

  • « Previous Page
  • 1
  • …
  • 37
  • 38
  • 39
  • 40
  • 41
  • …
  • 101
  • Next Page »

We are wicked happy to have you here! We hope you find much inspiration, help, humor and enjoyment here.


Archives


POPULAR POSTS

* * * * * *

SUBSCRIBE to House of Joyful Noise blog! Every new post, delivered right to your email box!


Privacy Policy

Amazon Affiliates

Never at any additional cost to you, we may earn a small commission for our endorsement, recommendation, testimonial, and/or link to any products from our website. Your purchase through our links helps support our family, while sharing with you the products we authentically use and recommend, for various ideas, and letting you know where you can purchase them. Thank you for your support!

[footer_backtotop]

Copyright © 2025 HouseOfJoyfulNoise.com · Genesis Framework by StudioPress