• HOME
  • {A}’s Chipmunk Training Archives

 Homepage

  • The Homestead
    • Home Projects
    • Home Improvement
    • Home Decor
      • Seasonal Home decor
        • FALL Home Decor
        • WINTER Home Decor
        • SPRING Crafts and Creations
        • SUMMER Crafts and Creations
    • Our Chickens
    • Gardening
    • Organization
    • Re-Purposing
    • Furniture Refinishing
    • Budget
  • Crafts & Creations
    • Seasonal Home decor
      • FALL Crafts and Creations
      • WINTER Crafts and Creations
      • SPRING Crafts and Creations
      • SUMMER Crafts and Creations
    • DIY (Do-It-Yourself) Project
    • Kids Arts and Crafts
    • Homemade/Handmade Gift Ideas
    • Holiday Crafts
    • Fan Pulls
    • Free Printable/Downloadable
    • Sewing Projects
    • Giveaways
    • Business Features
  • Recipes/FoodFun
    • Breakfast
    • Lunch
    • Main Dish
    • Sandwiches
    • Appetizers
    • Slow Cooker
    • On The Grill
    • Side Dishes
      • Soups
      • Salads
    • Baking
      • Breads, Rolls and Muffins
    • Snacks
    • Treats
    • Desserts
    • Drinks
  • Homeschooling
    • Elementary Homeschooling
      • Elementary Homeschooling READING
      • Elementary Homeschooling MATH
      • Elementary Homeschooling LANGUAGE ARTS
      • Elementary Homeschooling SCIENCE
      • Elementary Homeschooling HOME ECONOMICS
      • Kids Arts and Crafts
    • Middle School Homeschooling
      • Middle School Homeschooling SCIENCE
      • Middle School Homeschooling HOME ECONOMICS
    • Language Arts
    • Math
    • History / Social Studies
    • Geography
    • Foreign Language
    • Field Trips
    • Games
    • Nature Study
  • The Big Picture
    • Life In General
    • Celebrations
    • Faith
      • Into the Light; The Series
    • Giveaways
    • Reviews & Sponsors
  • Photography & Lettering
    • Photography
    • truck lettering
    • vehicle graphics
    • Newborns
    • Kids
    • Engagement
    • High School Senior Pictures
    • High School Senior Pictures Sneak Peeks

Camp Site Eclair | Getting Creative with Fondant

June 12, 2011 By Laura 22 Comments

fondant-art-fathers-day-dessert-14

I was brainstorming about a good dessert to have for Father’s Day coming up,

when I came up with this idea:  A Camp Site Eclair Dessert.
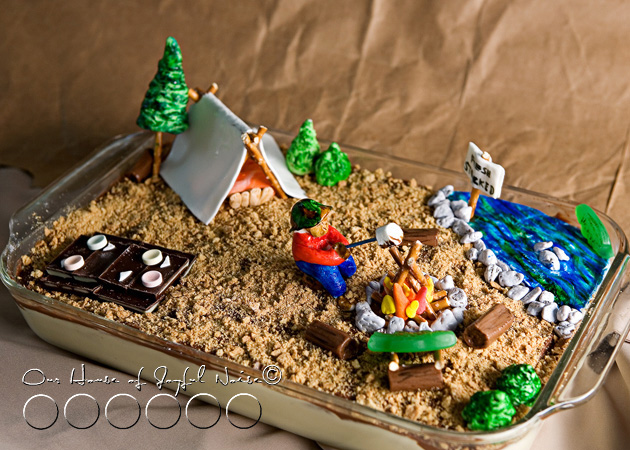
fondant-art-fathers-day-dessert I know the Daddy in our family, loves camping, fishing, and marshmallows! So this whole dessert was going to make him very happy, because there is a whole lot of marshmallow fondant involved! And as a bonus, there are other surprise treats everywhere!

I decided to make it ahead of time (with a little help from the Daddy in celebration, and our kiddos.)  Thankfully, we can save all of the decorations on top, make the dessert again next week, and redecorate.  Because I wanted to be able to share the idea with you all, our blog readers, in case you’d like to replicate the idea, or let it spark an idea of your own in some way.

So this decorated dessert is the pan variation of No Bake Eclair. You may remember we shared this recipe before, as individual cup servings, that looked like this:
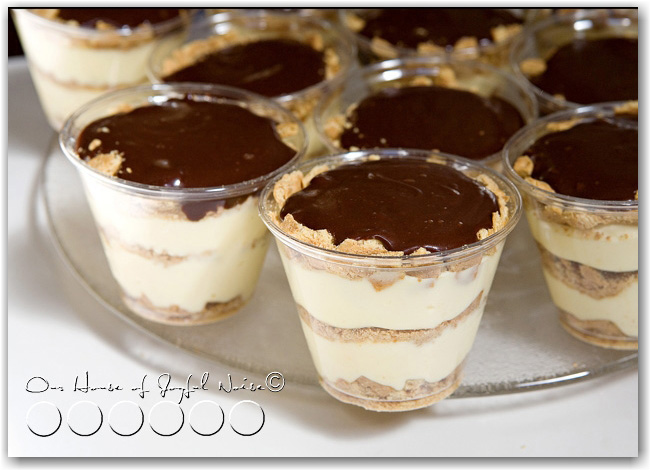
fondant-art-fathers-day-dessert-2 You can find that recipe and directions for the cups version here.
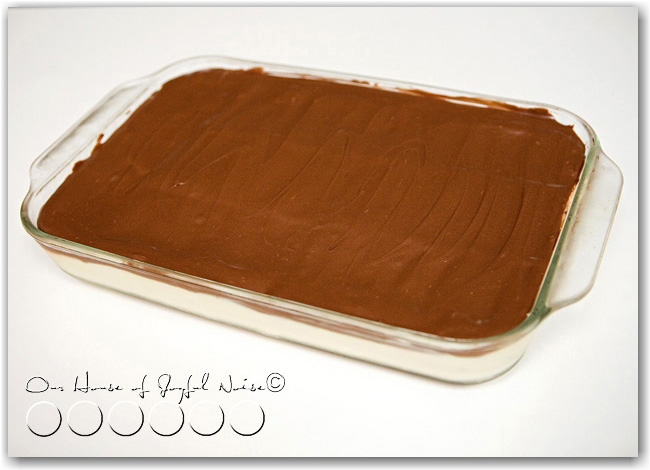
fondant-art-fathers-day-dessert-1 This is what our No Bake Eclair Dessert originally looked like, before covering with crushed

graham cracker, for a nice dirt ground effect, to set the scene for our camp site.  Here is the easy, no-bake

recipe for it. You can whip this part up ridiculously quickly!

::::::

No Bake Eclair

Participating Ingredients:

  • graham crackers
  • 2 boxes instant vanilla pudding
  • 8 oz. cool whip
  • 1 can of chocolate frosting and 2 tbsp. milk
  • 3   1/2  cups of milk

Directions:

Mix the pudding and milk with the blender- let it get a little thick. Add the cool whip in.

Butter a 9X13 in. cake pan. Place WHOLE graham crackers in the bottom of pan. You will need to break some though.

On top of graham crackers add 1/2 of the pudding/cool whip mixture.

Put on another layer of crackers and then the other half of the pudding mixture.

Place last layer of graham crackers on top.

In a separate bowl empty the frosting and add 2 tbsp. of milk. Mix so the frosting is creamy and easy to spread.

Frost the crackers and enjoy!

 ::::::

Now to share as much as I can, about how we decorated the pan of No-Bake Eclair:
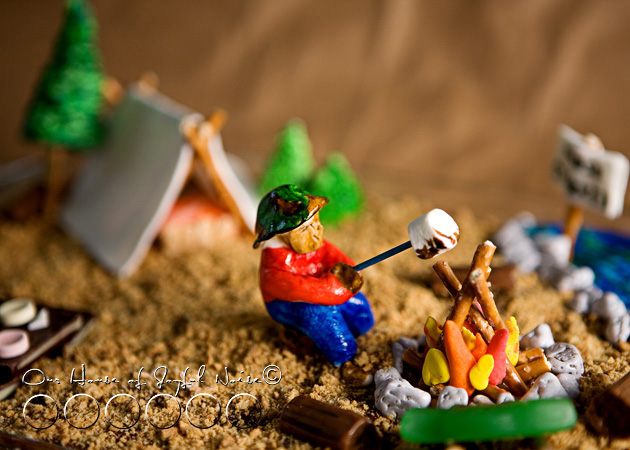
fondant-art-fathers-day-dessert-5 The ground as I said, is the top frosting layer, covered in lots of very crushed graham cracker.  On top of that, everything is made out of marshmallow fondant, various kinds of candy, and little pretzel sticks.

Now please keep in mind, we are no fondant artists, yet! This is our very first time working with the stuff.  This is actually marshmallow fondant, which is made so easily with mini marshmallows, confectionery sugar, and water.   Then of course, we used some food dye. (Not food coloring, but food dye, used for coloring icing.)  I very easily found 2 videos on making marshmallow fondant, and coloring it, just by Googling. I will put them at the end of this post, for your convenience.
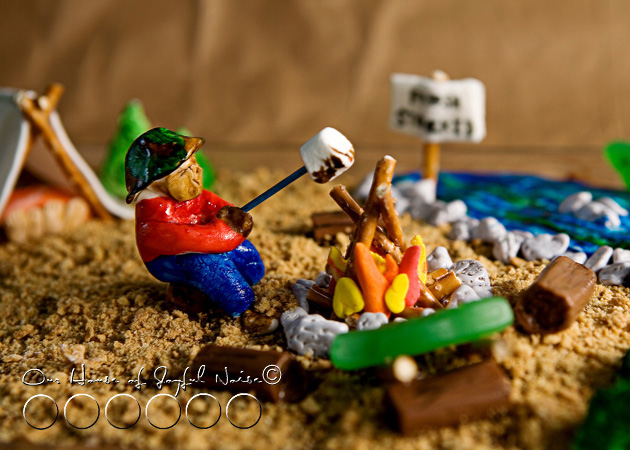
fondant-art-fathers-day-dessert-4 Don’t mind the father’s face, lol.  We really didn’t expect it to show much. It was just quickly smushed together. lol
But we’re not sure we could have done much better, if we tried. LOL

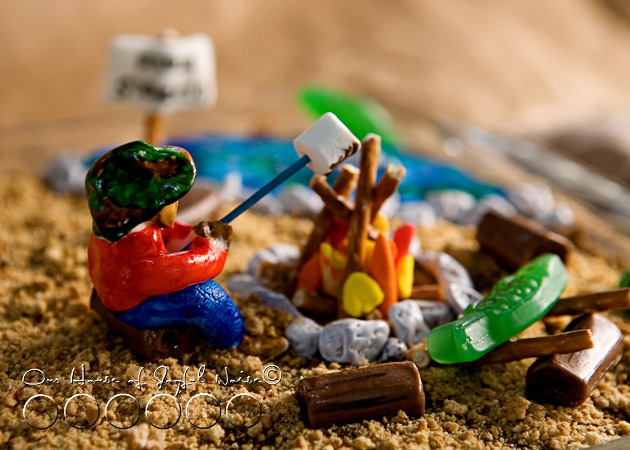
He is completely made of white/uncolored marshmallow fondant, and then painted with food dye and a brush.

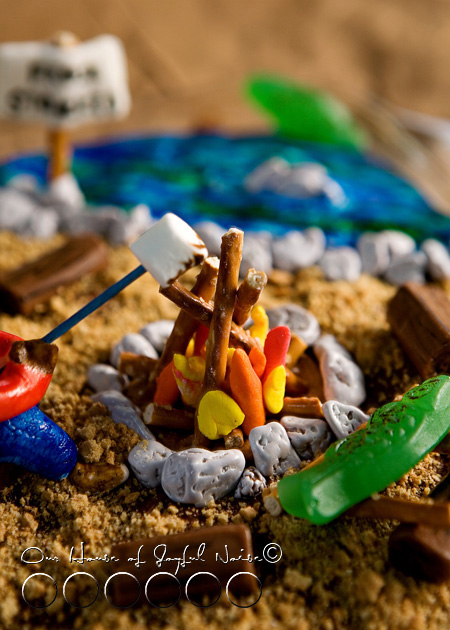
fondant-art-fathers-day-dessert-5 The camp fire is made of colored fondant for the flames, pretzel sticks, and chocolate rocks that we found in the cake aisle of Michael’s Arts & crafts.
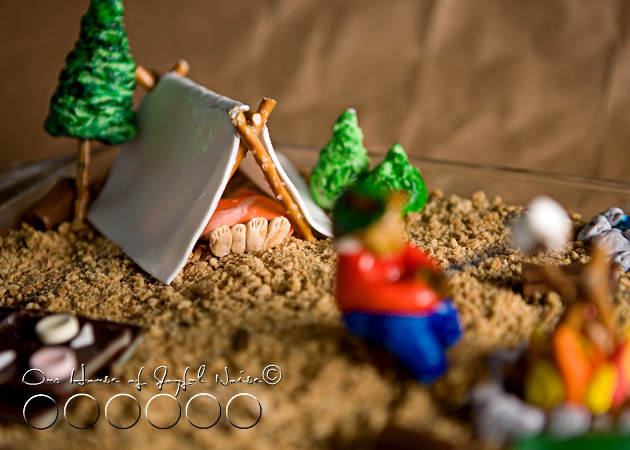
fondant-art-fathers-day-dessert-6  The tent and family feet are also all fondant, and pretzel sticks to hold the tent up.
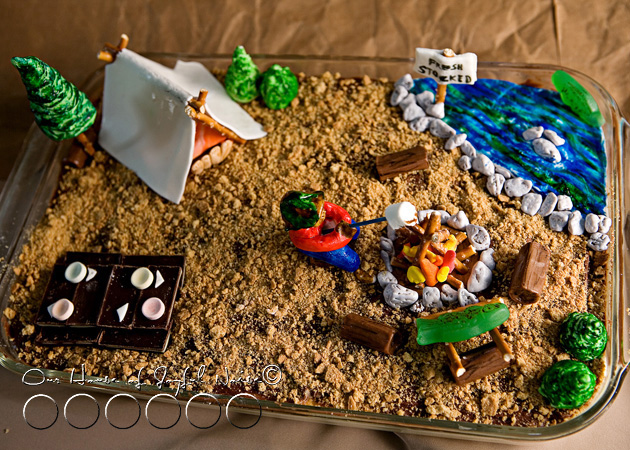
fondant-art-fathers-day-dessert-7 Here’s a helicopter view.

The trees and bushes are green dyed fondant, molded around Hershey Kisses, and then more green dye painted on the trees & bushes, for texture.  The pine tree uses a pretzel for the trunk.
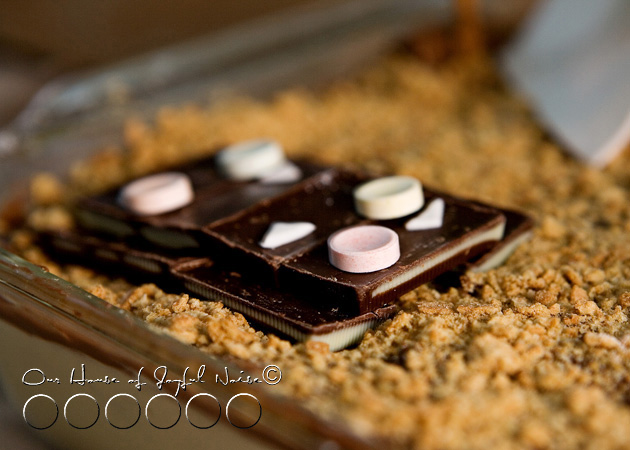
fondant-art-fathers-day-dessert-8  This is a set picnic table.  The table top probably could have been another layer higher.  But the table and bench seats are made of Andes Candies, the plates are Smarties Candies, and the little triangle napkins is plain marshmallow fondant.
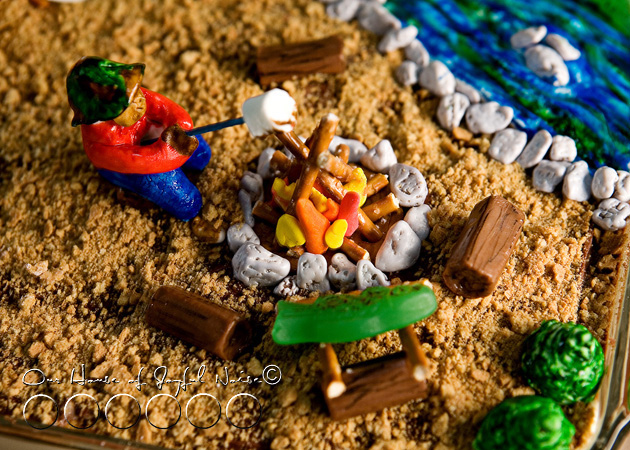
fondant-art-fathers-day-dessert-9 All of the logs you see here and there, are Tooties Rolls, with a little edible black writing pen to show some grooves and bark.
fondant-art-fathers-day-dessert-10 The 2 fish on the scene are Swedish Fish.

The marshmallow on a stick is actually fondant, but we could have just used a mini marshmallow, since we had plenty left from  making the fondant.
fondant-art-fathers-day-dessert-11

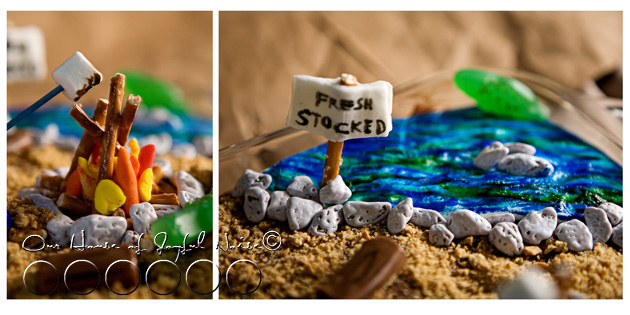
fondant-art-fathers-day-dessert-12 The water is plain fondant, painted with blue and green dye.

The sign face is fondant, with a pretzel stick, and more chocolate rocks. (Love those!)
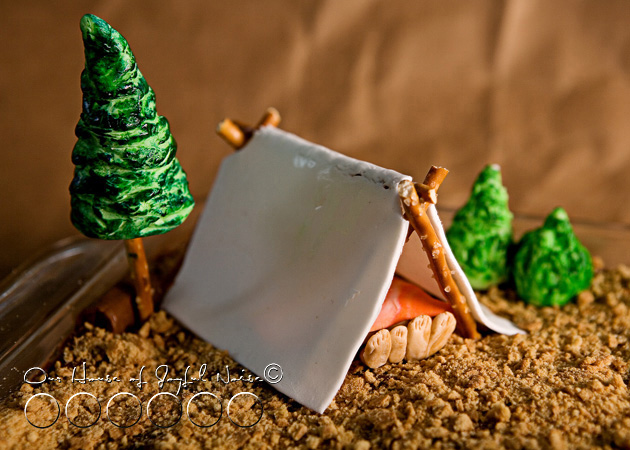
fondant-art-fathers-day-dessert-13  The tent, and the family dirty feet, is my favorite part!

It was so fun to make, and we thought it came out pretty good!!

Between shopping for the goods, and making it all, it was almost a day project, but a fun family one!

We wanted to note too that, while fondant and the colors are all edible, we don’t really eat artificial colors. But it is all SUPER fun to get creative with, as decorations.

Please tell us you are a at least little impressed with our work, even if you aren’t. 😉   Either way, hope you find yourself inspired to play with some fondant, and get creative with food, too!!

::::::

*(Love this post? How about subscribing to our blog in the sidebar, ‘Liking’ our Page on Facebook, or following me (Laura) on Twitter? Or all 3? 😀

Making Marshmallow Fondant

Coloring Fondant


Save

Save

Filed Under: Desserts, Fun Food, Holidays, Recipes, Treats Tagged With: cake decorating, coloring fondant, fathers-day-dessert, fishing-camping-scene-dessert, fondant ideas, fondant-art, getting-creative-with-fondant, marshmallow fondant, no-bake, no-bake-eclair
Chicken Italiano | Slow Cooker Recipe

June 8, 2011 By Laura 6 Comments

chicken-italiano-slow-cooker-recipe

 
As slow cooker meals go, this Chicken Italiano is definitely a family favorite!  We are sharing the complete recipe with you here today, and if it sounds good to you, we’ve got a printable recipe at the end that you can take with you. We are also sharing with you one of our favorite cookbooks, which is an affiliate link.

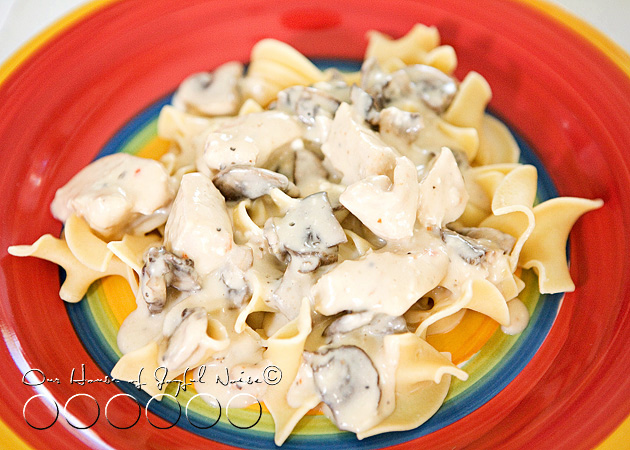
Chicken Italiano.

It may not be the most colorful meal, but don’t let that deter you from trying it, or you’ll be missing out! It’ll likely become a favorite of your families as well. It is creamy, rich, and so delicious, with the tender flavorful chicken chunks, and a rich cream cheese based sauce with mushrooms.  It’s a perfect slow cooker meal, that is easy to make, and makes the house smell wonderful! All slow cooker meals are fabulous in the colder months. But really, we are happy to make it & eat it year round! It’s that good. Everything we eat in the warmer months, can’t be cold food. Right? There are days year-round, that we need something super easy, super good, and ready at dinner time! So you get it going in the morning, and there is little to do before sitting down to eat.  This is one of those meals, and I got the recipe from one of my favorite slow cooker cookbooks:

fix-it-and-forget-it-cookbook

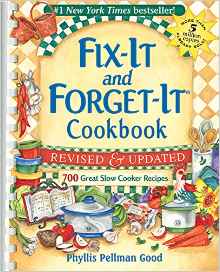
The Fix-It and Forget-It Cookbook
(*Now Revised and Updated)
(aff)

*The Updated and Revised version is all that is available now, and I have the original. Therefore I cannot guarantee that Chicken Italiano is in this one.
However, I imagine the collection of recipes is even better in this book now, and you can print out the Chicken Italiano recipe right from this post.
–

Here’s how easy it is to make this creamy, rich & delicious dinner, with such tender chicken chunks!  Most times, we double this recipe below, and have plenty left-overs another dinner or two!

Participating Ingredients:

  • 4 boneless, skinless chicken breast halves
  • 1 envelope dry Italian salad dressing mix
  • 1/4 cup water
  • 8 oz. pkg. cream cheese, softened
  • *10-3/4 oz. can cream of chicken soup
  • *(When we double recipe, the 2nd can of soup we use is cream of celery)
  • 4 oz. can of mushroom stems and pieces, drained
  • 1/2-3/4  1lb.bag of wide egg noodles

Directions:

1) Place chicken breast halves in slow cooker

2) Combine dry salad dressing mix and water.  Pour over chicken.

3) Cover.  Cook on low for 3 hours.

3a) As soon as the chicken is cooked through, if we’re home, I break up the chicken breasts into chunks, and return to the pot, so it can absorb the seasoned liquids. (I’ve just  broken it up while in the pot, with a wooden spatula too. The chicken is so tender, it’s no problem. Just be sure you’re not damaging the bottom of your pot.)

4) Combine cream cheese and soup until blended.  Stir in the mushrooms.  Pour over chicken, and mix it up.

5) **Cover, and cook 1 more hour.

**Note: If the chicken was cut into chunks much earlier, and so you are sure it is cooked through, it is ready as soon as all of the cheese & soup is heated, smooth and blended together.

6)  While the slow cooker contents is in it’s remaining time, cook egg noodles according to the package directions.

Serve the Chicken Italiano over hot egg noodles, and enjoy.

chicken-italian-slow-cooker-recipe_03
Be prepared to serve seconds.  : P

Chicken Italiano | Slow Cooker Recipe
 
Print
Prep time
30 mins
Cook time
4 hours
Total time
4 hours 30 mins
 
A creamy, rich, and delicious slow cooker meal, with the tender flavorful chicken chunks, and a rich cream cheese based sauce with mushrooms. It's the perfect savory slow cooker meal.
: Fix It and Forget It Cookbook / House of Joyful Noise blog
: Main meal | Slow Cooker
Cuisine: Italian
Serves: 5
Ingredients
  • 4 boneless, skinless chicken breast halves
  • 1 envelope dry Italian salad dressing mix
  • ¼ cup water
  • 8 oz. pkg. cream cheese, softened
  • *10-3/4 oz. can cream of chicken soup
  • *(When we double recipe, the 2nd can of soup we use is cream of celery)
  • 4 oz. can of mushroom stems and pieces, drained
  • ½-3/4 1lb.bag of wide egg noodles
Instructions
  1. Place chicken breast halves in slow cooker
  2. Combine dry salad dressing mix and water. Pour over chicken.
  3. Cover. Cook on low for 3 hours.
  4. - As soon as the chicken is cooked through, if we're home, I break up the chicken breasts into chunks, and return to the pot, so it can absorb the seasoned liquids. (I've just broken it up while in the pot, with a wooden spatula too. The chicken is so tender, it's no problem. Just be sure you're not damaging the bottom of your pot.)
  5. Combine cream cheese and soup until blended. Stir in the mushrooms. Pour over chicken, and mix it up.
  6. **Cover, and cook 1 more hour.
  7. **Note: If the chicken was cut into chunks much earlier, and so you are sure it is cooked through, it is ready as soon as all of the cheese & soup is heated, smooth and blended together.
  8. While the slow cooker contents is in it's remaining time, cook egg noodles according to the package directions, and strain.
  9. Serve the Chicken Italiano over the hot egg noodles, and ENJOY!
3.4.3177


******


Save

Save

Save

Save

Save

Save

Save

Filed Under: Main Dish, Recipes, Slow Cooker Tagged With: Chicken-Italiano-recipe, cold-weather-meals, crockpot-recipes, easy-slow-cooker-recipes, fix-it-and-forget-it-meals, Italian-recipes, main-meal-ideas, printable-recipes, recipes, recipes-with-chicken

Tissued Decorative Storage Tins | Craft

June 7, 2011 By Laura 7 Comments

tissued-storage-tins-craft-21

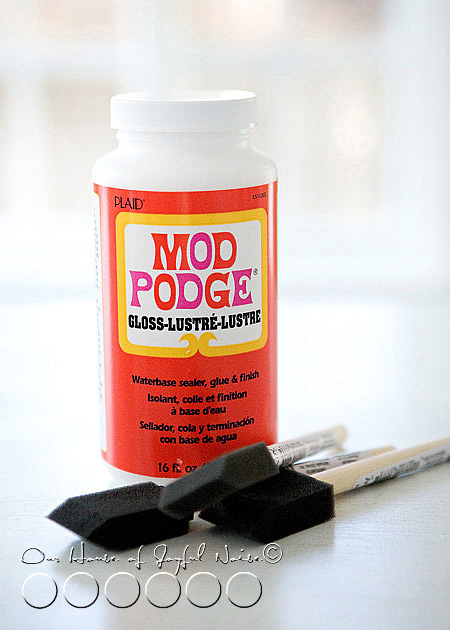
Sometimes, us creative people, have ideas that come out better in our head, than they do in real life!  Agree? But this project of tissued decorative storage tins was the opposite.  On the one hand, it may have been just a tad more difficult than I had imagined.  Only because I should have remembered how tissue paper and I, can go round and round and round.  We just don’t seem to get along. I normally do not have the patience for the stuff, and end up making the tissue a wrinkled mess. So much so, that I refer to my husband, to put the tissue in gift bags if I can, and he also is so kind, as to do all of my packaging for my portrait photography orders for my clients.   But on the other hand, these tissued tins actually came out way nicer than I expected!  I’d have to say the credit for that probably goes to Modge Podge. Love that stuff!

This idea is one I came up with as homemade gifts for our nieces & nephews, for Christmas 2010, as well as for my God-Daughter {Ju}. (You all know her by now, right?)   I thought they would be cool for them to keep little treasures & trinkets in, in their rooms, or even for my oldest nephew/God-Son to keep change or what-not in in his Jeep.

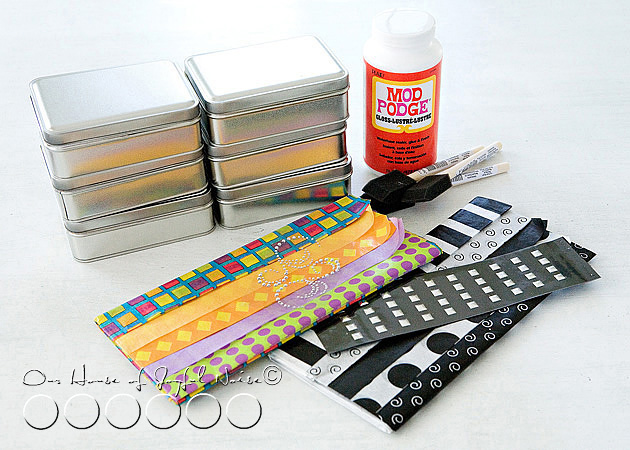
tissued-storage-tins-craft Here’s all you need!

As well as an x-acto knife or razor blade of some sort (not shown), and possibly a little patience, if you are like I am with tissue paper.  If you don’t need the patience…..well I’m happy for you!  : )

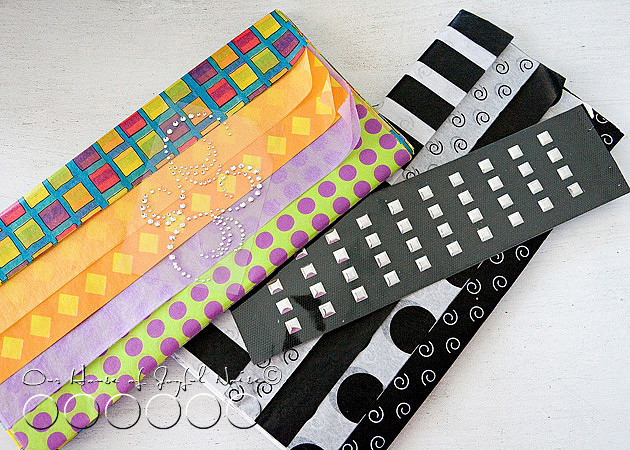
tissued-storage-tins-craft-1 I was so thrilled to find such bold & funky designer tissue paper, at The Dollar Store!…. that I thought was just perfect for the age range of the kids, from elementary school to teens, and for both the boys and the girls as well.  The silver sticky elements I got in the scrapbooking section of Michael’s Arts & Crafts.


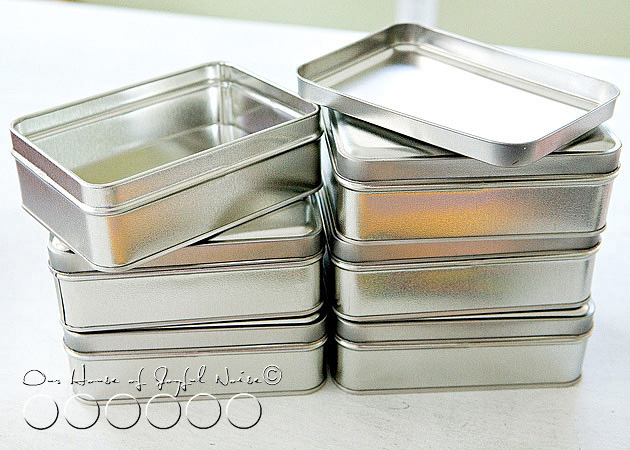
tissued-storage-tins-craft-2 I found the tins shown, at Michael’s Arts & Crafts.

They had a variety of shapes and sizes to choose from.

tissued-storage-tins-craft-3

Modge Podge and foam brushes came from the same place.

So this is how this is done:

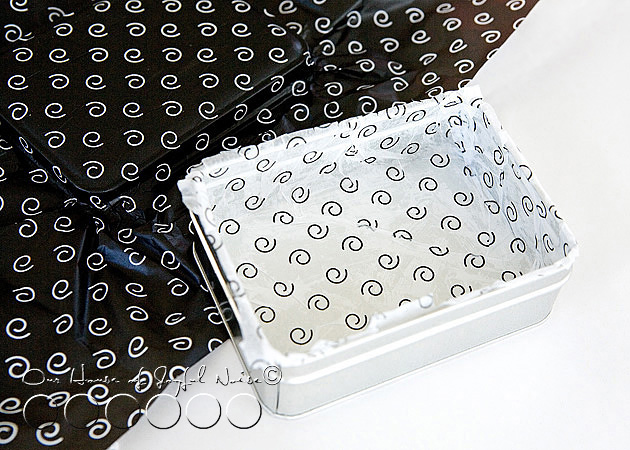
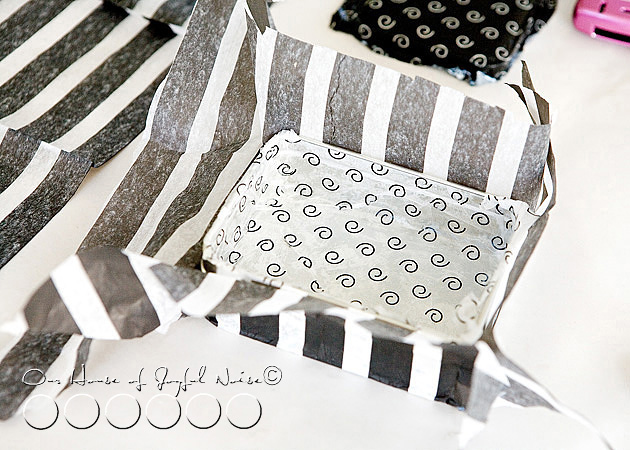
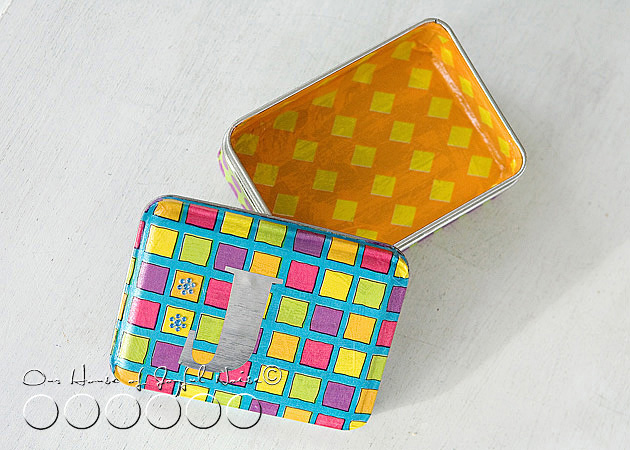
With your foam brush, you begin by Modge Podging the inside of one tin, and then layer it with the tissue design you would like on the inside.


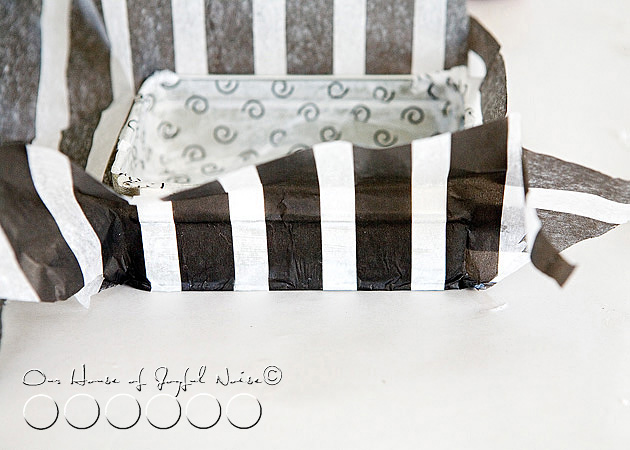
tissued-storage-tins-craft-4 You really only want to Modge Podge up to the lip of the inside of the tin before laying on the tissue, but let the tissue overlap from there, for now.  Just carefully rip off or cut the excess with scissors.  Then leave to dry.  We’ll get to how to finish it off in a minute or 2.

Now I am telling you right now, there is no way for the tissue to come out perfectly smooth. Most especially on the inside, where you virtually have to stuff the tissue in there.  But do be careful not to tear the tissue or poke a hole in it. However, IF you do by accident, (as I did more than once (yes, the patience with tissue issue…..) it’s not that hard to cover it up, or manipulate the tissue to make the hole not show.  Honestly, it’s just the insides of the tins that are the hardest part of the whole project.

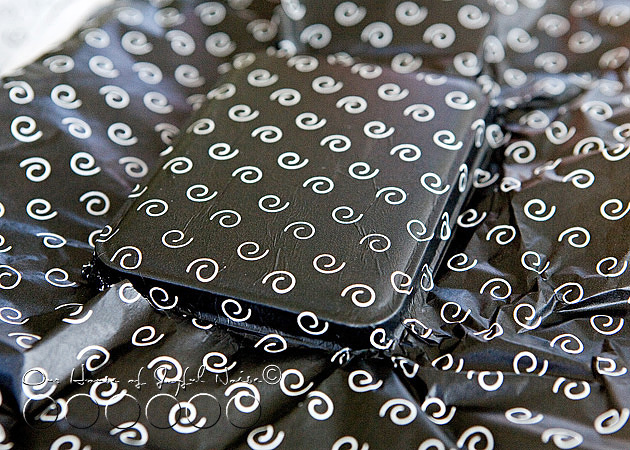
tissued-storage-tins-craft-5 Do the outside of the tin cover, in much the same way.  Again, only Modge Podge to the lip of the lid, then apply the tissue.  Now getting a little (Modge Podge) glue where it shouldn’t be, and the tissue sticking to it, is no big deal. It can be scraped off easily enough once dry.


tissued-storage-tins-craft-6 Just rough trim it with your x-acto blade, and then leave to dry.  If you are trimming first before it really sits to dry, just make sure you don’t drag-rip the tissue.  Your blade will get Modge Podge on it, so you’ll want to try to keep it clean too.


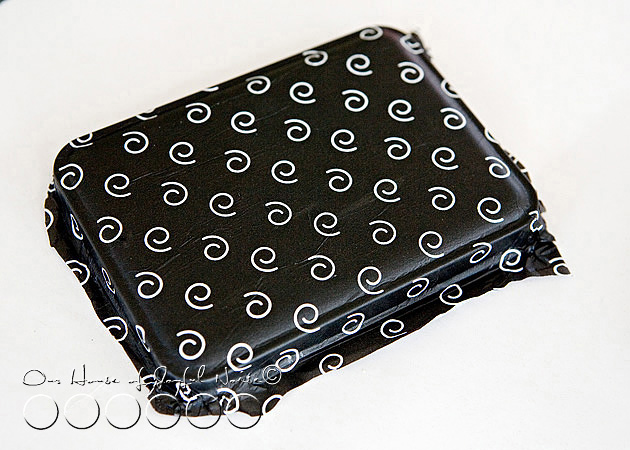
tissued-storage-tins-craft-7 Now you can do the outside of the tin container the same way:  Apply the Modge Podge, and then apply the tissue, smoothing it all as best you can.  Agai…wrinkled are going to happen here and there.


tissued-storage-tins-craft-8 It was really fun to have these co-ordinating designs to work with.  (Pay no mind to my BlackBerry over there.  Always nearby, and forever bLiNkInG!)

Now, in terms of cleaning them up, I found an x-acto knife to be a handy little tool!  I trimmed off the excess tissue, by running the sharp point of the blade, right in the groove of the lips.  If you aren’t sure exactly where or how I mean, just inspect the earlier photo above of the bare tins, and the ones coming up, and think about how the tin is put together.  You can’t have tissue anywhere, where the tin cover and container need to fit together.  Just a little common sense I dug up there. ; )

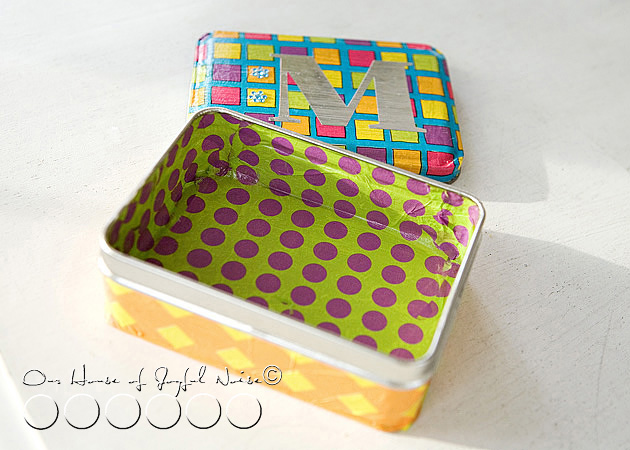
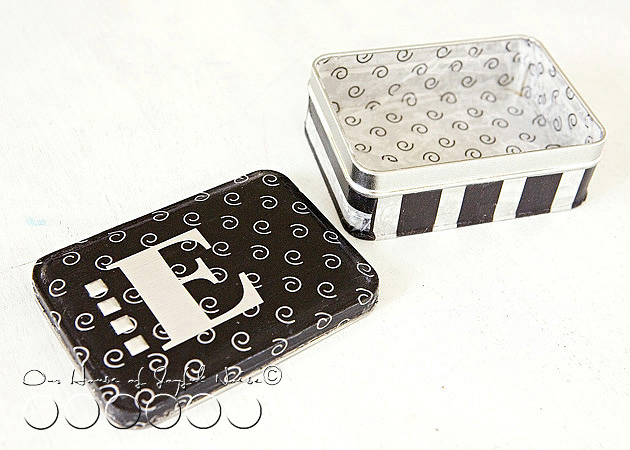
OK, so after each tissued piece is dry, and you have trimmed the excess tissue off everywhere, you then need to put a coat of Modge Podge over all of the tissue layers, inside and out!  I did second coats of Modge Podge too, letting them dry before coats, and I recommend doing that.  That is what gives the tins a finished look, once they are dried, and keeps the tissue surfaces protected.  Granted, now that the tissue is trimmed and there is tin lips exposed, you want to try and apply the Modge Podge a little more carefully, as to not get glue all over the naked tin parts .  But again, if any gets on the bare tin edges, once it is dry, it scrapes right off like any glue would. Modge Podging the inside of the tissued tins are probably the hardest to do with your foam brushes, only because you’ll see it puddles a little where folds and creases of the tissue are.  It looks a mess at first. But that is ok…..just spread it out best you can, because the Modge Podge really dries hard and clear.  You are using the foam brush to sort of stick down and smooth out any wrinkled tissue as well, as you work.  You’ll be amazed how good it starts to look as the Modge Podge dries clear.

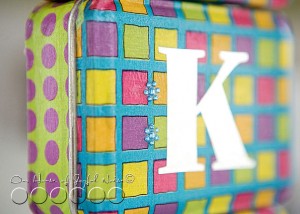
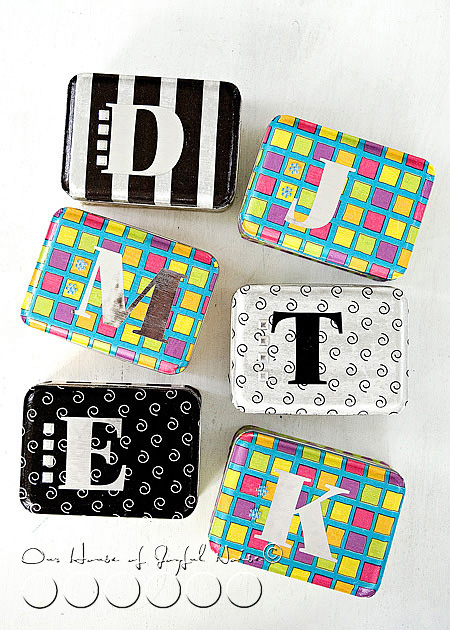
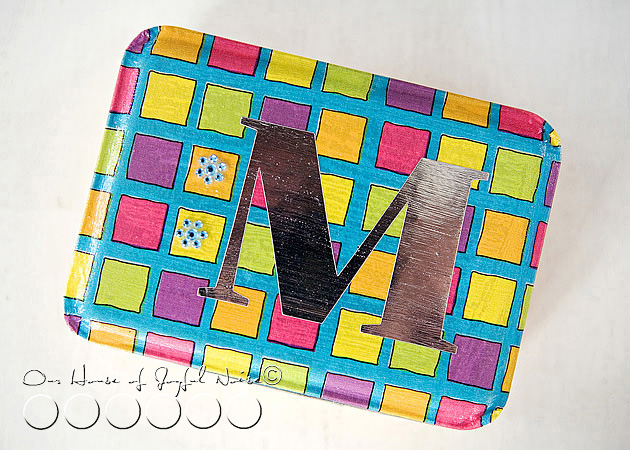
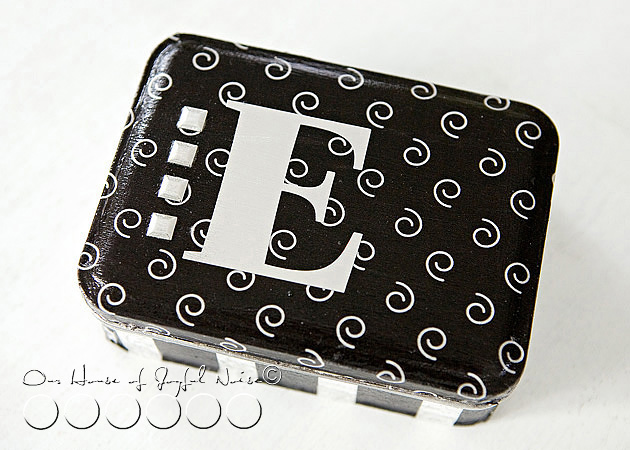
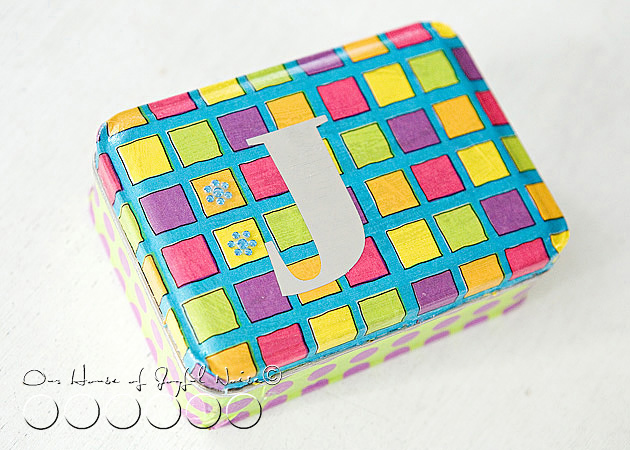
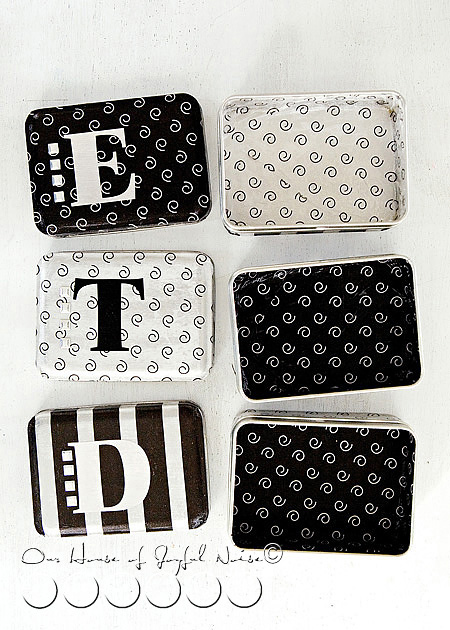
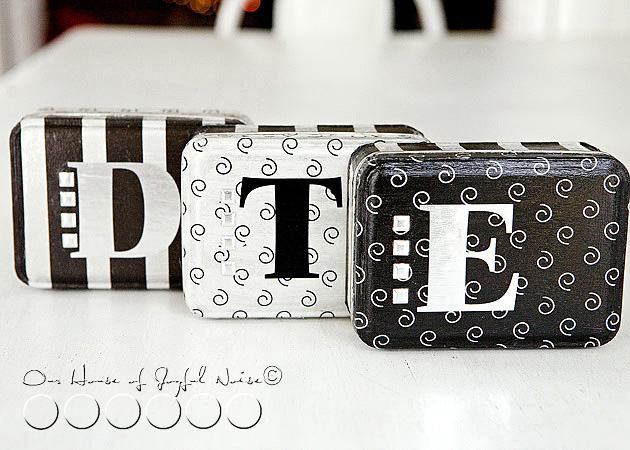
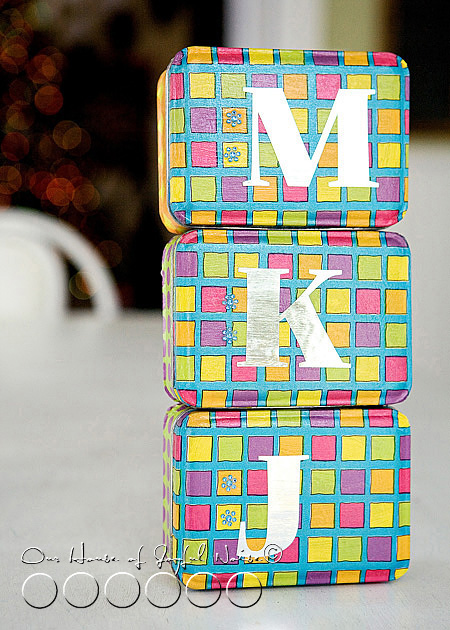
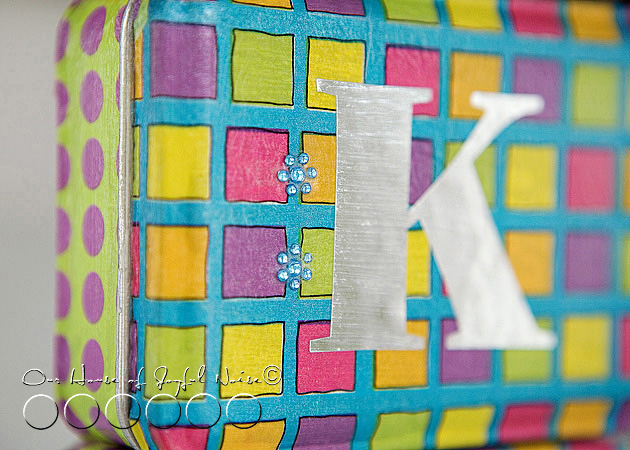
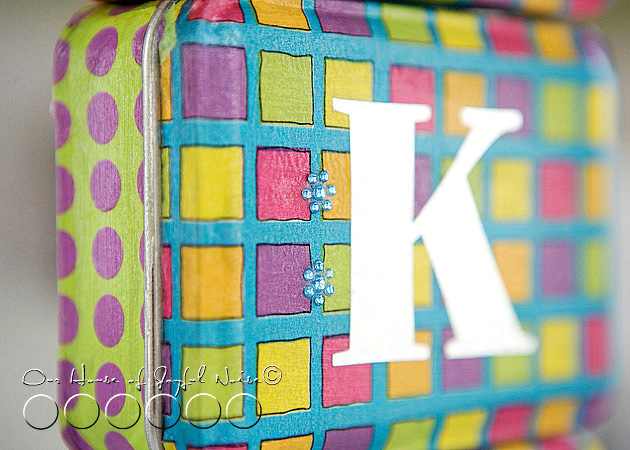
I wanted to personalize them, so I had hubby cut their initials out of sliver mylar vinyl.  Then used the decorative sticky elements, to add a little extra bling.  Finally, I went right over the mylar and the elements on the covers, with another coat of Modge Podge.  Honestly, these came out slick & with a bit of sheen, seeing as though I used the glossy Modge Podge.

I LOVE how they came out, and I am about to show you a whole bunch more of photos, so you really can get the idea. (And, o.k., so I can show them off a little more.)

tissued-storage-tins-craft-9

Bold Black & white for the boys……bright happy colors for the girls.


tissued-storage-tins-craft-10

tissued-storage-tins-craft-11

tissued-storage-tins-craft-12

tissued-storage-tins-craft-13

tissued-storage-tins-craft-14

tissued-storage-tins-craft-15

tissued-storage-tins-craft-16

tissued-storage-tins-craft-17

tissued-storage-tins-craft-18

tissued-storage-tins-craft-19

tissued-storage-tins-craft-20

Like? Love? Let me know what you think!

******


Save

Filed Under: Crafts & Creations, DIY (Do-It-Yourself) Project, Homemade/Handmade Gift Ideas, Tutorial Tagged With: crafts, gift tins, handmade gifts, homemade-gifts, Modge-Podge-crafts, modge-podge-projects, storage-tins, tissue paper crafts

Mailbox Tub Garden

June 4, 2011 By Laura 4 Comments

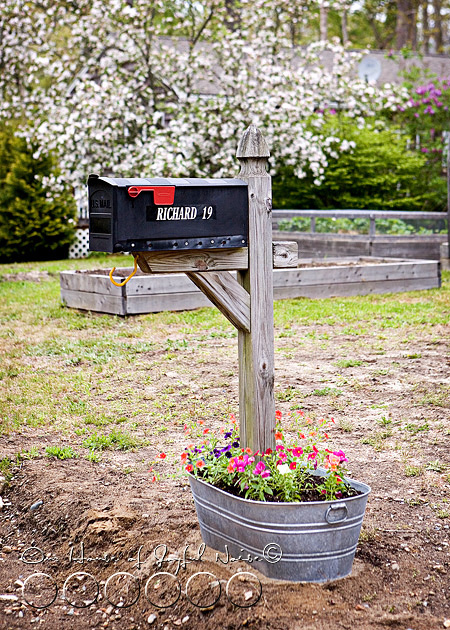
creative-mailbox-planter-ideas-3

We are still very much working on our long-term front garden-yard plans, and we’re far from completion.  A little each year, as we need to roll, but we’ve enjoyed the planning and the progress along the way.  We always wish we were further ahead than behind, but that’s the way it goes.

creative-mailbox-planter-ideas

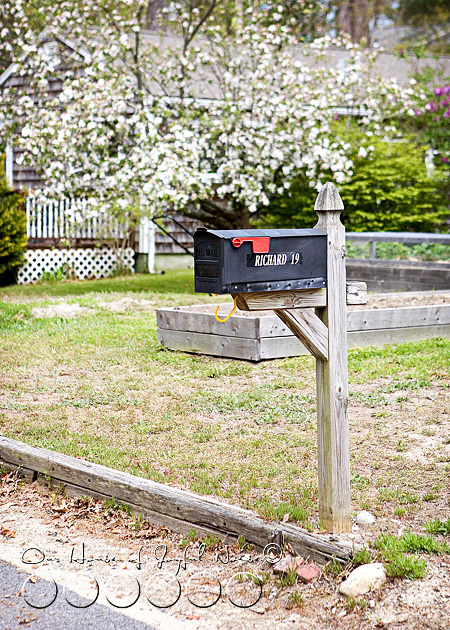
Our mailbox out front by the street, has really been looking like it needs some sprucing up, for some time.  Last year, we just planted some flowers around the post, in what sandy and rocky sloped dirt was there.  But because our front yards are our garden, and the general landscape plan is not completed yet, it didn’t look so nice.  The crabgrass that grows in the sandy dirt, spread into flower bed, and it just didn’t look clean. So this year, I had a new plan.

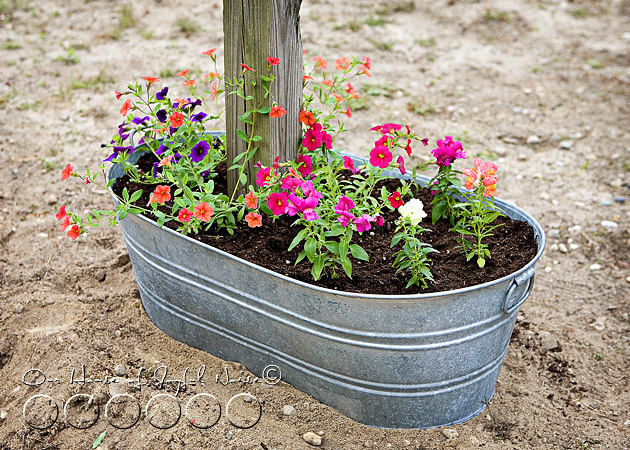
To have a little tub garden, around the mailbox post. I figured, filled with loam, it would keep the crabgrass from spreading into the garden bed.

creative-mailbox-planter-ideas-1

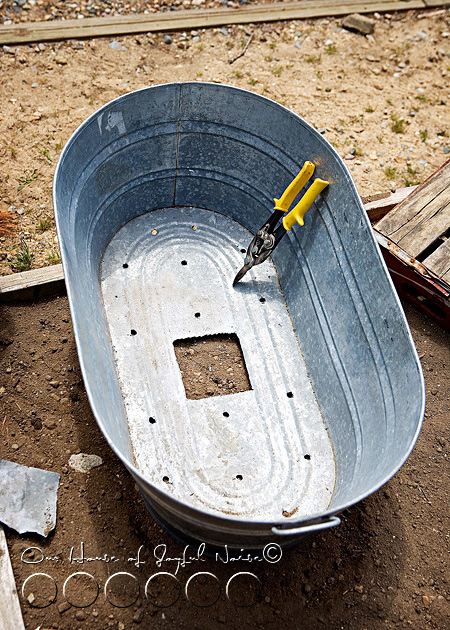
I picked up this aluminum tub for cheap, at my favorite antique/junk stop. I had passingly mentioned to Michael, that I had wanted to put the mailbox further to one side, than the other. But I didn’t make a point of it yet, because in my mind, I imagined he planned to just cut out the entire bottom of the tub. But next thing I knew, I had found this done.  A square cut out smack-dab in the middle, with drilled drain holes here & there.  Of course, I went through my typical reaction to these things:  “MI-CHAAAAAEL!”….and reminded him that I had mentioned to him, I wanted the post to the left.

He thought it would “look fiiiiine”, and proceeded to put the mailbox through the tub, and into the new hole he dug. (We were moving the mailbox over as well, closer to our driveway.

This situation is such a symbolic picture of US, by the way.  Michael and I, I mean.  He is all about liking things symmetrical, and I prefer asymmetrical.  He’s a ruler follower, and I’m a rule breaker. He likes new and perfect, I like things old and full of character.  He’s conservative in style, and I am SO not.  He’s even, and I’m odd.

Oh…wait.  🙄 Well anyway…

It was not yet filled with dirt, but I got the visual, and it just wasn’t right to me. So ….. boring, and non-creative, in my eyes.  So I proceeded to tell him, that it looked ridiculous, as I knew it would, in the center.  It was no big deal to cut the existing hole another square bigger, to the left, so we could move the whole tub over (thus appearing that the post had moved over, lol), and that’s just what he did.  If only to shut-me-up. : )   (We nag because it works, right? And because…..they don’t do what we say the first time!)

Kidding. I respect my husband.  I just have a little more flare, and fight, in me.  Or, a lot. Maybe.

creative-mailbox-planter-ideas-2 MUCH better!  Right?

(I mean….I couldn’t take a photo of it center. I just couldn’t.  But can’t you imagine?)

creative-mailbox-planter-ideas-4 He loaded it with the loam, and I planted my flowers.

Calibrachoa and Snap Dragons, to be exact.

creative-mailbox-planter-ideas-5 Crabgrass can’t touch this!

So what was your vote?  Center, or off-center?  How would you have done it?


Save

Filed Under: Gardening, Home Improvement, Re-Purposing, The Homestead Tagged With: creative-mailbox-planter-ideas, Gardening, ideas-for-old-metal-tubs, mailbox-planters

Superbowl Bound!- {A} & the BENGALS | Flag Football

June 2, 2011 By Laura 2 Comments

001

{A} wanted to play Flag Football last year.  She made it to a clinic for the sport, shortly after her basketball season ended, and she made her mark there.

kids-sports-flag-football

This year she signed up for try-outs to play on a team.  The ref who ran the clinic, was the one running try-outs, and joked to the observing coaches (who were there to watch for who they wanted to draft) that she didn’t even need to bother trying out.  He announced, “Coaches, you want her!”, and you could see them all looked a little puzzled & scribble something down on their clipboards. LOL.

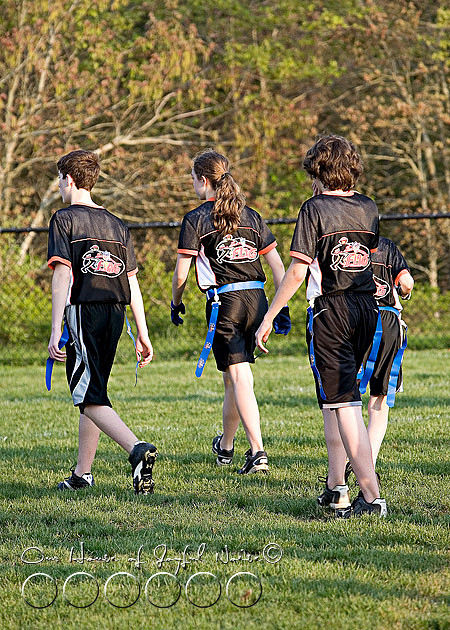
We were told she was drafted early on, and naturally, she is the only girl on the team.

kids-sports-flag-football-1

She has been having the time of her life, all season.  Another sport she really, really loves!

kids-sports-flag-football-2

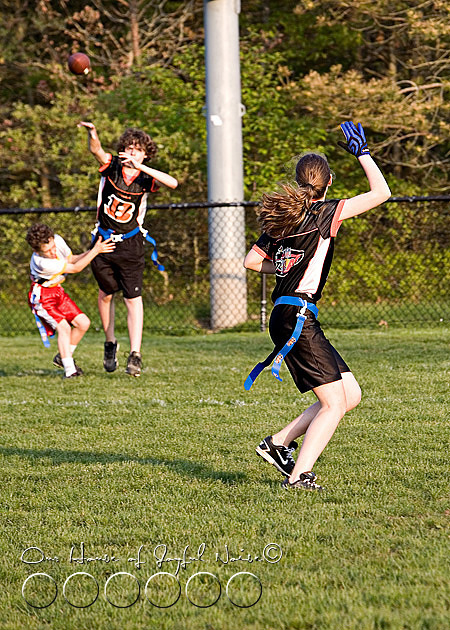
It’s a serious game, and the coaches and most of the players, are so serious about it.  {A} certainly is.  I am still learning the game, myself. Sometimes I don’t quite know what just happened. lol. And like basketball, taking sport photos is a challenge for me too!  I’m learning as I go, on both fronts.  The plays for this sport are short, but so fast.  Lots of huddling & planning, play-by-play.  She has fit right in with this team, like butter. Lots of new friends.

kids-sports-flag-football-3
BUSTED!

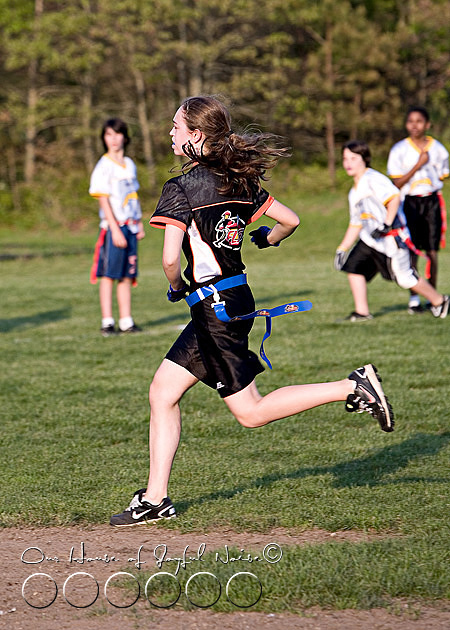
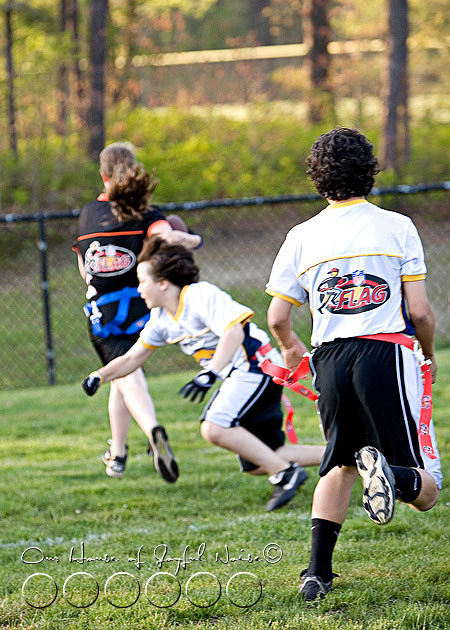
Her team is the Cincinnati Bengals.  They have some great players, as evident by the fact that they have only lost 1 game all season, have been through the play-off, and are onto the Superbowl tomorrow night!  The head coach really drafted a mix in heights!  The little bit younger/shorter ones can be fast & sneaky!  {A} of course is one of the tallest, at almost 5ft 6 inches. (Much taller than I am!) She’s seemed to be a key player all season.  She can be fast too!


kids-sports-flag-football-4

She’s been throwing and catching a football since she was 2, with her father, and has always loved it.  So wanting to play some form of football when she was old enough to be on a team, came as no surprise to us.   It’s been fun watching reactions all season though. Especially opposing teams and coaches, who were not yet familiar with her. They’d realize she was a contender after-all, and be making a few game adjustments.

kids-sports-flag-football-5
Heads up!

Watching the succession in some of these shots, is good for some chuckles.  But trust me, they all go down a few times, throughout any given game. {A} ends up down a lot, even on the basketball court, fighting for the ball until the whistle.

Here’s two in a row…

kids-sports-flag-football-6

kids-sports-flag-football-7

And she’s OFF…..

kids-sports-flag-football-8
That’s a TIGER FACE!

kids-sports-flag-football-9
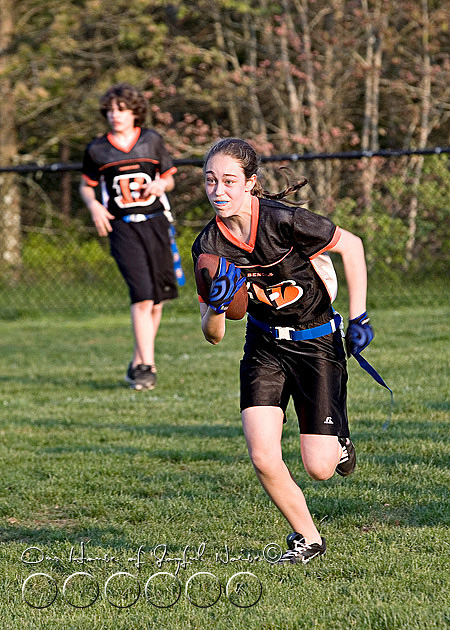
YES!!


kids-sports-flag-football-10
TOUCH DOWN!!

kids-sports-flag-football-11
She has loved every minute of this season.

It started out COLD.  It was even snowing at their first practice.

They have practiced in the rain, and played in real low temperatures.

kids-sports-flag-football-12

She’s hoping to play again next year, but as of now, there is not a next-up age group for this sport.  She’s campaigning for one though!  She’ll be starting a petition, if she has to. (She’s big on petitions. lol)  But word has it, one of the coaches is working on a 14-16 age group.


kids-sports-flag-football-13

{A} has high hopes about it, at this point.

We’d love to see her keep playing, as she clearly has passion for this sport too.

kids-sports-flag-football-14
Meanwhile, she and the boys  still have a big game ahead of them!

kids-sports-flag-football-15

The refs have been calling everything too, so the Super Bowl should be the toughest yet.

But that’s O.K.  She loves to win, and is serious about doing all she can to make it happen.

But in the end, win or lose, nothing squashes her team spirit, or love for a serious ball game.

Be it round, or oblong. ; )

kids-sports-flag-football-16
And on the sidelines, she can always count on having her biggest fans, cheering her on
, in her team colors!
Gosh I love this photo of my kiddos.
Thanks for coming to her game!


Save

Filed Under: Life In General, The Big Picture Tagged With: flag football, girls-play-sports, kids-sports

  • « Previous Page
  • 1
  • …
  • 36
  • 37
  • 38
  • 39
  • 40
  • …
  • 101
  • Next Page »

We are wicked happy to have you here! We hope you find much inspiration, help, humor and enjoyment here.


Archives


POPULAR POSTS

* * * * * *

SUBSCRIBE to House of Joyful Noise blog! Every new post, delivered right to your email box!


Privacy Policy

Amazon Affiliates

Never at any additional cost to you, we may earn a small commission for our endorsement, recommendation, testimonial, and/or link to any products from our website. Your purchase through our links helps support our family, while sharing with you the products we authentically use and recommend, for various ideas, and letting you know where you can purchase them. Thank you for your support!

[footer_backtotop]

Copyright © 2025 HouseOfJoyfulNoise.com · Genesis Framework by StudioPress