• HOME
  • {A}’s Chipmunk Training Archives

 Homepage

  • The Homestead
    • Home Projects
    • Home Improvement
    • Home Decor
      • Seasonal Home decor
        • FALL Home Decor
        • WINTER Home Decor
        • SPRING Crafts and Creations
        • SUMMER Crafts and Creations
    • Our Chickens
    • Gardening
    • Organization
    • Re-Purposing
    • Furniture Refinishing
    • Budget
  • Crafts & Creations
    • Seasonal Home decor
      • FALL Crafts and Creations
      • WINTER Crafts and Creations
      • SPRING Crafts and Creations
      • SUMMER Crafts and Creations
    • DIY (Do-It-Yourself) Project
    • Kids Arts and Crafts
    • Homemade/Handmade Gift Ideas
    • Holiday Crafts
    • Fan Pulls
    • Free Printable/Downloadable
    • Sewing Projects
    • Giveaways
    • Business Features
  • Recipes/FoodFun
    • Breakfast
    • Lunch
    • Main Dish
    • Sandwiches
    • Appetizers
    • Slow Cooker
    • On The Grill
    • Side Dishes
      • Soups
      • Salads
    • Baking
      • Breads, Rolls and Muffins
    • Snacks
    • Treats
    • Desserts
    • Drinks
  • Homeschooling
    • Elementary Homeschooling
      • Elementary Homeschooling READING
      • Elementary Homeschooling MATH
      • Elementary Homeschooling LANGUAGE ARTS
      • Elementary Homeschooling SCIENCE
      • Elementary Homeschooling HOME ECONOMICS
      • Kids Arts and Crafts
    • Middle School Homeschooling
      • Middle School Homeschooling SCIENCE
      • Middle School Homeschooling HOME ECONOMICS
    • Language Arts
    • Math
    • History / Social Studies
    • Geography
    • Foreign Language
    • Field Trips
    • Games
    • Nature Study
  • The Big Picture
    • Life In General
    • Celebrations
    • Faith
      • Into the Light; The Series
    • Giveaways
    • Reviews & Sponsors
  • Photography & Lettering
    • Photography
    • truck lettering
    • vehicle graphics
    • Newborns
    • Kids
    • Engagement
    • High School Senior Pictures
    • High School Senior Pictures Sneak Peeks

Love is the Beauty of the Soul./ A Social ShareIt

February 14, 2013 By Laura 7 Comments

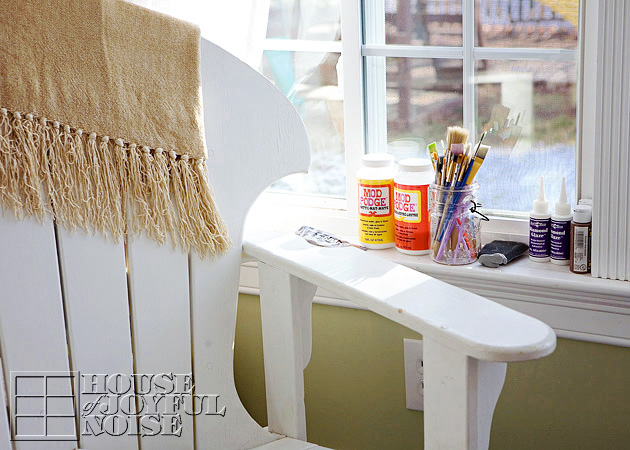
With yet another mess on my sun room table to share with you today, you may be interested in an update on how the art studio is coming along.
Yes, no, maybe?
Well, as of this week, it is all wired for the electricity. So we’re happy to have that part finished.
Also, the entire studio is all primed and painted. Which is just all white. I’m thinking that would be pretty boring photos for you all.  But it sure looks a lot nicer, and brighter, then it did, with just the sheet-rock.  I believe the ceiling is next, and that may be something to see.  We’re going with something a little different than traditional, with that.  So stay tuned if you care to see.

No big story on this ‘Social ShareIt’. I think the statement speaks for itself, and the heart I painted is just what I envisioned for it.
This was a challenging painting, trying to get the effect I wanted. I was going for a glow or light from within the heart.  Watercolor painting is such an ongoing learning experience, for me. There are so many techniques you can use, to get different effects. I can feel myself learning more and more, each time I paint, and it only adds fuel to the fire. I just want to paint more and more.   Wet on wet is always fun, and it really pushes me, because I need to work quickly.
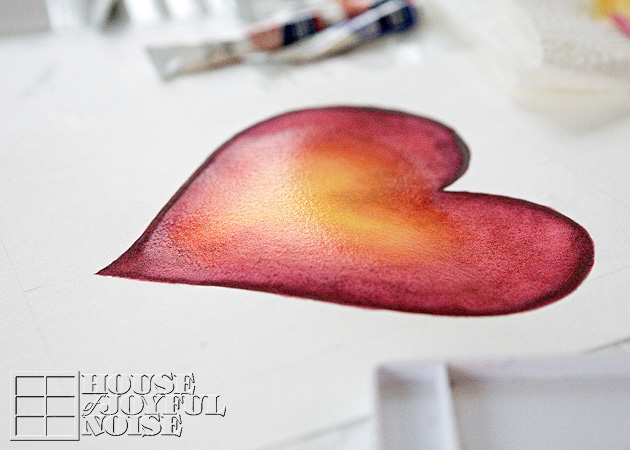
Still wet.

After scanning it into the computer, and adding some text design, here is the finished ‘Social ShareIt’ . . . .


I was pleased with how it came out.
On Facebook, you can share this creation, “Love is the Beauty of the Soul’, or any other ShareIts we have so far, from our Facebook Page’s ‘Social ShareIt’ Album.
On Pinterest, you can repin from our ‘House Of Joyful Noise Social ShareIts’ Board, or you’re welcome to just pin it right from this post.

More of what we’ve been up to, and some other show-and-tell, coming up soon.
Let us know what you think of this new ‘Social ShareIt’ below, and thanks so much for swinging by!

* * * * * *

Please come follow me here and there:


Save

Save

Filed Under: Crafts & Creations, House Of Joyful Noise 'Social ShareIts' Tagged With: House-Of-Joyful-Noise-Social-ShareIts, Love-is-the-beauty-of-the-soul, love-quotes, Quotes, watercolor

Banner of Love | A Valentine Decor Craft

February 4, 2013 By Laura Leave a Comment

While February, the ‘month of love’, was approaching throughout January, I had had this image in my head of a burlap pennant banner that spelled out LOVE, with little pink ribbons, over our french doors in the sun room, to the living room.  Of course, I didn’t actually have one, so it was something I’d need to create. After pondering how I might go about doing that, I decided I wanted to keep it as simple as possible, even if it doesn’t hold up for subsequent Valentine holidays.

As planned, I got some burlap, for the pennants themselves. I’ve never worked with burlap before.  Good-gosh does it stink!  I don’t understand why. ???  I need to get educated on burlap I guess.  I’m adding it to my list of things I intend to Google.  But in the meantime, I hung the burlap outside for a bit, and even went so far as to FeBreeze it, so I could work with it. I could have used another material, but my vision, was the burlap. So for this project I used it, as well as jute string, a 4.5″ x 6.5″  pad of designer cardstock that contained a variety of pink patterns (for the letters), and pink satin ribbon.

 I also used a few other supplies to make it as well, and I’ll explain in these easy steps as I go along here.
But before I do, let me show you how sweet it came out.

Kind of shabby-chic looking, don’t you think?
Of course this would be sweet with fabric letters, and would probably hold up for many more ‘months of Love’ and Valentine decor to come, but it would probably require some sewing, and I still don’t sew yet. I’m going to learn someday. But it wasn’t happening before this craft. So I used paper cardstock letters. Which does kind of have it’s own charm, I think.

This is how I made this rustic, simple, sweet little banner:

I made a template for the pennant, that measured 7″ wide by 10″ to the point. You can use cardboard as a template. My husband cut me a piece of sheet metal he had, but that’s not really necessary.
So using the template, I traced the pennants with a brown marker. I used the finished edge of the burlap itself, as the top of the pennant, to help hold it together as well as reduce my cutting.
1. Place pennant template at edge of material.  2. Trace template.  3. Cut out pennant.

4. To keep the sides of the pennants (the sides that form the V) from falling apart, because burlap is a weave, I applied a bit of matte Modge Podge just on the edges.
Modge Podge dries clear, and it worked like a charm.


Using the small 4.5″ x 6.5″ pad of designer cardstock that I bought, I wanted each letter as large as possible. So I made each letter to fit a full cardstock sheet edge to edge. I just created the outline of each letter (4.5″ x 6.5″) in photoshop, and arranged two of the letters side by side on an 8.5 x 11″ standard space, and printed them out. LO on one, and VE on another. Then, I traced those printed letters onto tracing paper. Then, I arranged each letter tracing upside down on the backside of my little cardstock sheet (for each letter).  Having done that, I had a backwards letter on the back/white sides of my cardstocks to cut out, so that when I did cut them out, they were facing the right way on the front.  Some of the patterned paper is embellished and bumpy, so it was easier to transfer the pencil lines on the backside, and keep the patterned side clean as well.

Here are my letters all cut out.
Again, the letters I designed filled a mini-cardstock sheet, so it reduced some of the cutting I needed to do, minimized paper waste, and gave me as large letters as possible.

Next, I wanted to string the pennants.

I planned to use jute string for this; another stinky material! I did not want to cut holes in the burlap at all, because it would simply fall apart, being a weave. So using the tip one side of the scissors, open, I just poked it into an existing hole of the burlap where I wanted a hole for the string, and gave the scissors a little twist.  No cutting, but just pushing the fiber-string over.


Then I strung a sufficiently long enough piece of jute through each pennant piece, as seen above.  

To add some touches of pink and pretty, I wanted to add some little simple bows. To do this, I first tied a little piece of satin ribbon onto the jute string in between each pennant, with a little piece of thread, and then cut off the excess thread ends to just leave the little knot.  Then I tied a bow with the ribbon. The reason I tied the ribbon onto the jute string with the thread first, rather than just tying the ribbon directly onto the jute string, was so that my bows would not be sideways.

  I did not take photos of this part, but to attach the cardstock letters to the burlap pennants, I used Modge Podge as a sort of glue.
I simply covered the back of each letter, and pressed it down onto each pennant.  Although the letters created to extend beyond the pennants, I still Modge Podged the entire back of the letters, because I figured it would help give each paper letter that extra stability.
I let it all dry, lying flat.

Then we hung it up, right where I envisioned it to be.

I think it makes for very cute Valentine decor.
It’s also made me start humming a few times,
♫ The Lord is mine, and I am His
His banner over me is LOVE . . . ♫


Sorry if that sticks in your head all day long, now! ; )
Hope you enjoyed this project, and it inspires you to make one like it, or one of your own design.

We’d LOVE your thoughts or a hello, if have another moment.
But know we’re always glad when you visit.

* * * * * *

Please come follow me here and there:


Save

Filed Under: Crafts & Creations, Holiday Crafts, Home Decor, The Homestead, Tutorial, WINTER Crafts and Creations Tagged With: February-crafts, holiday-decor, how-to-make-a-burlap-pennant-banner, love-banner, love-themed-decor, pennant-banner, valentine-craft-decor, Valentines-Day-decor-craft, valentines-home-decor

Let Your Happy Shine! / A Social ShareIt

January 27, 2013 By Laura 2 Comments

I’ve been spending lots of time painting lately.
I can’t tell you all how much I love just sitting, and doing artwork.  Any kind of artwork. Drawing or painting. It doesn’t matter.
Hours will escape me. But they are such happy hours.
Without the drink. Ha ha.
O.k., maybe sometimes with a drink. If it’s weekend night. lol

It seems I must love creating. Because I seem to make a great big mess in the process, every single time, that I have to clean up.
I sure am looking forward to that art studio being ready, for me to move right in!


Oh, the happy hours I will spend there!
And I won’t have to pick up projects I am working on, before I’m actually done.

Of course, there are many things that make me happy.  So many.
I was thinking a lot about that kind of thing, all throughout painting this little piece I’m sharing today.

Do you know those kind of people, who just always seem to radiate happiness? Surely there are people like that in your life. I know there are some in mine.
They are the ones that are just always smiling. Always hugging. The ones that light up when they see you, and are eager to talk to you. They make you feel so special, just the way you are, for who you are. And yet, you see them the same with others. Or the kind of people who you can just watch from afar, and see they are finding the real reasons to celebrate life, right there in that moment. What a blessing they are to know, and have in our lives.  What good examples for us all, too.

They are the ones who inspired this piece I painted.  The ones I am personally blessed with in my life. But also the ones you know.
Or strangers we all happen upon in the course of any day, who we noticed made others smile or laugh around them.

Knowing first hand how it feels so nice, to be a part of their happiness, should inspire us to let our own, SHINE a little more, onto others.
I know I personally am not always beaming happiness! I can let the little things get me down. The things I know will be all but forgotten, tomorrow.
Maybe some are just better at believing that in the moment, and letting those little things go sooner. So I don’t think for anyone of us, it’s a matter of pretending.

It’s a matter of choosing joy, moment by moment.

And letting it SHINE, to show our love, and help lift others, who may truly be facing bigger problems than our own, that day.

Being able to shine our own happiness for others more often, when we can, is probably a matter of choices too.  Don’t you think? To me, I think happiness derives for anyone from always counting your blessings. From knowing God, and having a great relationship with Him. It comes from truly loving those in our life who we have to love in our life, while we do!  Our families and friends. And it comes from our own unique gifts, that we DO all have. (I’ve talked about that soooo many times, here on the blog.) Everyone has at least one gift, they are meant to use in their life.  But all of these things I mentioned, I think are gifts in and of themselves, given to us by God, to know happiness. When we accept them for all that they are, we can’t help by SHINE HAPPINESS, for a time.
Why not shine it on others, and spread the love and joy?

So what have I been painting?  Well, I’ve been working on some more ‘Social ShareIts’.

Do you know what our ‘Social ShareIts’ are?

You see them all of the time on Facebook, and maybe Pinterest or Twitter or other social networks. I just named them, for me. : )  I’m talking about those little mini-posters/pictures, that make you laugh, or smile, give you an A-HA moment, speak to you in some way, or just have a message you want to spread. So you ‘like’ them or ‘share’ them.  Well, I am having so-much-fun, creating our own line of them.  Many will be illustrated by me, maybe painted, drawn, or using some other mediums. Others may be using my own photographs I took, and adding text in Photoshop. Or at times, I may use stock photography.  And, some will be complete graphic design work.  Whatever I feel like doing, in the moment.  I find joy in creating in many ways, and I just go with the flow.

So I’ve told you about the inspiration behind this one.
Here is the finished artwork for you . . . . . .


I hope you like it. It’s watercolor paint, and an art pen.

How do you TAKE any of our ‘Social ShareIts’?

I SHARE them with you, to take for yourselves,  so that you all can SHARE them with your family and friends on Facebook, or where ever.  I often will do a post like this one you are reading, here on our blog, if it was a real creative process, or I have a bit of inspiration behind the work, to tell you about.  So you can just’save the image’ from here, and use them as you will. But easier, I will always put them on our blog’s FACEBOOK PAGE, for you to to be able to click SHARE from there.  That way you will be SHARING it with your friends and family on Facebook as well. So please be sure you are following us there on Facebook, to see our Social ShareIts as they come out, or any other projects or recipes we are sharing, by click HERE and clicking the LIKE button.  If you look under PHOTOS there at our blog’s Facebook Page too, I am building an album named ‘House Of Joyful Noise Social ShareIts’.  So you can grab them from there also, or our board under the same name on Pinterest, any time as well.

You can find all of our buttons for all of the places you can follow House Of Joyful Noise, are below this post, as well as at the top right of the blog here.

Now, go out there today, and make the world a brighter place! 
I’ll do my best, too.
Thanks as always, for coming by.

* * * * * *

Please come follow me here and there:


Save

Filed Under: Crafts & Creations, House Of Joyful Noise 'Social ShareIts' Tagged With: happiness, happiness-quotes, House-Of-Joyful-Noise-Social-ShareIts, Quotes, watercolor painting

Chicken and Salsa | Super Simple, Super Delicious | Slow Cooker Recipe

January 21, 2013 By Laura 1 Comment

I’m about to rave about this meal, and I have countless reasons why.  It’s been a favorite of our family’s for quite some time now.  We all really love it.  When we have a very busy scheduled day, this is most always what I plan for supper, because it’s that easy and fast, to prep any of it.  Like, ridiculous. Especially for the amazingly delicious meal that it is.  It can actually be made and ready in 2 to 2-1/2 hours cooked on high, if you’d like. Or, you can let it slow cook all day. Either way, it’s super quick, easy prep-work, and pretty much ready to eat when you are.

Here’s a few other reason why I love it:  You don’t have to handle raw chicken at all!  I don’t know about you, but I’m just not particularly fond of touching raw chicken.  I will, and I’m not real freaked out. But I’d rather not if I don’t have to. And with this meal, I don’t have to!  It  is sooooooo good, and it’s so healthy too!
It has 4 out of the 5 food groups in my book:  protein, vegetables, grain, and dairy.

You need a slow cooker of some kind. So I hope you have one.

This is the slow cooker we have. It’s a GE 6 Qt. Digital Slow Cooker, and I LOVE it. It holds enough to cook at least 2+ full meals for our family of 6.
The container lifts right out of the heating element, to be put on the table, and it’s super easy to clean as well.

So many different bursting flavors, with every bite.

Let me show you how easy this is to make.   Even the ingredients are minimal.
Chicken breasts, a jar of salsa, brown rice, and shredded cheese.

The pre-packaged chicken is our trick.  There are 2 breasts in each wrapper. Just cut open the end of each package with scissors, drain the excess water, and dump the chicken into the slow cooker pot. We make up to 8 breasts at a time, for a batch that last for at least 2 family (of 6) meals, and usually more still left over. The 2 breasts in each wrapper are sometimes attached to each other, so I just use a fork and make sure they are all open and spread well in the pot.


Then you just cover all of the chicken in salsa!
Now, just because I have my little ways of doing things, I actually put a little layer of salsa all over the bottom of the pot first, put in the chicken, and then pour the rest of the salsa over the top.
But that’s it!

Then I set the slow cooker.  I can set it to low, and let it cook for 5-6 hours or whatever. Or if it’s a last minute idea, the chicken will pretty much cook in 2 or 2-1/2 hours on high.
Now here’s an extra step that I personally do, because I want the chicken as flavorful as possible:  As soon as all of the chicken is cooked (it is so tender, it’s crazy), I take each cooked breast out at a time, cut it into chunks on a plate, and scrape it back in the pot.  Repeating for each breast until it’s all cut up.  Leaving it all simmering in there with the salsa just adds that much more tastiness.

We like to have this chicken and salsa over brown rice. (It’s healthier than white. We’re all about whole grains around here.) So here’s another speedy trick  . . .

Boil-in-Bag Brown Rice, in 10 minutes. No measuring!  We need 2 bags.
But gosh….could it be any easier? Take the bags of cooked rice out of the water, let drain for a sec, snip off the top, and dump it in a bowl. Done!


At the table, we each just sprinkle some cheese on top.  Because it’s just all so good together.

The chicken comes out so unbelievably tender, and so tasty with the salsa juices and bits of salsa vegetables. It’s perfect on top brown rice.
And the sprinkle of cheese on top makes a fabulous meal, even better.

I never really feel like I put any time worth mentioning, into making supper, when I make this meal.
And yet, we’re all around the table eating delicious food together, and talking about how good it is.
  Try it on your family, and let us know what the reviews are.
We’ll be surprised if you all don’t love it too.

* * * * * *

Please come follow me here and there:


Filed Under: Main Dish, Recipes, Slow Cooker Tagged With: brown-rice, chicken recipes, chicken-and-salsa, crockpot-recipes, easy recipes, easy-meals, healthy-recipes, main dishes, recipes, slow cooker recipes, supper-ideas

Home Improvement Reveal; A Dream Come True; Part 1

January 15, 2013 By Laura 9 Comments

I have had a childhood dream, that has never faded away. Not even with the passing of decades of years, this dream has lived through.
Well, that childhood dream, is about to come true for me.


♥ I am getting a completely customized art studio! ♥

It’s in-home, and already in the works. I thought I would take photos of the progress, in case some of you might enjoy watching it come to life along the way.

I was in kindergarten, when I decided I was going to be an artist when I grew up.
That plan never waivered all through my schooling years.  As a kid, I used to see little empty shops with real estate signs around town, and dream of what it would be like, to have my own studio space in there. When I graduated from high school, I went on to commercial art school for the next 3 years.  In the past 22 years since then, I have been a freelance artist and photographer.  Following art school, in my early 20’s and back home, my parents were kind enough to give me an extra room in the house for my drawing table and such.  I probably did 100 commissioned, illustrated large portraits out of that little room. And I’ve had a cozy little in-home photography studio in our finished lower level here, for many years, until a year ago. But never….anything like this, that I’ve got coming.

Between Michael and I, we always have (all kinds of) projects going on. All over the house. And because I haven’t had a dedicated space, I have craft supplies  stored all-over-the-house too.  It is a wild-goose-chase to ever find what I need, when I need it.  Let me show you just a glimpse of what I mean.
But before I do, TAKE NOTE: *In these photos below, I had already started pulling stuff out, sorting, throwing away, and packing stuff up – for the new studio in development. So these areas have never looked like this big mess, unless you looked behind the curtain into the closet or in the cabinets.

But anyhoo, this is one end of my former photography studio in the lower level of our home.  You can see, one closet that’s been chock full. Those shelves were packed. So frustrating finding anything, or getting anything out. Much is already pulled out of the closet you see here, and on the floor and in bins now, not visible in the photo. Across from that closet, is 2 floor cabinets, with drawers, which have stored more craft supplies.


Another cabinet upstairs in  in the corner of the school room by the back door, holds yet more supplies.

But wait…..there’s more….
Our cramped little laundry room on the mid-floor, has still-more-supplies.

And, there are various other little places around the house, where there are tools and whatnot.
So as I’m sure you have gathered with just this much observation, that there is great need, for ONE LARGE STUDIO, that is organized, functional, and inspiring, to do our thing.
Art is a huge and active part of our lives and work fields.

This space in the upper level of our home, is where the new art studio will be. There is mega natural-light, and it is 12′ x 22′. The ceilings are 8′ high.  That’s great space!
So this is the view walking into the room.

It’s funny how this came to be.  We have been trying to work on our unfinished house for the past 6 years. It’s been held up many times, due to finances, or lack of time. And then it was held up for a bit more, while we re-pondered our original plans, and the intent of each room in our home.  The girls’ rooms have been done for quite some time, and I do plan on sharing those. But we realized that this one great big space that we had planned on making the boys’ room to share, would be of much wiser use, as the art studio that we desperately need. It would be much more appreciated and well-used, on a daily basis.  Although it’ll be my studio, and I’ll be spending the most time in it, it will actually be a great space for all of us.  It is such a grand space, that even Michael will be able to do his sign work in here as well.  The boys will still get awesome rooms, but of their own.  But much of this space, will be a new art studio. We’re back on track to finishing it now until it’s done.  And it’s well on it’s way, as you can see.

The opposite end; which will actually be used for another purpose, and I will tell you more about that at another time.
I know none of these photos are pretty or exciting now – but they will be. Right now, it’s a matter of imagination. : )

The other side of the room, the long way.
On the left is the entry door.

Viewing from the end we first saw, back towards the entrance.

This wall, seen when you first come into the studio, is going to be great.  The single window on the far right, is actually going to be replaced with a picture window, which we are removing from a side of the school room downstairs (which will become a wall.) We have regretted putting that window there downstairs.  It looks out at nothing, gives us no natural light, and would be of more use and more attractive as a wall.  Deciding we need one of these windows to be larger up here in the studio-to-be, gave us the perfect way to make use of the one we take out downstairs.  However, even with the windows, it is going to be a very functional area to work, as well as have a whole lot of storage and work space

We are still in the planning stages as far as design and layout.
But here’s what I can tell you for sure:

  • It will be all white: walls, ceiling, table tops, shelving, cabinets, etc.
    • There will be splashes of color everywhere, from the supplies, materials stored and organized, much out and accessible, as well as the artwork we create.
    • It will have natural pine floors.
    • It will have specialty lighting installed, for dark days, night-time work, and photography.

There will be:

    • A lot of flat working areas everywhere, for various needs.
    • An island block on wheels, with a large flat surface, cubby shelves on the sides, and additional storage inside.
    • Custom built storage spaces in various areas for specific supply-organization needs (paper, ribbon-spools, etc.)
    • An area specifically set up for photographing anything I need to.
    • A large, old drawing table.
    • Dedicated seating for the kids, to do their crafting, and sometimes, possibly their school work, too.

In this studio, designed correctly, here are some of the creative projects we’ll be able to do in here, and store all of the supplies/machinery to do them:

      • all illustration work
      • designing
      • crafting
      • scrapbooking and card-making
      • small furniture refinishing
      • sewing
      • sign-making
      • vinyl-work (large cutter/plotter
      • photography

                                   . . .  and more.

And here’s my man, who is making it all happen . . . . . .


If you follow us, you’ve seen he’s capable of some amazing carpentry work.  One of his greatest builds I haven’t even shown you all yet. But I will in time. Nonetheless, he is capable of making this space into absolutely anything I want it to be.  I couldn’t be more grateful. We’re a pretty good team too, and have a lot of fun bringing our little brainstorms to life.  He works about 50-60 hours a week, so he works on our house when he has time. Usually the weekends. But it should move along now, I think.

I plan to document the progress of this studio, to share with you all. if you’d like to follow along.  Not every little boring step, but a quick update here and there on how things have come along.  We would love your input and ideas along the way!  We know some of you have creative spaces of your own, as well, and we’re sure you have opinions and advice, that you could share with us.
I have already started a Pin board, just gathering some bits of ideas, options, and inspiration for storage and such.  And my brainstorming is on over-drive. As always.

We’re all too excited! It’s not every day a childhood dream comes true.
And by the way, the re-pondering of our home and the rooms/space it offers, will be resulting in ‘Musical Rooms’ of sorts (like Musical Chairs, but Rooms), and some fun redecorating too.
So there is more room make-overs, besides this one, coming as well.
We hope you’ll enjoy following along with us, as we go.
Got any tips or ideas for us already? Let us know anything you’d like to say, in the comments!
And as always, thanks for coming by. : )

* * * * * *

Please come follow me here and there:


Filed Under: Crafts & Creations, Home Improvement, Home Projects, Organization, Photography, The Homestead Tagged With: art-studios, craft-art-organization, craft-rooms, craft-spaces, craft-studios, home-renovating

  • « Previous Page
  • 1
  • …
  • 17
  • 18
  • 19
  • 20
  • 21
  • …
  • 101
  • Next Page »

We are wicked happy to have you here! We hope you find much inspiration, help, humor and enjoyment here.


Archives


POPULAR POSTS

* * * * * *

SUBSCRIBE to House of Joyful Noise blog! Every new post, delivered right to your email box!


Privacy Policy

Amazon Affiliates

Never at any additional cost to you, we may earn a small commission for our endorsement, recommendation, testimonial, and/or link to any products from our website. Your purchase through our links helps support our family, while sharing with you the products we authentically use and recommend, for various ideas, and letting you know where you can purchase them. Thank you for your support!

[footer_backtotop]

Copyright © 2025 HouseOfJoyfulNoise.com · Genesis Framework by StudioPress