• HOME
  • {A}’s Chipmunk Training Archives

 Homepage

  • The Homestead
    • Home Projects
    • Home Improvement
    • Home Decor
      • Seasonal Home decor
        • FALL Home Decor
        • WINTER Home Decor
        • SPRING Crafts and Creations
        • SUMMER Crafts and Creations
    • Our Chickens
    • Gardening
    • Organization
    • Re-Purposing
    • Furniture Refinishing
    • Budget
  • Crafts & Creations
    • Seasonal Home decor
      • FALL Crafts and Creations
      • WINTER Crafts and Creations
      • SPRING Crafts and Creations
      • SUMMER Crafts and Creations
    • DIY (Do-It-Yourself) Project
    • Kids Arts and Crafts
    • Homemade/Handmade Gift Ideas
    • Holiday Crafts
    • Fan Pulls
    • Free Printable/Downloadable
    • Sewing Projects
    • Giveaways
    • Business Features
  • Recipes/FoodFun
    • Breakfast
    • Lunch
    • Main Dish
    • Sandwiches
    • Appetizers
    • Slow Cooker
    • On The Grill
    • Side Dishes
      • Soups
      • Salads
    • Baking
      • Breads, Rolls and Muffins
    • Snacks
    • Treats
    • Desserts
    • Drinks
  • Homeschooling
    • Elementary Homeschooling
      • Elementary Homeschooling READING
      • Elementary Homeschooling MATH
      • Elementary Homeschooling LANGUAGE ARTS
      • Elementary Homeschooling SCIENCE
      • Elementary Homeschooling HOME ECONOMICS
      • Kids Arts and Crafts
    • Middle School Homeschooling
      • Middle School Homeschooling SCIENCE
      • Middle School Homeschooling HOME ECONOMICS
    • Language Arts
    • Math
    • History / Social Studies
    • Geography
    • Foreign Language
    • Field Trips
    • Games
    • Nature Study
  • The Big Picture
    • Life In General
    • Celebrations
    • Faith
      • Into the Light; The Series
    • Giveaways
    • Reviews & Sponsors
  • Photography & Lettering
    • Photography
    • truck lettering
    • vehicle graphics
    • Newborns
    • Kids
    • Engagement
    • High School Senior Pictures
    • High School Senior Pictures Sneak Peeks

Decorating with Autumn Leaves; Door Garland and Candle Jars

November 10, 2012 By Laura 26 Comments

I think you’d be hard-pressed to find anyone on God’s green earth, who appreciates the foliage that Autumn brings, more than I do.  I am mesmerized by the leaves, from beginning to end.  Ask my kids.  They are often amused at how taken I am, with the beauty of this season.  And they’ve certainly come to understand that I don’t want them to miss one bit of it, any more than I do. I get especially excited when we are driving here and there, which with 4 kids I can tell you, we do a whole lot of.  “Oh!! There’s a tree starting to change right there! Do you see it guys?” And as fall progresses., each week is more full of awe than the last. As we go along, I’ll burst out “LOOK!….at that GORGEOUS tree guys!! LOOK AT THE COLORS ON THAT THING!!”  I’ve startled them. And they’ll be like, “We know Mama! Watch where you’re going!”  It’s true. I probably shouldn’t be driving at all in the Fall. Certainly not during peak foliage week.  There is just a span of weeks in this season, where the trees are all I can talk about, everywhere we go. Sometimes, I feel God made Autumn, just for me. Perhaps not. But gosh, it sure feels like such a gift of love.

The peak beauty of the season, is really all too fleeting for me.  I want it to stay just as it is in those weeks, forever.  At least, I want to save as many beautiful leaves as I can.  But I’ve never found a great way to preserve them for a while, until this year. Oh yes, there was the waxed paper trick but, I heard that never worked all that well.  And besides…..Confession of Domestic Shame:  I really hate ironing.  So when I learned that using Glossy Modge Podge really worked well, I was so excited to try it.  And I immediately started dreaming up a very simple, very rustic leaf garland for my home.
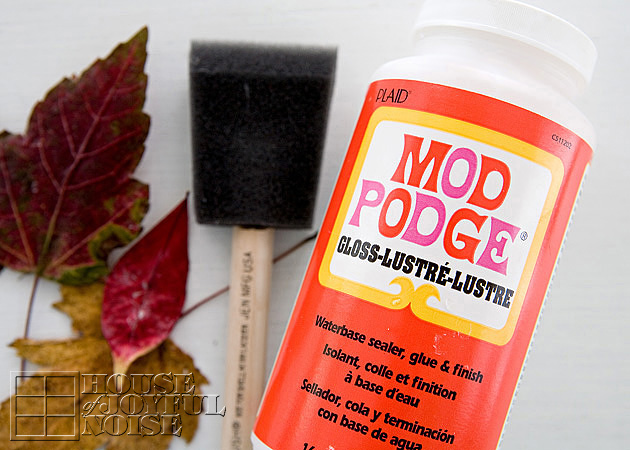
 The kids helped me Modge Podge countless leaves they had collected for me, over the weeks.  We had them drying and being pressed between the pages of newspapers and magazines all over the house. I’m willing to bet we’ll be finding several we missed finding again, well into spring.  But I found you can actually Modge Podge a fresh leaf right away, anyway.  I do recommend the Glossy medium. I tried the Matte finish just as a test, and it seemed to strip the color, and not look very impressive once it was dry either. Something about the Glossy really does enhance the color of the leaf, and add lustre.  To Modge Podge (MP) the leaves, we just poured some MP in a non-pourous bowl, and used foam brushes to apply it to our leaves, doing the back of the leaves first.  Then you can lay them on newspaper or whatever, until they dry. They don’t really stick anywhere as drying, because they are not flat or heavy.  MP is so easy to clean up anyway.
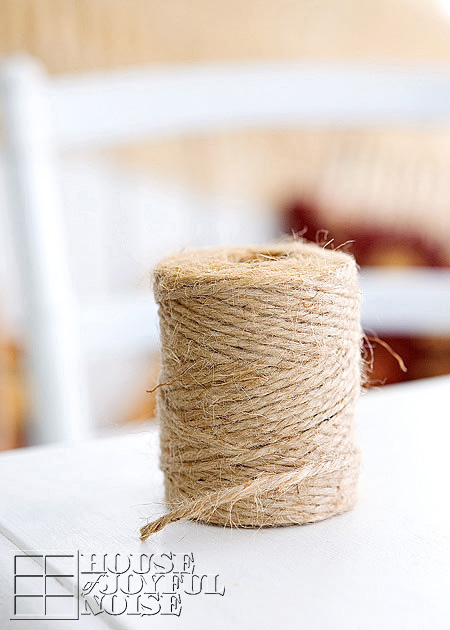

I wanted my garland extremely simple and rustic.  Jute was just the kind of string for the job. I love this stuff.
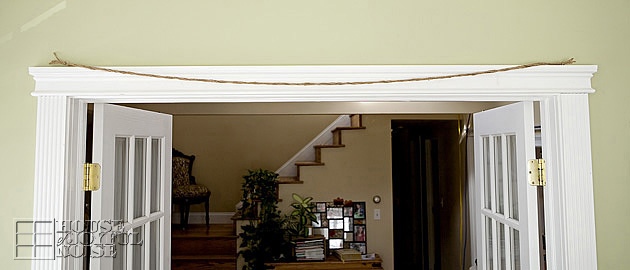
 I took 4 pieces of equal lengths of the jute, knotted the ends, and twisted the quadruple strand quite a bit before push-pinning it over the frame of our sun room french doors.
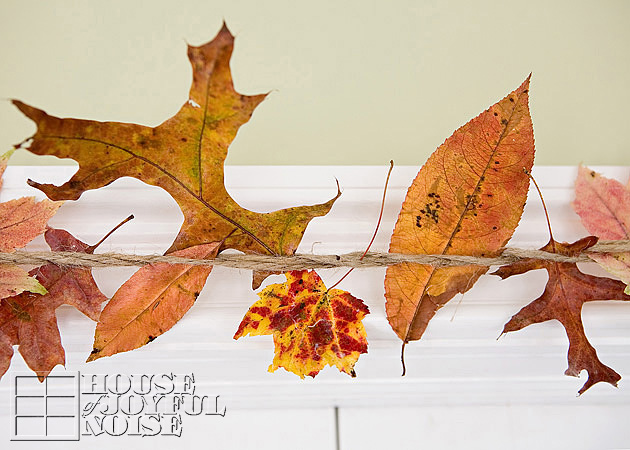
 Then, I just stuck my leaves in between the twisted jute string, arranging as I wanted to, all the way across.
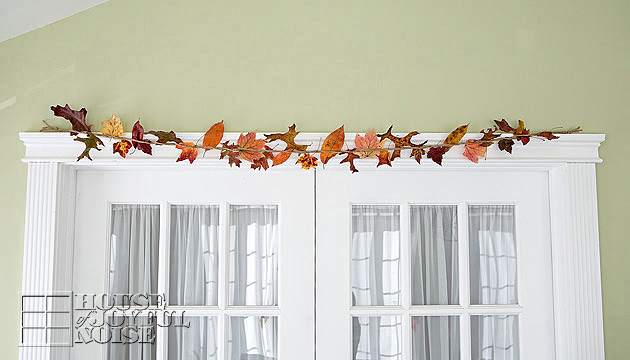
 There it is. Done in like, . . .a couple of minutes.
And I didn’t fall off while standing on the chair I had to keep moving, even once.
(Although I think I had my husband and kids nervous, because they kept reminding me to be careful. That might have to do with the many happenstances I have had. But not this time!)
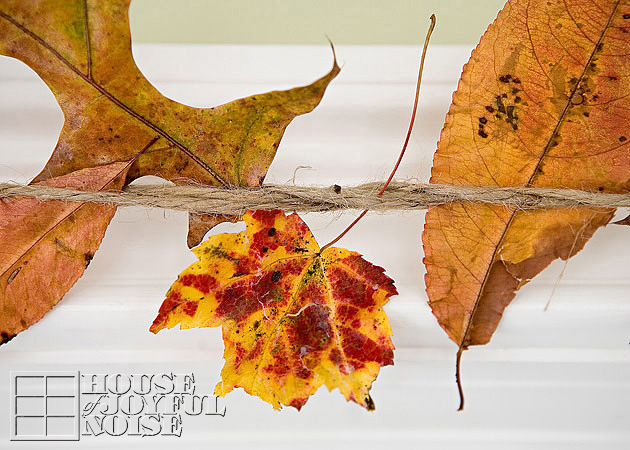
 Look how pretty!  Honesty….my heart is racing a little bit right now, just looking at them.
No two alike….such beautiful shapes and colors.
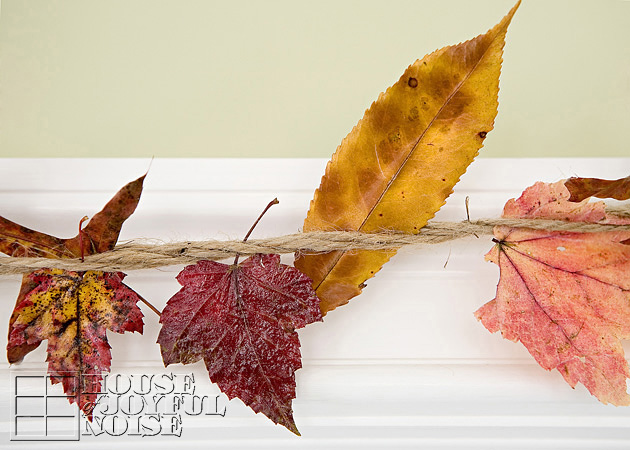
 Do you see that long pointy leaf? After being out and about collecting leaves, the kids came running in, so excited to give me that one. They call it my giraffe leaf.  I love giraffes, and they saw a giraffe skin pattern in it. I do too now.  I felt the love, and that leaf makes me smile even more than all the rest now.

I also used the glossy Modge Podge to apply more leaves to jars.  I love that you can just slap that MP all over the jar with a foam (or flat bristle) brush, and everywhere it dries where there is not a leaf, it looks like frosted glass.
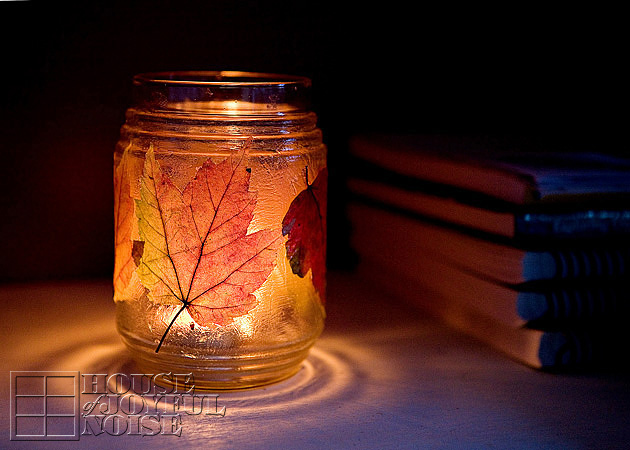
Isn’t it beautful?
I’ll warn you that this project took a little more patience than I had anticipated. Certainly not as easy as my garland! It’s worth the little bit of trouble I think though! It’s just that the leaves, which I had MP’d the back of, as well as the jar, don’t want to lay down flat right away. It’s all kind of slippery. It’s only once the MP glue starts setting a little, that is starts sticking as you need it to.  You need to MP over the leaves too anyway, so I kept kind of poking the leaves down where they were sticking up. Once the whole jar was dry, I did one more final coat.  Oh and I just let stems hang free off the glued down leaf. I liked them that way anyway, if they didn’t want to stick.
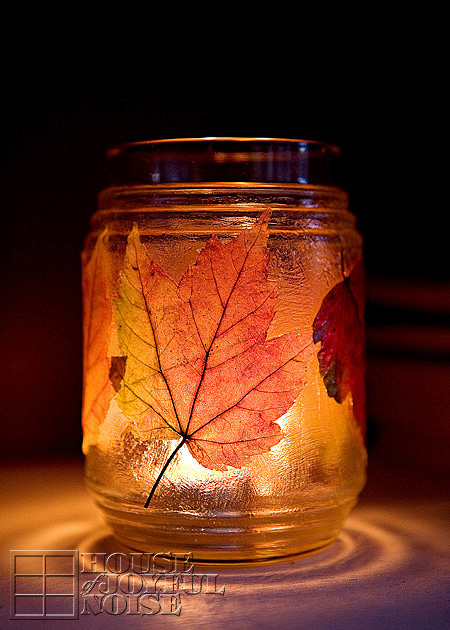
 They give such a warm glow of radiance.
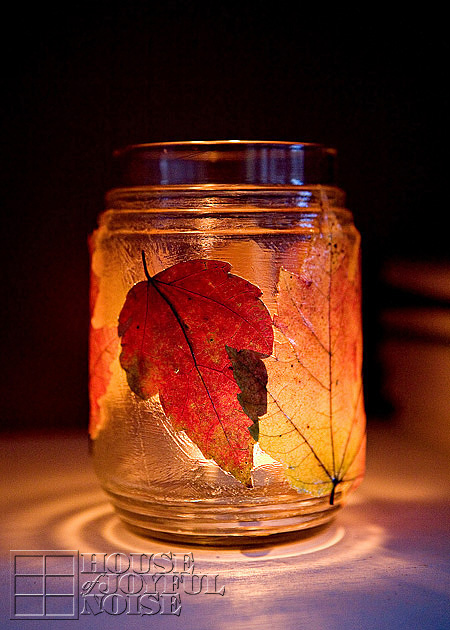
 I can see myself doing these same projects with leaves every year, from now on. And other preserved leaf projects I’ll think of I’m sure now too.
I so enjoyed every minute of working with the leaves, and I am so very happy I found a way to preserve them, and let the beauty live on in my home, as the world around us outdoors drains colorless.
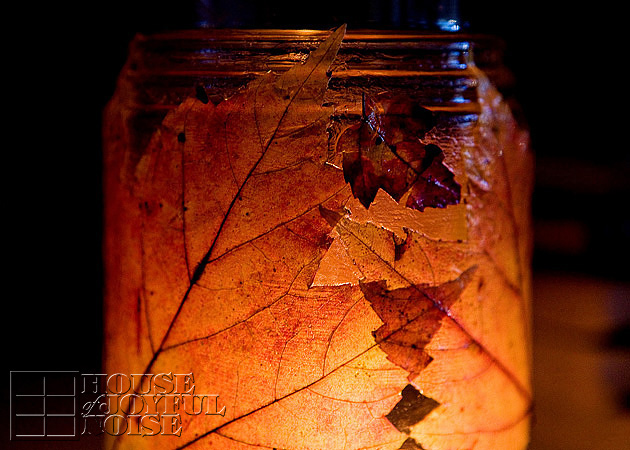
Thanks for coming by, and listening to me go on and on about my love for the colors of Autumn.
It sure was an amazing Fall season this year, and I thanked God for it every day.
Do you get a colorful foliage season where you live, in the Fall? And if so, have you done anything with the leaves?

Come follow me here and there:

Save

Save

Save

Save

Filed Under: Crafts & Creations, FALL Home Decor, Home Decor, Seasonal Home decor, The Homestead, Tutorial Tagged With: autumn decor, autumn-crafts, decorating-with-leaves, door-garlands, fall-craft, fall-decor, leaves-candle-jar, leaves-garland, Modge-Podge-crafts, modge-podge-projects, seasonal-decorating, simple-rustic-decorating

Decorative Wall Initials | Craft Tutorial

August 8, 2011 By Laura 10 Comments

decorative-wall-art-initial-modge-podge-10

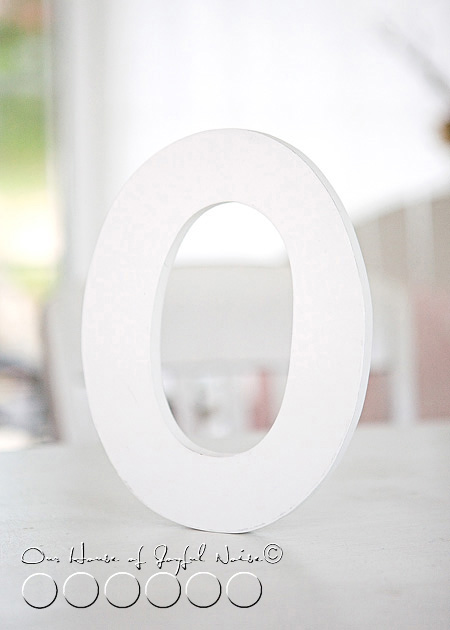
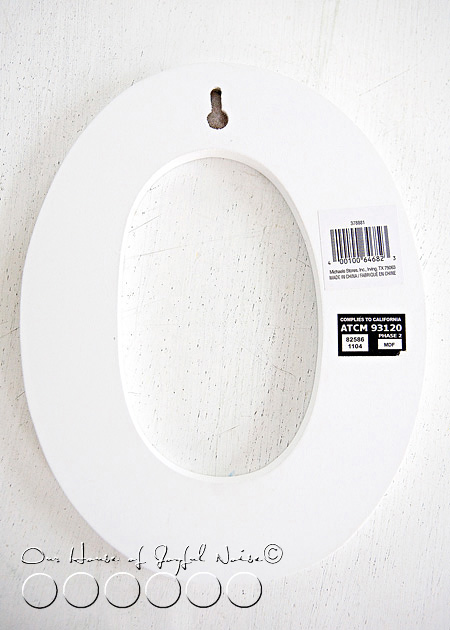
Every time I’ve gone to Michael’s Arts and Crafts, I’ve looked at these large white initials / letters you can purchase individually.  I knew I wanted to create something using these letters as personalization, for {O}’s room. But I was undecided if I wanted to do her whole name, or just her initial.

decorative-wall-art-initial-modge-podge

The letters have a nice flat white surface to work on.  But what to do on that surface, was another matter I was undecided on.  Those were the questions that kept me from purchasing any for while.  Finally, I decided just her initial would be cute, as we actually do call her “O” half the time.

To decorate the letter (or letters), I initially (no pun intended ; ), thought I’d probably paint a pattern. But then I took to the idea of picking out some cute scrap booking paper, and Modge Podging the surface.  Not a new concept by any means, but I wasn’t looking for a new invention.


decorative-wall-art-initial-modge-podge-1

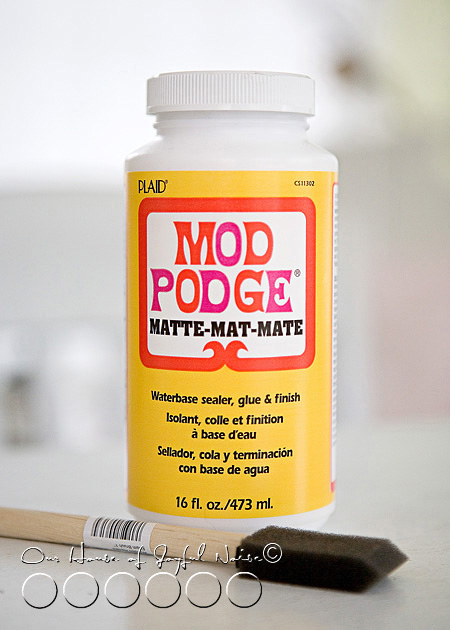
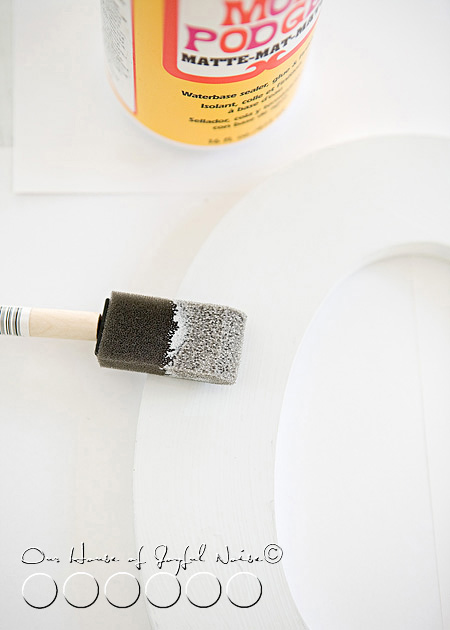
I love working with Modge Podge.  There are so many varieties, but I knew the Matte finish, which I had on hand, was all I needed, as a glue and also a top finish.


decorative-wall-art-initial-modge-podge-2

We had had a family trip to Michael’s one evening, so {A} could spend her Gift Card she got from her Grandmother for her birthday.  In case you are wondering, {A} knew exactly what she wanted, as she had been wanting it for a long time:  a wood burning kit.  She’s been having fun with that, practicing, and getting ready to do a project. So while we were there at our favorite local craft store, I thought it would be nice to let {O} pick out the scrap booking paper to use, to finish to the initial for her room.
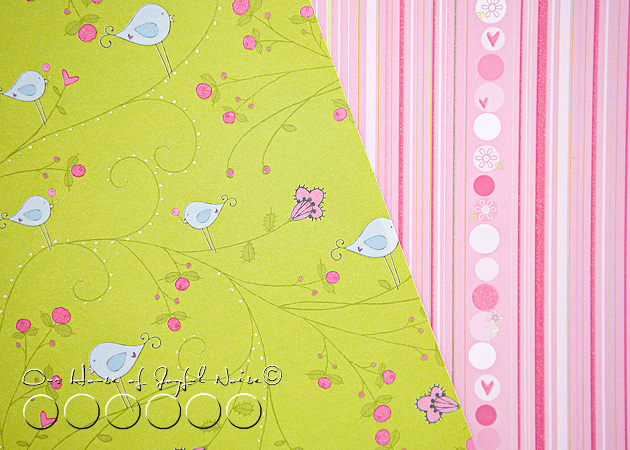
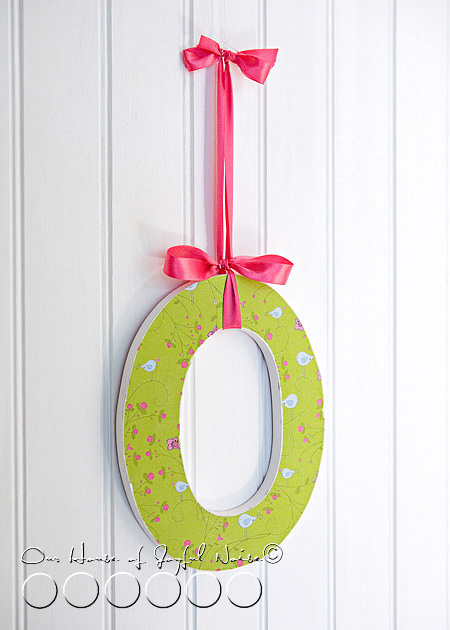
We chose 2, because I had the idea that we could finish both sides of the “O”, and make it reversible!  Naturally, you can’t do that with every letter of the alphabet, but it works for “O”.

decorative-wall-art-initial-modge-podge-3
The back side of the letter does have a hanger hole, and stickers, which were way too difficult to get off.  So I left them. The scrap paper is thick enough that I knew they wouldn’t show through. So my plan was to just paper and Modge Podge right over the hole and stickers.


decorative-wall-art-initial-modge-podge-4

I started by putting a good layer of Modge Podge on the front surface of the letter.

decorative-wall-art-initial-modge-podge-5

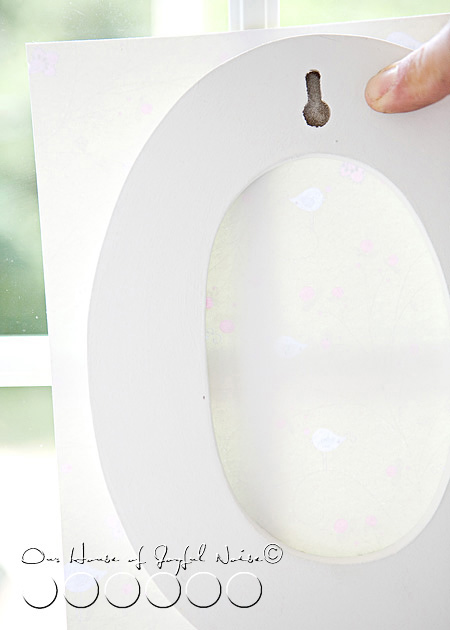
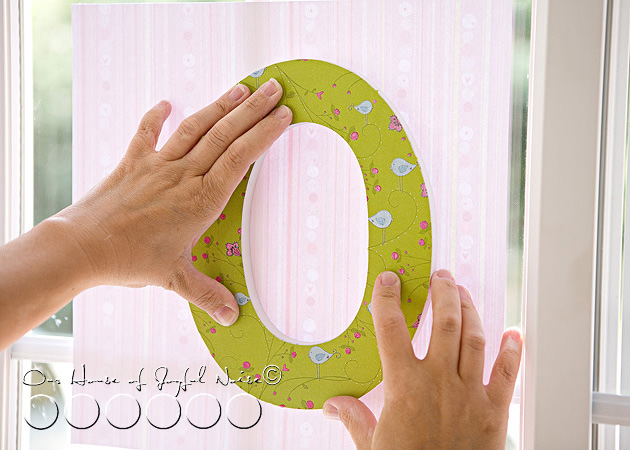
Then, I took my letter, and the apple green sheet of scrap booking paper, over to a window.  Placing the paper onto the window, with the backside facing me, I strategically placed the Modge Podged side of the letter, onto the paper.  The reason I did this at the window, was to be able to see the pattern on the other side of the paper, and get as many little blue birds onto the letter as I could, and not cut many or any in half, if possible.  The blue birds were the charm of the pattern to me, so I wanted them to be as much a part of the piece as possible.

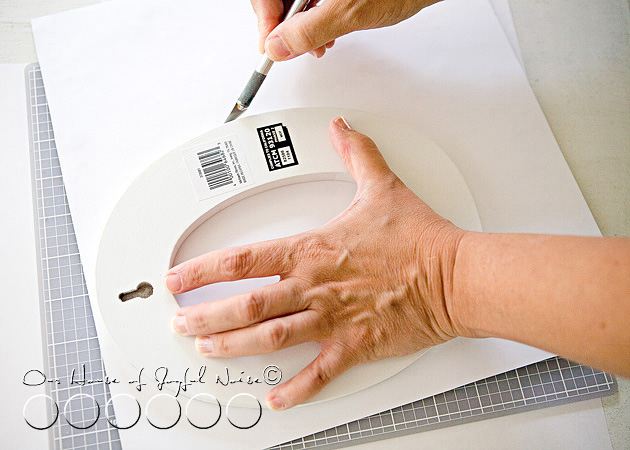
decorative-wall-art-initial-modge-podge-6 I took the letter now stuck to the paper, back to the table, and on a self-healing mat, trimmed off the excess paper with an x-acto knife.  Please excuse my mother’s hands. ; )


decorative-wall-art-initial-modge-podge-7 Once the apple green paper was all trimmed to size, and rubbed down good,  I repeated the whole process for the opposite side:
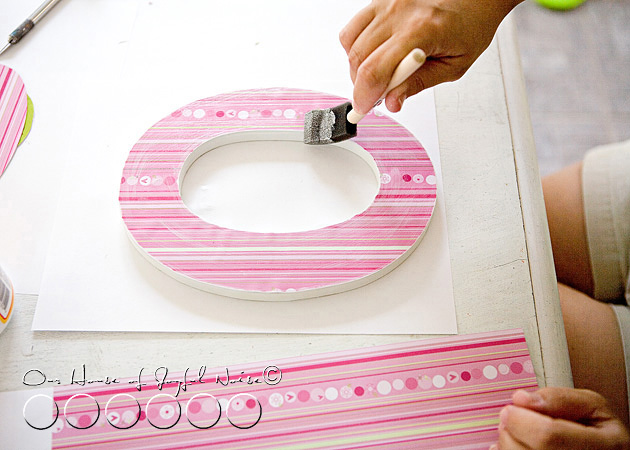
1) Modge Podge the white surface of the letter 2) Bring the scrapping paper and the Modge Podged letter over to the window, and place the paper onto the window with the back side facing you 3) *Strategically place the letter onto the paper, considering the placement of the paper.  4) Trim off excess paper with an x-acto.

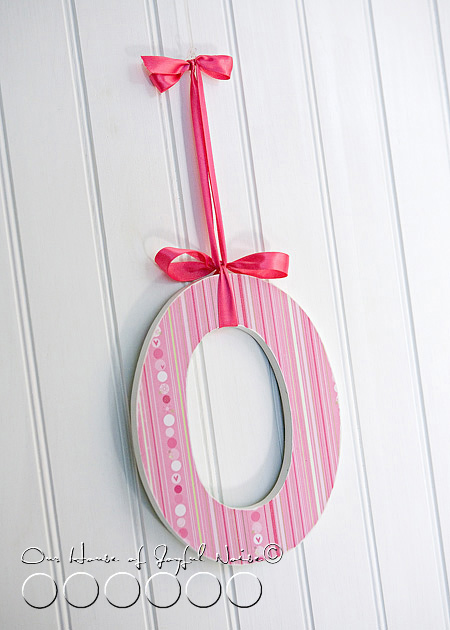
*Using striped paper, is even trickier! It’s a tad more difficult, with a rounded letter such as this, to place the letter in such a way to be sure that the stripes will be straight.  Of course the striped pattern could go horizontally, or even diagonally. With a letter with a straight edge, it is easier to line up with the stripes and get it straight.  If this is more than you’d want to bother with, be sure you choose paper that is a more random sort of pattern. Or, to be super safe, you could use solid paper, if that’s not too boring for you.


decorative-wall-art-initial-modge-podge-8 Once all of the paper is trimmed, Modge Podge the surfaces as a protective coating and finish. Allow one side to dry completely, before doing the other.   Then I sanded the edges, just to rough it up just a little.

I was undecided, it it really looked finished. I’m still not sure! I’d love your opinion, once you see it hanging.

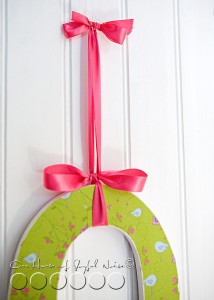
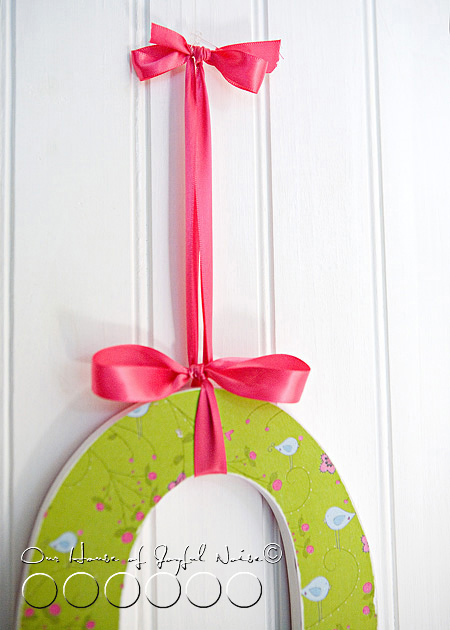
Now, since I made this a reversible/2 sided letter, covering the hanger hole on the back side, I hung the letter with a coordinating satin ribbon. It took a little patience, to double tie the bows, and have them come out nice, so that the weight of the letter did not untie the bows!  With a few deep breathes, I managed.

decorative-wall-art-initial-modge-podge-9

decorative-wall-art-initial-modge-podge-11
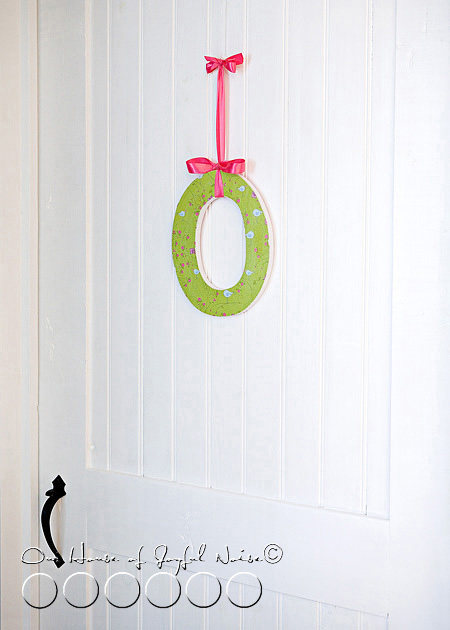
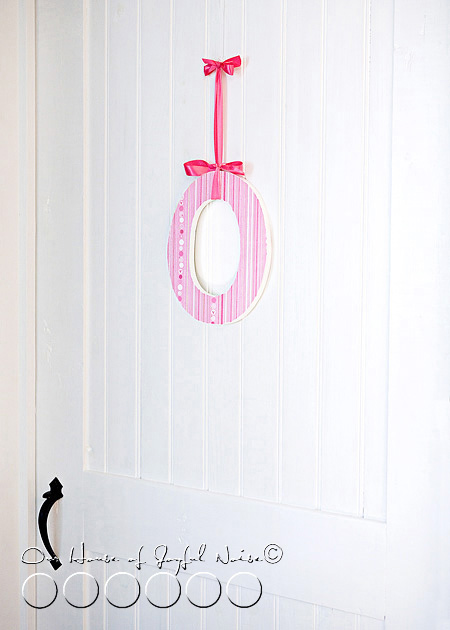
Here it is, hung on {O}’s bedroom door.  The plan was actually to hang it inside her bedroom, but there was not adequate light in there (later in the afternoon) when I wanted to photograph it. So I hung it on her door. It may or may not stay there.

As a side note, Michael made this latch door, as he is (still in the process of) making all of the doors in the whole house. I-love-these-doors!  They will actually be a little distressed and made to look older, later on when they are all done, for a more old farmhouse look.

decorative-wall-art-initial-modge-podge-12
{O} loves that she can flip her letter over any time she wants, and change the look of it, “depending on what mood I’m in that day”, as she put it.


decorative-wall-art-initial-modge-podge-13

Here’s a closer look.  I like it, but I am still wondering:  Does it need some sort of trim? Or should I paint the inside edge of the letter, a color that coordinated both sides? Or is it cute as is?


decorative-wall-art-initial-modge-podge-14
Give me your opinion. This craft may or may not be officially complete.  Either way, I think it’s a quick & easy craft, and adds a little cute personalization to a room. Imagine the creative ways you could make a decorative letter.  Maybe using 3d elements, painting, or hanging with different materials like thin rope, twine, lace…the possibilities are endless.  I’m already thinking of the boys room.

See, we’ve been working on finishing and decorating our home for years. I have SO much to show you, in the near and distant future, as various parts of the kid’s rooms are finished and decorated.  The girl’s each have their own room, and the boys have a BIG room to share.  Very cool features. The kids have very different personalities, and we are creating their rooms in ways to reflect that, and their style. Such a fun process! We are so blessed with Michael’s carpentry skills too, and we ladies know how much fun interior decorating is!  (As money allows, which is why it’s taken us this long as it is.) So I hope you’ll follow us along through our home finishing journey.

But back to the “O”.  Done or not? And have you resubscribed, as you need to, and put yourself in the running for our current GiveAway?


Save

Filed Under: Crafts & Creations, DIY (Do-It-Yourself) Project Tagged With: craft-tutorial, crafting, crafts, decorative-letters, kids-bedroom-decor-ideas, Modge-Podge-crafts, modge-podge-projects, room-personalization, uses-for-scrapbook-paper

Tissued Decorative Storage Tins | Craft

June 7, 2011 By Laura 7 Comments

tissued-storage-tins-craft-21

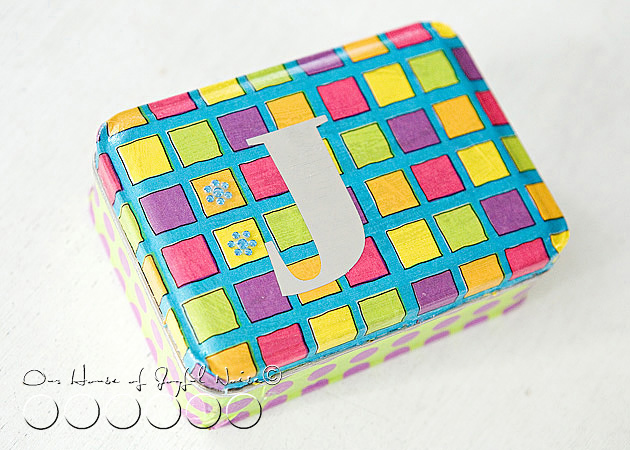
Sometimes, us creative people, have ideas that come out better in our head, than they do in real life!  Agree? But this project of tissued decorative storage tins was the opposite.  On the one hand, it may have been just a tad more difficult than I had imagined.  Only because I should have remembered how tissue paper and I, can go round and round and round.  We just don’t seem to get along. I normally do not have the patience for the stuff, and end up making the tissue a wrinkled mess. So much so, that I refer to my husband, to put the tissue in gift bags if I can, and he also is so kind, as to do all of my packaging for my portrait photography orders for my clients.   But on the other hand, these tissued tins actually came out way nicer than I expected!  I’d have to say the credit for that probably goes to Modge Podge. Love that stuff!

This idea is one I came up with as homemade gifts for our nieces & nephews, for Christmas 2010, as well as for my God-Daughter {Ju}. (You all know her by now, right?)   I thought they would be cool for them to keep little treasures & trinkets in, in their rooms, or even for my oldest nephew/God-Son to keep change or what-not in in his Jeep.

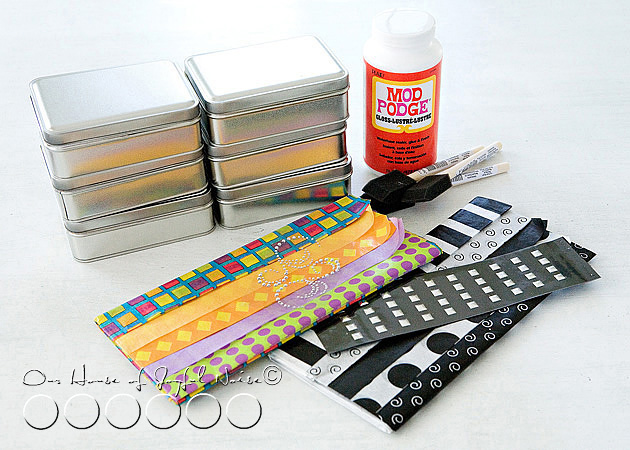
tissued-storage-tins-craft Here’s all you need!

As well as an x-acto knife or razor blade of some sort (not shown), and possibly a little patience, if you are like I am with tissue paper.  If you don’t need the patience…..well I’m happy for you!  : )

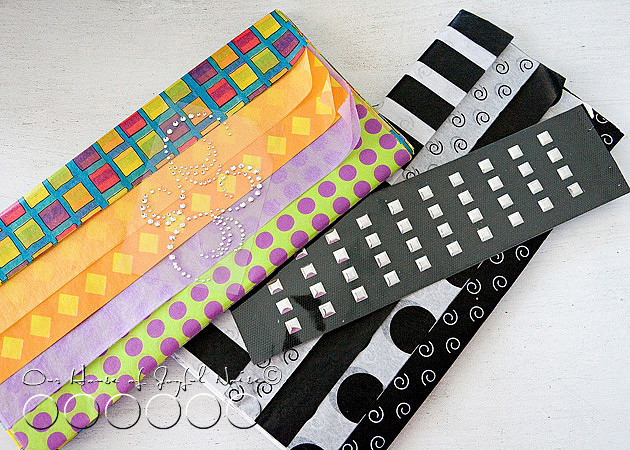
tissued-storage-tins-craft-1 I was so thrilled to find such bold & funky designer tissue paper, at The Dollar Store!…. that I thought was just perfect for the age range of the kids, from elementary school to teens, and for both the boys and the girls as well.  The silver sticky elements I got in the scrapbooking section of Michael’s Arts & Crafts.


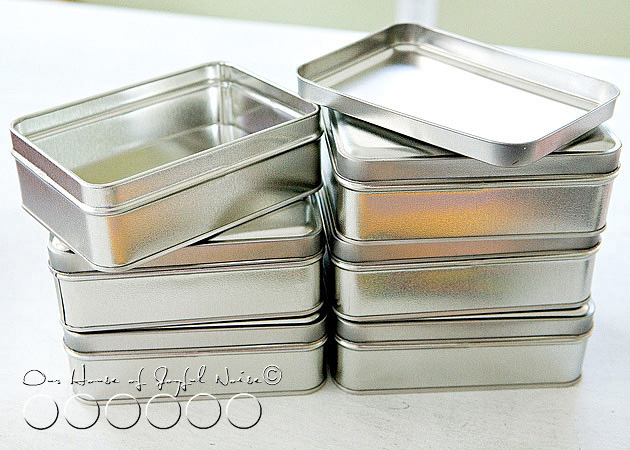
tissued-storage-tins-craft-2 I found the tins shown, at Michael’s Arts & Crafts.

They had a variety of shapes and sizes to choose from.

tissued-storage-tins-craft-3

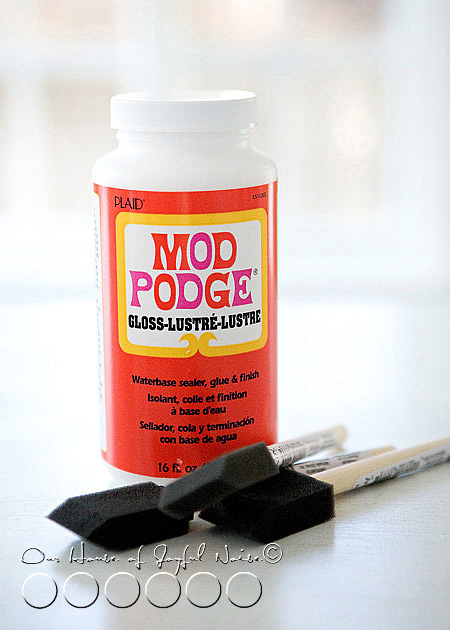
Modge Podge and foam brushes came from the same place.

So this is how this is done:

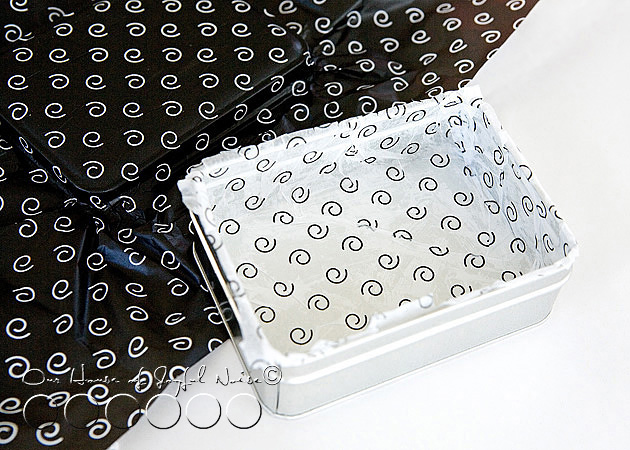
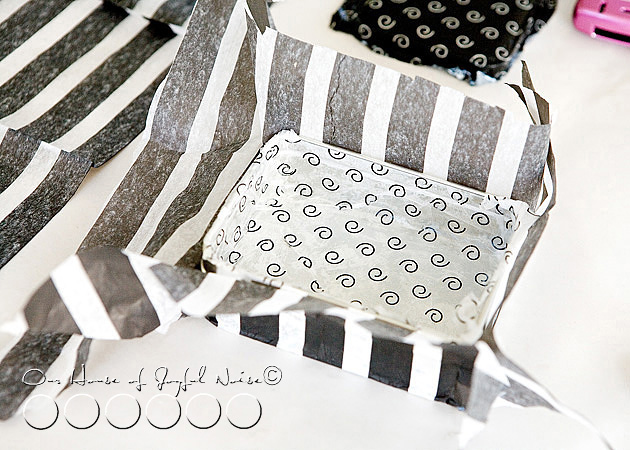
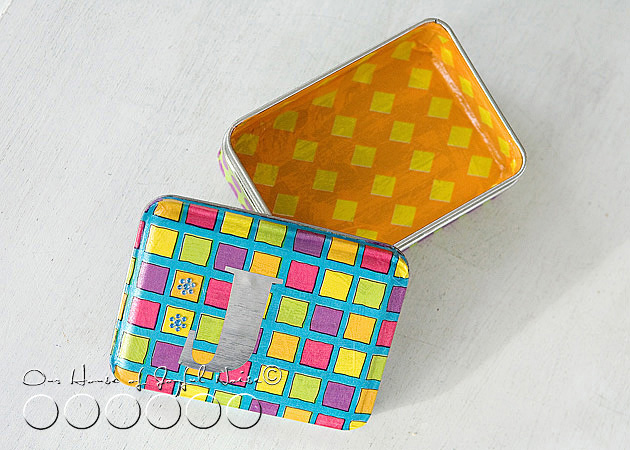
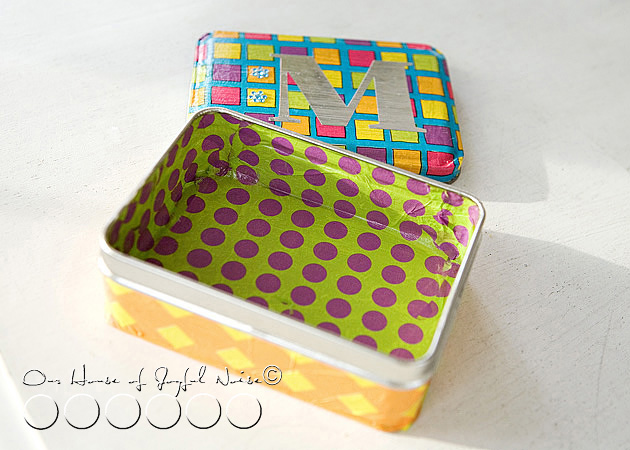
With your foam brush, you begin by Modge Podging the inside of one tin, and then layer it with the tissue design you would like on the inside.


tissued-storage-tins-craft-4 You really only want to Modge Podge up to the lip of the inside of the tin before laying on the tissue, but let the tissue overlap from there, for now.  Just carefully rip off or cut the excess with scissors.  Then leave to dry.  We’ll get to how to finish it off in a minute or 2.

Now I am telling you right now, there is no way for the tissue to come out perfectly smooth. Most especially on the inside, where you virtually have to stuff the tissue in there.  But do be careful not to tear the tissue or poke a hole in it. However, IF you do by accident, (as I did more than once (yes, the patience with tissue issue…..) it’s not that hard to cover it up, or manipulate the tissue to make the hole not show.  Honestly, it’s just the insides of the tins that are the hardest part of the whole project.

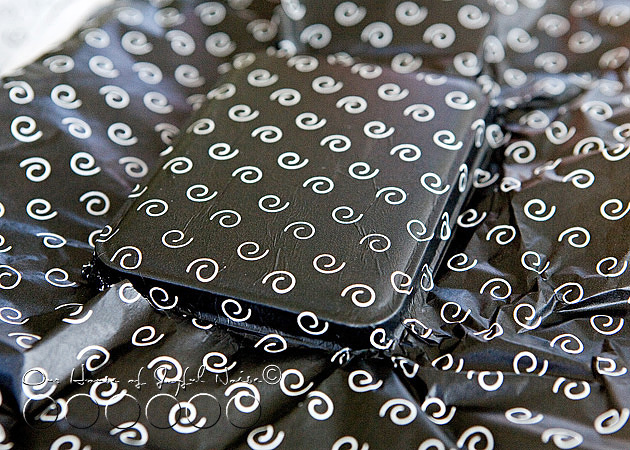
tissued-storage-tins-craft-5 Do the outside of the tin cover, in much the same way.  Again, only Modge Podge to the lip of the lid, then apply the tissue.  Now getting a little (Modge Podge) glue where it shouldn’t be, and the tissue sticking to it, is no big deal. It can be scraped off easily enough once dry.


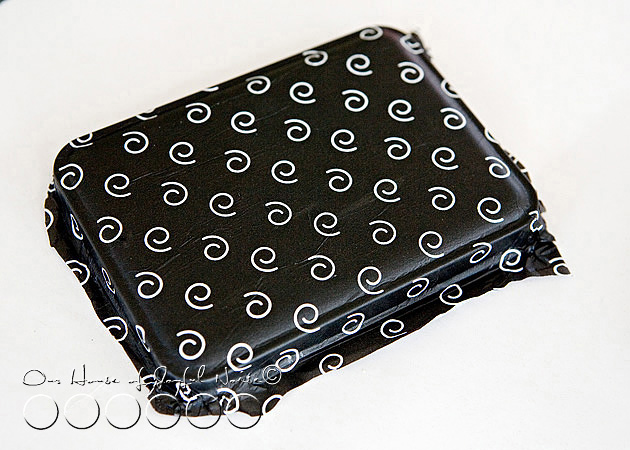
tissued-storage-tins-craft-6 Just rough trim it with your x-acto blade, and then leave to dry.  If you are trimming first before it really sits to dry, just make sure you don’t drag-rip the tissue.  Your blade will get Modge Podge on it, so you’ll want to try to keep it clean too.

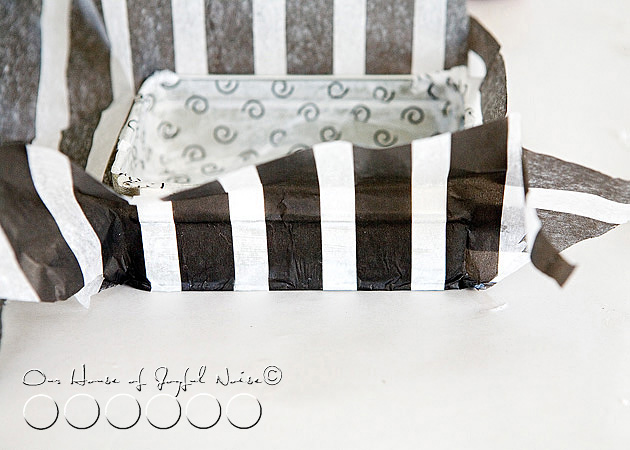
tissued-storage-tins-craft-7 Now you can do the outside of the tin container the same way:  Apply the Modge Podge, and then apply the tissue, smoothing it all as best you can.  Agai…wrinkled are going to happen here and there.


tissued-storage-tins-craft-8 It was really fun to have these co-ordinating designs to work with.  (Pay no mind to my BlackBerry over there.  Always nearby, and forever bLiNkInG!)

Now, in terms of cleaning them up, I found an x-acto knife to be a handy little tool!  I trimmed off the excess tissue, by running the sharp point of the blade, right in the groove of the lips.  If you aren’t sure exactly where or how I mean, just inspect the earlier photo above of the bare tins, and the ones coming up, and think about how the tin is put together.  You can’t have tissue anywhere, where the tin cover and container need to fit together.  Just a little common sense I dug up there. ; )

OK, so after each tissued piece is dry, and you have trimmed the excess tissue off everywhere, you then need to put a coat of Modge Podge over all of the tissue layers, inside and out!  I did second coats of Modge Podge too, letting them dry before coats, and I recommend doing that.  That is what gives the tins a finished look, once they are dried, and keeps the tissue surfaces protected.  Granted, now that the tissue is trimmed and there is tin lips exposed, you want to try and apply the Modge Podge a little more carefully, as to not get glue all over the naked tin parts .  But again, if any gets on the bare tin edges, once it is dry, it scrapes right off like any glue would. Modge Podging the inside of the tissued tins are probably the hardest to do with your foam brushes, only because you’ll see it puddles a little where folds and creases of the tissue are.  It looks a mess at first. But that is ok…..just spread it out best you can, because the Modge Podge really dries hard and clear.  You are using the foam brush to sort of stick down and smooth out any wrinkled tissue as well, as you work.  You’ll be amazed how good it starts to look as the Modge Podge dries clear.

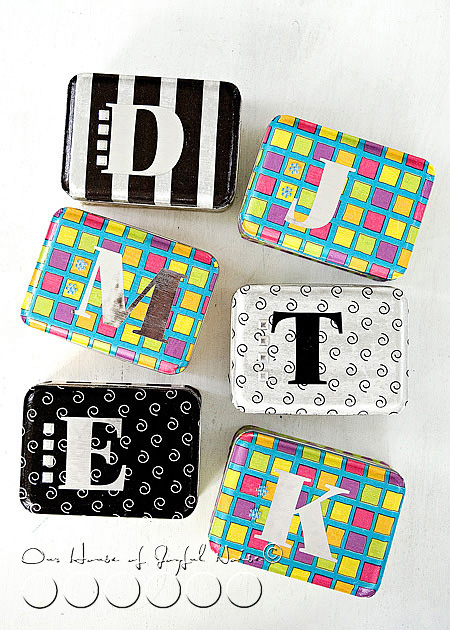
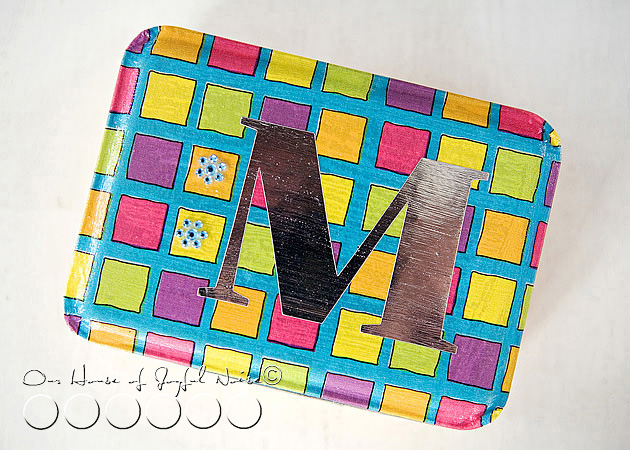
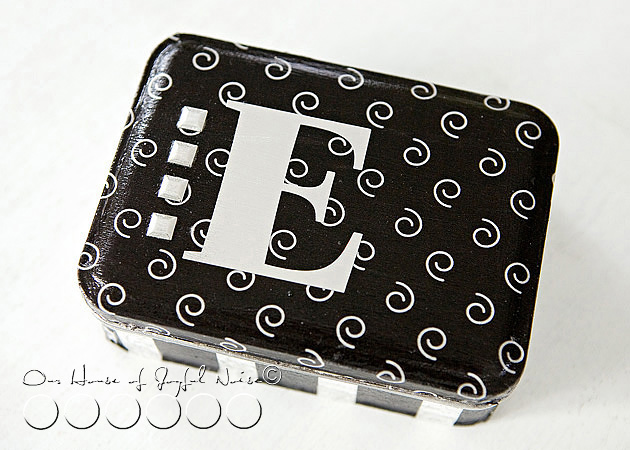
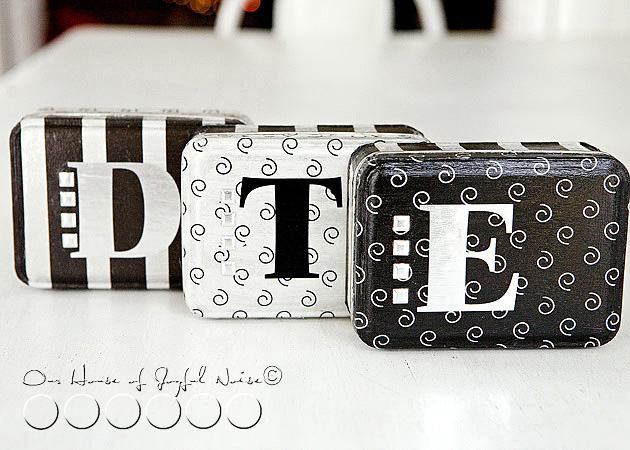
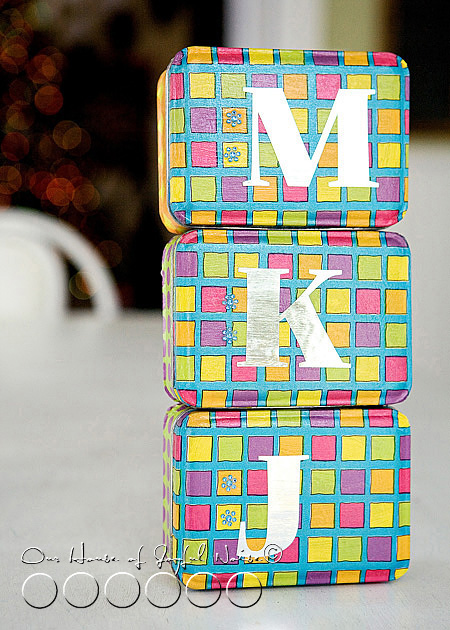
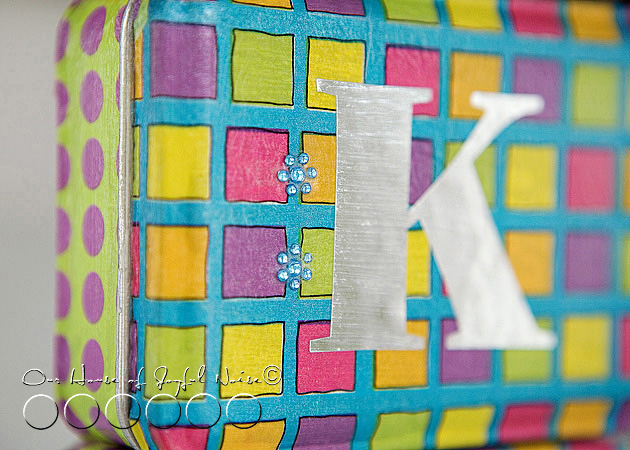
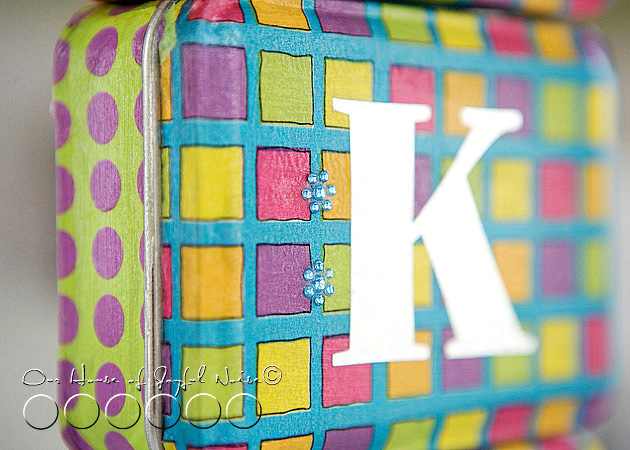
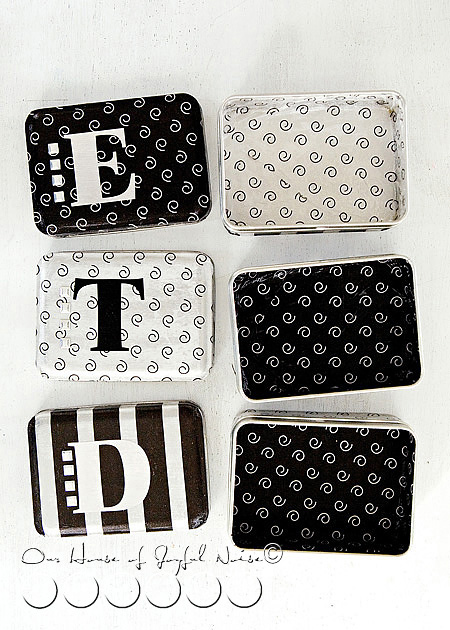
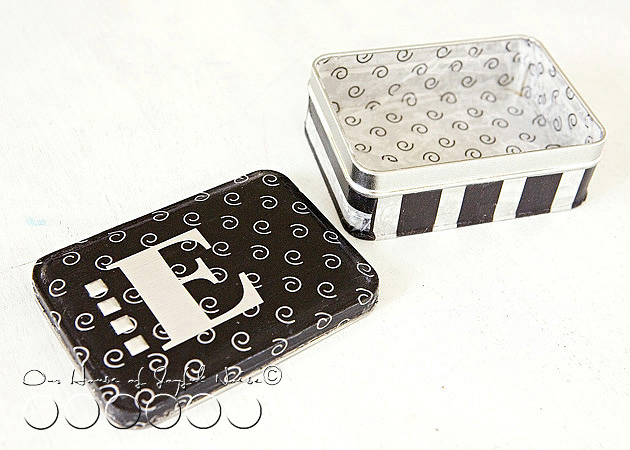
I wanted to personalize them, so I had hubby cut their initials out of sliver mylar vinyl.  Then used the decorative sticky elements, to add a little extra bling.  Finally, I went right over the mylar and the elements on the covers, with another coat of Modge Podge.  Honestly, these came out slick & with a bit of sheen, seeing as though I used the glossy Modge Podge.

I LOVE how they came out, and I am about to show you a whole bunch more of photos, so you really can get the idea. (And, o.k., so I can show them off a little more.)

tissued-storage-tins-craft-9

Bold Black & white for the boys……bright happy colors for the girls.


tissued-storage-tins-craft-10

tissued-storage-tins-craft-11

tissued-storage-tins-craft-12

tissued-storage-tins-craft-13

tissued-storage-tins-craft-14

tissued-storage-tins-craft-15

tissued-storage-tins-craft-16

tissued-storage-tins-craft-17

tissued-storage-tins-craft-18

tissued-storage-tins-craft-19

tissued-storage-tins-craft-20

Like? Love? Let me know what you think!

******


Save

Filed Under: Crafts & Creations, DIY (Do-It-Yourself) Project, Homemade/Handmade Gift Ideas, Tutorial Tagged With: crafts, gift tins, handmade gifts, homemade-gifts, Modge-Podge-crafts, modge-podge-projects, storage-tins, tissue paper crafts

We are wicked happy to have you here! We hope you find much inspiration, help, humor and enjoyment here.


Archives


POPULAR POSTS

* * * * * *

SUBSCRIBE to House of Joyful Noise blog! Every new post, delivered right to your email box!


Privacy Policy

Amazon Affiliates

Never at any additional cost to you, we may earn a small commission for our endorsement, recommendation, testimonial, and/or link to any products from our website. Your purchase through our links helps support our family, while sharing with you the products we authentically use and recommend, for various ideas, and letting you know where you can purchase them. Thank you for your support!

[footer_backtotop]

Copyright © 2025 HouseOfJoyfulNoise.com · Genesis Framework by StudioPress