• HOME
  • {A}’s Chipmunk Training Archives

 Homepage

  • The Homestead
    • Home Projects
    • Home Improvement
    • Home Decor
      • Seasonal Home decor
        • FALL Home Decor
        • WINTER Home Decor
        • SPRING Crafts and Creations
        • SUMMER Crafts and Creations
    • Our Chickens
    • Gardening
    • Organization
    • Re-Purposing
    • Furniture Refinishing
    • Budget
  • Crafts & Creations
    • Seasonal Home decor
      • FALL Crafts and Creations
      • WINTER Crafts and Creations
      • SPRING Crafts and Creations
      • SUMMER Crafts and Creations
    • DIY (Do-It-Yourself) Project
    • Kids Arts and Crafts
    • Homemade/Handmade Gift Ideas
    • Holiday Crafts
    • Fan Pulls
    • Free Printable/Downloadable
    • Sewing Projects
    • Giveaways
    • Business Features
  • Recipes/FoodFun
    • Breakfast
    • Lunch
    • Main Dish
    • Sandwiches
    • Appetizers
    • Slow Cooker
    • On The Grill
    • Side Dishes
      • Soups
      • Salads
    • Baking
      • Breads, Rolls and Muffins
    • Snacks
    • Treats
    • Desserts
    • Drinks
  • Homeschooling
    • Elementary Homeschooling
      • Elementary Homeschooling READING
      • Elementary Homeschooling MATH
      • Elementary Homeschooling LANGUAGE ARTS
      • Elementary Homeschooling SCIENCE
      • Elementary Homeschooling HOME ECONOMICS
      • Kids Arts and Crafts
    • Middle School Homeschooling
      • Middle School Homeschooling SCIENCE
      • Middle School Homeschooling HOME ECONOMICS
    • Language Arts
    • Math
    • History / Social Studies
    • Geography
    • Foreign Language
    • Field Trips
    • Games
    • Nature Study
  • The Big Picture
    • Life In General
    • Celebrations
    • Faith
      • Into the Light; The Series
    • Giveaways
    • Reviews & Sponsors
  • Photography & Lettering
    • Photography
    • truck lettering
    • vehicle graphics
    • Newborns
    • Kids
    • Engagement
    • High School Senior Pictures
    • High School Senior Pictures Sneak Peeks

The Making of Mantels / Appeasing my Mantel Envy!

April 1, 2013 By Laura 8 Comments


A couple of weeks ago, I hinted on our Facebook Page about the weekend project we had in the works. I mentioned that I was all done dealing with the ‘mantel envy’ I have had going on, for years now. You know, mantels, the shelving surface that many homes have over their fireplace?  Many creative homemakers have great fun decorating their mantels for various seasons and holidays, switching it up all of the time. I wanted that, too!
We don’t have a fireplace, anymore. Years ago, before the little-house to big-house renovation, we had a built in coal and wood fireplace insert, with a brick mantel. But that was ripped out when our sun room was added on.
I wanted a mantel of my own to work with. And when I really want something, I usually figure out how to get it.
And you know how good I am at that?

I got me TWO mantels! HA!

I reckon some will have some envy for me, now. ; )  See, the good Lord blessed me, like Mary, with a carpenter of my own.  A very skilled carpenter, I might add, who can build just about anything I want. And because I am not only blessed, but possibly (possibly . . . ) spoiled, he does build me anything I want.
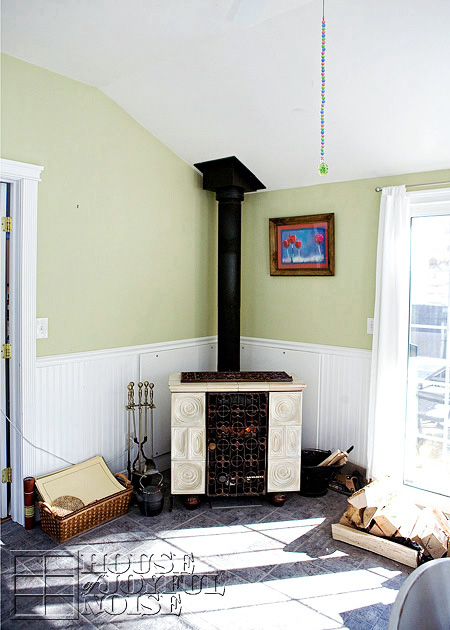
 
I had been telling my-personal-Joseph, how I thought it was a fine idea, for him to build me a great pair of corner mantels, over our beloved, ceramic wood burning, family-heirloom. I explained it to him in great deal, trying to paint the picture for him. I don’t think he was really getting my vision for awhile, because he kept looking puzzled, while assessing the area, and saying, “Really?”, every time I brought it up.  But then on the Thursday before said-prior weekend, I told him I just had to have it. And I’d love for him to get sketchin’, and bring home any materials he;d need for the weekend, home after work on Friday. And he said, “So let me get this straight. This is our new urgent project, that you’d like done right away, before I have even finished the last urgent project, that you’d like done right away? I’m supposed to stop that one, and do this one first, after stopping the one I was doing 2 projects ago, to do the last, new urgent project?”  And I said,
“Right. Honey.”

And so he got sketchin’,
and buildin’, and
yes, I helped quite a bit too.
Because I’m not that spoiled.

And by the next weekend, my mantel dreams had come true, x2.
And I was and am still, thankful.

WANNA SEE?!
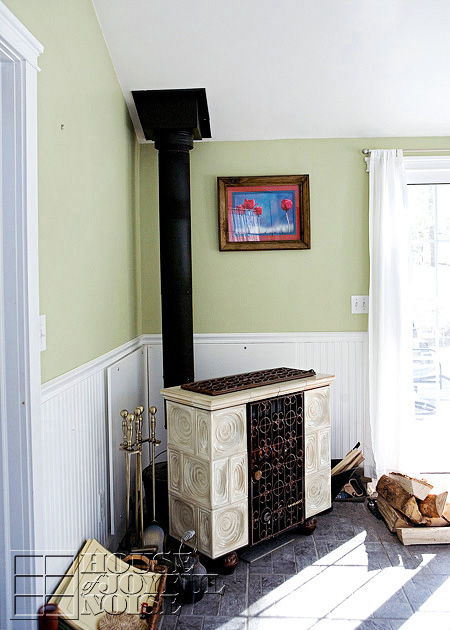

Ok so this is the corner as it has been (before), when anyone is looking at, when they walk into our front door. On the left hand side there, is where our Prayer List Chalkboard has been hanging for years. (And we still use it, regularly.) For now, it’s moved to the wall beside the front door. But take not of the wall straight ahead.  It’s shorter . . . . .
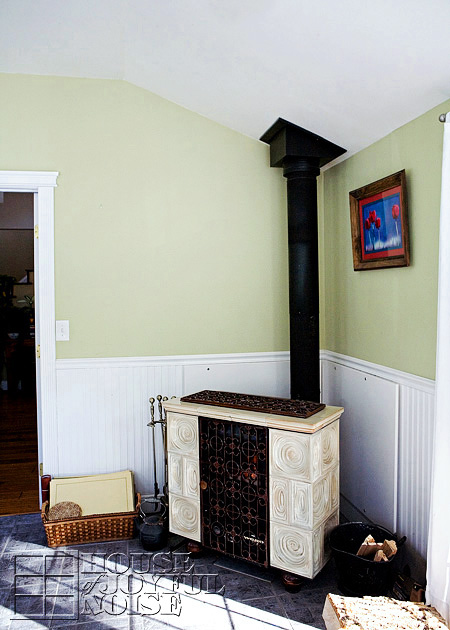
. . . . than the corner wall perpendicular to it. This one is a bit longer.  So I’ll have two different lengths of mantels.
I also got thinkin’ about how much I’ll be photographing the mantels as it changes for our home decor. And it hit me that the backdrop will always be the same, and green. And the simple (right?…) mantels project instantly grew. I wanted a wider bead board like wall as a backdrop.
See? Spoiled. Possibly.

I knew if my Joseph built me these, I would be so grateful. I’d be happy to finish them myself. Of course, I wanted them to not look new. Or fresh. And for my vision, distressing on fresh wood was not going to work. So I researched how to weather/age the wood, before painting and distressing, and was pleasantly surprised to find a way to do it. That worked!
It’s fairly simple too.  You ‘paint’ the wood with tea, first. I made a big strong batch, soaking my tea bags over night.
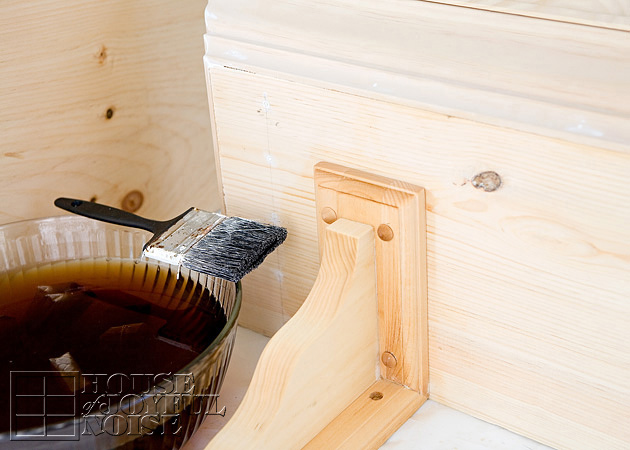
So I brushed the tea on all over my two built mantels, and let them dry. There was no difference to see. 
But the tea is only applied to react with the next strange solution brushed on.
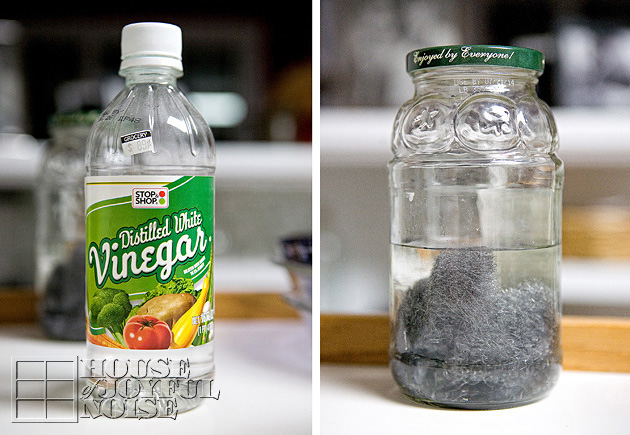

I had to cover very fine steel wool (#0000) with straight distilled white vinegar.  And just let it soak, at least for overnight. 
The next day, it didn’t look much different in the jar. I know in time, that wool would rust. (It has since…). But anyway, while applying it to the mantels (already treated with the tea), I could see the instant reaction happening. Very cool. Almost magical!

To see the dried wood after the vinegar/steel wool solution treatment, click on any image in the gallery below, use arrows to see each next, and then your ESC button to close.

[Show as slideshow]
07_weathering-wood-technique
08_weathering-wood-technique
09_weathering-wood-technique
10_weathering-wood-technique

Interestingly, even after the wood had been dry and I took the above photos, the wood seemed to turn even a bit greyer. which I was happy about. For a darker finish, I could have brushed on a second treatment, but I was quite happy with the results after just one, for this project.

So then it was time to paint both mantels, white.  I used about 3-4 parts paint to 1-part water.
And then a whole lot of sanding and distressing.
Meanwhile, Michael, a.k.a my Joseph in this post, was taking care of the walls to my every wishes.


And I’m pretty much done talking, and ready to show you lots of photos of this exciting home improvement project!
Here we go!
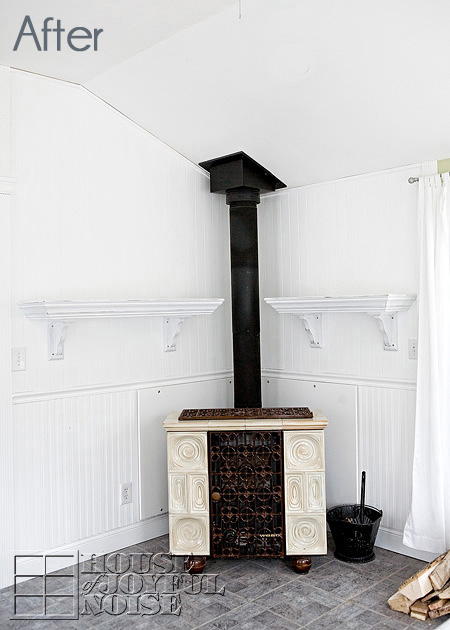

Now for anyone concerned, we were sure to make certain these mantels met fire code.  They needed to be at least 6 inches from the stove-pipe, and they are. It’s hard to tell in these photos, but trust us. We have the most to lose! That is why they don’t wrap around behind the pipe.  The mantel shelves are very thick, and keep in mind too, that the stove is only in use maybe 1-1/2 seasons a year.
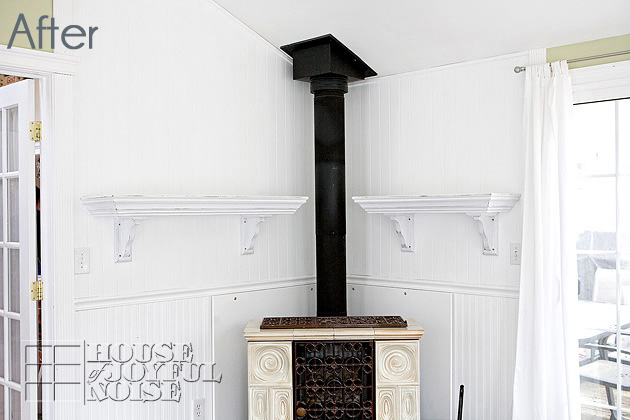
So yes, while narrow bead-board goes all the way around the lower half of our green sun room (as of this post), the wider bead board (v-groove) type paneling is just in this corner.  I think because of where we let it end, and because of the molding we used, it works nicely! 
And how about those mantels?
I love that I have two to work with! Because sometimes you get going on a theme, but you really have another idea that kind of ties in too.
So that is going to be way fun.  One is 48″ and the other is 35″.
Let’s take a closer look at the beauty of the craftmanship of my husband, shall we?
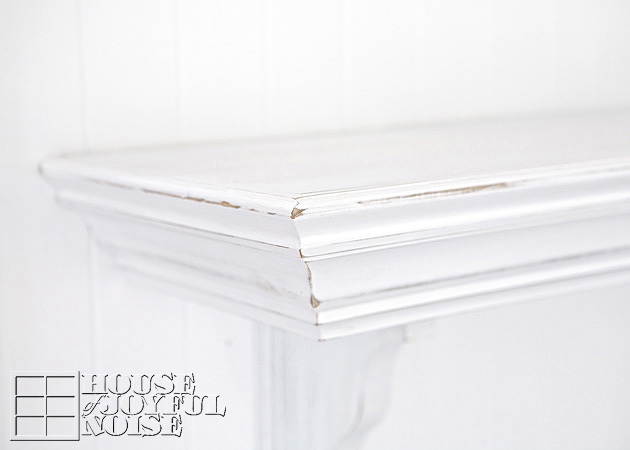
He used  1×12″ and 1×10″ pine boards, crown molding, and base cap.
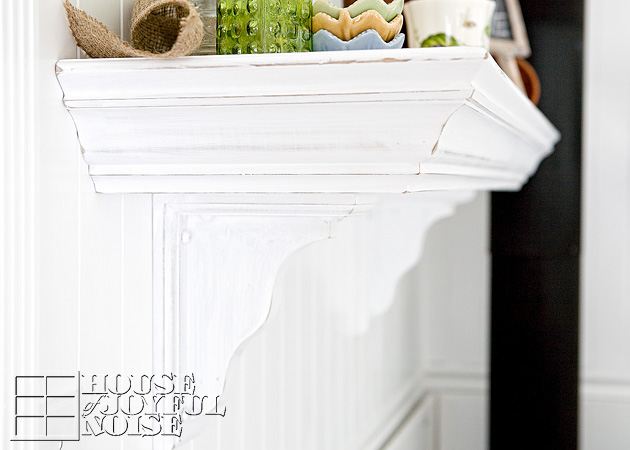
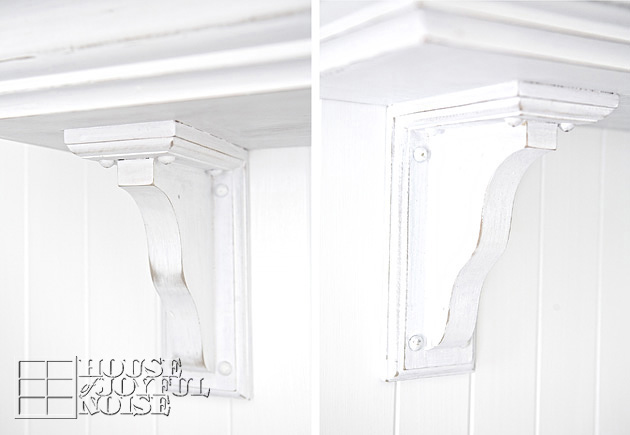
And these awesome pre-assembled 9×7″ shelf brackets. Which, I love.
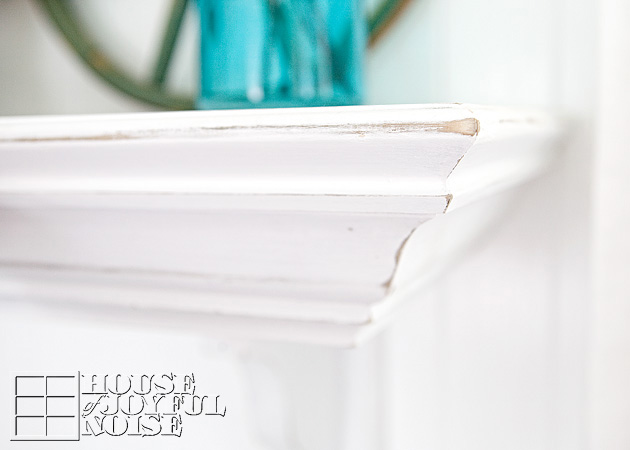
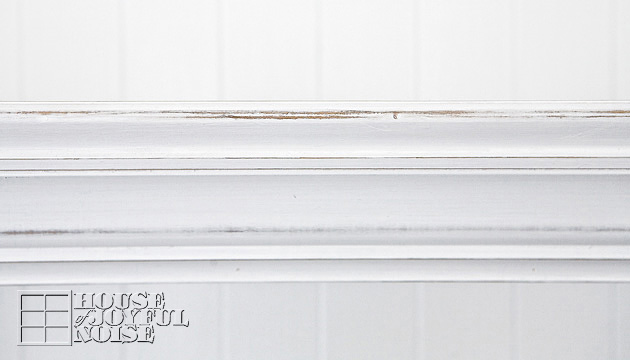
Do you see how the wood looks older, peeking out from underneath the (supposed) worn paint?
Love it!
A few more photos . . . .
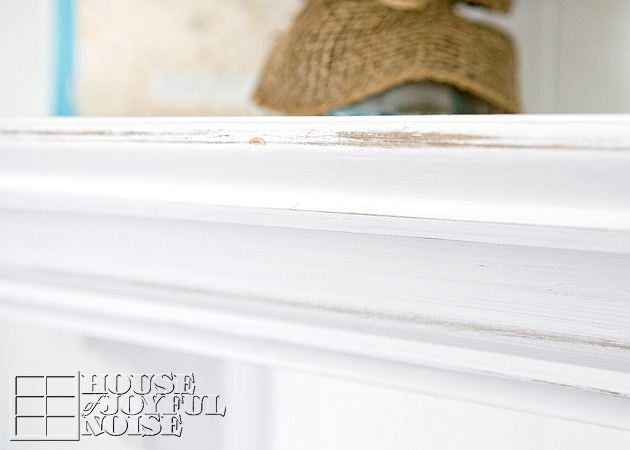

Beautiful, no?

 I am SO happy with them. Of course, the whole point of having them, was to decorate. They are looking kind of NAKED in these photos.
But as you can see peaks of in a few photos above, I have indeed gotten my Spring mantels together!
So my Spring Mantels…..that is a next post coming up!
Detail photos of what I adorned these mantels with, for this season, are on their way. Which I believe will really help you pull the whole vision together.
They are gorgeous, and so homey, all decorated. I can’t wait for you to see!
But this post is about the craftmanship of Michael’s work, and his ability and willingness to build my little dreams.
Please leave him your thoughts!
And then look for the Spring Mantels post real soon.! ; )

* * * * * *

Please come follow me here and there:


Filed Under: Furniture Refinishing, Furniture Refinishing, Home Decor, Home Improvement, Home Projects, Mantel Decorating (Ideas), The Homestead Tagged With: carpentry, corner-mantels, custom-mantels, home improvements, making-mantels, mantel-decorating, mantels, shelving, weathering-new-wood, wood-stove-mantels

Let’s Talk Trash | A Solution to Hide Your Kitchen Trash

March 25, 2010 By Laura 12 Comments

In this post I’m going to do a little personal venting, and then I’m going to show you the solution to our kitchen trash problem!

kitchen-trash-solutions-7

Ask anyone who lives with me. I’m a sheer-compulsive-pet-peeved- maniac about certain aspects of our home.  The sudden sight of clutter is one. It sends me over the edge.  Like a sunny 30 mph Sunday drive, to a buck-60 in a clap of thunder.

I’ve analyzed my seemingly over-reactions enough, to figure some of myself out.  The sight of clutter, instantly clutters my mind.  An organized mind of thoughts and agendas is something I work very hard at. So I don’t need some tall and disheveled pile of paper to come along, and mess with me.  See what I’m sayin’?

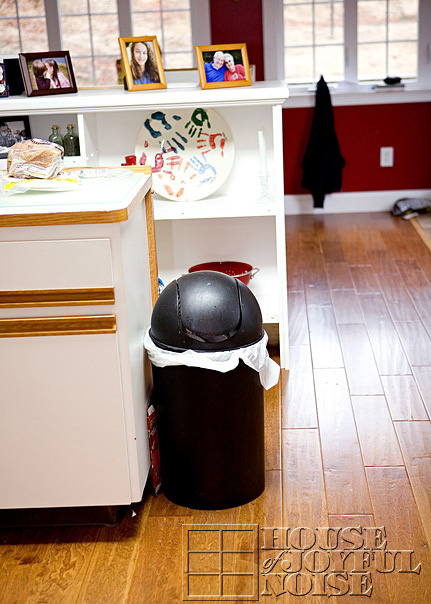
Another personal demon I’ve been determined to beat, is the trash.  I know where this issue started for me too.  I was living at someone else’s house at the time. I was in the kitchen one day, went to throw something away, and the sight of that cover of that plastic rectangle trash can stopped me in my tracks, and grossed me right out.  Nasty as all get out.  Thank goodness it had one of those levers you could step on to open it, but I found myself holding my breathe even as I did that.  Yuckity-doo-da.

I never forgot that. The haunting of it has followed me right into my own home.  You may understand the thought process for example, that your own bathroom, for instance, as in need of a cleaning as it may be, never seems quite as dirty as say, a public bathroom. Right?  One might apply the same perspective to their trash can covers.  In your own home, it may be like, “Oh, that should be wiped down.”  In someone else’s home, or worse on the sidewalk in front of the storefronts, it’s more like, “OH. GROSS.  I am NOT touching that if I can help it!”  Am I right?  (O.K….if it’s just me, don’t tell me. Sometimes I like to make believe I am one with the world.)

At any rate (….my mother used to say that phrase ALL Of the time.  I don’t get it. But I still say it now.)  At any rate, I see the clutter in my home, and the yuckity-doo-da on the trash covers, through the eyes of make-believe unexpected visitors. I really do not want someone to come into my home, and be repulsed.  Know what I’m saying?  Yes…I COULD go the therapy route.   But why not just fix the problem instead, so we ALL can be comfortable?


kitchen-trash-solutions

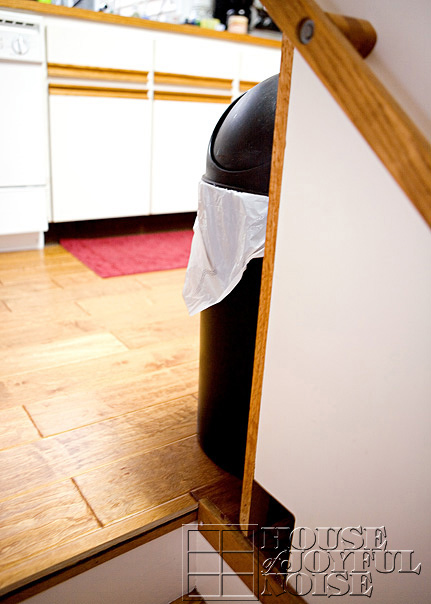
So…that brings us to our own kitchen trash container.  I’m going about my happy day.  I go to throw something away, and I see that cover.  So here we have already gone from sunny, leisure Sunday drive, to a buck-60 in a clap of thunder.  Then I try to put something IN, and the trash-a-plenty keeps it from opening properly. Ggrrrr.  Once I do finally get said-trash in, then the cover is stuck open, on some trash.  Now I have to touch it a SECOND time.
I’m ready to throw the whole thing off a cliff at this point.
–

2_stairs

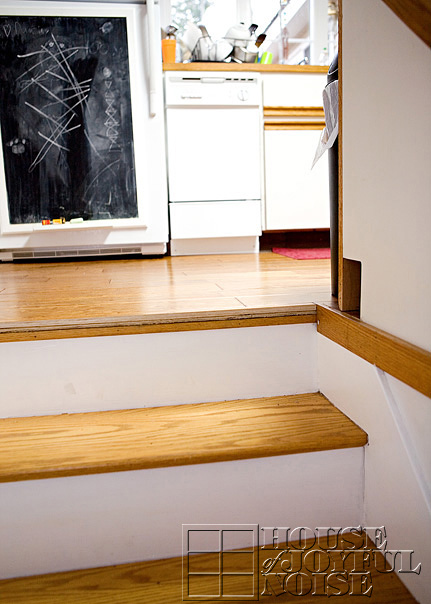
As IF I’m not self-conscious enough, this inevitably also becomes part of that ‘fun and relaxing experience’ I try to give my clients, that I photograph in my studio.   We come up from a good time, after an exciting and fun photo shoot in my studio, and we begin to climb the stairs when we are done, with me leading…..and the sun sneaks behind a cloud….

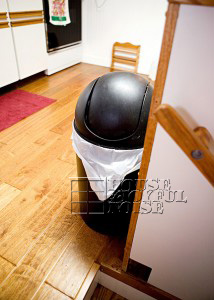
kitchen-trash-solutions-5

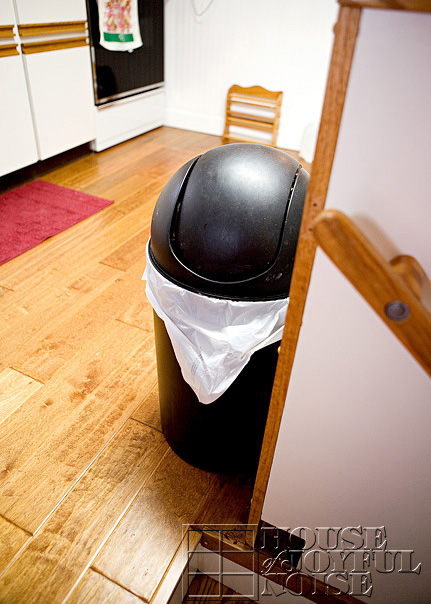
……there it ISSSSSS.  The trash.  Practically in our faces as we come up the stairs.  I notice the sticky spot.  I think I might smell something.  I keep the conversation going with a little more enthusiasm, as my distraction tactic.

kitchen-trash-solutions-6
But really.  WHO is going to miss that thing?
–
Oh.  And then there is my ‘participating ingredients’ shots I do when I am planning a recipe post for the blog . . . .

5

I get it all set up. I set my camera.  I look through the lens.  And it’s not the ingredients I see first.  All I see is the FREAKIN’ TRASH IN THE BACKGROUND!  Oh my gosh!  Somebody move that thing!!  The light seems to have disappeared, and I up my ISO.

So I was heck-bent on a solution, for this trash-matter. (Yes, there is such word as heck-bent.)   I have spent many a moment, just standing in this room or the other, brainstorming on a solution.   And I’ve had a successful brainstorm or two, as a result of my desperation.

6_corner-shelves-repurposed

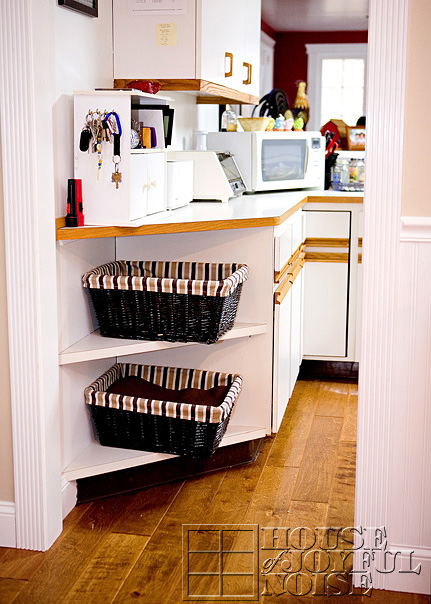
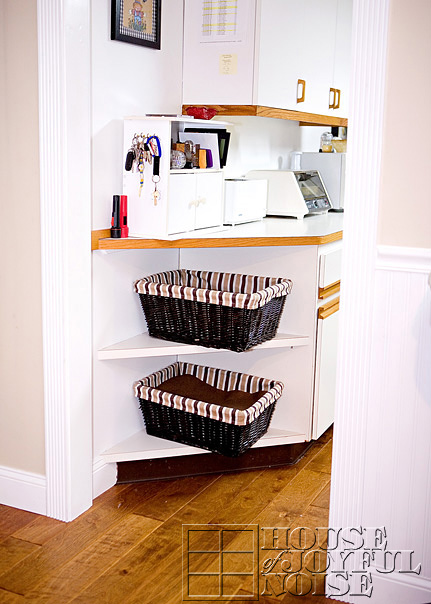
As you enter our kitchen from the front of the house, we have these corner shelves.  When we first saw this house and bought it, I thought these shelves were as cute as the dickens.   Another little unique feature to our first home, to display cute little things.   Most recently, I have had these storage baskets on the shelves, because I really needed somewhere to put ‘stuff’.  Like extra phone books we might need sometime.  I did get past that one, and just throw them out. But then….the cover would get stuck open. :  (  Or, the umpteen photo lab invoices I get.  Those piles of paper I mentioned before, or questionalbe mail. Etc.  It was a great idea for awhile for another place to stick things, until I saw the clutter in the baskets!  So I got creative and bought matching table place mats to throw on top.  ; )    I was feeling super-clever until one day, my Dad was here, and as he walked by for the 100th time that day he said, “What are these things anyway”.   I told him-storage baskets.  He said, “OK, but why are those things on top?”  So I told him; to cover the clutter of course.   But by his, “Oh. O.k.”, and the moment he took to take that in,  I got the feeling he thought that was tacky.

Now, I am quite sure my father doesn’t really know ‘tacky‘ when he sees it.  So I was concerned.  About my basket covers. Not him.  Hmmm.  We have a problem, Houston.

7_corner-shelves-repurposed

Once upon a time, I kept a few cook books on these triangle shelves.  They were awkward items to keep there.  I had a few decorative kitchen items too.  All of it could have been cute.   If no one (like me) looked closely enough at the dust that collected on the shelves and the things I kept there.

I had better use for that space.   I told Michael I had a good idea for the kitchen.  He’s all ears now-a-days.  He’s come to realize the genius that I am with my ideas.   I knew he’d see the light, in time.     ; )

–

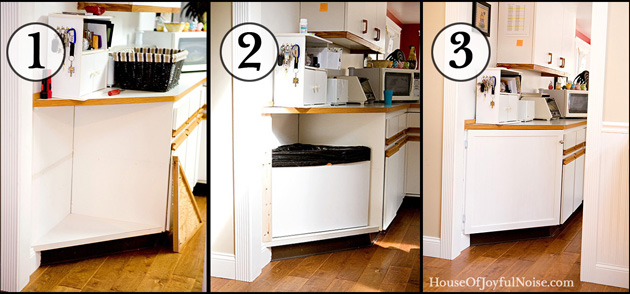
1. So Michael ripped out those shelves and supporters, and took some measurements.

2. Then he built a custom-fitting container.  That was, of course, after he accepted the fact that he would have to buy larger trash bags from now on, and that would mean fewer in a box also.  That took a bit for him to live with in his mind, but he came around again.

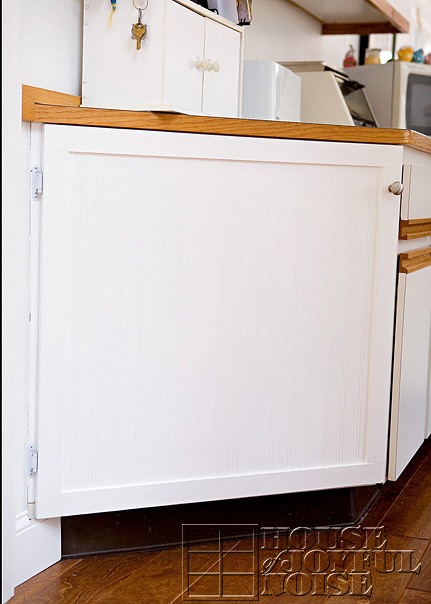
3. To finish it, he built a nice door for the cubby.  (And now, what I see is that counter-cabinet above it, that I despise. It’s next on my hit-list. But we won’t go there today.)

kitchen-trash-solutions-1-2-3-8

kitchen-trash-solutions-1

It’s really nice though.  I could look at it all day.You know how you do that, with new things in your home?  I might tomorrow, too.

–

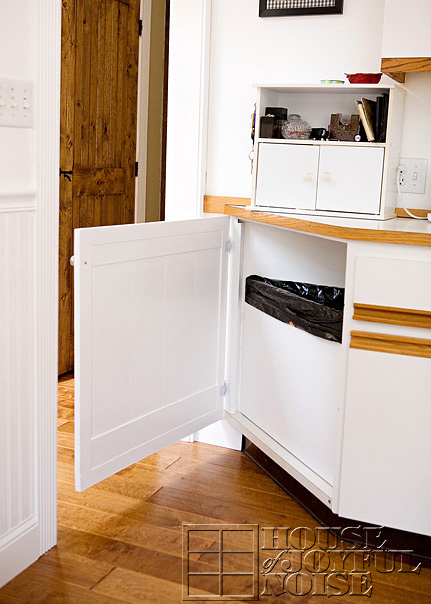
kitchen-trash-solutions-2

It opens perfectly quietly.  And when you throw trash in, you can’t miss, or not be able to close the door again.

–

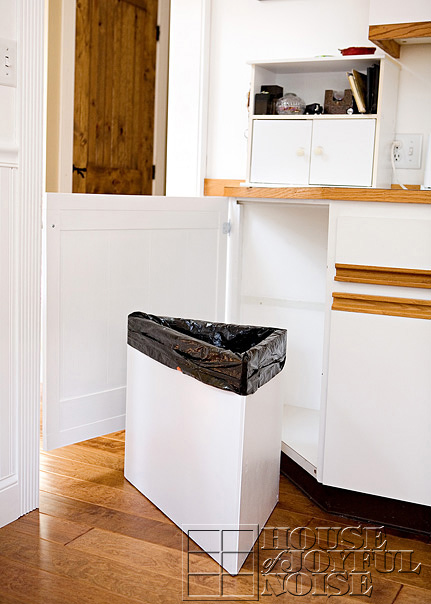
kitchen-trash-solutions-3

The container itself,  pulls right out, for easy trash bag changing.  There is felt buttons on the bottom, so it just slides in and out softly.   The door closes completely silently.   There is a spring hinge on it.
–

kitchen-trash-solutions-4

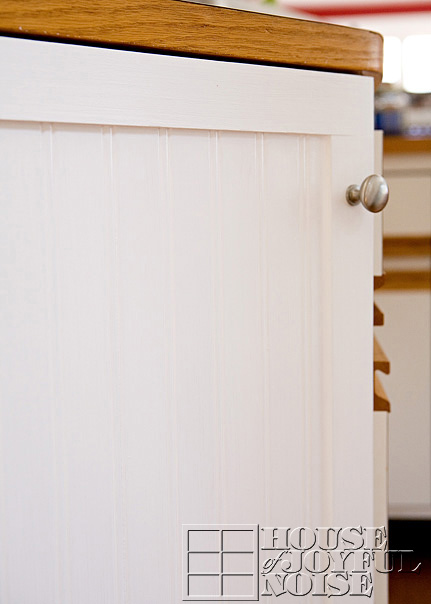
The door is built with a wainscot paneling face, framed out, and a brushed nickle knob.   The wainscot bead-boarding flows the lower walls of our home in the sun room, flowing right into the main living space under the breakfast bar, and wraps around right into the wall of the kitchen.

YOU can do this too, in any floor level kitchen cabinet, to hide your own trash container!  You can build a custom fit trash bin, to maximize your trash cabinet size! Just be sure a trash bag will fit your new container.  Or, just stick your current trash container in a cleared out cabinet.

–

15_school-room-cabinets

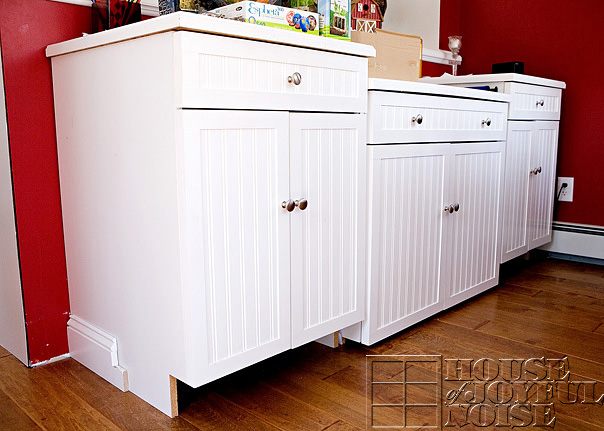
The trash door now also now matches out school room cabinets Michael did.  They still need kick-board faces on the bottom.

–

17_kitchen_cupboards_lower

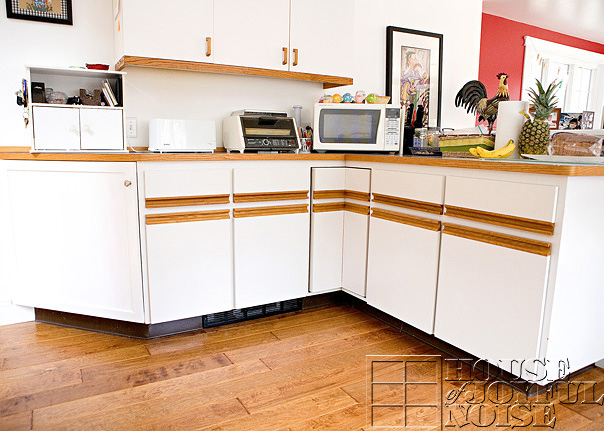
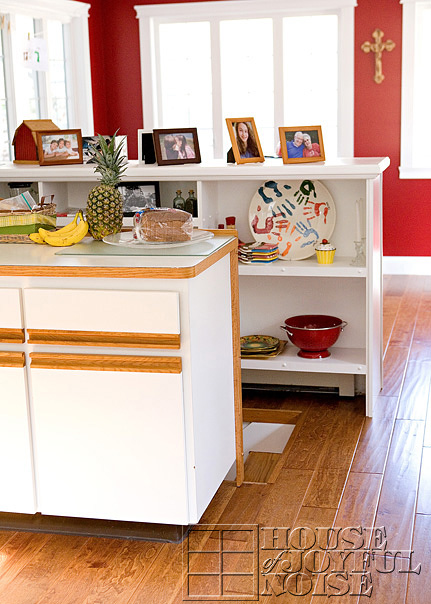
 In time, we’ll be replacing these kitchen cabinet faces with the same  doors.  They aren’t TOO bad looking.  And thank goodness, because who knows if it could be years before they get done.   But, they don’t really say ‘farm house’ to me.  And remember…I’m pretending I am living on a farm.   Minus anything gross.
–

18_notrash

The best part?   No UNSIGHTLY trash can to look at anymore!  I can’t tell you how happy this makes me. I ride these joys for weeks on end.  And some days, when I need a little pick-me-up to think about how far we have come, I say out loud to no one in particular……”Remember when we had that ugly, nasty-covered trash can in the kitchen, right by the stairs?  Man, WHAT were we thinking all of those years.  HOW did we even let people come over?“

19_openfloor

There is no longer panic coming up those stairs with my clients. My kitchen floor plan is wide-open, and the eye does not stop in some black sticky-topped container.  It’s a sunny, leisure Sunday drive.  Not a cloud in the sky looking east-ish.

See?  I am my own therapist.  And all it costs me is a little fluttering of the eye-lashes, and asking Honey, nicely, if he”ll make my new little dream come-true.

It’s a beautiful day in the neighborhood.

Who wants to come over and throw somethin’ out with me?!

Save

Save

Save

Save

Save

Save

Filed Under: Home Improvement, Home Projects, Organization, Re-Purposing, The Homestead Tagged With: hiding-your-kitchen-trash, home improvements, kitchen improvement, organization, trash-can-ideas, trash-solutions

We are wicked happy to have you here! We hope you find much inspiration, help, humor and enjoyment here.


Archives


POPULAR POSTS

* * * * * *

SUBSCRIBE to House of Joyful Noise blog! Every new post, delivered right to your email box!


Privacy Policy

Amazon Affiliates

Never at any additional cost to you, we may earn a small commission for our endorsement, recommendation, testimonial, and/or link to any products from our website. Your purchase through our links helps support our family, while sharing with you the products we authentically use and recommend, for various ideas, and letting you know where you can purchase them. Thank you for your support!

[footer_backtotop]

Copyright © 2025 HouseOfJoyfulNoise.com · Genesis Framework by StudioPress