• HOME
  • {A}’s Chipmunk Training Archives

 Homepage

  • The Homestead
    • Home Projects
    • Home Improvement
    • Home Decor
      • Seasonal Home decor
        • FALL Home Decor
        • WINTER Home Decor
        • SPRING Crafts and Creations
        • SUMMER Crafts and Creations
    • Our Chickens
    • Gardening
    • Organization
    • Re-Purposing
    • Furniture Refinishing
    • Budget
  • Crafts & Creations
    • Seasonal Home decor
      • FALL Crafts and Creations
      • WINTER Crafts and Creations
      • SPRING Crafts and Creations
      • SUMMER Crafts and Creations
    • DIY (Do-It-Yourself) Project
    • Kids Arts and Crafts
    • Homemade/Handmade Gift Ideas
    • Holiday Crafts
    • Fan Pulls
    • Free Printable/Downloadable
    • Sewing Projects
    • Giveaways
    • Business Features
  • Recipes/FoodFun
    • Breakfast
    • Lunch
    • Main Dish
    • Sandwiches
    • Appetizers
    • Slow Cooker
    • On The Grill
    • Side Dishes
      • Soups
      • Salads
    • Baking
      • Breads, Rolls and Muffins
    • Snacks
    • Treats
    • Desserts
    • Drinks
  • Homeschooling
    • Elementary Homeschooling
      • Elementary Homeschooling READING
      • Elementary Homeschooling MATH
      • Elementary Homeschooling LANGUAGE ARTS
      • Elementary Homeschooling SCIENCE
      • Elementary Homeschooling HOME ECONOMICS
      • Kids Arts and Crafts
    • Middle School Homeschooling
      • Middle School Homeschooling SCIENCE
      • Middle School Homeschooling HOME ECONOMICS
    • Language Arts
    • Math
    • History / Social Studies
    • Geography
    • Foreign Language
    • Field Trips
    • Games
    • Nature Study
  • The Big Picture
    • Life In General
    • Celebrations
    • Faith
      • Into the Light; The Series
    • Giveaways
    • Reviews & Sponsors
  • Photography & Lettering
    • Photography
    • truck lettering
    • vehicle graphics
    • Newborns
    • Kids
    • Engagement
    • High School Senior Pictures
    • High School Senior Pictures Sneak Peeks

Olivia’s Scrumptious Ginger Cookies | Printable Recipe

March 24, 2017 By Laura 2 Comments


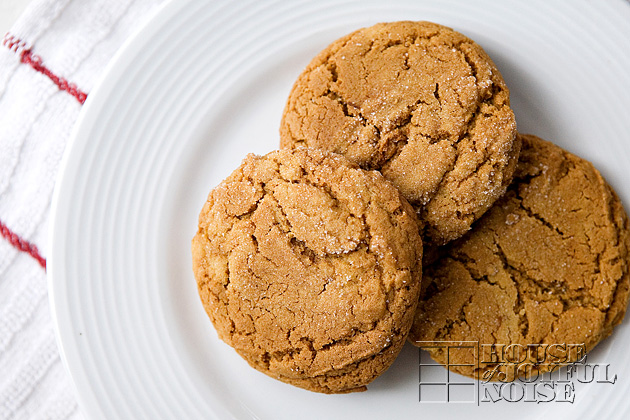
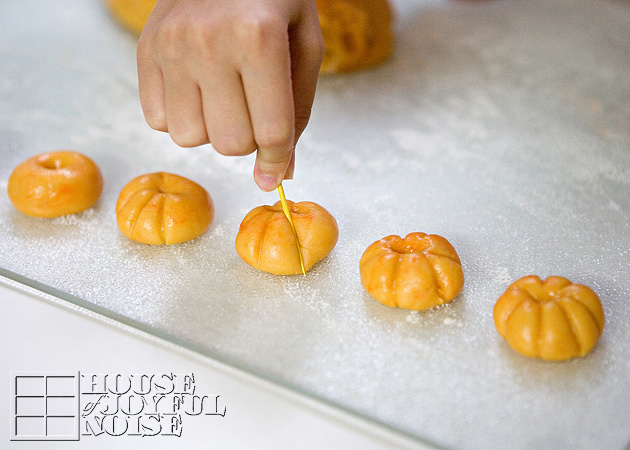
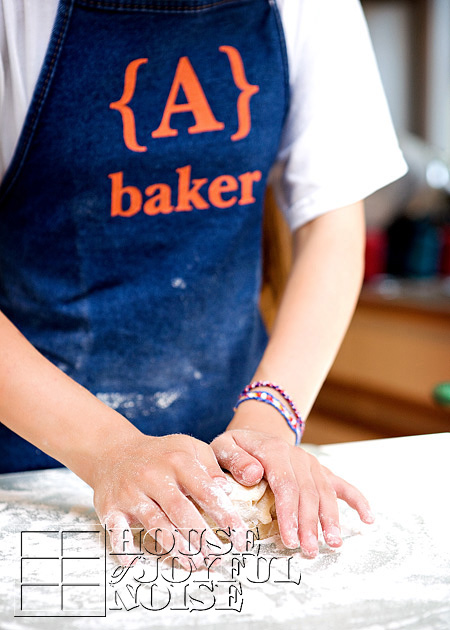
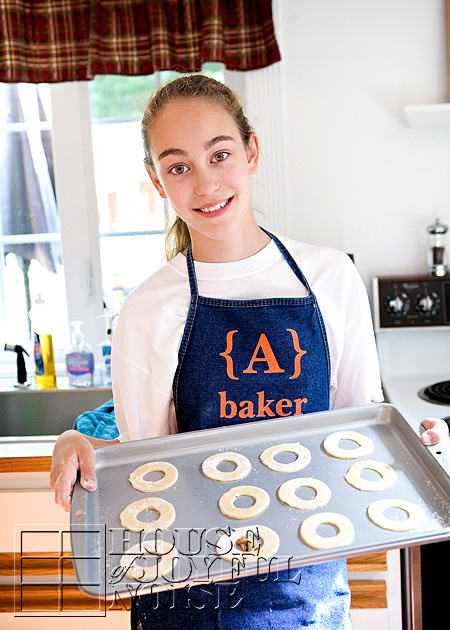
I never considered myself to be a fan of the ginger spice. But somehow when my daughter Olivia (14 – the girl of the triplets) makes her ginger cookies . . . . I take one bite, and there’s a party in my mouth! I think it must be just the right amount of ginger, combined with the butter. Whatever it is, it can be hard to stop from having another.  And if no one is looking, another. We don’t have treats like these around the house often. But when we do, they are homemade, and it’s a treat indeed!  In fact, anytime Olivia bakes or cooks for us, which is frequently, it’s a treat!  As I type up this post, she is actually packing up to head out for a cooking competition for the weekend! She’s got some real skills, and you can taste them in these cookies. (Like everything else she whips up for us!)

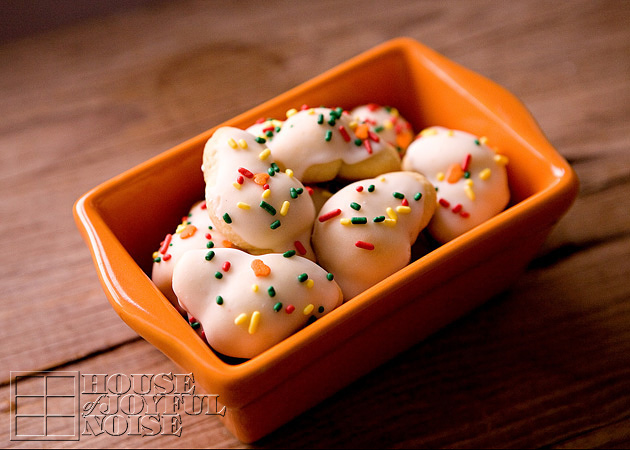
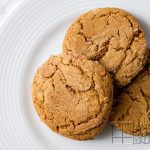
We’re giving you Olivia’s Ginger Cookies recipe today. There’s a printable version at the end of this post. 
So, you can make some for yourself, and thank us later.
–

Olivia’s Ginger Cookies


[Read more…]

Filed Under: Baking, Desserts, Recipes, Snacks, Treats Tagged With: Baking, cookie-recipes, cookies, ginger-cookies, ginger-cookies-recipe, printable-cookie-recipes

Pumpkin Shaped Cookies | Recipe

November 1, 2012 By Laura 14 Comments

00

It’s the first day of November, and we’re still riding high on the beauty of Autumn all around us! I think we’ve done more baking than ever this year as well.  I had an idea about trying to make some pumpkin shaped cookies, using a dough recipe I already had, and they came out so great!  These are beautiful cookies to have around on Thanksgiving, or anytime during the pumpkin/Autumn season, and they were fun to make, too.  It may seem like a lot of steps, but it is easy, and the dough recipe itself is very useful!

The dough is the same recipe from my God-Mother’s Italian cookies, found here in a post called Cookie Love.  It’s a very I am going to give you the recipe right here as well, but you really can see how it is made at the other post.  *Please note; you can mix the ingredients to make dough with a Kitchen Aid Mixer, but we did not have one at the time of the other post, so we did it by hand. For these pumpkin shaped cookies, we did use the mixer since we have one now. It’s just easier and faster with a mixer, but still doable by hand.

Ingredients

  • 4  C Bleached All Purpose Flour
  • 1  C Sugar
  • 2 Tbs. Baking Powder
  • 4 Eggs
  • 1/2C Land-O-Lakes Margarine
  • 4 Tsp. Vanilla Extract
  • 1/4 C Milk
  • Confectioners Sugar
  • A Little Extra Milk for Glaze
    . . . . . . and some kind of Coloring.

Which brings me to this stuff . . . . . .

01_icing_coloring

Wilton’s Icing Colors.
Even though it says for icing, it works for any food coloring. I love it, because it IS concentrated.  It gives a nicer color, and is more potent, so it gets the job done easily.  Food coloring drops to me are a pain. It takes too much to get the depth of color you want, and adds a water content at the same time that you may not want. So this stuff is the bomb for me. It’s what I used to color my cookie dough orange. It is also great for icing, and we use it for that in this recipe too. ; )

1. In a large bowl (or your Kitchen Mixer bowl),  put in flour, sugar, baking powder, eggs, margarine, vanilla, and milk.

2.    Mix it all together with fork at first. Once it starts to form, you can use your mixer or clean hands.

3. Flour a counter or big board.

4. Remove dough from bowl, and knead for several minutes, sprinkling the surface more if the dough starts sticking.

5. Grease baking sheets with vegetable oil. (You probably can use Pam Spray…if you’re a fan of that.)

02

6. Once your dough is formed, it’s ready to color. Using a toothpick, mix up the orange container of coloring gel, and just wipe the toothpick onto your dough.  Then fold it in and knead the dough some more until the color works through and is uniformly mixed into the dough. Add more color as needed to get the desired  density of color.

** Two Things to Note Here:  A) This gel will likely stain yours hands and/or clothing a little, so use kitchen gloves and an apron is your concerned with that.  B) The color will lighten/fade a lot after baking.  So keep that in mind. Although the dough may appear too dark orange, they won’t be when done. (See photos of baked cookies for reference.)

7.   Grab a piece of dough, and begin to roll into a ball between the palms of your hands.  You want it to be about the size of say….a large cherry tomato.  You can place them directly on the cookie sheet, or keep working on a floured surface, such as a cutting board.

8. Pre-heat your oven to 375 degrees.

03_how-to-make-pumpkin-shaped-cookies 9) First poke your finger down into the center of each orange dough ball.

10) Then, taking a toothpick, stand it up beside the dough ball, and press in your indentations for the pumpkin grooves, as seen above.

04_how-to-make-pumpkin-shaped-cookies Make the indentations deep!  Really lay that toothpick in there, and rock it to the top, so the grooves are made all the way to the top.  The cookies will puff while baking, and you will completely loose your groove indentations if you don’t make them deep pre-baked.

05_pumpkin-shaped-cookies They should look similar to this when the are done.   My little girl Olivia was a great help forming the pumpkins!

11) Now transfer to cookie sheets with  thin metal small spatula if need be.  (Try not to squich your pumpkins, as the dough is soft!) Place the dough pumpkins on the cookie sheets,  about an inch 1/2 apart, staggered.

**You will have more pumpkins waiting for their turn in the oven.  This dough makes at least a few dozen, depending on the size of your cookies.

12) Bake full sheets for 8-10 minutes.  You want them to be pale – not browned, but if you are wondering if they are cooked enough, open one with knife and see if it is baked through well. If not, put back in for 1-2 minutes more, depending on how doughy they still were.

13.  Remove from oven………and then place them each on a cooling rack.

  For cookie glaze:
14) In a small bowl, pour some confectioner’s sugar, and add a little milk.  I don’t really measure the sugar or milk here.  I recommend adding one tablespoon of milk at a time, and stir well. You want the glaze thick, as it will be much easier it will be to work with if it is not thin and runny.. You will be surprised at how much powdered sugar you need!

15) Add in green gel coloring and mix well.

16)  When cookies are completely cooled, transfer your green icing to a piping bag with a very fine point tip, or if need be, a zip-lock bag with the very tip of the corner snipped off.

17) Just pipe on a stem in the center top of the pumpkin, a leaf if you are really good, and maybe make some curly vines coming off.

06_pumpkin-shaped-cookies As you can see, my piping skills could use some practice.  But I thought they came out so adorable, and they are as delicious as the Italian Cookies recipe! It’s all the exact same ingredients, except for the tasteless coloring.  What I love about this dough recipe, is it is flexible to make many different looking cookies.

Alexis kept some of the dough before it was colored orange, and made these traditional cookies. . . . . .

07_italian-cookies Also quite Autumn looking!
The cookies can be sealed in an air tight container, or even put in the freezer the same way, for a coming holiday, or unexpected company.

We hope you try this recipe out, and have some fun making them yourself. Your mouth will surely thank you!

. . . . . .

 Come follow me here and there:


Save

Save

Filed Under: Baking, Desserts, Fun Food, Recipes, Treats Tagged With: Autumn-cookies, Baking, cookie-recipes, cookies, cute-cookies, Fall-cookies, italian cookies, pumpkin-shaped-cookie-recipe, pumpkin-shaped-cookie-tutorial, Thanksgiving-cookies

Teddy Graham Sandwich Cookies – Recipe

August 3, 2009 By A Leave a Comment

Hi blog friends!  This is {A} this time.   Mama said she has noticed we haven’t blogged any recipes of ‘real food’ in awhile, and it’s looking like we’ve been on a ‘sweets kick’ lately, so she said to let you know we’ll have some meal-related type recipes coming up soon. She just needs to think of some.  But today, I wanted to share this cookie recipe I came up with on my own.  Everyone in my family loved them when I made them, so I hope if you make them, you do too.

Teddy Graham Sandwich Cookies

teddy-graham-sandwich-cookies-recipe

Participating Ingredients:

All Purpose Flour, Sugar, Butter, Vanilla Extract, Baking Powder, an Egg, Polaner’s Raspberry All Fruit, Salt, Hershey Chocolate Bars, and Chocolate Chip Teddy Grahams.

  • 1/2 c. butter, softened (1 stick)
  • 3/4 c. granulated sugar
  • 1 large egg
  • 1 tsp. vanilla extract
  • 1-1/3 c. all purpose flour
  • 1/4 tsp. baking powder
  • 1/4 tsp. salt
  • 1/2 c. Polaner’s All Fruit Seedless Raspberry Jelly
  • Chocolate Chip Teddy Grahams
  • 2 regular sized Hershey Chocolate Bars

teddy-graham-sandwich-cookies-recipe-1

In a large bowl, put softened butter and sugar.

teddy-graham-sandwich-cookies-recipe-2

Cream until fluffy.

teddy-graham-sandwich-cookies-recipe-3

Add egg.

teddy-graham-sandwich-cookies-recipe-5

Add vanilla extract.

teddy-graham-sandwich-cookies-recipe-4

(He wanted to watch, so he hopped out of the box and made himself comfortable on the rolling pin.)

teddy-graham-sandwich-cookies-recipe-6

Mix and beat egg and vanilla extract in creamed mixture with fork.

In a small bowl, combine dry ingredients: flour, baking powder and salt.

teddy-graham-sandwich-cookies-recipe-7

(Oh…sledding in our dry ingredients  now!  Great! Do I have time for this?)

teddy-graham-sandwich-cookies-recipe-8

Little by little, slowly add dry ingredients into creamed mixture.

teddy-graham-sandwich-cookies-recipe-9

Mix all together really well.

teddy-graham-sandwich-cookies-recipe-10

You might need to eventually use your hands.

teddy-graham-sandwich-cookies-recipe-11

Once it’s a good ball of dough, cover the bowl with plastic wrap…

teddy-graham-sandwich-cookies-recipe-12

….and place in fridge for 2-3 hours.

teddy-graham-sandwich-cookies-recipe-13

Later, remove from fridge and cut dough into 1/2, and place that 1/2 back into fridge to keep chilled.

Preheat oven to 375 degrees.

Start kneading remaining 1/2 with floured hands, and have floured surface ready as well.

teddy-graham-sandwich-cookies-recipe-14

Keep kneading, and get ready to roll it out.

teddy-graham-sandwich-cookies-recipe-15

Flour rolling pin.

teddy-graham-sandwich-cookies-recipe-16

teddy-graham-sandwich-cookies-recipe-17

Roll out dough to about 1/4″ thick.

teddy-graham-sandwich-cookies-recipe-18

With a 2 1/2 inch circle cookie cutter, cut out as many dough circles as you can.

teddy-graham-sandwich-cookies-recipe-19

And place them on cookie sheet.  (Um, I wouldn’t recommend staying there, Buddy. You might be sorry in a minute.)

Get out remaining dough from fridge, knead and roll out same as above.

teddy-graham-sandwich-cookies-recipe-20

teddy-graham-sandwich-cookies-recipe-21

When about 1/4″ thick, cut out as many circles as you can again, removing all of the scrap dough around them, and using a melon ball scooper, cut a small circle out of the middle of the the dough circles from the second batch of dough only.

teddy-graham-sandwich-cookies-recipe-22

Now both sheets of the two shapes of cookies are ready to go into pre-heated oven.

(He’s a stubborn one, huh?)

teddy-graham-sandwich-cookies-recipe-23

teddy-graham-sandwich-cookies-recipe-24

(Oh, he jumped off at the last minute.  Smart.  Slow, but smart.)

Bake cookies for 7-9 minutes—but this varies from oven to oven. Basically you want to take them out as soon as you notice the edges start to turn golden.

Remove from oven when done, and let cool completely.

teddy-graham-sandwich-cookies-recipe-25
teddy-graham-sandwich-cookies-recipe-26

Take a Hershey Chocolate Bar or 2, break up into microwave safe dish, and microwave at 15 second intervals, giving stirs in between, until just melted.

teddy-graham-sandwich-cookies-recipe-27

Stir well.

teddy-graham-sandwich-cookies-recipe-28

Take whole circle cookies, one at a time, and dip in chocolate inside-face down to cover that side.

teddy-graham-sandwich-cookies-recipe-29

Place each on clean cookie sheet, as you go.

teddy-graham-sandwich-cookies-recipe-30

Grab your Polaner’s All Fruit.

teddy-graham-sandwich-cookies-recipe-31

Spread some on the inside-face if each holed-circle.

teddy-graham-sandwich-cookies-recipe-32

Place down onto chocolate cookies, making sandwiches.

teddy-graham-sandwich-cookies-recipe-33

Place sheets of cookies into fridge to harden up chocolate. When hardened, place into containers or zip lip lock bags for storage, but keep refrigerated in warm weather.  Take out for at least a few minutes before serving, because they tend to be a little firm if you bite right away.

teddy-graham-sandwich-cookies-recipe-34

Just before serving, place a Teddy Graham in the center.  I wait to do this, because the Teddy Grahams are on the soft side as it is, and so get a little too soft from absorbing moisture from the cookie/chocolate.   They are just better with a little crunch.

teddy-graham-sandwich-cookies-recipe-35

Makes about 1 dozen sandwich cookies.

They are really delicious, and they aren’t just for kids!

Enjoy!!

Save

Filed Under: Baking, The Big Picture Tagged With: cookie-recipes, teddy grahams, teddy-graham-recipes, unique-cookie-recipes

Cookie Love – Italian Cookies Recipe

March 26, 2009 By A 13 Comments

Italian cookies recipe

Have you ever seen cookies like these?  They are called Italian Cookies, and maybe they are ordinary to you. But the very thought or sight of them, has always made my heart simply swell.  The recipe will be below.

My Godmother has made these cookies for me, all of my life.  I think she makes them a lot. She may even be known for them in the lives of many people who are in her life. But it doesn’t matter.  Whenever she made them for ME, it always felt like such a  gift of her love for me.

Italian cookies recipe

My Godparents are AMAZING people. Not just to me, but to anyone who knows them.  They are the essence of unshakable faith,  completely selfless sacrifice, sincere compassion, and always a lot of very unconditional love.  As Godparents, they always gave all of those gifts to me. They also truly had a BIG part in forming the foundation of my faith. They were ALWAYS there for me. ALWAYS with some wise words, without judgement. ALWAYS lived an example of inspiration.  I have always felt so blessed to be their Godchild. Even though I have always known, I am one of umpteen of Godchildren that they have.   Again…a testament of the kind of people they are to everyone. But they have always made me feel like their only one.  Now as a grown adult with children of my own, they give that same kind of love to my husband and my children. And my they all  feel it, powerfully, just as I always did.

My Godmother is a retired teacher. I have spoken about her in this blog before, I am sure. In the years of her teaching, she reached the hearts of 100’s and 100’s of children.  If you were in her student, you knew you were very sincerely loved.  And she taught each one with all she had. She instilled in me the love for books, which thank God, my children have been able to embrace as well.  When she retired from teaching, her grown former students from all over the world, came to give her their thanks, or sent notes of the beautiful impact she had had on their lives.

When I was a teenager with troubles on my mind, my Godmother was there to talk with me, and she made me these cookies. As an art student, when I came home for the weekend, she wanted me to come visit, and she made me these cookies. When my family and I go visit them, she has these cookies made for us.  And when my mother died, she was there for me, and she made me LOTS and lots of these cookies.

So I don’t know if you have ever seen or tasted cookies like these. But whenever I think of them, see them, or taste them…..I am filled with the comforting feeling of her love.

{A} bakes A LOT. And lately, more than ever. I think baking posts like this will become quite regular from her, here on our blog, because it is a big part of her. I will share more about that another time. But suffice it to say, she got the recipe for these cookies from my Godmother, having grown up with her own sense of how special they were.  So this is {A}’s post, sharing this Italian Cookies recipe, and how to make them. They are indeed delicious. But it’s the memories of love that the familiar taste of them bring, that we love even more.

~ Laura

~~~~~

Hi Everyone!   {A} here now. I am going to share with you how to make these cookies that are very special to us. You will find a printable version of this recipe at the end of the post.

Here is what you’ll need:

Participating Ingredients

Italian cookies recipe

  • 4  C All Purpose Flour
  • 1  C Sugar
  • 2 Tbs. Baking Powder
  • 4 Eggs
  • 1/2C Land-O-Lakes Margarine
  • 4 Tsp. Vanilla Extract
  • 1/4 C Milk
  • Confectioners Sugar
  • A Little Extra Milk for Glaze* This cookie dough was formed by hand. But you can use a Kitchen Aid or other mixer, and it will be much faster.COOKIE DOUGH
  1. In a large bowl, put in flour, sugar, baking powder, eggs, margarine, vanilla, and milk. (Add your own special love.)

Italian cookies recipe

2.  Mix it all together with fork at first. Once it starts to form, you can use your clean hands.

3.  Flour a counter or big board.

4.  Remove dough from bowl, and knead for 8-10 minutes, sprinkling the surface more if the dough starts sticking.

Italian cookies recipe

Italian cookies recipe

Italian cookies recipe

6.   Grease baking sheets with vegetable oil. (You probably can use Pam Spray…if you’re a fan of that.)

7.   Preheat oven to 375 degrees.

8.   Grab a piece of dough, and begin to roll into a ball between the palms of your hands.  You want it to be about the size of a chestnut.
(I decided the ones in the photo below are too big. I made them all smaller after Mama took a photo. But see how I am rolling them in my hands into balls.)

Italian cookies recipe

9.    Place the dough balls on the cookie sheets, about an inch 1/2 apart, staggered.   You will likely have more dough balls waiting for their turn in the oven.

Italian cookies recipe

10.   Bake full sheets for 8-10 minutes.  You want them to be pale, but if you are wondering if they are cooked enough, open one with knife and see if it is baked through well. If not, put back in for 1-2 minutes more, depending on how doughy they still were.

11.  Remove from oven………and then place them each on a cooling rack.

Italian cookies recipe

GLAZE and SPRINKLES

12.  In a small bowl, pour some confectioner’s sugar, and add a little milk.  I don’t really measure the sugar or milk here.  I recommend adding one tablespoon of milk at a time, and stir well. You want the glaze thick-ish. You will be surprised at how much powdered sugar you need!

13.  Pour sprinkles into shallow bowl. Watch out, because these things are ridiculously bouncy!!!

Italian cookies recipe

14.  Once the cookies are COMPLETELY COOLED, you can start glazing them.  We just dunk the top of the cookie into the glaze, lift out, and really let it drip off as best as you can.

Italian cookies recipe

Italian cookies recipe

15.     Place dunked cookies back on rack.  The glaze needs to set a little.

16.    Continue dunking cookies, but when keep checking the first ones you dunked, and once you see that the glaze on those is starting to become clear, they are ready for sprinkles!  (If you sprinkle them when the glaze is too wet, the colors of the sprinkles will run, and your cookies will be a multi-colored mess. Kind of pretty anyway, but not what we are going for here!)

17.    Now to get the sprinkles on the cookies, we think Mama’s Godmother shakes them on out of the container.  She has patience like that. But this is how we do it:

15_Italian-cookies-recipe

Pretty easy, huh?

18.  Keep glazing and sprinkling, putting them on the rack as you go.

16_Italian-cookies-recipe

19.   Any air tight container is great storage for these. They are so pretty all together!

*  This recipe makes 6 dozen cookies.  But trust me, they go fast. (Especially if Mama is around these cookies.)   Below is what was left after filling two larger containers.

17_bowl-of-Italian-cookies

ENJOY!!!

18_bite
ENJOY!

 I hope you enjoyed this recipe post! You can print it out below.

~ {A}

Cookie Love - Italian Cookies Recipe
 
Print
Prep time
30 mins
Cook time
10 mins
Total time
40 mins
 
Italian Cookies Recipe Recipe Type : Baking Cuisine: Italian Author: House of Joyful Noise blog / houseofjoyfulnoise.com Prep time: 20 mins Cook time: 10 mins Total time: 30 mins Serves: 6 Dozen
: House of Joyful Noise blog / houseofjoyfulnoise.com
: Cookies
Cuisine: Italian
Serves: 6 Dozen
Ingredients
  • Italian cookies recipe
  • 4 C All Purpose Flour
  • 1 C Sugar
  • 2 Tbs. Baking Powder
  • 4 Eggs
  • ½C Land-O-Lakes Margarine
  • 4 Tsp. Vanilla Extract
  • ¼ C Milk
  • Confectioners Sugar
  • A Little Extra Milk for Glaze
Instructions
  1. * This dough for this cookie recipe is formed by hand. You can also use a Kitchen Aid or other large mixer.
  2. COOKIE DOUGH
  3. In a large bowl, put in flour, sugar, baking powder, eggs, margarine, vanilla, and milk. (Add your own special love.)
  4. Mix it all together with fork at first. Once it starts to form, you can use your clean hands.
  5. Flour a counter or big board.
  6. Remove dough from bowl, and knead for 8-10 minutes, sprinkling the surface more if the dough starts sticking.
  7. Grease baking sheets with vegetable or olive oil oil. (You probably can use Pam Spray...if you're a fan of that.)
  8. Preheat oven to 375 degrees.
  9. Grab a piece of dough, and begin to roll into a ball between the palms of your hands. You want it to be about the size of a chestnut.
  10. Place the dough balls on the cookie sheets, about an inch ½ apart, staggered. You will likely have more dough balls waiting for their turn in the oven.
  11. Bake full sheets for 8-10 minutes. You want them to be pale, but if you are wondering if they are cooked enough, open one with knife and see if it is baked through well. If not, put back in for 1-2 minutes more, depending on how doughy they still were.
  12. Remove from oven.........and then place them each on a cooling rack.
  13. GLAZE and SPRINKLES
  14. In a small bowl, pour some confectioner's sugar, and add a little milk. I don't really measure the sugar or milk here. I recommend adding one tablespoon of milk at a time, and stir well. You want the glaze thick-ish. You will be surprised at how much powdered sugar you need!
  15. Pour sprinkles into shallow bowl. Watch out, because these things are ridiculously bouncy!!!
  16. Once the cookies are COMPLETELY COOLED, you can start glazing them. We just dunk the top of the cookie into the glaze, lift out, and really let it drip off as best as you can.
  17. Place dunked cookies back on rack. The glaze needs to set a little.
  18. Continue dunking cookies, but when keep checking the first ones you dunked, and once you see that the glaze on those is starting to become clear, they are ready for sprinkles!
  19. - (If you sprinkle them when the glaze is too wet, the colors of the sprinkles will run, and your cookies will be a multi-colored mess. Kind of pretty anyway, but not what we are going for here!)
  20. Now to get the sprinkles on the cookies, we think Mama's Godmother shakes them on out of the container. She has patience like that. But we dip them in a bowl of the sprinkles.
  21. Keep glazing and sprinkling, putting them on the rack as you go.
  22. Any air tight container is great storage for these. They are so pretty all together!
  23. ENJOY!
3.4.3177

~~~~~

Save

Save

Save

Save

Filed Under: Baking, Recipes Tagged With: Baking, cookie-recipes, cookies, italian cookies, Italian-cookies-recipe, party-cookies, recipes

We are wicked happy to have you here! We hope you find much inspiration, help, humor and enjoyment here.


Archives


POPULAR POSTS

* * * * * *

SUBSCRIBE to House of Joyful Noise blog! Every new post, delivered right to your email box!


Privacy Policy

Amazon Affiliates

Never at any additional cost to you, we may earn a small commission for our endorsement, recommendation, testimonial, and/or link to any products from our website. Your purchase through our links helps support our family, while sharing with you the products we authentically use and recommend, for various ideas, and letting you know where you can purchase them. Thank you for your support!

[footer_backtotop]

Copyright © 2025 HouseOfJoyfulNoise.com · Genesis Framework by StudioPress