• HOME
  • {A}’s Chipmunk Training Archives

 Homepage

  • The Homestead
    • Home Projects
    • Home Improvement
    • Home Decor
      • Seasonal Home decor
        • FALL Home Decor
        • WINTER Home Decor
        • SPRING Crafts and Creations
        • SUMMER Crafts and Creations
    • Our Chickens
    • Gardening
    • Organization
    • Re-Purposing
    • Furniture Refinishing
    • Budget
  • Crafts & Creations
    • Seasonal Home decor
      • FALL Crafts and Creations
      • WINTER Crafts and Creations
      • SPRING Crafts and Creations
      • SUMMER Crafts and Creations
    • DIY (Do-It-Yourself) Project
    • Kids Arts and Crafts
    • Homemade/Handmade Gift Ideas
    • Holiday Crafts
    • Fan Pulls
    • Free Printable/Downloadable
    • Sewing Projects
    • Giveaways
    • Business Features
  • Recipes/FoodFun
    • Breakfast
    • Lunch
    • Main Dish
    • Sandwiches
    • Appetizers
    • Slow Cooker
    • On The Grill
    • Side Dishes
      • Soups
      • Salads
    • Baking
      • Breads, Rolls and Muffins
    • Snacks
    • Treats
    • Desserts
    • Drinks
  • Homeschooling
    • Elementary Homeschooling
      • Elementary Homeschooling READING
      • Elementary Homeschooling MATH
      • Elementary Homeschooling LANGUAGE ARTS
      • Elementary Homeschooling SCIENCE
      • Elementary Homeschooling HOME ECONOMICS
      • Kids Arts and Crafts
    • Middle School Homeschooling
      • Middle School Homeschooling SCIENCE
      • Middle School Homeschooling HOME ECONOMICS
    • Language Arts
    • Math
    • History / Social Studies
    • Geography
    • Foreign Language
    • Field Trips
    • Games
    • Nature Study
  • The Big Picture
    • Life In General
    • Celebrations
    • Faith
      • Into the Light; The Series
    • Giveaways
    • Reviews & Sponsors
  • Photography & Lettering
    • Photography
    • truck lettering
    • vehicle graphics
    • Newborns
    • Kids
    • Engagement
    • High School Senior Pictures
    • High School Senior Pictures Sneak Peeks

Recipe for Apple Pie Pops

October 2, 2012 By Laura 20 Comments

000_apple-pie-pop-recipe

 If you only knew the recipes I see in a day, a week, a month – that I have every intention of making!  I get to really making some, but most not, simply because there is really only so much time in a day, and so much food we can eat in it!  Granted some (little) people (my kids and husband), eat way more than others (myself.)  I actually am one of those with big eyes. I can be starving, and then eat 2 crackers, and I’m good. My kids cannot believe how little I eat. I just get full easy. Still, I consider myself a food lover, if only in my head. I love to find recipes, plan great food for my family, and photograph it too. And I really do enjoy eating. I’m just done sooner than everyone else.

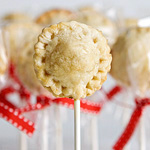
Anyway, I first saw these pie pops almost 2 years ago at Bakerella’s site.  As soon as I saw them that first time, I immediately fell smitten.  She had seen them at yet another’s site. Since then I have seen them 100 times, all over the place.  Of course, you can make these pie pops with any kind of pie filling you’d like. But I have a particular fondness for apple pies, so that’s what I was planning to make.  We do a lot of baking in the Fall, so last year got away before we made them. But not this year! This past weekend we finally made them, as well as some cute cookies I’ll be sharing soon too!

So although these are not my idea, I thought I’d share how we made our Apple Pie Pops.

001_green-apples-red-colander

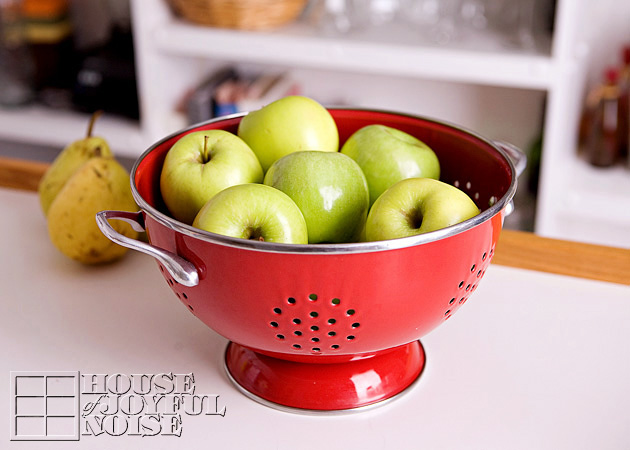
For any apple filling for baked goods, you want to start with good, firm apples, and a mix of the tart and sweet variety. Whether they are evenly mixed, or a little more of the sweet or tart, is all up to your preference.  I chose to keep it even, and used Granny Smiths (tart) and Golden Delicious (sweet).

002_antique-apple_peeler-corer-slicer 
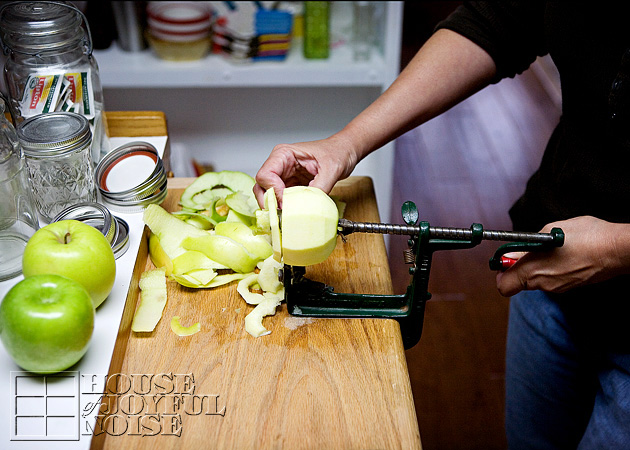
One of the greatest parts of making any baked goods that call for apples, is using my Aunt Dot’s apple peeler-corer-slicer.  The peeler part actually needs to be replaced, but we have not been able to find it yet.  But that’s alright – so we peel the apples by hand for now, or forever. We still feel so blessed to have this antique of my beloved aunt’s, that is such a part of my most fondest childhood memories.

003_antique-apple-peeler-corer-slicer 
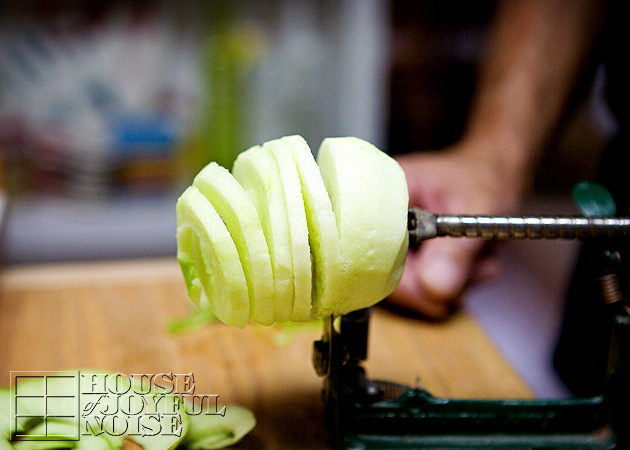
But I’ll admit, it’s damn handy!

Apple Pie Filling Recipe

6 C. peeled *apples, chopped small, and evenly sized as possible
3/4 C. sugar
2 T. all purpose flour
3/4 t. ground cinnamon
1/4 t. salt
1/8 t. nutmeg (Optional. I don’t like it.)
1 T. lemon juice

*Reminder: Use a mix of sweet and tart firm apples.

004_apple-filling 
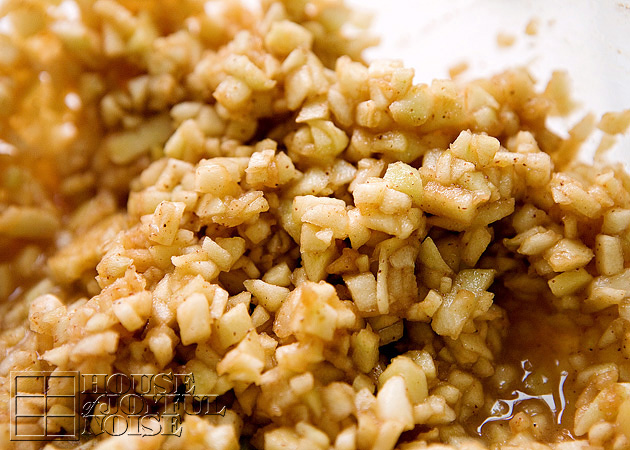
Mix it all up well in a bowl.

005_dough-circles Pie Crust Dough: You can make your own, or use store-bought ready pie crust, such as Pillsbury.
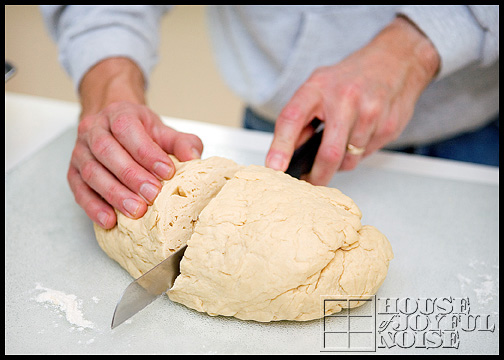
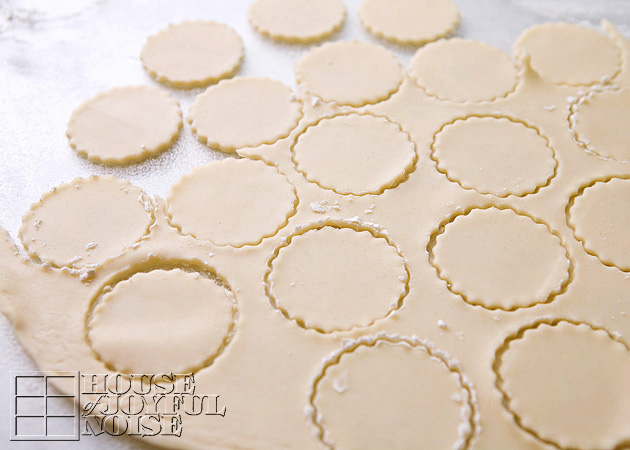
On a flour dusted surface, roll out your dough.  If you are using ready pie crust that is already round, remember that the size of the circle of dough does not matter for our purpose with pie pops, as it would for a pie dish. So you can roll it out larger and thinner than as it comes, and get more out of it. (We wish we did roll ours out thinner, and will next time. I’ll tell you about that at the end.)

006_scalloped-cookie-cutter
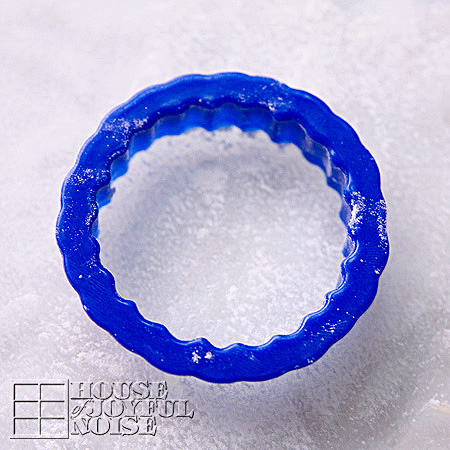
Use a scalloped or plain circle cutter, or any other manageable shape that you would like, that is about 2 inches in diameter.  I like the idea of our pops looking like real little pies, but using shapes like an apple, or a maple leaf, or a pumpkin, etc., would also be cute.  Cut your shapes out of your crust dough as closely as possible, to get as many out of your dough as you can. Weed out the scraps of dough, re-roll, and use again. (As seen 2 photos up.)


007_apple-pie-pops-recipe

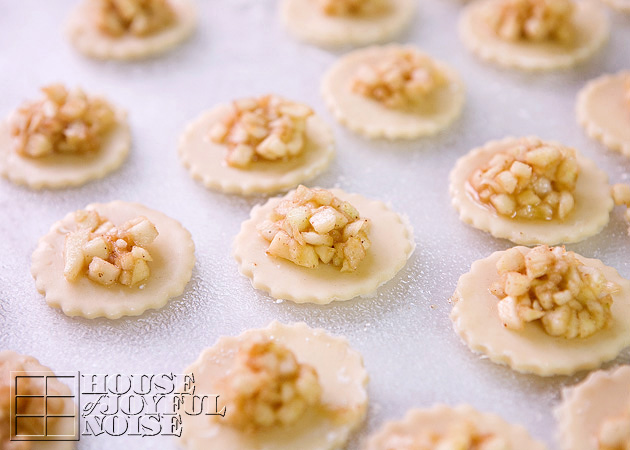
Put a good dollop (what a great word…dollop..) of apple filling in the center of half of all of your cut dough shapes, because you’ll need the other half as tops, of course. You want to put as much as possible on there, but remembering you’ll need to cover it with the other dough circles, and be able to seal it. Too much apple filling will be a problem, and too little will just be….sad.

008_making-apple-pie-pops 
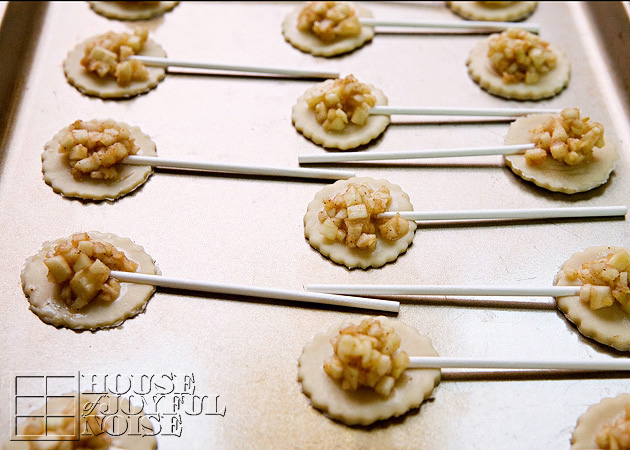
Transfer your pie bottoms with the filling onto a greased or sprayed cookie sheet.
If it easier for you, you can transfer the dough shapes first, and then put the filling on.

009_how-to-make-apple-pie-pops 
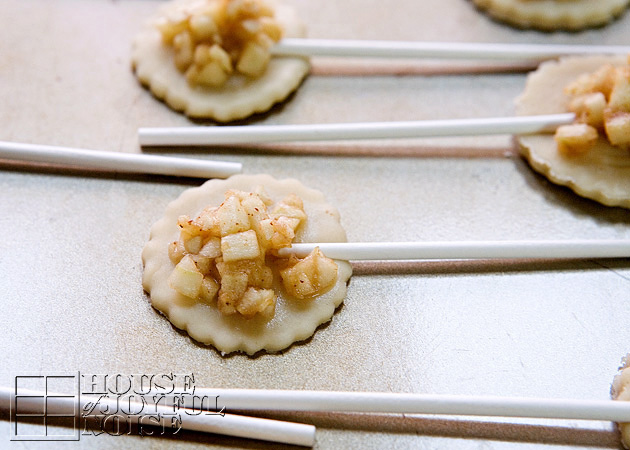
Also add your pop sticks. These are found in the candy making aisle of the craft stores. Now, I have seen that some cover their sticks with aluminum foil, to prevent them from burning. That is too tedious for me, and I was sure they wouldn’t burn anyway, and they didn’t, except where they got a little juice on them. No biggie, and still not worth covering them in foil. But you do what you want!

010_how-to-make-apple-pie-pops You may want to pre-heat you oven at this point, to 375°

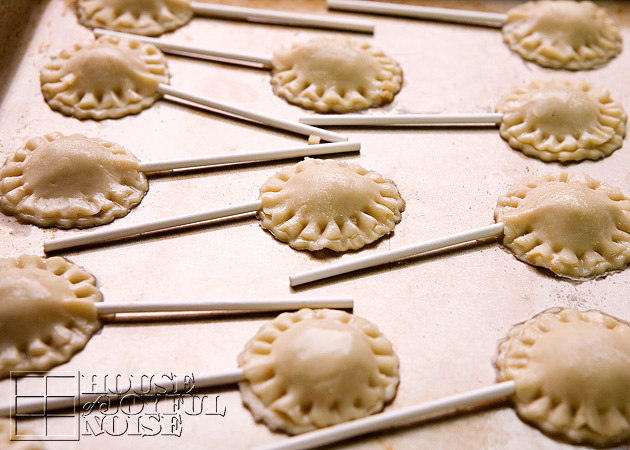
 Now put on your tops. We had a little dish of water, just to dip one finger in, and wet the under-edge of the top all the way around, just to help it stick the bottom better. It also helps to stretch the top piece out bigger, to better fit over your dollop : ) of apple filling.
To make the wavy edge like a real pie, just cut off the end of a pop stick, and use it to press grooves all the way around each pie. This is a a bit tedious too, but one that is worth it to me!

Lastly, just brush each pie pop top with a little egg white, and if you wish, sprinkle with a bit of sugar for sparkle. The egg whites really help the pie crust kind of blister and look nice.

When the oven is up to temperature, you can put your pie pops in for 12-15 minutes.

011_apple-pie-pops 
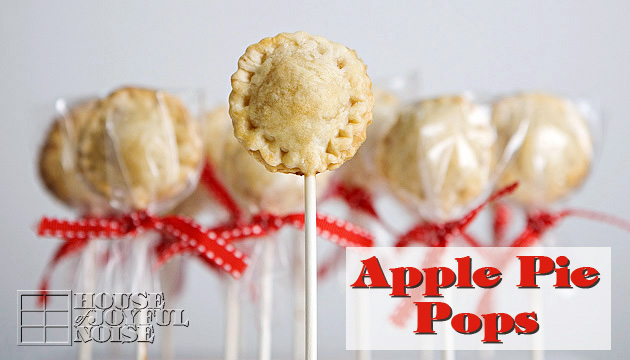
How’s that for a high cute factor?
We bagged each one, and tied them closed with a little red stitched ribbon. Presentation is everything, Folks!

As mentioned earlier, we did not roll out our dough as thin as we will next time. Our pops seemed to be a little more crust, and a little less apple filling than we would have liked. We must remember the filling soaks in just a bit, and the dough really puffs as it bakes into pie crust. Nonetheless, they were oh so good, and next time they’ll be perfect. : )

There are SO many Fall-time apple treats to enjoy – Apple Pie Pops, big Apple Pies, Apple Crisp, Caramel Apples, Apple Sauce, Apple Cake, Apple Cider…..it’s endless, and there are no complaints here! My favorites are Apple Crisp and Apple Pie, both with Vanilla Ice Cream, please.
Do you eat more apples this time of year? What are your favorite apple or Fall treats?

******

Come follow me here or there:

Save


Save

Save

Filed Under: Baking, Recipes, Treats Tagged With: apple-pie-filling, apple-pie-pops, apple-recipes, Baking, baking-recipes, fall-treats, how-to-make-pie-pops, recipes

One Fine Bread Maker! – A Homemade Bread Recipe

February 9, 2009 By Laura 10 Comments

bread-maker-1

That’s MY bread maker!

He’s a fine bread maker.

And a fine bread maker, too. lol

9_photos-of-making-homemade-bread

The bread we go through is crazy, and it’s seemed one of those things you can’t buy enough of, and it’ll go just as quick.  We’re not ‘white bread’ people either, so what we spend on bread can get….tiresome.  So a few weeks back, my hubby decided he’d try making some. After all, he makes a mean pizza dough.  And he had a good book that his parents let us have. (I think.  I’m afraid we borrowed it, and never returned it, but he says no.)  Anyway, they’re experienced…everything makers.

13_Beard-on-Bread-book

Anyway….I can’t tell you how many loaves he has made now, in the past few weeks. He loves doing stuff like that anyway. (What a blessing. lol)  The rest of us love eating it up!!

The recipe we use is a version of a James Beard bread recipe. However, we like to replace 1 cup of the flour called for, with some whole wheat flour, for a bit of a healthier and heavier bread.
We’re sharing our version of the recipe with you today, at the end of this post.

If you happen to have the old book Beard on Bread (shown above), you can find the original recipe Basic Home-Style Bread, on Page 30.

I took photos one Saturday or Sunday not long ago, along the way, from flour and yeast, to our home smelling like something possibly from Heaven.  Is there ANYTHING that smells as good as baking bread??  Few things, I reckon.

1_photos-of-making-homemade-bread

Working together the flour, proofed yeast (with milk and sugar), and salt.

~~~~~~

2_photos-of-making-homemade-bread

Rising.

~~~~~~

3_photos-of-making-homemade-bread

Doubled and ready for round 2!

~~~~~~

4_photos-of-making-homemade-bread

{JM} is the lucky kid who was around to punch it down!  These little things make them SO happy, you know.

~~~~~~

5_photos-of-making-homemade-bread

Kneading some more.

~~~~~~

6_photos-of-making-homemade-bread

Dividing for 2 loaves.

~~~~~~

7_photos-of-making-homemade-bread

8_photos-of-making-homemade-bread

Rising for a second time.

~~~~~~

breadmaker-2

Hanging around, just looking good, while the bread bakes in the oven. He was so tired, I could tell, having chopped a lot of wood that day too.

Beep!  Beep!  Beep! (Timer goes off.)

~~~~~~

10_photos-of-making-homemade-bread

Knock-knock-knock! It sounds done.

11_photos-of-making-homemade-bread

But when the kids hear the timer go off , and the knocking….they come calling, to check for themselves.  Everyone has to get into the knocking, you know. These little things make them SO happy, you know.  : )

Sounds ready!!

9_photos-of-making-homemade-bread

Not quite perfectly formed, but that’s what happens when kids help. The family love that went into them is perfect! And oh….if you could smell our home right about now.   For those of you who bake bread daily (I know you’re out there..) you know what I’m talking about. For those of you who buy fresh baked bread, you know what I’m talking about too.  It’s the smell of a bakery. lol

~~~~~~

14_slicing-homemade-bread


Basic Home-Style Bread
 
Print
Prep time
4 hours
Cook time
45 mins
Total time
4 hours 45 mins
 
A basic simple homemade bread, based on a James Beard recipe, adding some more wholesomeness with a bit of whole wheat flour, and lot of homemade love.
: House of Joyful Noise (.com) blog / Based on James Beard Recipe
: Baking
Serves: 2 loaves
Ingredients
  • 1 package of active dry yeast
  • 2 cups of warm milk (100 to 115 degrees, approximately)
  • 2 tablespoons granulated sugar
  • ¼ cup melted butter
  • 1 tablespoon salt
  • 1 cup whole wheat flour
  • ~ 4 cups all-purpose flour
  • *additional flour as needed when kneading
Instructions
  1. *NOTE: The directions below are all done by hand. However, if you have a Kitchen Aid or other large mixer, as we do now, it is much faster to make this dough!
  2. Warm 2 cups of milk.
  3. Add the yeast to ½ cup of warm milk, along with 2 tablespoons of sugar, and stir well until the yeast is completely dissolved. Allow yeast to proof.
  4. Place the remaining milk, the melted butter, and the salt in a large bowl.
  5. Stir in the flour, *1 cup at a time, with a wooden spoon.
  6. *Start with first cup of whole wheat flour, and then for rest of recipe use all-purpose.
  7. After the third cup of flour, add the yeast mixture.
  8. Continue stirring in flour until the mixture is rather firm, which should take ~ 4 cups.
  9. Remove the dough to a floured board or smooth surface, and knead, adding more flour as necessary if it gets sticky, until it is satiny and no longer sticky.
  10. Butter a bowl and place the dough in it, turning and using your hands to coat all sides with the butter. Cover with a with a kitchen towel or other suitable covering.
  11. Options for Rising:
  12. Place covered dough bowl in a warm, draft-free spot until doubled in size (approx. 1.5 - hours)
  13. -OR-
  14. Heat oven to 170 degrees, and when it reaches temperature, turn the oven OFF, and place the covered dough bowl in the oven. ( ~ 1 hour)
  15. Once dough is doubled in size, punch it down firmly 2 or 3 times, and return to floured surface.
  16. Knead 4 or 5 minutes more.
  17. Divide dough into 2 equal parts, and shape into loaves.
  18. Place each in well-buttered 9 x 5 x 3-inch loaf pans.
  19. Cover and allow to rise again, in a warm, draft-free spot (or warmed/off oven again) until doubled in size.
  20. When loaves are risen, preheat oven to 400 degrees.
  21. Slash the loaves with a sharp knife.
  22. Bake in 400 degree oven for 40 - 45 minutes, or until bread sounds hollow when taped on with knuckles on the bottom.
  23. Optional: Remove from pans and put them in oven a few more minutes longer to become crisped.
  24. ENJOY!
3.4.3177

15_homemade-bread-toast

 What a delicious bread! Great for sandwiches. Toasted, is how I like mine.

Save

Save

Save

Save

Save

Save

Save

Filed Under: Baking, Breads, Rolls and Muffins, Recipes Tagged With: Baking, baking-recipes, homemade-bread-recipes, James-Beard-bread-recipes, recipes

We are wicked happy to have you here! We hope you find much inspiration, help, humor and enjoyment here.


Archives


POPULAR POSTS

* * * * * *

SUBSCRIBE to House of Joyful Noise blog! Every new post, delivered right to your email box!


Privacy Policy

Amazon Affiliates

Never at any additional cost to you, we may earn a small commission for our endorsement, recommendation, testimonial, and/or link to any products from our website. Your purchase through our links helps support our family, while sharing with you the products we authentically use and recommend, for various ideas, and letting you know where you can purchase them. Thank you for your support!

[footer_backtotop]

Copyright © 2025 HouseOfJoyfulNoise.com · Genesis Framework by StudioPress