Summer holds a whole lot of good things, and for us, it really kicks into high gear in the beginning of July, with back to back celebrating of the 4th of July, and our oldest daughter’s birthday! Then the summer rides out with a little more down time, just chilling on the beach, making day trips, and hanging out chatting and laughing around the camp fire at night. So about this time in June, we’re getting excited for all of the fun to come, just around the corner! The gardens are planted, we’re reaching the end of our school books, and we can just feel the summer vibe coming on the sea breeze!
What really gives me so much joy, is helping make my home and gardens, reflect the seasons and holidays! Around here, about mid-June through July, it is all about red, white and blue! Our family’s homestead is that much more enjoyable, with the little bits of decor I add, and it just puts the happy in my heart, to see it. But the greatest joy in it all for me, is planning and creating all of those little things around our home. Like this American Birdhouse I am sharing with you all today. Honestly, day or night, you can turn the music up loud, put some art tools in my hands, and COLOR ME HaPpY!!
So I’ll just tell you how I did this. While I didn’t photograph every step of the action, I can tell you what I did, and give you some photos I took of what the birdhouse looked like after those steps.
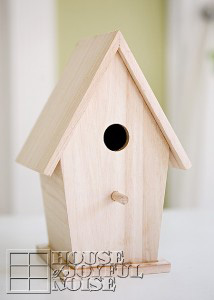
To start, I picked out an unpainted wooden birdhouse at Michael’s Arts and Crafts. There were a few styles to choose from, but this one would best work with the paint-job layout I had in my head.

I primed it with some grey primer I had on hand, and then I painted it white with acrylic paint. Because of the grey primer, it did take 2 quick coats of white to cover. This paint dries fast, which I love, so I can keep the fun rolling.
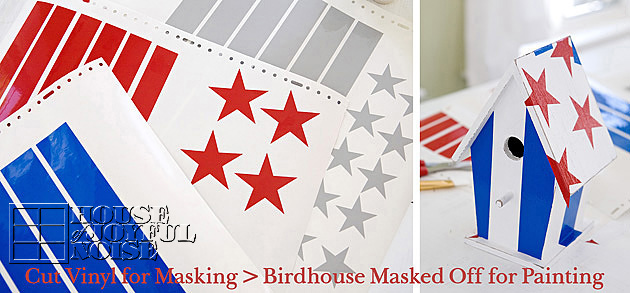 Next, I asked my husband, Michel, to cut some stars and stripes out of vinyl for me, the next job he ran, to use as masks. I wasn’t sure of the size I wanted to work with for either the stars or stripes, so he cut out 2 sizes of each. Sticking some cut pieces on the house helped me decide which size I’d like better, and I went with the fatter stars and stripes. NOTE: Just to confuse things, Michael used some scrap vinyl he had, that happened to be red and blue…to put on my white house. I know….it looks done already, huh? I would have preferred white masking, but c’est la vie….it was just a mask. Don’t let it confuse you-as it was trying to confuse me. It was going to be way better looking when I was done with it, but the colored vinyl did give me a good preview of the final layout!
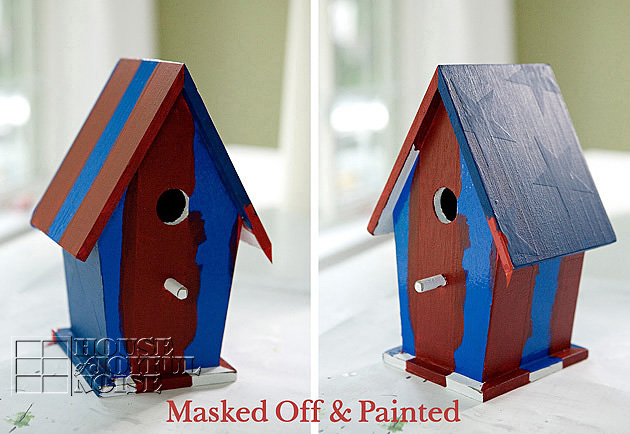 So here it is, with the masking still on, and all painted in. Looks like a hot mess to me! It did take more brain power than I had planned on burning, trying to think in opposite terms here: “Ok….where the red and blue mask is, it will be white….and I am painting the white I see, red and blue. Right?….Wait……”. Ugh. See? White vinyl would have taken less thought for me.
But I managed, believe it or not, to not screw it up much. Although everyone was instructed not to talk to me or ask me questions whilst paintbrush in hand. I’m good, but I’m not that good. ; )
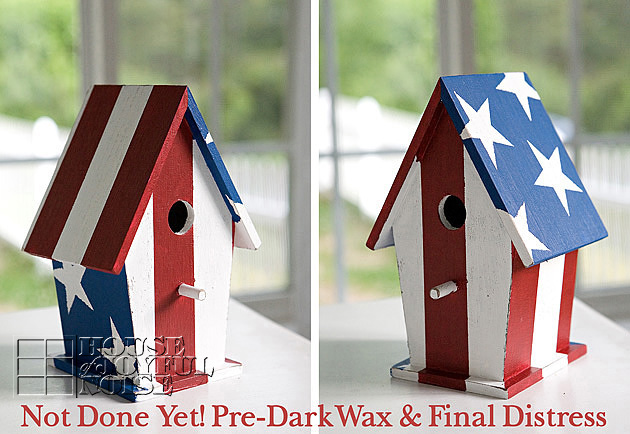 So here is what it looked like after all of the masking was peeled off. Revealing that I really did it right!
It’s looking pretty good already, huh? But it was still not done yet!
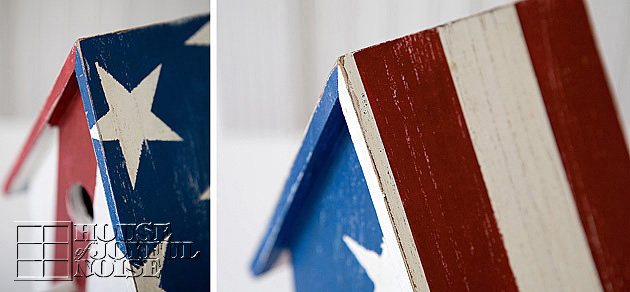
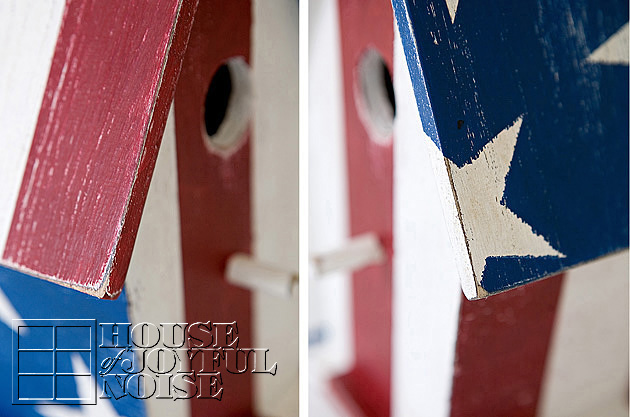
My vision was an older looking American Birdhouse. So I finally really attacked it, with my sand paper! I go to town, distressing. I don’t know what it means, but I suspect distressing my creations gives me an unnatural level of joy. Sometimes, I need someone around, to stop me. For me, this is when many things I make, really come to life, and become what I created them to be.
So, after Michael took away the sand paper, I did just a few more little things: 1) I dusted it all off with a soft rag. 2) I rubbed on a good coat of clear wax, and let that dry. 3) Then, ever so tentatively, I added some dark wax too. I am so careful with that stuff, because it is powerfully staining! I carefully and minimally applied it, to age it exactly to a specific, pinpointed year. (Ha ha…I have no idea what year, really….I’m just kidding. lol) I’m not sure if you can even tell how much it was aged in these photos, with the effect of the dark wax, but it really was the final touch of perfection, for me to call it d-o-n-e.
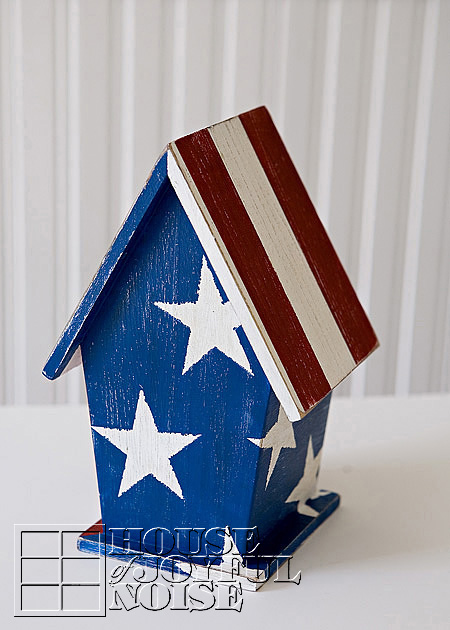
And here it is! . . . . . .
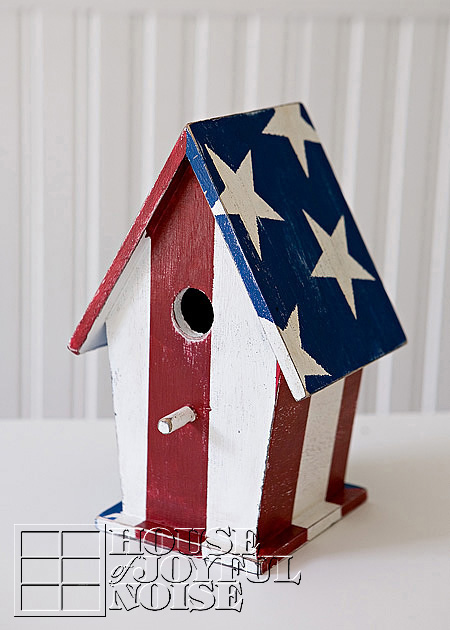
This is the front and it’s left side, obviously. But I tell you this for you to notice, how the stars wrap around from one side, diagonally, all the way to the other. And the stripes do the same thing.
So I am about to show you all sides . . . . . .

Of course, I would love to show you close-ups of the detail in my distressing . . . . . .
 It truly is what makes this an American Beauty, to me!
I just love how it came out. Do you? You can bet your American bottom, I’ll be Pinning this baby!
 Coming up soon here on the blog, I’ll be showing you where I put this, to be displayed for awhile this summer.
Tell us, do you had any special summer decor to your home this time of year? We hope you have a moment to tell us about it, or say hello, before you ski-dattle! If not today, thanks so much for coming by! We’re always glad you did.