• HOME
  • {A}’s Chipmunk Training Archives

 Homepage

  • The Homestead
    • Home Projects
    • Home Improvement
    • Home Decor
      • Seasonal Home decor
        • FALL Home Decor
        • WINTER Home Decor
        • SPRING Crafts and Creations
        • SUMMER Crafts and Creations
    • Our Chickens
    • Gardening
    • Organization
    • Re-Purposing
    • Furniture Refinishing
    • Budget
  • Crafts & Creations
    • Seasonal Home decor
      • FALL Crafts and Creations
      • WINTER Crafts and Creations
      • SPRING Crafts and Creations
      • SUMMER Crafts and Creations
    • DIY (Do-It-Yourself) Project
    • Kids Arts and Crafts
    • Homemade/Handmade Gift Ideas
    • Holiday Crafts
    • Fan Pulls
    • Free Printable/Downloadable
    • Sewing Projects
    • Giveaways
    • Business Features
  • Recipes/FoodFun
    • Breakfast
    • Lunch
    • Main Dish
    • Sandwiches
    • Appetizers
    • Slow Cooker
    • On The Grill
    • Side Dishes
      • Soups
      • Salads
    • Baking
      • Breads, Rolls and Muffins
    • Snacks
    • Treats
    • Desserts
    • Drinks
  • Homeschooling
    • Elementary Homeschooling
      • Elementary Homeschooling READING
      • Elementary Homeschooling MATH
      • Elementary Homeschooling LANGUAGE ARTS
      • Elementary Homeschooling SCIENCE
      • Elementary Homeschooling HOME ECONOMICS
      • Kids Arts and Crafts
    • Middle School Homeschooling
      • Middle School Homeschooling SCIENCE
      • Middle School Homeschooling HOME ECONOMICS
    • Language Arts
    • Math
    • History / Social Studies
    • Geography
    • Foreign Language
    • Field Trips
    • Games
    • Nature Study
  • The Big Picture
    • Life In General
    • Celebrations
    • Faith
      • Into the Light; The Series
    • Giveaways
    • Reviews & Sponsors
  • Photography & Lettering
    • Photography
    • truck lettering
    • vehicle graphics
    • Newborns
    • Kids
    • Engagement
    • High School Senior Pictures
    • High School Senior Pictures Sneak Peeks

The Process of Gold Leafing – A Church Steeple Cross – Part I

July 15, 2009 By Laura 4 Comments

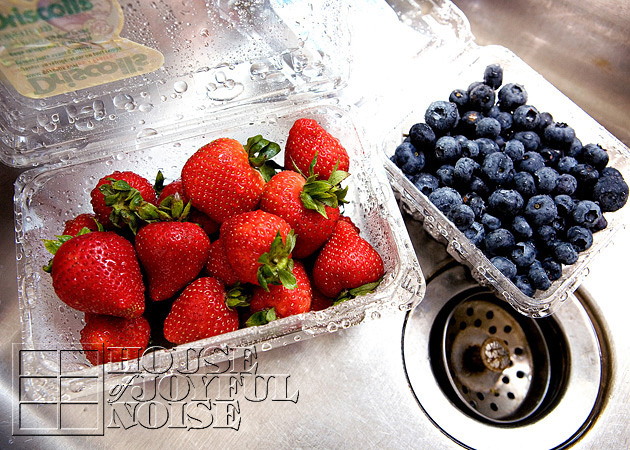
Did you know that many of the gold church crosses you see are actually real gold?  If you did know that, have you ever wondered what the process is to apply the gold? This is called gold leafing, or gilding, and today we are going to show Part I of that process with you, on a church steeple cross.

In Michael’s business of truck lettering and sign making, he often does gilding.  Gilding is the process of applying a fine, thin layer of real gold, to a prepped surface.  Often times, letters or graphics are done on flat surfaces in gold on truck doors, boats, signs or storefront windows. 3D letters can also be gilded, to be applied to a building side, sign, etc.  Michael has done gilding for all of those lettering purposes.

But he also does weather vanes,  and church steeple crosses!  He is often-subcontracted by Christopher Burgess, of The Burgess Company Steeple Jacks from Pembroke, MA.  As a steeple and tower specialist, Chris often removes (if possible), repairs and replaces these structures for refinishing.  Chris strips them and preps the surface for finishing, and often hands off the piece to Michael for gilding.
So while Michael had this church cross in to be gilded, we thought some of you might be interested in seeing the process.

gold leafing gilding

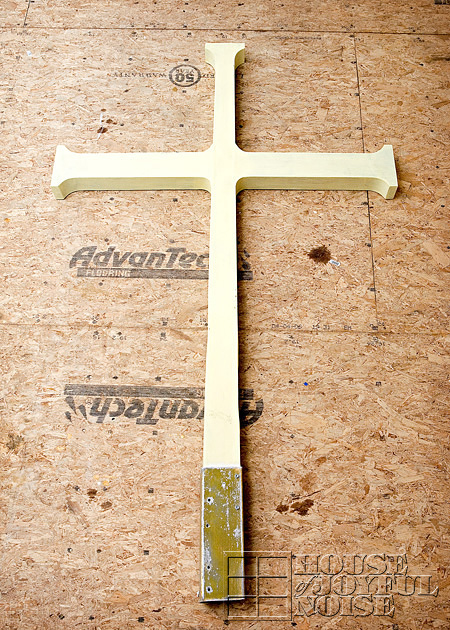
This cross is 5 feet 10 inches tall, and needs to be gilded, picked up and replaced on the steeple as soon as possible.

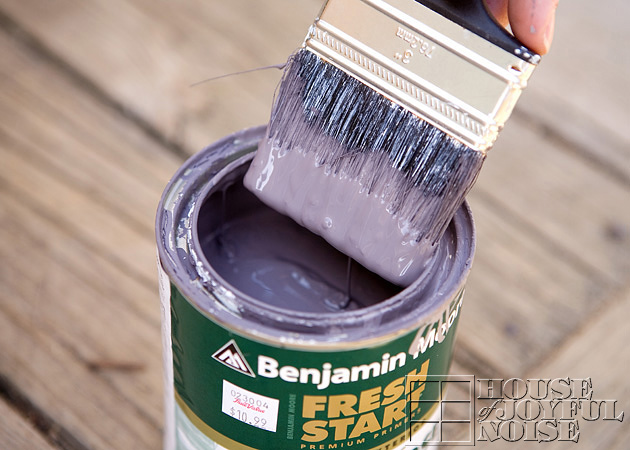
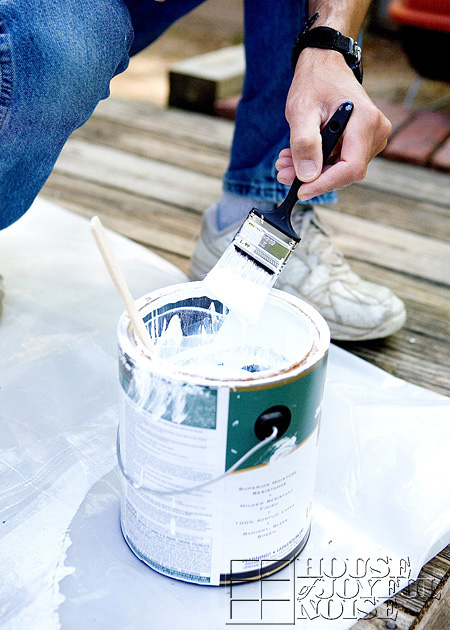
So Michael starts with these 2 mediums….

gold leafing gilding
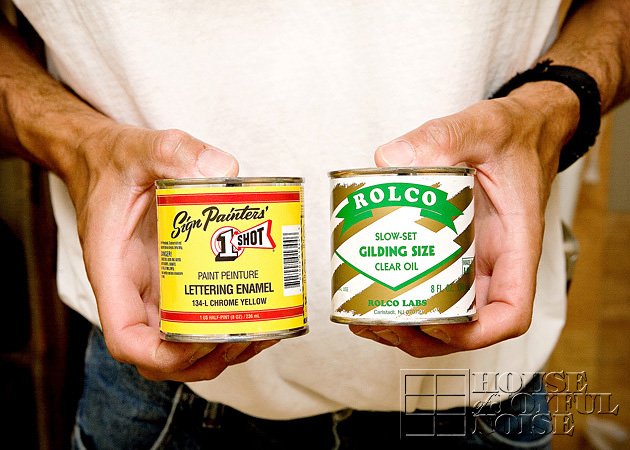
Slow-Set Gilding Size, and Yellow Lettering Enamel.  The sizing is the medium applied to the surface first, to make the gold adhere.  Because the sizing is a clear oil, about a tablesp0on of yellow paint to 1/4 cup of sizing is added, to tint the oil.  This way Michael can see where the oil has been applied already as he works.

gold leafing gilding

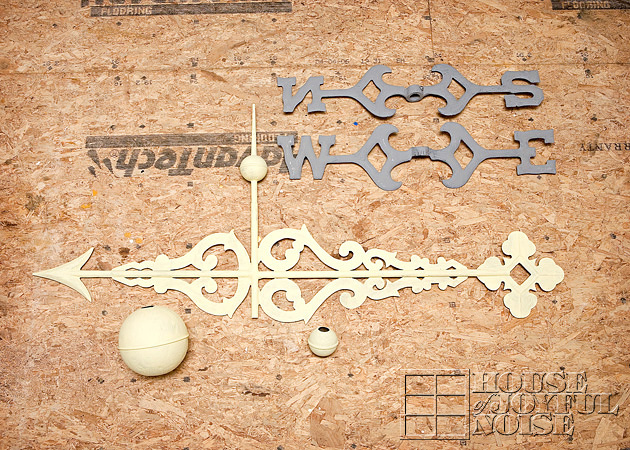
He also had a weather vane to be done, but for this post we are going to focus on the cross.

gold leafing gilding

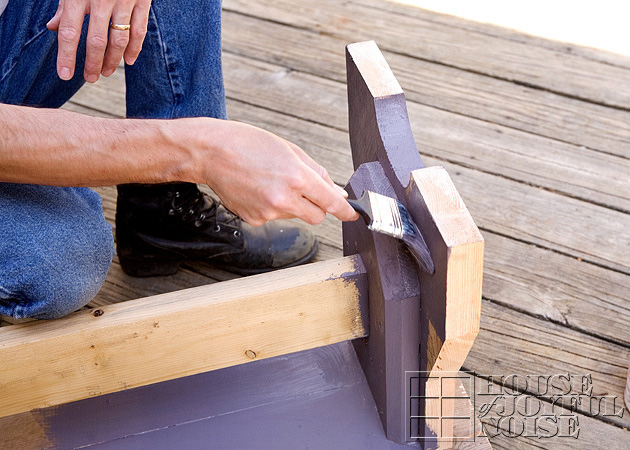
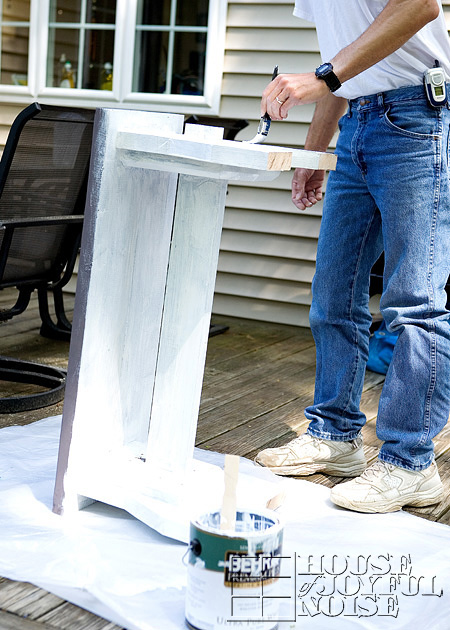
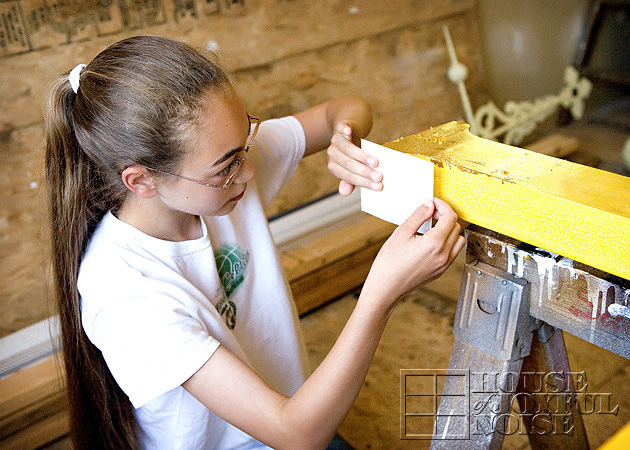
 Here, for this piece, he is able to roll out the mixed medium on the entire cross.

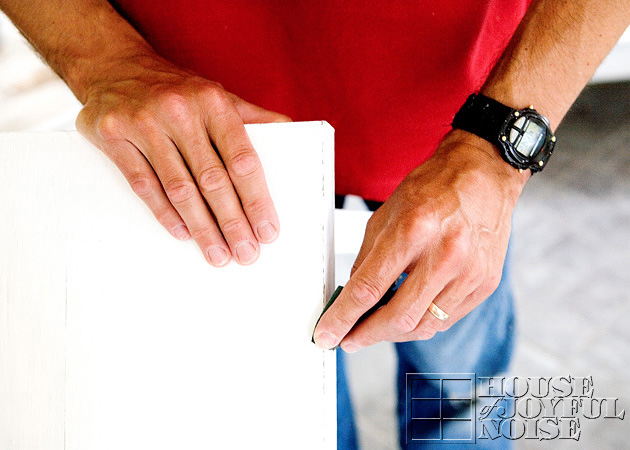
Then it needs to be left alone for awhile. For slow-size, it takes anywhere from 12-16 hours, depending on humidity, to reach a desired tack.  Quick size can be ready in 2-3 hours, but is preferred for truck doors, boats and windows, when it would receive a clear coat over the surface.  But slow-size is used for gilded pieces that will not be handled, touched, or washed.  In these instances, the gold by itself will stand up to the elements for a number of years.   In any case, the desired tackiness Michael waits for is when he can drag his knuckle on the surface and it squeaks.

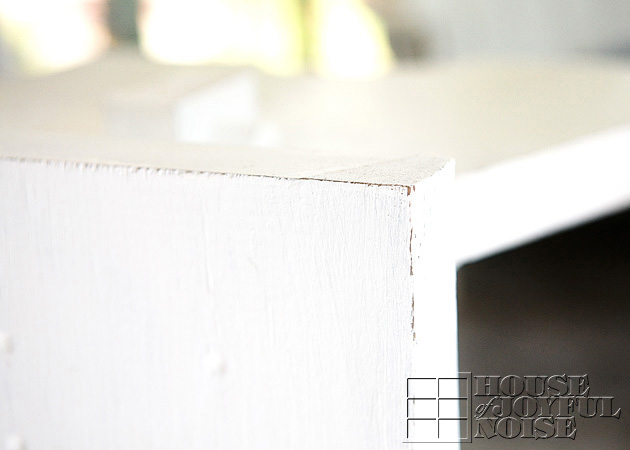
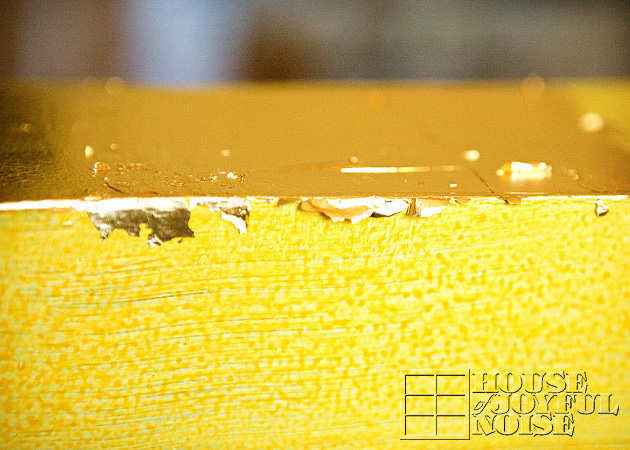
Once the surface is at the appropriate tackiness, it is ready for gold.

gold leafing gilding

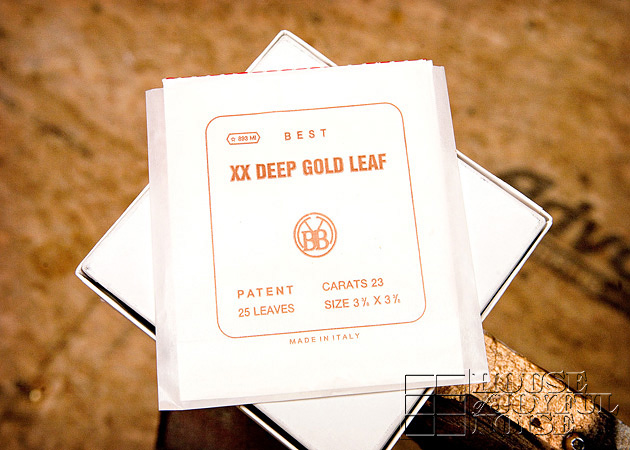
This is how the gold comes – in a box that holds 25 books with 25 leaves per book.   This is patent gold, which means that it is adhered to sheets of tissue.

gold leafing gilding

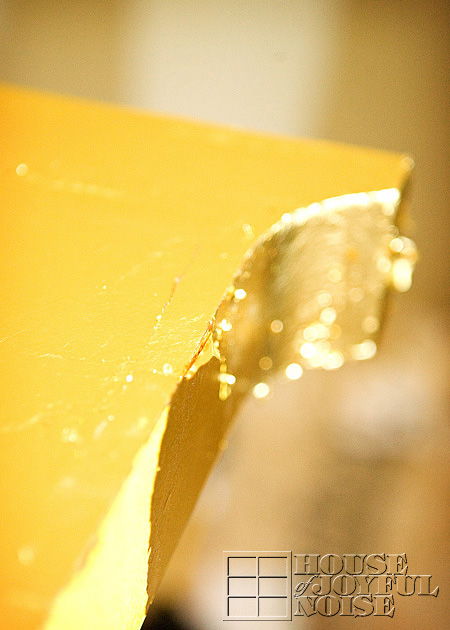
A sheet of gold looks like this.  This is very fine, thin gold layer.

gold leafing gilding

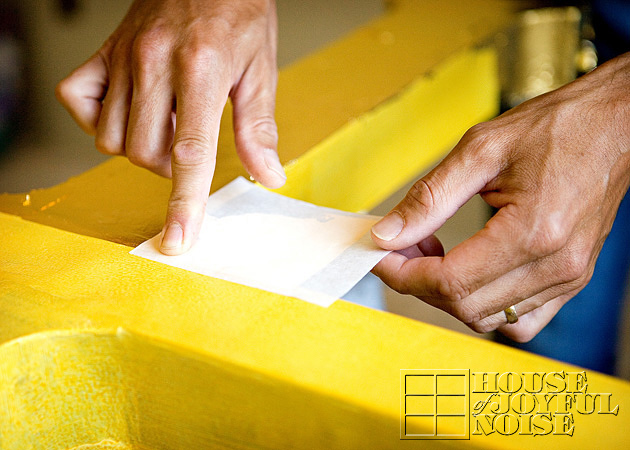
It’s applied very carefully, to the surface, as you see above.   The sheet is gently laid down, and then rubbed with a finger or thumb.

gold leafing gilding

gold leafing gilding

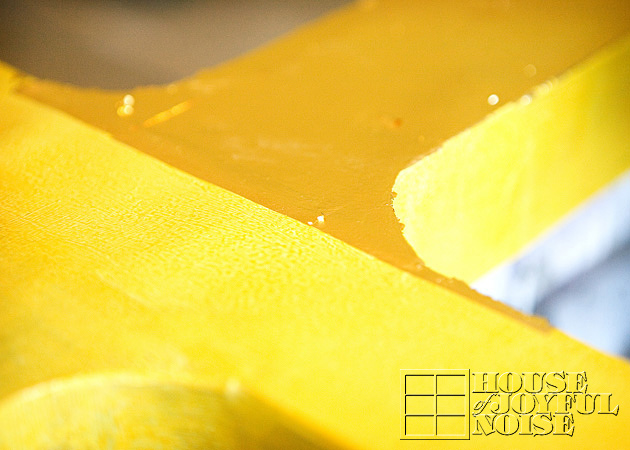
You can see how very soft and light as air the gold is.

gold leafing gilding

gold leafing gilding

gold leafing gilding

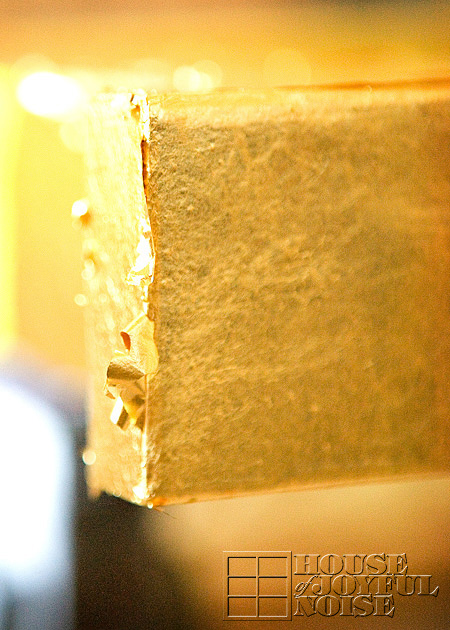
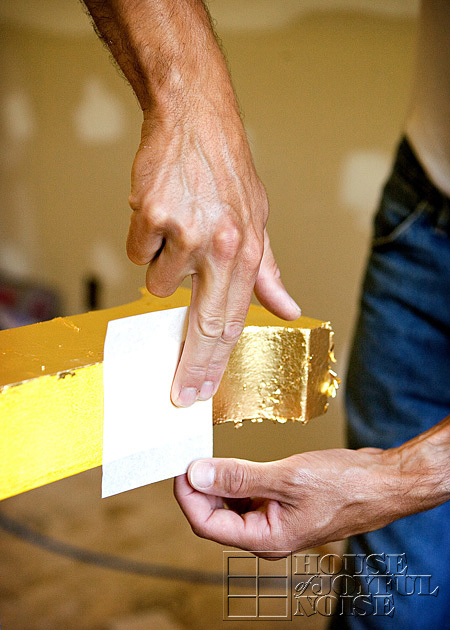
This method, of precisely laying sheets of gold, and rubbing down to apply it, is continued over the entire surface of the cross, until it is covered completely.

gold leafing gilding

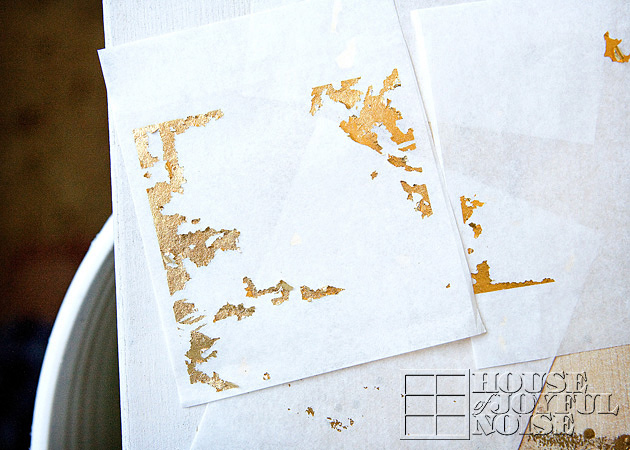
The goal is to use every bit of gold off of every sheet.  What’s left on the sheets like above, are used for filling in seams, cracks and missed spots.

gold leafing gilding

As we’ve mentioned before, {A} is often a voluntary apprentice on our jobs.  She loves to gild with Daddy-Boy.  Not to say she doesn’t have an ulterior motive or 2 as well.  ; ) More on that later…

This post would just be way too big and long to explain the entire process with all of the photos, so stay tuned to see how this church cross is finished, and how beautiful it looks when it is all done!

Check out PART II HERE.

Save

Save

Save

Save

Save

Save

Filed Under: Faith/ Catholic, Photography & Lettering Tagged With: about-gold-church-steeple-crosses, Catholic, Catholic-blogs, Catholic-Church-gold-cross-steeples, Catholic-families, gilding, gilding-tutorial, gold-leafing, gold-leafing-tutorial, gold-lettering

A simple Summer Treat

July 12, 2009 By Laura 4 Comments

    We threw together this wonderful and simple summer treat on the afternoon of {A}’s birthday, and called it a  Birthday Parfait.

strawberries and blueberries

It couldn’t be any easier to make:

1) Rinse some strawberries and blueberries in the sink.

(Next year we’ll have enough strawberries of our own from our garden, to not have to use store-bought, but these were really good berries, anyway! Big, juicy, and sweet.)

strawberries

strawberries

2) De-stem and slice the strawberries.

blueberries

blueberries

3)  Go through the blueberries real quick , just to make sure there are no smooshy ones, : ) , and also take off any tiny stems still on.

4)  Get out your can of Redi-Whip.

5) In clear cups, layer strawberries, whip cream, blueberries, and more whip cream on the top.

fruit treats

It was just the ‘light-little-something’ we needed that day, to hold us over until dinner.

It’s also perfect to serve on the 4th of July weekend, or Memorial Day weekend, being red, white and blue.

We and the kids loved it so much, we had it again a couple of days later.  But that time, we sprinkled some Grape Nuts cereal on top, and we loved it even more.

Simple. Pretty. Tasty.

And simply pretty tasty.

Save

Filed Under: Recipes, Treats Tagged With: blueberries, fruit, fruit parfait, fruit-desserts, fruit-treats, healthy-summer-treats, light-fruit-desserts, light-summer-desserts, strawberries

4 Moments from Our 4th – July 2009

July 9, 2009 By Laura 6 Comments

Just 4 moments I loved from our 4th of July, 2009.

4kids

First, of course, is our kids.  Yes, they do huddle frequently for a shot together, because I ask them to, and they oblige me. However…they put themselves in this order most every time. The triplets always scramble around each other saying “Birth order, birth order!”.  And then {A} jumps on at the end. lol  Being the orderly person that I am, I don’t argue. : )  It rather pleases me, actually.

I can’t tell you how much I LOVE this next photo of {O}?…..

o_

“I LOVE THIS PHOTO OF {O}!”

Yes, she actually is that cool.  Those are my shades she has on. But she’s cool without them, too.

She has also lost that last front tooth, since this photo was taken.  PRAISE THE LORD!  The last of the trio’s top front teeth are all out.

Speaking of teeth…..here’s one to throw you…….

.

molars

This is {A}.  I can’t tell you how happy I was that this dang molar finally came out!!  It’s been bugging her for, I don’t know…months.   Is it any wonder why it bothered her so, now that we can see?  Look at the tooth that was already up underneath it.  All I can say is….Amen.

I have to mention…..we actually lost yet ANOTHER tooth in the house since these 2.   Yes…that would be 3 teeth in 5 days.  I think we’ve been losing a tooth every other day since winter, or something.  With triplet 6 year-olds and a pre-teen, that’s where we’re at in life right now.  I won’t freak you out, and tell you how we have to keep them all.

Just to help you get those disturbing images out of your head, I will leave you with what might be one of the sweetest American moments there ever was…….

grasshopper

Can you see what it going on there?  Need a closer look?  Ok…..

grasshopper_cu

My sweet, sweet, thoughtful boy, is feeding the grasshopper… a blade of grass.  It was taking bites, too!

<shaking head> If that’s not what America is all about, I don’t know what is.

Hope your 4th was full of moments to remember, too!

Save

Filed Under: Celebrations, Holidays, The Big Picture Tagged With: 4th of July, grasshopper, grasshopper-photos, kids-losing-teeth, triplets

How to Build a Wood Stove Bench – Part III – Finished

July 8, 2009 By Laura 1 Comment

How to Build a Wood Bench

For those of you who have been following our blog for awhile, you’ll know how this post is a little late coming.  The project was done quite awhile ago – we just didn’t get to posting the last part of the project.  Not sure if anyone has literally been following this project to build a bench of their own anyway.  If so….we’re sorry!!

For the rest of you, who may be new to our blog here, or missed these project posts before, we can catch you up with links, and a brief explanation:   We were using a silly footstool at our wood stove over the winter, to sit upon as we loaded wood into the stove, or poked the fire some.  Eventually, I had mentioned that I thought Michael should build us a real rustic bench enough times, that he got to sketching.

Here are Parts I and II of this project:

How to Build a Wood Stove Bench – Part I

How to Build a Wood Stove Bench – Part II

So, where were we?   Oh yes.   Michael had completed building the bench, and it just needed to be sanded some, primed, and painted.  (And I prefer….sanded a little again, for that older look.)

The primer we used was a mixed color that, actually, was not quite the color we were going for.  I wanted a medium brown that had some gray in it.  But it came out looking more like…..medium gray-brown with some purple in it?

How to Build a Wood Bench

It was a Sunday when we had gotten this primer.  Michael had them mix it up at the little local hardware store.  By the time we popped open the can, the store was closed.  We had gotten the primer that day, for our unfinished farm table we had gotten for the sun room.  I was eager to do the project that day, so we used the primer anyway, and it turned out to be fine.

Like the bench, we were painting the table white anyway, in the end.  The reason the primer color mattered any, was because I like to sand the corners and edges of the piece of furniture, to give it a worn old look.  Most times we sand right down to the wood anyway, but in parts the primer does show.  But it is so subtle, you couldn’t pinpoint the color.

So, after a quick sanding of the bench, Michael got to priming.  It wasn’t important to us to have it super smooth, so if it would be to you, you’d want to put more time into that, until it is as smooth as you’d like it all over.  We pretty much got right to priming.

How to Build a Wood Bench

Once it was primed all over, and the primer had dried, he filled in the screw holes some with filler, and got to painting it white.

How to Build a Wood Bench

I helped, with a brush of my own, in between taking photos. : )

How to Build a Wood Bench

Once it was painted all over, dried, and got a second coat dry, Michael sanded the edges and corners some, to make the bench look older and worn, as I had told him I wanted.

How to Build a Wood Bench

And when he was all done, I did it again. : )  He just wasn’t aggressive enough for me. I wanted it OLDER and MORE WORN than he had accomplished.  But ….it’s a preference thing.

How to Build a Wood Bench

That’s better!!  We did the same with our farmer’s table in the same room, so they kind of go together.

So now, the bench was finally done, just in time for……………SPRING??  lol

But, we did have a few very cold and rainy days and nights in early spring, that we got a cozy fire going.

How to Build a Wood Bench

How to Build a Wood Bench

So much better than the footstool….don’t you think??  That thing was barely accommodating to the backside of myself.

Remember, you may not need a wood stove bench, but a bench like this can be used in any room of the house.  For taking off and putting on shoes in a mudroom.  By a window for some light reading.  In the bathroom for putting down your fresh clothes and towels.  Or outdoors under a tree, on your deck, or by an outdoor fire pit! I’m sure if you’re needing a rustic bench, you know the perfect spot for it at your home.

We hope you enjoyed this home project, however sporadic. Sometimes, we’re just pleased with ourselves, that we finished a project, even if it did take longer than we had originally planned!

Save

Save

Save

Save

Filed Under: Crafts & Creations, DIY (Do-It-Yourself) Project, Home Projects, The Homestead Tagged With: build-a-bench, build-it-yourself-wood-bench, how-to-build-a-wood-bench, wood stove bench, wood-bench-plans

Our Baker’s Dozenth Birthday – Our Oldest Kiddo

July 7, 2009 By Laura 3 Comments

{A} turned 12 years old on Sunday. She’s our oldest kiddo. And our baker.
We thought we’d share with you a bit about her day, while more importantly, documenting this special day for her, when she’s older. aspancakewishduo Her birthday morning started out as all birthday mornings do around here…..with the birthday pancakes, of course.  Daddy always makes birthday number pancakes, usually by cutting out the numbers.   But this time he surprised us all, with yet another twist of his pancake creativity.

bdpancake

If you’d like to use this idea for a special birthday celebration in your own family sometime, how he did this is too easy to believe.  He just took a sharp razor, and very gently cut the numbers through just the very, very top of the pancake, and peeled off the surface of the numbers.  That’s it!! Easy.

If you’re wondering, once in awhile our kids do have butter and syrup on their pancakes. But most times they love just eating them with strawberry yogurt.

I remember the night of laboring with {A} very clearly.  Getting to the hospital, through the fireworks traffic was no small task.  Of course, being a first time mother, panting through what sure felt like intense contractions to me, I was sure she was coming out any second. I always laugh at that memory, as I learned with the passing of time, that I wasn’t feeling much of anything yet, compared to what was coming! One LONG night of labor, with contractions that intensified and multiplied by the hour! A pure, natural, drug-free labor rewarded me well at 10:08 a.m. , with the most beautiful and sweetest little face I had ever seen in my life.

scard

She truly kick-started our journey of parenthood that day, and we could never have imagined the ride she would take us on.  The transformation of watching her grow, learn, grow, shine, grow, create, grow, give, grow, dream, grow, plan….and grow some more, has been amazing to witness.  She’s a tad taller than I am already!

ocard

{A} truly is a dreamer.  She plans out her life, in detail, cultivates her skills almost daily, and those dreams and plans grow all of the time.

scard

She loves to bake. She is baking in our kitchen way too often, and I’m telling you,  it’s not jiving with my clothing sizes!  But oohhhh….. she is such a wonderful baker! She loves to research recipes, experiment with them and put her own twist on them to make it more her own. She has been collecting recipes and writing a cookbook in her laptop computer for probably a year now.  She is also a HUGE fan of Bakerella.….and asks if there is a new post on a daily basis.

So it was easy to figure out the kinds of things I knew she would be thrilled with to receive as surprises on her birthday…..

cookbook2

Baking cookbooks…….

cookbook1

and most anything……

…and everything…..

beforegift

…to do with BAKING!!

caketips

She was really excited to see the cake decorating tips set!  That’ll take some practicing for sure!  (Oh darn….what ever will we do with all of those cupcakes!!  We just love cupcakes. And her Daddy really-(really)-loves-cake!)

I found some really fabulous baking cookbooks at the book store, on the discount shelves!  I was thrilled with that!  I actually went in to see if I could find a copy of Black Beauty, and {O} spotted and suggested the cookbooks!  What a great idea that little one had! Just beautiful books.

cookbookcover1

This one, above,  has a great section in the beginning on all kinds of bake ware information.  Photos of what various pans or tools look like, what they are called, and what they are used for.  Then there is also photo-illustrated examples  of various baked goods on ‘what went wrong’.  These display common mistakes with baking, what they look like, and how to avoid them next time.  Very educational for the baker enthusiast!

cookbookcover2

This is a great book too!!

She has just been pouring over these cookbooks since Sunday, and has even let the little ones join her in reading about them, deciding which ones look extra good, and which items to try and bake first.

Despite all of the baking that goes on, we are a pretty health-conscious family.  (It’s true!) Even {A} is always checking the amounts and kinds of fat involved, and how many grams of sugar.  We don’t eat much processed food at all, and really attempt to have a healthy daily diet.  Thankfully, the kids are all great eaters, and have never been especially picky.  But I must admit.  The more {A} has gotten into baking, the more goodies we’ve all been eating.  Not every day by any means.  But, more than we ever used to.

We all always choose what kind of cake we want on our birthday, and she did the same this year.  So it’s probably no surprise, she insisted on baking her own cake, herself.

blowingcandle5

For once, it wasn’t actually from scratch, but I was pleased with what she chose:  Duncan Hines Blueberry Streusel cake.  Made with whole wheat!  It actually tasted wholesome and healthy.  It was very good.  And as of today, it’s GONE.

There’s no doubt that this girl is really passionate about anything she is interested in.  She goes above and beyond delving into anything that tickles her fancy.   Whatever she decided to do, we know she’ll succeed, and we know she’ll be happy  She just has a light about her, that I can’t imagine will ever go out.  I think part of it comes from her deep, spiritual faith, that is pretty astounding at her age.  It’s certainly the core of who she is, and maybe that’s where that light comes from.  Whatever it is, I just pray she keeps on shining.  And may that light ALWAYS be BRIGHT and HOT enough, to keep baking  some goodies  for us now and then!    : )   That would be SWEEEEET!

apron

Happy Birthday, Darlin’!   Shine On!!

So on birthdays in our family, no one ever works or has school, and we spend the day together doing something fun together, per request of the birthday person (or people, in the case of the triplets. lol).  This birthday just happened to land on a Sunday.  We also always have (number) pancakes, and cake of choice.

So our question to you is:  Do you have any birthday traditions in your family?  If so, what are they?

Save

Save

Filed Under: Baking, Celebrations, Recipes, The Big Picture Tagged With: Baking, birthday pancakes, family-birthday-ideas, gifts-for-someone-who-loves-to-bake, kids-baking, sibling-love, siblings, triplets

  • « Previous Page
  • 1
  • …
  • 70
  • 71
  • 72
  • 73
  • 74
  • …
  • 101
  • Next Page »

We are wicked happy to have you here! We hope you find much inspiration, help, humor and enjoyment here.


Archives


POPULAR POSTS

* * * * * *

SUBSCRIBE to House of Joyful Noise blog! Every new post, delivered right to your email box!


Privacy Policy

Amazon Affiliates

Never at any additional cost to you, we may earn a small commission for our endorsement, recommendation, testimonial, and/or link to any products from our website. Your purchase through our links helps support our family, while sharing with you the products we authentically use and recommend, for various ideas, and letting you know where you can purchase them. Thank you for your support!

[footer_backtotop]

Copyright © 2025 HouseOfJoyfulNoise.com · Genesis Framework by StudioPress