When Lent comes around, it’s difficult enough for us as adult Christians, to decide in which ways we’d like to embrace the 40 days leading to Easter. We are led by 3 things: Sacrifice, Prayer, and Alms-giving. But as parents, we also want our children to take part in some way, and fully realize the significance of this period of time, too! Attending Mass (especially through Holy Week), hearing the Scripture relating to Jesus’ death and resurrection, and witnessing (or participating in, depending on the ages of the children) their parent’s participation throughout Lent, certainly helps build their understanding of the importance of this season in our faith.
However, I was thrilled last year, to come across this great project for the kids, that really invited them to be involved in some significant way even more, throughout the Lenten Season!:
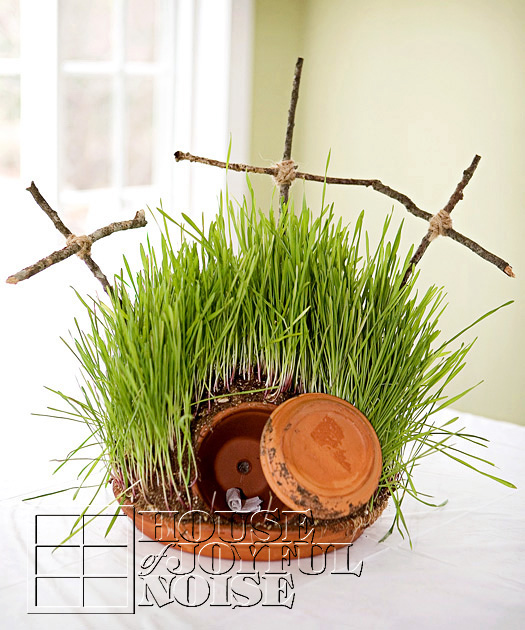
Calvary Hill
As parents instruct the kids how to build this project, and plant and water the grass seeds, they have the opportunity to teach, or further discuss, the reality of the death and resurrection of Jesus, why and how He died, and what that means for all of us!
This Calvary Hill plant needs to be nurtured and tended to by the kids, throughout Lent. By Easter, it is beautiful plant, symbolic why we celebrate. It makes for a wonderful Easter table centerpiece, and can also be put outdoors to keep for many months! We put ours out near our gardens, on our potting bench. It can also simply be placed right into a garden bed, or on a deck. We trimmed the grass down when necessary, and kept it watered, enjoying it for long past Easter.
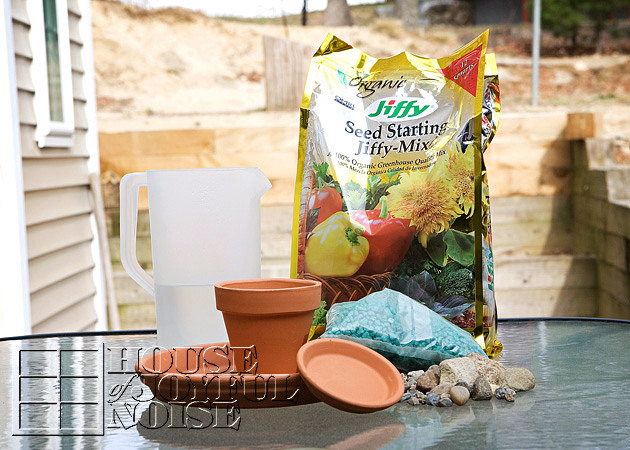 Pictured here are some of the supplies you will need.
Here is a more complete list:
- Organic Seed Starting Mix (we used Jiffy brand)
- Organic Hard Winter Wheat Berries, OR, Winter Rye (we used Winter Rye),
- a large (12″) flower pot dish (w/ no drain hole),
- a small (4″) flower pot and it’s dish,
- small rocks (for drainage),
- a pail
- pail and shovel, with some water, for mixing soil.
- some straightish-sticks of any kind, for the crucifixes
- brown twine to tie together crucifixes
- probably a glue gun
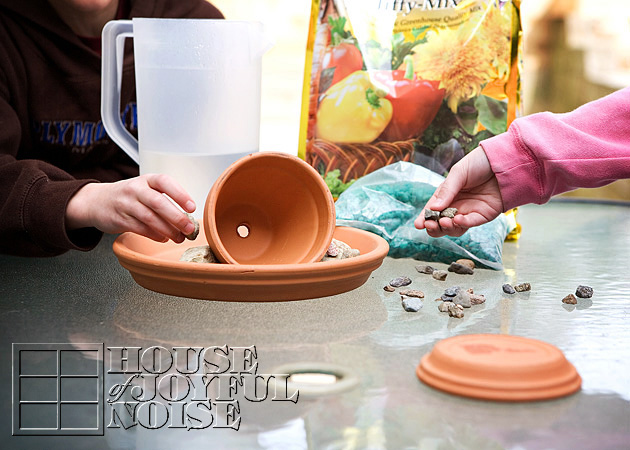 First will be creating Jesus’ tomb: Lie the small pot on it’s side, in the center of the large pot dish, with the opening of the pot a couple of inches or so from the inside edge of the big dish. The small pot is representative of Jesus’ tomb. You just want to be sure you leave room for the dish to that pot, to be in front of the pot opening, and room to roll to the side, which will serve as the stone in front of Jesus’ tomb.
–
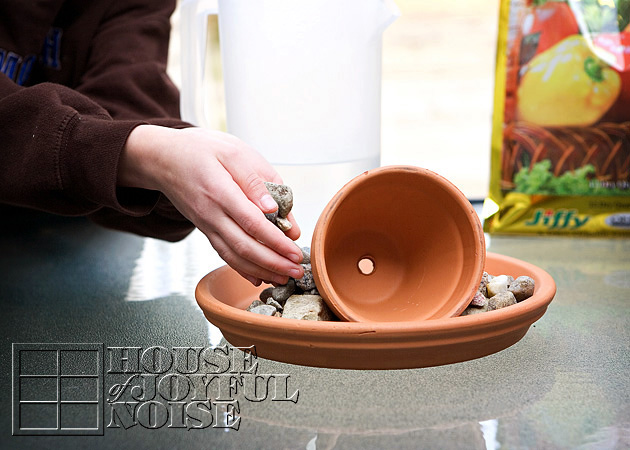 Fill the whole bottom of the large potting dish with small rocks on the 3 sides of the small pot (Jesus’ tomb), supporting it to keep it from rolling. Smaller rocks than we used are acceptable and may even be more suitable and manageable. We just grabbed some from our driveway!
–
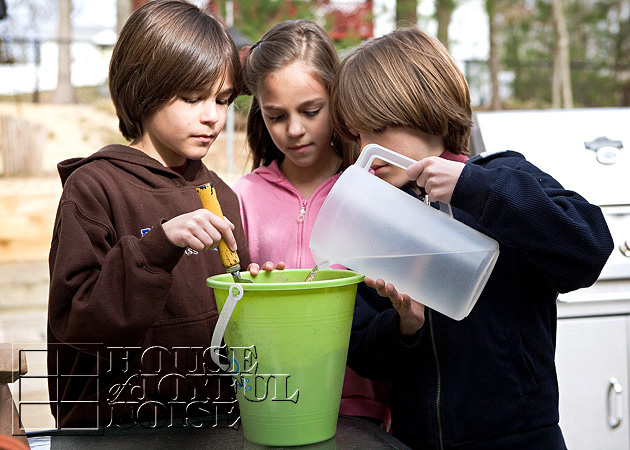 Next, in a pail, add water to some Organic Seed Starter Mix . . . . . .
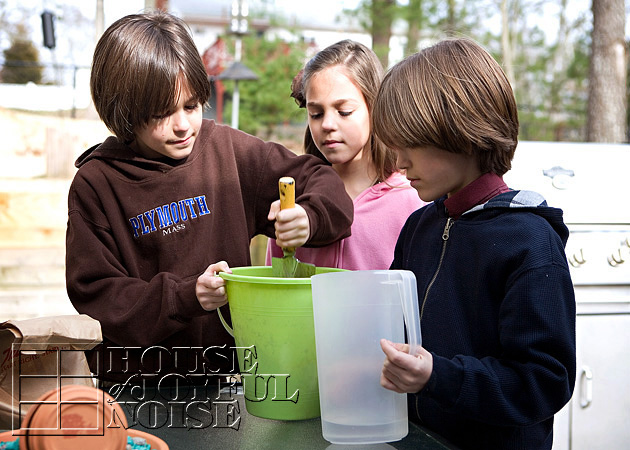 . . . . . .and mix to make some nice wet dirt!
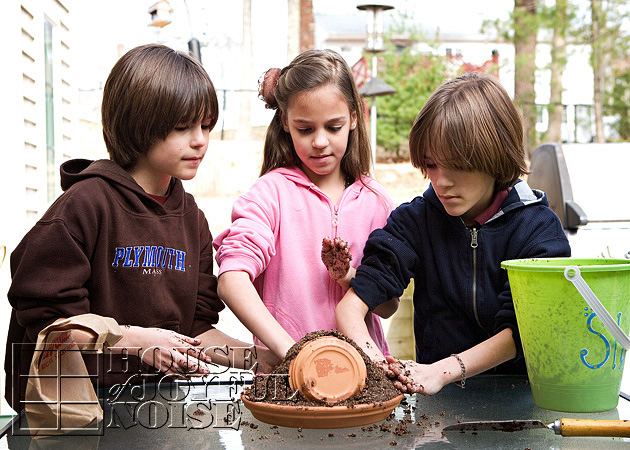 Time to get dirty!
Scoop handfuls of dirt out of the pail, and place it all around the sides of and behind the tomb, as well as right over the top of it. Create a nice round hill.
*Note that in these photos, you see some dirt in front of the lid and somewhat in the way here. We learned that was not a good idea, as dirt was always falling out when we moved the lid. It is best to keep it clear of any soil.
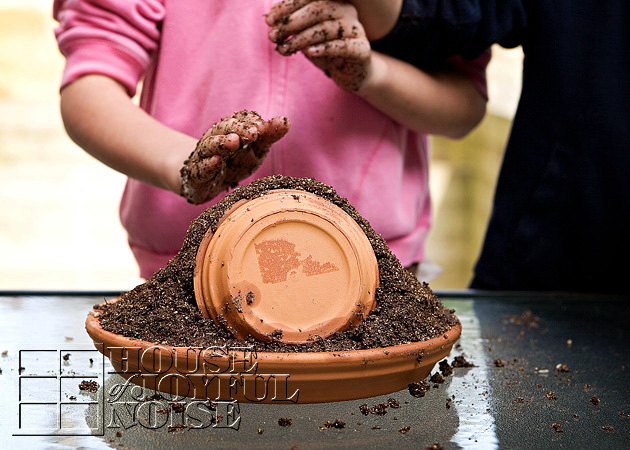 Again, keep the dirt away from the front of the tomb, so the ‘stone’ can roll away. But be sure the tomb is covered in the soil mixture.
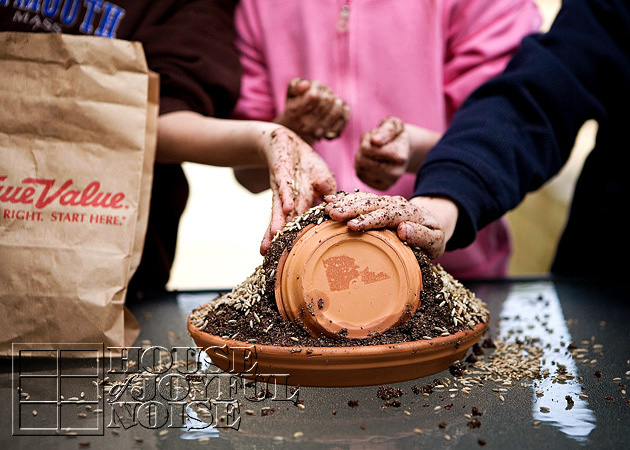 Next, is planting the seed. As mentioned earlier, we used Winter Rye, but Organic Hard Winter Wheat Berries can also be used. Either grow quickly! Simply cover the soil with the seed, pressing down into it if possible, and perhaps cover it with some more where you can, if there is room.
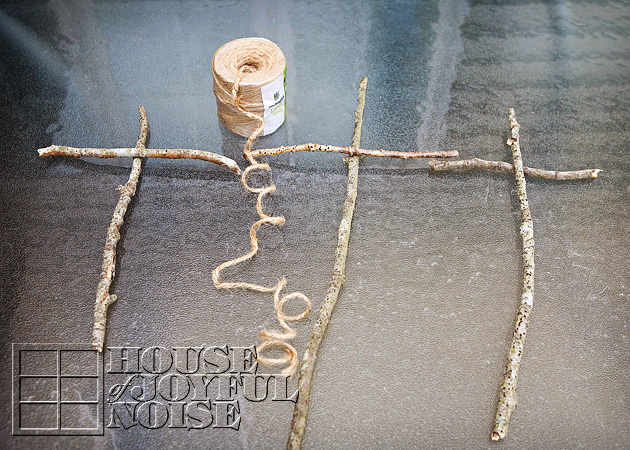 Now 3 crucifixes need to be made. We wanted to keep it simple and rustic, so we simply found some straight sticks up in our wooded area, and created crossed wrapping the twine in a criss-cross effect around the intersection of the 2 sticks. We tied off and then cut the twine ends, but then also used a dab of glue with a glue gun to secure it.
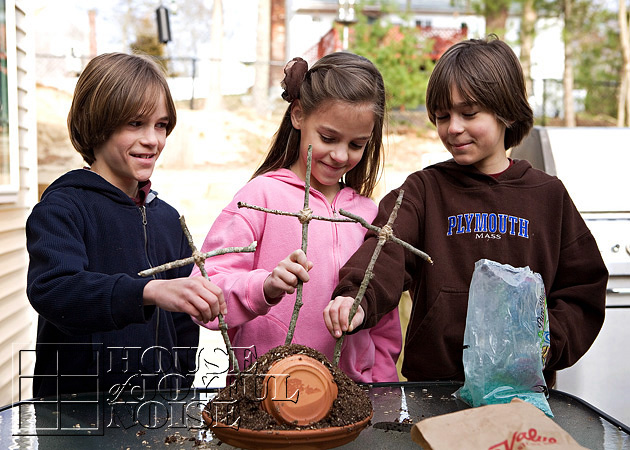 The crucifixes can be placed into the soil of your Calvary Hill now, as we did right away. But as a tip, they would stay in place better, if you waited a bit for the seed to sprout and begin to grow, so there is a bit of a root system established to support the sticks.
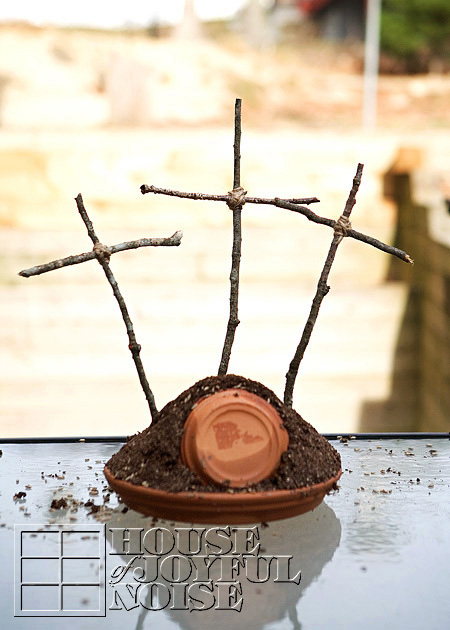
Here is what ours looked like, all done and ready to grow!
We brought it indoors, and placed it on a plastic covered table where sunlight would be on it a good part of the day. Throughout the first week or so, the kids need to simply mist spray the soil with water, in a spray bottle, 3 times a day, to keep the soil moist, and encourage the seed to sprout. Perhaps you can come up with a simple 1 or 2 line poem to say, while they do this, as a form of meditation.
–
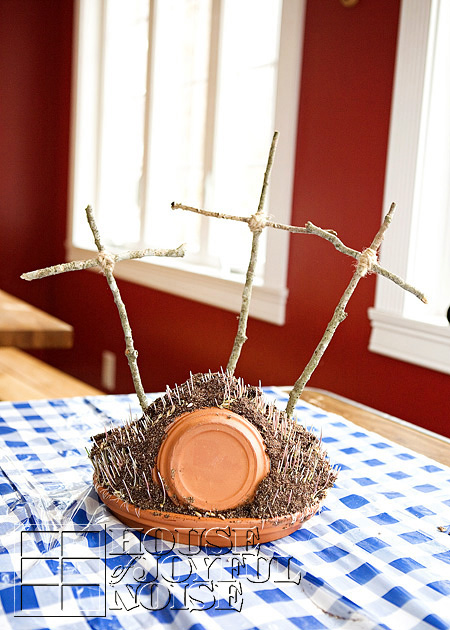
It’s growing! The kids will be so excited to see this.
As sprouts push upward from beneath, some dirt will tumble down. This is why it is important to really try to keep the soil quite moist, until it is all held in place by the grass that grows. We thought the plastic table covering was wise, because all of the water spraying.
–
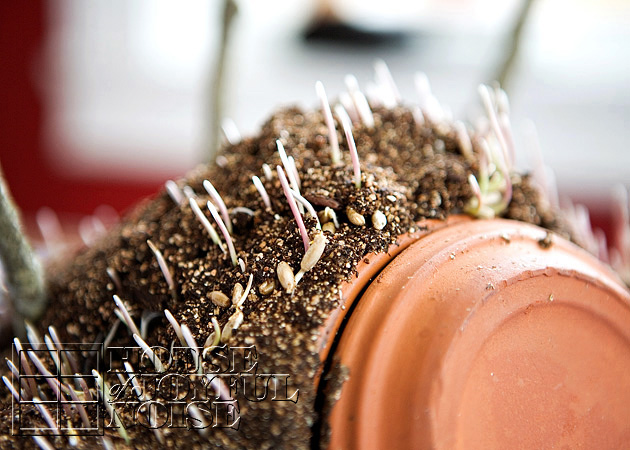 You will also notice some seeds and seed casings being pushed up to the surface. It’s fine.
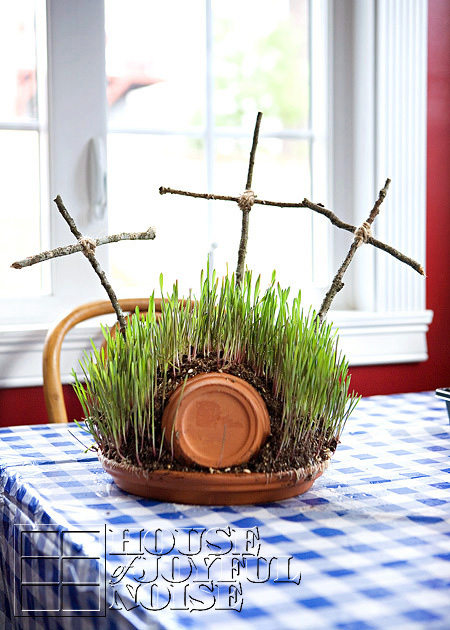
Before you know it, you’ll have lush green grass, on your Calvary Hill!
More photos of Jesus’ empty tomb….
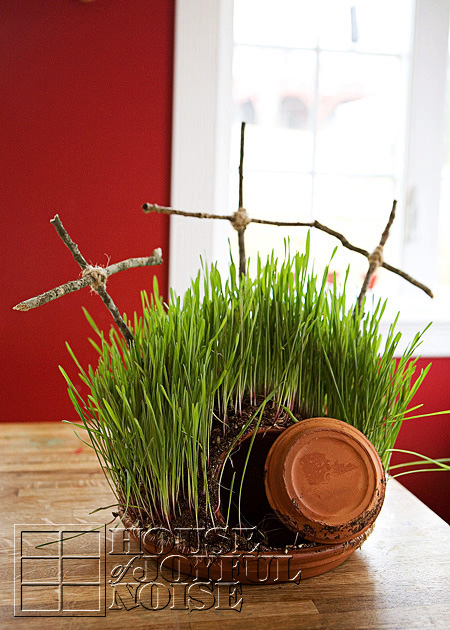
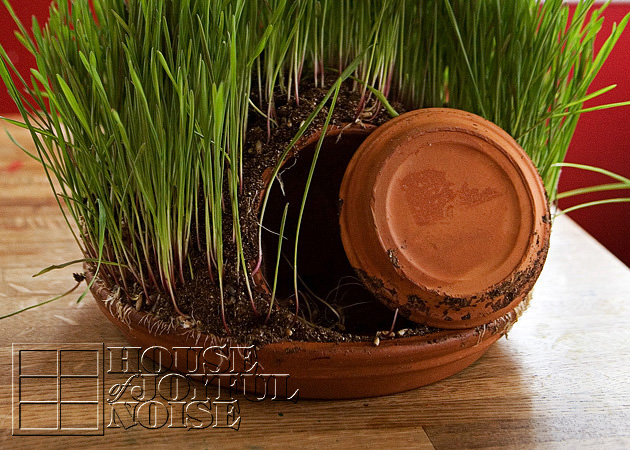
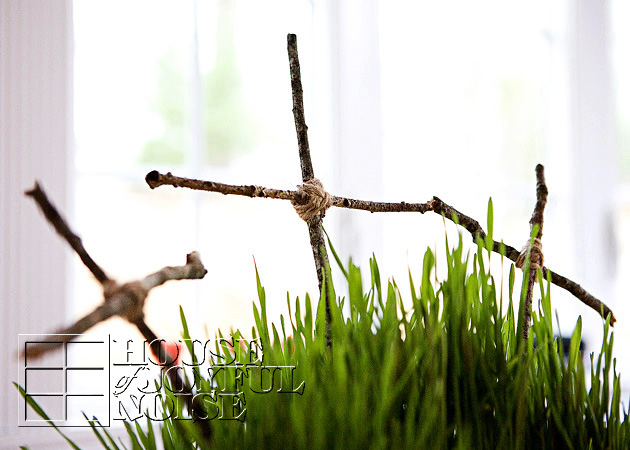 I just love this photo.
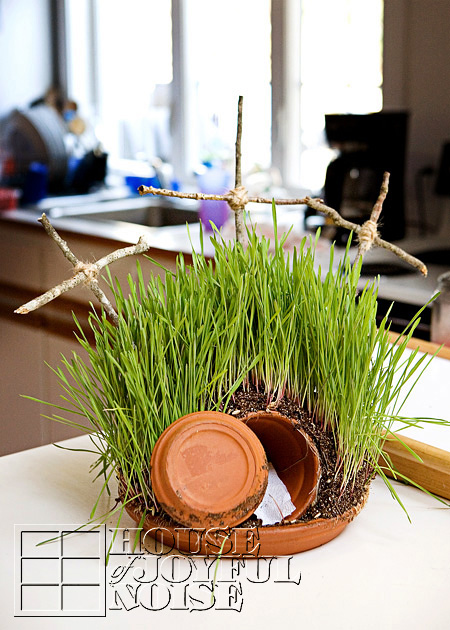
On Good Friday, you can wrap a clothespin with a white piece of cloth or paper towel, or simply cover it. The clothespin and wrap is representative of Jesus’ body. Then roll the stone to close the opening of His tomb. : (
–

On Easter morning, JESUS IS RISEN! When the kids get up in the morning, let them find the stone rolled away from Jesus’ tomb, and his garments folded or rolled neatly inside.
It is our hope and prayer as adults, that our Lenten Season practices, help draw us closer to Jesus, deepening our relationship with Him. May your kids not only enjoy this project, but like the seeds in the fertile soil, may it help sprout a faith in their hearts, that is bound to grow within them, and help guide them all throughout their lives.
ALLELUIA!!
(We’re happy to discuss this project, or answer any questions for you, in the comments below.)
* * * * * *
Follow us on FACEBOOK!

I want to do this with Sunday School kids and am interested to know how many days it takes before the grass gets that tall. Thanks!
Hi Anne! – First, I would say the rate of growth would really depend on the type of seed you plant, and then also dependent on the care of watering. light, etc. That said, I believe we used rye seed, and it took 2-3 weeks. Probably closer to 2, as I recall being concerned we planted too late, and worried if it would be grown well by Easter. It was!
Regardless of how tall the grass grows, I think any Sunday School kids would *love* this project! Parents would be impressed as well.
I know it was a beautiful way to help really embrace the joy of the risen Jesus, for my children that year!
Best wishes and many blessings! –
Laura / House of Joyful Noise blog
How did you handle the daily watering. Was it at the church?
Hi Gale,
I think maybe your question is for Anne, but in case it was for us, it’s just a table plant, so it got watered like any other plant at home. I am guessing Anne’s Sunday school kids did the project together as a class, and then took them home to care for and watch grow.
Hope that helps! Wishing you a fulfilling Lent.
Laura / House of Joyful Noise blog
Please tell me where we could get organic hard winter wheat berries or winter rye…thank you,
Hello Diane! You should be able to find seed for winter wheat berries or winter rye at any big home and gardens type store. That’s where we found some. I hope this helps.
Laura / House of Joyful Noise blog
The Calvary Hill planting was a true blessing for my entire family! My “speedy” rendition included scotch moss, a few pansies and some dainty white and purple “easter bonnet” flowers that I bought at Lowes garden center. My daughters (13 and 16) made crosses from twigs off our lilac bush, a baked clay figure of Jesus and even a Roman guard for the sealed tomb. This was seriously a tangible and moving experience for us. My husband even “reminded” me to remove Jesus from the tomb before Easter morning! Thank you again for sharing this lovely project! It is a new tradition for us, and will serve as a beautiful reminder of what our Savior did for us!! God bless you!!!
Hi Katie! –
We just love it when families like you share their stories with us! I love how you were inspired to make a ‘speedy rendition’, and it sounds so beautiful with the flowers and all! Your girls really went the extra miles too, with the baked clay Jesus and Roman guard – wow wow wow! We’ll be checking out your blog anyway….hope you blogged it!
Thank you so much for taking the time to share your uplifting thoughts. Jesus lives! God bless you all too. You family sounds simply beautiful and amazing!
I just want to clarify to all of you – this was not my idea! I saw something like it somewhere on the web a couple of years ago. I couldn’t remember where, nor could find the link if I saved one, or else I’d be sharing it, and giving the credit, if it was their idea. So just wanted to say that again. But I’m so thrilled so many were inspired as we were, and especially happy so many of you shared your projects with us via links you left us! Nice to find new kind bloggers to visit as well. Thanks so much!
Hi Laura!
Loved this idea! I just posted our version of it here: http://www.makingitinvermont.com/2012/04/filling-up-by-reaching-up/ .
We’re hoping to start it at the beginning of Lent next year with the grass seed, this year digging up some sod worked 🙂
~Lisa
What clever improvising, Lisa!! Great idea using sod, with no time left to grow grass. I also love the dish, and using your palm crosses is beautiful too. Thanks for sharing yours! Love it when you visit! : )
This is precious beyond words… In fact, as I scrolled through your tutorial, I had difficulty reading the instructions through my tears (starting at your “frowny face” when the tomb was closed)! I wish I had come across this project several weeks ago, but I am going to try and make a speedy rendition of this for this Easter. God bless you for sharing this! Christ is risen indeed!!! 🙂
How sweet, Katie. I’m glad this touched you so much. That’s just what projects with such significance does for us. It helps us be and feel a part of our faith all the more. Thanks for the visit, and sharing your thoughts with us. : )
Hi,
Nice to have seen the Lenten Programs or projects for the children and I appreciate your programs for the children. Congratulations. Wonderful.
I am a Pastor of the Church of St. Pault the Hermit, Haputale in Sri Lanka. I am inrestingly working with children. These are children from families of Tea Estate Plantation. They are really poor but interestinf to see them participating in all events of the church. I thank God for this faith in them.
God bless you and the children.
G.A. Rajah, OMI
It is God’s Children given to us as the greatest gifts to the humanity and we all have the repsponsibility to take care of them. They are the future of our generations. They are the children of God, children of the particular family, the children of the Church and the children of the generations which will bring out the new new and future generations.
God Bless you
fr.G.A.Rajah
You speak the truth, Fr.! Thank you so much for the visit, the hello, and sharing such wisdom. : )
thanks for the great tutorial. i coordinated this project for 36 girls, ages 5-9. they loved it! i posted pictures here, http://joyfilledfamily.blogspot.com/2012/03/empty-tomb-easter-garden.html
Just visited again, Lena – such a nice job on yours too. Your kids are beautiful, and so is your blog. : )
Thank you! Your suggestions are great. I may use smaller pieces; and I am going to check Ali’s links too.
Sure Annie, smaller pieces are an option. I like the shorter chunkier crosses, rather than the taller skinny ones my kiddos did. But yes, a smaller plate and pot could make a smaller overall centerpiece. Thanks for your visit!
We have done this project for several years and really enjoyed it.Here are some posts about ours.
http://homeschoolingdownunder.blogspot.com.au/2010/04/holy-thursday.html
http://homeschoolingdownunder.blogspot.com.au/2010/03/making-tomb-and-waving-palms.html
http://homeschoolingdownunder.blogspot.com.au/2011/04/palm-sunday-preparation-and-making-of.html
Your crucifixes look really good.great blog too,will be back to check out more!
I enjoyed visiting your links, Ali! Thanks for sharing them, as well as your visit! We’d love for you to come again. : )
That is really neat! It’s a good home schooling project 😉
Thanks, Josh! : )
This is an AWESOME Project. I’m still in awe and can’t wait to make it. I do have a question, though. I teach pre school+ aged Sunday School kids. Aged 4 – 6. Do you think this is a good project for that age group. I usually send a take home sheet explaining our lesson, so I can write up for the parents to place Jesus in the tomb, etc. Thanks for sharing!
Hi Annie! – Welcome! I’m so glad this project has you excited. : )
I DO think this is a ‘wonderful’ project for kids that age, WITH some adult assistance, though. Even better as a Sunday School project, while telling the story of Jesus’ death and resurrection.
BUT…..if you are considering each child doing their own IN CLASS, with THESE supplies and on this scale, I think that would be difficult to manage. Many of the children will need help, and I can only imagine the mess you would have on your hands. Dirt would be everywhere, as well as all over the kids. I’m not sure the parents would love that part. And on this scale, it is a HEAVY and big finished piece, that would be hard to get home.
So, on that note, I have 3 other suggestions:
1) Find smaller and more manageable materials that each child can work with, IF you have some other adult class assistants to help out. Possible materials you could use, are pie tins for the base, and plastic cups for the tomb? Add dirt and seed, and an instructions sheet about watering, the lesson, etc. I would suggest a cover for the pie tin, to get them home safely-ish. Maybe even warn the parents ahead of time of a dirty class coming up.
2) Make a big one, as a class project > IF there is place in sunlight to keep it, and someone to water-spray-mist it 3 times a day! Then you can just send the lesson home info home, to tell the parents what you are doing.
3) Send the whole project idea home, for the families to consider doing with their child. It could include a materials list, instructions, and the lesson to be learned by the child.
So those are my ideas!! I hope you find them helpful. Let me know if you use this project in any way, and how the kids loved it!! We love hearing. : ) Thanks so much for your thoughts!