• HOME
  • {A}’s Chipmunk Training Archives

 Homepage

  • The Homestead
    • Home Projects
    • Home Improvement
    • Home Decor
      • Seasonal Home decor
        • FALL Home Decor
        • WINTER Home Decor
        • SPRING Crafts and Creations
        • SUMMER Crafts and Creations
    • Our Chickens
    • Gardening
    • Organization
    • Re-Purposing
    • Furniture Refinishing
    • Budget
  • Crafts & Creations
    • Seasonal Home decor
      • FALL Crafts and Creations
      • WINTER Crafts and Creations
      • SPRING Crafts and Creations
      • SUMMER Crafts and Creations
    • DIY (Do-It-Yourself) Project
    • Kids Arts and Crafts
    • Homemade/Handmade Gift Ideas
    • Holiday Crafts
    • Fan Pulls
    • Free Printable/Downloadable
    • Sewing Projects
    • Giveaways
    • Business Features
  • Recipes/FoodFun
    • Breakfast
    • Lunch
    • Main Dish
    • Sandwiches
    • Appetizers
    • Slow Cooker
    • On The Grill
    • Side Dishes
      • Soups
      • Salads
    • Baking
      • Breads, Rolls and Muffins
    • Snacks
    • Treats
    • Desserts
    • Drinks
  • Homeschooling
    • Elementary Homeschooling
      • Elementary Homeschooling READING
      • Elementary Homeschooling MATH
      • Elementary Homeschooling LANGUAGE ARTS
      • Elementary Homeschooling SCIENCE
      • Elementary Homeschooling HOME ECONOMICS
      • Kids Arts and Crafts
    • Middle School Homeschooling
      • Middle School Homeschooling SCIENCE
      • Middle School Homeschooling HOME ECONOMICS
    • Language Arts
    • Math
    • History / Social Studies
    • Geography
    • Foreign Language
    • Field Trips
    • Games
    • Nature Study
  • The Big Picture
    • Life In General
    • Celebrations
    • Faith
      • Into the Light; The Series
    • Giveaways
    • Reviews & Sponsors
  • Photography & Lettering
    • Photography
    • truck lettering
    • vehicle graphics
    • Newborns
    • Kids
    • Engagement
    • High School Senior Pictures
    • High School Senior Pictures Sneak Peeks

Valentine Ladybug Mint Cookies

January 24, 2012 By Laura 4 Comments

valentine-ladybug-cookies-12

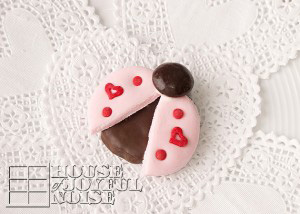
These adorable Ladybug Cookies I came up with, come right in time for Valentine’s Day, and I promise you, they couldn’t be easier to make! (There’s not even baking involved!) I think you are going to love what they are made with, too!  (You know…besides LOVE.)  I’m talking ingredients.  These cookies are also a sweet idea for a little girl’s birthday party, or to send in with your kids to school, to share with their class.  You’ll look so clever. (You don’t have to tell a soul it was my idea. ; )

Does the word fondant scare you?  Ever heard of the stuff? I know it makes more than a few nervous. But it can actually be a LOT of fun to play with! (Think Play Dough. ; )  Truth be told, in this recipe, we did make and dye our own marshmallow fondant, simply because we knew how, and we think it tastes a little better than store bought. But you don’t have to!  Rolled and ready fondant is available in craft and baking supply stores, and even comes in colors! I know Wilton sells ready-made fondant, but I heard a brand called Satin Ice, tastes better. I see that the Satin Ice brand is available to order online. I’ve seen it in a container so you probably roll that out yourself. I have not tried it yet, but I will.  But if you’d like to learn how to make your own marshmallow fondant like we did, we have a tutorial coming up on that.  For today, we’re just going to show you how simple it is to put together these cookies, with some light pink fondant all ready to go!
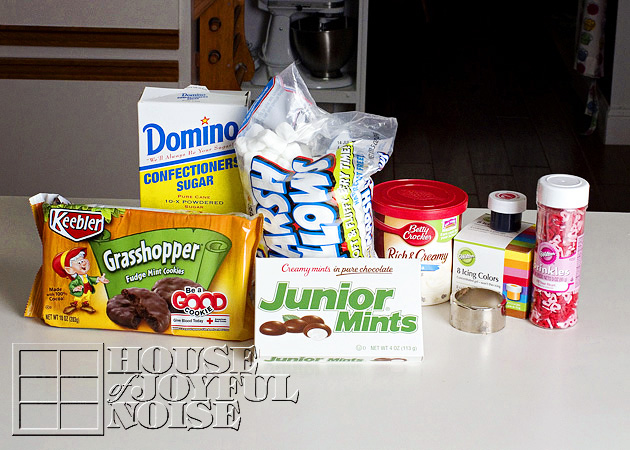
valentine-ladybug-cookies Participating Ingredients: 

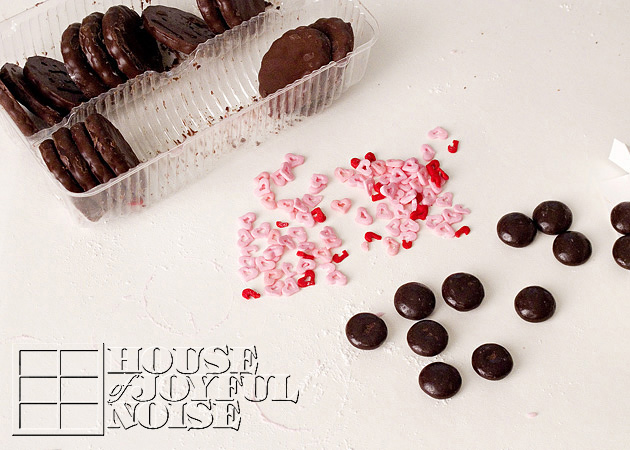
      • Keebler Grasshopper Fudge Mint Cookies *(peanut safe)
      • Junior Mints Candy (*peanut safe)
      •  Fondant – in light pink (rolled and ready)
      • Any kind of icing (for piping glue)
      • Sprinkles in Valentine shapes/colors (*peanut safety varies with brands)
      • Confectionery Sugar
      • (Mini marshmallows and color dye seen are for making your own fondant, if you are.)

* One of our boys has a serious peanut allergy, so we are always checking ingredients carefully, for his safety.
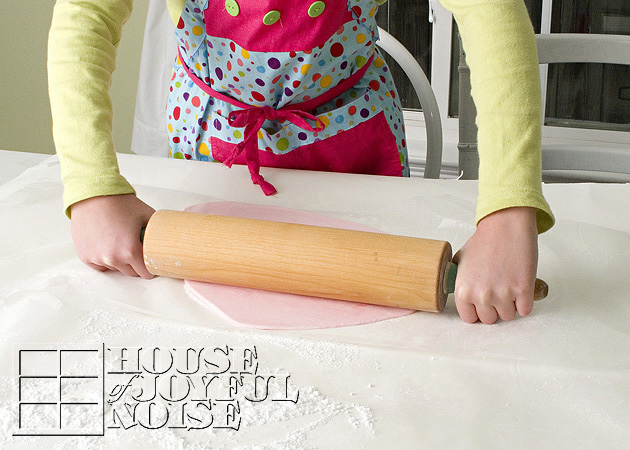
 

valentine-ladybug-cookies-1 We rolled out our fondant on wax paper and a little dusting of confectionery sugar, making sure to roll it thin and even. 
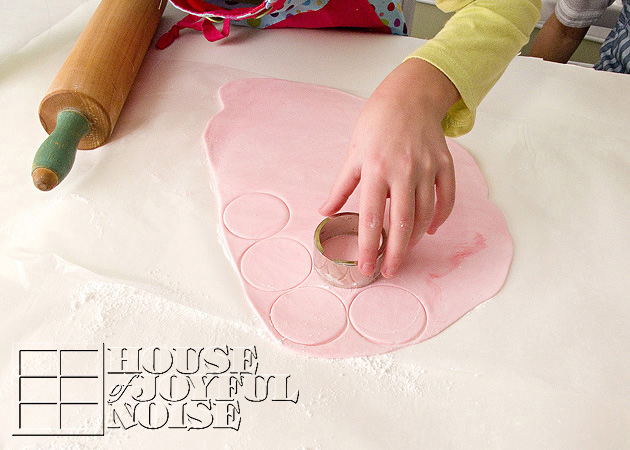
 

valentine-ladybug-cookies-2 Next, we cut circles out of the fondant.  These will be the wings.  We started with this small cookie cutter, but it turned out to be a little bigger than we wanted the circles to be, as the cookies were smaller than this.  It was the smallest actual circle cookie cutter we had, so we needed to improvise. And so the search began throughout the house, to find something that will cut the circles smaller.
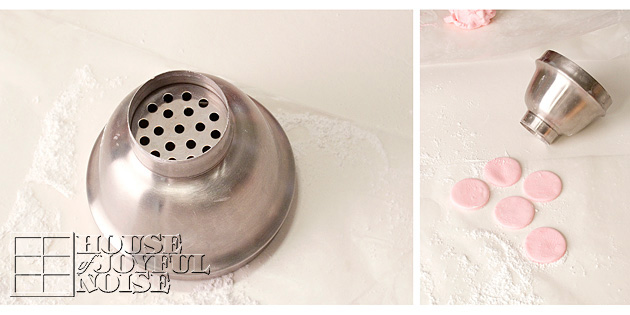
 

valentine-ladybug-cookies-3 Phew!  Good think we have a drink now and then! ; )  This shaker/mixer top turned out to be just right!
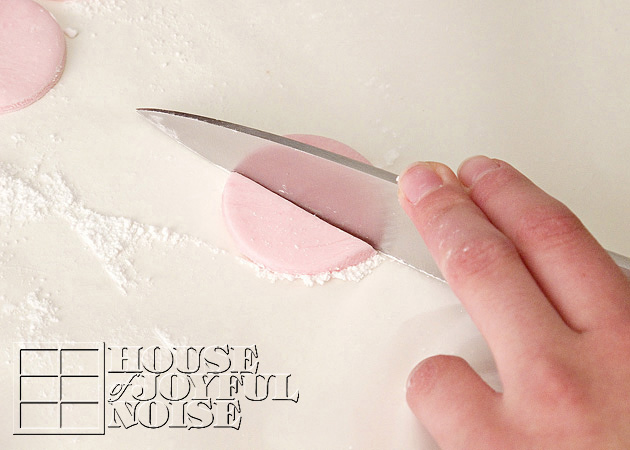
 

valentine-ladybug-cookies-4 Cut the circles in half, and the wings are done! 
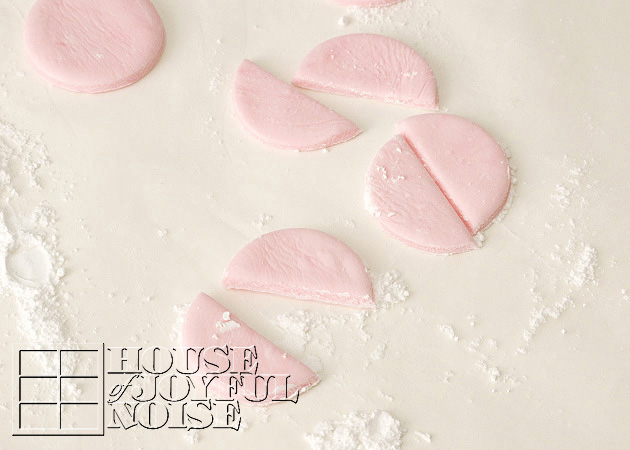
 

valentine-ladybug-cookies-5 I told you! Easy, right? 


It’s mere assembly, from here on out, Friends.
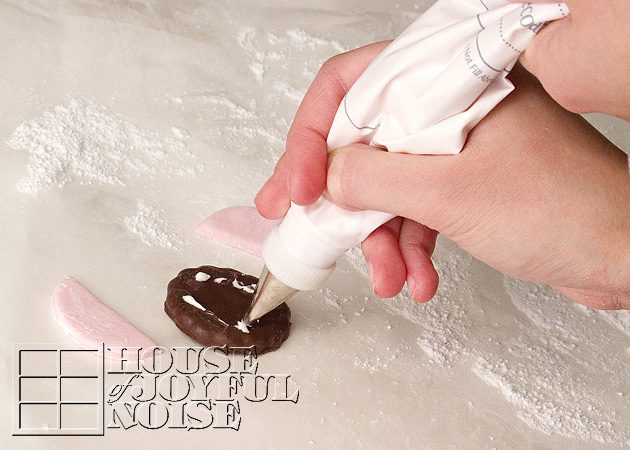
 

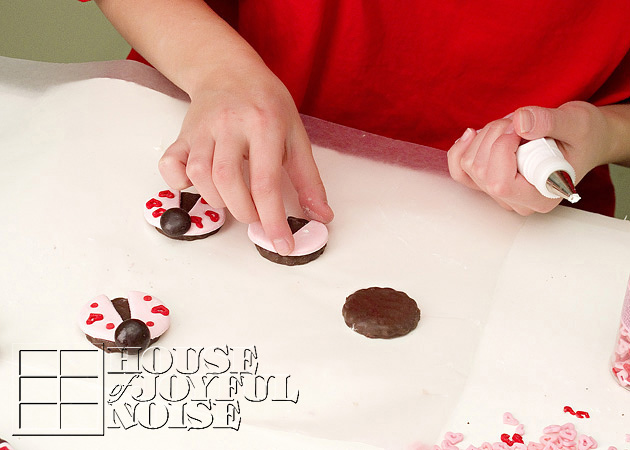
valentine-ladybug-cookies-6 Put some of that icing in a piping bag, with the smallest tip, and just put a little on each side of the cookies.

(These cookies do tend to come a little stuck together in the packaging, so we made efforts to pipe on the messy sides, leaving the smoothest and nicest part of the cookie at the bottom, where it will show between the wings.)
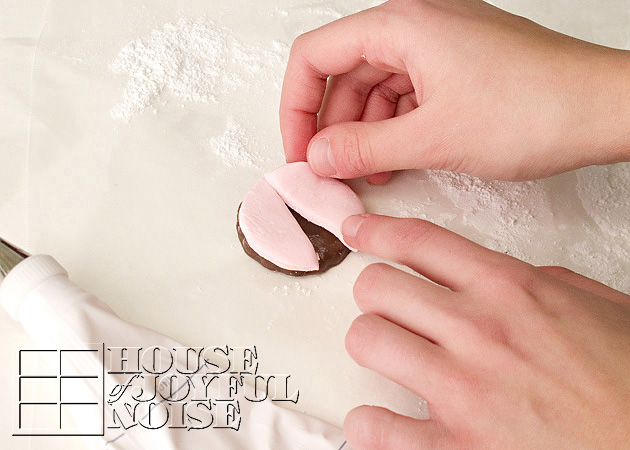
 

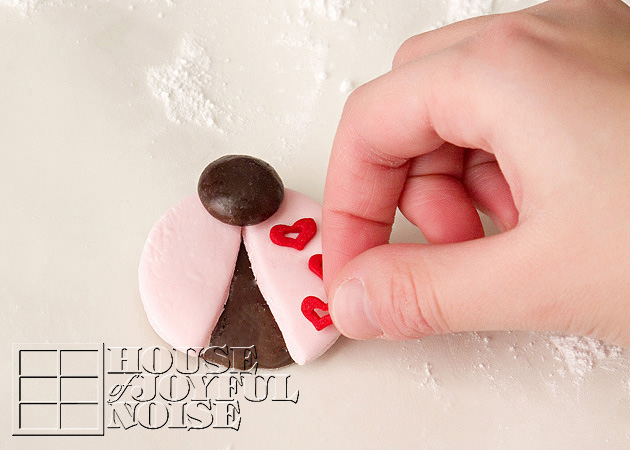
valentine-ladybug-cookies-7 Put the wings on, as shown above. Like a ladybug’s wings, slightly spread.
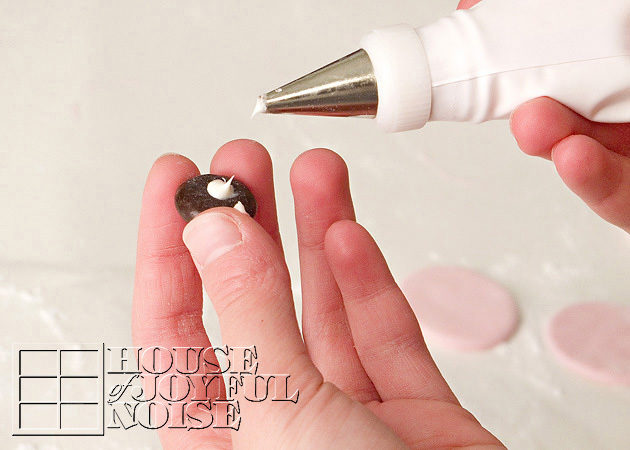
 

valentine-ladybug-cookies-8 Pipe a little dab of icing on the back/flatter side of a Junior Mint candy…..
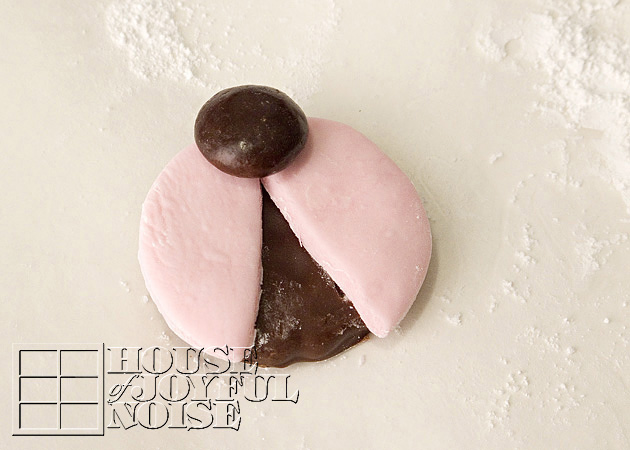
 

valentine-ladybug-cookies-9 ….and stick on the head.


valentine-ladybug-cookies-10 All that is left to do, is decorate the wings a little!  We tried to arrange them, like the dots usually on the wings of a ladybug, as we recalled.  You do want to be sure, that you press the decorative sprinkles down into the fondant.  You may even want to add a dab of water? (Didn’t try that).  If the sprinkles aren’t pressed down enough, they’ll fall off when the fondant sets up more.
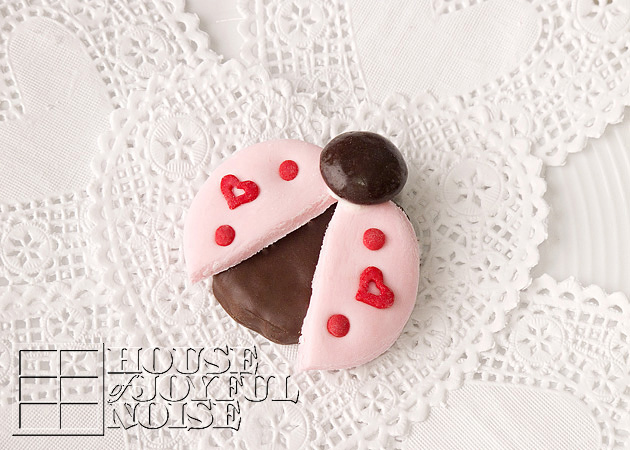
 

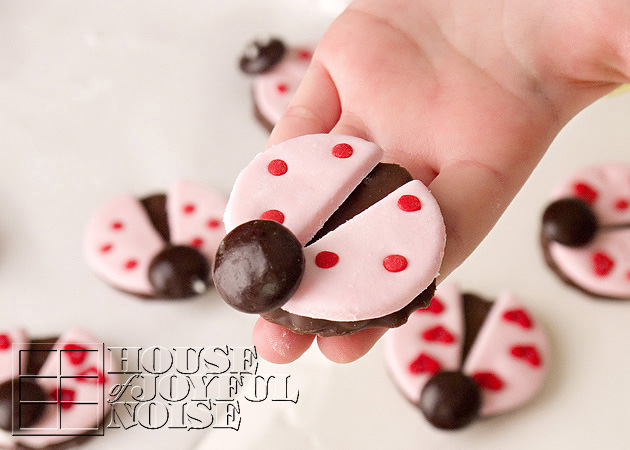
valentine-ladybug-cookies-11 THAT’S IT!!  How CUTE are these?  How EASY are these? 
 

valentine-ladybug-cookies-13 You can make a whole bunch, in no time at all.  And it’s fun!
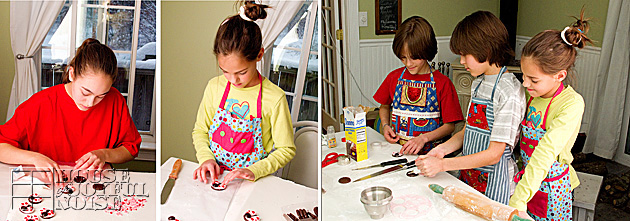
 

valentine-ladybug-cookies-14 Our kids all got in on the action!  They were on their own (the three younger ones are 9 years old here.).  But even younger ones can put these cookies together with a little help! 
 

valentine-ladybug-cookies-15

valentine-ladybug-cookies-16 We used the red cots from Confetti Sprinkles too.
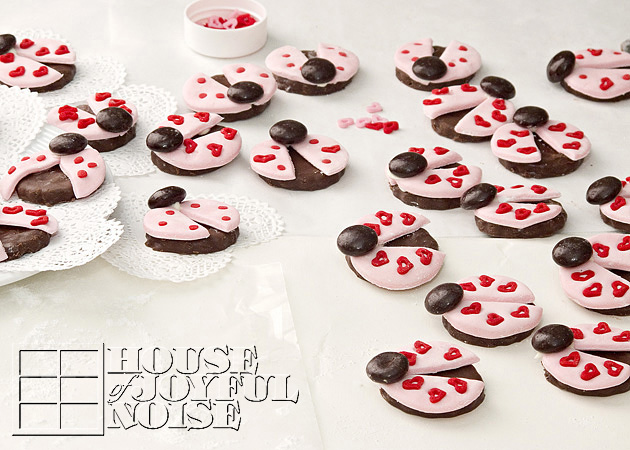
 

valentine-ladybug-cookies-17 If you think about it, you could use some alternative ingredients, to make these cookies similarly as well. Oreo cookies could be cute. Dark brown M&M’s can be used as heads. (They are not peanut safe, for us.) Use your imagination!
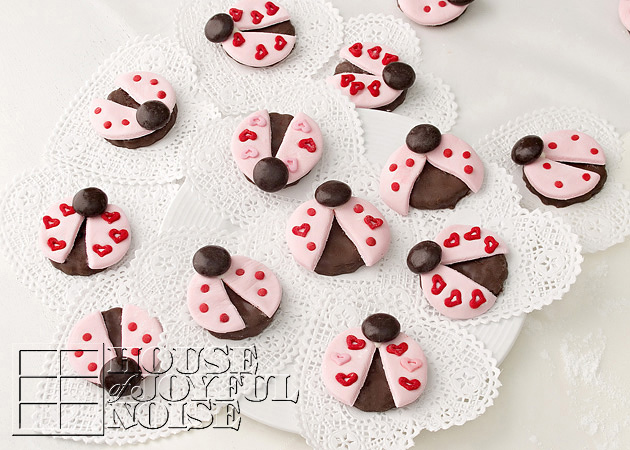
 

valentine-ladybug-cookies-18 Just for fun, can you spot the ladybug, who’s wings were cut too big?
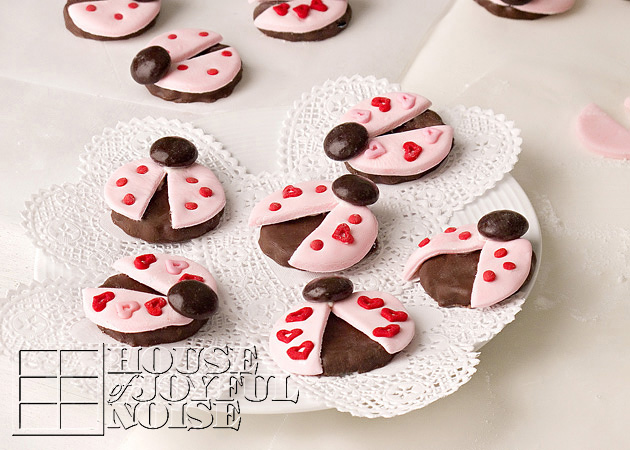
 

valentine-ladybug-cookies-19 We hope you liked this cute little idea. Share it.  🙂  And thanks for stopping by the House!

Stay tuned, for more thoughts and shares on the way!  Valentine’s Day related, and otherwise.

Save

Save

Filed Under: Baking, Fun Food, Holiday Crafts, Recipes, Treats, Tutorial Tagged With: Baking, ladybug-cookies, ladybug-theme-ideas, ladybugs, marshmallow fondant, Valentine-cookies

Camp Site Eclair | Getting Creative with Fondant

June 12, 2011 By Laura 22 Comments

fondant-art-fathers-day-dessert-14

I was brainstorming about a good dessert to have for Father’s Day coming up,

when I came up with this idea:  A Camp Site Eclair Dessert.

fondant-art-fathers-day-dessert I know the Daddy in our family, loves camping, fishing, and marshmallows! So this whole dessert was going to make him very happy, because there is a whole lot of marshmallow fondant involved! And as a bonus, there are other surprise treats everywhere!

I decided to make it ahead of time (with a little help from the Daddy in celebration, and our kiddos.)  Thankfully, we can save all of the decorations on top, make the dessert again next week, and redecorate.  Because I wanted to be able to share the idea with you all, our blog readers, in case you’d like to replicate the idea, or let it spark an idea of your own in some way.

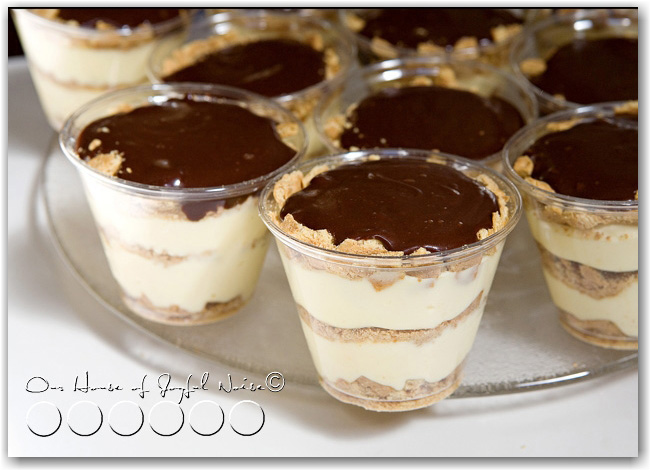
So this decorated dessert is the pan variation of No Bake Eclair. You may remember we shared this recipe before, as individual cup servings, that looked like this:

fondant-art-fathers-day-dessert-2 You can find that recipe and directions for the cups version here.

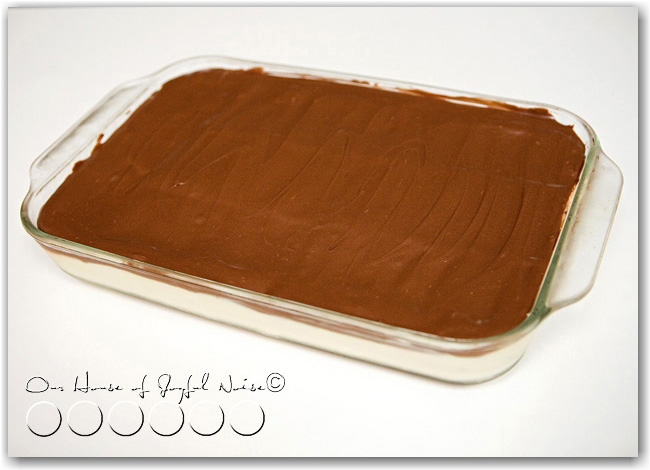
fondant-art-fathers-day-dessert-1 This is what our No Bake Eclair Dessert originally looked like, before covering with crushed

graham cracker, for a nice dirt ground effect, to set the scene for our camp site.  Here is the easy, no-bake

recipe for it. You can whip this part up ridiculously quickly!

::::::

No Bake Eclair

Participating Ingredients:

  • graham crackers
  • 2 boxes instant vanilla pudding
  • 8 oz. cool whip
  • 1 can of chocolate frosting and 2 tbsp. milk
  • 3   1/2  cups of milk

Directions:

Mix the pudding and milk with the blender- let it get a little thick. Add the cool whip in.

Butter a 9X13 in. cake pan. Place WHOLE graham crackers in the bottom of pan. You will need to break some though.

On top of graham crackers add 1/2 of the pudding/cool whip mixture.

Put on another layer of crackers and then the other half of the pudding mixture.

Place last layer of graham crackers on top.

In a separate bowl empty the frosting and add 2 tbsp. of milk. Mix so the frosting is creamy and easy to spread.

Frost the crackers and enjoy!

 ::::::

Now to share as much as I can, about how we decorated the pan of No-Bake Eclair:

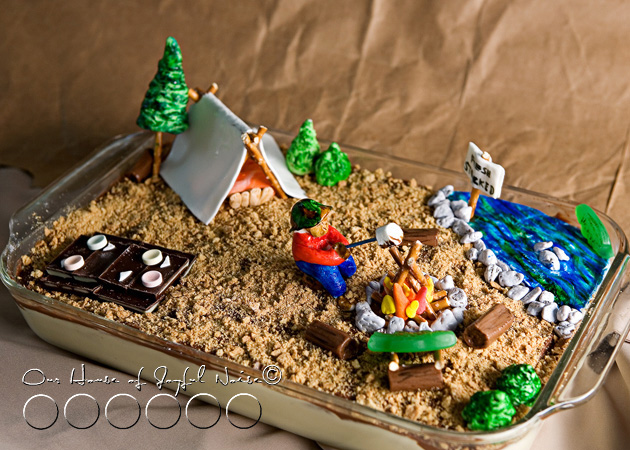
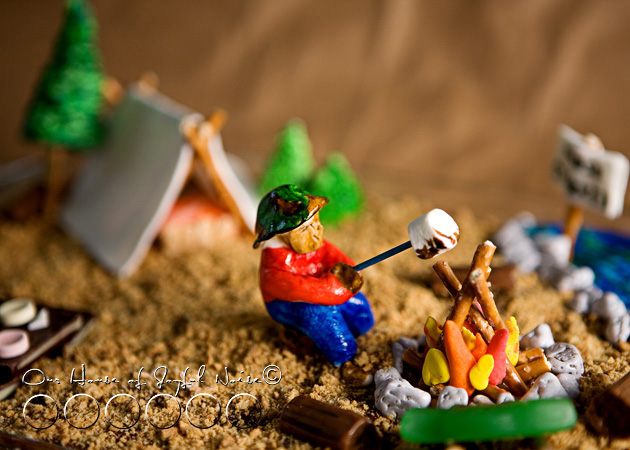
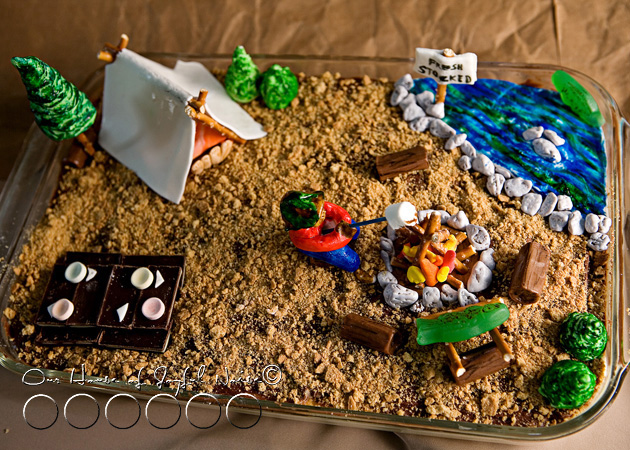
fondant-art-fathers-day-dessert-5 The ground as I said, is the top frosting layer, covered in lots of very crushed graham cracker.  On top of that, everything is made out of marshmallow fondant, various kinds of candy, and little pretzel sticks.

Now please keep in mind, we are no fondant artists, yet! This is our very first time working with the stuff.  This is actually marshmallow fondant, which is made so easily with mini marshmallows, confectionery sugar, and water.   Then of course, we used some food dye. (Not food coloring, but food dye, used for coloring icing.)  I very easily found 2 videos on making marshmallow fondant, and coloring it, just by Googling. I will put them at the end of this post, for your convenience.

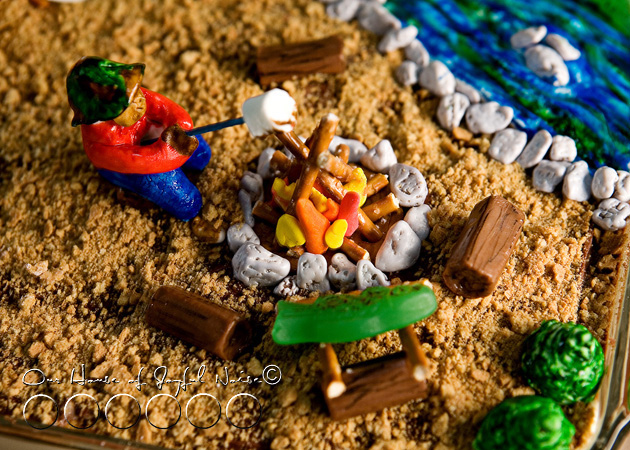
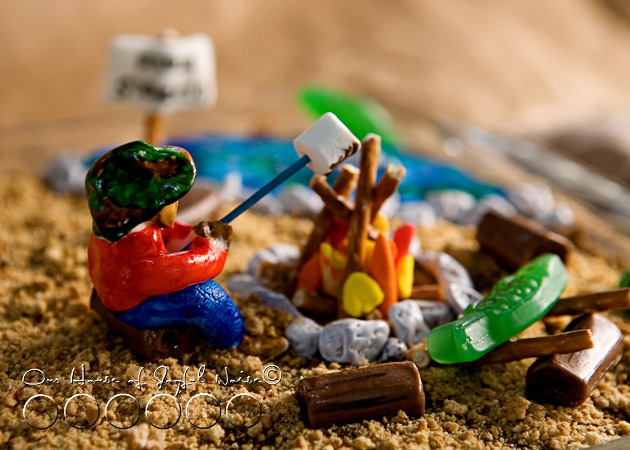
fondant-art-fathers-day-dessert-4 Don’t mind the father’s face, lol.  We really didn’t expect it to show much. It was just quickly smushed together. lol
But we’re not sure we could have done much better, if we tried. LOL

He is completely made of white/uncolored marshmallow fondant, and then painted with food dye and a brush.

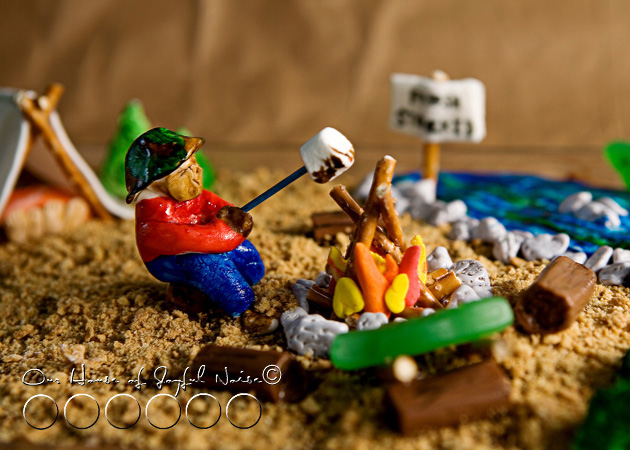
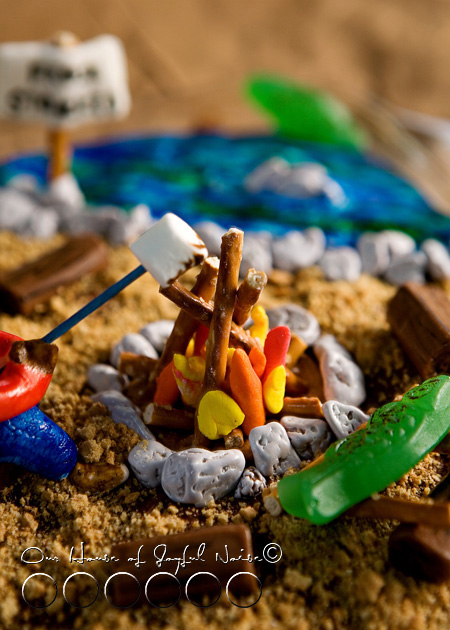
fondant-art-fathers-day-dessert-5 The camp fire is made of colored fondant for the flames, pretzel sticks, and chocolate rocks that we found in the cake aisle of Michael’s Arts & crafts.

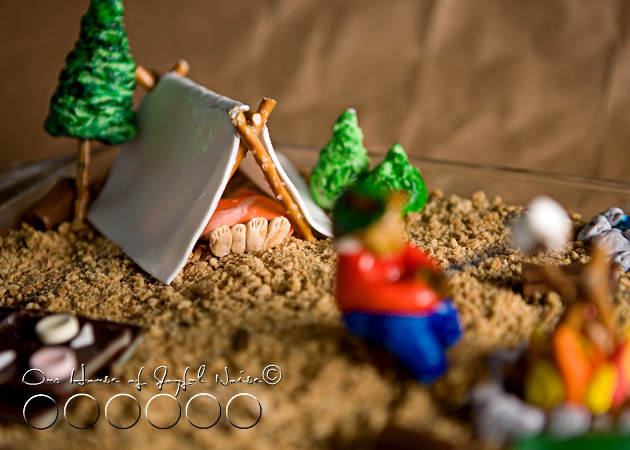
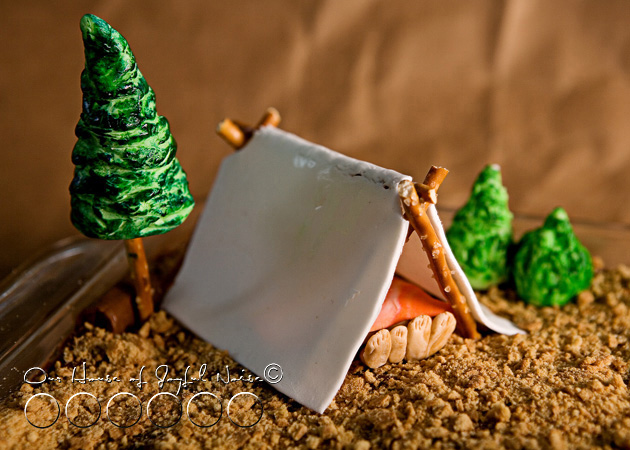
fondant-art-fathers-day-dessert-6  The tent and family feet are also all fondant, and pretzel sticks to hold the tent up.

fondant-art-fathers-day-dessert-7 Here’s a helicopter view.

The trees and bushes are green dyed fondant, molded around Hershey Kisses, and then more green dye painted on the trees & bushes, for texture.  The pine tree uses a pretzel for the trunk.

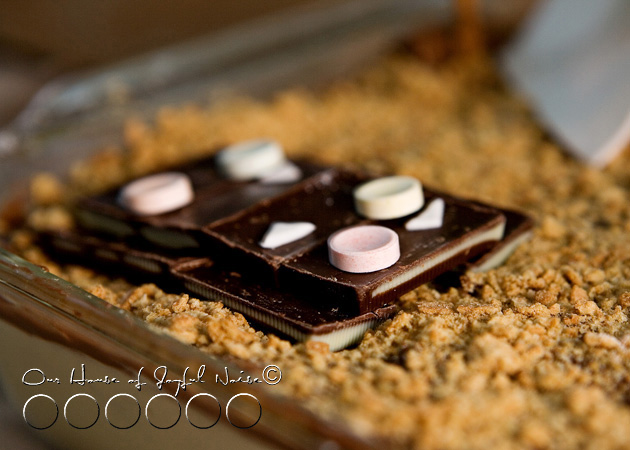
fondant-art-fathers-day-dessert-8  This is a set picnic table.  The table top probably could have been another layer higher.  But the table and bench seats are made of Andes Candies, the plates are Smarties Candies, and the little triangle napkins is plain marshmallow fondant.

fondant-art-fathers-day-dessert-9 All of the logs you see here and there, are Tooties Rolls, with a little edible black writing pen to show some grooves and bark.

fondant-art-fathers-day-dessert-10 The 2 fish on the scene are Swedish Fish.

The marshmallow on a stick is actually fondant, but we could have just used a mini marshmallow, since we had plenty left from  making the fondant.

fondant-art-fathers-day-dessert-11

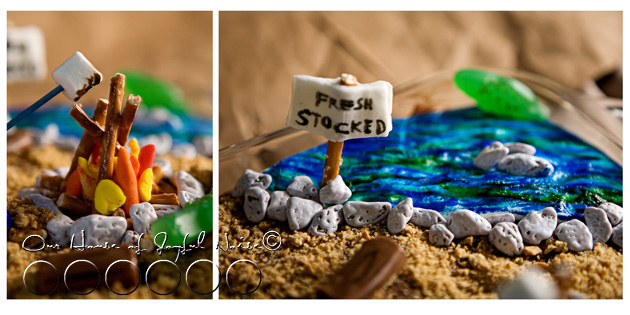
fondant-art-fathers-day-dessert-12 The water is plain fondant, painted with blue and green dye.

The sign face is fondant, with a pretzel stick, and more chocolate rocks. (Love those!)

fondant-art-fathers-day-dessert-13  The tent, and the family dirty feet, is my favorite part!

It was so fun to make, and we thought it came out pretty good!!

Between shopping for the goods, and making it all, it was almost a day project, but a fun family one!

We wanted to note too that, while fondant and the colors are all edible, we don’t really eat artificial colors. But it is all SUPER fun to get creative with, as decorations.

Please tell us you are a at least little impressed with our work, even if you aren’t. 😉   Either way, hope you find yourself inspired to play with some fondant, and get creative with food, too!!

::::::

*(Love this post? How about subscribing to our blog in the sidebar, ‘Liking’ our Page on Facebook, or following me (Laura) on Twitter? Or all 3? 😀

Making Marshmallow Fondant

Coloring Fondant


Save

Save

Filed Under: Desserts, Fun Food, Holidays, Recipes, Treats Tagged With: cake decorating, coloring fondant, fathers-day-dessert, fishing-camping-scene-dessert, fondant ideas, fondant-art, getting-creative-with-fondant, marshmallow fondant, no-bake, no-bake-eclair

We are wicked happy to have you here! We hope you find much inspiration, help, humor and enjoyment here.


Archives


POPULAR POSTS

* * * * * *

SUBSCRIBE to House of Joyful Noise blog! Every new post, delivered right to your email box!


Privacy Policy

Amazon Affiliates

Never at any additional cost to you, we may earn a small commission for our endorsement, recommendation, testimonial, and/or link to any products from our website. Your purchase through our links helps support our family, while sharing with you the products we authentically use and recommend, for various ideas, and letting you know where you can purchase them. Thank you for your support!

[footer_backtotop]

Copyright © 2025 HouseOfJoyfulNoise.com · Genesis Framework by StudioPress