
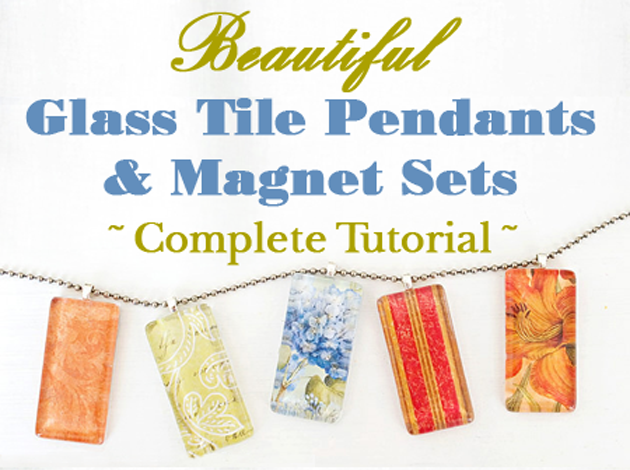
Today we’re going to show you how we made these beautiful glass pendants and magnets. They make such beautiful gifts, for women, as necklaces or magnet sets. I’m sure you could use the same technique to make other jewelry as well, such as cuff bracelets or rings.
You can choose any cardstock print you love, and the necklace pendants can be worn on any necklace chain, ribbon or cord. So they can be very versatile in style, for you or your gift recipient’s liking.
This was the my first time doing this particular project. But in doing, so I learned lots of tips and tricks along the way, that I’ll be sharing with you throughout this tutorial. Also, at the end I will share with you the specifications of the supplies, and the resource where you can get them, as I did. So let’s get started:
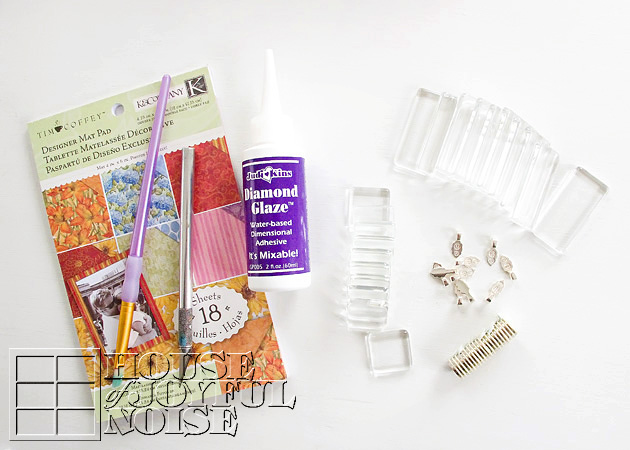 Here are all of the supplies I used, but I’ll give more details and sources at the end, so you know exactly what to get, and where:
- 2-sided designer card stock
- glass tile rectangles
- glass tile squares
- magnets, with adhesive
- sterling silver plated bails
- Diamond Glaze Dimensional Adhesive
- an x-acto blade
- a synthetic hair paint brush
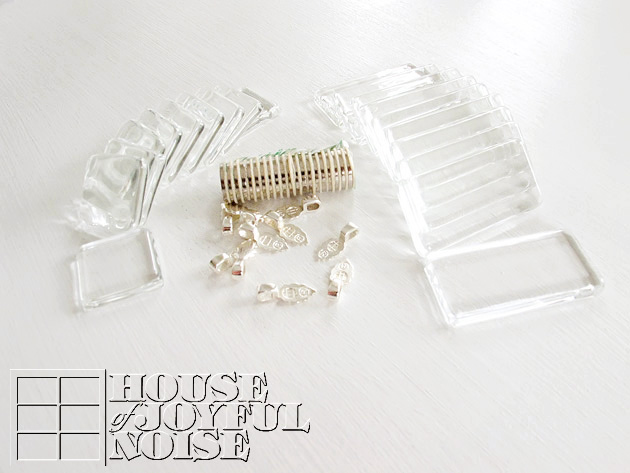 Here is a closer look, at the beautiful tiles, bails and magnets I started with.
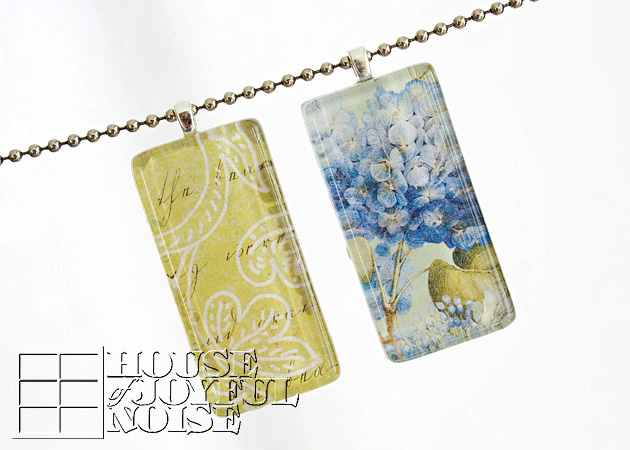
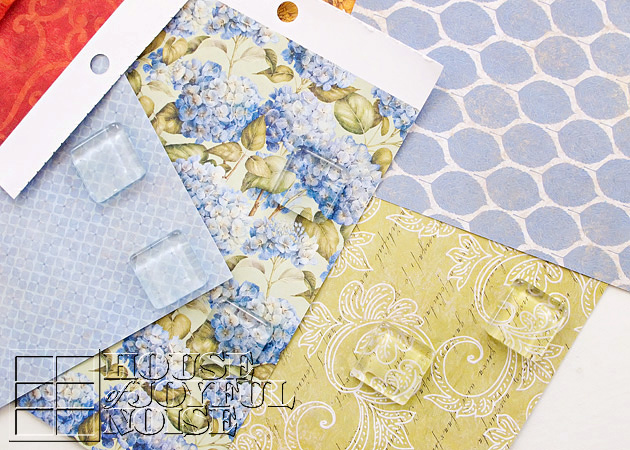 All of the tiles, both pendants and magnets, are made by adhering beautiful card stock paper behind the tile, which is then magnified through the glass in such a pretty way.
So here’s a TIP to start: Before applying any adhesive, I put each tile on the paper I’d be using, and moved it around and looked at the design coming through, so I could decide ahead of time, exactly where I wanted to place each tile.
 Once I decide that, I put a little Diamond Glaze on the center back (flat side) of a tile, and then spread it out with a little brush to the edges, pressing out any bubbles with my brush. I’d give it a moment to get a little tacky and less wet, and then I’d place and press down onto the paper where I wanted it.
TIP: Eventually I got tired of squeezing it out of the bottle, so I’d put a small puddle on a coated paper-plate, to work from with the brush. You can do that too, if you want to.
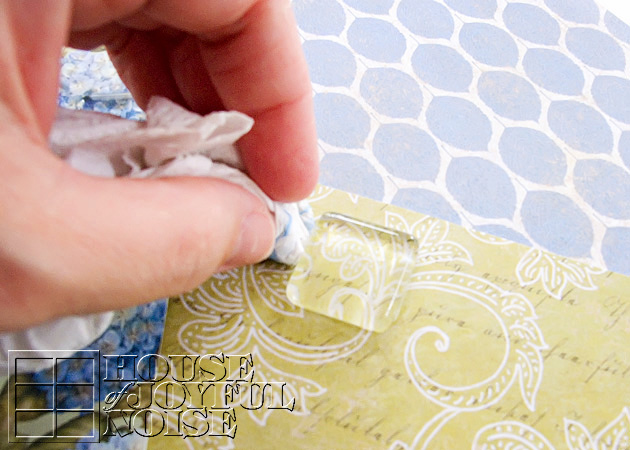 TIP: In pressing it down hard enough, to be sure there is no air bubbles, the adhesive smooshes out from underneath the sides of the tile little. You don’t want to leave it, because it hardens like glass! And you’ll be trimming the excess paper off. So, I used little pieces of twisted paper towels, to clean/wipe the sides, every time. If you leave it, you will not be able to trim the paper neatly.
Also, I often carefully picked up the paper with the tile on it, and rubbed the back down too, just to be sure it was smoothed out. Any of the tiles may need to be pressed down repeatedly, as air bubbles tend to sneak in. So just keep checking them until they are drier.
One by one, get all of your tiles adhered to the paper.
 Once they are all adhered and dried, it’s time to trim.
TIP: To know if they are dry enough, simply touch the back-side of the tiles where the paper is, and if it is at all cool to the touch or damp feeling, leave them longer to dry. I honestly do not have any time frames for you on drying time, because I made a LOT of tiles in a craft period spread over 2 days.
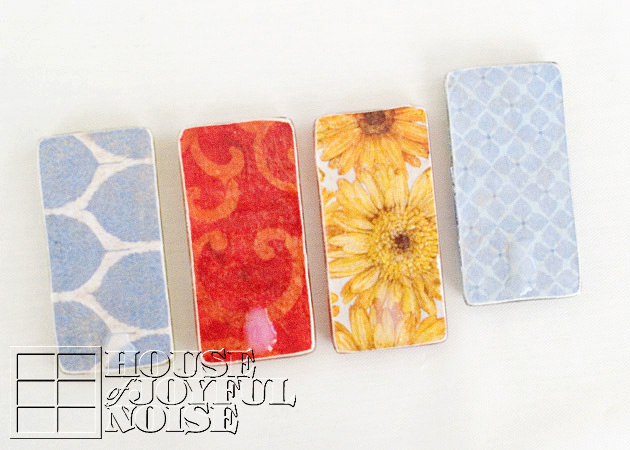
But once you know they are dry, trim the tiles out of the paper, very closely to the edge of the tiles. I always cut on my self-healing cutting mat. But you can use dense cardboard (not corrugated), if you need to.
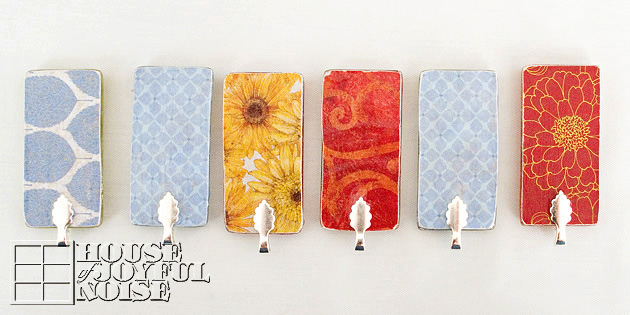
Once all of the tiles are trimmed out, they look pretty done from the front! You’ll see how beautiful they are already, and you’ll be inspired to make them wearable, or be able to place on a refrigerator. So they need bails or magnets!
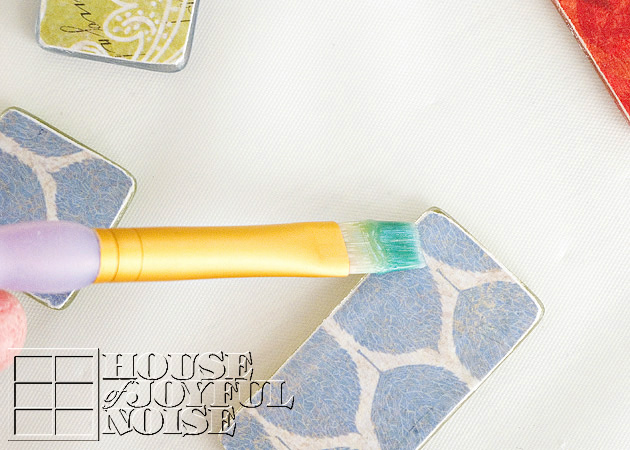 Now I wanted to give the whole back-side of the tiles a coat of Diamond Glaze, as well, brushing just over the edges of the paper as well. The purpose of this is to protect the paper, seal the edges, and make the backs glass-like as well.
TIP: Whenever and where-ever you brush on this glaze, you want to use an adequate amount to let it settle to a glass-like surface. If you brush too thinly, just know it will leave a brush marks in those areas. Allow them to dry completely.
If you want to be sure they are thoroughly dry, leave them overnight before the next step.
From there, I lightly sanded any rough edges of paper I felt, with fine sand paper, just to make it feel smooth. I wiped off any fine dust from that.
 Once all of the backs were dry, it was time to add the bails to the backs of the pendants. Basically, I just added a dab of glaze straight from the bottle, onto the center back top of the pendants.
TIP: Be sure to look at the front design, to check that you won’t be adding your bail to the wrong end, leaving you with an upside down pendant! ; ) (I was proud of me for remembering to check that, before I made that mistake.)
 Once it has tacked up just a bit, I pressed my bails on just like shown, and then cleaned up what smooshed out, with my brush.
TIP: As you work throughout this whole process, you may want to clean your brush. The Diamond Glaze is washable, and so so is your brush! Just wash with warm water (maybe a bit of dish soap if need be), rinse well, and dry.
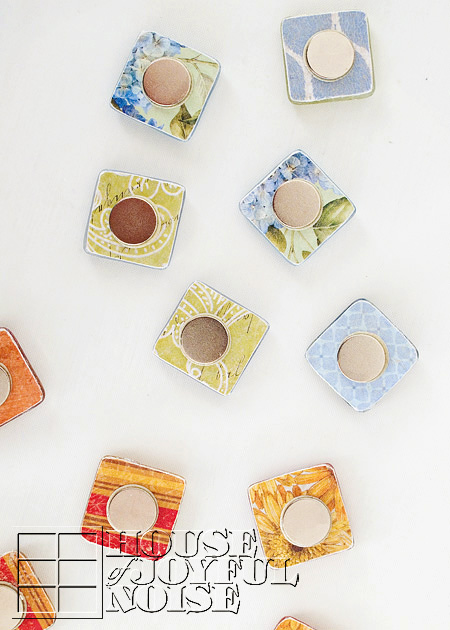
For the magnets, add a small dollop of glaze to the center of the back of the magnets. It will tack up a bit while you try to pry the magnets apart, and peel the adhesive backing off of one. Then just press the sticky part down onto the center of the magnet. Again, clean up any glaze that squished out, for a cleaner looking finished piece.
TIP: If you use too much glaze, the magnet will just slide off center. Just move it back in place. As the glaze tacks up, it’ll stay. I can see a couple of mine above slid a little, and I missed it.
Another Tip: After all of the pieces were dried, I went back one more time, and added a bit of glaze around the magnets, and around the bails (and underneath the loop), then smoothing with the brush, just for a little more re-enforcement. Whether they really needed that or not, I don’t know. But I just wanted to be sure the bail would not lift the paper if pressed on, or the magnets would not stay on the fridge and the tile be left in anyone’s hand without the magnet, when moving them! So I took the time for that extra step.
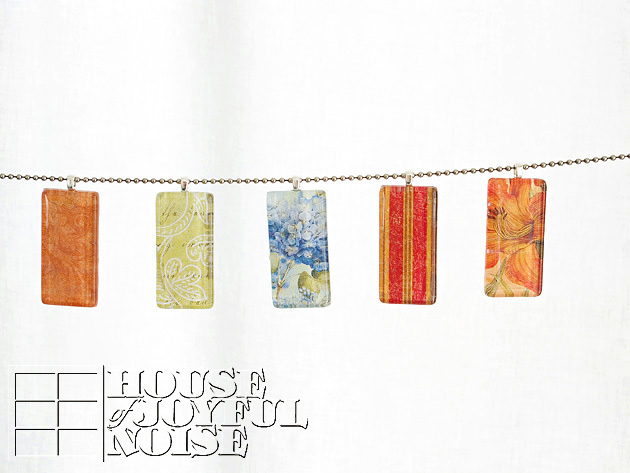 As I said before, they can be worn on a ball chain as a necklace. But they are so versatile for various outfit styles! Consider wearing them on box chains, suede string, leather cords, or a matching sheer or satin ribbon!
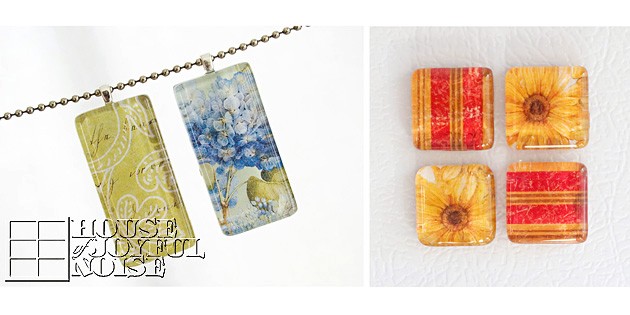
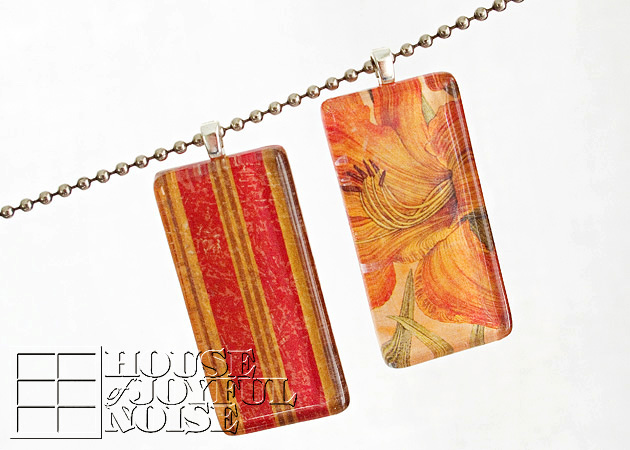
Closer peeks of pendants….
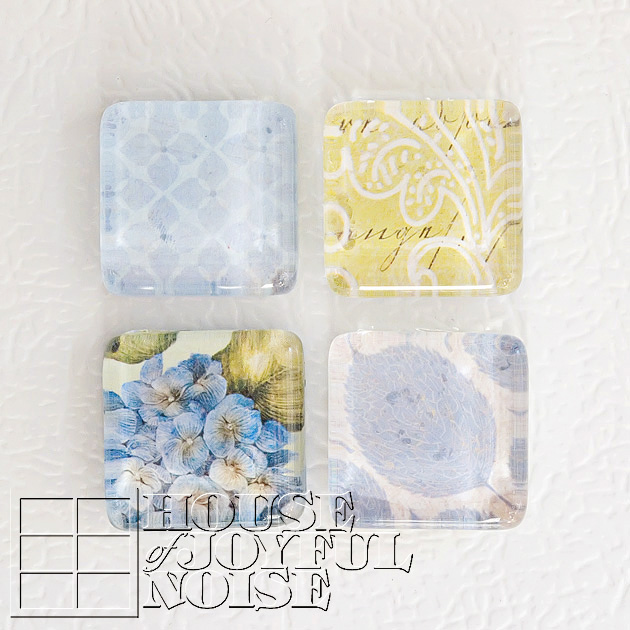
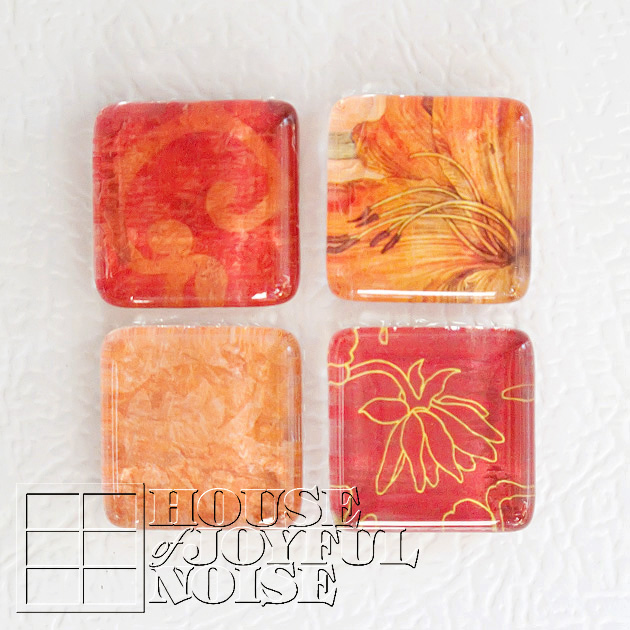
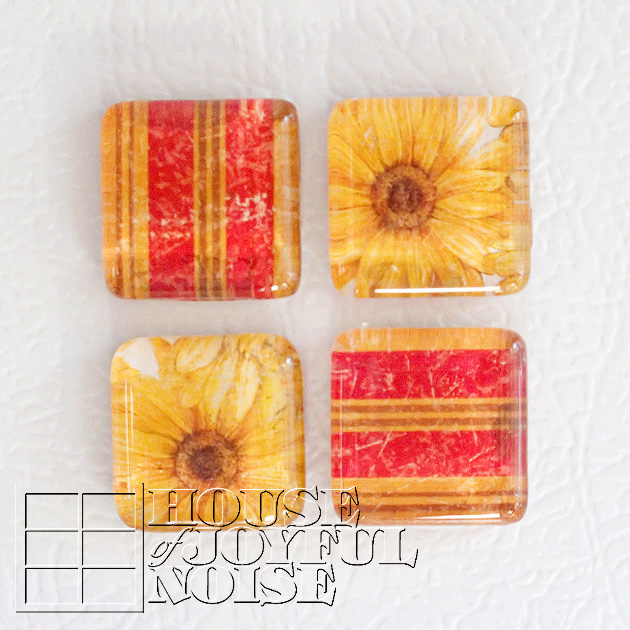
….and the magnets sets….
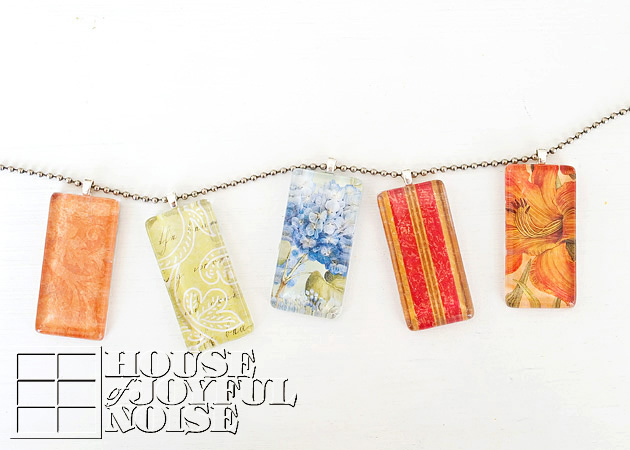 The chained pendants, lying on the table.
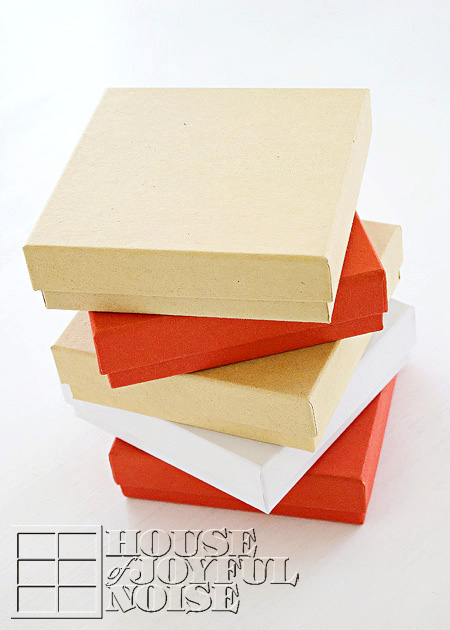
I found the perfect boxes, to package these gifts in.
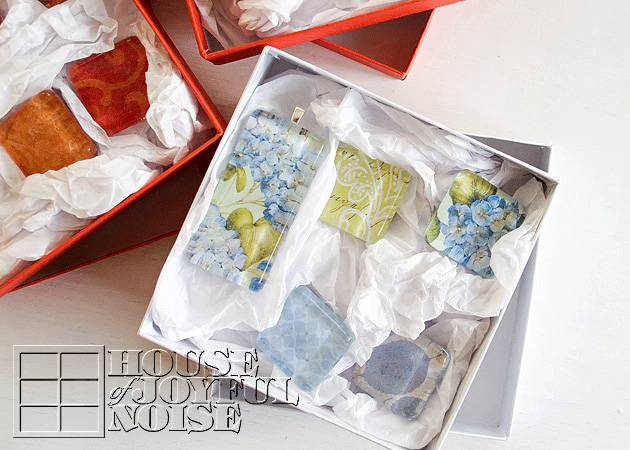 I started, trying to fold the tissue paper. But ummm….honestly, there needs to be a youtube filmage someday, on me and tissue paper, trying to work together. I have NO = NONE = ZERO patience for it! It took me….seconds, to just crumble it up, and start stuffing it in the boxes! But you know, in the end, the look kind of worked, with the slick glass pieces!
I was SO excited to finish packaging them up, and get them to the post office!
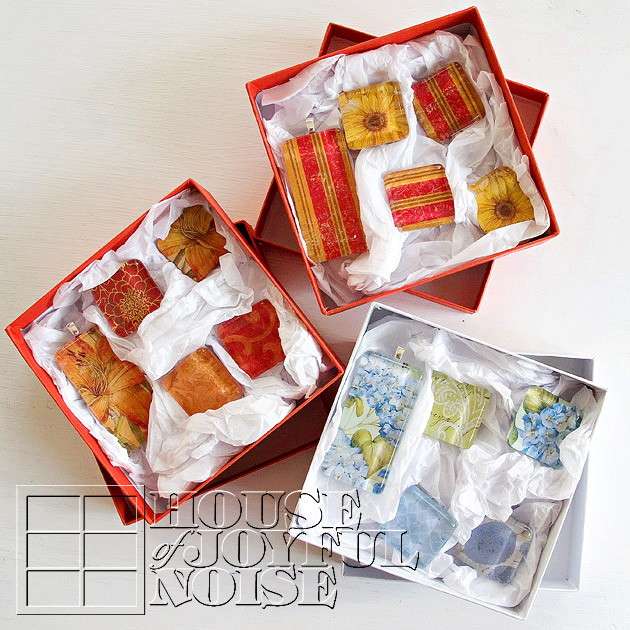 I was just thrilled, with how nice they all came out! Granted, every piece was not absolutely perfect, but they were made with absolute love! That’s what anything homemade, is all about!
In closing, I’d like to give the the specifications and resources, if you’d like to try making these yourself. Because really, it’s quite easy, quite fun, and you’ll be amazed at what beautiful pieces you made all-by-yourself! What a perfect gift for a special friend’s birthday, or as Mother’s Day or Christmas gifts! Someone, could be impressed with you. ; )
EXTRA TIPS:
CARD STOCK CHAT: You do really need to use heavy designer card stock for these, as opposed to regular scrap booking paper. The layer of glaze would make regular weight paper very soggy and ripply, very fast. You’d have a hot mess on your hands, quickly. The heavier stock holds up to the glaze much better. Also, I really loved using the 2 sided designer card stock, because the coordinating papers made really nice coordinating mixed sets of magnets! I had fun putting them together. The brand I used of the card stock were pads by K&Company.
MAGNETS: I got the 1/2″, ‘3 pounds of force’ Neodymium magnets for strength. Of course, I had no idea what that meant. I can tell you, they have some crazy force!! I had a few comical happenings! At times, they just kept pushing away from each other. Or, they would just pulling each other and piling up, with no sense of control! Chaos, I tell you! So maybe I got too strong? But it’s better than the frustration of weak magnets!
GLASS TILES: I got/used 7/8″ Square Pure White Glass Hand-Cut Tiles, and 1-7/8″ x 7/8″ Rectangle Pure White Glass Handcut Tiles
BAILS: Sterling Silver, Standard Small. (There are various styles.)
DIAMOND GLAZE: 2 Oz. Bottle. – This stuff can be used as a glaze, and also as an adhesive. As you know, I used it for both in this project! It dries beautifully clear, and glass-hard! So it can also be used dimensionally! For example, as raised glass dots on a piece, or to add pop to any design! I can’t wait to work with it some more.
SUPPLY SOURCE: Well, the card stock pad I got at Michael’s Arts & Crafts. But everything else….the tiles, bails, magnets and Diamond Glaze, I got on Etsy! I would start by searching look for a vendor who sells glass tiles, and in particular, search for ‘pure white glass’ tiles. They seem to be superior in quality, in my experience. I did have a specific vendor I could recommend, from whom I bought my supplies from, but she seems to be out of business now.
* That’s a wrap to this project! I hope you loved what you saw, and find yourself inspired! You can do this! Please feel free to ask any questions you may have in the comments and I’ll do my best to answer them for you, or just leave some love, if you’d like. Thanks for coming by!
Love it? PIN IT!!

Thank you, I’ve recently been looking for information approximately this topic for a long
time and yours is the greatest I have found out till
now. However, what about the conclusion? Are you sure about the supply? http://www.garciaadvocacia.com.br/
I pay a quick visit day-to-day some sites and sites to read content,
except this blog gives quality based content.
http://www.s221798444.online.de/01_news_admin/admin/news_edit.php?a=0&id=20140703055046&url
Do you mind if I quote a few of your articles as long as I provide credit and
sources back to your blog? My website is in the very same niche as yours and my visitors would truly benefit from a lot of the information you present here.
Please let me know if this alright with you. Thanks a lot!
We don’t mind, as long as you do not steal the whole post. A short summary, and one photo, with a link back to us for your readers to read the full tutorial, is perfectly acceptable, and we would appreciate it. Thanks for asking, and sorry for delayed reply.
The Richard Family / House of Joyful Noise blog
Pretty! This has been an extremely wonderful post.
Thanks for providing these details.
Ugh. I had trouble with this one… I couldn’t find the Diamond Glaze locally, so it was suggested that I try Mod Podge Dimensional Magic. Label reads as though it would perform just as the Diamond Glaze did. I also used Tim Holtz acrylic tiles (which were a bit pricey!). Long story short, after much effort the paper did not stay adhered, there were many air bubbles and blobs of the adhesive. Any advice?
Hi Marybeth –
Yes, UGH is right. It sounds like you had a really hard time for sure. Well, I would say my first real suggestion would be, to order the Diamond Glaze online! Honestly, I have found it to be the best. I really recommend my supplier.
Secondly, I’m not sure if you happened to see my second and more recent post on glass tile jewelry. But I’m gong to give you the link here, because it is loaded with more tips, techniques, and lessons learned of my own! I hope this helps you!
https://houseofjoyfulnoise.com/new-glass-tile-pendant-tutorial-new-tips-techniques/
– Laura / House Of Joyful Noise
I just made my first tile pendant last weekend. I appreciate the tip of using two sided stock paper. Makes complete sense because I was thinking as I worked last weekend that the paper rippled and did not look quite right on the back. Your tips and tricks were helpful.
Hi Patty – Yes, the two-sided stock paper makes a world of difference. It’s just thicker, and more durable, whereas the thinner paper gets soggy, translucent and very difficult to work with, if it isn’t ruined first!
I’m really glad to hear my tips and tricks were helpful to you. That’s what it’s all about, for me!
Laura / House Of Joyful Noise
Laura, thank you for the great tutorial. You are amazing!!
Thank you so much, Stephanie!
I appreciate your visit, and your sweet words.
: ) – Laura
This is a great project Laura. Thanks for all the details! Have you tried this with a photo print? I was thinking of doing something for a friend.
I have not tried it with a photo yet, Dee. If you try it first, I would recommend do an experiment by putting some Diamond Glaze on a photo you don’t need, as a test.
I am def going to take some time out and try this Laura. Thanks!! Enjoying your blog!
What a neat idea!! This is so pretty. I need to try to do this, but idk if I would have the time/patience…haha. These are gorgeous though. Bookmarking this post!
Surrrrre you can do it, Shermika! Take a day when you have some time, and just enjoy crafting. You’ll be pretty proud you made these, when you’re done! ; )
Thanks for dropping by, and the kind words. Hope to see you around here again! : )
I kinda came across your website/blog by pure accident i was looking something up and had set my tablet down and my daughter Abbey started playing around and ended me up here i was almost upset with her until i saw these beautiful tiles you really did an amazing job and left very easy to follow instructions. Being crafty myself i saw these and right away knew i was going to have to try them and having been racking my brain for weeks now as to what to do for the moms in my life fir mothers day i knew this was it when i saw it. Im even playing with the thought in my head of mixing and matching some with pics like you have done and also maybe doing one of each of my two little ones havent fully thought that out but thank you so much for the i spiration i will definitly be looking through some of your past posts and following you future ones as well! I should give my daughter a special treat just for “accidentally” finding this hey maybe i will make her her very own big girl necklace she can where to church and such!
What a great story, Lynn! Thanks for sharing it! It made me smile, how this random accident brought you here, and was just the kind of idea you needed. Thank you Abbey!! : )
Hello! found a link to this post on a Blogher news feed on my KindleFire last night in bed– pinning is glitchy with a Kindle so first thing this morning I looked your blog up on the desktop– and finally pinning this fabulous post so I won’t lose it. I just bought a wood tile pendant off etsy and saw these glass tiles as well. Wondered how to make them and now I know! Thank you!! I’m more of a cook and gardener but want to expand my diy horizons so hope to give this project a go soon. I bookmarked your lovely blog for future reading– I already spotted a granola post thumbnail link that I must check out…
:o)
Hi Lesa! – Well I am excited for you, venturing and expanding into crafting, from cooking and gardening! I am so happy that my project inspired and helped you. It’s always nice to have tips, huh? I bet wood pendants would be so lovely too – they’d be lighter pieces (in weight) and have a more casual/cool style to them.
Thanks so much for saying hello, and bookmarking us! Hope to hear from you again. Let us know how your wood pendants come out!
So sorry to hear about your camera.! 🙁 Crossing my fingers that you’ll get it back soon. The jewelry pendants are gorgeous. They look like something that would be sold at craft fairs or on etsy, so I know all of your recipients must have loved them. 🙂
Thank you! Hoping I get my camera body back soon too, without too much expense! I’m glad you liked my tiles. I am looking forward to making more, and keeping some for me! They are fun to make for sure. Thanks so much for stopping by again, and saying hi!