• HOME
  • {A}’s Chipmunk Training Archives

 Homepage

  • The Homestead
    • Home Projects
    • Home Improvement
    • Home Decor
      • Seasonal Home decor
        • FALL Home Decor
        • WINTER Home Decor
        • SPRING Crafts and Creations
        • SUMMER Crafts and Creations
    • Our Chickens
    • Gardening
    • Organization
    • Re-Purposing
    • Furniture Refinishing
    • Budget
  • Crafts & Creations
    • Seasonal Home decor
      • FALL Crafts and Creations
      • WINTER Crafts and Creations
      • SPRING Crafts and Creations
      • SUMMER Crafts and Creations
    • DIY (Do-It-Yourself) Project
    • Kids Arts and Crafts
    • Homemade/Handmade Gift Ideas
    • Holiday Crafts
    • Fan Pulls
    • Free Printable/Downloadable
    • Sewing Projects
    • Giveaways
    • Business Features
  • Recipes/FoodFun
    • Breakfast
    • Lunch
    • Main Dish
    • Sandwiches
    • Appetizers
    • Slow Cooker
    • On The Grill
    • Side Dishes
      • Soups
      • Salads
    • Baking
      • Breads, Rolls and Muffins
    • Snacks
    • Treats
    • Desserts
    • Drinks
  • Homeschooling
    • Elementary Homeschooling
      • Elementary Homeschooling READING
      • Elementary Homeschooling MATH
      • Elementary Homeschooling LANGUAGE ARTS
      • Elementary Homeschooling SCIENCE
      • Elementary Homeschooling HOME ECONOMICS
      • Kids Arts and Crafts
    • Middle School Homeschooling
      • Middle School Homeschooling SCIENCE
      • Middle School Homeschooling HOME ECONOMICS
    • Language Arts
    • Math
    • History / Social Studies
    • Geography
    • Foreign Language
    • Field Trips
    • Games
    • Nature Study
  • The Big Picture
    • Life In General
    • Celebrations
    • Faith
      • Into the Light; The Series
    • Giveaways
    • Reviews & Sponsors
  • Photography & Lettering
    • Photography
    • truck lettering
    • vehicle graphics
    • Newborns
    • Kids
    • Engagement
    • High School Senior Pictures
    • High School Senior Pictures Sneak Peeks

Bartering; It’s a Beautiful Thing

December 8, 2015 By Laura 4 Comments

One of the awesome things about having skills, and owning your own small businesses especially, is the ability to barter with other small businesses!  Michael and I have made some fantastic bartering agreements over the years, that have really made us feel like we got quite a deal. They have also enabled us to get more tasks accomplished sooner, than we otherwise would have been able to.

    Not sure exactly what bartering entails? Here is an official definition of the term:
………………………………………………………………………………………………………………………….

bar·ter
/ˈbärdər/
verb
gerund or present participle: bartering
  1. exchange (goods or services) for other goods or services without using money.

    “he often bartered a meal for drawings”

    synonyms:

    trade, swap, exchange, sell

    “they bartered grain for salt

………………………………………………………………………………………………………………………….

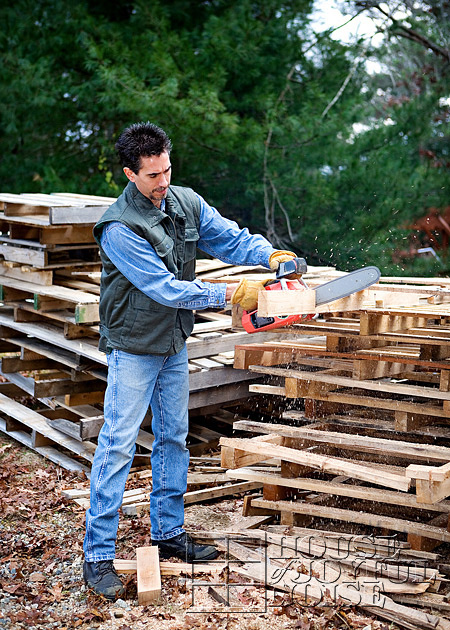
I bartered a few deals when I had my photography business running. Michael has bartered many great deals in his business, over the years. Michael works full time for our church now, but he still runs his own business on the side that started 15 years ago or so. He is a truck letterer and sign maker, and so the majority of his many client accounts are small local businesses; men with families they are trying to support. We always make an effort to support small business people, and do our part to help our own community thrive. We know many have done the same for us. Needless to say, Michael is tapped into a vast array of blue-collar trade services, and has known them all long enough to know who does the best work.

For example, Michael has exchanged his truck lettering or sign making services for [Read more…]

Filed Under: Budget, Home Page, Home Projects, Life In General, Our Chickens, The Homestead Tagged With: bartering, budget-ideas, saving-money, trading-skills

Customized Sketchbooks | DIY idea

September 18, 2012 By Laura 15 Comments

customized-sketchbooks-idea

The kids and I are well into a new school year here, and things are going really well so far.  Our oldest is a high school sophmore now, and the 3 youngest (triplets) are fifth graders.  So naturally, each year has gotten more academically involved, deeper and serious for all of us;  myself as the teacher, and they as students.  But I can freely admit that I am learning almost as much as they are, and enjoying my re-education as we progress with each year.  I love finding new ways to keep their homeschooling experiences fun.

One new idea I came up with this year, actually came about as I was brainstorming a gift idea for a special-little someone-else in my life.  While that gift is more elaborate and expensive, and personalized from me, it occurred to me that it might be fun to incorporate the general idea into our schooling, on a more budget level, for my own kids. So I mentioned the idea to them, of keeping their own sketch books throughout the year, and was not prepared for their level of excitement about it! I also wanted them to customize their very own a little bit, so they treasured them more.

The intentions for these sketch books are for the kids to just use freely whenever they want to, to practice drawing, write a little poetry, journal some thoughts, or even just doodle as they feel like it. But I did let them know I may ask them to use their sketch pads to express their thoughts or feelings in any way they’d like, following field trips or other home schooling or life events worth noting, in an artistic way. These pads are for dry medium only, but naturally you can adapt the general idea to any kind of pad, as well as customize the cover using any material you’d like. But today, I’m just sharing with you what we did.

Here’s the basic supplies we worked with:

  • customized-sketchbooks-idea-1 Inexpensive spiral bound sketching pads
  • Modge Podge
  • Foam brushes
  • Scissors or an X-Acto type blade

customized-sketchbooks-idea-10
And, 12″ x 12″ patterned scrap booking paper.  These are the sheets my kiddos picked out for themselves.

Now things are about to get ever-so-slightly-messy. Especially with kids. So I thought I would tell you my cheap little trick I use for protecting the table for all of our craft happenings . . . . . .

0012-214x300

TIP: Plastic party table covers, from the Dollar Store!  One usually lasts us for many, many projects. When we are done working, we make sure any paint or glue on it is dry, and then we just roll it up in a ball and put it away for next time.  (You could fold it, if you really need to. I know some people are like that. Hey, I have my own weird issues, but they are different. I’m not judging! lol)

customized-sketchbooks-idea-2 So the first step is putting a quick layer of Modge Podge on the back of the patterned paper.

customized-sketchbooks-idea-3
You don’t want to put any excessive amount on, or go over and over it, or the paper will get kind of soggy, and buckle.
But you do want to go right to the edge of the paper.

customized-sketchbooks-idea-4
Then also put a layer all over the cover of the sketchbook.

customized-sketchbooks-idea-5
Then carefully place your Modge Podge’d paper, onto your Modge Podge’d sketch pad cover.

customized-sketchbooks-idea-6
You can line up your paper evenly, by using the spiral bind as a guide.
Be sure to smooth out any air bubbles in the paper.

Now, the paper was not cut to size on purpose. You could figure out and prepare the exact size paper you needed ahead of time. But it just seemed easier to me to just put it on their, and then either trim off the excess, or just fold it over into the inside of the cover.

customized-sketchbooks-idea-7

These particular sketch pads were conveniently 12 ” tall, but only 9″ wide, so we had 3 extra inches to fold in.  The putting Modge Podge on both surfaces is just a preference, and may not be necessarry.  I just know with my kids, these sketch books were going places, and going to take a traveling beating. So, I figured the more secure the paper was adhered, the better.

customized-sketchbooks-idea-8 Granted, not all of them came out with the paper put on perfectly straight anyway, because they are kids, and doing the best they can. And perhaps not as particular and picky as I am! (Which really, has got to be a nice feeling, sometimes!) They just had fun making them, and were really excited about the whole project. Which is really the best part:  Kids being proud of what they made, and caring for those things that much more, because it is their own creation, from start to finish.

customized-sketchbooks-idea-9 I’ll tell you, it’s been weeks now, and these sketch books have proven to be a really great idea for my kids. They have really used them, on their very own whims. Regularly! Every day. It’s a beautiful thing to catch your kids sketching this or that.  Sometimes really working on a particular one over time, trying to make it come out just right. This is how all of my illustration skills were born!

As you can see, we further personalized their sketch pads, with their initials. Those were all cut in vinyl for them, but they each specified the exact initials they wanted, colors, design and arrangement. I think they all came out so great!  And each cover really does well express their individual styles and personalities.

customized-sketchbooks-idea-11

 I hope this idea inspires you in some way. I know that for me personally, any notebook or sketch book full of blank or lined paper, gives me the butterflies.  IS there anyone else out there, who understands what I mean? The opportunity for expression just laying before those two covers, is exciting!  So consider making yourself a special one of your own, and just let whatever wants to come out of your head to your hand, come out. See what happens inside! You may be surprised, and you may just enjoy every minute of it. Everybody should just take time to chill and doodle, sometimes.

Thanks for coming over. Please share this idea if you are so inclined.

Save


Save

Filed Under: Budget, Crafts & Creations, DIY (Do-It-Yourself) Project, Homeschooling, Kids Arts and Crafts Tagged With: Catholic-families-Catholic-blogs, customized-sketchbooks, doodling, encouraging-imagination, homeschooling, illustrating, journaling, journals, sketchbook-ideas-for-kids, sketchbooks, triplets

Doors to Storage. (Literally.)

September 28, 2011 By Laura 34 Comments

We are so excited to show you a couple of major storage solutions we came up with for our home, that has made a huge help to us!
Not only do we feel much more organized, but these are unique projects where we re-purposed old doors.

005_old-door_300


We’re guessing many of you love to see little home transformations, and creative spaces, as we do, and that’s just what we hope to share with you today.  The photos we share will likely explain what we have done. But if you have just a bit of time, grab a drink of choice, and let us amuse you with a little more about the birth of this project.

We’ve heard some people try to ‘ keep up with the Jones’. But that’s not our style.  I’m sure they’re really nice peeps, and all. But they don’t run in our circles, and even if they did, I doubt we’d want or care what they have, even if we could  afford a thing.  No, our wants and needs are really quite simple. If not a little off-beat sometimes, I suppose.

What we would love to keep up with, is ourselves, and our own plans and ideas.  Michael and I enjoy walking around our home and yard, chat, brainstorm, and hatch a plan, that continues to make the best of our little piece of the world. Our ideas always have a purpose, whether they are to create a sense of decor, efficiency, organization, to save money, or simply to amuse ourselves because we think it’s cool. Many times, it’s all of the above. One thing is for sure; 100’s of plans have been laid out between us, in detail, and never come to fruition, whether it was intended to be done right away or not. Time and/or funds usually hold up the process a bit, until we’ve forgotten we even had the plan!  Sometimes, new plans and ideas have been made over the old ones we forgot, or remember we had.  And we always have more, than we could ever realistically get to, anyway.  It’s craziness, actually. So priority is the key, and some things just need to be dealt with once and for all.


001_shoe-storage-problem

Case in point is this hot mess, known as our shoes issue.  First, you should know, “I” am the kind of person, that really prefers one take off their shoes, before walking around the house.  Not because we have any fancy home, or carpet that mustn’t get dirty for appearances sake.  But, because of the things I notice in the world around me, the things I think of, and the things I know dang well those shoes have walked through.

Take for example, (just to make the most of my point), those teenage/adolescent boys you see walking through parking lots from point A to B, when you suddenly see and hear them do a big collecting sniff of sorts, hack it up, and just let it fly out onto the parking lot ground.  It turns-my-stomach. I’ve seen/heard it hundreds of times, and I have told my boys every time, “Don’t you EVAH, in your life time, do that.  I don’t care if you are 36. That is absolutely dis-gust-ting, rude and UNacceptable.” To which they reply, “We know Mama. You tell us that every time.”  So along with 100 other examples I could give (I’ll spare you), I simply know it’s a small sample of what is on the bottom of anyone’s shoes, and I really do not want to know such disgust is all over the floors of my home.

I’ll take earth-dirty-feet over that kind of what-nots, any day of the week.

So that helps explain all of the shoes, along the walls of our sun room, right inside our front door.  Keep in mind, this is also the room with our wood stove, and one of our family tables where we often eat and school, half the time. We originally imagined it as a cozier room for reading and such, possibly with a chaise lounge chair or 2, and an area rug under the table. Not the feel we had going here. Using the table for eating and schooling the other half of the time, it is the room we enter when we come home, and through which guests come as well. With only our shoes for that season out, with 6 of us, it’s too many. Any, is too many, for me.  It’s actually worse then you see. At the time of this photo, some had just been put away, and 5 other pairs were busy walking around in the world of what-not.  The bottom line is this:  the sight of these shoes always puts me in a bad mood. It looks terrible, and we are always tripping over them.  So, for a couple of years now, our plan was to build a storage bench along the wall you see. We had designed it right down to the details, and frankly, the shoes could never let us forget that plan.  It’s just been on a list of many things we’re been trying to get to.  But we finally did, with a whole new spin, and we’re about to show you.

But completely related, you need to see this…..

002_antique-typewriter This is in (in part) our school room. If I ever took photos of these floor cabinets Michael built for our school room 4-5 years ago, I cannot find them.  So this photo and the one below, will have to give you an idea.  There are 3 of them along the 1/2 wall adjoining the kitchen.

003

If you can possibly look past one of our adorable boy when he was starting 1st grade, you will better see the size of these cabinets.  Michael did an great job, and they served us well in this room for 5 years.  But as of late I decided they are really (way) more specious inside, than we actually need, for our school books and materials. Very roomy.  And we probably did not need so much table-top space either.  As a whole, they take up a lot of space in this room, where there is also another long table and chairs, and where we also tend to gather to eat and school.

Since the sun room was meant to be cozier and lounge-ier than it is, we thought a good first step, is to not let it be the door we come inside the house through, for one.  The back door would probably be better for that.  More like a mud room. But there was still the countless shoes issue! We still needed somewhere to sit down and take our shoes off, and somewhere to store all of those shoes. What we did not need, was quite so much storage space, for all of our schooling materials.   I forget now exactly when, but the 2 matters collided at some point in my head, and ideas started rapidly coming together.  It was likely in the shower, which tends to be my most productive think-tank, but if that is TMI for you, disregard.

The gist of it all was….get rid of the big spacious cabinets in the school room, build some kind of more shallow shelving instead, and move this whole storage bench idea to the school room, where we should really enter the house from now on. A-hA!!  Then we can do better with the sun room! But that would be getting ahead of ourselves here.

004_old-doors

I also had an idea of how/where else we could use the big cabinets, but that too is for another time. In a nutshell, they were moved elsewhere, and it occurred to me that it would probably come out pretty cool, and save us big-time in material costs, to build our storage bench and shelves, out of old doors.

In a matter of days, we had found 4 doors on ebay offered for dirt cheap, just a hop, skip, and maybe 2 jumps, from us. Michael arranged to meet the guy to take a look, and he brought them home. (2 of them from this photo were already moved to the school room.) The doors were dirty, and somewhat mismatched, but that was all workable.

Show and tell will go fast from here I think.All 4 doors were re-purposed in this project(s).

005_old-door I loved the features on these old doors, and I knew I’d probably rough things up some more, from here.

006 First Michael relocated the huge cabinets to other locations. The floor space we gained just doing that, was unreal. Then, put up some leftover bead-board we had, as the back wall.

Then a bit of measuring and taking a moment to think things through, and we started to build.

007_old-door-repurposing-bench
The doors were sawed into half the long ways, as well as proper sized-pieces, for various parts, and we were able to start putting it together.   We wanted it a good height to sit on, and have as much room on the inside, to store/hide the abundance of shoes.


008_shoes-storage-bench As you can see, the bench unit, using the doors, was built 3 sided, simply using the back wall as the back of the unit.   And all of our shoes fit in there perfectly.

009_storage-bench Without all of the shoes inside yet, here is what the bottom looks like.  These removable racks are a feature we came up with, even when the plans was to build traditional storage benches in the front sun room:   The shoes we take off when we come indoors are not only dirty/sandy, but often times wet too.  I know what a mess the elements from the shoes made on the floor, so I had thought of that in terms of the inside of the bench, and what a pain it would be again, to move each pair of shoes, to vacuum up the sand and dirt.

010_storage-bench So we built these shoe racks out out of strapping and chicken wire, so that a whole rack with shoes on it, could be lifted out, and we could vacuum underneath.  They would also keep the shoe off the floor of the bench, so they could dry easier.

011_old-doors-repurposing
At the same time, we were not only building the storage bench with our old doors, but wall shelves beside it, for all of our school books and materials.


012_old-door-shelves
I know it’s quirky, but I really love this part of the door-shelves.  I knew the doorknob would serve purpose, aside from looking cool. The sharpener simply needed to be relocated from elsewhere, as it ended up being located in such a way they we could no longer use it, without moving it, and this was the best place for it.

As you can see, a lot of the doors were beat-up, and the dark wood of the original door showed through. I liked that.  But a few parts of the structures were also necessarily built with new wood.

013
Such as the shelving itself, built with new wood.  So there was still some distressing and aging to do anyway, on new wood and not, which I did with course sand paper, and dark wax, to properly stain and age the new wood, with the old.


016_doorknob-hangers Here is the lid to the storage unit open, pre-distressed. Obviously a door, but this side was painted by the original owner more recently, it appeared.  To add interest, and of course organization and function, we added a collection of old and mismatched doorknobs along the wall above it.

017_storage-doors-bench Here’s a better look as you step back and look at it as a whole. Again, we obviously used doors, and we intended for it to remain obvious, keeping every lock , doorknob and door feature we could.

Coming into the house using the back door, we come in and sit down on the bench to take off our shoes, and put them inside.  I should add, we will be putting down a mud runner, from the backdoor to along the front of this bench.  The little kids can hang their jackets and hats on the doorknobs, which is much easier for them as they cannot reach well in the coat closet that is in the room.  Yes, some coats will be too long to hang completely, leaving the bottom of the coats to sit on the bench, but that’s fine.  Scarves, bags and all kinds of accessories can be hung on the knobs too.

018_old-doorknob-repurposing

019_old-door-shelves The top shelves are for what you can see, as well as some of our music books.  I have many more of my teacher and resource school books that I plan to move from other shelves in the house to these upper ones, for my own use. But the depth we made the door shelves was just right for our needs.

020_old-door-storage The lower shelves are for the kid’s school books, and more of my every day teacher books.  As you can see, we found immediate use for this original doorknob, as well.

020_old-door-storage The kids hang their recorder instruments there. Perfect!

022_old-doors-bench I forgot to take photos of the bench with the lid closed, before we embellished it just a little bit.  But in closing this post, I wanted to give you a better look at the finished bench and shelves.

023_old-doors-bench

In an upcoming post, we will share with you the embellishments details you see, and how exactly we did it, with a surprise inside as well! But that’s pretty much the finished project as a whole.

We have found the entire project to serve us much better. It’s all so much more convenient, functional, and we think, has a cool factor.  I would think it’s the kind of thing that one would either love, or hate.  And I wonder, would features such as these, have a negative 0r positive impact on the ability to sell a house, should the time arise?  What do you think? We personally love the uniqueness and interesting features of people’s homes, and this fits right in with why we love ours. Everyone’s tastes vary, and so our feelings could never be hurt. But we’re curious to know what you think of this idea?  Is it cool, creative, or downright crazy?

* * * * * *

Come follow us here or there:


Save

Save

Save

Save

Filed Under: Budget, Furniture Refinishing, Home Decor, Home Improvement, Home Projects, Organization, Re-Purposing, The Big Picture, The Homestead Tagged With: antique-door-knobs, bench-seats, best-repurposing-ideas, custom-built-storage-benches, home, Home Improvement, home-organization-ideas, old-door-shelfs-shelving, organization, repurposing-old-doorknobs, repurposing-old-doors, shelving, shoes-storage-solutions, storage-benches, unique-shelving

Big Furniture Refinish } A Work of Heart

May 10, 2011 By Laura 51 Comments

 This is the biggest furniture refinish I have done, yet.  (Well, my husband did very kindly help me. I worked pretty hard on it too, though.)
But as big of a job as it was for my hands, it was a much bigger job, for my heart.

refinishing furniture
(‘Before’ thumbnail. The ‘After’ is a must see!)


refinishing furniture This is my mother’s dresser.  My mother passed away very suddenly, in 2005.  Her passing hit me like a train, and threw me into a grieving like I had never known. In the state of fog & hurt I lived in, one month after another, the only other thing I was aware of at all, was the depth of grief my father was in. It was hard to watch him go through all he was. I honestly don’t know which hurt more.

This dresser was the only one my mother ever had, in all of my years growing up, since the day I was born.   Except for a few sets of sheets, the drawers of it have been empty for the past several years, since my sister and I cleaned out my mother’s clothing together. But the rest of the house my father has kept exactly, as my mother had it. People say things to him about that, but he can’t understand why anyone thinks he would change anything.

My youngest daughter had moved out of the bedroom she had shared with her triplet brothers, and into her very own room.  I gave her my old white iron twin daybed, from my adolescent years, but she still needed a bureau of some kind.  One night, as I lay in bed, unable to sleep, I got to thinking about what kind of dresser would go best in her room, and when I came up with a long dresser with a mirror, I immediately got thinking about my mother’s.

refinishing furniture My intention right along, had been to find an antique or used dresser somewhere in my hunting, and refinish it.  We don’t buy much of anything new.  But when I remembered my mother’s, I knew I had more thinking to do.  You see, I knew my father wasn’t going to use it again.  He has the tall dresser, that goes with this one. When he sells the house, I knew he would either sell the dresser in an estate sale, or sell it with the house.  But one way or another, he wouldn’t be taking it with him, because he didn’t need it.

My issue was, the dark finish and style of the dresser, didn’t go with {O}’s room at all, or our home’s farmhouse style in general.  But, when it comes to sentimental matters, I am also the type, that doesn’t like things to change. I want everything to stay the same – which is why I take such comfort in going to my parent’s home, where my father is, and everything is just as my mother left it. My mother would be there too, if I had any say in that.

refinishing furniture So the idea of refinishing this dresser, of my mother’s, was hard to think about.  Just the vision of it, just as it is, with every detail, brings back memories. It’s such a part of my history, and my parent’s.  But it was either take it and refinish it, or let the whole thing go to some stranger, who never even knew my mother.   I decided changing it was a easier to handle, than letting it go altogether.

I talked to Michael about it the next morning, and called my father that afternoon, to ask him about it.  I was tentative, to tell him about the refinishing part.  (Yikes!) He did pause for a second of silence, when I got to that part of my plan.  But I wasn’t sure in the moment, if it bothered him because it was my mother’s, or if he didn’t get why I would do that.  I guessed it was the latter, knowing him pretty well, and a couple of questions later, I found I was right.  I figured, even if he was OK with me refinishing it, he wouldn’t understand why I would bother.  (Because he wouldn’t even think of it….because it works as is!)   “Why would you do that?”  “Because Dad, it doesn’t go with her room.  At all.”  I could hear him trying to wrap his brain around it.  He’s just a simple guy, who is not at all about home decor, etc.  If it works, it’s good! If it’s comfortable, it doesn’t matter what it looks like.  But he was fine with whatever I wanted to do with the dresser.  And he insisted on bringing it down to us, even though Michael had every intention of going out to western MA to get it.

I knew he would insist on driving it down, and as soon as possible.  He always makes sure we understand, “Anything you guys ever need, just ask me.  I mean it.” He means it.  There is nothing he wouldn’t do for us.  The dresser arrived in the back of his van, which arrived in our driveway, that weekend.

It was a beautiful day, so we got right to sanding it down, before it even came into the house. I did need to take a deep breathe, and push my hesitancy away, before I let the sander hit the surface.  But after I took some ‘before’ photos!

refinishing furniture I could see the dresser, all refinished just as I wanted it, in my head.  I went to Home Depot myself that week, and found what I was hoping I would, for the original hardware – which I definitely wanted to keep!  It was the design of the hardware, that that really marked the dresser as my mother’s, and part of my parent’s set.

The spray paint I chose, was brushed nickel.

refinishing furniture The tone was so beautiful.

The dresser itself, was a whole lot of work.  A lot.  Sanding, painting, steel wooling, and the high & smell of denatured alcohol, that was stuck in my head.  It was a big piece to work on. So much to it. My hands took a beating.

But the labor of it all, was therapeutic in a way, too.  It was a process I needed to go through.  Accepting change, and looking it in the eye, whether it is easy, or welcome, or not.  Knowing inside, that the only thing that is ever guaranteed to never change, is the memories born in the minutes and years that pass by.

Time marches on.

refinishing furniture The dresser came out absolutely beautiful, I think.  I totally love it, refinished.  It now goes so perfectly, with the rest of {O}’s bedroom.

But it’s funny to me that, as completely different as it looks now, I somehow still see my mother’s dresser.

refinishing furniture Every time I see the hardware, I am back in my parent’s bedroom(s), or I actually hear in my head, the clinking sound it makes, when the drawer is closed and the handle is let go.  I heard it for 21 years, or something.

refinishing furniture The dresser has new history now.

{O} now has her grandmother’s dresser, and she watched her parent’s refinish it with love, just for her.

refinishing furniture

I can’t tell you how many times, I used this big mirror myself, growing up in a house with 5 kids, and one bathroom.

I can even easily imagine the many things of my mother’s on the dresser top, that were there for so many years.

refinishing furniture {O} is slowly covering it, with her own things, now.

She knows it’s her Meme’s dresser, and it makes her happy to have it in her room, and call it her own, now.

Things change.  It’s a part of life.


refinishing furniture
And yet some matters of the heart, inside, never do.

No matter what it looks like, on the outside.

refinishing furniture Sometimes, letting go, is all we can do.

While we hold on to whatever we can, as best we can.

I’m so happy I thought of getting my mother’s dresser, before it was too late.

I miss her so very much,  and it was hers.

Nothing I do to it, can ever change that.

******

Did you enjoy this post? They aren’t all this long, but they always have lots of photos!

Come ‘LIKE’ us at our Facebook Page!


Save

Save

Filed Under: Budget, Crafts & Creations, DIY (Do-It-Yourself) Project, Furniture Refinishing, Home Projects, Into the Light; The Series, Life In General, Refinishing, The Big Picture, The Homestead Tagged With: furniture-makeover, painting furniture, refinishing-furniture

Blessings of Wood / Home Heating with Pallets

December 19, 2009 By Laura 3 Comments

I think all of us New Englanders can agree, that it’s not cheap to heat a home in the winter seasons. Especially larger or older homes. So sometimes, we need to keep the heat thermostat down a bit, double up on clothing layers, or find a cheaper way to heat our home. We’ve done all of the above.  Today we’re sharing one way we sometimes heat our house, for FREE. If you are able to burn wood, consider burning and heating your home with free hardwood pallets, if you can find them!

a
This is often what one side of our drive-way looks like, as of the past few months.  Sometimes, the piles of these pallets are a little higher, and sometimes a little lower.  But one thing is for sure – we’re always happy to see some out there!
–

heating-with-pallet-wood

Because these pallets heat our home, for free.  Well….maybe for a little labor.  Although I doubt Michael would call it that.  Michael’s supply company for his business, sometimes gives us stacks of pallets, that they want out of their warehouse.  When they are delivering down in our area anyway, they put a stack or 2 of these on the truck, to be delivered to us.  Most of the pallets are oak, or other hard woods.  Sometimes, there’s a little pine too, but that’s o.k.  It all burns in our wood stove!  But hard wood does burn longer and hotter.

heating-with-pallet-wood-1

The pallets just need to be cut up.  But Michael is always happy to fire up ‘Little Red‘, and cut wood.  He loves doing it.  (Seriously. We all can tell.)  As a matter of fact, he’s out there cutting up pallets right now! On his birthday no less.  Even the kids said awhile ago, “Daddy wants to go out and cut wood on his birthday.”  lol.

heating-with-pallet-wood-3

heating-with-pallet-wood_
Can’t you see that manly-expression of satisfaction on his face?  I can. lol

He’s got an ax now too….so he’s even happier!
–

heating-with-pallet-wood-4

Here’s just one pile we’ve got going.
This one he keeps stacked pretty high, because he loves to just crank open that window above, and grab some wood for the stove. lol
–

There is usually a great big pile on the floor in the house too, just to the right of the stove.

You may have wondered about all of the nails in the pallets.  Michael doesn’t bother pulling the nails out, most times.  He’s a clever time saver;
TIP: When the stove cools down from previous fire(s), he has this magnet he sticks in to the floor of the stove, and it picks up all of the nails that fell out of the wood as it burned. ; )

heating-with-pallet-wood_5

Our 2-floor house is not small, by any means, anymore.  And the living room ceiling is high.  So it can be costly to heat, with gas.  This stove really helps out with that though.  Michael has a couple of fans going, and the heat fills the house, and even blows right upstairs and heats up there, too. The entire upstairs is the new part of the house, but we don’t happen to have the heating system completely intact up there yet. Because honestly, we’ve gotten along fine without it.  After all, our stove is burning on any given cold day throughout the cold season, and most of the night.  It gets fired right back up, first thing in the morning.  We LOVE our wood stove, if you haven’t read that before here. (I reckon some of you are sick of reading that, by now. lol).

heating-with-pallet-wood_6

But this post isn’t about our stove again.  It’s about the WOOD!

We also are blessed with wood from another source.  There is a sweet old man that has lived at the end of this street for a very long time.  He and his wife are elderly now (although he doesn’t seem to know it yet, at 89 years old), but he and his wife raised eleven children in their home down there.  Of course, their children are all grown now, and they have probably 100’s of grandchildren, or something close.  Anyway, this sweet man has called numerous times, or left messages, that always go the same way:  “Michael! Lenny.  I’ve got wood down here for you. Come and get it.”   Trees that he took down himself.  Michael always catches him doing something labor-intensive, and goes over to help him.  Or, other times Michael has very sneakily snuck in like an elf, and finished a job he saw Lenny working so hard at during the day, so Lenny wouldn’t have to.

So think real hard, about where you can get some free pallets, or other wood!  If you see piles of them out back behind local warehouses and big chain stores, stop in, and ask to speak to the manager about the possibility of taking them off their hands. Look for piles of broken pallets beside dumpsters. Go for a walk on a sunny winter day, and see what old dead tree limbs you can find, throw it in the back of your truck. It may need to be seasoned for a bit back home, but you’ll appreciate it as free heating wood, at some point.

j_

Well, as I close this post, we’ve got a snowstorm on the way!!  The funny thing is, we haven’t even had a FLURRY this cold season, yet.  We’re just going to kick it off with…..who knows how much.  Supposedly a lot, but it depends on which weather report you read.  As Michael says, after reading the different predictions, “Basically, we’ll be getting anywhere from a dusting, to several feet of snow.”

One thing is for sure.  We’ll be home.  And cozy as can be.  Well….except for the kids sometimes, who will probably spend some of that time playing out there in the first fallen snow.  Perhaps they’ll build me another snowman, that I can admire outside my windows, by the fireside.

I often wonder who else always has a fire going in their home during cold seasons.   And if anyone loves it as much as we do. Do you?  If so, we hope this post gave some of you wood burners out there some new ideas, about cutting the cost of heating your homes more affordably, or for free.
Wishing you warm winters!

Save

Filed Under: Budget, Re-Purposing, Seasonal Home decor, The Homestead, WINTER Home Decor Tagged With: budget heating, burning-pallet-wood, free-wood, heating-home-for-free, heating-home-for-less, heating-home-on-a-budget, heating-homes-in-New-England, winter-heating, wood-stove-tips

  • 1
  • 2
  • Next Page »

We are wicked happy to have you here! We hope you find much inspiration, help, humor and enjoyment here.


Archives


POPULAR POSTS

* * * * * *

SUBSCRIBE to House of Joyful Noise blog! Every new post, delivered right to your email box!


Privacy Policy

Amazon Affiliates

Never at any additional cost to you, we may earn a small commission for our endorsement, recommendation, testimonial, and/or link to any products from our website. Your purchase through our links helps support our family, while sharing with you the products we authentically use and recommend, for various ideas, and letting you know where you can purchase them. Thank you for your support!

[footer_backtotop]

Copyright © 2025 HouseOfJoyfulNoise.com · Genesis Framework by StudioPress