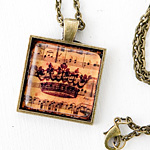
It is not often that I ever do the same craft-like project, twice. But I’ve got a feeling that making glass tile pendant pieces are going to be something I’ll be doing again, and again. I am so fond of the high quality feel of the finished pieces, the variety of styles that can be made, the multitude of purposes they can be made to be used for, and the fact that I simply enjoy making them for myself and as gifts for others. By knowing how to do the general process of making glass tile pieces, you will then have the ability to make all kinds of wonderful and customized things, such as jewelry necklace (bracelet or ring) pendants, decorative magnets, key chains, drink coaster sets, vehicle rear-view mirror hangings, home decor embellishments, and so much more.
Recently, I did a whole lot of experimenting with making glass tile pieces, and in the process, learned quite a bit in my quest to perfect my techniques. Knowing what works well, or best, while crafting these, is information I wanted to have, considering I do plan on continuing to make them as I get the whim. In this post, I wanted to pass on all of those tips to you, if you are considering making some tiles yourself. I will also compare the different style of these that I made, with the first time I made some glass tile pieces.
The first post I did on some glass tile pendants I made, was a detailed step-by-step tutorial, and it has been very popular in traffic.
Here below is a photo of just a couple of the finished pieces.
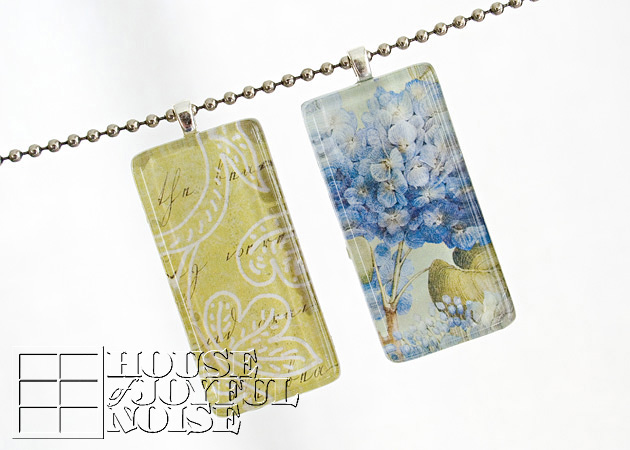
Those pendants were made differently, and are ultimately different in style, than the ones I am sharing today.
But they were also made with different materials. Let me tell you about that first: The first time, I used some beautiful, 2-sided scrapbooking paper (different on opposite sides), which is an adequately heavy stock to work with, and is also acid-free and manufactured printed, is completely permanent and so does not run or change in any way. With the endless choices of beautiful scrapbooking papers available today, it’s definitely a wonderful option, when deciding on the designs of your pieces.
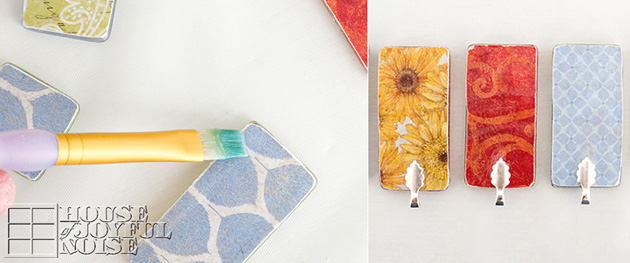 Briefly put, the way in which they are made is that the 2-sided papers you chose applies directly onto the back of the tile, sealed with the glaze used, and the bail adhered directly to the back. (All seen in photo above. You can see the complete tutorial here. I also made some lovely magnet sets at the same time. This method is just a bit more unfinished in the way that it is evident that they are hand-crafted. I would also say that they are a bit more work than the method I’m sharing in a moment, because the paper needs to be closely trimmed to size of the tile, and then the edges need some sanding down. Still, they are beautiful finished pieces in their own way, and most everyone has a certain appreciation for hand-crafted jewelry. If you would like to follow the tutorial for that style of glass tile pendants, please see that post.
****
Now let’s move on to what I am sharing today. The glass tile pendant tutorial in this post is with using trays, which already have a bail. I am going to show you how these are made differently.
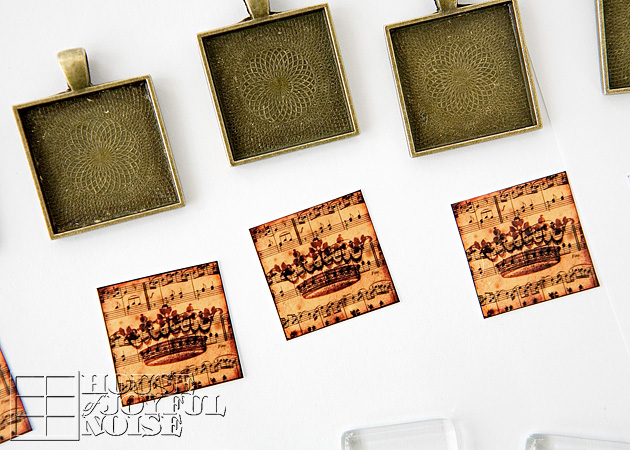 The bronze trays you see above (there are many sizes, shapes, finishes and styles available), designed to hold a graphic and glass tile, are shown in the above photos.
But first, I’d like to talk about the graphics. Meaning, the image/design that will show through the glass tile. If you would like to skip right to the successful method I used, you can jump to the SUCCESS paragraph.
If you’d like to learn through my own personal errors and just have the power of knowledge about what does not work well in relation to printing the graphics yourself, you can also read the FAIL paragraphs.
FAIL: My trials and challenges came with hoping that I could print any graphics I wanted to use, myself. I had heard though that when using printed graphics in a craft in which the paper would come in contact with any kind of wet medium, a laser printer needed to be used, or else (if using an ink-jet printer) the ink would likely bleed/discolor, or change in some undesirable manner. We do not have a laser printer; but in fact an ink-jet printer. Which from what I knew, as I just stated, was going to result in problems. However, I had found this stuff called Micro-Glaze, that in description of the consistency, is much like a shortening. It meant to be used to apply with a brush to the surface of the printed paper graphics, even if from an ink-jet printer, and supposedly protect the inks from the wet medium and any adverse effects. Well I can report that I tried again and again, following instructions and in various manners, without success. While the pieces always initially seemed fine, the following day the colors of the graphics became muddled beneath the glass (now permanently set), and soon it was a hot visual mess. Very frustrating in terms of a waste of time, as well as a waste of glass tile pendant supplies that are not meant to be so consumable and disposable.
FAIL: So, as seemed to be the recommendation for printing, I sent my graphics to be printed at the local copy center (Staples), that indeed only prints with laser printers. But again, I had the same sort of issues with the ink of the graphics getting blurry and muddled, and generally not looking like a clean graphic that kept it’s colors quality. I was sure it was an ink/printing issue, and not any other supply I was using, because I was generally using the same materials I used last time, with the addition of trays. The only thing different, was that I was either printing my graphics, or having them printed, as opposed to purchased, acid-free, 2-sided scrap booking paper. Finally, I found the solution to being able to use graphics I made myself or found somewhere, that needed to be printed somehow first.
SUCCESS: Lastly, I decided to have the graphics I wanted to use, printed as photos. (So, on photo paper.) I was quite confident this was going to be the method that finally worked for me. While ordering those photos, in a spur of the moment decision, I chose for the photos to me printed on metallic paper. I’m not sure if or where that may be an option for you. But as a professional photographer, I choose to have all of my photos printed by my lab for professional photographers only. (This is to ensure that my photos are printed to my specific editing settings.) I just thought maybe the metallic paper would throw a little more light back from the pendant graphic behind the glass, and I was right. But metallic paper is in no way necessary. Regular photo printing will be just as successful in the beauty of your piece.
Another product you’ll need for these kind of projects is Diamond Glaze.
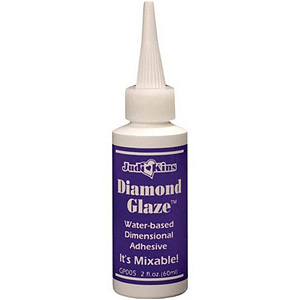
This versatile product serves as an adhesive, as well as a crystal-clear sealer, and even a dimensional liquid you can apply that dries clear and as hard as glass!
I have tried a couple of other products that have claimed the same, but this one is the best quality stuff, in my opinion. The bottle sizes it comes in are small, but that is because it goes a long way.
For the highest quality of pieces, I also highly suggest using only the highest quality of glass tiles.
I will give you links to my supplier at the end of my post.
Here is how I make glass tile pendants in 4 easy steps:
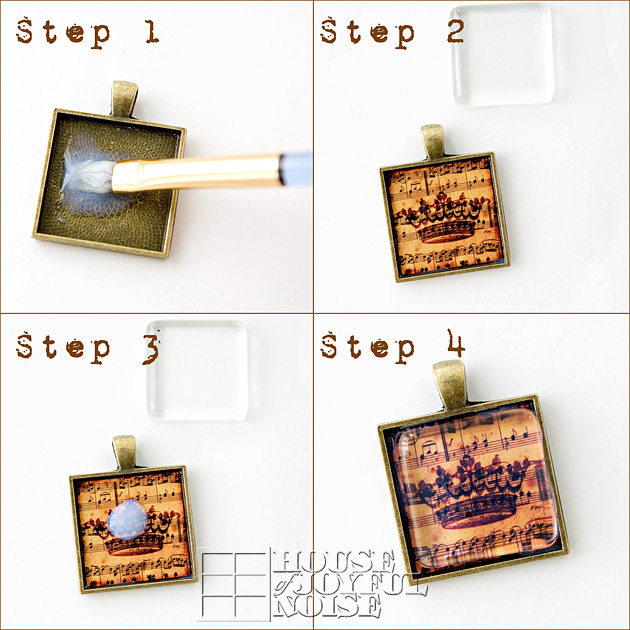
1) With your graphics trimmed to size for your pendant (and checked for fitting), put just a drop or 2 of Diamond Glaze medium in the bottom of the pendant. Using a small flat brush, spread the glaze to cover the bottom of the pendant edge to edge. This will serve as an adhesive.
2) Lay your graphic over the just applied glaze. Only gently tap down all over. You don’t want to squish the adhesive underneath out and over the sides of your graphic.
3) On top of the graphic, in the middle areas, squeeze another drop or 2 of glaze. There is no need to spread it with this small pendant.
4) Gently place your glass tile on top of the glaze puddle. The weight of the tile will automatically squish-spread the glaze beneath the glass.
Immediately look for any air bubbles and gently press the glass tile in the appropriate places to force the air bubble out from under the edge of the tile.
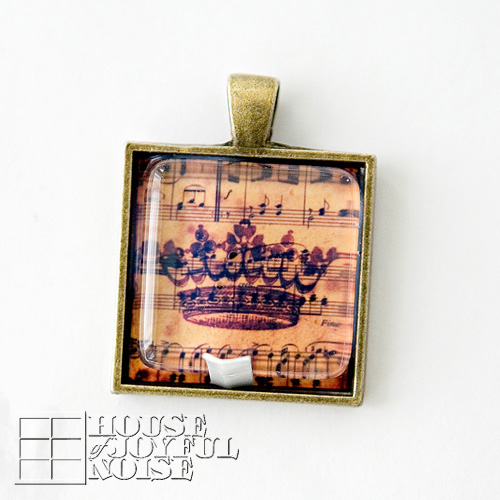
You can now leave your piece to dry and harden. If you notice that the tile is sliding more to one side or the other, because there is just enough excess space to do so, just take a little folded piece of paper to hold the gap, and your tile in place, as shown in the above photo. (But try not to let the paper tip come in contact with the glaze in the bottom of the pendant.)
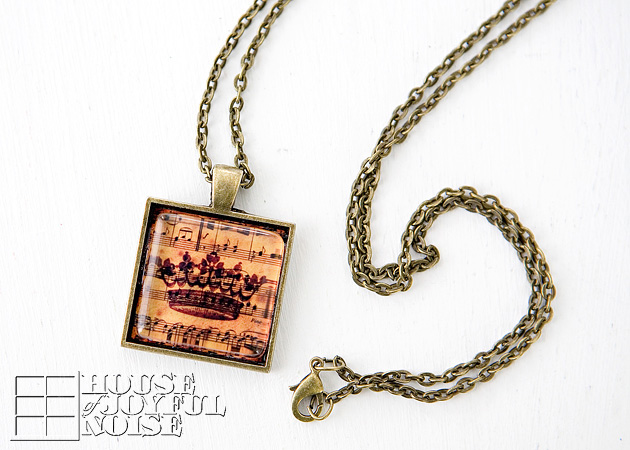
Here is a finished pendant on a matching bronze chain. I made this one for my sister, first.
She calls great Christian tunes “Jesus music”, and the crown made me think of Jesus (the Prince).
Then after I made it, I loved it so much, I made more: for me, my oldest daughter, and some friends. LOL
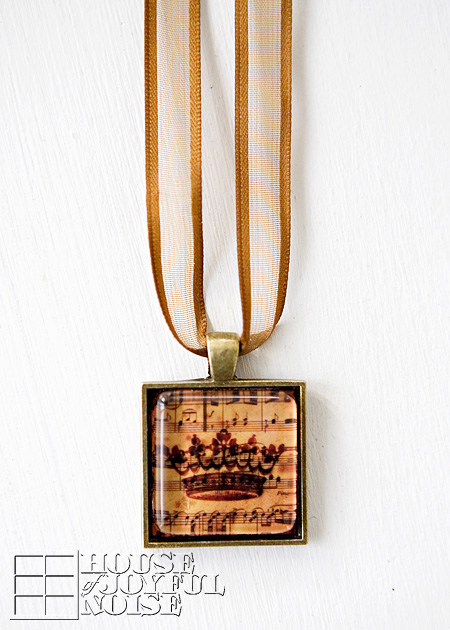
You can change it up, and wear your pendant on a little fancy, feminine ribbon.
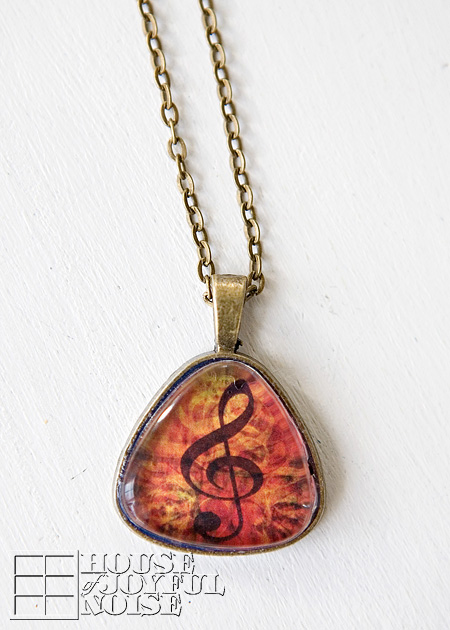
Here’s another I made; a guitar pick shape.
The crown on a music sheet pattern, as well as this music note, are graphics I found online.
But this next one ( 2 shown on the sheet), I custom designed very specially, and there is a story that goes with it . . . .
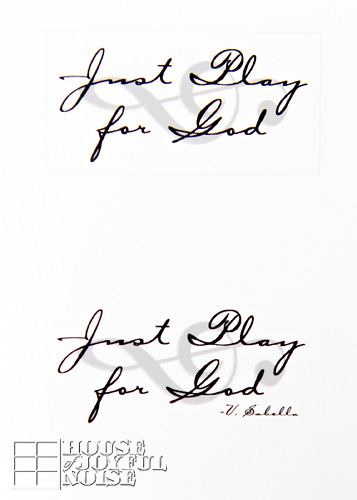
Our 10 year old son Shane plays piano, and he has a wonderful piano teacher. When his first public performance was coming up, he found himself nervous about the upcoming occasion. So he told his teacher about his nerves, and asked her for any advice or tips she might have for him. She explained that being a little nervous was very normal, and how she herself has been very nervous with her own performances in the past. She recommended forgetting about all of the people there watching and listening, and then added:
“You know Shane, just play for God.”
Well, those were words that resonated with Shane. And in essence, changed him. From that moment on, because of this suggestion, and the new light he saw it in, his nerves disappeared. When performance day came, he walked up there as calm as could be, and gave a beautiful and flawless performance.
It’s amazing, how someone can say just the right thing, in just the right way, that really speaks to our heart. It was words that really meant something to Shane, and I literally watched the effect wash over him, and stick. So I decided I really wanted to design a meaningful pendant for his teacher, that expressed her powerful words. As a reminder that they truly meant something to someone, and helped them not only in the present time, but likely words that will be there for him to fall back on, for the rest of his life.
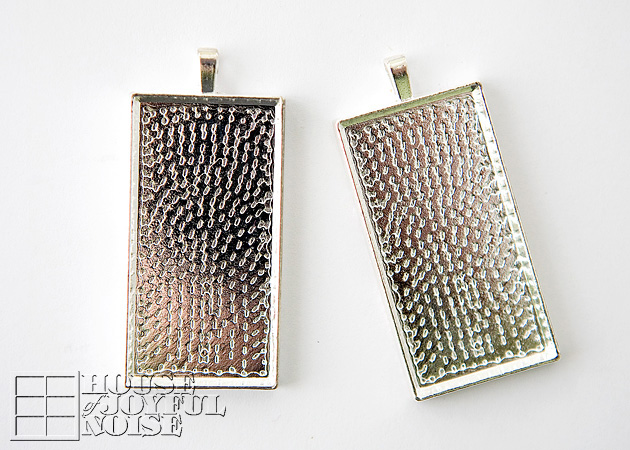 I purchased these silver-plated rectangle pendants on Etsy, with a shiny silver matching chain, and trimmed the quote-graphic to fit perfectly.
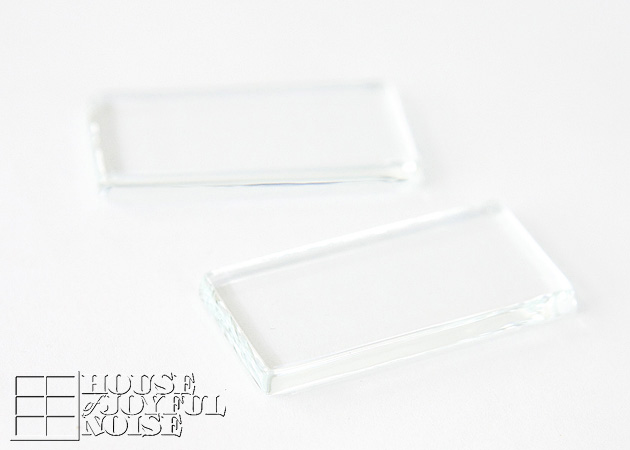 Here are the gorgeous rectangle glass tiles to fit.
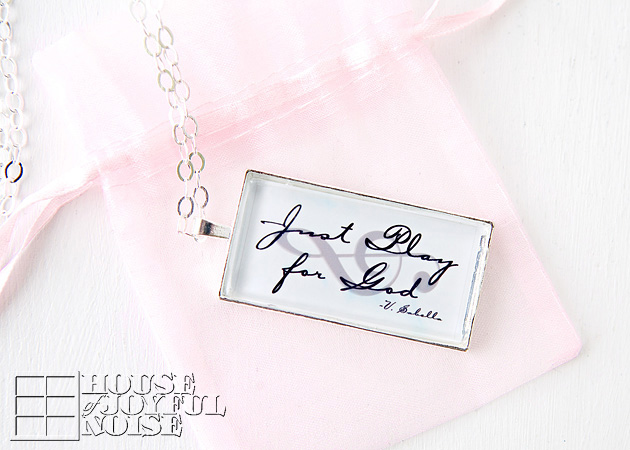 Here is the finished pendant, which was a gift he gave to his piano teacher, while (verbally)sharing with her how much her words meant to him, and why he wanted her to have this.
She cried, and it clearly meant a lot to her. We’ve seen her wear it often, too.
I had to make myself one as well.
 And I made Shane a dog tag with the same graphic, which he wears with his medical i.d. dog tag (for his severe peanut allergy.)
My best recommendation for jewelry supplies is to look around Etsy. I did have a great supply vendor there, but she seems to be out of business now. Still, there are many similar vendors on Etsy. I suggest first searching for ‘pure white glass tiles’, and then hopefully they will also carry the rest of what you’ll need. But the tiles, in my opinion, are the most important supply. I have found that the ‘pure white glass’ tiles are particularly superior in quality. So definitely make an effort to try to find those, whether you can find them on Etsy, or elsewhere.
I DO hope this tutorial has been helpful to you, and inspires you to make some beautiful glass tiles of your own!
Please leave any questions or comments you may have, in the comments section below, and I will respond best I can.
Thanks for hanging out with me.
* * * * * *
Please come follow us here and there:


Hi! Thank you for sharing this tutorial. Do you have any information as to how well these pendants hold up? I’ve seen other tutorials that require more glaze sealing and hours of drying time between sets. Just wondering if you did all of your steps in quick succession, and if so, how the pendants have lasted.
Thanks so much! I’m making a large batch for the girls at my church, so your quick method would speed things along. 🙂
Hi Jill! – Yes, I let them dry before steps, if you mean between steps of apply graphic, and then sealing. With the inlayed graphic though, the pendant just drops in over the glaze, you push out the bubbles, and that’s it.
The paper printed ones have held up beautifully! The graphic I printed on photo paper (the g-clefs) did have some bleeding issues, for some reason.
Hope that helps!
Laura / House of Joyful Noise blog
Hi!! This is such a great tutorial!! what program did you use to design your own font? Really wanting to put scripture in some of these but cant get pretty lettering off of word lol. Thanks!!!
Hi Ashlie! I use Photoshop/CS2. There is a pretty good set of fonts that come with it, and I can always get others and load them in as well. I do everything in Photoshop. As a professional photographer, it’s just what I’ve always been accustomed to using. Hope that helps. Love the Scriptures idea!! Thanks for the visit; please come again!
Laura / The House of Joyful Noise blog
FYI The above link by Little Bit caused a virus on my computer 5-28-15
We’re so sorry, Val. Their linked comment has been deleted. We usually remove links immediately when they are left, just as a precaution for that reason, but it looks like that one got away from us. We’re sorry you clicked on it, and hope it wasn’t a huge ordeal for you. Hate that.
Laura / The House of Joyful Noise blog
Thinks for the tutorial. I may try the diamond glaze as I have been having some problems with silver spots with glaze I have been using. I print illustrations on Kodak matte medium weight 35 lb paper for inkjet printers. I let the paper dry for a couple of hours. I then coat both sides of the illustration with modge podge. This keeps image from smearing. Some people put images between clear packing tape instead to prevent smearing. I get glass tiles from Sun and Moon crafts and they are very good quality. Have never had problems with image smearing using the kodak paper and modge podge.
So excited after I saw your website! I had a vision and am trying to fulfill it, but I am not computer savy, and am not a jewelry maker. I am looking to have a message on one side, and a scripture on the other side of a pendant. I believe this is for ministry, but something may develop to fund the costs. My question is how do I print what I want ,or if I choose to write it out, what pen is soluable. Can you direct me toward products, and or other info. Anything would be appreciated. Thanks….. God bless.
So will having info printed by a photo printer such as walgreens work?
Hi Cathy – I believe using photos printed at non-professional labs should work, although I would suggest being sure they are printed on glossy paper, as opposed to a matte finish. That may help eliminate any air bubbles from being trapped. Also, I would definitely do a practice/test one before doing a whole bunch. It can be a challenging project at first, but you’ll find you get your groove quickly.
Best wishes! – Laura / House of Joyful Noise blog
I have been researching this for a while, i have a letter that was written from my Father to my Mother (both have now passed away). He signed it ‘all my love’ and I have been wanting to have this made into a pendant for so long but I am terrified of ruining it. I am so glad I read this first, I think I will try to have it copied (i want it in his exact handwriting) and printed on photo paper. Hopefully this will work!
Bethany –
Your comment really touched me. I am so glad my post gave you an idea of a way to help preserve the original from your Father to your Mother, by making a copy of it and using that for your pendant. If you get a chance, I would love to know how it turned out!
Thanks so much for sharing your heartwarming story with us.
Laura – House of Joyful Noise blog
Thanks for all of the great tips. I’m getting ready to make some of these with my daughter. I was able to get all my supplies at unitedcraftersinc.com. The materials seem like good quality, but I have nothing to compare it to. Shipping was super fast.
Hi. Thanks for the tutorial. I’m an absolute beginner and it appears that The Crafty Dragonfly is not currently doing business…? What should I look for as far as quality of the tiles? Or do you have a recommendation for another vendor? Thanks!
Hi Ann! Thank you so much for informing me that you found that The Crafty Dragonfly seems to be out of business at this time! I checked too, and indeed, she seems to have no items for sale at the moment.
My suggestion would be to just find other vendors who sell these supplies on Etsy, by searching for the items using the search engine there. As far as quality of tiles, I know Jen at the Crafty Dragon said her tiles were “Pure White Glass’….so maybe search using that term. I really did find her glass tiles to be superior to others, so maybe that was the difference in quality.
Also, if you haven’t, be sure to check out the original post on pendants, for some possible tips as well: https://houseofjoyfulnoise.com/glass-tile-handmade-gifts-necklace-pendants-and-magnet-sets/
Thanks for stopping by, and hope this helps! Have fun crafting!
Laura / House Of Joyful Noise
Love it. This is so simple to do. I need to do this too.
My photo lab only prints on glossy paper. Will that work too? I’m so frustrated with the process of bleeding and tossing. So excited to finally have a solution?!
Hi Christie – Thanks for your question.
Yes, glossy photos works as well. Many of the pieces you see here were done on glossy photos.
It can be very frustrated indeed, with the bleeding and tossing. The trick is not using any more medium than you need. Unfortunately a craft like this definitely takes a little trial and error, but I always hope my tutorials help save others more time than I spent. Good luck and have fun!
Laura / House of Joyful Noise
Thanks for the tip with diamond glaze. This seems really simple that I can do this.
Laura – love your creations! I especially like the guitar-pick shape setting and was wondering where you found that? Did not see it on TheCraftyDragonfly does now carry trays, but I did not see that shape! Also – love the dog tags!
Hi Carol! I cannot recall EXACTLY where I got the guitar-pick shaped tiles, but I do know that it was on Etsy! So that’s a great start for you. All you need to do is go to Etsy, and do a search for them, and I am betting you’ll find them in a heartbeat! If not, come back and let me know, and I’ll do a little digging for you myself.
Thanks for the visit, and the question!
Laura / House Of Joyful Noise
Love the new ones and the ones you made before…and the best part is, it looks like something I can handle…can’t wait to try.
Thanks, Niki! I’m sure you could handle it, for sure! Have fun with it, and thanks for coming by.
: ) Laura
Thanks so much!
WOW Laura! I love these. I love the necklace you made for your son as well. I am definitely going to have to try making some of these. Thank you for the link to your other step by step tutorial. I always appreciate easy to understand tutorials with lots of pictures!
Thank you for stopping by my blog and leaving a sweet comment. :0)
Thank you, and you’re welcome Melissa! I hope you DO try making some pendants yourself, and that my tutorials really help make it as easy as it can be for you. You just may get hooked, when you see the beautiful pieces you made, all by yourself. The high-quality pure white glass is crucial! They do make such fabulous gifts, but I love to make them for myself too. Enjoy crafting, and thanks for coming by my place!
~Laura / House Of Joyful Noise
I did something similar with the trays, except instead of using the glass tiles on top, I just used a liberal amount of diamond glaze over the image. I’m wearing my cheshire cat one today: https://julzreads.wordpress.com/2012/12/16/bookish-jewelry-crafts/
Loved your Alice in Wonderland Jewelry Collection, Julie!
So fun & unique!
~Laura