After a lot of dreaming, and then months of hard work by our own hands, an old farmhouse bedroom is finally a reality for us.
You should know that Michael’s and my bedroom is the very last bedroom we have finished in the house. Three of our kids’ rooms were finished from new construction when we had the addition put on, and the fourth’s was a renovation. Finally (after 11 years of finishing the rest of the house ourselves), it was time for our own room to be done. It’s a renovation and makeover all-in-one, and we are excited to show you all how it came out.
Now, it’s a medium size room, about 11×20’, so I hope we can all squeeze in there together. Let’s try!
COME ON IN!!
First things first! Any good room makeover reveal cannot be fully appreciated, without first seeing the BEFORE photos. Don’t you agree? So with that said, this has been our bedroom for the past couple of decades or so.
BEFORE BEDROOM PHOTOS

** A HELPFUL TIP YOU’RE GOING TO NEED: For all slideshow photos in this post, click on the thumbnail photos, use the arrows under the photos with the description to see the NEXT photo, and then CLICK ON THE LAST PHOTO to CLOSE OUT the slideshow. And also, be sure to read the descriptions of course, to learn all you can about what we did.
More BEFORE photos . . . .
So yeah, that was our plain-blah bedroom. I just kept the door closed all of the time, and especially if people were over. It wasn’t horrific by any means, but I wouldn’t want people to think that was my decorating style, or anything. LOL. It was simply a room not done. For just a few years (prior to our house addition), it was the triplets’ bedroom, as it was the only bedroom (of only 2 in the house then) that fit 3 cribs and then 3 toddler beds. During that time, Michael and I had no bedroom! We slept in the crawl loft of our living room on a mattress! We had to go up on a ladder to get up there, and all. After the addition on our house, as rooms were finished by us on weekends, we were finally able to reclaim our own bedroom. It was good enough, for the time being. We were saving all of our efforts for OUR bedroom, until it was our turn to renovate, after all of the kids’, of course.
That time came.
And now . . . . The New ‘Old Farmhouse Bedroom’
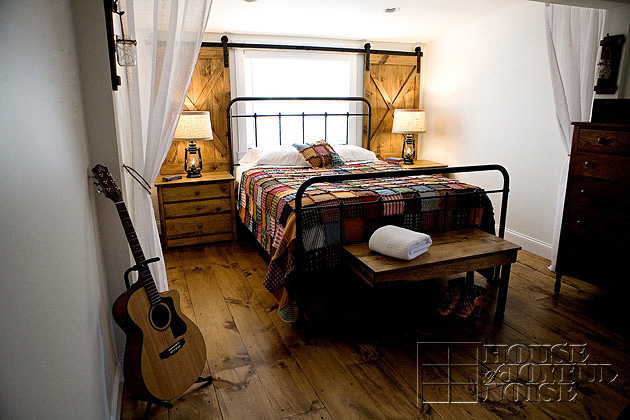
It’s everything I ever hoped, and more, in a less-is-more sort of way!
Can’t you smell the fresh sawn wood and lingering scent of stain? I don’t know why, but every time I walk in this room, that scent immediately calms me to a state of peace and thanksgiving. And so I always find a reason to stay for awhile.
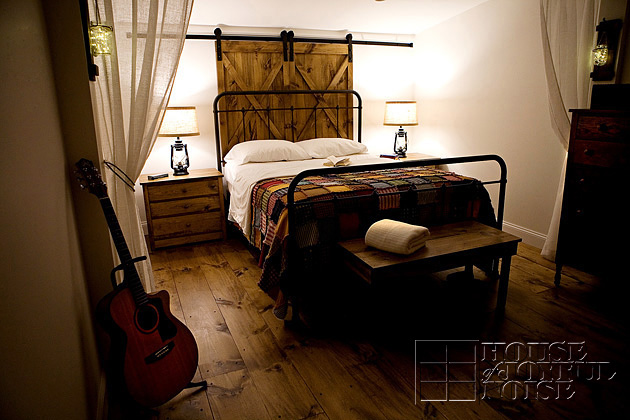
NOTE THESE DETAILS IN THE PHOTO ABOVE . . . .
(all of which we are going to talk about….)
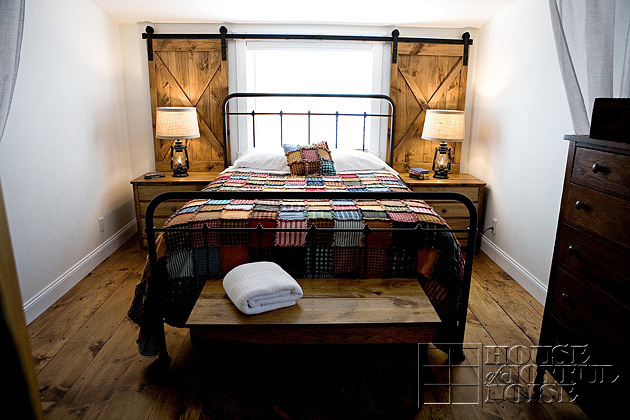
- the Sliding Barn Door Shutters
- the Bed Frame and Rag Quilt
- the Rustic Custom Floors
- the Nightstands
- the Lantern Lamps
- the Bench at the foot of the bed
- the wide framed opening into that side of the bedroom with the Sconces and Curtains
- and the Dresser on the right.
There is so much to take in here and talk about (and I’ll be giving details on all of it), but let’s start with an important decision that would set the tone for any room . . . .
The WALL PAINT COLOR
After pondering for years in my head over paint colors for our own bedroom makeover someday, and never feeling settled on any color in the world-wide palette, I finally realized all I really wanted was just to go with NO color – white! I never wanted to commit to a color for so many years, needing to fuss about coordinating the bed covering with the walls, etc. In my vision, I just wanted to elements of the room to really stand out, and I wanted the room as a whole to have a primitive feel to it. It was also my true heart’s desire to have a patchwork rag quilt, and it would hopefully be those squares, that I wanted to add most of the color to the room.
Believe it or not, even choosing a white paint got complicated, once we got to the paint store! But in the end we chose Simply White, by Benjamin Moore.
And we haven’t regretted that decision for a moment.
A real special feature of the room now is that true heart’s desire I just mentioned . . . .
The PATCHWORK RAG QUILT
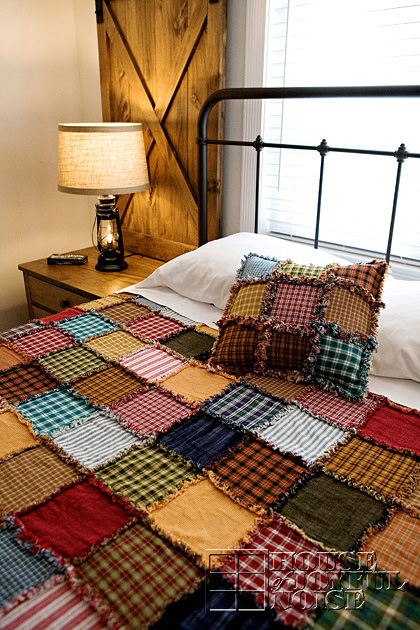
Yeah, I have wanted a patchwork rag quilt for as long as I can remember, and it has been my plan to get one for our own bed one day, for years. Unfortunately, I never saved my childrens’ clothes, but I’m not sure they would have worked anyway, as special as that would have been. I wanted it created with many random fabric patterns, much like the ‘Coat of Many Colors’. Although my sewing skills have been coming along, this queen-sized rag quilt was a large task I was in no way ready for. So I needed to find someone to make it for me.
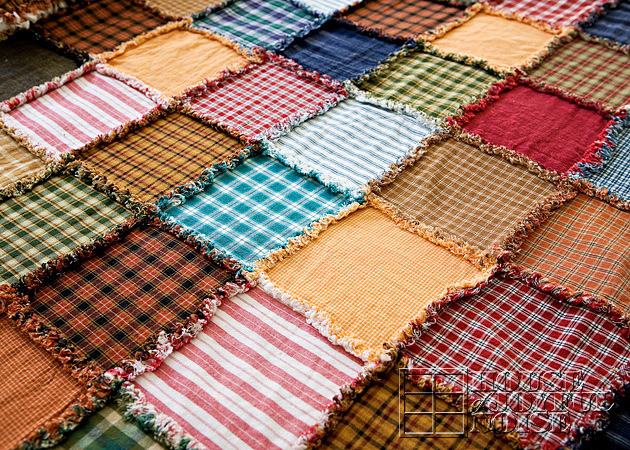
I collaborated with Amber at Jonquil Junction and got exactly what I wanted! After choosing all of the fabrics myself, I had them sent right to her, and she sewed my little dream together, square by square and stitch by stitch. She was a dream to work with, very affordable, and I cannot tell you how much joy and comfort this rag quilt brings me. Michael also loves it (which is important), and I love that it’s a piece that fits us both so well, too. It will be my treasure for many years to come, as it is worn out and loved to death, just like the Velveteen Rabbit.
The BED FRAME
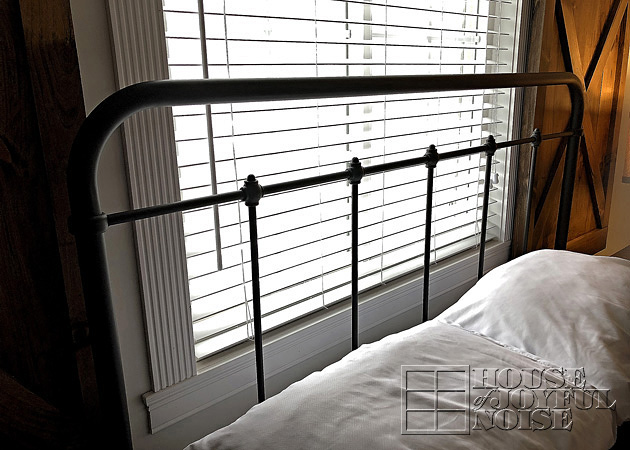
Although Michael and I had a long list of creative ideas for a headboard, most of all our goal was to keep it very simple. And since our bed would be in front of a window, we didn’t want it to block it or any light, or night-time air flow in the summer, from our open windows. And of course, the frame needed to fit the farmhouse style.
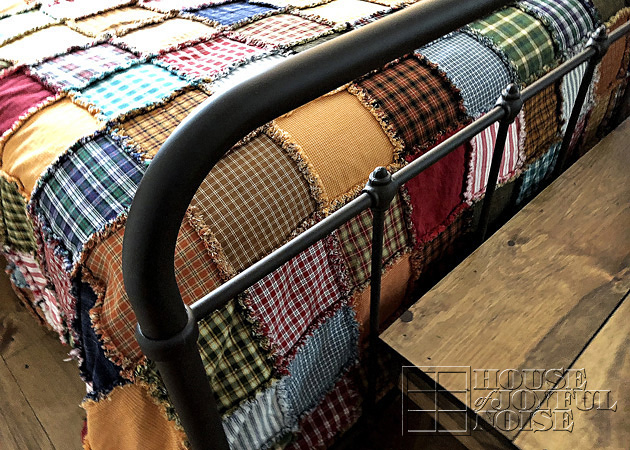
We found what worked just right for us online, from Wayfair.
The NIGHTSTANDS
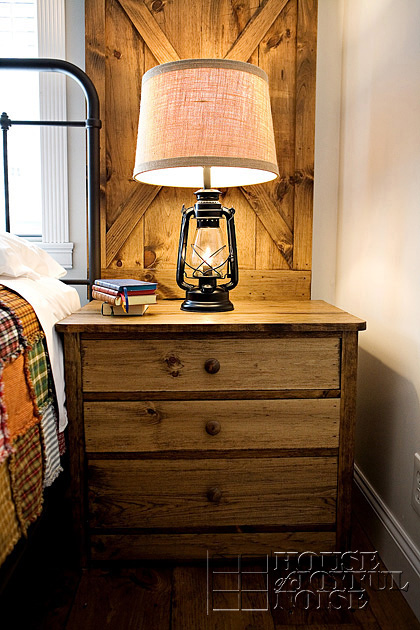
Michael designed and built our two nightstands himself.
With 3 drawers for lots of storage, rounded corners on the large table-top, and a Minwax Provincial stain, they came out exactly what we had in mind.
The LANTERN LAMPS
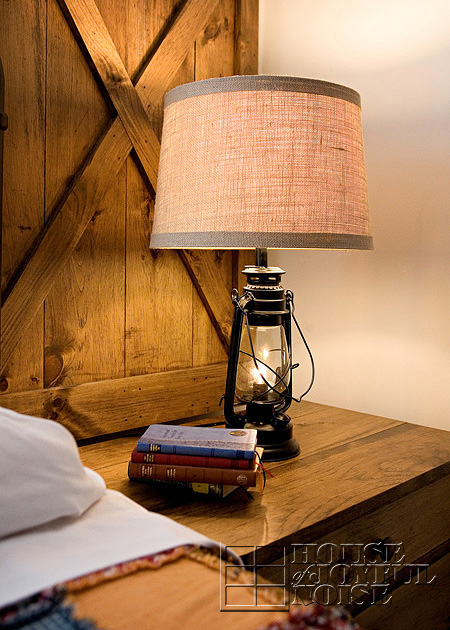
Ok, a bit of a mind-boggling story, here.
These dang lamps played a good and guilty part in holding up this post being published, for many weeks! We have had one like it, in our living room /stairways cutaway, that we casually picked up at The Christmas Tree Shoppe years ago. Well, we decided it was exactly what we wanted for our bedroom nightstands, because they are farmhouse-ish, and they have the 2-circuit switch; so we can have just the upper lamp light on, just the bottom light on (like a nightlight), or both on at the same time. Perfect. So we’d just pick up two more like that somewhere.
Uhhhh, do you think we could find more lamps like this anywhere, in stores or on the whole world-wide web? NOPE!
So finally, what we ended up ordering were two camping lanterns we found online that just had the nightlight part – no upper light. (?) Ok. So, Michael figured with a few lamp parts, he could rewire them to make them table lamps also, with the nightlights. But then, PLOT TWIST . . . . they arrive after forever, and they have a short 3 foot cord, with no plug on the end! Seriously! Just loose wires! (Yeah, clearly from China.) Like….how is anyone without a handy husband supposed to plug that in? Thankfully, I had one (because I am smart and thought ahead before saying ‘I do’ like that). But still. Other people would really be in a pickle.
Bottom line: Michael completely rewired, re-built, and pieced together these lamps, and then we bought the perfect lamp shades for them, because we wanted what we wanted, that bad. We are a straight-up crazy and determined pair, sometimes. But we got our 2-circuit switch lantern lamps, in the end.
We are going to get to talking about those awesome Sliding Barn Door Shutters soon but . . . .
The BENCH
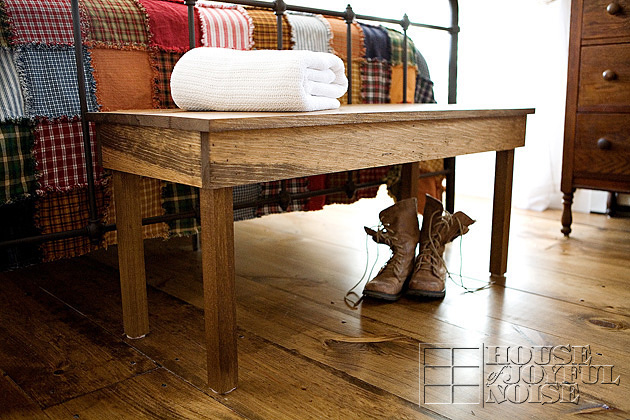
Michael custom built this, also. I’ve always wanted a bench at the foot of my bed, but there was never any room for it, the way our bedroom had to be arranged before. I not only love the look of it, but it’s really nice to have somewhere to sit and put your socks on, etc., without messing up the bed you just made.
The Rustic Wood Floors
Are you ready to hear more about these beautiful rustic floors?! They really do play a huge part in making this farmhouse bedroom!
And all thanks to Michael’s hands (and knees) and hard work, again.
A bit more info in these slideshow photos, on how we made this wood flooring . . . (we, hahaha) . . . .
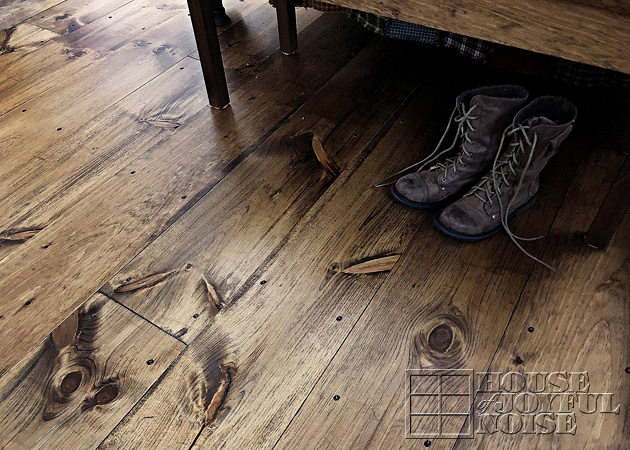
Board by board, and nail by nail, they went down, and then a coat of that same stain choice for the room: Minwax Provincial.
But ohhh, not any nails . . . .
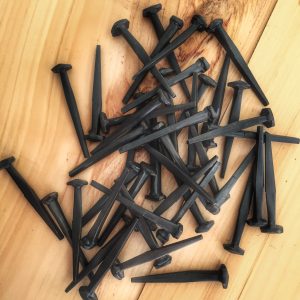
I badly wanted steel wrought iron nails. (Shown here on the unfinished floors). We had to special order them, and when Michael saw the price, he was like, “Really, Honey?!“. And I was of course like, “Really, really, Honey. Sorry.”
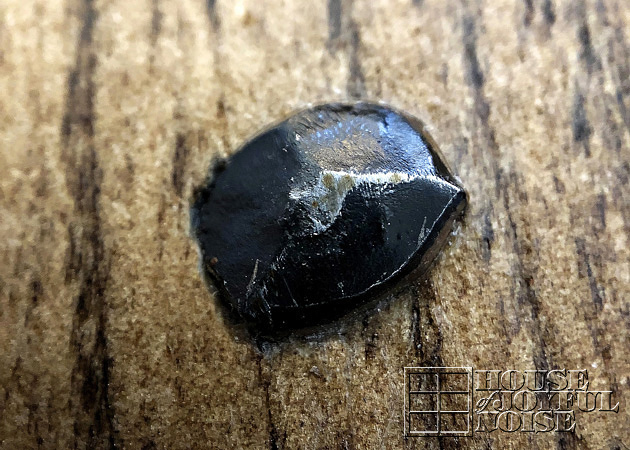
(An irregular shape to the nail heads.)
I mean, I was wicked stuck on these nails. I knew they would make the floor as rustic and as farmhouse as could be. And I do believe I was right. I do believe Michael realizes I was right, too. But he hasn’t said it out loud yet.
(Oh, I just mentioned this bit to Michael, and he said he’s still bitter about the price. Oops.)
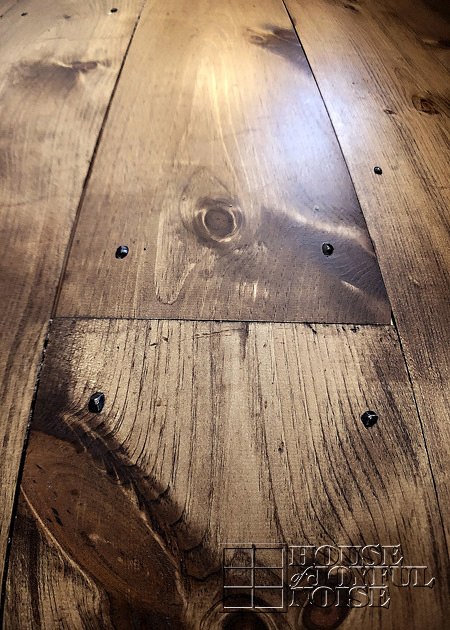
Beautiful though, right?
The DRESSER
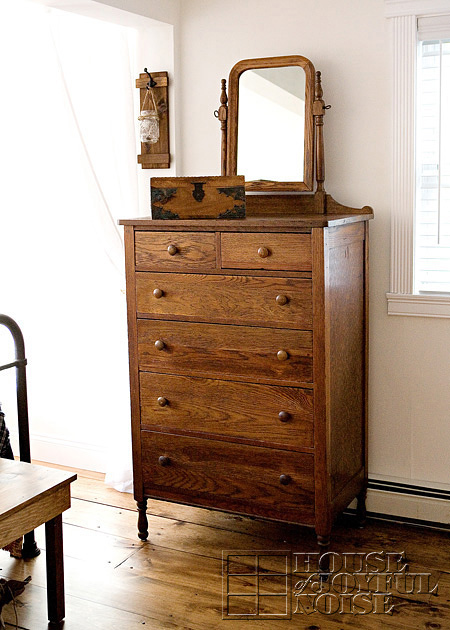
We are sadly still on the hunt for Michael’s dresser, because he needs one too, of course. But this one for me, we found early on. In fact it was the first piece we had for the room, built or bought. We found it at a consignment shop, eventually, and they said the gentleman who brought it in said it’s from 1927! It’s clearly old, as I wanted, but solid and in great condition. Look at that mirror! And the legs. I’m in love with it.
When Michael finds a dresser to his liking, for himself, I’ll probably edit this post and add it in, like it was never missing.
(Well, it’ll still be missing from the wider shots of the room, because I’m not doing that over!)
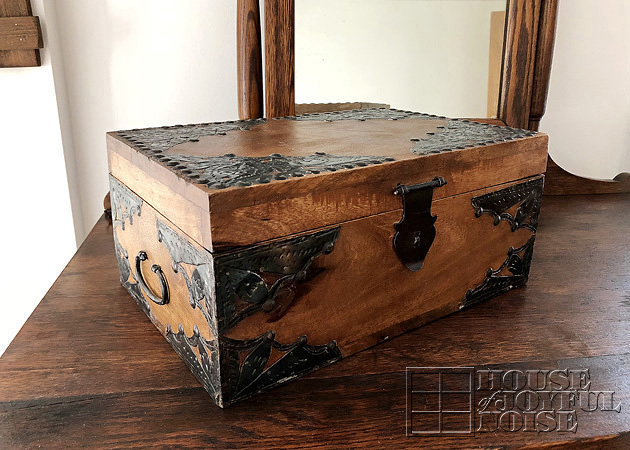 In the same consignment shop, I found this beautiful wooden box, and had-to-have.
It is filled with all of my mother’s missals, at the moment.
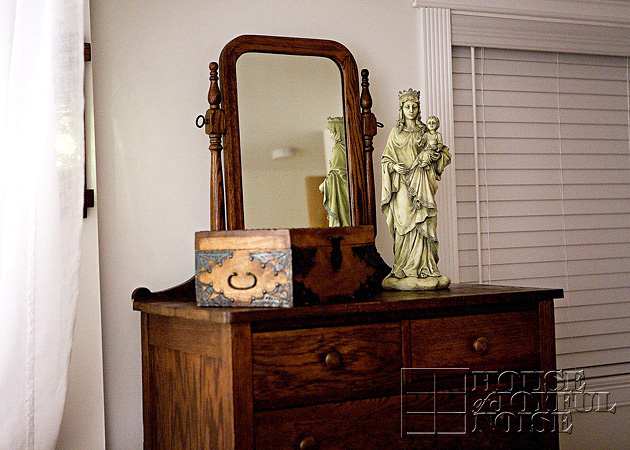
To be honest, I also keep this very sentimental statue of the Blessed Mother, on my dresser. It was also my mother’s.
I didn’t show Her in the first photo of my dresser, because She would obviously steal all of the glory. And rightfully, so! But I still wanted to show you. Because I just see Her, and she sets this mother straight, over and over.
The CLOSET DOORS
See the BEFORE slideshow photo below, and read the description with it.
The AFTER . . . .
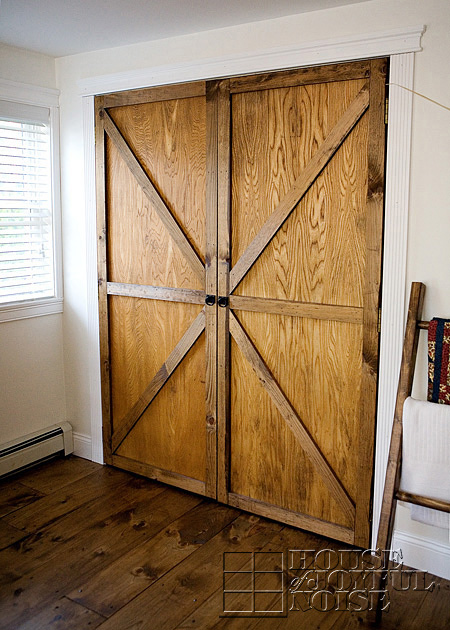
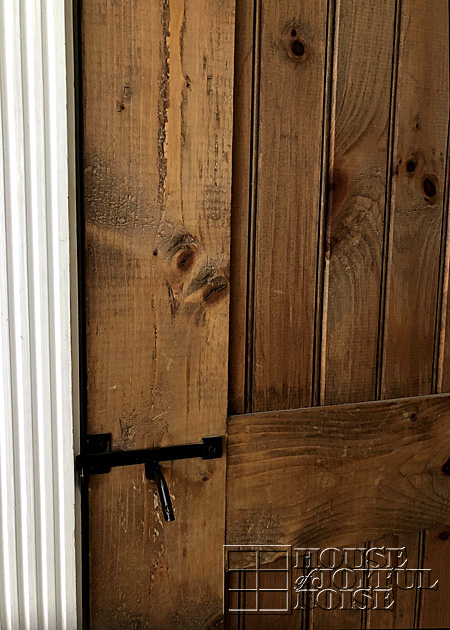
We simply refaced the solid wood doors we had, to fit the style of the room like barn doors, with iron ring pull handles.
A Few Other Room Details
And finally, let’s talk about those . . . . .
The SLIDING BARN DOOR SHUTTERS
In the planning of this room, (usually on Saturday mornings in our old room, sitting in our bed with our first cups of coffee), Michael and I brainstormed much about how we wanted to arrange the room, and what we would make of this feature wall, where the largest window was. I’ll save you some chatter and not run down all of our ideas, but suffice it to say that in the end, we wanted to save as much floor space in the room as possible, but do something awesome on the wall on each side of the window.
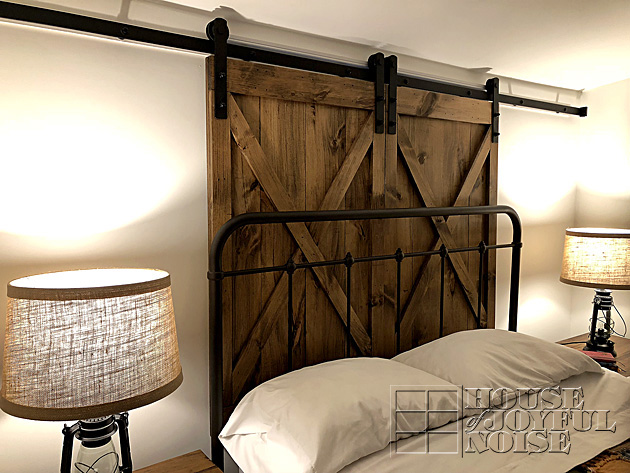 When we hit on the idea of sliding barn door shutters, we knew it was perfect! Not only so fitting in the farmhouse style, but functional and useful! Michel did an incredible job custom building these to size, and they glide beautifully. During the day time, they serve as decorative backdrops behind our lamps and nightstands. (As seen is photos earlier in this post.) At night, they cover the windows, and keep out all of the light in the morning. They also keep us warmer in the winter, when it’s bitter cold and storming outside.
Day or night, they are definitely an awesome feature in the room.
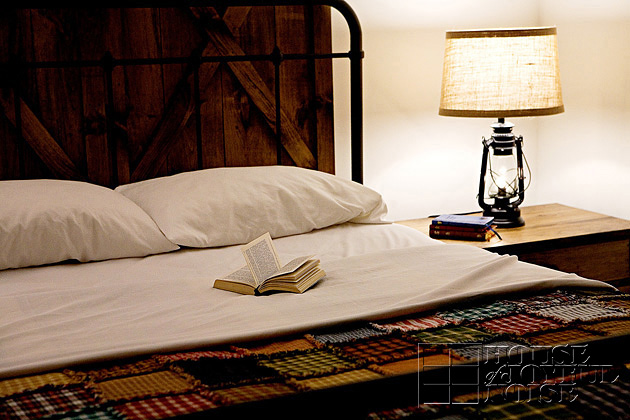
Wrapping it up, I just have to say, Michael and I BOTH love how our old farmhouse bedroom came out. It especially makes me happy how much Michael loves it. It’s always been important to me that we didn’t have a feminine room, as it’s his room, too. Admittedly, MICHAEL made this room become a reality. It is chock-full of his incredible carpentry work, and skilled hands. I am so very grateful to him and his ability to do stuff like this for us all of the time, and I am happy he loves the results of our bedroom in particular, as much as I do.
I spend most any spare moments I can in this room; even during the day time, if I can. I do most all of my prayer time in here, and at the end of the day, I cannot wait to take my shower, and crawl onto my bed with a book, or to play my guitar, just to wind down, and get ready for sleep. (That tends to take me awhile.)
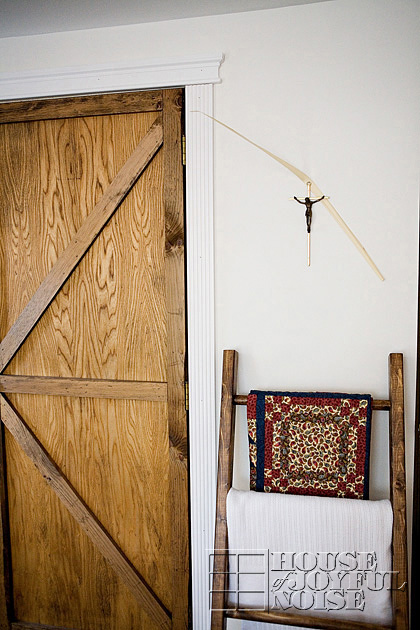
Across from our bed, we see Jesus on this small crucifix we have had for years. We’ve decided we just want a much bigger crucifix there, than this. So we are looking for one. We’ll spare no expense, because it’s something where the quality will mean a lot to us. We are so thankful to Him, for more reasons than we can count. He is the center of our family and the core of our hearts, and He unquestionably deserves the greatest place of honor we can give Him in our humble bedroom, as he does our home, always. When we find a new and more prominent crucifix, we’ll be sure to show it to you.
Thank you all so much for coming to see our new old farmhouse bedroom! It was our pleasure to show you around.
Now, if you all don’t mind ski-dattling, it’s getting a little awkward with you all in our here.
But let us know what you think! Scroll down to the comment box. And please be sure to stay connected with us by giving us a LIKE over on our public FACEBOOK PAGE!
And if you’d like to see our entire house addition after the triplets came, you can see it all starting HERE!
See you around, Friends!


I just love this farmhouse bedroom makeover. An amazing job is done by you. These before and after pictures are awesome.
This bedroom is a beautiful tranquil retreat. It makes it all the more special that you and your husband planned it and did it together. I would love to make a rag quilt similar to this. I would like to know how many different color patterns you used and how large are your squares? Thanks for sharing!
You’re right Cheryl, it is so special that my husband and I planned and did it together. We really love working togther, and have probably done 100’s of house and garden projects around here. They are all over this blog!
Our quilt is 21 different fabric patterns, and 6″ blocks – I think it’s 512 blocks all together, both front and back.
Hope that helps!
Laura / House of Joyful Noise blog
Oh Laura, this is just amazing! I adore the warmth of the wood and natural colors and textures. What beautiful work you both did and what a joy it must be to experience now. Thank you for sharing! xo
Thank you so much, Mary! The room really does bring us so much joy.
lovely room, so warm and inviting. Great workmanship Michael
Thank you so much, Roseann! It was nice of you to come and see it. We hope you’ve been well.
The Richard Family / House of Joyful Noise blog
Laura and Michael, what a wonderful job you have done together!
I Loved reading this and seeing all the beautiful pictures, you have created a beautiful space for rest,relaxation & recovery 🙂
Thank you for the shout out and including the quilt, it looks great in your BEAUTIFUL room!
I’m truly honored you choose me to make it for you!
Thank you, Amber! It wouldn’t be all it is without you!
Very nice job! Glad you’re happy and the house is complete now.
Thanks so much, Kim!
We don’t know about complete…..we always find more to do. It’s like a hobby that won’t die. LOL