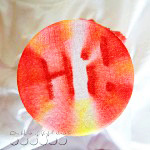
This just may be the coolest and most fun craft, I have ever done with our kiddos. If that wasn’t awesome enough, it is super easy, and it doesn’t make a mess either!! I know, right? It’s perfect for kid’s birthday parties, scouts, camps, etc. Our kids didn’t want to stop. They even made a couple of shirts for their friends. But all of you mothers, as we show you how simple this project is,….think outside the box, for yourselves, or other projects, too. I am!
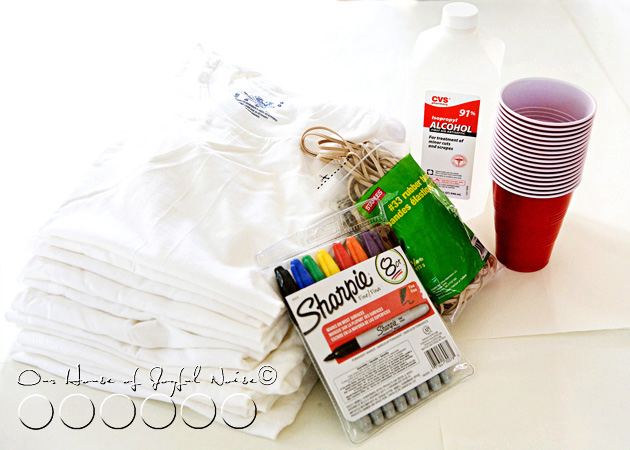 All you need is:
- some white t-shirts (in your sizes)
- sturdy plastic cups
- rubber bands
- bottled rubbing alcohol
- a (liquid) dropper
- and Sharpie Permanent Markers in colors!
Easy supplies to gather, right? Here’s how you get creative with them.
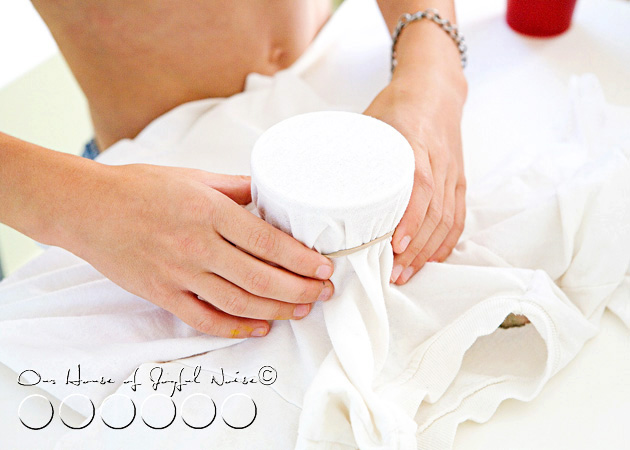 Lay your t-shirt on the flat surface you are working on, front side up. Take the cups, and arrange them upright in different places inside the t-shirt, one at a time. As you do this, consider that where ever you have a cup, that’s where a design will be put on your shirt. Secure each cup as you go, with a rubber band. (You can do more later, on the sleeves or backside of the shirt.)
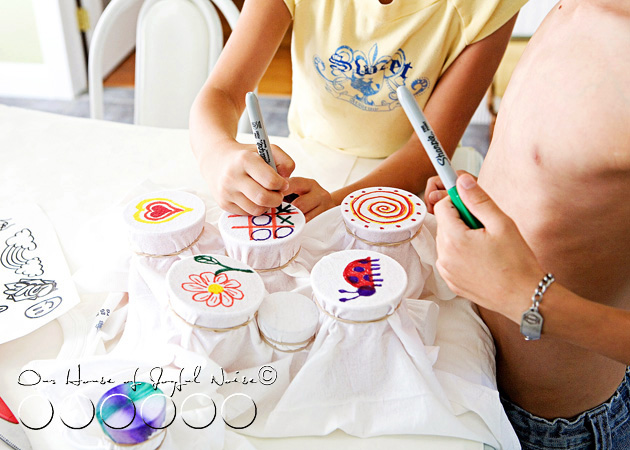 Using your colored Sharpie Permanent Markers, get creative and make some designs or simple line drawings on t-shirt fabric that is over the opening of the cups. My kids even played a game of Tic-Tac-Toe on one. In a moment or 2, I’ll get to what colors or techniques you may want to avoid, and which ones worked best. We learned from little mistakes so you don’t have to, and figured out some tips and tricks that I’ll share with you too.
You’ll be able to see them for yourself, too. ; )
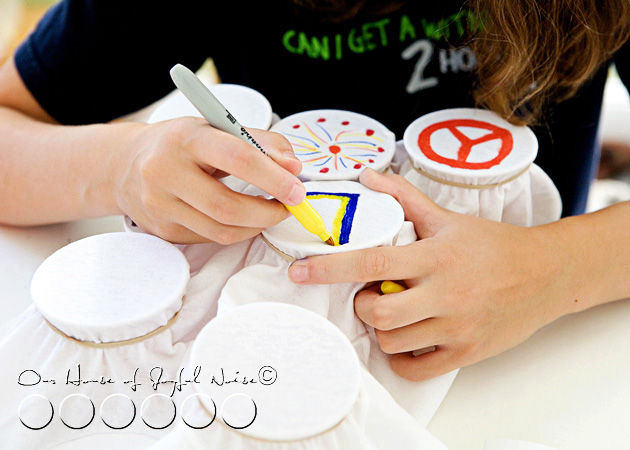 Each designer can personalize them in their own style, symbols, colors, or simple line drawings that they like, or mean something to them. Or if it’s a gift, think of the recipient. Simple words may be able to be used as well.
Here’s where it gets even more fun.
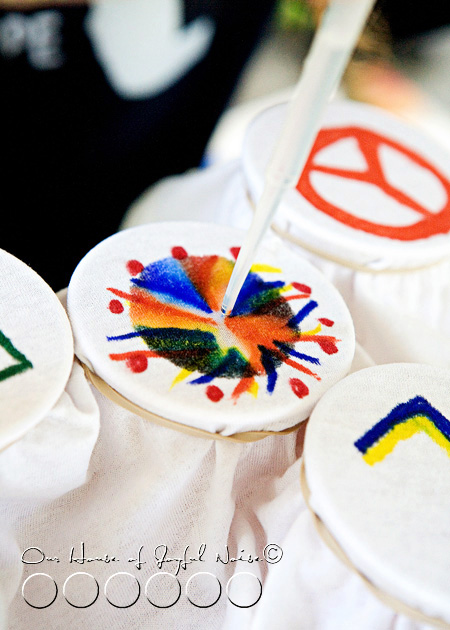
Working on one design at a time, slowly drop drops of alcohol in the *center of the circle/design. As you do, you will see the marker ink start to spread. You don’t want to drop too much alcohol though…..you need to do this slowly, and watch what is happening. The spreading will slow down, but if you watch carefully, it is often still spreading. If it does seem that it stopped, add more drops, one at a time, and keep watching.
*TIP: It’s important, to only drop the alcohol drops in the center. Reason being, it pushes the ink from the center, outward, spreading it evenly and nicely, for the right effect. Also, if the fabric becomes too saturated with alcohol, the drops drip into the cup beneath, which pretty much evaporate. But that is why it’s important to keep the cups pretty upright, as to not spill any colored alcohol that may be sitting in the bottom of the cup.
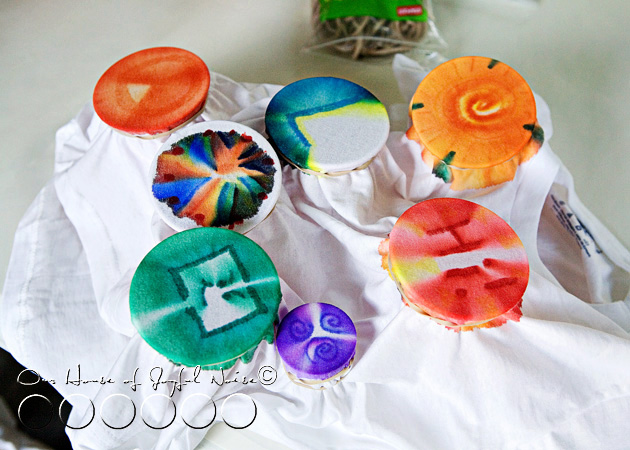 Once you get the feel for it, you can do more at once. As one design is spreading, you can start another (and another) beside it.
Do you see the multi-color burst? That one is still spreading very slowly. Do you see the little purple swirly one? That’s a little shot glass, instead of a bigger plastic cup. Perfect for the side of a sleeve too.
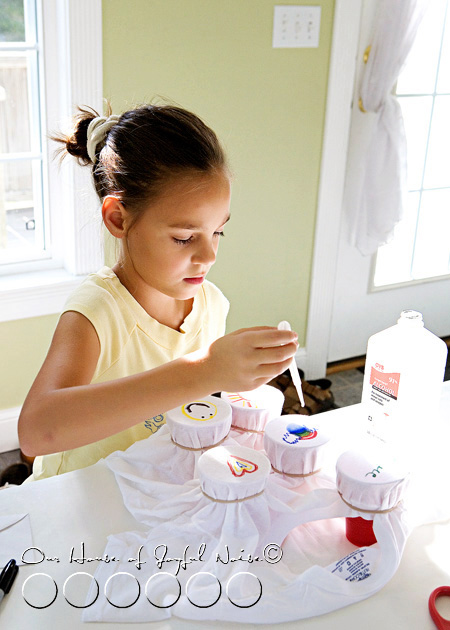
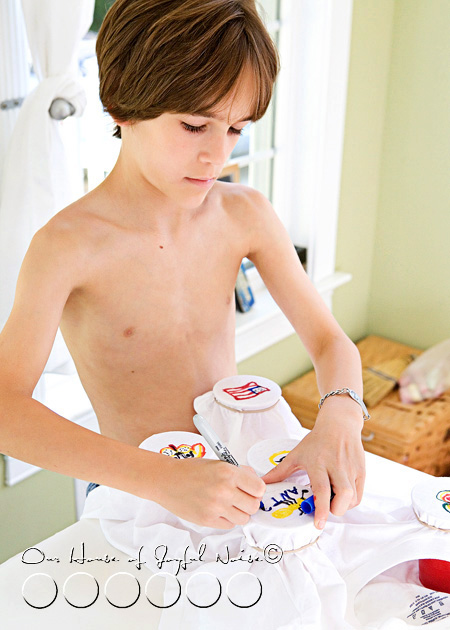
Here, {O} had finished drawing out her designs, and she’s now dropping alcohol on them. It’s really so exciting, to watch them and see how they are going to turn out.
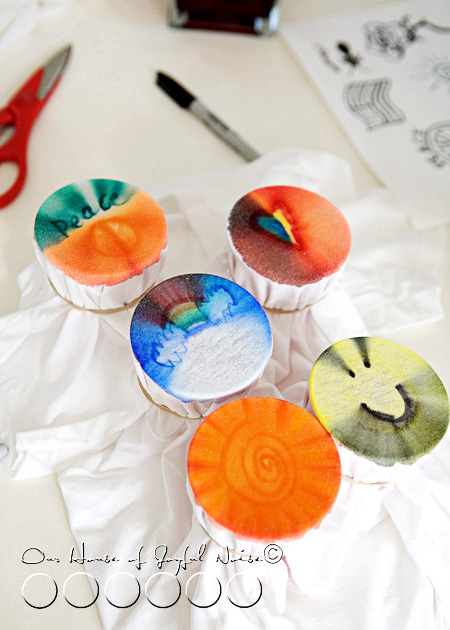
As you can see, black can get pretty messy. In the case of the smiley face, I like how it turned out. It reminds me of a record. Remember those? ; ) But if the black were in the center of the design, it really would have blotted out the rest of the colors.
Now look at the rainbow and clouds. Because she was dropping alcohol under the last color of the rainbow, where the center is, all of the color above that pushed up. Because again, it spreads from the center. So that’s a good thing to keep in mind with your designs. Blue reeeeaaallly spreads, so be mindful with that color, too. It may seem like it’s a lot to remember, but really, once you are working with the colors you, you get it quickly.
*TIP: We actually did a test t-shirt before we began our own t-shirts, and played a bit, just to see how it was going to work. But the colors’ chemistry is something we learned on the real ones. So you may want to consider 1 practice t-shirt for everyone to do a practice design on collectively. Or, you all can just live on the edge, and go for it!
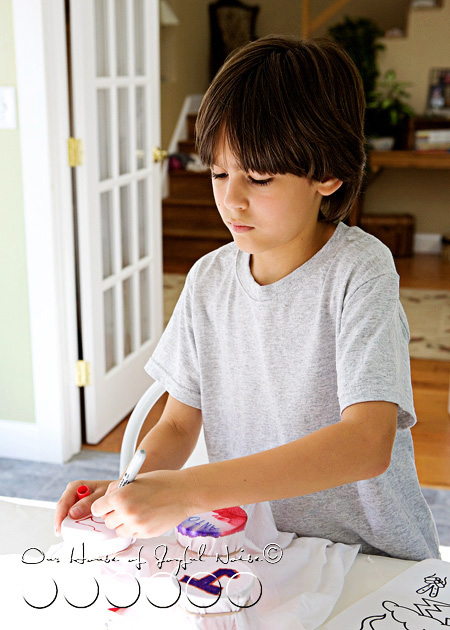
Here, the boys draw out their designs…..
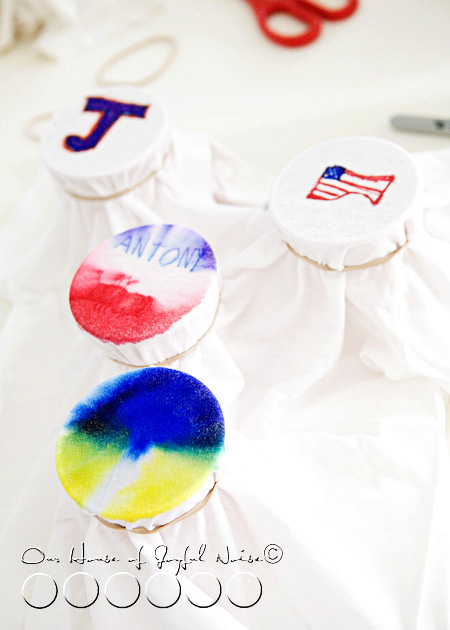
Sometimes, the ink will spread so much, that you can’t hardly tell what it was anymore, such as with the blue and yellow one above. It was a thunder cloud, with lightening coming out. But that’s ok! The designer knows what it was, which makes it fun! Other times, you can vaguely still see the deign, like a subliminal message. ; ) In the photo above, the very top two designs in the photo are not alcoholed yet. So let’s take a look at how those came out….
 See, I was concerned that that “J”, so colored in and outlined so darkly like that, might turn into a hot mess. Using dark colors and solidly coloring in something, is going to turn out much like that J. But the flag turned out pretty cool! Again….see how it spread from the center? It creates it’s own design.
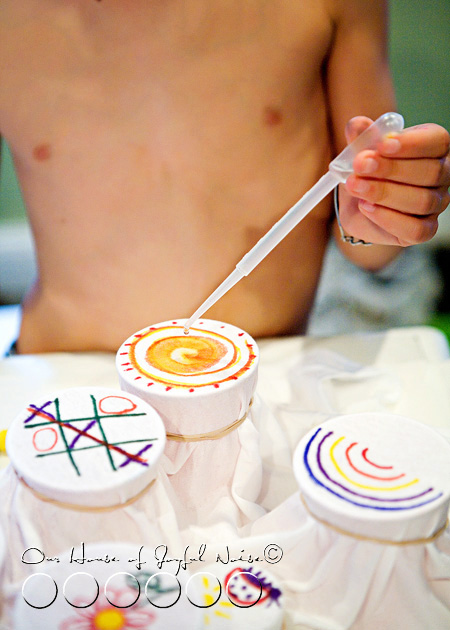
Drop…..drop…………….drop…..we don’t really want to stop!
Here are some of my favorite designs…..
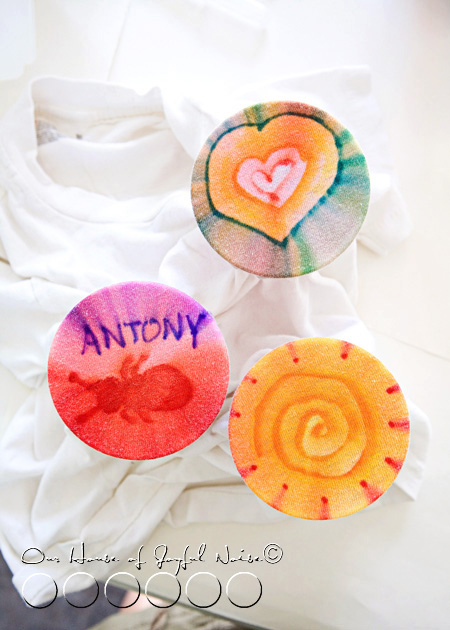
Antony…..get it? ; )
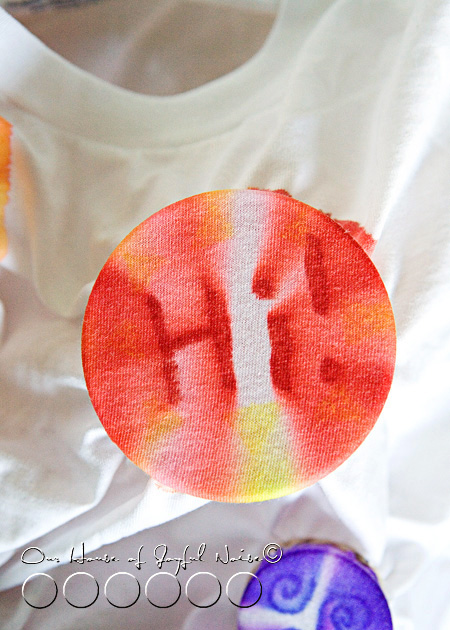
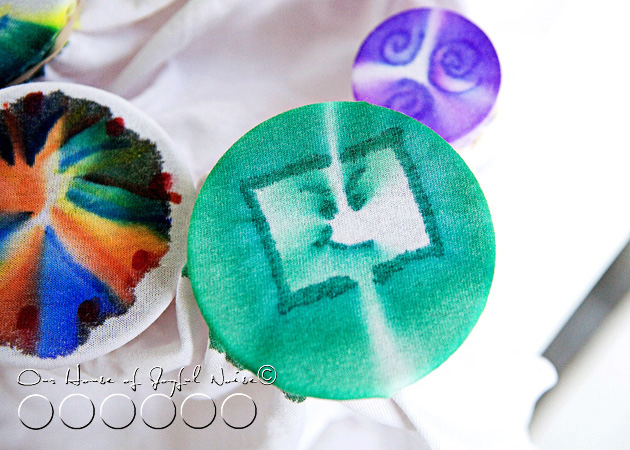 Have a nice day.
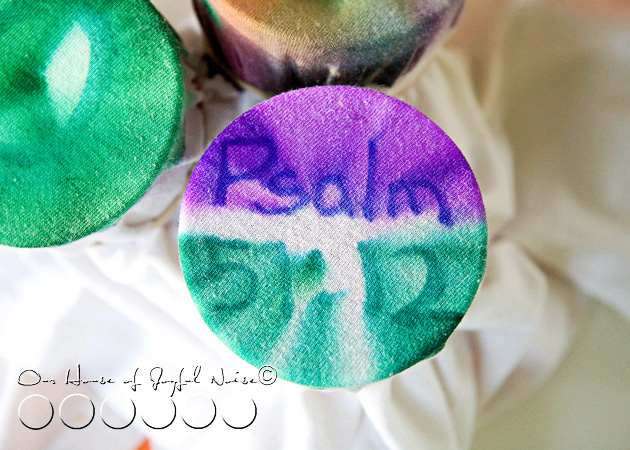 Love this one. It’s {S}’s design.
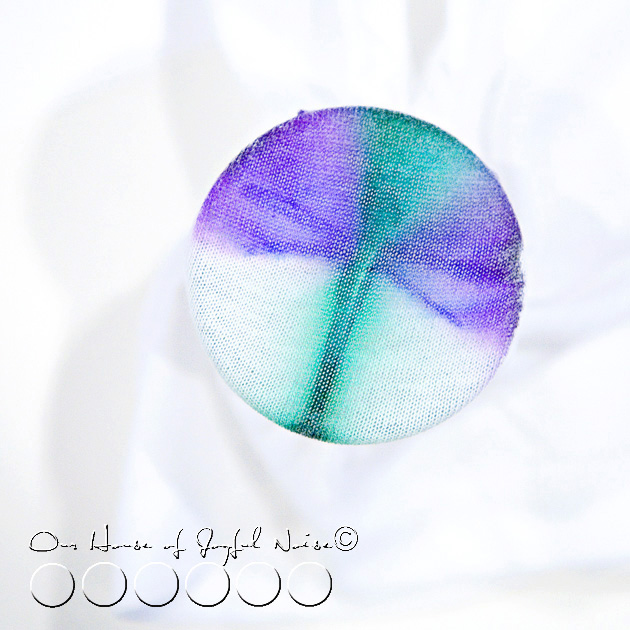 Dragonfly.
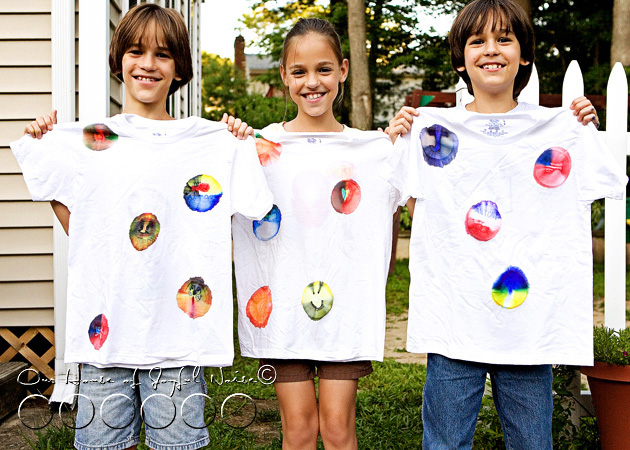
Here’s how the kid’s own t-shirts turned out. WHICH, they are loving wearing. We have not washed them yet. I think I will just hit them with an iron before throwing them in the wash, to kind of ‘heat-set’ them first. Even though, it IS permanent marker, and shouldn’t come out.
Also…the shirts dry very fast, because it’s just alcohol, which evaporates.
Next time……because there will be a next time, very soon……we’re going to try not securing the rubber bands so tightly, and try to make a less defined circle. Because it’s the fabric pulled tight over the edge of the cup, that really keeps the ink from spreading much more. I bet it would look cool to let it go, too.
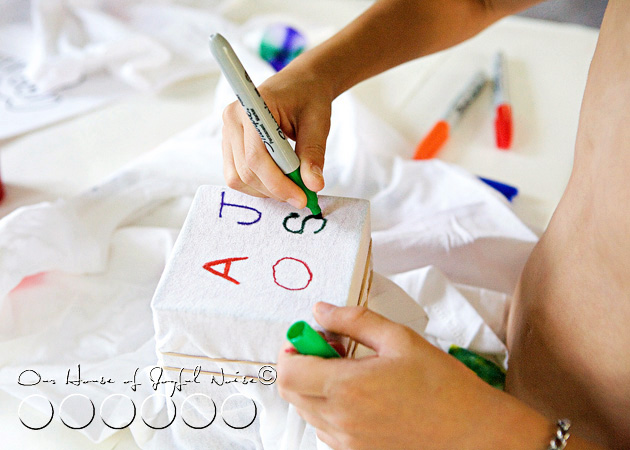 Our kids ‘signed’ the shirts to their friends, on the back side, bottom left, of the shirt. Here, the shirt is secured over a square vase container.
Check out how cool it spread…..
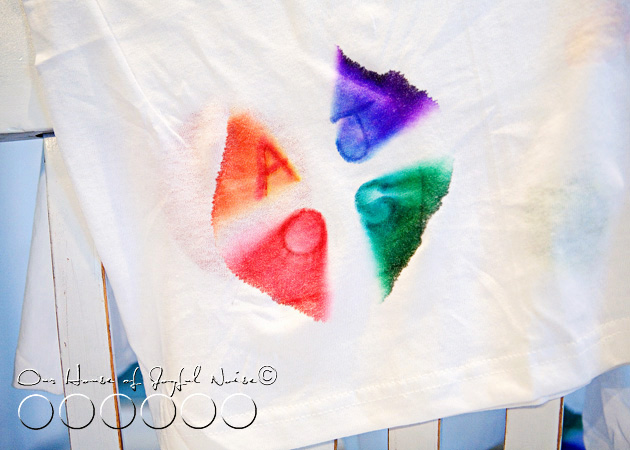 I have more designs in mind, that will be fun trying.
Other Ideas: This technique can be used in the more traditional way that tie-dyed shirts are done, by twisting and rubber banding the shirt, coloring it with markers, and applying the alcohol.
I’m going to try making my own shirt, with a design just in the center, on a women’s t-shirt. Maybe a little something cool on the sleeve cuff too.
Another idea: white bandanas!!
Hope you loved this easy, fun crafts, that’s (not just) for kids!!
You may also be interested in another t-shirt craft we did years ago: T-Shirts with Sole!
* SPREAD the craft idea with others! Facebook it, Twitter it, or Pinterest it for yourself.*
Have fun with it!
If you and your kids do this craft, take photos, and blog it….come back and leave the link in the comments of this post, so we can see how yours came out!
******

Can the shirts be safely washed with other clothes?
Hi Jennifer,
We have never had any problem washing them with other clothes. Since the designs are made using permanent markers, it doesn’t bleed or wash out. It just fades a bit like anything, over time. My kids had and wore their t-shirts they made, for many years.
Hope that helps.
House of Joyful Noise blog
Thanks for the quick reply. This will be a Father’s Day project in our Sunday School.
You’re welcome! And how wonderful! I hope the kiddos have a lot of fun making them, and are excited to give them to their fathers!
House of Joyful Noise blog
I really like what you guys are usually up too. Such clever work and reporting!
Keep up the amazing works guys I’ve incorporated you guys
to blogroll.
Thanks for sharing your thoughts on tee shirt design. Regards
We are trying this tomorrow night on white pillowcases! A great idea! Thanks for sharing!!
I’m doing this with my kindergarteners for a field trip. Thanks for the easy to follow directions. The only question I have is…why would you put your son on the internet without a shirt? I think that it’s very strange, and it makes me uncomfortable. You seem religious, so I don’t get it.
Hi Shannon –
Thank you for your comment, and you are quite welcome. I hope your K class has great fun with this project, and be excited to wear their shirts.
You know in retrospect, as I edited the photos, I did wish my son had happened to have a shirt on; just being aware that some people have strong opinions about that. But I personally really don’t, at this age especially, and I didn’t really want to exclude him from the blog post. The fact of the matter is, it was a very hot August/summer day, he is a boy, and was only 7 years old here, so he can be shirtless. And you know, Jesus is all over the internet, shirtless, and with less than that on! You’re right. I am very religious. So I can’t imagine anyone seeing anything but kids enjoying doing a fun craft in these photos. This post has been up for almost 3 years, and our blog has been going since 2008. This is the first comment I’ve gotten on this topic, but was still food for thought to revisit I guess. Anyway, thanks again for dropping by.
Take care and God bless – Laura / House of Joyful Noise blog
I love this project and run a pre-teen group at my church. We are doing this for our Friday group. I was wondering if the alcohol has to be a certain percentage? I see in the picture it was 91%
*** Ps. As a Christian mother of 7, (yes seven) my son’s take their shirts off all the time. They run all over the place without them. You can find my middle son playing basketball without it constantly. Posting a pic of your son without his only gave the impression that as soon as it dries, these shirts are safe to put back on. Nothing else!
My blessings to you and thank you for sharing this idea! 🙂
-Kara
Oh Kara!! I feel bad that I’m just getting back to you, and it’s Friday today! :/ I’m so sorry. To answer your question anyway though; I don’t know the answer for definite, as I have never tried it with the 70% alcohol > only the 91%. That said, I know the 70% one is quite weaker of an alcohol, so I would GUESS that it may not have quite as much effect. An experiment with the 2 would be interesting, to observe the difference in their performance.
***On another note, THANK YOU for your support and encouragement, as a fellow-Christian mother of boys!! 🙂
God bless you and yours, and thanks for coming by! I really hope your project went well with your pre-teen church group!
Laura / House of Joyful Noise blog
Wonderful tshirt idea! I love this and featured it on my blog today 18 New Year’s Eve activities for kids http://www.sohosonnet.com/crafts-and-diy/diy-holiday/new-years-eve-countdown-activities-for-kids/
Ohhh, what a FUN New Years’ Eve activity to do with kids! Wish I thought of that. My kids would have loved to do this again, and they could have made 2014 shirts! lol. I originally saw an idea like this elsewhere, and then got a little carried away with it. LOL It’s science, fashion and fun, in one! Thanks so much for featuring this on your blog! – Laura/House Of Joyful Noise
I am an educator at a campground in NC, and last weekend I did this as one of my programs. It was awesome! The kids AND parents loved it! In fact 2 different people said that they were going to do it as a fundraising activity. Thank you!
Awesome, Sarah! Honestly, it wasn’t all completely my idea, but we made it our own. I’m really glad you found the project here on our site, and that it inspired a whole lot of fun and smiling faces at your campground! Thanks for coming back to share that news! I love it when people do that.
Best wishes for continued creative and successful activities! – Laura / House Of Joyful Noise
Waooo, what a great idea and fun for the kids. We are having VBS (Vacation Bible School) and this look like fun for the kids. Thanks.
Sure, it could be a great activity for VBS! I’d suggest having a poster board of ideas that show some simple examples of Christian designs, so their t0shirts turn out somewhat within the theme of your VBS. I bet the parents will be impressed with the shirts they made, and brought home!
Thanks for coming by, Iraida! Have a great VBS this year!
Laura / House Of Joyful Noise
uhoh… have become slightly addicted to trying out your ideas.
sooooo….. 2nd craft was this t-shirt idea. Kids loved doing it (ok, well the 3 yr old and 6 yr old that were here…. the rest have a PD day and stayed home with their parents). Our “experiment” t-shirt turned out really cute but I am glad I didn’t have them make their own at 1st go. I heat set it with an iron and then washed by hand in cold water and….eek…. the water turned a lovely shade. Wash # 2…. still turning pretty colours. Wash # 3. Still turning colours but getting much better. Was # 4 and water was finally clear. Definitely NOT colour fast right away and I would NOT wash it with anything elsse that might soak up the colour. Since I know you did your shirts way back in 2011 just curious to find out how yours washed. I can’t send you a link to our creation since I don’t blog. I did post a photo on FB for my friends to take a look though.
Hi Lise!
I apologize for the delayed reply here, but your crafting mishap puzzled me, and I had to do some tests. We did these t-shirts over year ago, but I didn’t recall having any problem at all with the colors running. My husband, who also helps with laundry, didn’t remember having a problem either. Also, the kids still have their t-shirts, and the t-shirt/material is white all around the designs.
Still, I had to test this. So I cut some white t-shirt material, and marked it up with every color of the Sharpie markers we used, and poured some alcohol over it to spread the color, as we do in this craft. Once the t-shirt dried, I put it in a clear glass of water, and swished it around. The water remained crystal clear, with no color releasing from the shirt.
So my only thought is……Are you sure you are using Sharpie PERMANENT markers? They have to be permanent. Other than that, I cannot figure out why you had a problem with the colors running. Please check the markers you used, and let me know.
ahhhhhh stink. I am bound and determined to do this darn craft with these little stinkers. LOL…. I’m heading out to buy new markers. I used Sharpie permanent markers but maybe they were too old (who knows).
Going shopping after Birthday breakfast and I’ll get back to you. Have a good one.
hey, it’s me again. So the new markers worked. Maybe mine were that old that it made a difference…. I don’t know. Went and got new Sharpies and it worked wonderfully. Washed in cold water, hung to dry and shirt looks great. The little ones will be making their creations this week.
I did try doing this with non-Sharpie permanent markers and they ran when washed. It’s all in the Sharpie.
Thanks bunches.
Awesome, Lise!! Thanks for the report! So happy you made a success of this t-shirt craft, because it sure is a fun one. My kids still love their shirts. We could make pretty shirts for us women, too. ; )
Love it!
Wonder if you could use big embroidery hoops to do a larger design?
Wonder also if you could do a garden design and lightly spray mist the alcohol on to create a sort of Monet impressionist effect…?
I truly love your method though…it tickles to the hippie child in me! 🙂
Cheers!
Did you try this? If so, how did the spray work? Were the embroidery hoops as easy to use as a smaller hoop? Did it make writing/drawing difficult?
Sarah, this is my family doing this project in the photos, years ago. So yes, we tried this. If you note in the supplies list, as well as in the photos, we didn’t use an embroidery hoops of any size. We used bowls or cups, and rubber bands to hold the shirts in place. The kids managed to draw quite well. A little tricky, with no support under the fabric or your drawing hand, but if the fabric is pulled tight enough, it comes out as good as a drawer or writer you are. 🙂 This project was great fun, so we hope you give it a try. Our kids enjoyed their t-shirts for many years, until they grew right out of them.
The Richard Family / House of Joyful Noise blog
This is awesome! I’m pinning it and putting it on my FB page…I may even do it with my kids and count it as art! 🙂
Oh, this looks like fun AND it’s supposed to rain here tomorrow so I think I know what we’ll be doing…
Great idea, Mag! It’s a perfect rainy day craft project! Have fun! If you blog it, come back and tell us, or link us, so we can come see how yours came out too! : )
Off to buy some white t-shirts!
Paula!! I SEE your beautiful face!! I could kiss it all over! Have fun doing this craft! Let me know how you all love it!
Can’t WAIT to try this with the kiddos next week! Thanks for the GREAT idea!!!
I think they are going to love it!! Make sure no one is sniffing the alcohol. LOL. Have fun! Let me know how it goes!!
I love this! What a grea idea! And so much fun with the kids. Hmmm, they would have to touch my precious sharpies though. LOL
Buy them their own?? You’ll want to join in, with this one, Jenni! ; )