
This is a fairly easy craft project tutorial where you can create some really fun or beautiful wrap jewelry for kids or adults. Depending on the materials you use, you can really get all kinds of styles using the same concept. Also, keep in mind; they can be homemade Christmas gifts, and made ahead of time! We’ve made these as Christmas gifts before, and they were very well received! So this may be a great idea for all or some of the little girls and ladies on your list. Or, maybe you’d like to add to your own accessories! The pieces we created so far have been more for girls, from little girls to women, but with a little creativity and thought, we think we’ll be able to come up with some boyish pieces as well.
You don’t need much in the way of supplies!! Here’s a quick run down, depending on the design of the piece you are making: Memory wire, bottle-nose pliers/cutters, a bead assortment, charms, waxed cotton cord, and possibly acrylic nail polish.
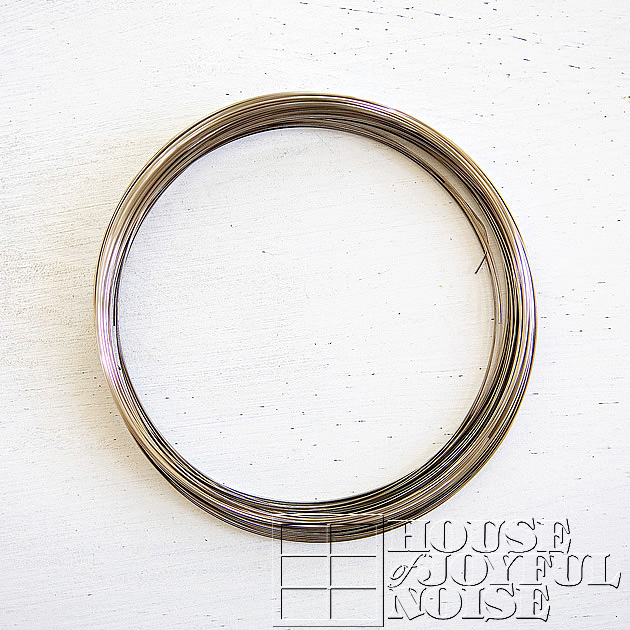
This is memory wire. It is called such, because it keeps it’s nice shape, no matter how you try to bend it. We threw out the packaging, but this wire can be found in any jewelry supply aisle of any craft store. There are a 2 or 3 sizes, and this is the largest for necklaces, but it works perfect for grown ups or little ones. The above is one piece, and you just cut off what you need.
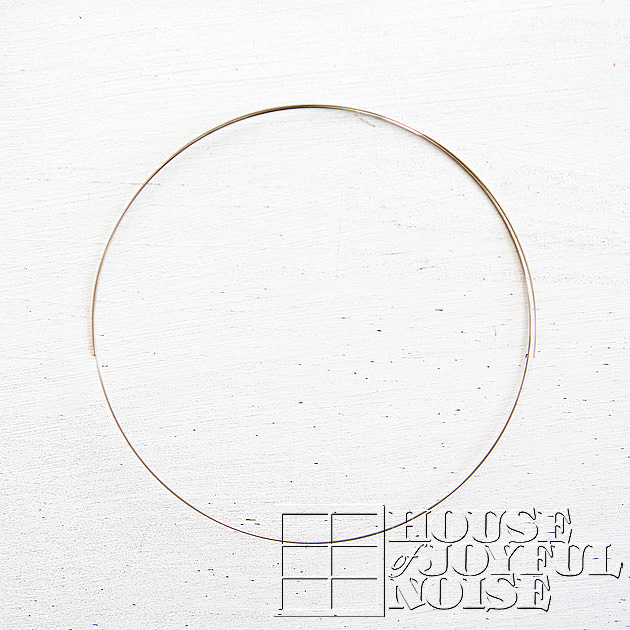
Above is a piece cut off to be just the right size. Using bottle nose wire cutters, we cut it to be 1-1/2 circles, and that seems to be just about right for grown ups and little ones alike.
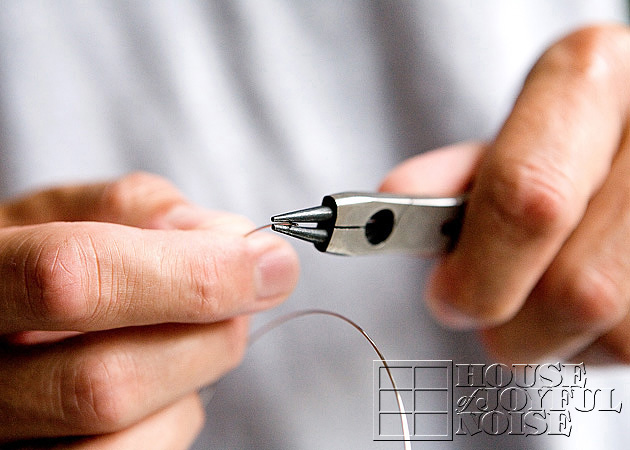
Next, using bottle nose pliers (the same tool that has a cutter on it as well), you want to twist a little loop at the end of the wire. This little loop is to keep any beads you put on from falling off on the other end. You’ll only do this on one end to start, because you need to slide on your beads first on the other end. When all the beads are on, you loop the other end to finish.
So…..you grab the tip end of the wire, and …..
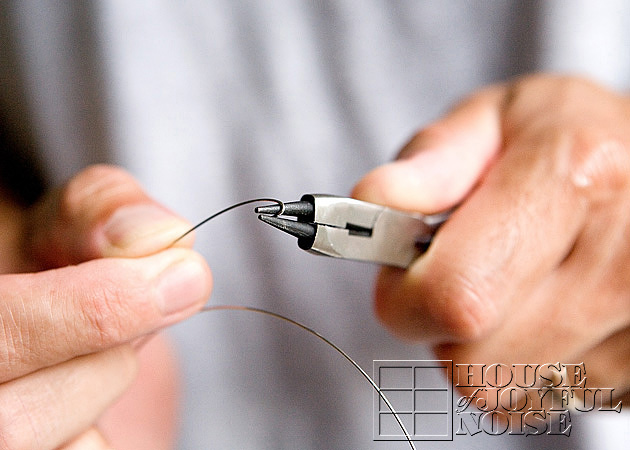
….just twist the wire into a little tight loop.
Michael does this for me, because honestly, my hands are not strong enough to do it myself. But don’t let that discourage you, because {A} can do it on her own just fine. So I guess what I’m saying is, I’m just weak.

This is what the little loops should look like. It’ll stop any beads from being pushed off.
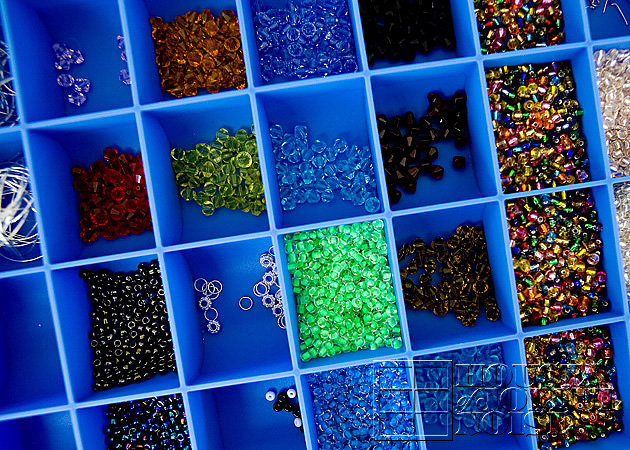
Here’s some of our assortment collection of beads. These container organizers are really nice! We’ve done lots of projects using beads, so collecting them and keeping them sorted like this is fun and efficient.
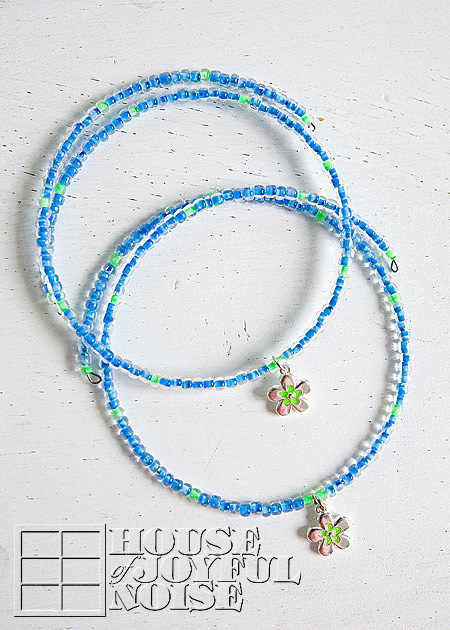
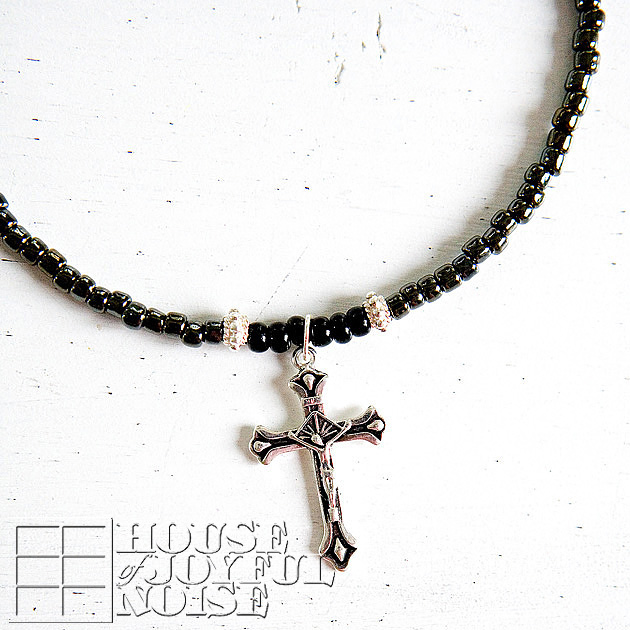
Here are two little girl’s necklaces, all done. All kinds of charms and gems can be found in craft supply stores, or online. These charms matched some beads we had perfectly! {A} made these.
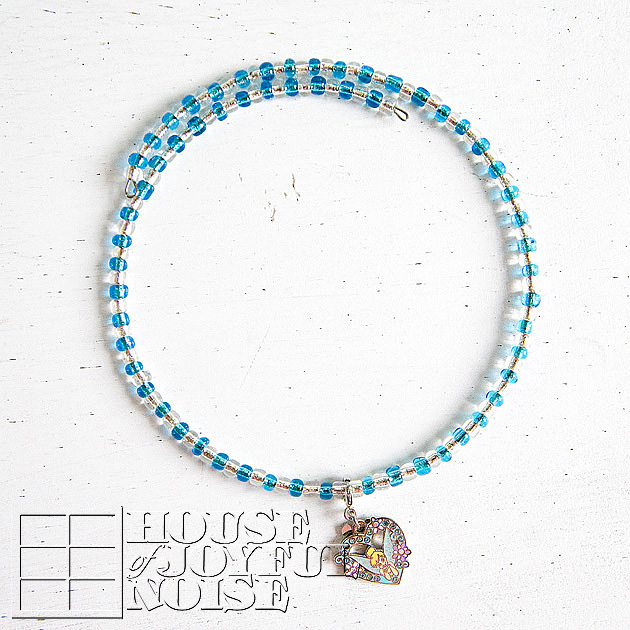
Here’s another little girl’s necklace.
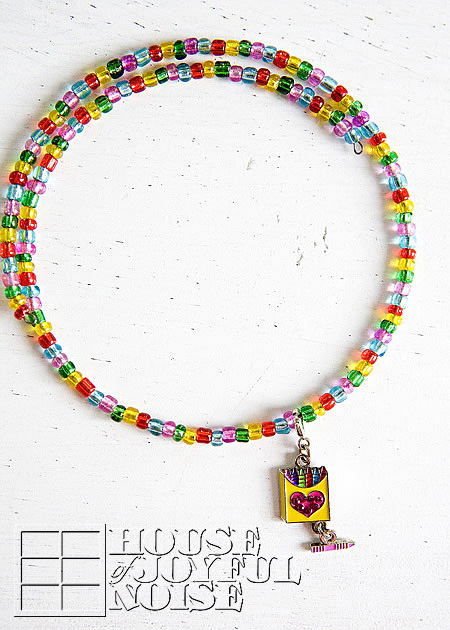
This one is adorable…
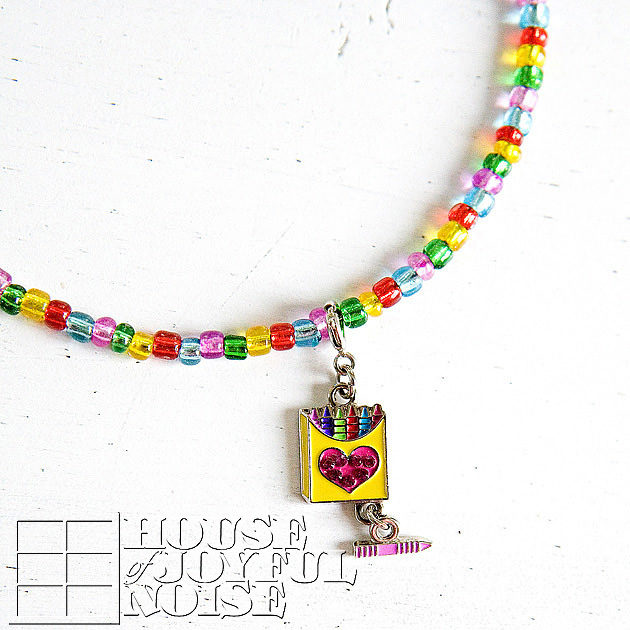
…..it’s a crayon box, as you can see. {A} made those as well.
As we’ve said, there are all kinds of charms in craft stores, but there are also
lots of great charm places online, and here is one we’ve ordered from: charms
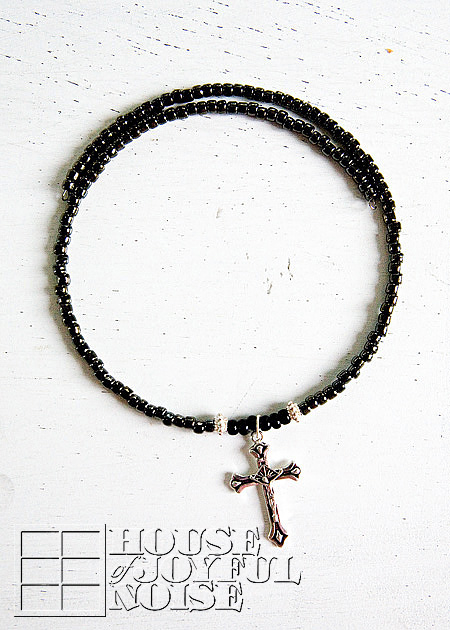
And for some older looking pieces, we just found this place and this place as well.
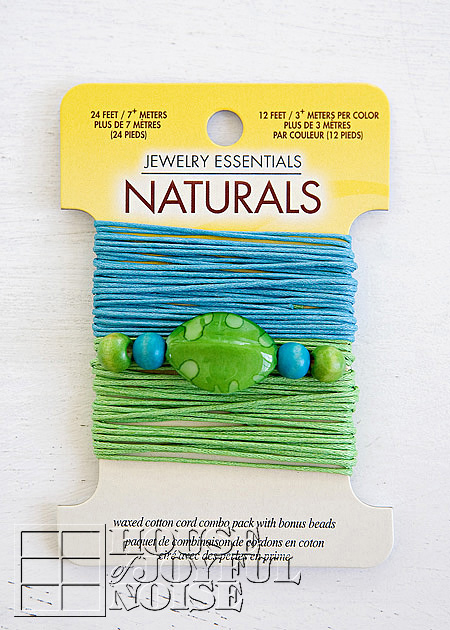
Here’s another option, above. In the jewelry section of craft stores, you can also find little sets like this, all ready to go. This set has 4 wooden colored beads, a beautiful polished stone, and dyed waxed cotton cord.
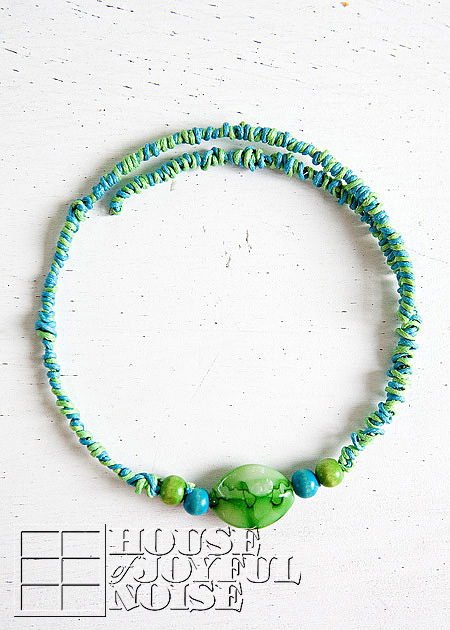
So I used that set to make this necklace above. This one wasn’t quite AS quick to make as the all bead ones. I looped one end of the wire, (well, Michael did), and put the stone and beads on first, centered as I could, and then looped the other end right away. Then I wrapped the colored cord around the wire. It did take a but more time, and patience. I wanted the cord sort of twisted and irregular, but you can also wrap the two to make it striped, all the way down the wire. There are a couple of small challenges with this design, but I’ll share some solutions: 1) The cord tends to just slip around as you wrap it, making you quickly realize you are getting nowhere, fast. So you need to start by tying the cord at the loop end of the wire, and then wrapping around the loose ends. I used acrylic nail polish right in the beginning there, to help secure it.
2) The other challenge is just checking as you go, to be sure the beads and stones are going to end up centered on the piece, as they should be. It’s a little tricky, and I think mine is a little off. But use the two ends of the wire to gauge wear the center of the piece as a whole is. Is anyone following what I’m trying to say here? lol
I made this one for ME. : )
I LOVE it!!
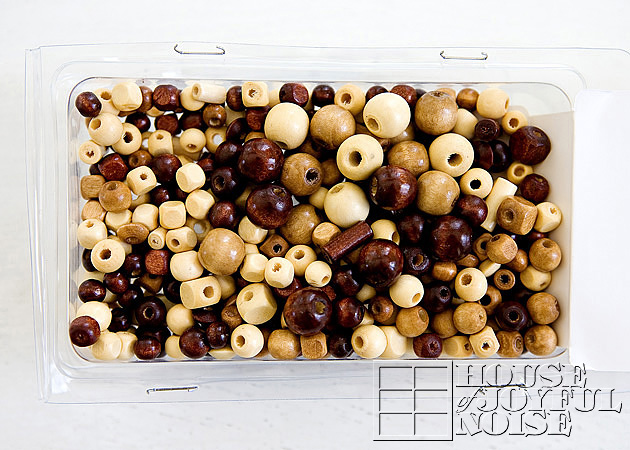
Here’s some other kind of assorted wooden beads that would work.
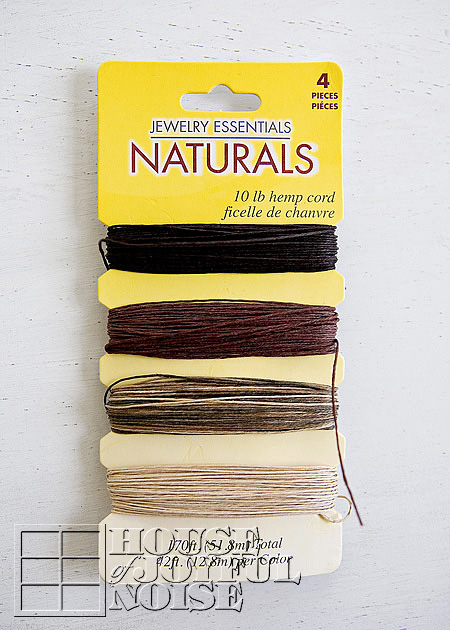
They would look really nice with these natural shades of hemp cord. Together they would make a lovely necklace for a neutral or warm toned outfit.
Here’s another idea: They sell much smaller memory wire, so you could make matching bracelets to go with any or all of these necklaces! For instance, you could do the necklace with the beads and charm, and then a bracelet with just the matching beads!
Here’s our little model, {O}, who by the way, made her own necklace!
So kids can do this craft project with very little assistance, using the beads and charms. They just need a little help to cut the wire, do the loops, and maybe put the charm on. These particular charms we ordered just have a regular round necklace clasp with the little lever. So they can put it on the center after all of the beads have been put on, and someone loops the ends of the wire.
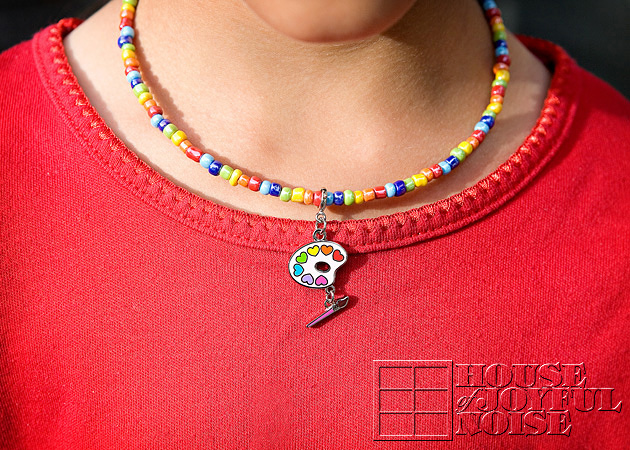
It appears about the same fit on kids or adults. It’s just with kids, it overlap wraps around at the back more so than on adults. But I find them pretty comfortable, and definitely stylish.

Cute, huh?
We hope you enjoyed this craft project! Let us know what you think, and if you have any questions at all, just ask and we’ll be happy to clarify! We hope it makes for a great gift idea for someone, even if that someone is yourself. : )