• HOME
  • {A}’s Chipmunk Training Archives

 Homepage

  • The Homestead
    • Home Projects
    • Home Improvement
    • Home Decor
      • Seasonal Home decor
        • FALL Home Decor
        • WINTER Home Decor
        • SPRING Crafts and Creations
        • SUMMER Crafts and Creations
    • Our Chickens
    • Gardening
    • Organization
    • Re-Purposing
    • Furniture Refinishing
    • Budget
  • Crafts & Creations
    • Seasonal Home decor
      • FALL Crafts and Creations
      • WINTER Crafts and Creations
      • SPRING Crafts and Creations
      • SUMMER Crafts and Creations
    • DIY (Do-It-Yourself) Project
    • Kids Arts and Crafts
    • Homemade/Handmade Gift Ideas
    • Holiday Crafts
    • Fan Pulls
    • Free Printable/Downloadable
    • Sewing Projects
    • Giveaways
    • Business Features
  • Recipes/FoodFun
    • Breakfast
    • Lunch
    • Main Dish
    • Sandwiches
    • Appetizers
    • Slow Cooker
    • On The Grill
    • Side Dishes
      • Soups
      • Salads
    • Baking
      • Breads, Rolls and Muffins
    • Snacks
    • Treats
    • Desserts
    • Drinks
  • Homeschooling
    • Elementary Homeschooling
      • Elementary Homeschooling READING
      • Elementary Homeschooling MATH
      • Elementary Homeschooling LANGUAGE ARTS
      • Elementary Homeschooling SCIENCE
      • Elementary Homeschooling HOME ECONOMICS
      • Kids Arts and Crafts
    • Middle School Homeschooling
      • Middle School Homeschooling SCIENCE
      • Middle School Homeschooling HOME ECONOMICS
    • Language Arts
    • Math
    • History / Social Studies
    • Geography
    • Foreign Language
    • Field Trips
    • Games
    • Nature Study
  • The Big Picture
    • Life In General
    • Celebrations
    • Faith
      • Into the Light; The Series
    • Giveaways
    • Reviews & Sponsors
  • Photography & Lettering
    • Photography
    • truck lettering
    • vehicle graphics
    • Newborns
    • Kids
    • Engagement
    • High School Senior Pictures
    • High School Senior Pictures Sneak Peeks

Christmas Advent Calendar Idea for the Home

November 25, 2012 By Laura 9 Comments

        As I type this post, it’s the end of the weekend following Thanksgiving, and the last weekend of the month of  November.  For many families, this is the weekend their home gets decorated for Christmas!  While it probably would have been nice to share this idea with you just a little sooner, I personally prefer to get past Thanksgiving, before I can (or even want to) focus on Christmas.  That being said, there still are several days to spare before the first of December is here, so you still have time to do this simple and beautiful idea, for a Christmas Advent Calendar in your home.  This idea is something I created  two years ago, and I thought I’d share it with all of you, in case it’s something you’d like to try for your own kids.


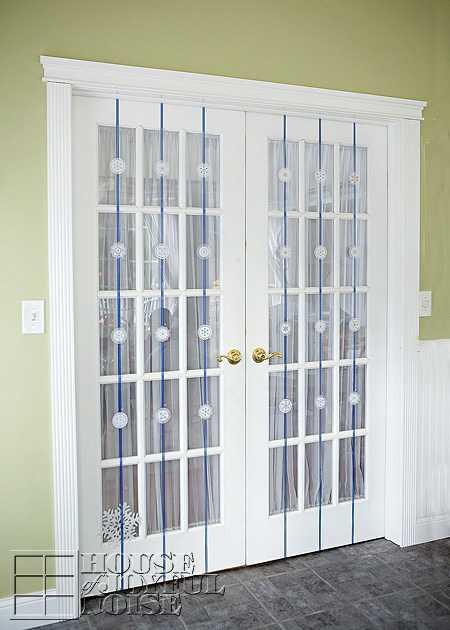
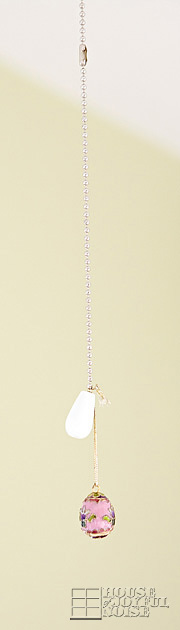
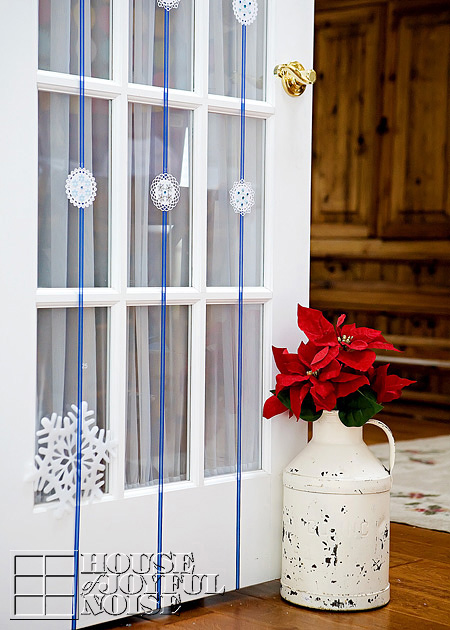
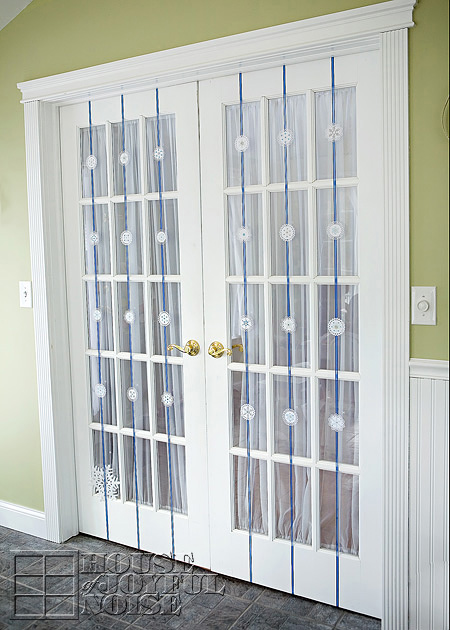
If your a frequent visitor here at our blog, you may have seen us decorate our french doors like this before.  Using door length ribbons, and placing a decorative element on the ribbon strand in each window, I call these ‘fancy strands’.  I’ve made them for the season of spring, and also Halloween. So this project started out with the same single intent of dressing up our French doors, in this case for the festive season winter, but immediately turned into the idea of using it as a home Christmas Advent Calendar for the kids. For us, December and the the Christmas Advent Calendar is not so much about the countdown until Christmas Day, but celebrating the whole season each day.  This idea made every day really fun for our kids.

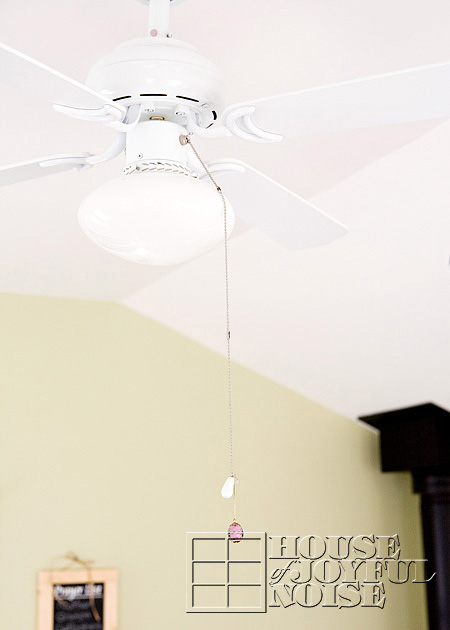
You don’t need French Doors in your home, to adapt this idea!
You can do the same thing using other areas or parts of your home. Some suggestions are using regular doors, a large wide window, the banisters of the stairs in your home, or even a wall.  Look around your home and find your options, and then just make it work for you!  In addition, you can create this using any theme or colors. You may want to use red and green ribbon, with paper gift elements, or gold ribbon and ornament shapes.  The theme and look of it is part of the creative fun.  I wanted mine to work throughout winter. When Christmas was over, we simply peeled off the numbers on the windows, and the strands stayed through February or so.

I’m going to tell you how I made this Advent Calendar so simply.


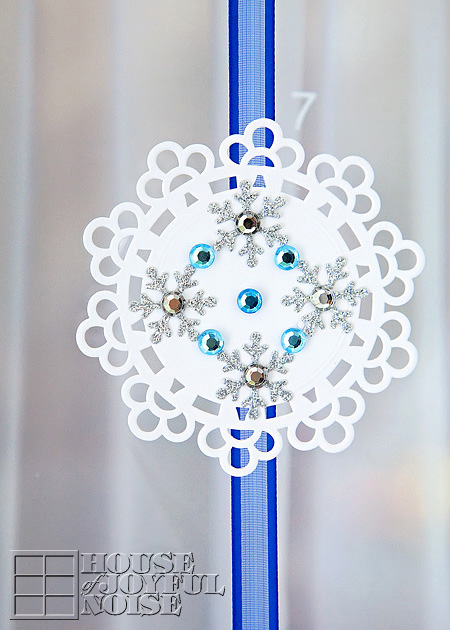
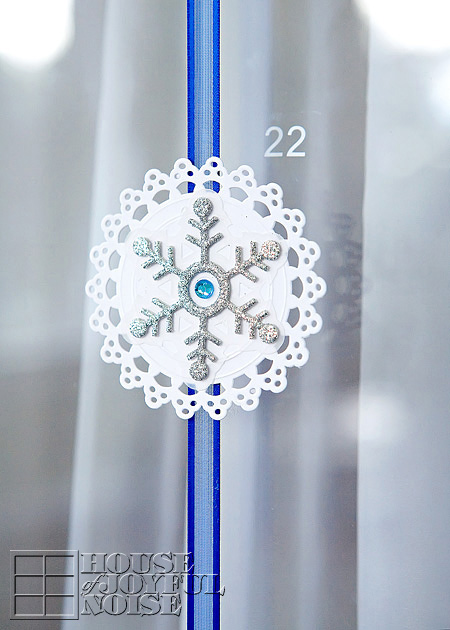
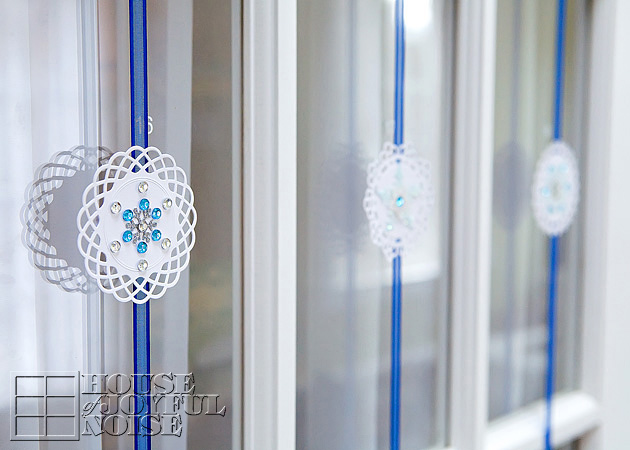
The snowflakes were fun to make. I actually did not just buy them this way.  The white paper snowflake alone, are die-cuts I bought packaged loose, in the scrapbooking area at Michael’s Arts and Crafts.  To give them some sparkle and make them more beautiful, I also found sticky some snowflake-ish elements of glitter and rhinestones, and put them together to make my own specially designed snowflakes. So easy and fun, creating each one!

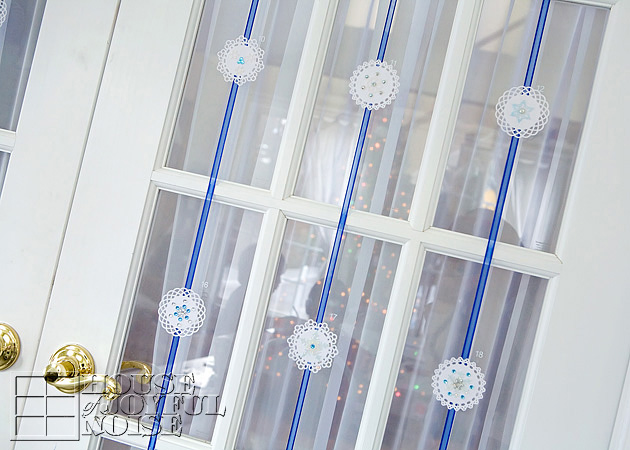
I chose blue ribbon for my winter theme, and placed a single 1-piece length from the top to the bottom (underneath) of the door, down each row of window frames of my doors.
I measured the height of the doors, and made sure I bought enough ribbon spools for 6 whole full lengths. We have 30 window panes, so plenty for the 25 days until Christmas.


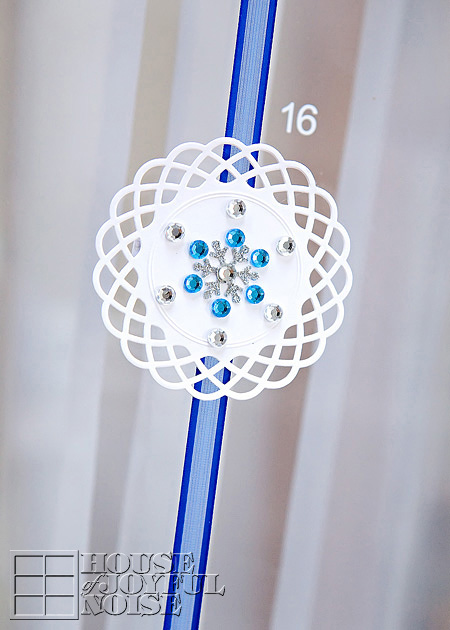
To number the Calendar for the days of December, we cut small white vinyl numbers, and simply put them on the glass besides the upper-right of each snowflake.
However, if you are creating your advent calendar elsewhere in your home, the number can certainly be put ON the paper elements.
On front side of the snowflakes, it’s just pretty.
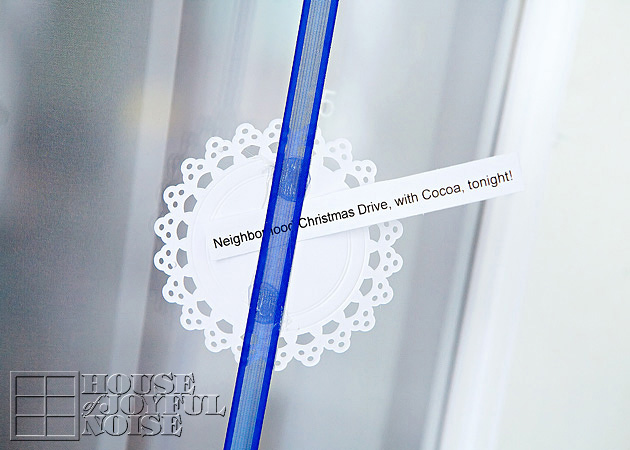
But on the backside, it was designed to serve a purpose.


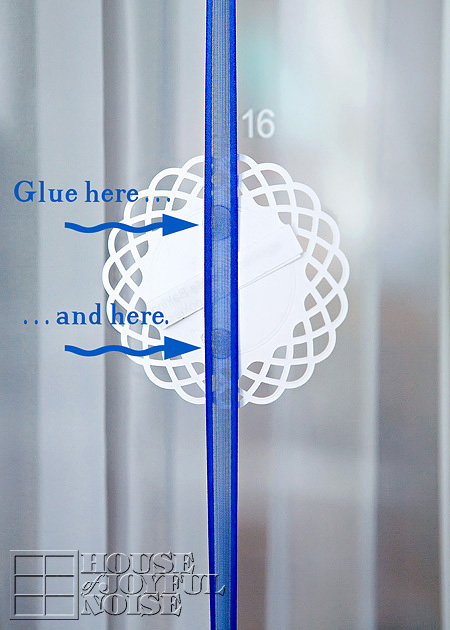
When attaching the snowflake to the ribbon, I was sure to put two dabs of glue; one at top of the snowflake, and one on the bottom, leaving a space without glue in between.


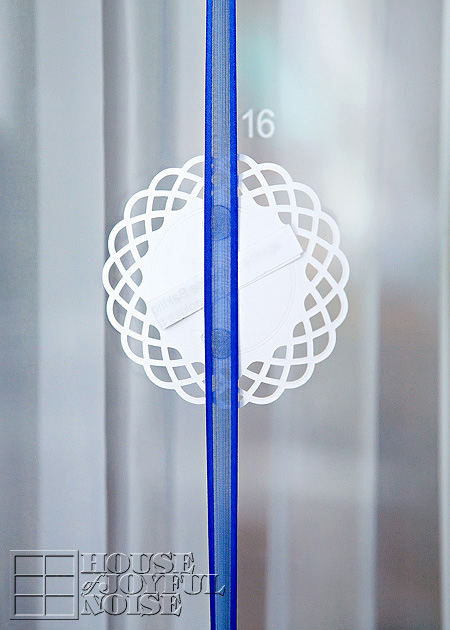
Did you notice the little slip of paper slid under the ribbon? There was one for each snowflake, and each little slip expressed something different for that day.

Again, we’re simple folks. Our holidays are kept pretty simple too, and our days of any season are focused on faith and our family. For Christmas, it’s about pondering and celebrating Jesus’ birth, the time we spend together being creative, making things for others, and generally just having fun together as a family.

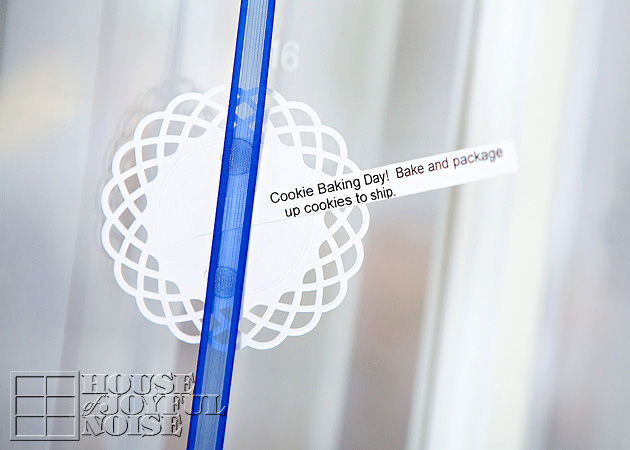
So our slips of paper behind each snowflake reflected those kinds of things.  Some were a surprise activity for the day: maybe a task for serving others. Some were a small treat, and others were a Scripture to remember and reflect on. A good variety of that kind of thing. Again, you can come up with what you want for your family, throughout the month of December, as you prepare for Christmas, and enjoy the season.  


Just type up a list in small print on your computer, skipping a line in between, print it out, and cut them into strips to fit behind your elements.

The kids took turns taking out the slip and reading it to the others each morning. That way they knew what was in store for the day.
It really takes very little to get our kids all excited. You would not believe the fun we have each year, just driving around neighborhoods checking out people’s home Christmas lights and displays, with our cocoa and snacks!


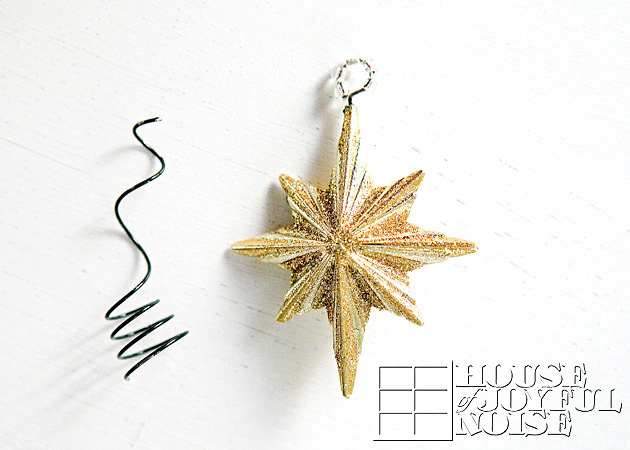
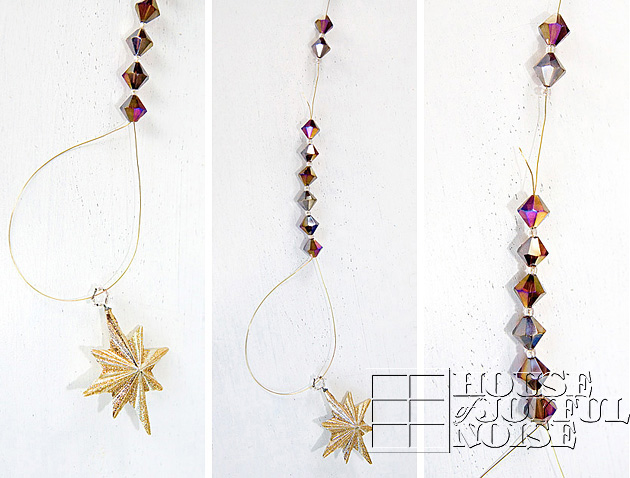
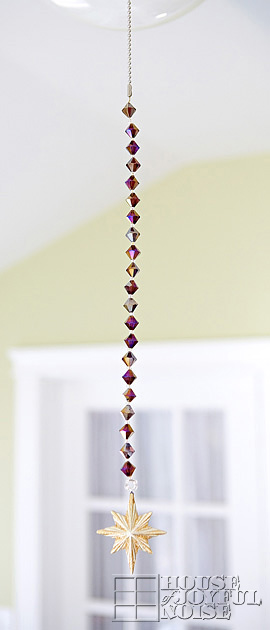
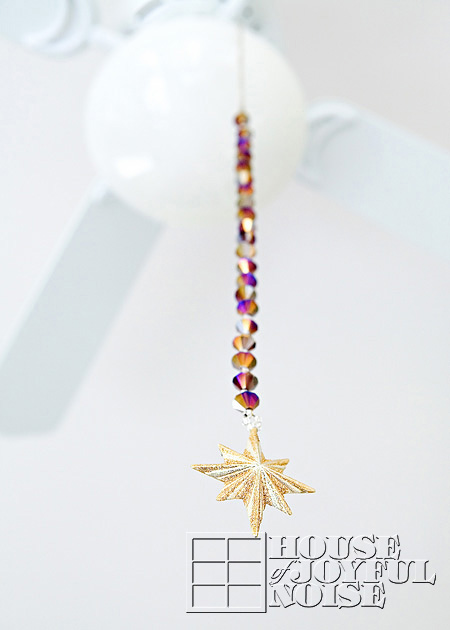
The big snowflake represents December 25th – Christmas Day.

I thought it all came out very pretty, and of course the strands themselves are reusable again every year.
It takes no time at all to cut out some new little numbers, and apply them.  The slips of paper can be used again if they re saved as well.
Mix them up, add new ones, or create a whole new set. I like to keep our kids on their toes.


This Christmas season, make the most of every day with your family, and keep the spirit and love of what Christmas is truly all about, alive in your hearts and homes.
We hope you find this idea inspiring. Thanks for coming by.

* * * * * *

Please come follow me here and there:


Save

Filed Under: Crafts & Creations, DIY (Do-It-Yourself) Project, Holiday Crafts, Home Decor, The Homestead Tagged With: advent-calendar-craft, advent-calendar-for-the-home, advent-calendar-ideas, advent-calendars, Catholic-blogs, Catholic-families, Christmas-advent-calendars, Christmas-craft-ideas, Christmas-decorating, December-home-decor, door-advent-calendars, home-advent-calendar, homemade-advent-calendar, how-to-make-an-advent-calendar

A Christmas Fan Pull | Crafts

December 15, 2009 By Laura 6 Comments

The other day,  I found myself gazing at this tiny,  intricate, beautiful little ceramic egg, that I spontaneously hung from our fan pull in our sun room one day, quite awhile ago.

b

I wondered why it never struck me as a little Easter decoration until then, and how it really didn’t look quite right hanging there, the way it was.

Christmas fan pull craft

It bothered me a tad more, when I realized Christmas was really coming very soon.   I needed to do something about the egg, hanging there.  I had a little more time on my hands than I have had for the past few months, so I decided I would make a Christmas fan pull, to replace the egg.

Then I thought about the year ahead, and my imagination ran wild.  You all know I love holiday and seasonal themed ‘anythings’, and especially for my home decor.  So, if all of the ideas in my head come to be, you all will be seeing some more themed fan pulls crafts around here, as the coming year progresses.  I’ve got a whole array of a collection of fan pulls in my head, and I think it’s a lovely idea to have that collection, to change my fan pulls with the holidays and seasons as we roll through the year.

So here is my first fan pull craft, for Christmas.  It’s not quite the vision I had in my head, only because I didn’t see the beads in the store, that I created in my head. (I don’t get why I can never find the stuff I make up?  I mean, if  “I”  thought of it…..). I also sort of winged the construction of it this time around, but I am sure with experience will come…near perfection.

Here’s all I needed at the store for this craft:

Christmas fan pull craft

Some pretty beads that said ‘Christmas’ to me.  I love the ‘strands’ of beads found in the craft stores….because you can really take a good look at them, without them being in a container and such. Also needed, was some thin but strong gauged wire.  I went with 26 gauge.  And then…..I wanted a ‘star of Bethlehem’ of some sort.  Whatever form I could find one….which was found in a back aisle in the way of a tree topper.  I think.  But I could fix that.

beads

So first I cut the string and spread my beads out on the table.

ornamental star

Then Michael cut the star off the wire spring, leaving some wire to twist into a circle, which I covered with the small beads that came on my strand, and closed the loop more tightly.

Christmas fan pull craft

Next I measured how long I wanted my pan full, doubled that length and added a couple more inches to that, and started stringing the beads, alternating between the larger color-faceted beads, with the clear crystal ones.   Once through all of the beads, I slid the wire through the loop of the star, and back UP the whole wire of beads, until both ends were coming out of the top.

As an after-thought, I could have just hung the star on the center of the wire, grabbed both of the other ends of the wire, and fed them together through all of the beads, until they came out the top.  But that would have been too easy I guess. lol

christmas-fan-pull-craft-4

For security, I took both ends of the wire, and re-routed them again up the bottom of the top bead, so they came back out the top once again. So yes, 2 thin wires are now showing on the outside of that top bead.

Christmas fan pull craft

With the excess wire coming out of the top of the strand of beads (with the star on the other end), I balled up the remaining wire, and just worked it into the clasp on the piece of chain hanging on the fan.  Then I gave the whole thing a yank.  It was nice and strong, and the fan turned on and everything. : )

I noticed a bit of wave to my hanging piece, and realized it was from the doubled wire.  Perhaps I could bend it more here and there to try and straighten it a little more, but I rather like the bit of wave I think.  It adds a little character and design.  I decided to pass it off like I totally did that on purpose.

Fan pull chain and clasps can be found at hardware stores, etc.   So in the future, if my current project involves beads with large enough holes, I may just decorate the chain itself.  I already have some craft items for my plans for a new fan pull come January, as a winter theme.

Christmas fan pull craft

But for now, I’ll enjoy my Christmas fan pull.  I wondered if midnight blue beads would have been more appropriate, with the star of Bethlehem, but I still thought this looked rather pretty and Christmas-sy.  It really twinkles, and displays such beautiful colors, when the room is filled with sun!

It was fun to make.  I’m really going to enjoy creating this collection.

Oh, the possibilities!

Save

Save

Filed Under: Crafts & Creations, Fan Pulls, Seasonal Home decor, The Homestead, WINTER Home Decor Tagged With: Christmas decor, Christmas-crafts, Christmas-decorating, fan pull crafts

We are wicked happy to have you here! We hope you find much inspiration, help, humor and enjoyment here.


Archives


POPULAR POSTS

* * * * * *

SUBSCRIBE to House of Joyful Noise blog! Every new post, delivered right to your email box!


Privacy Policy

Amazon Affiliates

Never at any additional cost to you, we may earn a small commission for our endorsement, recommendation, testimonial, and/or link to any products from our website. Your purchase through our links helps support our family, while sharing with you the products we authentically use and recommend, for various ideas, and letting you know where you can purchase them. Thank you for your support!

[footer_backtotop]

Copyright © 2025 HouseOfJoyfulNoise.com · Genesis Framework by StudioPress