
It’s the first day of November, and we’re still riding high on the beauty of Autumn all around us! I think we’ve done more baking than ever this year as well. I had an idea about trying to make some pumpkin shaped cookies, using a dough recipe I already had, and they came out so great! These are beautiful cookies to have around on Thanksgiving, or anytime during the pumpkin/Autumn season, and they were fun to make, too. It may seem like a lot of steps, but it is easy, and the dough recipe itself is very useful!
The dough is the same recipe from my God-Mother’s Italian cookies, found here in a post called Cookie Love. It’s a very I am going to give you the recipe right here as well, but you really can see how it is made at the other post. *Please note; you can mix the ingredients to make dough with a Kitchen Aid Mixer, but we did not have one at the time of the other post, so we did it by hand. For these pumpkin shaped cookies, we did use the mixer since we have one now. It’s just easier and faster with a mixer, but still doable by hand.
Ingredients
- 4 C Bleached All Purpose Flour
- 1 C Sugar
- 2 Tbs. Baking Powder
- 4 Eggs
- 1/2C Land-O-Lakes Margarine
- 4 Tsp. Vanilla Extract
- 1/4 C Milk
- Confectioners Sugar
- A Little Extra Milk for Glaze
. . . . . . and some kind of Coloring.
Which brings me to this stuff . . . . . .
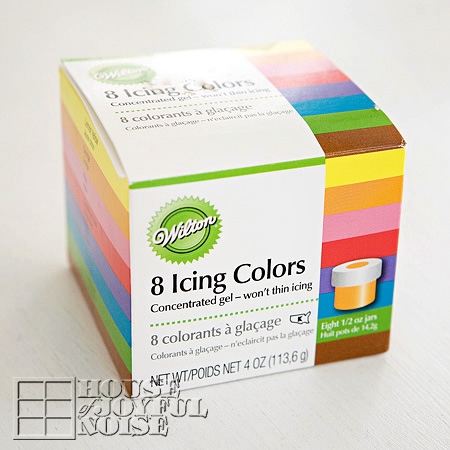
Wilton’s Icing Colors.
Even though it says for icing, it works for any food coloring. I love it, because it IS concentrated. It gives a nicer color, and is more potent, so it gets the job done easily. Food coloring drops to me are a pain. It takes too much to get the depth of color you want, and adds a water content at the same time that you may not want. So this stuff is the bomb for me. It’s what I used to color my cookie dough orange. It is also great for icing, and we use it for that in this recipe too. ; )
1. In a large bowl (or your Kitchen Mixer bowl), put in flour, sugar, baking powder, eggs, margarine, vanilla, and milk.
2. Mix it all together with fork at first. Once it starts to form, you can use your mixer or clean hands.
3. Flour a counter or big board.
4. Remove dough from bowl, and knead for several minutes, sprinkling the surface more if the dough starts sticking.
5. Grease baking sheets with vegetable oil. (You probably can use Pam Spray…if you’re a fan of that.)

6. Once your dough is formed, it’s ready to color. Using a toothpick, mix up the orange container of coloring gel, and just wipe the toothpick onto your dough. Then fold it in and knead the dough some more until the color works through and is uniformly mixed into the dough. Add more color as needed to get the desired density of color.
** Two Things to Note Here: A) This gel will likely stain yours hands and/or clothing a little, so use kitchen gloves and an apron is your concerned with that. B) The color will lighten/fade a lot after baking. So keep that in mind. Although the dough may appear too dark orange, they won’t be when done. (See photos of baked cookies for reference.)
7. Grab a piece of dough, and begin to roll into a ball between the palms of your hands. You want it to be about the size of say….a large cherry tomato. You can place them directly on the cookie sheet, or keep working on a floured surface, such as a cutting board.
8. Pre-heat your oven to 375 degrees.
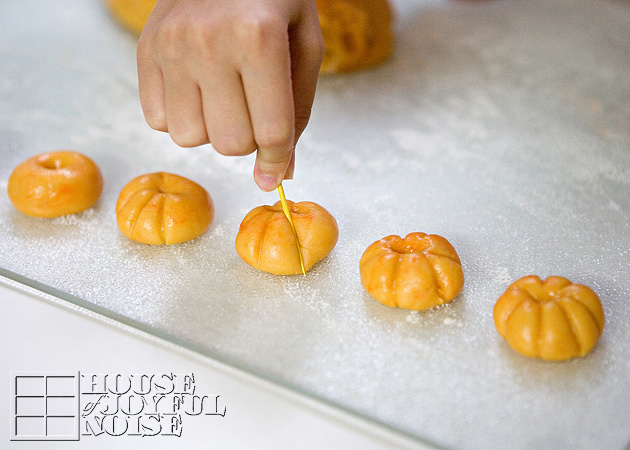 9) First poke your finger down into the center of each orange dough ball.
10) Then, taking a toothpick, stand it up beside the dough ball, and press in your indentations for the pumpkin grooves, as seen above.
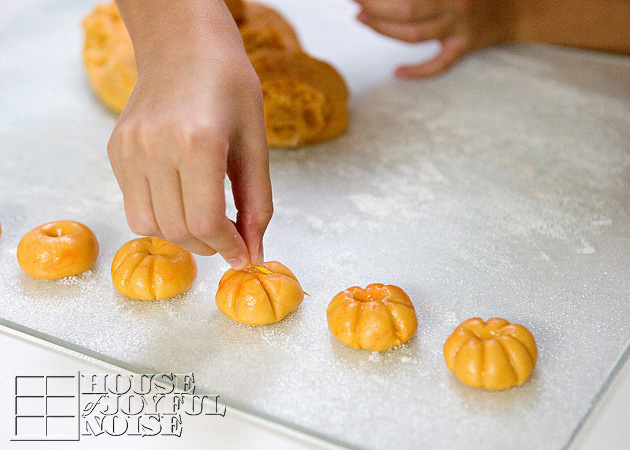 Make the indentations deep! Really lay that toothpick in there, and rock it to the top, so the grooves are made all the way to the top. The cookies will puff while baking, and you will completely loose your groove indentations if you don’t make them deep pre-baked.
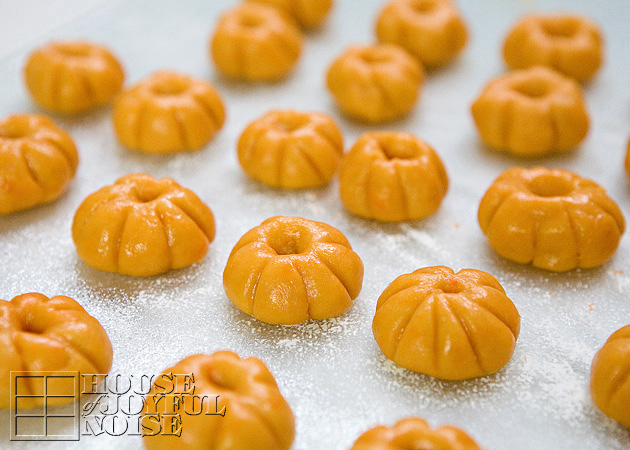 They should look similar to this when the are done. My little girl Olivia was a great help forming the pumpkins!
11) Now transfer to cookie sheets with thin metal small spatula if need be. (Try not to squich your pumpkins, as the dough is soft!) Place the dough pumpkins on the cookie sheets, about an inch 1/2 apart, staggered.
**You will have more pumpkins waiting for their turn in the oven. This dough makes at least a few dozen, depending on the size of your cookies.
12) Bake full sheets for 8-10 minutes. You want them to be pale – not browned, but if you are wondering if they are cooked enough, open one with knife and see if it is baked through well. If not, put back in for 1-2 minutes more, depending on how doughy they still were.
13. Remove from oven………and then place them each on a cooling rack.
For cookie glaze:
14) In a small bowl, pour some confectioner’s sugar, and add a little milk. I don’t really measure the sugar or milk here. I recommend adding one tablespoon of milk at a time, and stir well. You want the glaze thick, as it will be much easier it will be to work with if it is not thin and runny.. You will be surprised at how much powdered sugar you need!
15) Add in green gel coloring and mix well.
16) When cookies are completely cooled, transfer your green icing to a piping bag with a very fine point tip, or if need be, a zip-lock bag with the very tip of the corner snipped off.
17) Just pipe on a stem in the center top of the pumpkin, a leaf if you are really good, and maybe make some curly vines coming off.
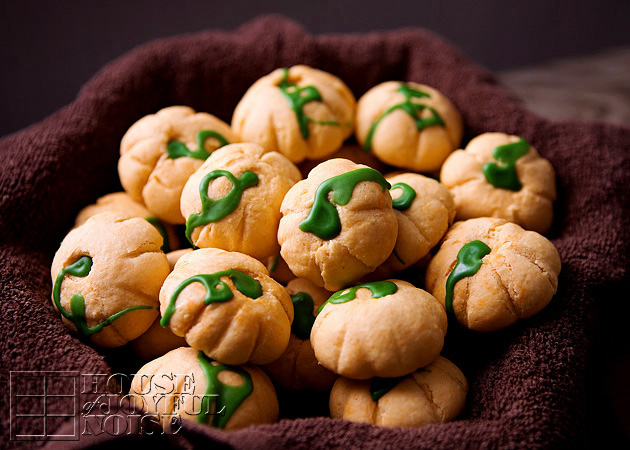 As you can see, my piping skills could use some practice. But I thought they came out so adorable, and they are as delicious as the Italian Cookies recipe! It’s all the exact same ingredients, except for the tasteless coloring. What I love about this dough recipe, is it is flexible to make many different looking cookies.
Alexis kept some of the dough before it was colored orange, and made these traditional cookies. . . . . .
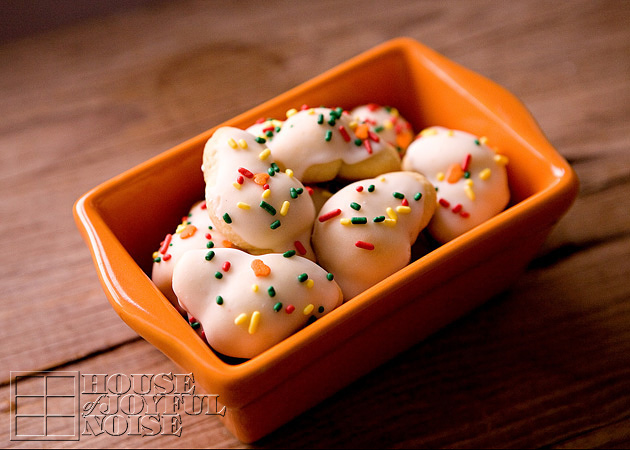 Also quite Autumn looking!
The cookies can be sealed in an air tight container, or even put in the freezer the same way, for a coming holiday, or unexpected company.
We hope you try this recipe out, and have some fun making them yourself. Your mouth will surely thank you!
. . . . . .
Come follow me here and there:


