

I thought I would share with you a little bit about making your own cards, today. To be honest, I feel a little bit silly, because my sister is the real card-making whiz. And I’m, well….the one who most always forgets to even buy a card, and send it on time….to even those with birthdays in our families. I’m flat-out awful about it. They’ll tell you.
But, last year I challenged myself to make sure I get a card to everyone, and on time, for at least a year from that point forward. I think I’ve managed so far! I’ve even made most of them, myself. Now that’s planning ahead. I’d be proud of myself, if it weren’t for all of the prior years I forget altogether. I think if I patted myself on the back, someone might slap me. 😉
My sister is awesome at making a whole bunch of great cards at once. She has files of ready-made cards, made with love, to just grab last minute. There is always something fitting for any occasion, for any one. We love her cards. I save them all. Plus she usually writes a little something that makes me cry.
I have a different style. I make cards one at a time, and I make them specifically for whoever I need one for. I custom make something I think they’ll like. Or they they will anyway.
I have fun with it. Like a little art project.
I thought I’d share with you some of my tips, ideas and tools you might use, to make cards of your own.
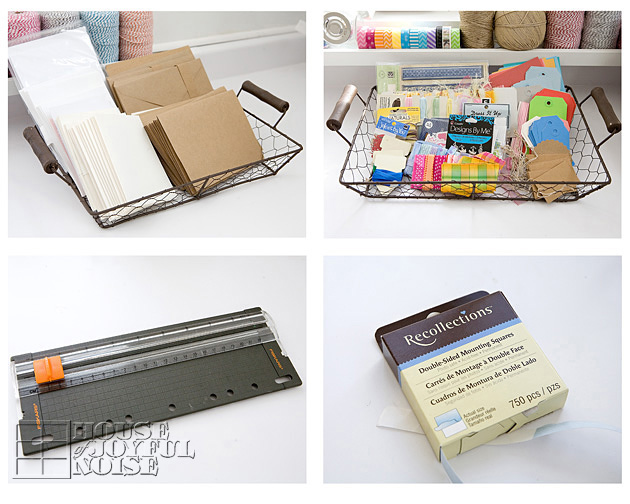 Clockwise from the top left (in my studio):
1. I have a basket of blank cards and envelopes, in a few different colors and textures, and in 2 different sizes. Blank cards w/ envelopes can be bought in packages at craft stores, and they are very handy. It’s also an option to make your own cards, by folding and cutting to size card stock, in a variety of colors and textures. I do that sometimes as well.
2. Another basket in my studio holds just some of the elements I have. Shown here are some specialty ribbons, colored strings, tags, and flat gems. Seen in the back, as more ideas, are washi tape, and striped baker string. You can also use stickers, embossers, or die-cuts. I love working with elements on my cards, to add those special little touches.
3. I highly suggest a Fiskar trimmer. I just find them so quick and easy to work with, for cutting paper to size and trimming. I have a cutter in 2 sizes, and I use them super-regularly in crafting.
4. Sticky-tabs!! It doesn’t matter what brand you get. But these little 2-sided tabs come on a roll in a box like this, and I use them as an adhesive when working with paper or photos. They are so convenient, mess and hassle-free. My kids love using them when doing their own crafts too, as evidenced by the little blue peel-offs I find here and there that I didn’t leave. 😉
–
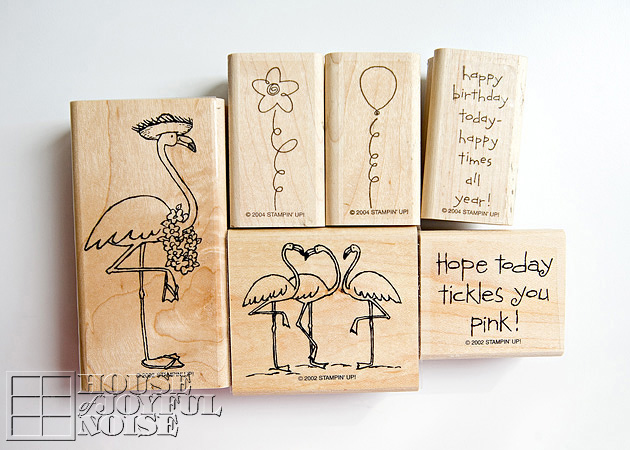
Rubber stamps are very useful in card making!! I have…a LOT. My sister used to be in the Stampin’ Up business. So I have bins of sets. You can get really creative with stamps like these, just stamping with different colored inks, or really getting into it with embossing powders.
I have struggled with the flatness of the stamp look though, when just working with ink.
So I tend to get coloring, because I love to color!
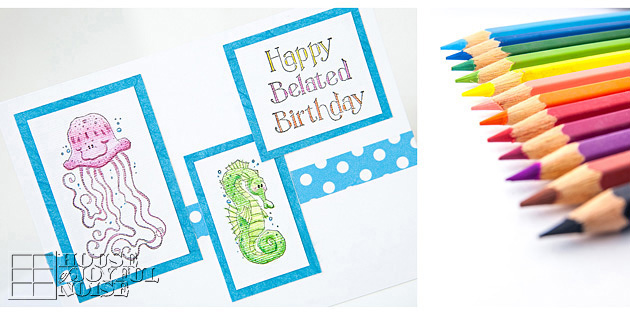
Colored pencils are so much fun to use, with rubber stamps. By deciding which direction light might be hitting your subject (such as my octopus and sea horse above), and coloring lighter where light may be hitting more, and harder where the areas would be more in shadow, you can really take your flat stamped art to a more dimensional look.
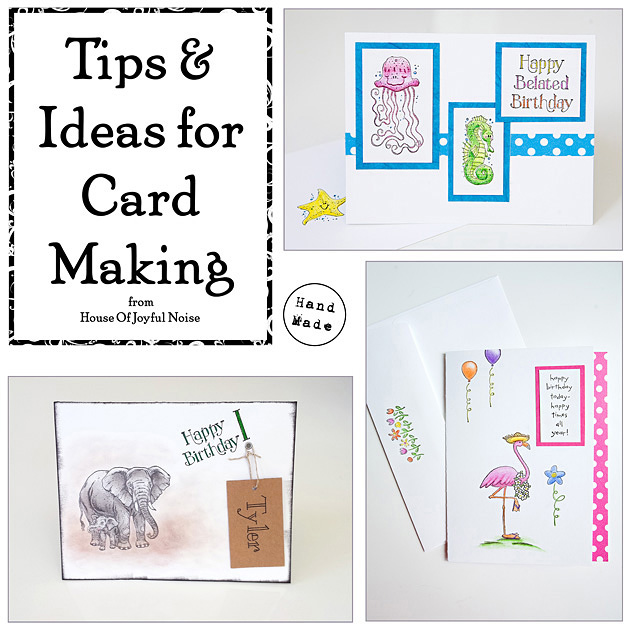
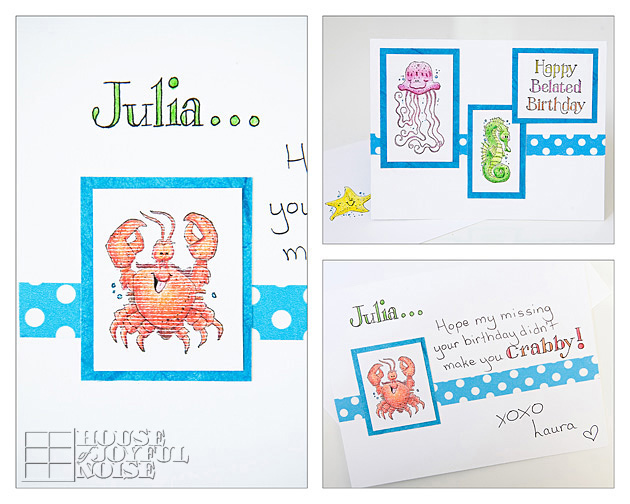 So this card was created for my Goddaughter, with a blank white card and envelope, rubber stamps, white card stock, colored pencils, some aqua textured cardstock, and washi tape. ‘Happy Belated Birthday’ was a stamp, and I free handed ‘Julia‘ and the word ‘Crabby‘ to match the same letter-style as the stamp. And just wrote the rest of the message in regular printing. So the little sea creatures were stamped on separate card stock, trimmed to a rectangle, and then mounted on slightly bigger aqua rectangles, to kind of frame it. Sticky tab this, to this, to this. Voila!
The image of the card in the upper right is sitting on the envelope, which I stamped with the starfish. See it? I addressed it right next to that star fish. I think it’s fun to pull out mail from the mailbox and see a decorated envelope. I always imagine it makes the mailmen/women smile too.
Part of the fun for me, of making cards, is trying to come up with something clever or witty to write inside. Trying is the key word there. No one else may think I’m very funny, but I promise you, I’m laughing and really enjoying my own jokes sometimes, making cards. 😉 I’ve always said, “Nobody thinks my jokes are funnier, than I do.” True story. I amuse myself more than anyone else.
–
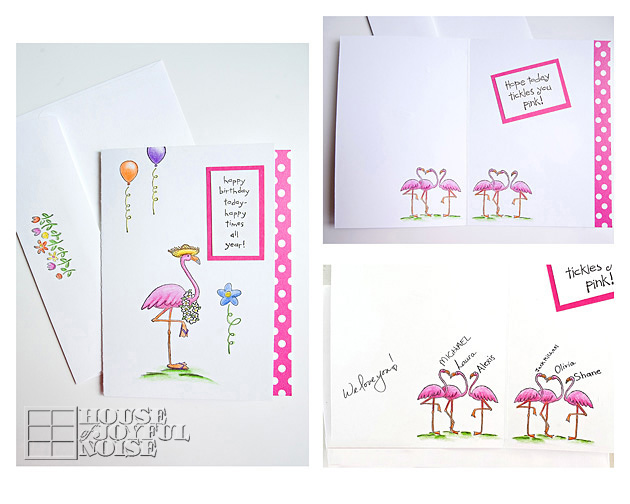 This was for my mother-in-law/Grandma. That’s her on the front. 😉 Another rubber-stamped card (using the set seen near the beginning of this post). On this one, I stamped right on the card, except for the message inside and out, and colored. The pink polka-dot wash tap is along the side of the inside of the card only. But I trimmed the front/cover side of the card off to reveal that element, even when the card is closed.
I used the trio of pink flamingos stamp twice, so there was a family of 6. That would be us, who the card was from. We all signed the card next to ourselves. 🙂
The envelop was also stamped and colored. (See left photo.)
When Michael was talking to his mom on the phone, he asked her if she got her card. She had to think about it, and then said she wasn’t sure…she couldn’t remember. So…either it was forgettable, or it never got to her. But the thought was there, she got a call anyway (and us singing!), and I had fun making the card. For whoever got it. lol
–
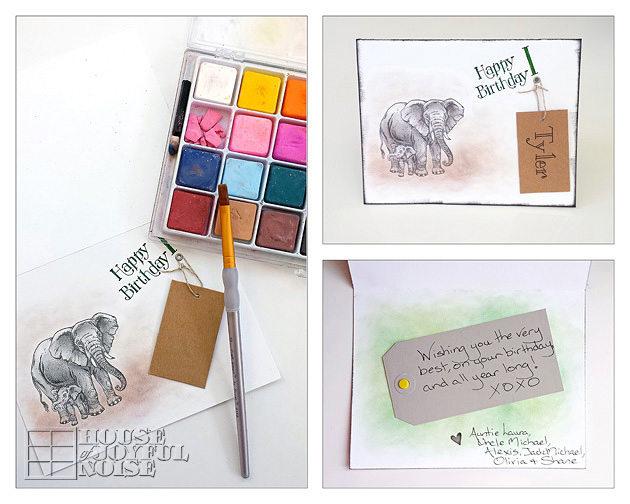 This one was for one of my teen nephews. I just wanted to keep it boyish. The elephants were stamped. Although my sister-believed I illustrated them myself, because…..well, she knew I could. But why? When I have the stamp? LOL. I did color/’paint’ it though….with chalk! That might have been a bit crazy. And time-consuming. But again, it was all fun, and specially made for someone I love. The dirt clouds around the elephants were specially fun, and the chalk was a suitable medium to work with, to create that. The ‘Happy Birthday’ was stamped, and I hand-matched the exclamation point, which I punctuated with a hand-hammered rivet. (More fun elements to work with!). I ‘hung the tag, with his name hand-drawn on both sides, off of the rivet. The string was actually hammed in there, to stay.
I gave the card a quick fixing spray when I was done.
–

This one was for another nephew, who is an avid, very serious, very good, hunter. I really planned this one in my head.
Now, you’d think with all of my paper stock, I’d have some kind of camouflage patter, or any kind, right? No. So I decided, to pick a background color, and just cut out those weird random shapes, in the other colors, and layer it together. I used glue this time.
His name I stamped, and that star is another fun rivet!
The inside: card stock, tissue paper, washi tape, and hand writing. Again, I was too-amused with myself. But I totally had to Google and research, what a ‘sight’ mark might look like. I’m probably not even using the right terminology. But hopefully he could tell I put some real love in it. Although, it was from all of us.
–
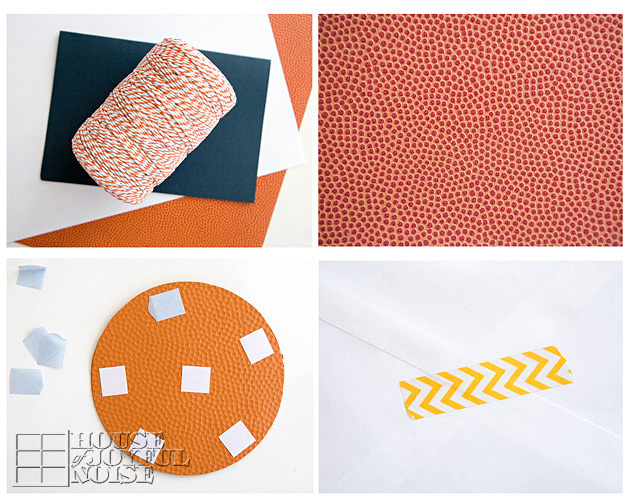 My niece is very much into sports; basketball being one of her favorites. Can you believe I had basketball skin stock? I did. So I cut a circle out of it that would fit on the front of her card. Loved that I had orange striped baker’s twine to work with too. And washi tape that complimented well enough too. I often use a piece as a seal on the envelope. (Well, I lick it too. For security-paranoid purposes.) I think it’s another nice touch.
I could not even believed I pulled off drawing the basketball lines and name with permanent markers. Her name is in the Wilson band letter style. 😉 (Had to tell you in case it wasn’t good enough to notice. Ha haha.) This is the little free-hand thing (the ball)I did that and I walked room to room, showing everyone in my house, and the kids totally ‘checked’ me about boasting. < Insert eye roll here. >
I shared about that on our blog’s Facebook Page, in case you missed it.
Hope the ball makes up for the lame joke inside. : [ .
–
Next!
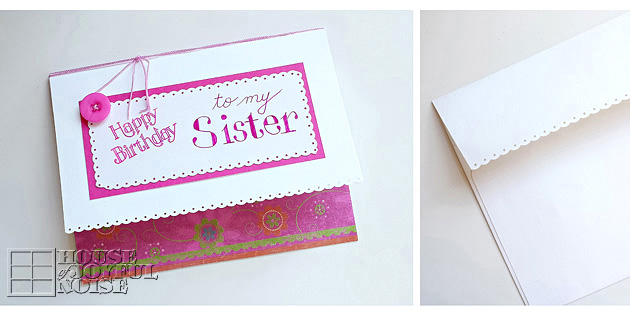
Lastly, for today, a card I made for my sister. I have an eyelet edge punch, which I used all over this card, as well as on the edge of the envelope flap.
All hand drawn I think…copied from that stamp. The pretty decorative paper along the bottom of the inside of the card, was shown when closed too, by making the front of the card trimmed smaller, like before.
My sister and I share a birthday. Did you know that? We do. (I won’t say she’s the older one, this time. 😉 ) So on the inside, I said something like….
“If all of your birthday wishes come true,
Then all of my wishes will have come true, too.”
–
So…..there are just some of the cards I made during my self-challenge here. I did make a few others and mailed them out, forgetting to photograph them. And even some of these photos were just taken with my phone, because I hadn’t thought of making a blog post and sharing them with you all at the time. So, the photo quality varies, and I apologize about that. But I do hope you enjoyed this big share, and I hope you feel inspired to make some custom, personalized cards for others as well.
You can do this card-making thing!
Fold, stamp, color, sticky-tab, ….it’s all fun you need to get in on!
 Save and share the card-making love! PIN this on Pinterest and be sure you are following us there!
Thanks for coming to hang out with me today.
– Laura
Thanks for the compliment and not saying that I am the older one ( this time ) hee hee now it’s out there again.
Ha haha. I’ve got more compliments where this one came from, for you! 🙂
And ok, I won’t say that you said that you are the older one this time either. 😉 < Giggle! >
Love you! – L.
You have provided me with so much inspiration. I love the idea of COLORING the stamps. Though I don’t have nearly as many as you do, I’m definitely going to have to try using my watercolor markers with stamps. It’s amazing how many variations there are on making cards.
https://houseofjoyfulnoise.com/the-lost-art-of-letter-writing-and-creative-correspondence/
Hey Julieeee! I should have known you’d love this post! 😉 Yes, always coming up with something different for each and every card (I call it brainstorming) is a good part of the fun for me.
Wishing you lots of fun COLORING!
<3 - Laura