• HOME
  • {A}’s Chipmunk Training Archives

 Homepage

  • The Homestead
    • Home Projects
    • Home Improvement
    • Home Decor
      • Seasonal Home decor
        • FALL Home Decor
        • WINTER Home Decor
        • SPRING Crafts and Creations
        • SUMMER Crafts and Creations
    • Our Chickens
    • Gardening
    • Organization
    • Re-Purposing
    • Furniture Refinishing
    • Budget
  • Crafts & Creations
    • Seasonal Home decor
      • FALL Crafts and Creations
      • WINTER Crafts and Creations
      • SPRING Crafts and Creations
      • SUMMER Crafts and Creations
    • DIY (Do-It-Yourself) Project
    • Kids Arts and Crafts
    • Homemade/Handmade Gift Ideas
    • Holiday Crafts
    • Fan Pulls
    • Free Printable/Downloadable
    • Sewing Projects
    • Giveaways
    • Business Features
  • Recipes/FoodFun
    • Breakfast
    • Lunch
    • Main Dish
    • Sandwiches
    • Appetizers
    • Slow Cooker
    • On The Grill
    • Side Dishes
      • Soups
      • Salads
    • Baking
      • Breads, Rolls and Muffins
    • Snacks
    • Treats
    • Desserts
    • Drinks
  • Homeschooling
    • Elementary Homeschooling
      • Elementary Homeschooling READING
      • Elementary Homeschooling MATH
      • Elementary Homeschooling LANGUAGE ARTS
      • Elementary Homeschooling SCIENCE
      • Elementary Homeschooling HOME ECONOMICS
      • Kids Arts and Crafts
    • Middle School Homeschooling
      • Middle School Homeschooling SCIENCE
      • Middle School Homeschooling HOME ECONOMICS
    • Language Arts
    • Math
    • History / Social Studies
    • Geography
    • Foreign Language
    • Field Trips
    • Games
    • Nature Study
  • The Big Picture
    • Life In General
    • Celebrations
    • Faith
      • Into the Light; The Series
    • Giveaways
    • Reviews & Sponsors
  • Photography & Lettering
    • Photography
    • truck lettering
    • vehicle graphics
    • Newborns
    • Kids
    • Engagement
    • High School Senior Pictures
    • High School Senior Pictures Sneak Peeks

How to Build a Wood Stove Bench – Part III – Finished

July 8, 2009 By Laura 1 Comment

How to Build a Wood Bench

For those of you who have been following our blog for awhile, you’ll know how this post is a little late coming.  The project was done quite awhile ago – we just didn’t get to posting the last part of the project.  Not sure if anyone has literally been following this project to build a bench of their own anyway.  If so….we’re sorry!!

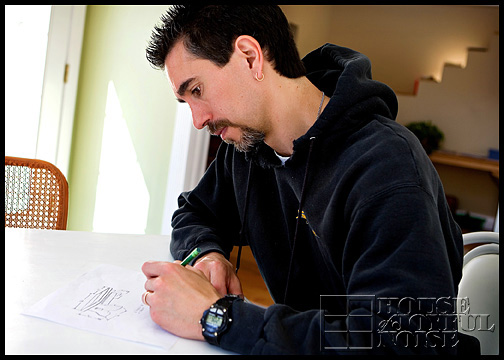
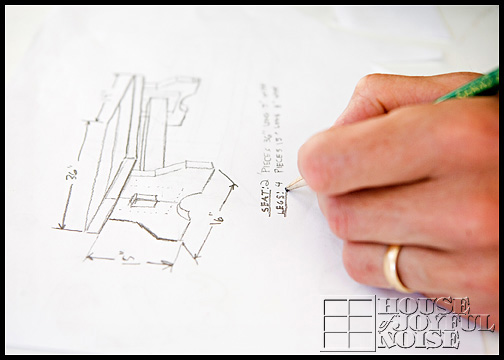
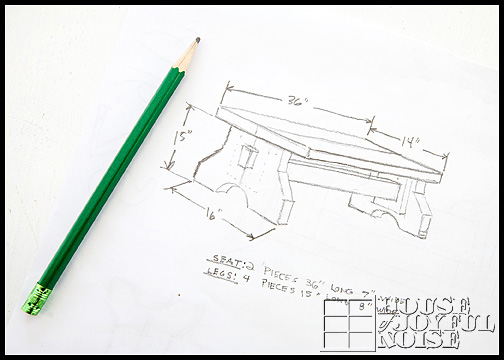
For the rest of you, who may be new to our blog here, or missed these project posts before, we can catch you up with links, and a brief explanation:   We were using a silly footstool at our wood stove over the winter, to sit upon as we loaded wood into the stove, or poked the fire some.  Eventually, I had mentioned that I thought Michael should build us a real rustic bench enough times, that he got to sketching.

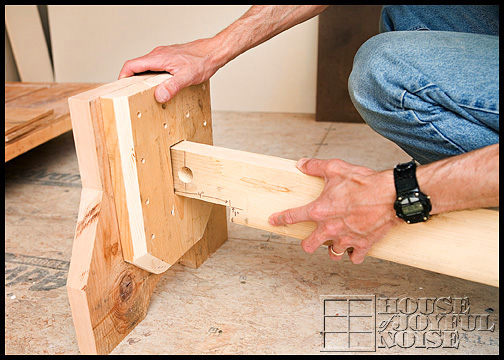
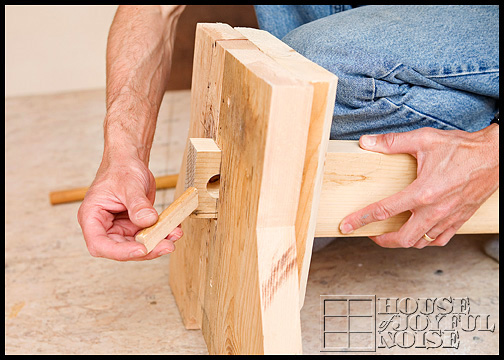
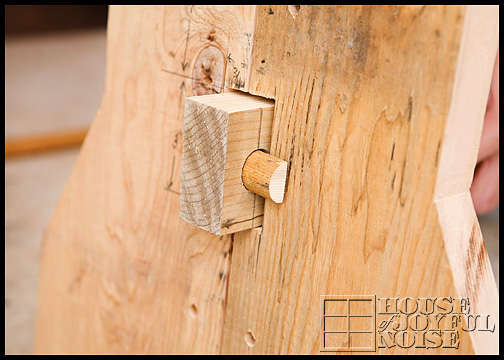
Here are Parts I and II of this project:

How to Build a Wood Stove Bench – Part I

How to Build a Wood Stove Bench – Part II

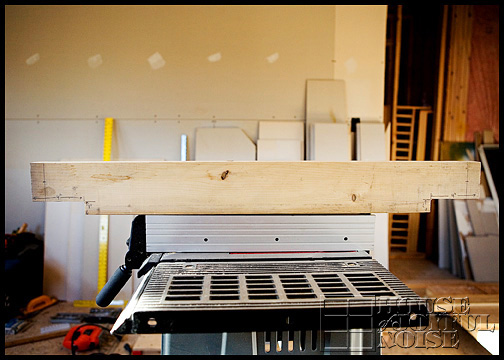
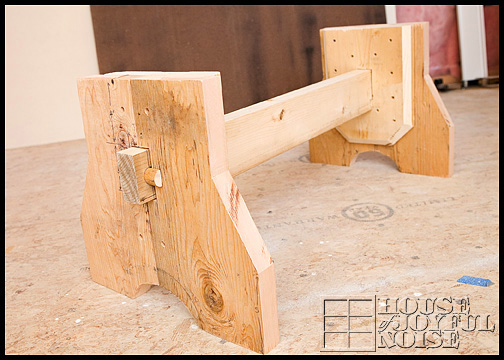
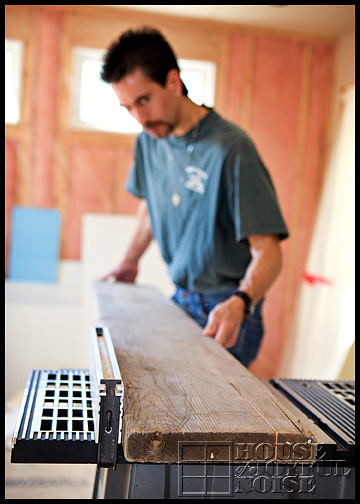
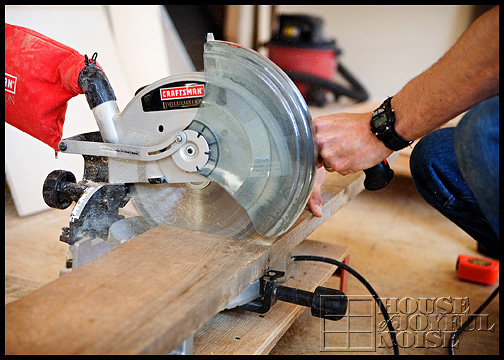
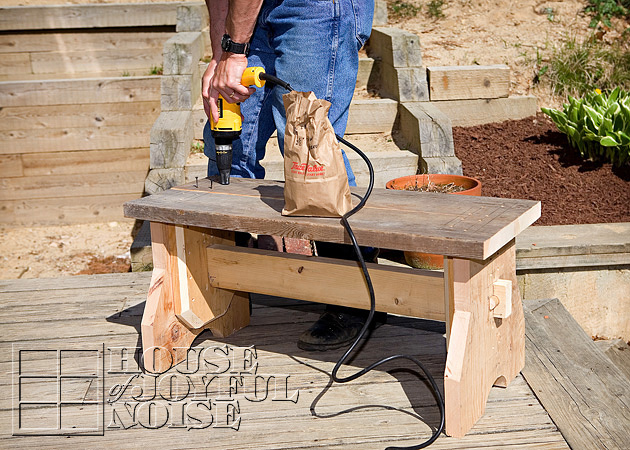
So, where were we?   Oh yes.   Michael had completed building the bench, and it just needed to be sanded some, primed, and painted.  (And I prefer….sanded a little again, for that older look.)

The primer we used was a mixed color that, actually, was not quite the color we were going for.  I wanted a medium brown that had some gray in it.  But it came out looking more like…..medium gray-brown with some purple in it?

How to Build a Wood Bench

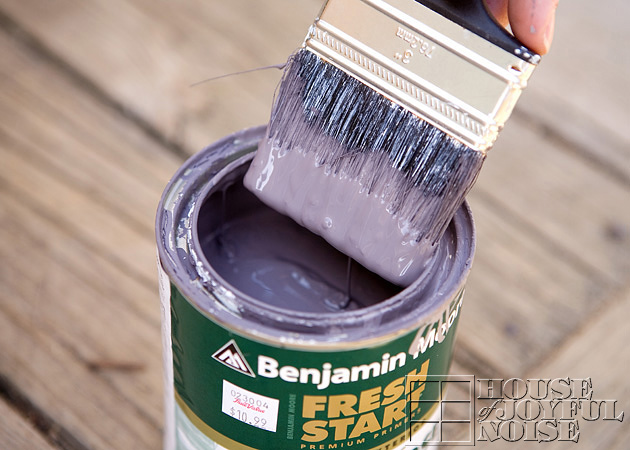
It was a Sunday when we had gotten this primer.  Michael had them mix it up at the little local hardware store.  By the time we popped open the can, the store was closed.  We had gotten the primer that day, for our unfinished farm table we had gotten for the sun room.  I was eager to do the project that day, so we used the primer anyway, and it turned out to be fine.

Like the bench, we were painting the table white anyway, in the end.  The reason the primer color mattered any, was because I like to sand the corners and edges of the piece of furniture, to give it a worn old look.  Most times we sand right down to the wood anyway, but in parts the primer does show.  But it is so subtle, you couldn’t pinpoint the color.

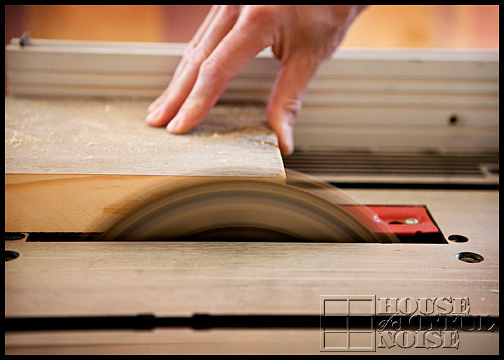
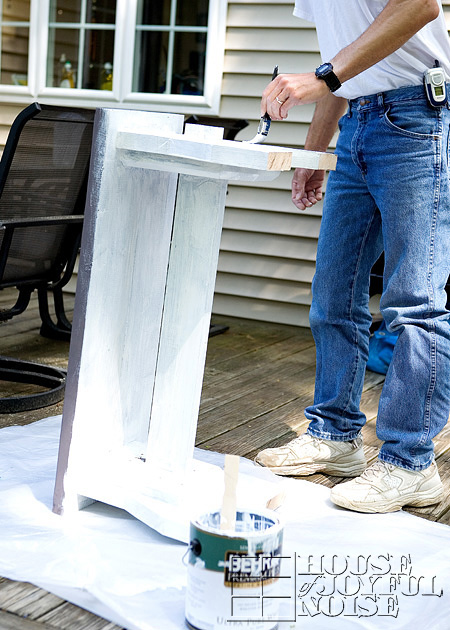
So, after a quick sanding of the bench, Michael got to priming.  It wasn’t important to us to have it super smooth, so if it would be to you, you’d want to put more time into that, until it is as smooth as you’d like it all over.  We pretty much got right to priming.

How to Build a Wood Bench

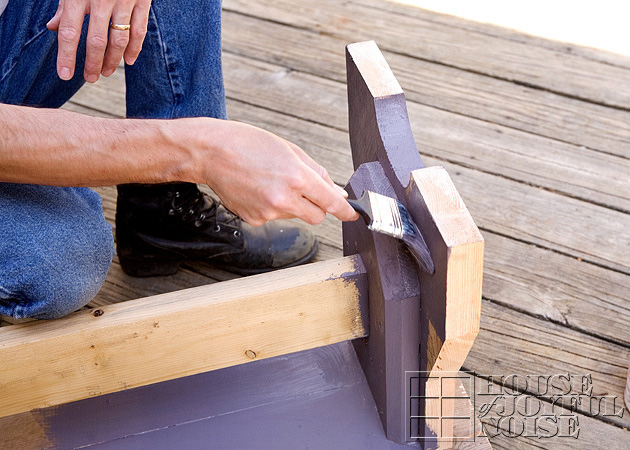
Once it was primed all over, and the primer had dried, he filled in the screw holes some with filler, and got to painting it white.

How to Build a Wood Bench

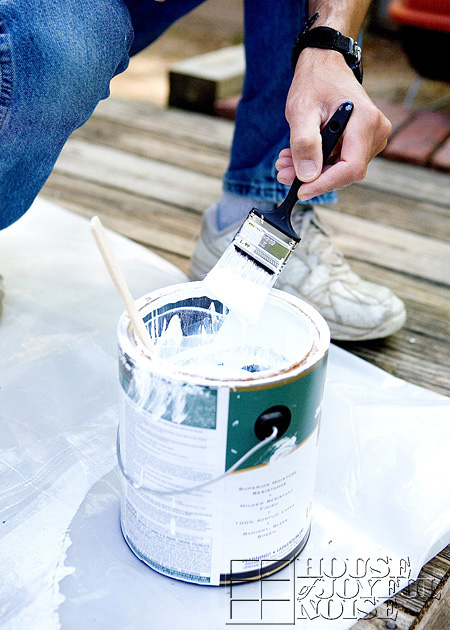
I helped, with a brush of my own, in between taking photos. : )

How to Build a Wood Bench

Once it was painted all over, dried, and got a second coat dry, Michael sanded the edges and corners some, to make the bench look older and worn, as I had told him I wanted.

How to Build a Wood Bench

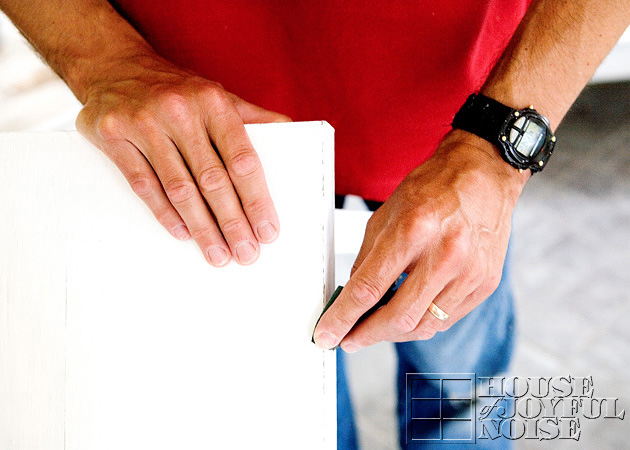
And when he was all done, I did it again. : )  He just wasn’t aggressive enough for me. I wanted it OLDER and MORE WORN than he had accomplished.  But ….it’s a preference thing.

How to Build a Wood Bench

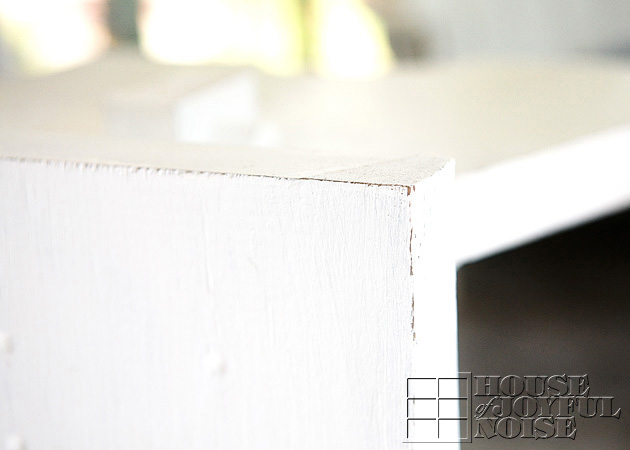
That’s better!!  We did the same with our farmer’s table in the same room, so they kind of go together.

So now, the bench was finally done, just in time for……………SPRING??  lol

But, we did have a few very cold and rainy days and nights in early spring, that we got a cozy fire going.

How to Build a Wood Bench

How to Build a Wood Bench

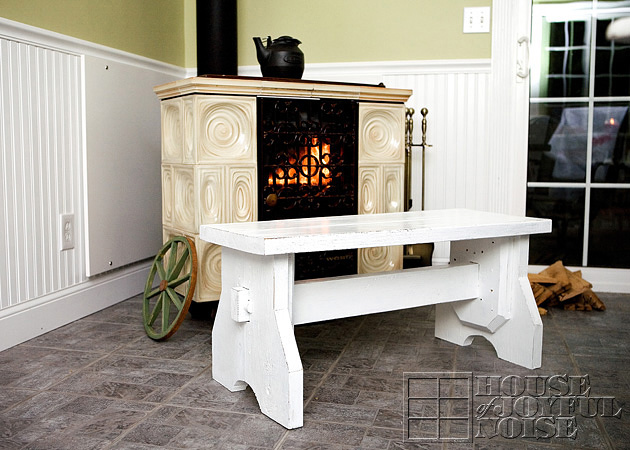
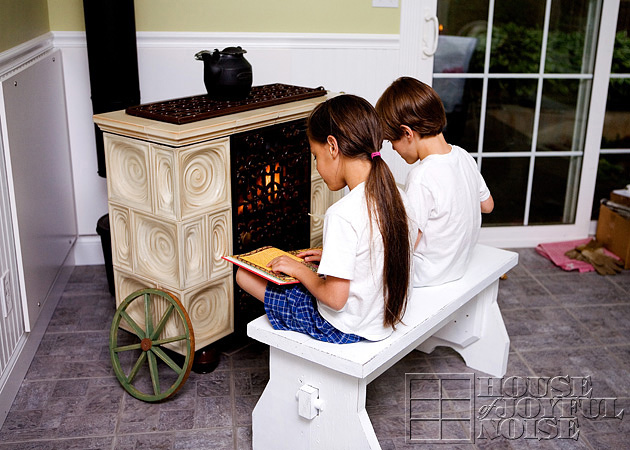
So much better than the footstool….don’t you think??  That thing was barely accommodating to the backside of myself.

Remember, you may not need a wood stove bench, but a bench like this can be used in any room of the house.  For taking off and putting on shoes in a mudroom.  By a window for some light reading.  In the bathroom for putting down your fresh clothes and towels.  Or outdoors under a tree, on your deck, or by an outdoor fire pit! I’m sure if you’re needing a rustic bench, you know the perfect spot for it at your home.

We hope you enjoyed this home project, however sporadic. Sometimes, we’re just pleased with ourselves, that we finished a project, even if it did take longer than we had originally planned!

Save

Save

Save

Save

Filed Under: Crafts & Creations, DIY (Do-It-Yourself) Project, Home Projects, The Homestead Tagged With: build-a-bench, build-it-yourself-wood-bench, how-to-build-a-wood-bench, wood stove bench, wood-bench-plans

How to Build a Wood Stove Bench – Part II

May 6, 2009 By Michael 2 Comments

Here we are with more to teach you, about how to build a wood stove bench. So sorry about the big delay between the parts of this project. No doubt, many of you will need to refresh your memories about where we left off.  So here is Part I.   We’ll wait until you come back.

So below I need to cut out a rectangular notch for the cross beam to fit through. I have it sketched out in step one, which also shows 2 holes I drilled, as starters, for me to cut the notch with a saber saw.  I cut the rectangular hole to the size of 3×1.5 inches.   This is 4 inches down from the top, centered.

How to Build a Wood Bench

With that done, I now had to cut the same notch out of the legs.  On this piece, it’s also 4 inches down, 3/4 inches in from the inside, and 3inches long.

How to Build a Wood Bench

This is done 4 times, on each of the 4 pieces……… How to Build a Wood Bench
–
Lay support pieces on top of leg halves, on what is to be the inside.  Make the top flush and centered on pieces of legs, which are only pushed together here.  Using 2 -1/2 ” screws, screw them together on both inside and outside.

Below as seen:  Left: inside of one leg, Right: outside of one leg.  Put 4-6 screws on the outside (less than the inside) for a better appearance.

How to Build a Wood Bench
–
Below is one end of the center cross beam, to show the measurements that a notch needs to be cut out of.

How to Build a Wood Bench
–
Cut this out of the bottom edge of both ends of center beam.

How to Build a Wood Bench
–
Here below is a 1″  dowel, in which I ripped to 1/2″ wide, and then after, chopped to 3″ long. (2 times, for 2 pieces.)  I’ll show you what these are for in a minute…

How to Build a Wood Bench

How to Build a Wood Bench
–
At each end of the cross beam, in 1-1/16″ centered (in the height), I drilled a 1″ diameter hole.

How to Build a Wood Bench
–
Now it is time to insert the center beam into the notch which is cut into the legs.

How to Build a Wood Bench
–
Insert 3″ dowel.

How to Build a Wood Bench

How to Build a Wood Bench
–
Now you have a free-standing base.

How to Build a Wood Bench
–
Just to sturdy things up, I installed a 2-1/2″ screw diagonally, through the support, into the center beam.

How to Build a Wood Bench
–
Next, I started placing the seat planks into place, making sure that they had the same over-hang on each end and sides.

How to Build a Wood Bench
–
Once both planks were down and in place, I screwed them into place, through the seat into the leg bases with 2-1/2 ” screws.

How to Build a Wood Bench

In Part III, we are going to prime and paint this baby, giving it a nice worn, farmhouse look.

See you then!   Click here to see FINISHED BENCH >>>>  PART III

Save

Save

Save

Save

Save

Save

Save

Save

Filed Under: Home Improvement, Home Projects, The Homestead Tagged With: build-a-bench, build-it-yourself-wood-bench, how-to-build-a-wood-bench, wood stove bench, wood-bench-plans

How to Build a Wood Stove Bench – Part I

March 28, 2009 By Michael 5 Comments

Hi Everybody. I’m Michael, a.k.a. Mr. House Of Joyful Noise.
I’m excited to introduce my first project on the blog!  I’m going to teach you how to build a wood stove bench.

Michael - House of Joyful Noise blog

 I’ll be working this project in parts, and blogging as I go.  I’ll do my best to explain what I’ve done, along with what photos we took, but if you find you still have questions, you can let me know in the comments to this post, and I will try to answer as best I can.  So check the comments for replies if you leave me a question.

The other day, my bride mentioned that she was tired of our little stool in front of the wood stove.  She wants something larger, homier, and I had to agree.

1_l

So I asked her what she would like to have, and she described the type of bench she would like.  At this point, I sketched out something, as I always do when I start a project, just to have an idea of what direction I’m going in.

How to Build a Wood Bench

How to Build a Wood Bench

I came up with a height that would be best to sit and load the stove with wood, poke the fire, or clean the stove out, etc. My bride wanted it wide enough for 2 people to sit together. ♥♥  I also wanted a comfortable width so the bench would be stable on the floor.  I felt like I had a good enough plan on paper to start the project.

How to Build a Wood Bench

I set out to find some scrap stock around the house.  I ended up using two 6 foot pieces of 2″x10″ ‘s, left over from our sun room rafters.

I wanted the bench top 14 inches wide, and 36 inches long.  So I ripped one of the 2×10’s to 7 inches in width.

How to Build a Wood Bench

Once I had that ripped to size, it was time to cut it to 36 inches in length. This left me with 2 finished pieces 7″x36″.

How to Build a Wood Bench

Then it was time to start the legs. I knew I needed 4 pieces 8 inches wide, by 15 inches tall.  (Two pieces 8″x15″ per leg.)  So it was back to the table saw to rip my second 2×10 to 8 inches in width.

How to Build a Wood Bench

With that ripped to 8 inches wide, I then cut 4 pieces 15 inches long.  These would be the legs. I then sketched the pattern onto one of the legs.  I measured from the side in to 2.5 inches, and down from the top 5 inches, and marked it with a pencil.   Then from the bottom of that piece, on the same side, I measured up 5 inches, and marked that. Then I drew the angle connecting those 2 points.

How to Build a Wood Bench

How to Build a Wood Bench

I cut on that pattern, and then repeated this 3 more times with the 3 remaining pieces. This gave me 4 identical pieces to build 2 legs for the bench.

How to Build a Wood Bench

I also wanted an arch cut out of the bottom of the leg.  So I measured 2 inches up the side, and marked it. Then I measured 3 inches along the bottom, and marked it. I took a one gallon paint can, set it on the piece, so that the can touched on both of those marks, and traced the curve. I cut them out with a jigsaw.  (Don’t pay attention to the larger pencil arc. I was just figuring out how high I wanted it.)

How to Build a Wood Bench

Here is a finished half leg.

How to Build a Wood Bench

Putting 2 of these cut pieces together, this gives you an idea of the look of a finished leg.

How to Build a Wood Bench

Now, to secure these 2 pieces together, I cut a support piece for the inside of each leg. They are 9¼ wide by 12 inches high.  To dress these pieces up a little, I cut 2 45 degree angles off the bottom, and did 45 degree bevel all the way around, except for the top.

How to Build a Wood Bench

That piece will sit centered on the width and flush to the top of the legs.

How to Build a Wood Bench

In Part II of this project, we will finish the cutting, and get ready for assembly of this bench.  Later on, in Part III, we will prime, paint and finish the bench to a worn look, and show you how it looks  in front of the wood stove.

Something to think about:  In keeping with the general design of this bench, the measurements could be changed to build a bench for many different uses. For example, you could build a bench for your deck, your garden, a wall bench for in your home, or a bench for your kids to sit on in their playroom.

The projects I intend to blog about are anything I happen to be doing anyway, for our own home or needs. So as they come up in life, I will try to share in this manner here on our blog.  I think you will find that my projects are often rough and simple. Since I am not a carpenter by trade, I have limited tools to work with. But I make do ok.  My hope is that these projects will offer a jumping point for projects you may like to do, or inspire the men in your family in some way.

Please feel free to leave any suggestions or feedback about these project posts for me as well. I am new at blogging and explaining step by step. I just DO IT. So if there is anything I can do to clarify things for you, please let me know and I will do my best.   Meanwhile, I hope you enjoyed Part I of my first blogged project!!
Click Here >>>> for Part II

Save

Save

Save

Save

Save

Save

Save

Save

Save

Save

Filed Under: Crafts & Creations, DIY (Do-It-Yourself) Project, Home Improvement, Home Projects, The Homestead Tagged With: build-a-bench, build-it-yourself-wood-bench, how-to-build-a-wood-bench, wood stove bench, wood-bench-plans

We are wicked happy to have you here! We hope you find much inspiration, help, humor and enjoyment here.


Archives


POPULAR POSTS

* * * * * *

SUBSCRIBE to House of Joyful Noise blog! Every new post, delivered right to your email box!


Privacy Policy

Amazon Affiliates

Never at any additional cost to you, we may earn a small commission for our endorsement, recommendation, testimonial, and/or link to any products from our website. Your purchase through our links helps support our family, while sharing with you the products we authentically use and recommend, for various ideas, and letting you know where you can purchase them. Thank you for your support!

[footer_backtotop]

Copyright © 2025 HouseOfJoyfulNoise.com · Genesis Framework by StudioPress