
Are you an ‘old junk’ lover? Do you love going looking for old junk, and get butterflies at the opportunity to bring some of it home? That’s ME to a T! Sometimes, I don’t even have a clue what I’m going to do with the old junk I’m bringing home. But I know I’ll think of something! (That’s the other part of the fun! Right?!).
Well, previously I shared in a post on our Facebook Page, a few photos of some old junk I picked up the weekend prior, of a big old rusty clock, an old cabinet, and a little bird bath/feeder dish. I promised I’d let you know what I did with them.
Here I am, keeping my promise, with a post on it! (Well, 2/3 of the promise, anyway.)
Since I have the most to say about it, we’ll start with . . . . . .
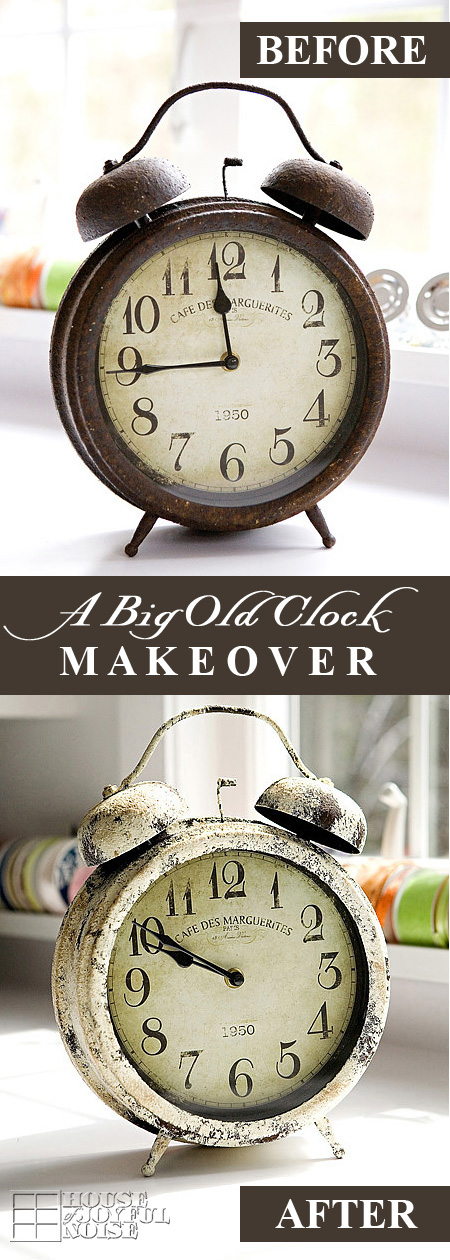
The Big Old Rusty Clock
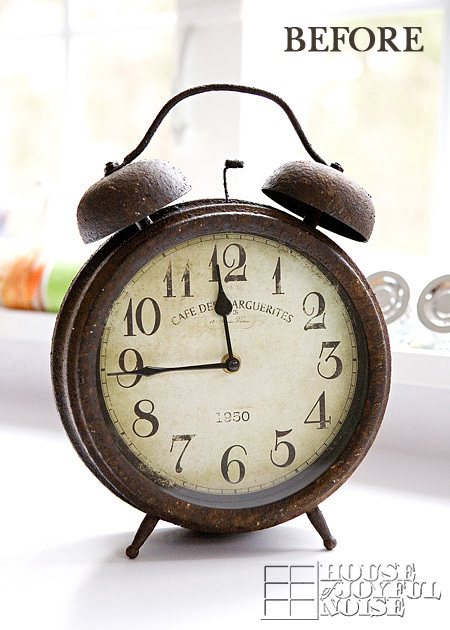
Here is the clock, the way I bought it. Now, knowing photos tend to really confuse actual scale of objects, I want you to realize that this clock is actually a foot tall! So it’s bigger than it may appear, if you imagined it to be a close-up of the size of a regular alarm clock this style.
I actually ‘settled’ for this clock, in the antique store. The first one I saw was that old-style 50’s turquoise-blue-teal (you know the one?), but extremely chipped, worn, with rust coming through everywhere. I loved the look of that one, more than this unpainted one. The problem was, it just went out the door, in someone else’s hand! Ha haha! So, we bought this one instead, with the plan that I could create the same look as the one I originally wanted, with a little creativity. Somehow. As soon as I figured out how. Because the thing was, I just didn’t care for the ‘finish’ of this one, which to me, really looks like it was almost manufactured to appear rusty. The rust is far too….uniform, to be convincing. So, my plan was to try and fix that.
It did end up being one of those projects where, as soon as I got started and past that moment of ‘too late to go back now’, I got that sinking feeling like, ‘Oh no, what did I just do? What am I doing? I’m ruining it!“. But in the end, I was happy with it.
But quickly, here was my thought process, getting to the happy point.
I got thinking about where it would ultimately be put, and, I realized that old teal color wasn’t the ideal color. I mean, I did have a choice at this point! I didn’t have to make it the same color as the one I originally saw. Considering where I knew I wanted to put it, the most ideal color would be a cream. I did the best I could to replicate the texture of the look of the original clock I saw.
And here is how it came out . . . . . .
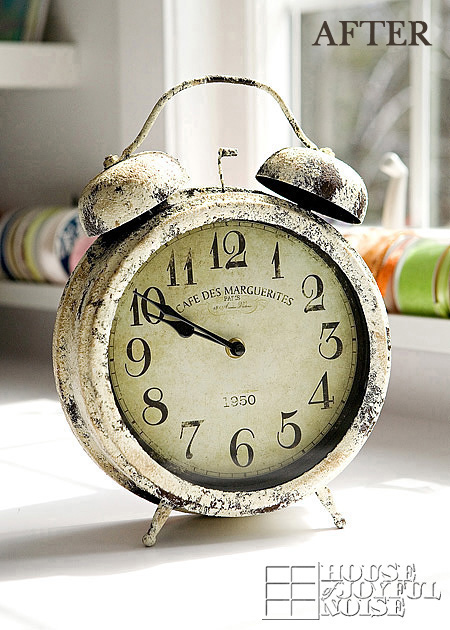
What a change, huh? I think it looks almost older, and to my delight, junkier. Authentically, so, too.
Some may like the before better, which is fine, but we prefer the after.
Where will it go? Well, that excitement, my friends, is a future post! I’ll just tell you that we have a whole entire renovated room reveal, to show you all soon! Really, really cool. And you all will see the clock in it’s very special place, then and there.
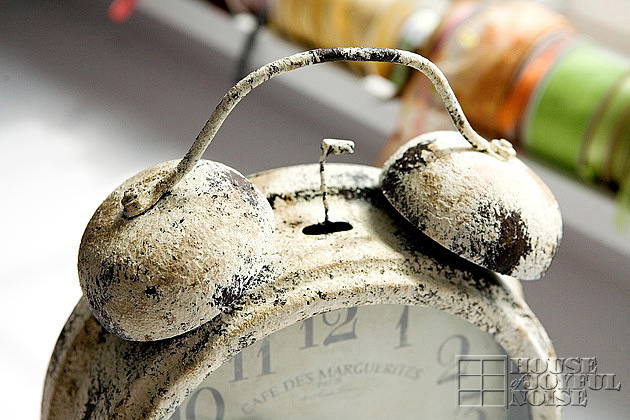 Here is a closer look at what the finish looks like.
A real hot mess. Perfect!
Now let me now tell you how I did it . . . . .
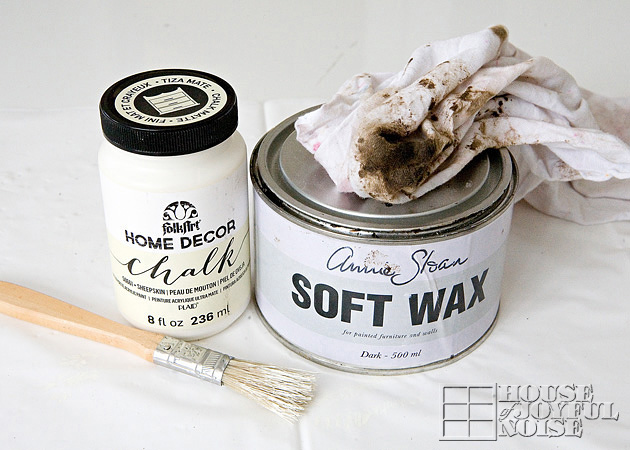 First, I chose a chalk paint, and I think that was a really smart idea. This paint has a very dry look to it, like most very old paint on metal, would look. No shine, no ‘new paint’ look. It was a perfect choice for this project. I applied it with a very bristly brush, in a stippling type technique. Meaning, no brush strokes. I just kept jamming the brush with paint on it, onto the clock. (That was hard to explain. I hope you all know what I mean.) In doing so, I was careful to keep the paint thin in spots, heavier in others, and really intentionally miss a lot! The bare areas would be where the paint appears to have worn or chipped off.
To finish the look, I used my favorite ‘dirtier‘, here and there, Annie Sloan’s Dark Soft Wax, applying just a bit with a rag, and rubbing it out good. That last step really made a huge difference, if you ask me, in making it look authentically old, junky, and rust-stained.
Are you on Pinterest? (We are too!) Here below is a great ‘Before and After’ PIN-able image, if you’d all Pin and share for me! I would appreciate that.
Next up is another of my happy-finds . . . . . .
An Old Cabinet
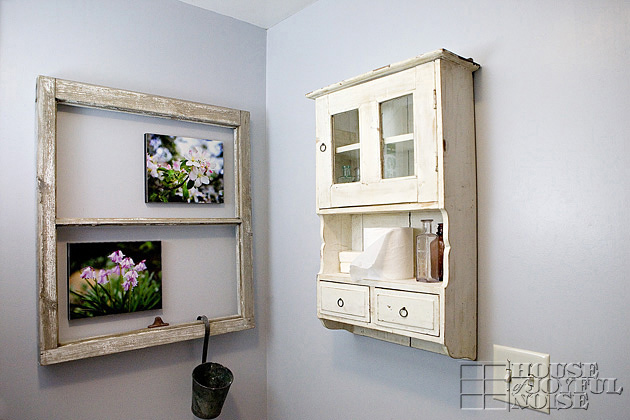 I wasn’t really looking for a cabinet. It just happened to be sitting there on the floor of the crammed antique store, as I walked around, and I instantly wanted it.
I was pretty sure the bathroom was the only place it would seem fit, but we tossed around where in the bathroom, for a good 15 minutes. Ultimately, it was secured to the wall on the toilet/shower side of our bathroom. (We also have a sink/vanity area, on the other side of the vertical half wall.) We all really like it there!
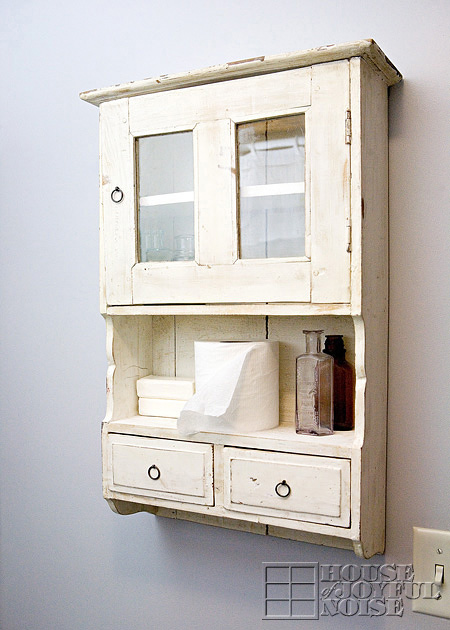
What it holds will probably change, or accumulate, in time.
It’s awesome for Michael’s Ivory soap bars, an extra roll of toilet paper, and some old medicine bottles.

My favorite is a pharmaceutical bottle that was my mother’s, from the city she lived in all of her life (and where I grew up as well.).
That’s it on our old junk, today. As for the tiny bird bath/feeder I also picked up, it is not outdoors yet (since we currently have snow in April!). But when I get it in my gardens or flower containers, I will share a pic on our InstaGram for you all. So follow us there as well as our Facebook page, and you’ll be sure not to miss all of our projects we’ll be sharing in upcoming blog posts, including our room reveal!
Thanks so much, for coming by!
Before you go though, let us know what you think of what we did with our new junk! Questions or Comments….We’d love to know your thoughts!
Oh my gosh Laura! I’m so glad I hopped over here to see how you redid your clock. I saw the link to your blog post on the All Things Creative Facebook page! Your clock looks amazing and I’m going to try your technique to a fireplace screen that I’m planning to paint soon. I pinned your graphic so that I could find my way back to the directions!
Hi Jane!! Well, I’m so glad you hopped over to our blog and saw my make-over clock, too! THRILLED that it is inspiring you for your fireplace screen!! THAT”S what sharing ideas and techniques is all about!! THANKS for visiting, pinning, and….leaving your excitable comment! (We’re excited with you!). I’ll have to go thank All Things Creative for sharing our post, too. HAPPY CREATING!!
Laura and family / House of Joyful Noise blog